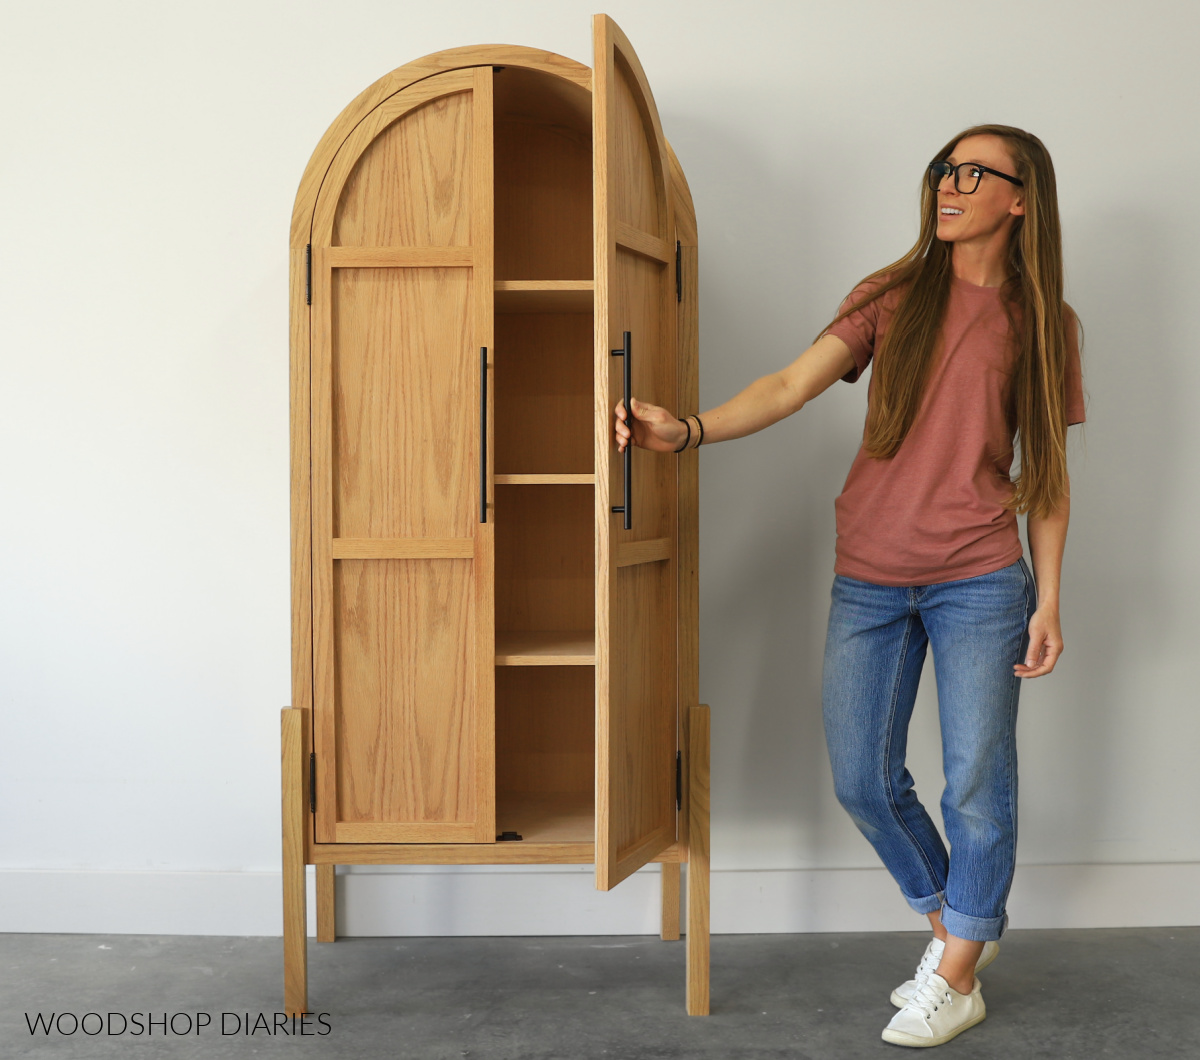
In this post, I’m showing you how to build a DIY arched cabinet with double doors!
Arched cabinets and shelves are so trendy right now, but all the affordable ones are super poor quality…whomp whomp…
They’re typically made from particle board which looks and feels, well…cheap. And they fall apart so quickly (just read the reviews). You really do get what you pay for.
But, it’s tough to spend thousands of dollars on a REAL WOOD arched cabinet. So I built one myself for just under $300 in lumber.
This project was a bit of a challenge, but it turned out AMAZING and it was so rewarding to step back and say “I BUILT THAT!”
It looks and feels ten times nicer than those store bought fake wood ones and if you want to build one of your own, I’ve got all the details below.
*This post contains affiliate links. See website policies.
What to know before building a curved top cabinet
Full transparency, this is not what I would consider a beginner level DIY project. It uses simple joinery like pocket holes and dowels so no advanced joinery is needed.
But, with the curves and the notched out legs, it can be a bit of a challenge and attention to detail is a must.
I mentioned this in the video linked below, but there are several parts of this project that I would do differently if I built this again. So I updated the printable plans to match what I SHOULD have done vs exactly what’s shown in the video.
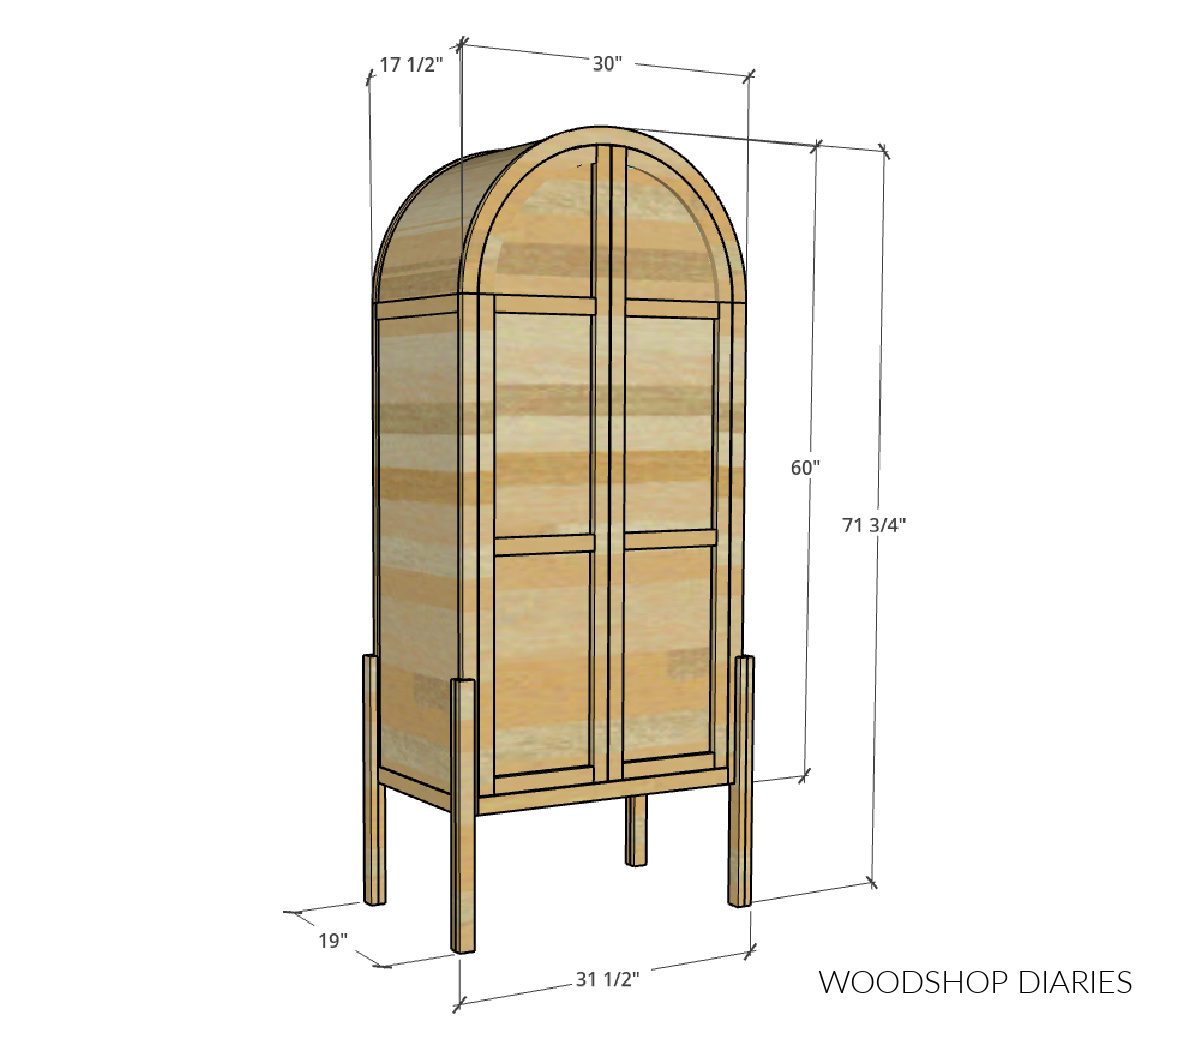
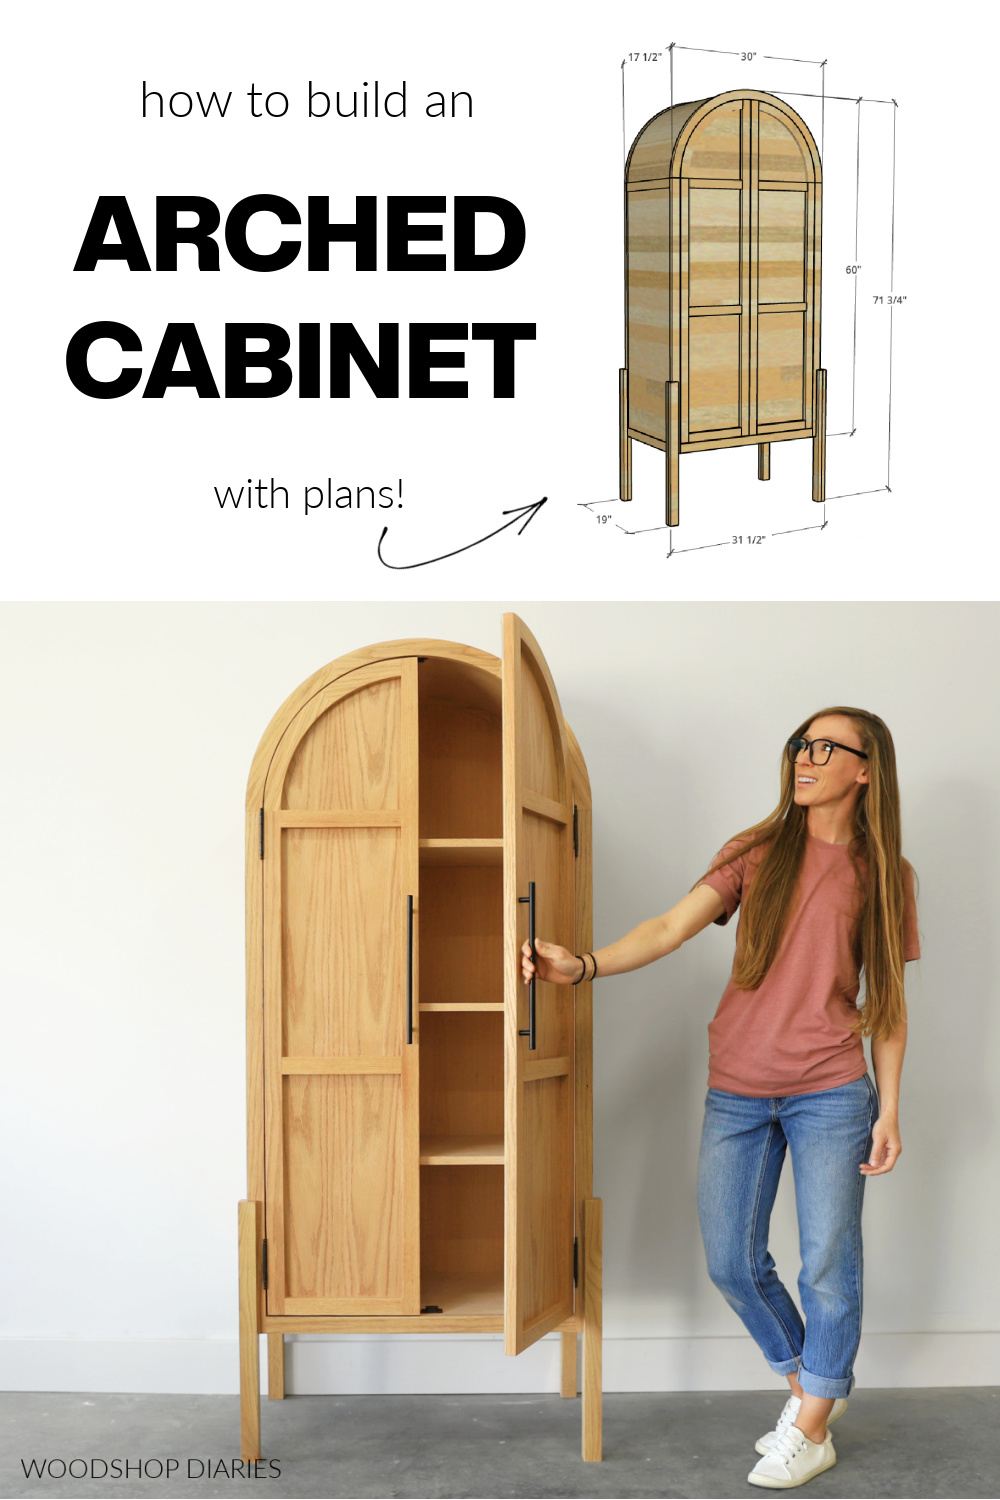
Overall Dimensions
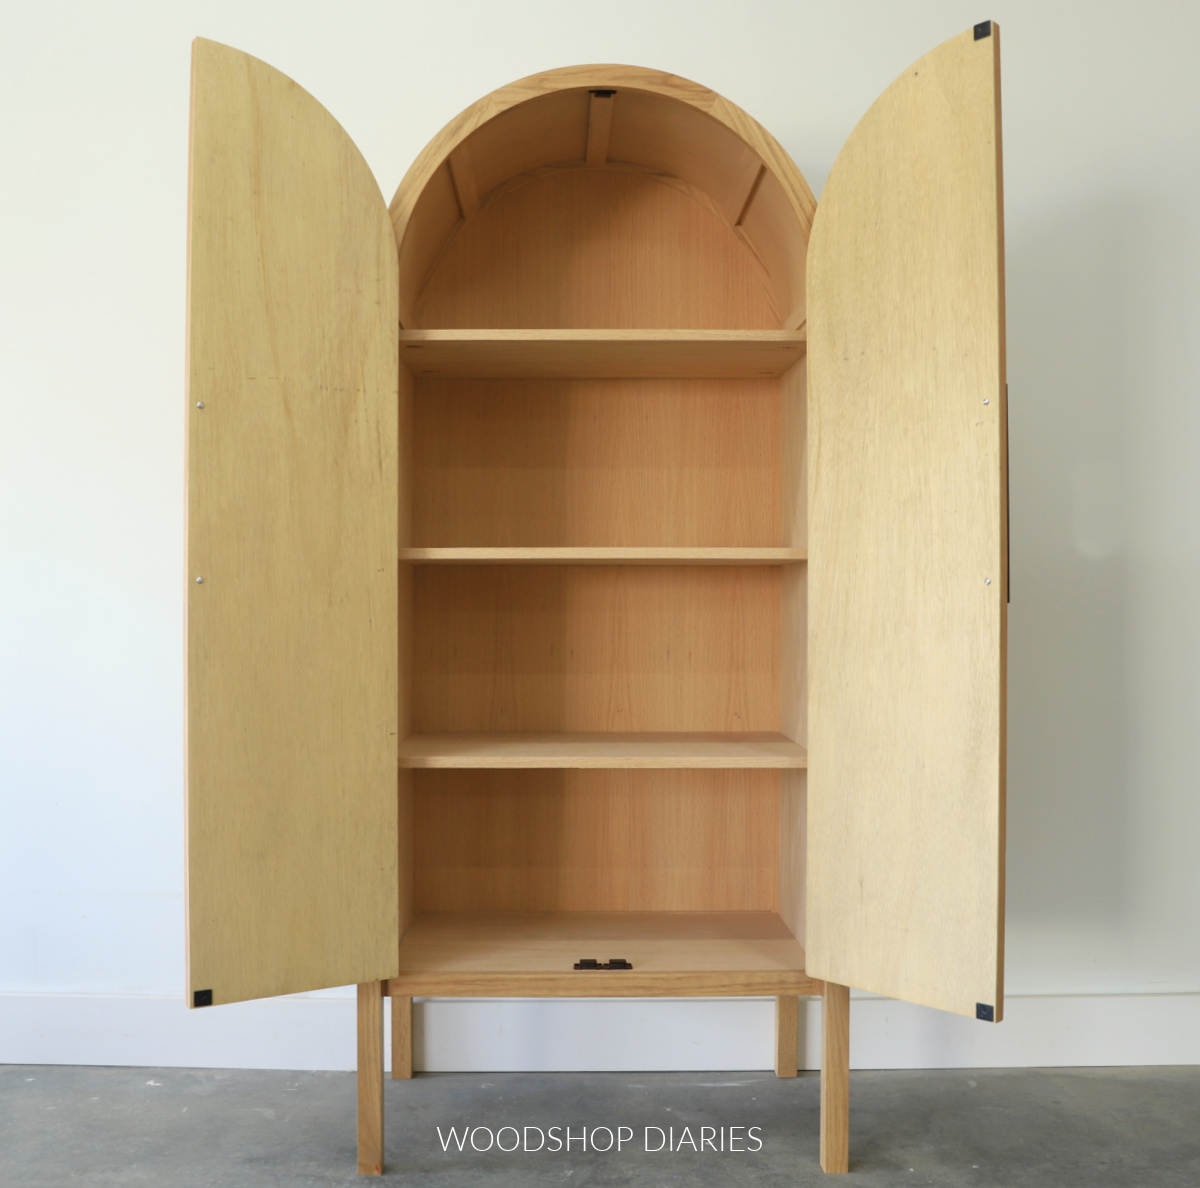
The overall dimensions of this arched cabinet ended up being about 19″ deep x 31 ½″ wide x 71 ¾″ tall including the legs. The cabinet part is 17 ½″ x 30″ x 60″.
You may find these resources helpful throughout the build:
Enjoy DIY projects and woodworking plans? Sign up for priority access for the latest posts on Woodshop Diaries!
How to build an Arched Cabinet
If you prefer to watch, I’ve shared the full build video with tons of tips, behind the scenes, and additional details on my YouTube Channel here.
Love watching how-to videos? Subscribe to my YouTube channel for plenty more where that came from!
Prefer to print? Grab the printable arched cabinet building plans available here:
Tools & Materials
Tools:
- Drill/Driver
- Circular Saw and Plywood Cutting Guides (Kreg Rip Cut & AccuCut)
- Miter Saw
- Pocket Hole Jig (standard size)
- Micro Pocket Hole Jig
- Dowel Jig (⅜″ recommended)
- Router
- Router Circle Cutting Guide with ¼″ straight bit (optional, but recommended)
- ⅜” Rabbeting Router Bit
- Flush Cut Router Bit
- Stapler
- Jig Saw
Materials:
- (1) 4’x8′ sheet ¾″ plywood
- (2) 4’x8′ sheets ¼″ plywood
- (8) 1x2x8′ boards
- (1) 1x8x10′ board
- (1) ½” x 1 ½″ x 8′ board
- (1) ¼” x 1 ½″ x 6′ board
- 1 ¼” washer head pocket hole screws (100 count box)
- 1 ¼” pan head pocket hole screws (100 count box)
- 1″ pan head pocket hole screws (100 count box)
- (20) ⅜″ x 1 ½″ dowel pins
- ⅝” long staples
- Wood glue
- Edge banding (optional, but recommended)
- (4-6) Large Cabinet Butt Hinges
- Knobs/Pulls for Doors
- Magnetic catches (optional)
Not sure what type of wood to use for this project?
1x LUMBER & TRIM: If painting, preprimed pine, spruce, or poplar are great budget friendly options. And if staining, usually, you want to use the same wood type as your plywood or something that will stain similarly so that they match. Check out this post to learn how to shop for and purchase lumber for your project.
PLYWOOD: I recommend using cabinet grade hardwood plywood (like birch, maple, oak, etc). Check out this post to learn how to choose the right plywood for your project.
This project was built with red oak 1x lumber and red oak plywood.
Step 1: Assemble the Curved Frame
This project starts out a little weird, so hang with me. I promise it will make more sense as we go along.
First, I needed to cut two wooden rings, one slightly smaller than the other. So, I glued up a hexagon “ring” from 1x6s using dowels.

In hindsight, I would NOT glue up a hexagon if I were to do this again. Instead, I’d use a 1×8 board, miter the ends 45 degrees and glue up a large square. This is just much easier to glue up and clamp tight than a hexagon was.
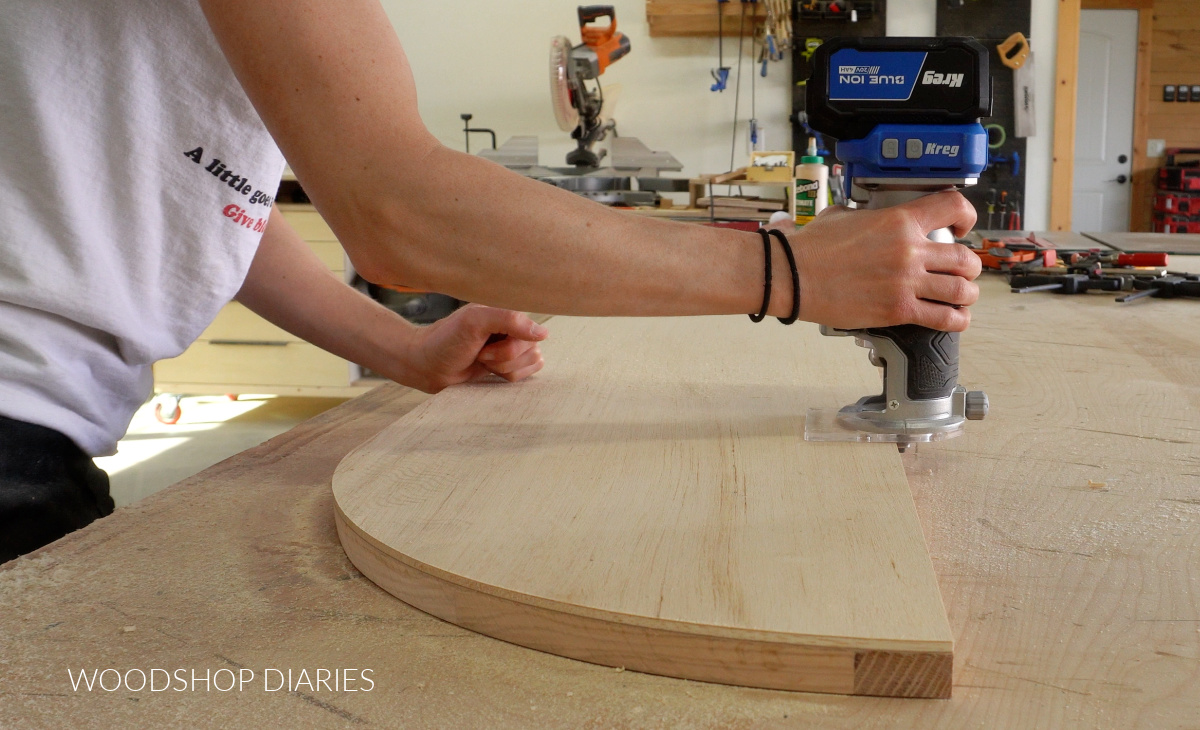
After the glue dried, I used a trim router with this trim router circle guide to help me cut my two rings.
I cut my first circle with a 30″ outside diameter, then moved in to cut out the large ring so that it was exactly 1 ½″ thick.
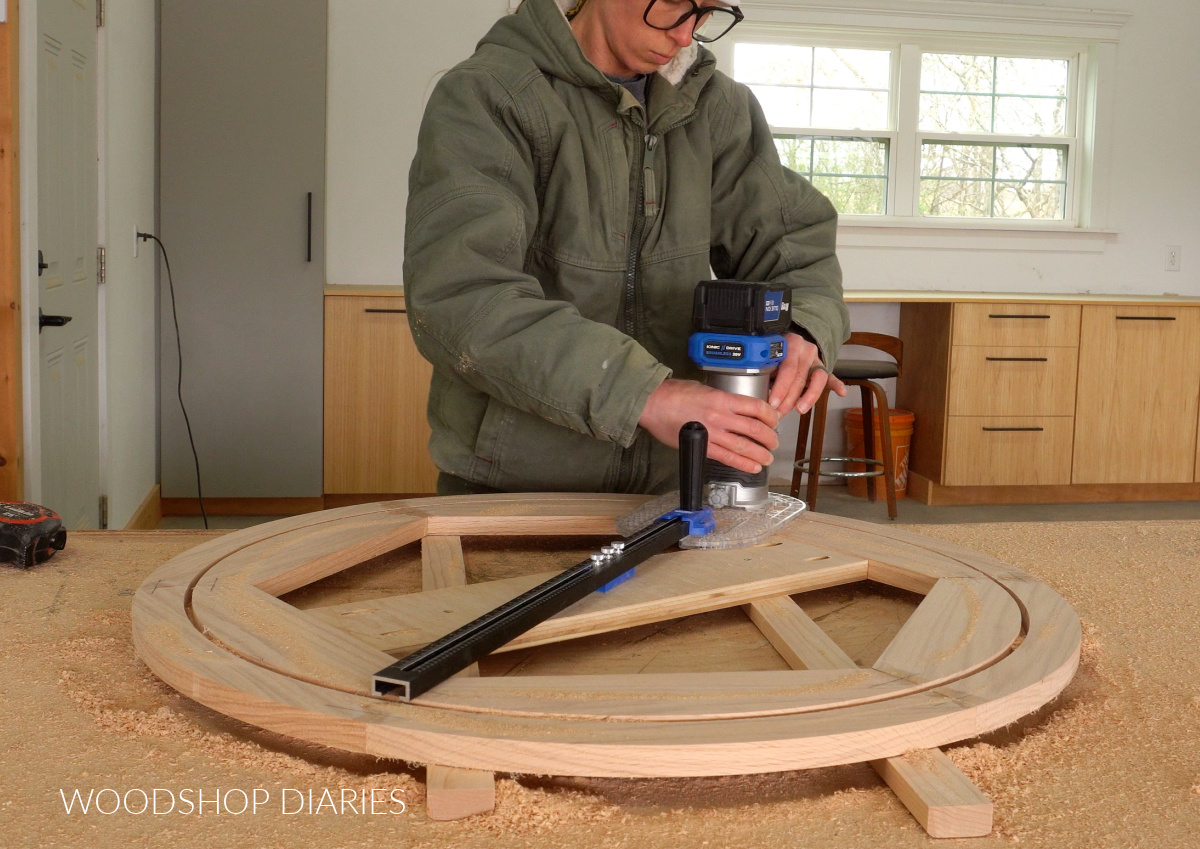
Then, I repeated to cut a second smaller ring exactly 1 ½″ thick. The larger ring will be for the front and back cabinet frames and the smaller one will be for the doors later. So I set the smaller ring aside for now.
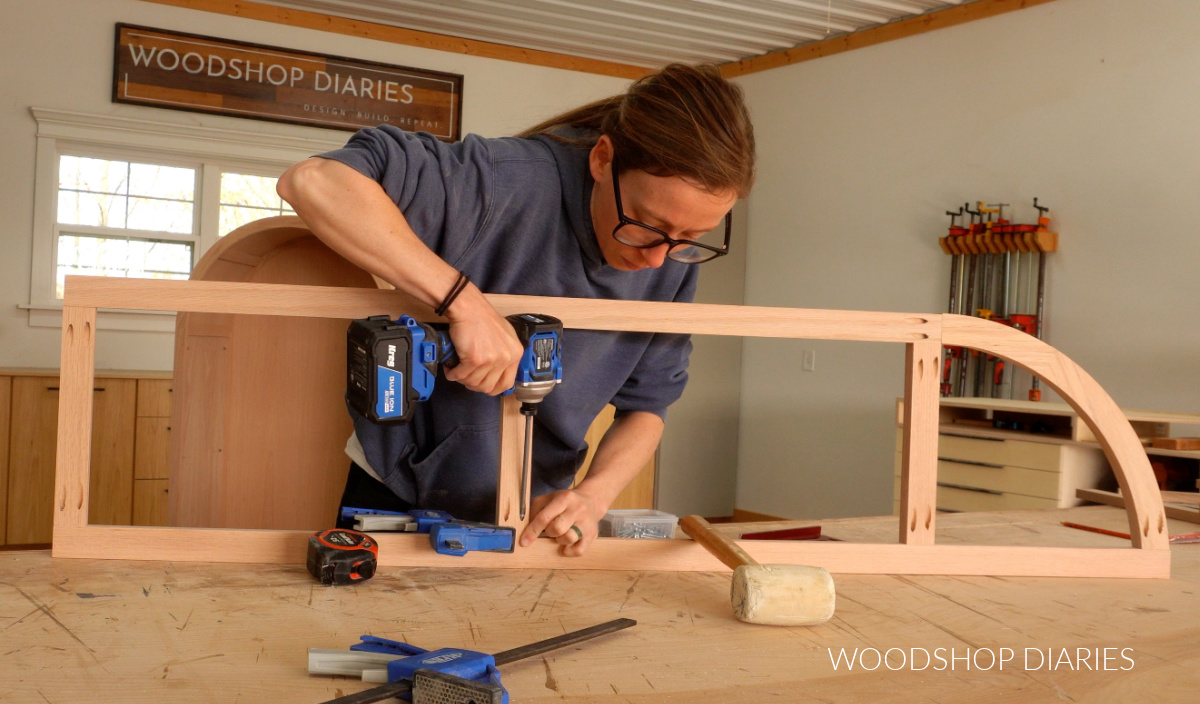
I cut the larger ring in half to give me two arches. Then, I cut 1x2s and assembled two identical frames with these arches at the top.
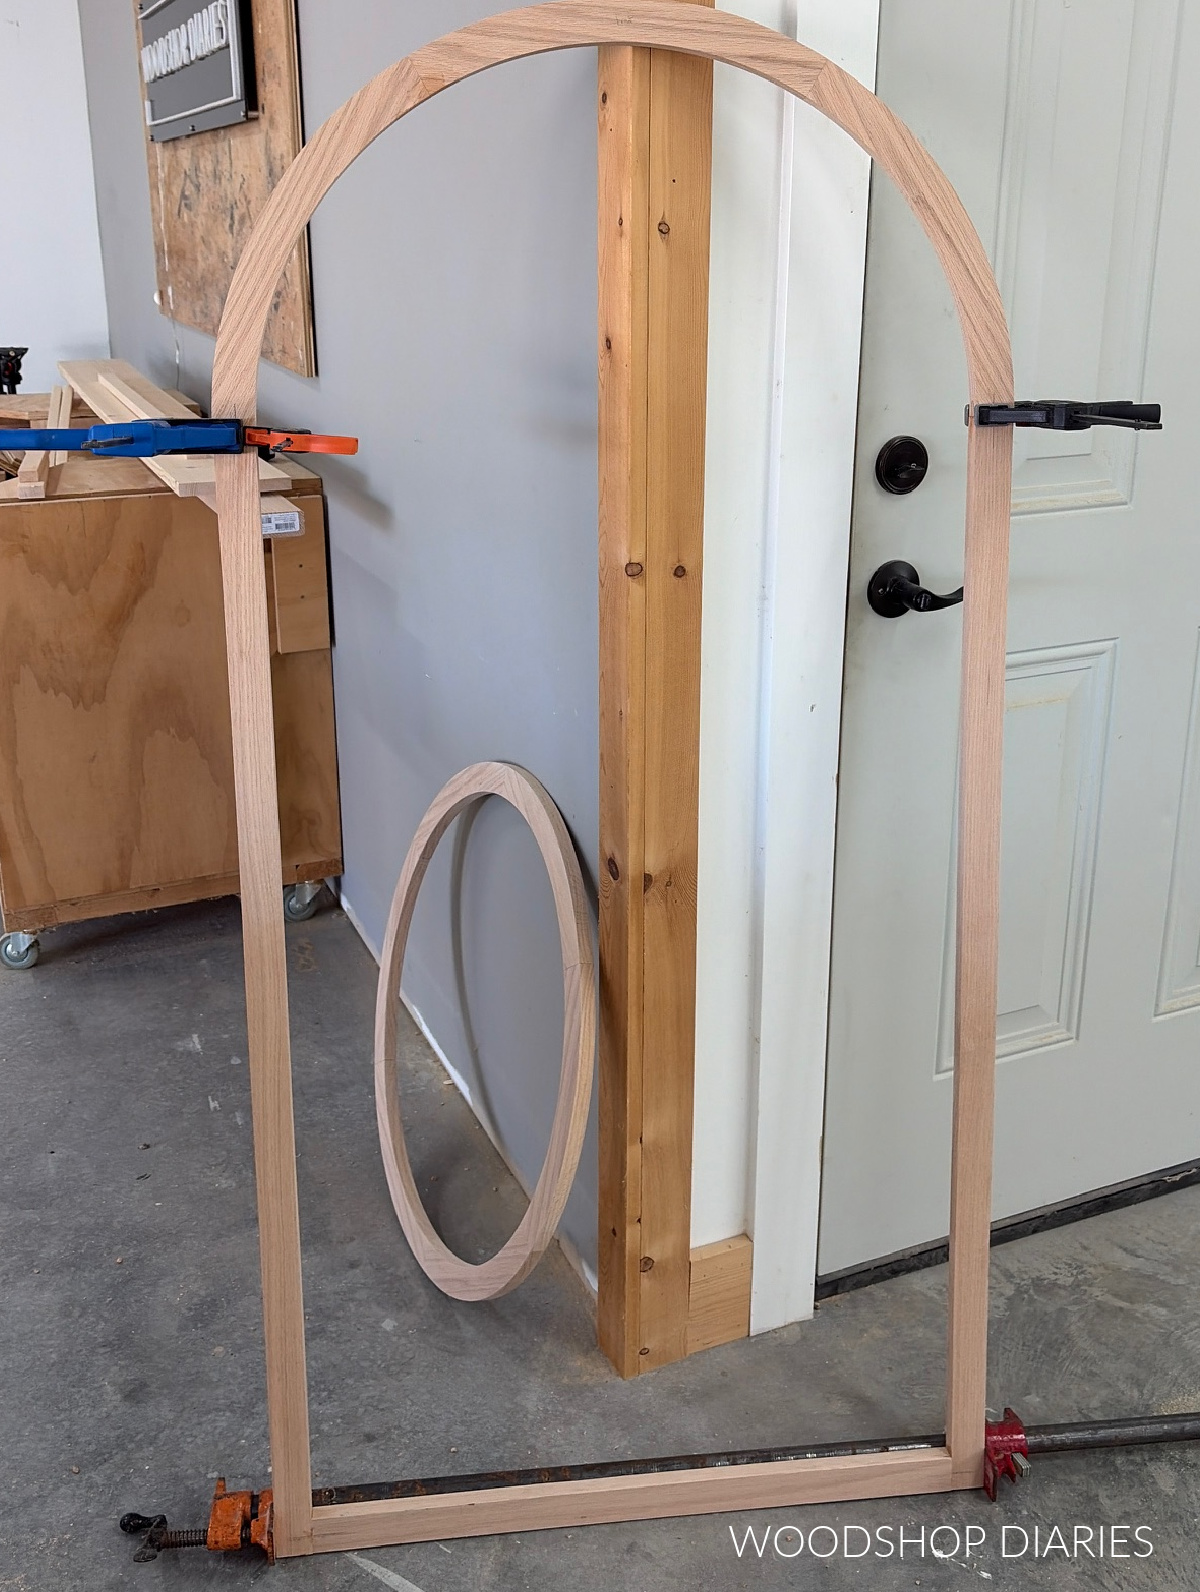
These frames were glued up with dowels and were a bit tricky to clamp, but I share some helpful tips in the video.
Once the glue was dry on the two frames, I cut some ½″ x 1 ½″ strips and attached them between the two frames around the arch using pocket holes and screws.
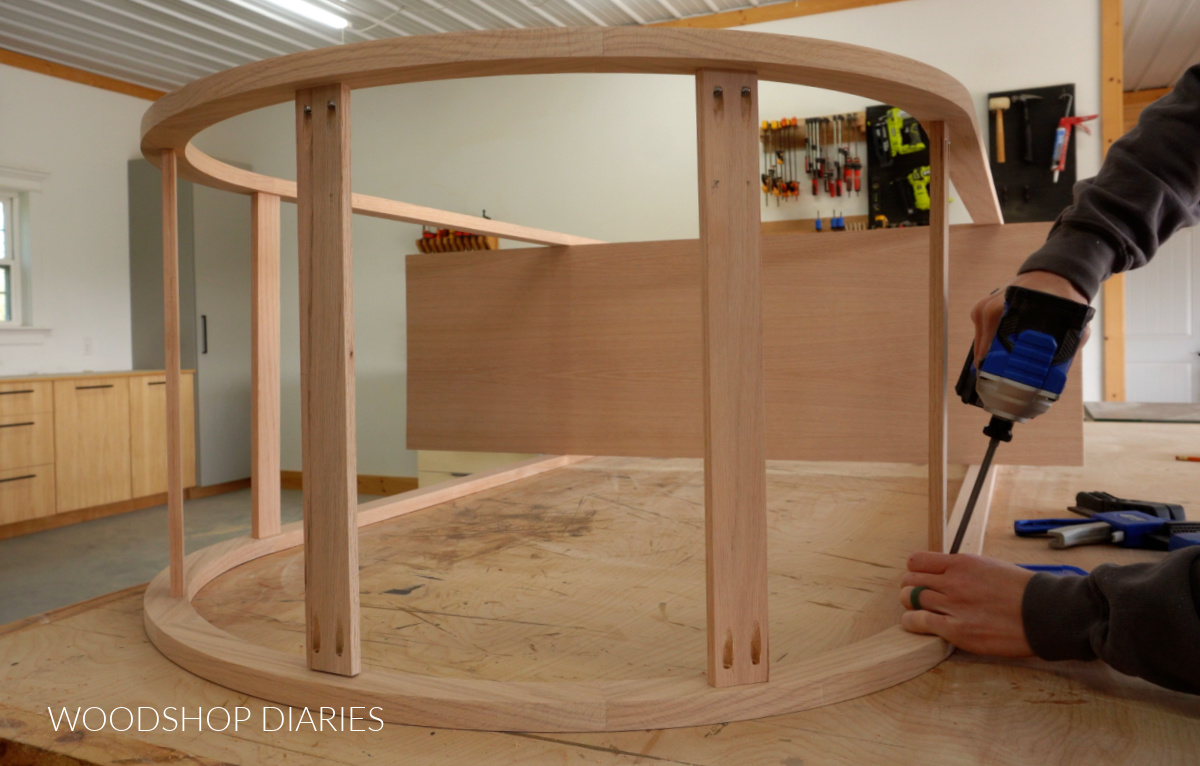
These pieces were small and delicate, so I recommend using the Kreg Micro Pocket Hole Jig with small pan head screws to avoid splits.
Prefer to print? Grab the printable arched cabinet building plans here.
Step 2: Build the Arched Cabinet Box
Now the arched frame is together, but I needed to cover the sides to make it a box. Again, this seems a little weird, but hang with me!
I ripped a strip of ¼″ plywood to fit between my arched frames from step 1. Then I marked every ½″ along the full 96″ length…it was a lot of marks.
This piece needs to bend over the top of my cabinet, so I set my circular saw cut depth to about ⅛″ (so it would cut about halfway through this panel) and cut along every line.
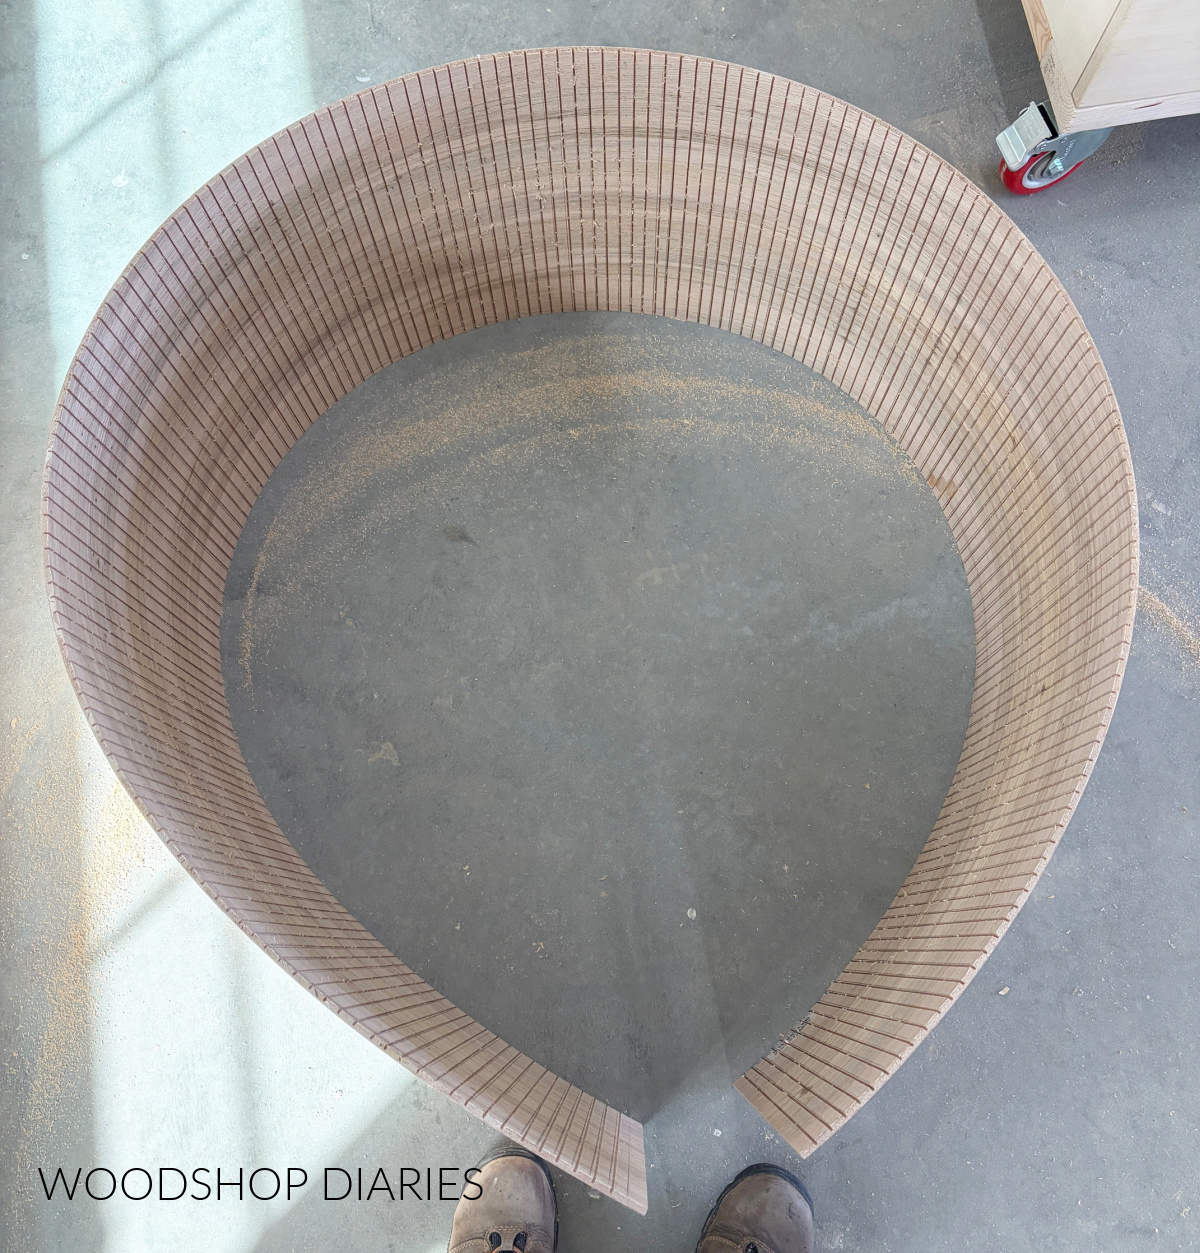
If you’re wondering, that took about an hour straight of cutting. But it was so worth it because this piece was perfectly bendy after all those cuts. This is called “kerf bending” and it works great for curved projects.
FYI: I tried cutting different intervals on some scrap pieces and anything more than ½″ would bend okay, but it wouldn’t bend smooth. You could feel every cut and it was very segmented. ½″ spacing seemed to be where the bend started to look and feel really smooth.
The problem is that now I have a pretty side and a side with a thousand (well, more like 190 ish) cuts. But that’s okay…I have a plan.
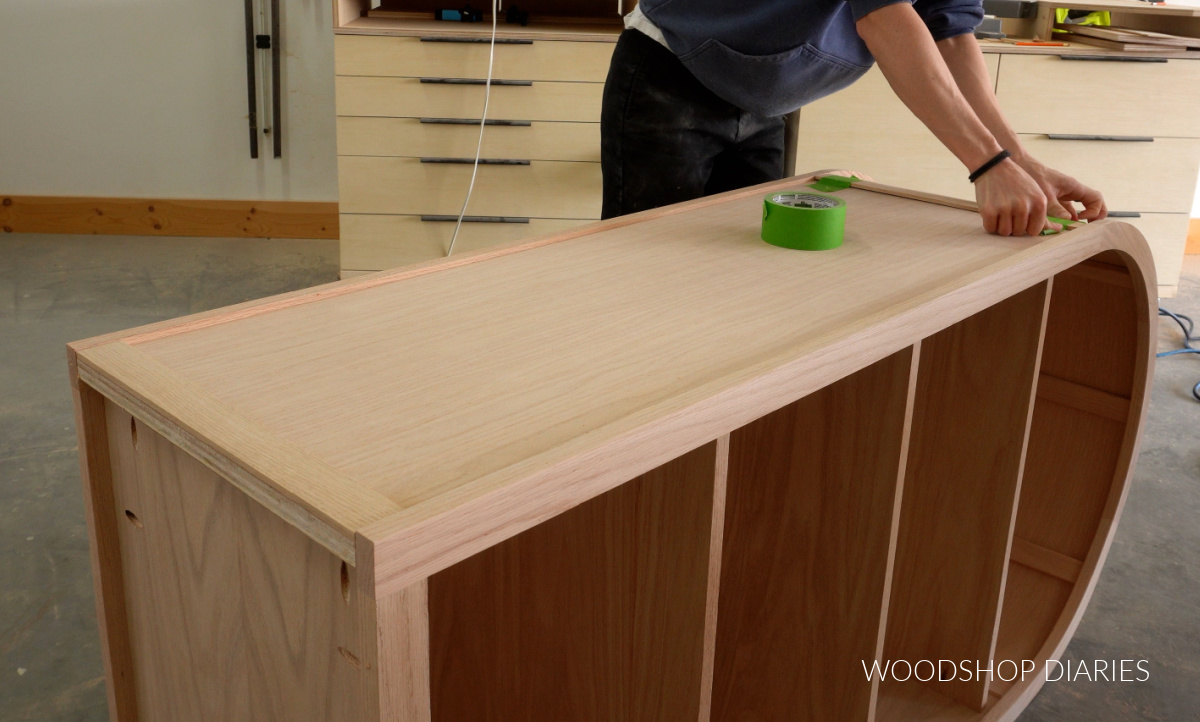
I cut a piece from this kerfed panel to wrap over the top of my frame and stapled it cut side up to the supports.
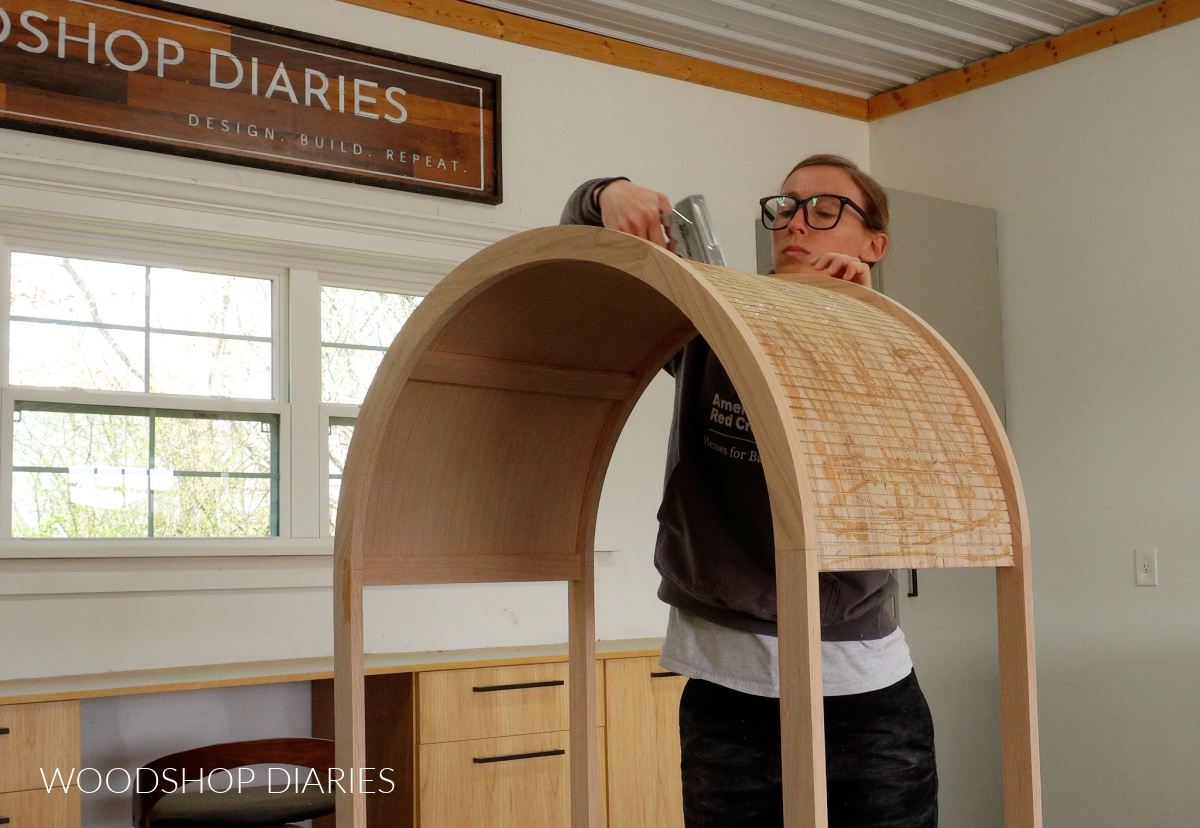
Then, I cut a second piece from my kerfed strip to wrap over the top. I applied a liberal amount of wood glue to the cut side, then smoothed and clamped this piece over the top.
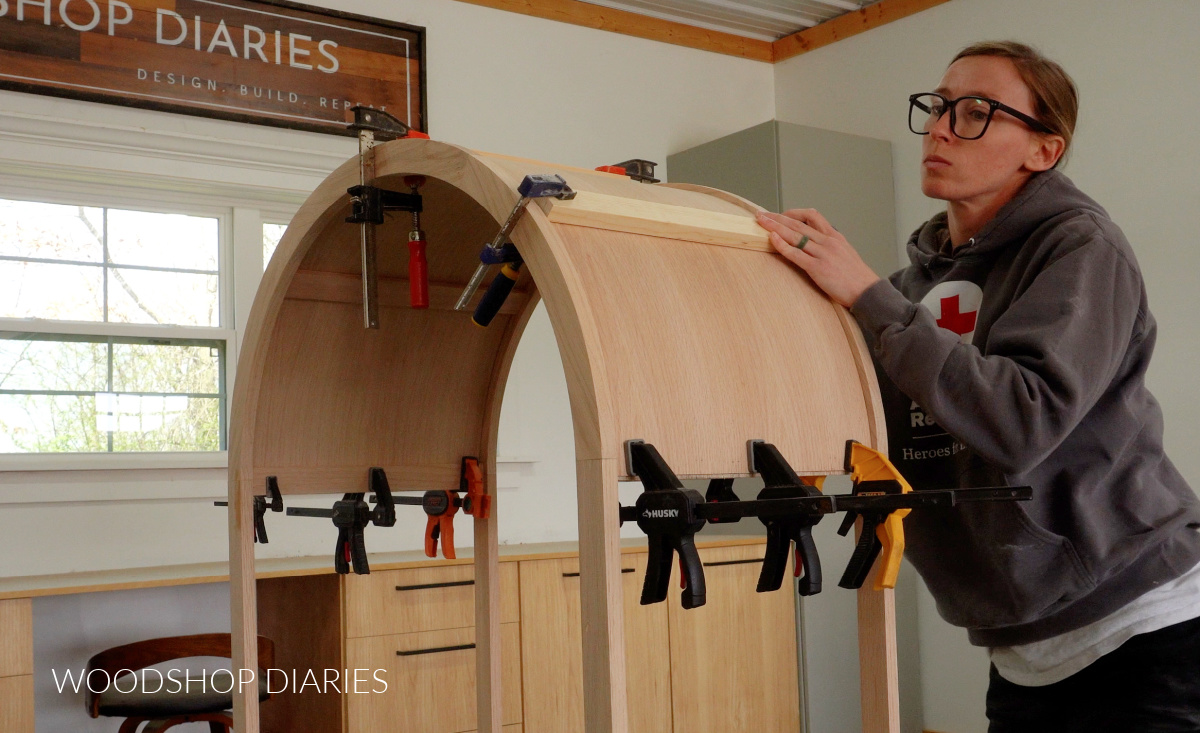
Now the cut sides are hidden and once the glue dries, this piece gets a lot more rigid. But, it’s important that these pieces are tightly together and don’t have large air bubbles or voids between them while the glue dries.
Once the top was on, I cut ¾″ plywood pieces for the sides and bottom and installed these between my front and back frames using pocket holes and screws.
This part was a bit more straightforward so I won’t go into too much detail here. Check out the printable plans for all the details, dimensions and cut diagrams for this project.
Step 3: Add Back, Shelves & Trim
For the back, I debated back and forth on whether I should recess the back panel into the frame or just staple it over the opening.
Ultimately, I decided to use a router and a rabbeting bit to route a groove along the back, inside edge of the frame. Then I cut a piece of ¼″ plywood to fit inside and stapled it on.
But, while routing, I hit a couple of the pocket hole screws on the bottom panel. So, in hindsight, I would either install the back panel BEFORE the bottom panel OR just staple the back panel over the cabinet and not recess it.
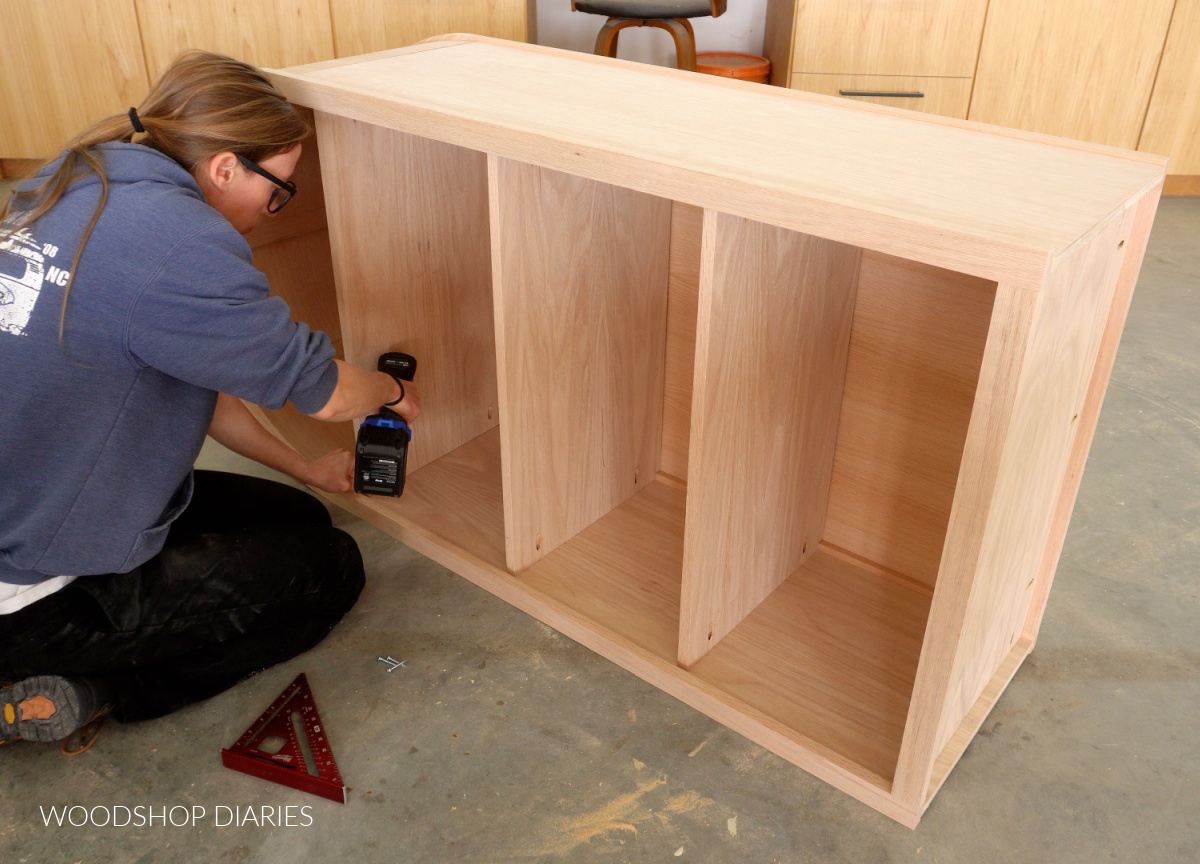
Then, I cut three shelves and installed these into the arched cabinet using pocket holes and screws.
I used these stationary shelves to hide the pocket holes on my side panels so that none of them are visible in the finished project.
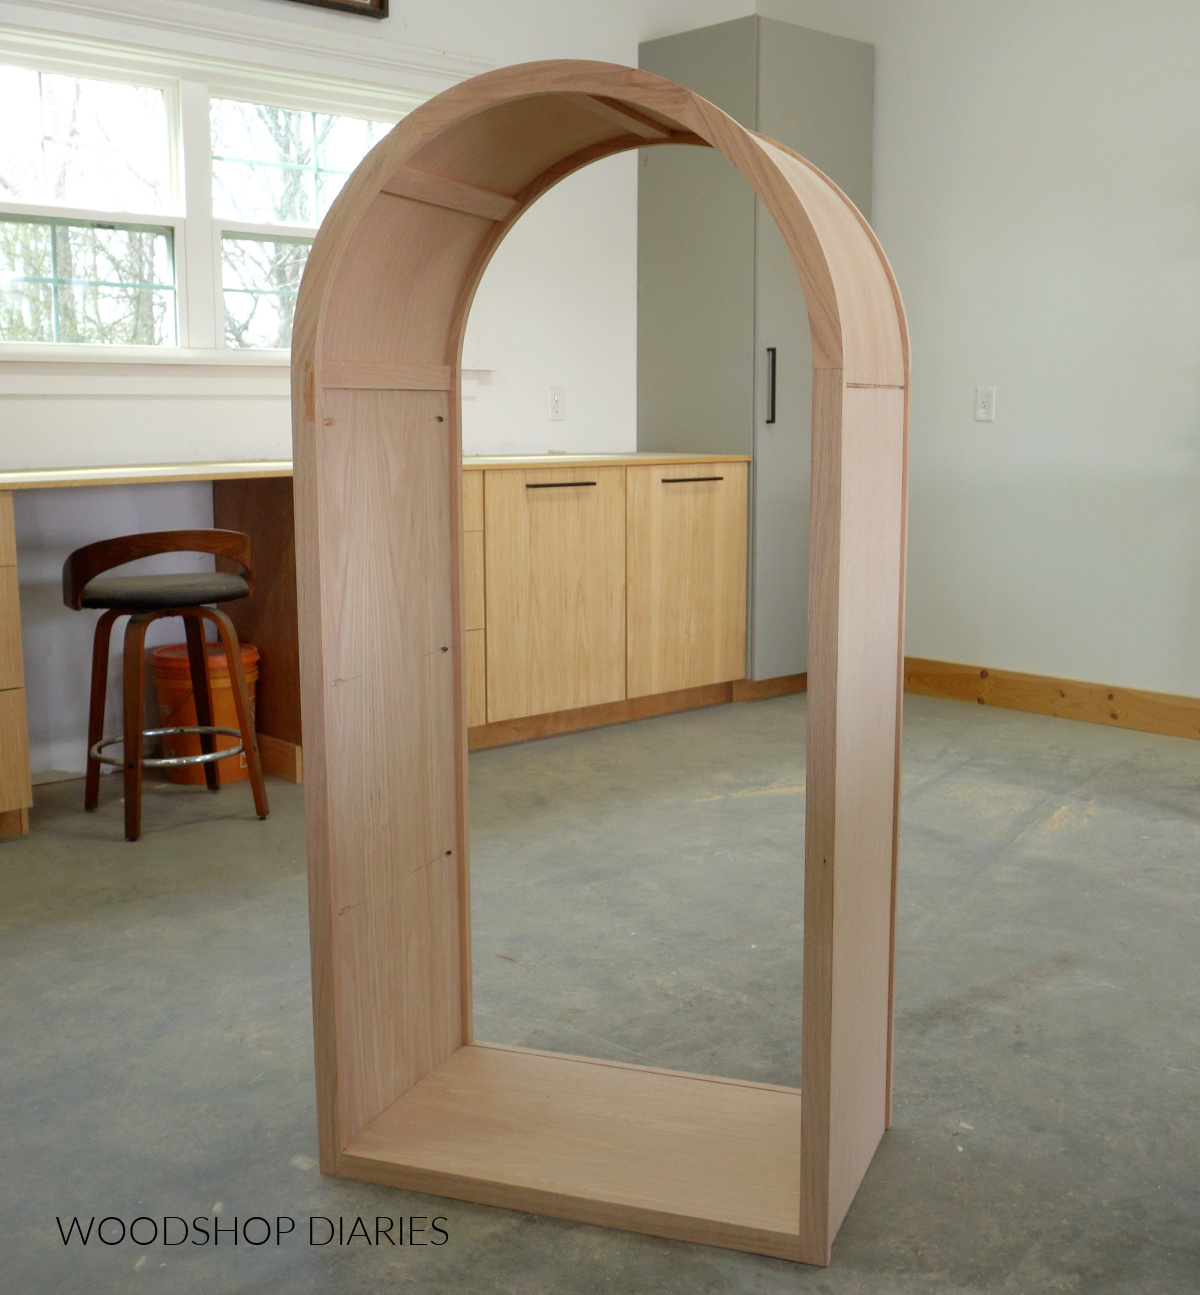
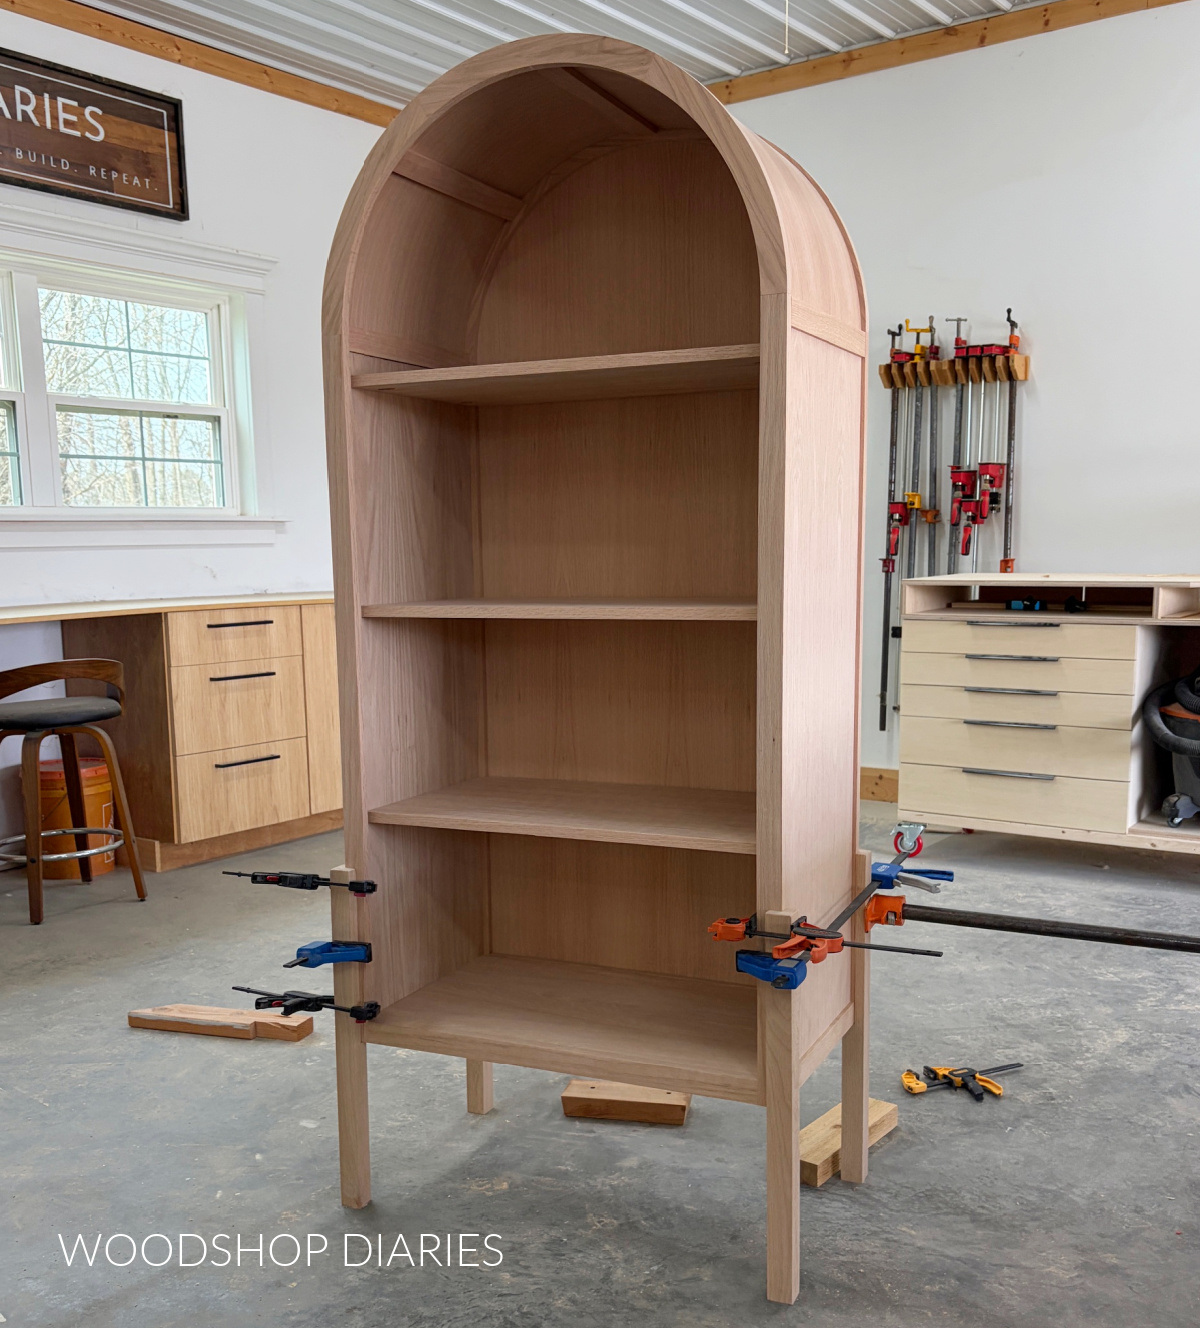
Then, to finish up the cabinet portion of the project, I cut some ¼″ thick trim pieces and glued them over the joint where the arch meets the straight sides.
I also added a piece at the bottom of each side to help balance it out. And now the arched cabinet box is assembled, but I still needed to add the doors and legs.
Step 4: Attach Modern Legs
For my legs, I wanted to use 2x2s, but I needed to notch out a section for them to kind of “wrap around” the cabinet corners. That way, the cabinet could rest in the notch.
To do this, I cut my 2x2s to length, then used a table saw to cut halfway down on two sides. Then I could use an oscillating saw to cut it square at the corners. And this worked…but I wouldn’t do that again.
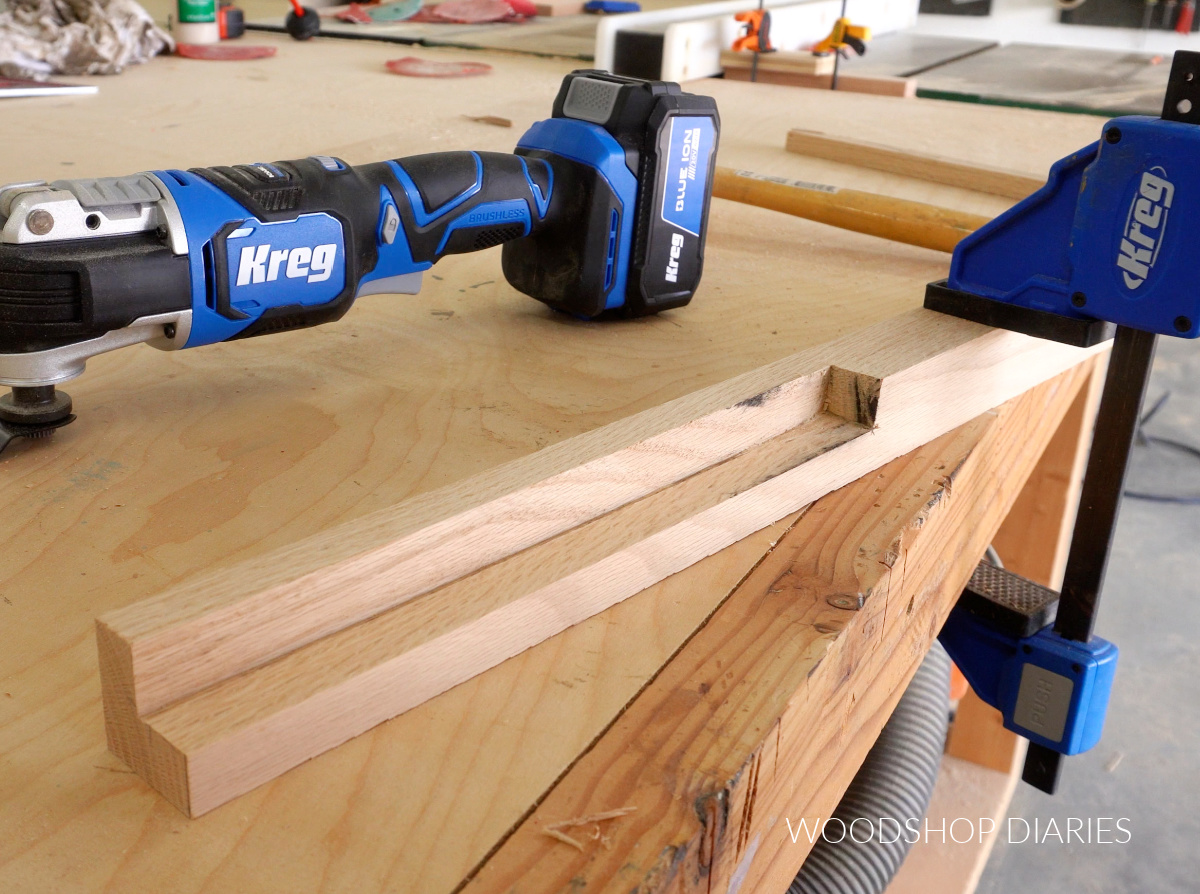
Instead, I should have cut two 1x2s for each leg and used a jig saw to cut a notch out of the corner of one of them. Then I could glue them together to make the same thing as my 2x2s…just much easier.
Hindsight always makes everything clearer. Too bad it’s always too late ha!
Once I had my four legs notched, I carefully glued and clamped them around the corners of my cabinet.
I didn’t add any nails or screws here, but you could if you’d like. The glue should hold well, but I made sure to apply plenty of it.
Prefer to print? Printable plans for this arched cabinet project can be found here.
Step 5: Assemble and Attach Arched Cabinet Doors
For the doors, I cut 1x2s for the frame. But remember that smaller wooden ring from step 1? I cut it to use for the arch along the top of my doors.
Its a bit tricky to size, so I clamped my door frames like you see below, placed it on the ring, aligned the corners, then marked where to cut.
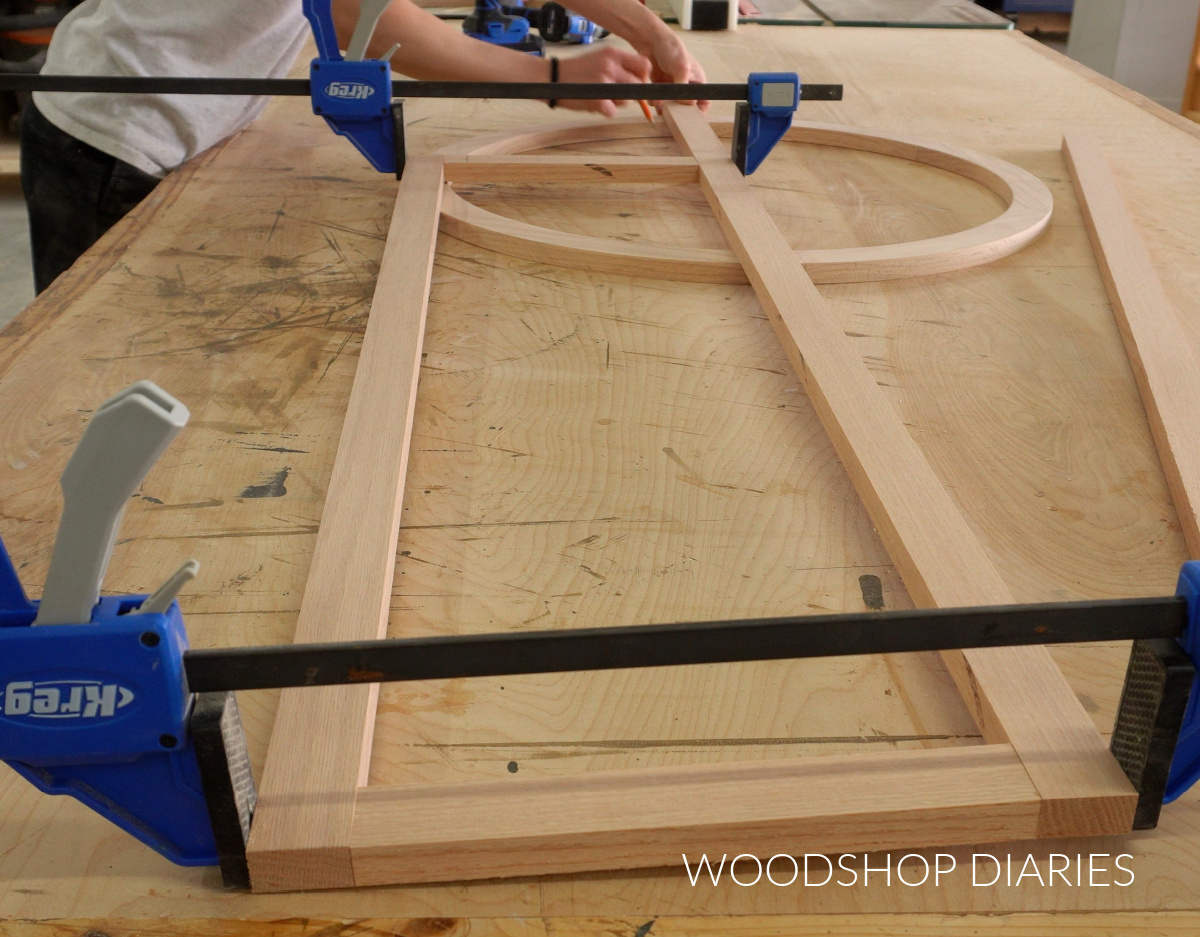
Then, I assembled my door frames using pocket holes and screws.
TIP: A standard size pocket hole jig can work if you’re careful, but I recommend using a Kreg Micro Jig for these door frame pieces with pan head pocket hole screws. The smaller holes and screws are less likely to cause splits.
Learn how, when, and why to use the Kreg Micro Pocket Hole Jig here.
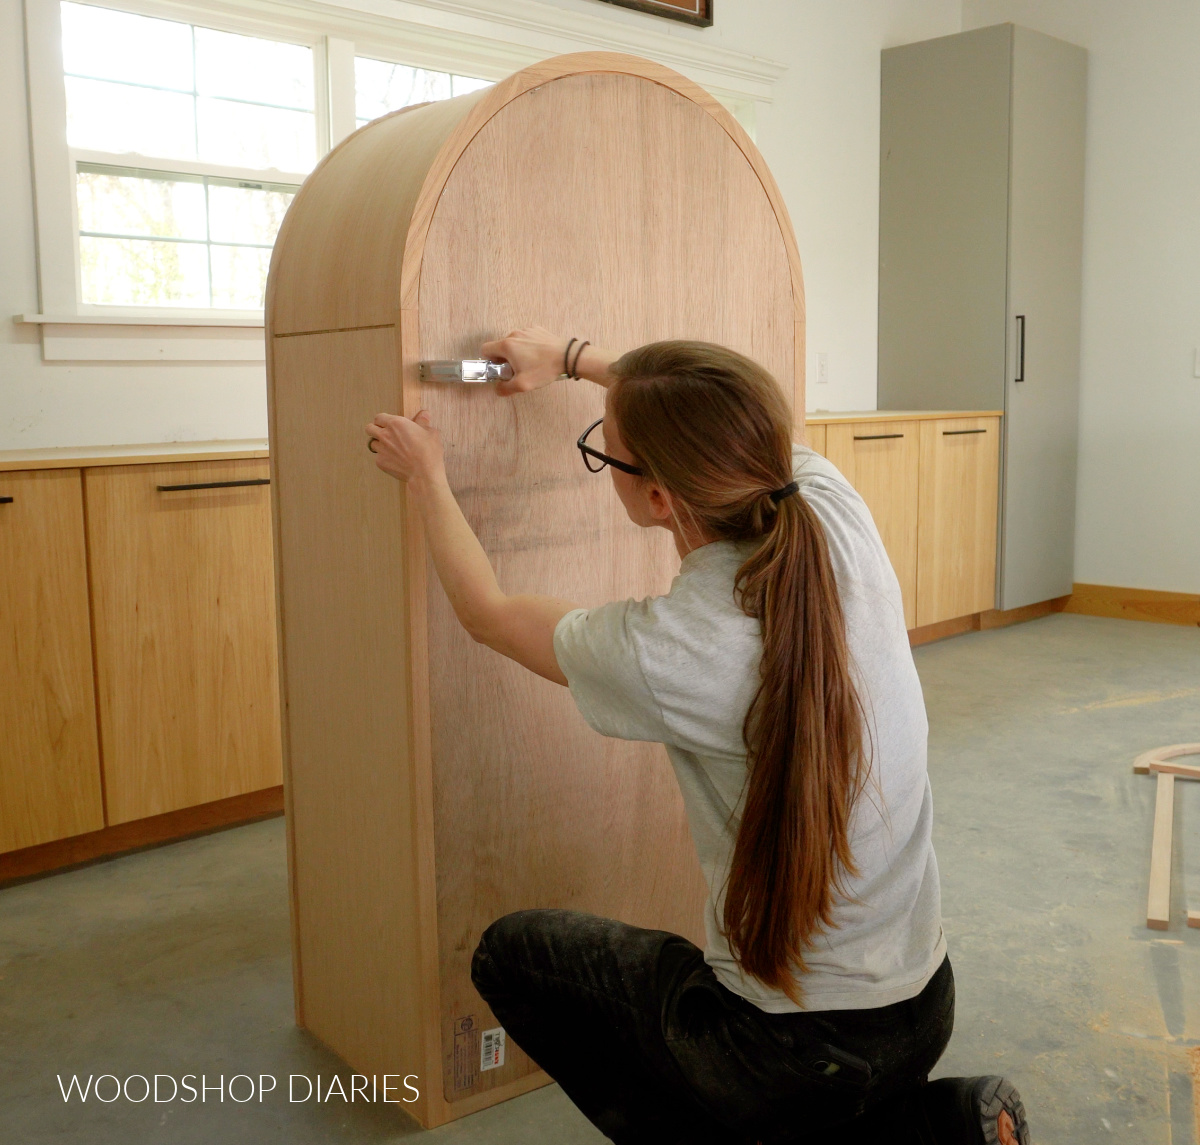
Once the frames were assembled, I glued ¼″ plywood panels onto the back side, then used a flush cut bit in my router to trim all the edges nice and flush.
If you don’t have a flush cut bit and/or router, you could also trim and sand the edges flush instead.
After test fitting the doors, I decided to go ahead and finish the doors and the cabinet separately before installing them.
I stained this project in Minwax Weathered Oak wood stain and sealed it with a few coats of Minwax Polycrylic.
Then, I installed the doors using these large antique style cabinet hinges.
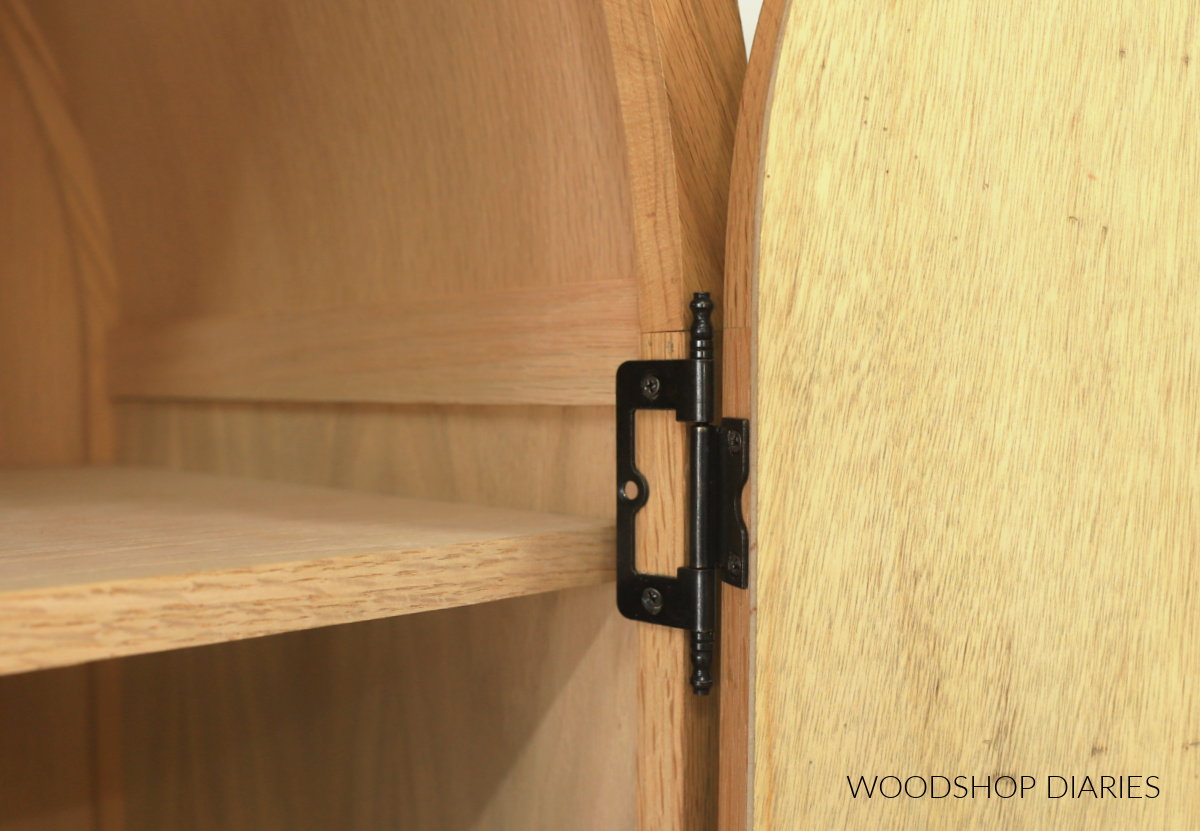
These hinges worked great and fit the style of the cabinet really well. But, unlike concealed hinges, these butt hinges didn’t have any adjustment options. So if your doors are a little off, you may have to add some small shims here or there.
TIP: It is a bit tricky to get these doors to fit perfectly (mine are close, but not perfect!), So if you need to trim or sand a little here and there to get them to fit, that’s okay!
Once the doors were on, I added some large door pulls and magnetic catches at the top and bottom to help hold the doors nice and flat when closed.
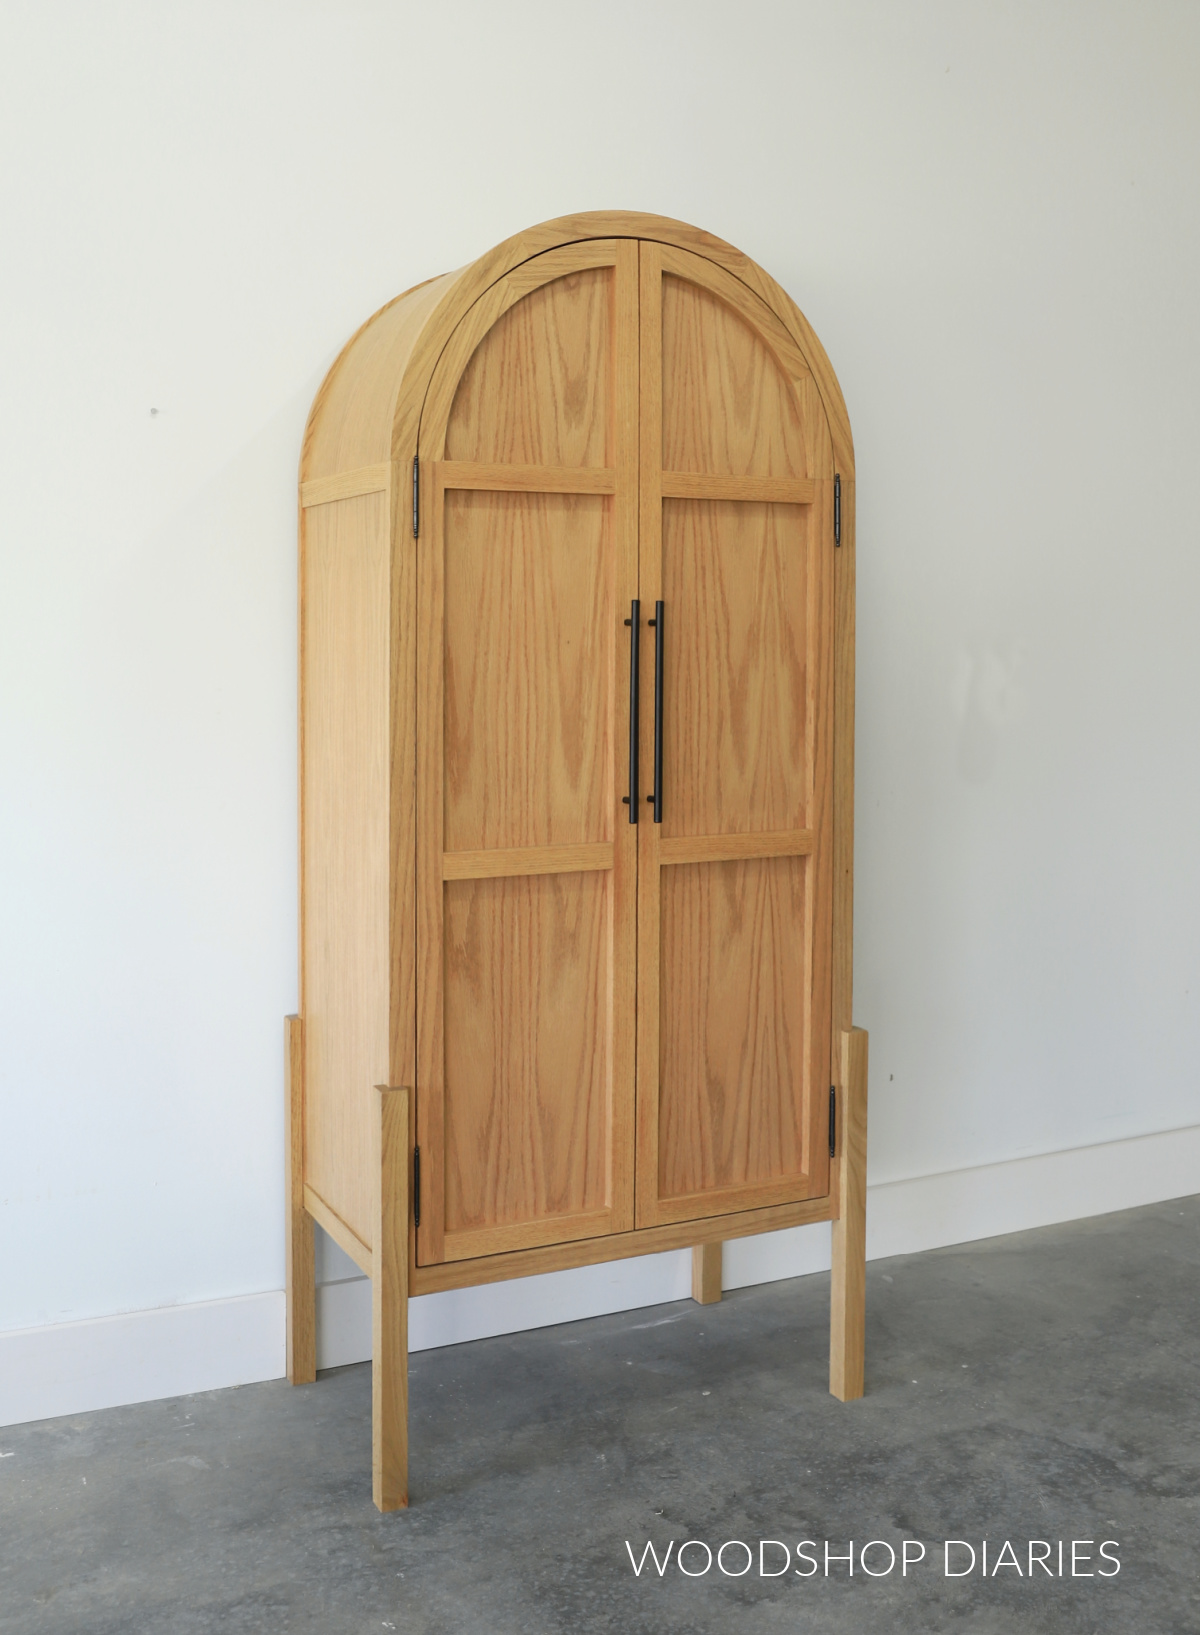
I am absolutely thrilled with how this project turned out. The curves made it challenging, but it was so much fun to work through the process. It really turned out to be a beautiful piece.
Now the question is…where should I put it?! I think it would be great in several places, so I’ll have to make a decision soon.
But in the meantime, I hope this inspired you to tackle your own DIY arched cabinet build!
If so, don’t forget to check out the printable plans here!
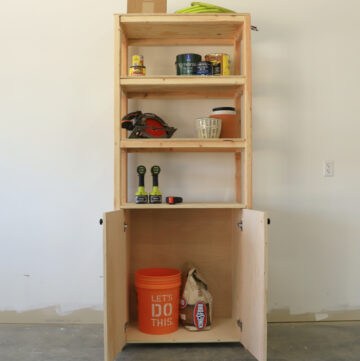
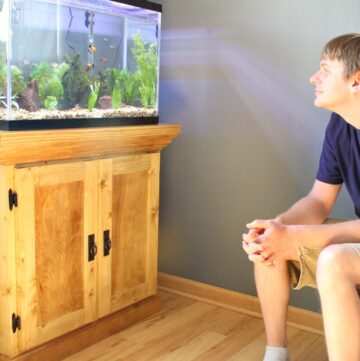
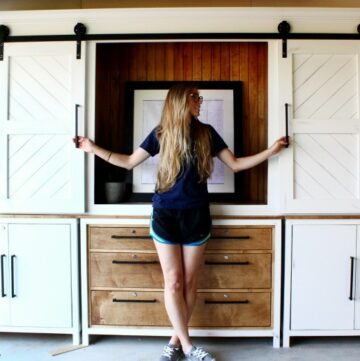
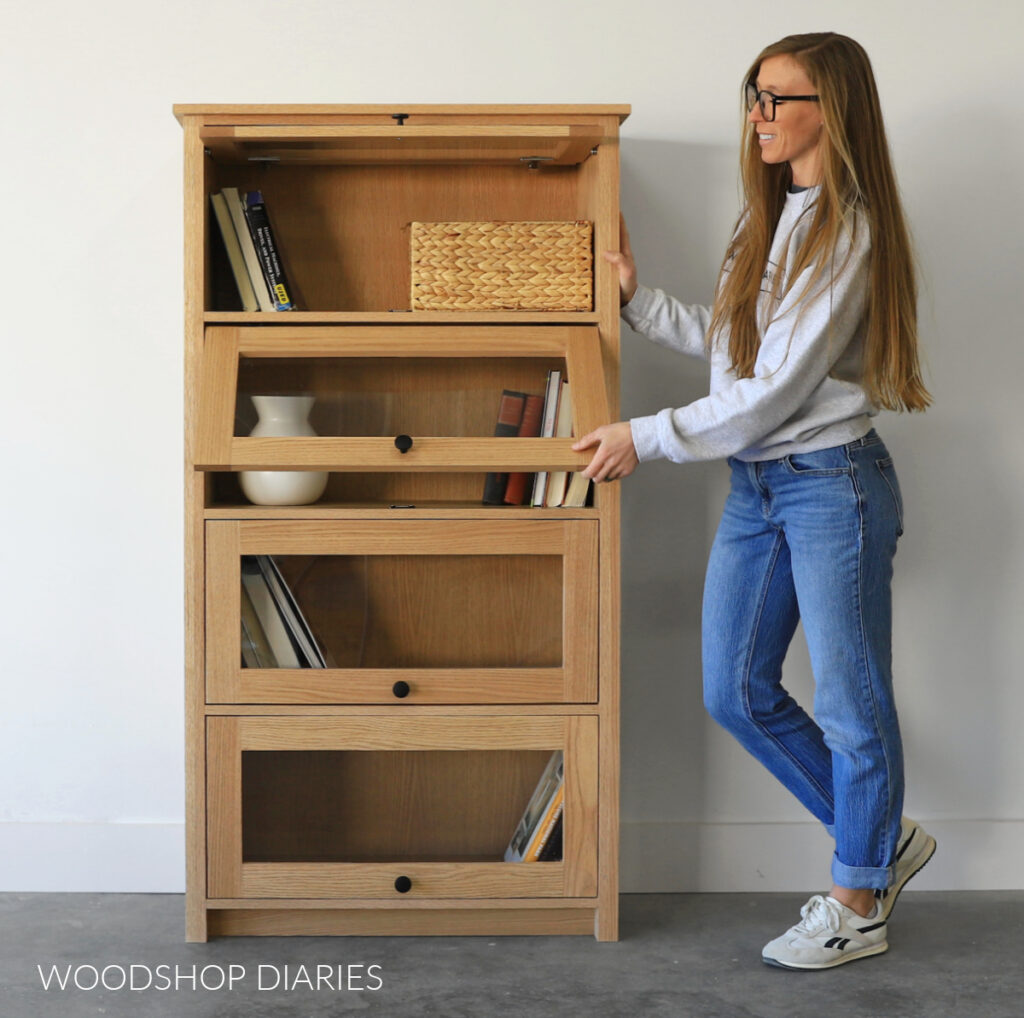
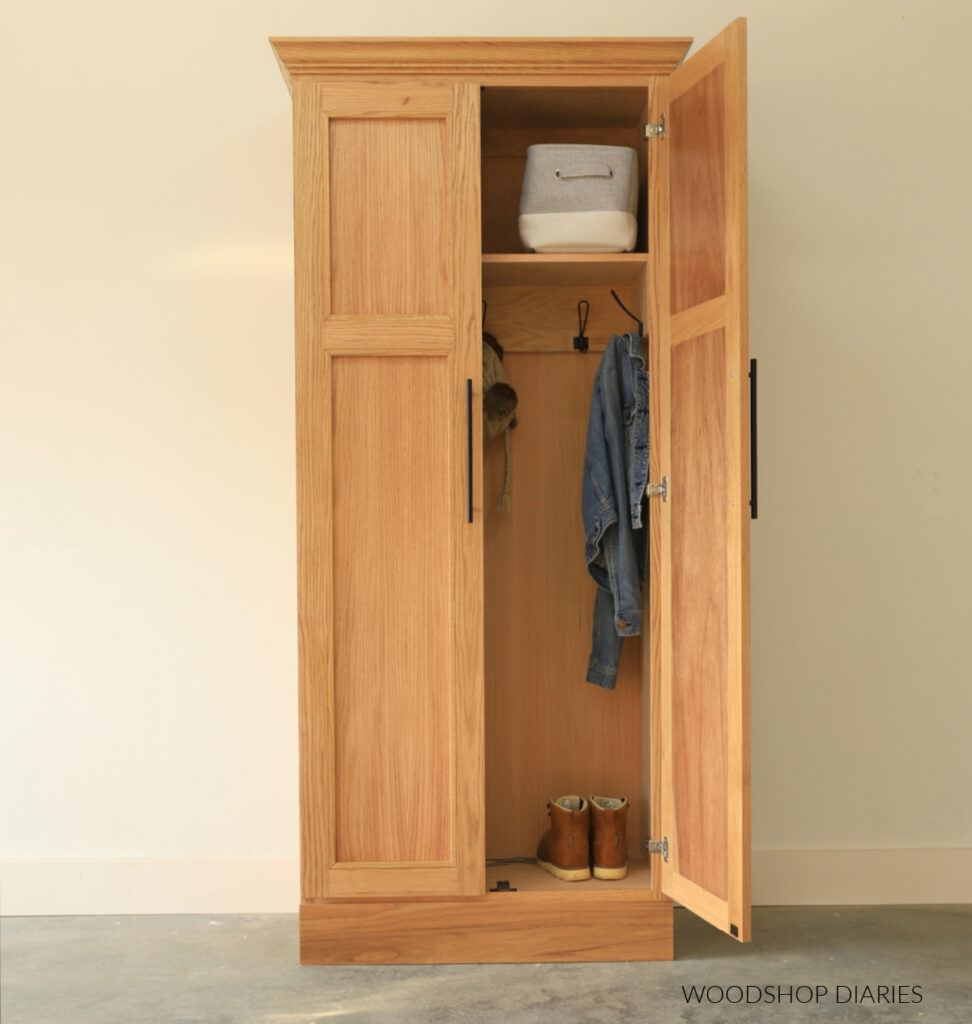
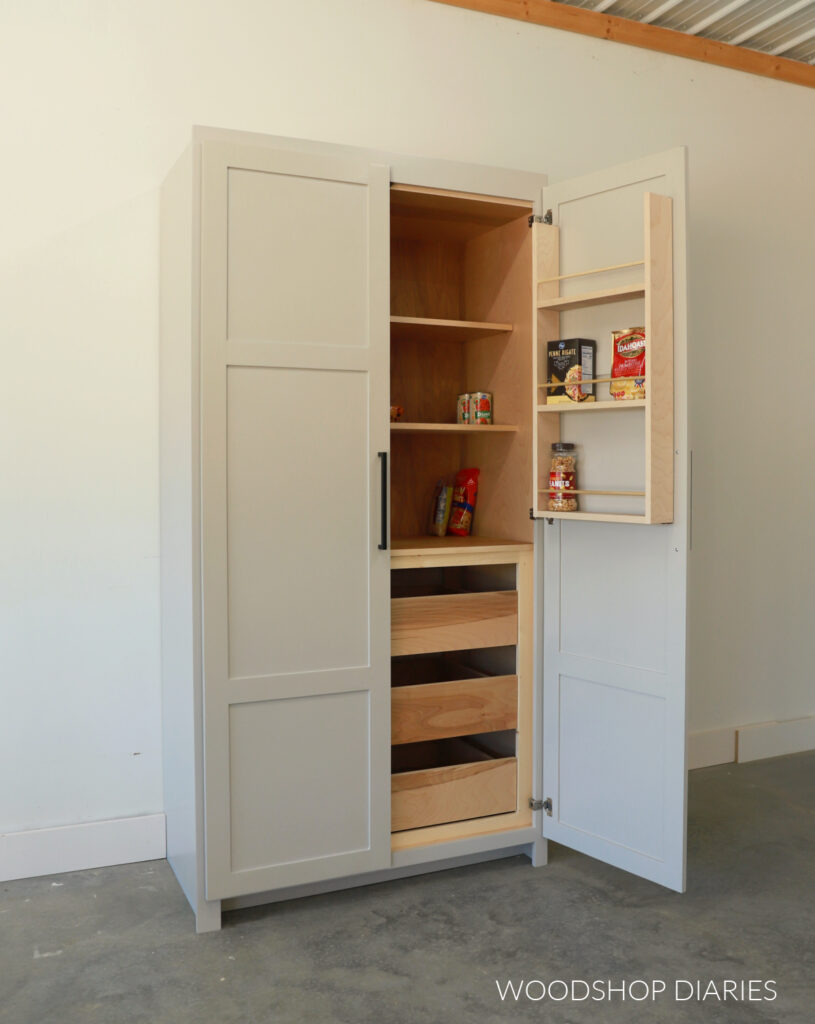
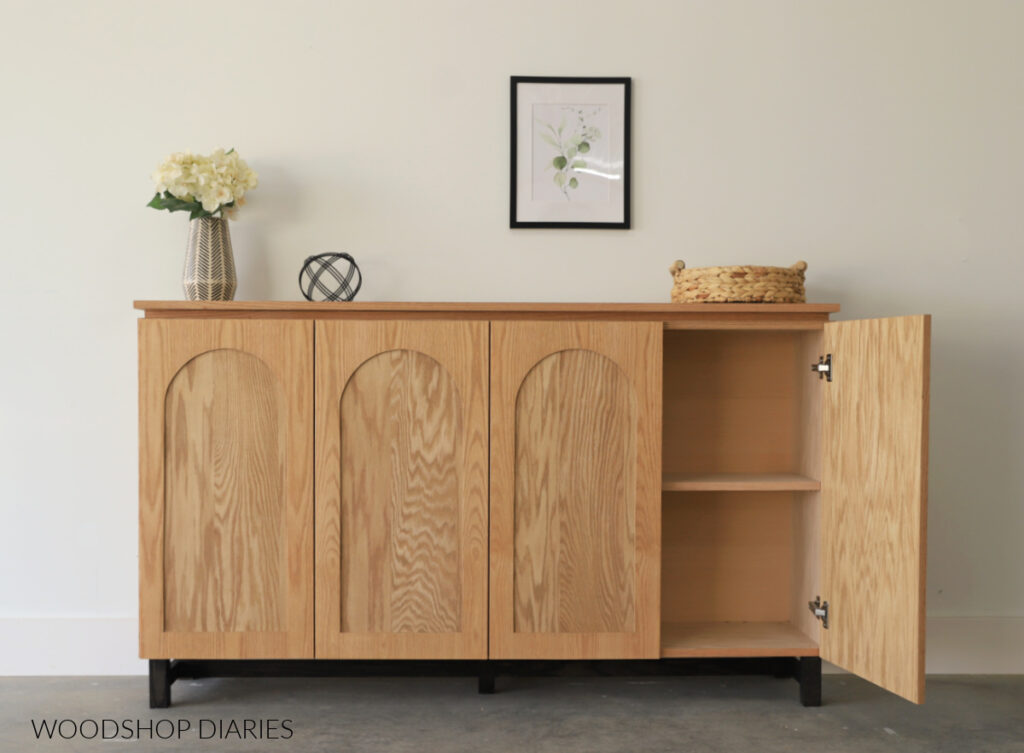
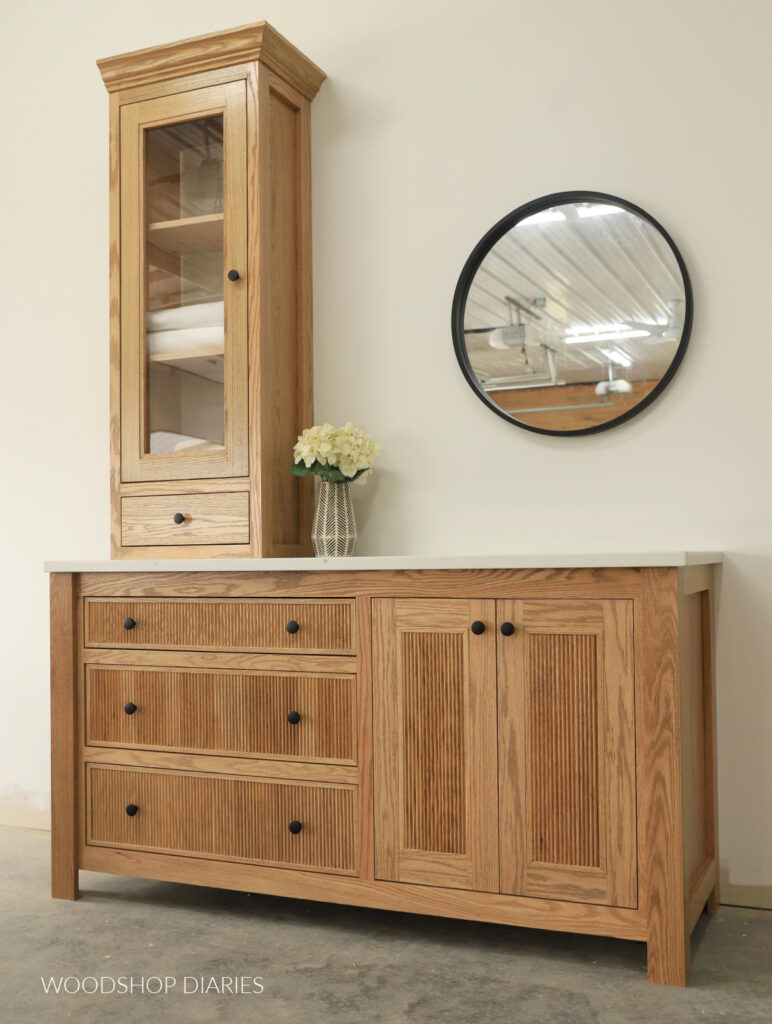
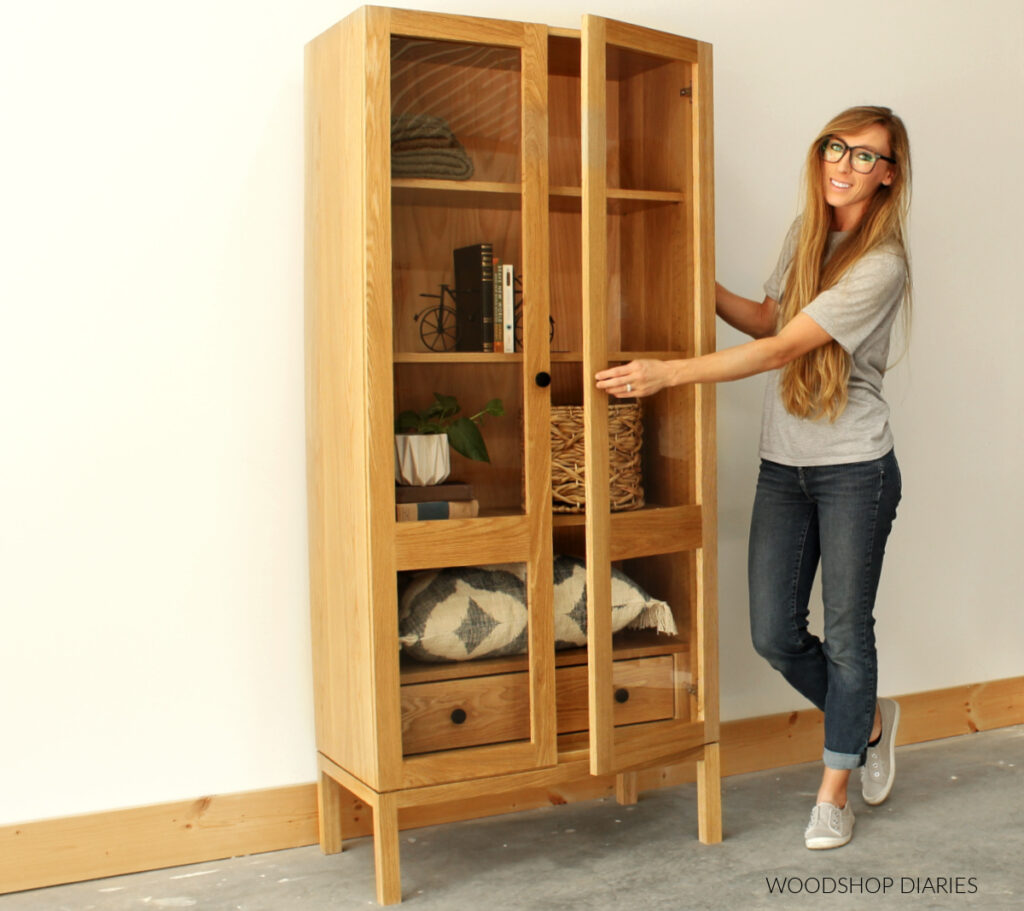
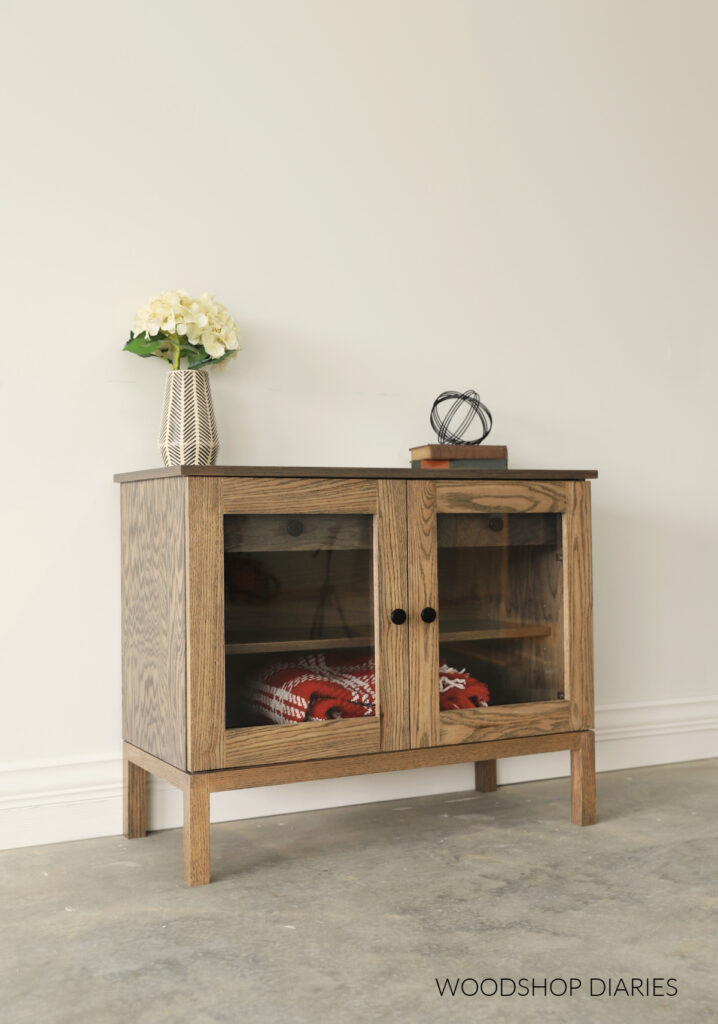
Looking for more unique storage cabinet ideas?
Enjoyed this build, but looking for more unique storage ideas? I’ve got you covered! Click on the image(s) below to learn how to build each project:
If you enjoyed this post, be sure to save it for later by pinning or sharing to your favorite social channel!
Until next time, friend, happy building!