Woodshop Diaries

  • Shop
  • About
    • Work With Me
    • Frequently Asked Questions
  • DIY Projects
    • DIY Furniture Plans
      • DIY Bed Plans
      • DIY Dresser Plans
      • DIY Nightstand Plans
      • DIY Desk Plans
      • DIY TV Stand Plans
      • Coffee and Side Table Plans
      • Tables
      • Shelves and Bookcase Plans
      • DIY Storage Trunk Plans
      • DIY Bench Plans
      • DIY Storage Cabinet Plans
      • DIY Bathroom Vanity Plans
      • Kids Projects and Furniture
    • DIY Scrap Wood Projects
    • DIY Workshop Projects
    • DIY Home Decor Projects
  • Getting Started
    • Cabinet Building
    • Woodworking Basics
    • Furniture Finishing Tips
    • Tool Guides & Reviews
  • Blog
menu icon
go to homepage
  • Shop
  • About
    • Work With Me
    • Frequently Asked Questions
  • DIY Projects
    • DIY Furniture Plans
      • DIY Bed Plans
      • DIY Dresser Plans
      • DIY Nightstand Plans
      • DIY Desk Plans
      • DIY TV Stand Plans
      • Coffee and Side Table Plans
      • Tables
      • Shelves and Bookcase Plans
      • DIY Storage Trunk Plans
      • DIY Bench Plans
      • DIY Storage Cabinet Plans
      • DIY Bathroom Vanity Plans
      • Kids Projects and Furniture
    • DIY Scrap Wood Projects
    • DIY Workshop Projects
    • DIY Home Decor Projects
  • Getting Started
    • Cabinet Building
    • Woodworking Basics
    • Furniture Finishing Tips
    • Tool Guides & Reviews
  • Blog
search icon
Homepage link
  • Shop
  • About
    • Work With Me
    • Frequently Asked Questions
  • DIY Projects
    • DIY Furniture Plans
      • DIY Bed Plans
      • DIY Dresser Plans
      • DIY Nightstand Plans
      • DIY Desk Plans
      • DIY TV Stand Plans
      • Coffee and Side Table Plans
      • Tables
      • Shelves and Bookcase Plans
      • DIY Storage Trunk Plans
      • DIY Bench Plans
      • DIY Storage Cabinet Plans
      • DIY Bathroom Vanity Plans
      • Kids Projects and Furniture
    • DIY Scrap Wood Projects
    • DIY Workshop Projects
    • DIY Home Decor Projects
  • Getting Started
    • Cabinet Building
    • Woodworking Basics
    • Furniture Finishing Tips
    • Tool Guides & Reviews
  • Blog
×
Home » Woodworking » DIY Furniture Plans

DIY Faux Slat Toy Box

Modified: Nov 16, 2020 · Published: Dec 17, 2018 by Shara, Woodshop Diaries ·

*This DIY Toy Box post was sponsored by Build Something.  This post also contains affiliate links.  See disclosure policy for details.

How to Build a Simple DIY Toy Box with Faux Slats--Great Storage Trunk or Blanket Chest

For some reason, I’ve become really infatuated with faux things in my builds lately.  I mean, we’ve been over the fact I don’t have a very big appreciation for fake things. 

.

BUT, I’ve discovered that “faking it” in woodworking has some pretty cool advantages sometimes.

.

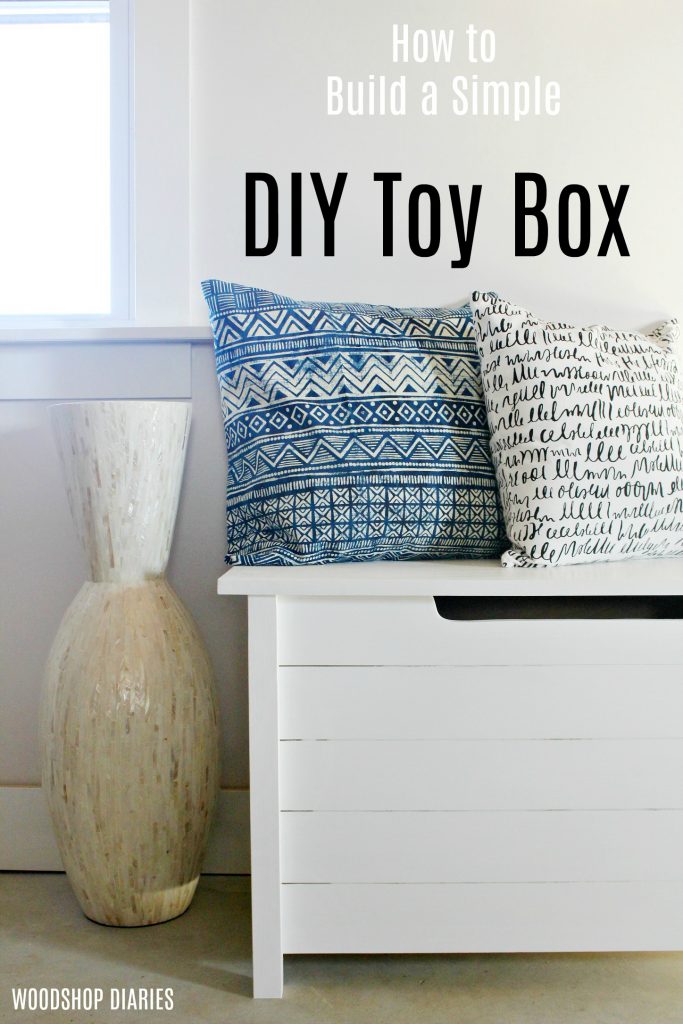
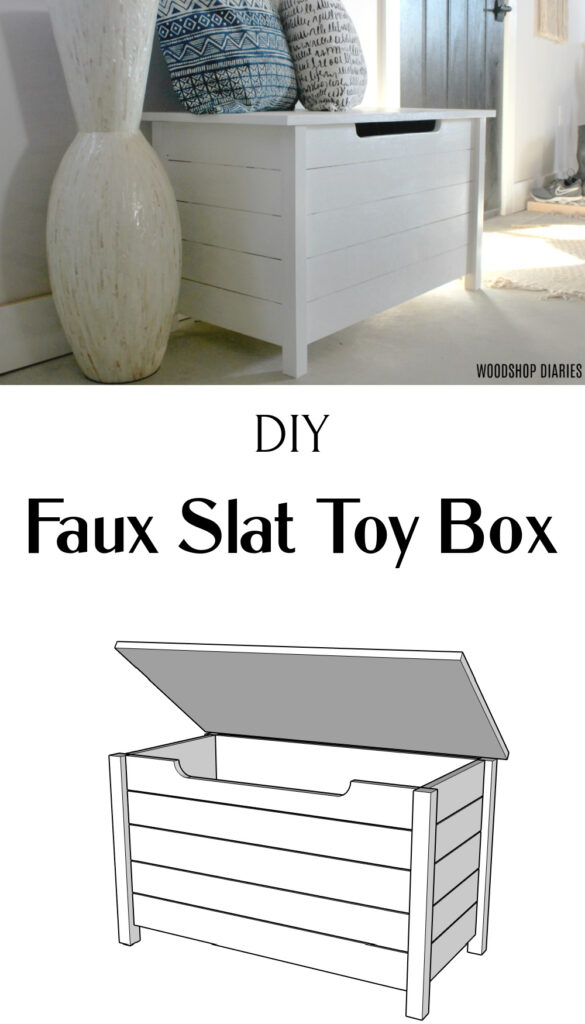
Like with this faux slat DIY toy box.

.

I mean, you could totally build this with ACTUAL slats.  BUT, that would be a ton of screws and joinery and then you have to make sure your boards are perfectly straight or your slats may have gaps.  It’s just a WHOLE lot easier to fake it in this case.

.

And if anyone judges you for faking it, you just smile and wave and show them your gorgeous new toy box.  You don’t have time for that kind of negativity 😉  You have pretty things to build.

.

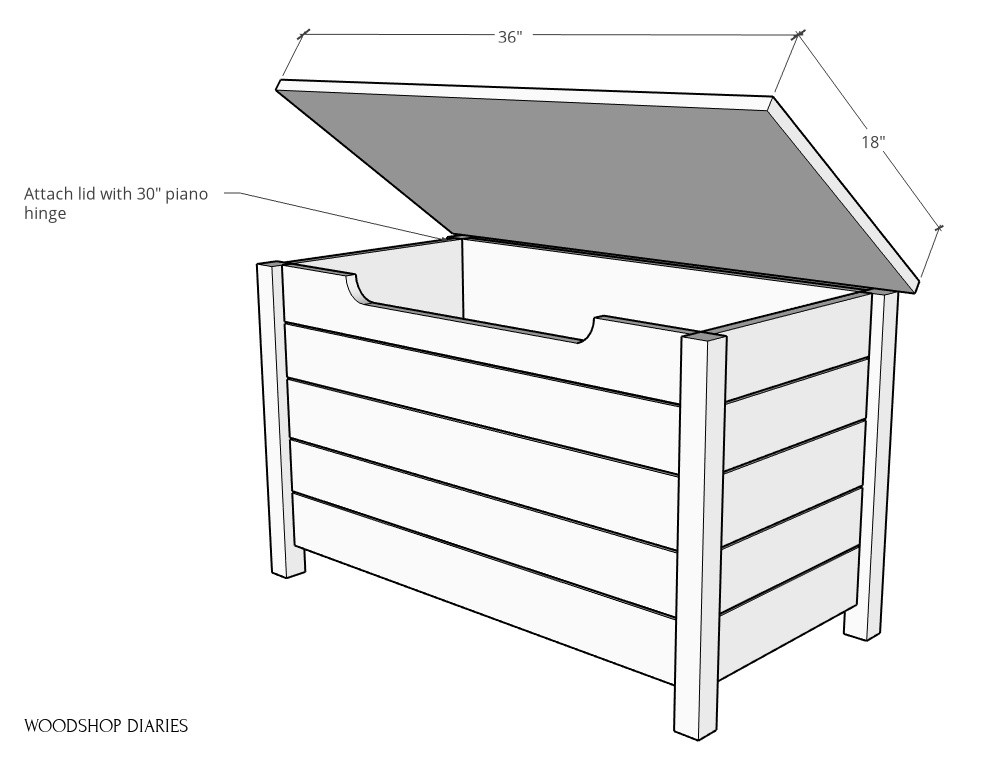
I’m sharing the tutorial below, the printable plans over on Build Something and the YouTube tutorial video here:

https://youtu.be/QV41KP9Acgc

For This Slatted Toy Box Build, You Will Need:

  • Kreg Pocket Hole Jig
  • Kreg Rip Cut
  • Kreg AccuCut
  • Drill
  • Miter Saw
  • Circular Saw
  • Piano Hinge
  • 1 ¼″ pocket hole screws

Step 1: Cut Faux Slats in Toy Box Side Panels

First, I cut two small side panels and two larger front and back panels of ¾″ plywood.

RELATED: Check out this post for how to Easily Break Down Plywood Sheets.

.

Then, I cut ¼″ deep and ⅛″ wide dados in the panels like shown.

Diagram of dado locations to make fake slats

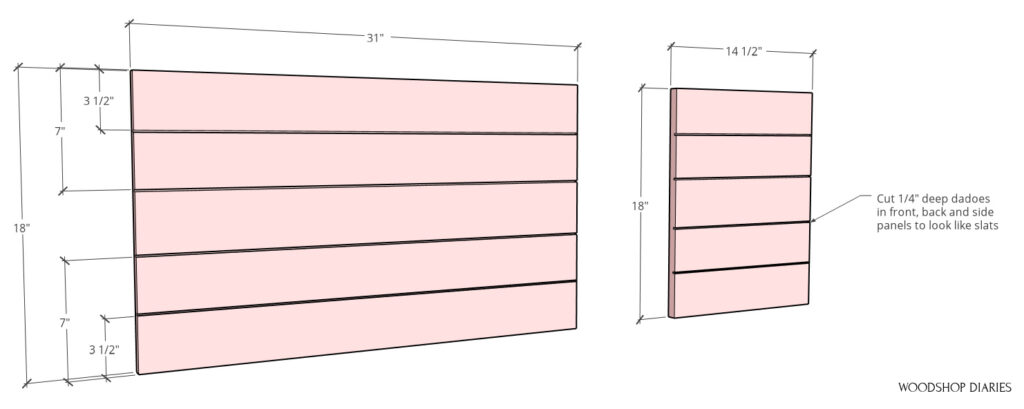
You can do this several ways. One way is to set up the table saw rip fence 3 ½″ from the blade and set the blade depth to ¼″ deep. Run the panels through once, then do the same on the opposite side.

.

Then, repeat the process setting the rip fence 7″ from the blade.

Shara woodshop Diaries cutting faux slats into box side panels

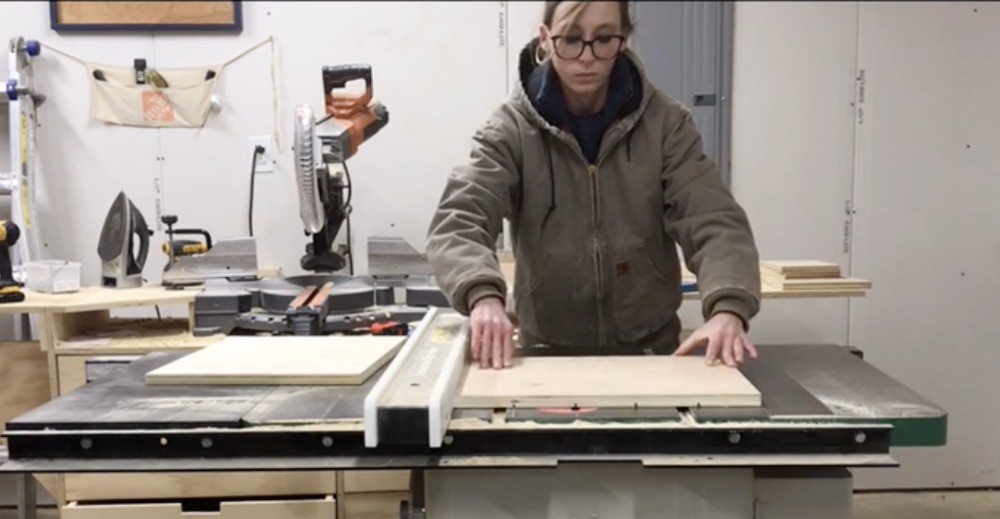
But, if you don’t have a table saw, you can do this with a circular saw and a straight edge OR using the Kreg AccuCut track.

RELATED: Check out how to cut dadoes with a circular saw on this post.

.

Simply set the circular saw up to cut ¼″ deep and clamp a straight edge on the piece (or use an AccuCut Track) so that the blade will cut 3 ½″ from the edge. Then repeat for 7″ from the edge.

.

Then, repeat until you’ve made all four cuts on all four panels.

Step 2: Assemble Toy Box Side Panels

Once the panels were “slatted,” I cut 20″ long 2×2 legs and assembled two side panels like shown using ¾″ pocket holes and 1 ¼″ pocket hole screws.

Side panel diagram of toy box

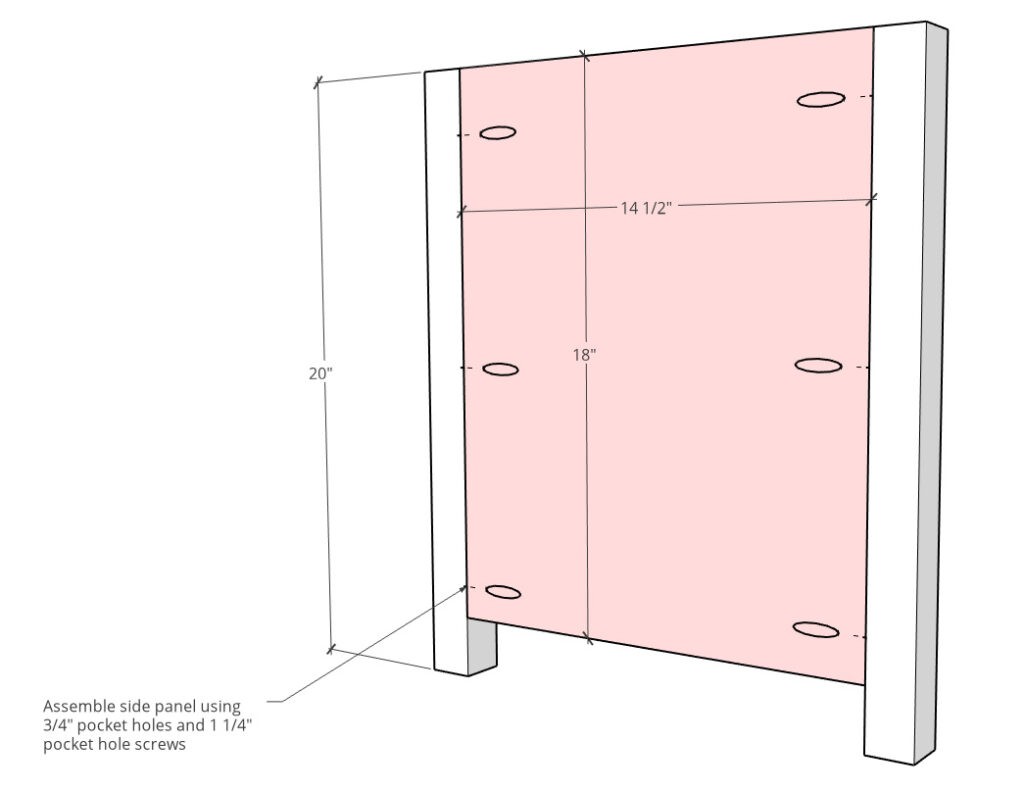
Keep the plywood panels flush to the INSIDE of the legs.

Step 3: Assemble Rest of Toy Box Sides

Attach front and back panels the same way using ¾″ pocket holes and 1 ¼″ pocket hole screws like shown.

Attaching front and back panels onto toy box carcass

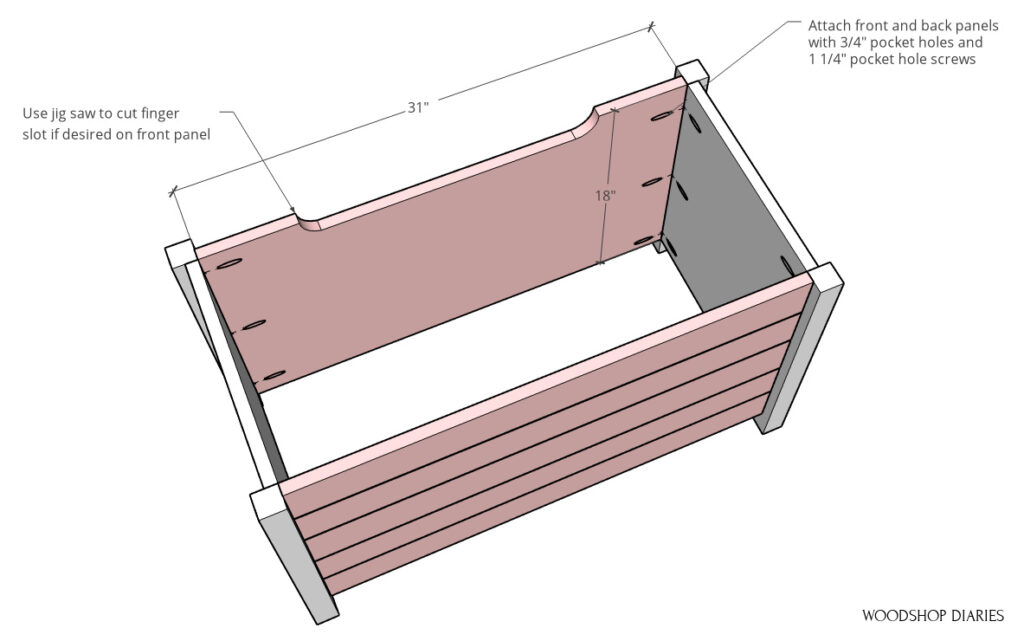
If desired, before attaching front panel, use a jig saw to cut out a slot to help prevent fingers from getting smashed when the lid shuts.

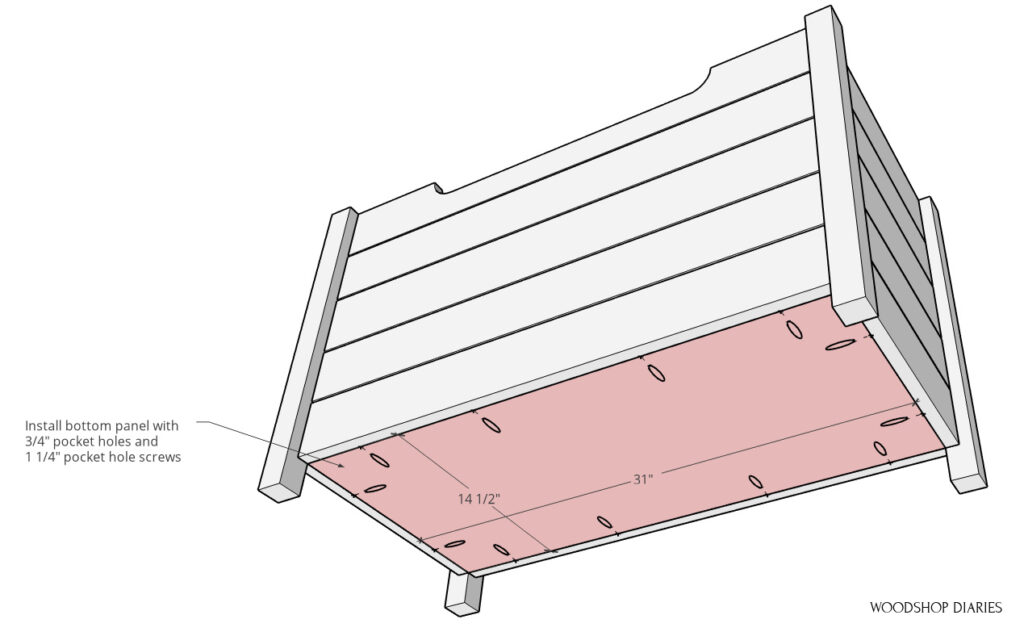
Step 4: Install Bottom Panel

Install ¾″ plywood bottom panel into toy box using ¾″ pocket holes and 1 ¼″ pocket hole screws so that it’s flush with the bottom of all side panels.

Bottom panel diagram for installation into toy box

Step 5: Install Lid

All that’s left is to add the top!

.

Now, because these panels are inset to the inside of the legs, in order to use a piano hinge, I needed to add a scrap block to the top of the back panel like shown.

Adding scrap block diagram to back side of toy box

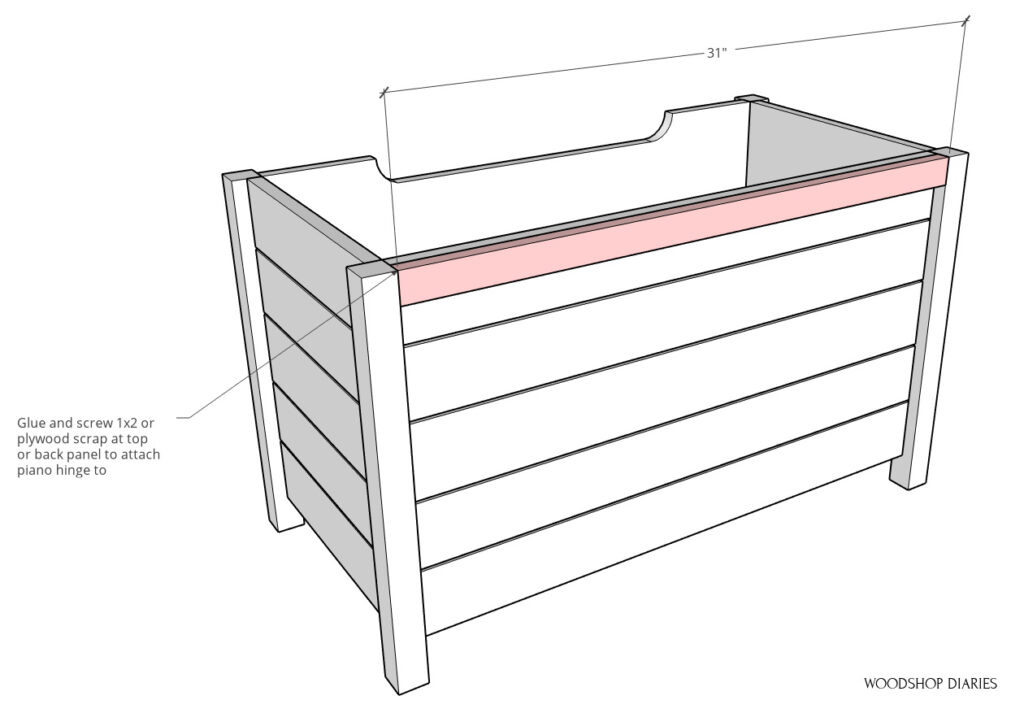
This doesn’t have to be a specific size, it just needs to be long enough to mount the piano hinge to. Attach using wood glue and brad nails OR 1 ¼″ wood screws.

.

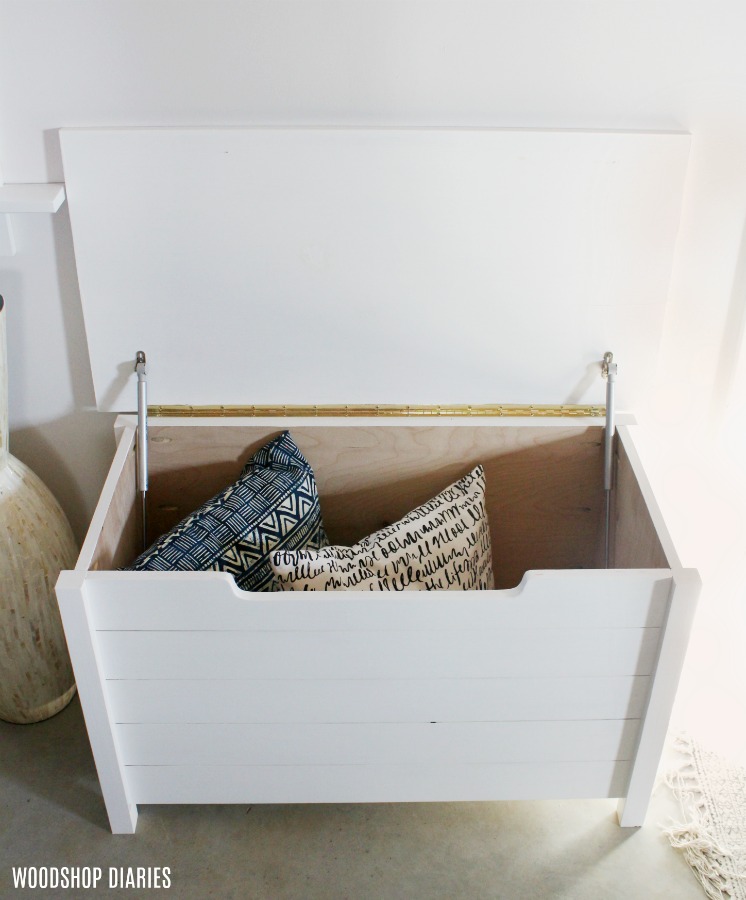
Then, attach a ¾″ plywood lid like shown using a 30″ piano hinge.

Attaching lid to top of storage chest

I also added in soft close hinges since this was for my 1 year old nephew and I didn’t want him to smash his fingers on a heavy lid.  These are actually not really “hinges”, but more like gas filled springs. 

.

I used a 30″ piano hinge for the actual hinge, but added these to each side for the soft close feature.  I used them once before on another toy box and they worked great!

Soft close hinges mounted onto DIY toy box lid

At this point, it’s ready for edge banding (to cover the plywood edges, if desired) and finish. I painted this white, but it would look nice stained, too.

.

Just a note: you need a tiny brush to brush paint or stain into the little slats–or a sprayer. The only downside to faux slats is that they’re a little difficult to get paint into. There are always pros and cons haha.

DIY Faux slat toy box painted white used as an entryway bench

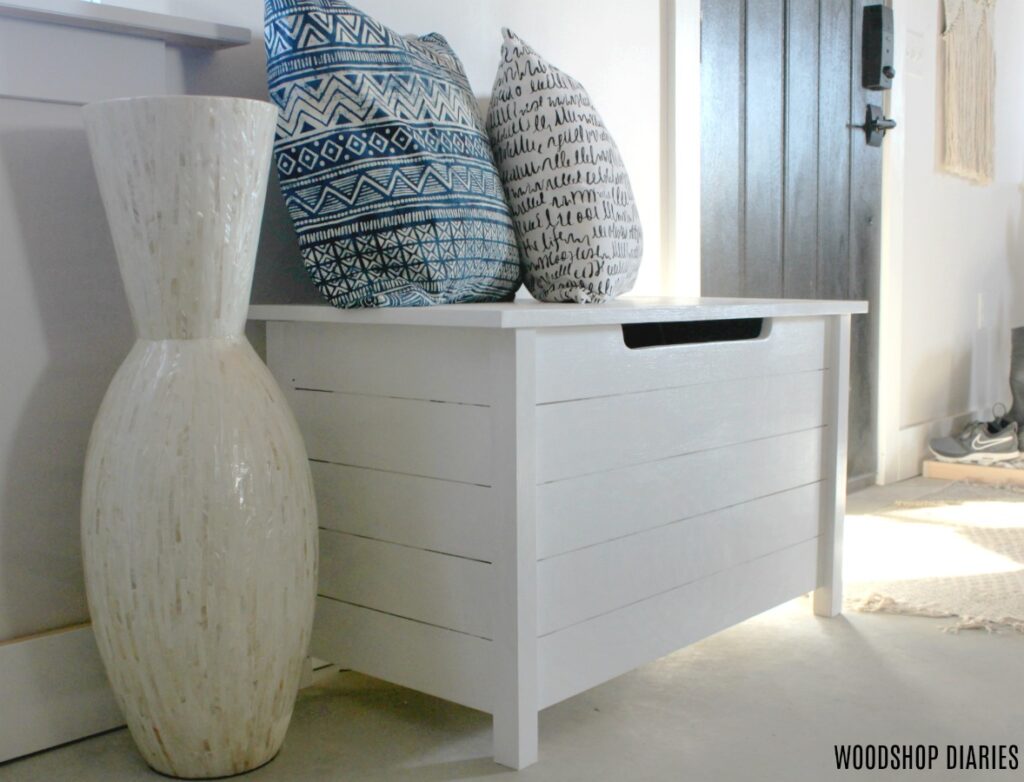
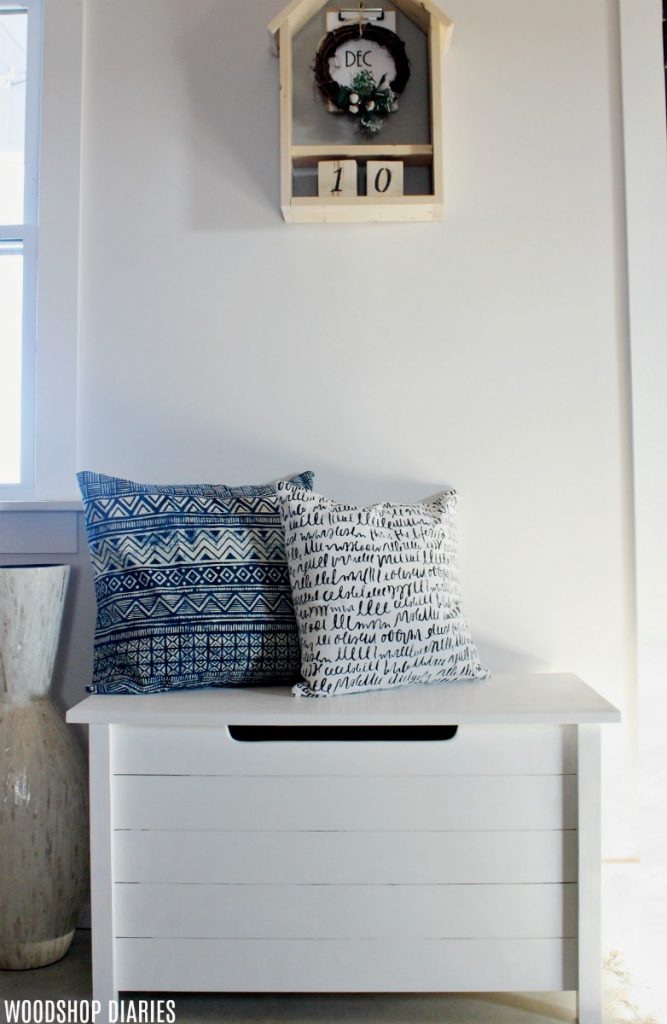
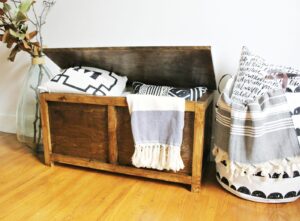
This simple slatted toy box makes an excellent Christmas or birthday gift, or keep it for yourself for an entryway bench or extra storage at the end of the bed.

Simple DIY Toy Box made from one board and a little plywood--free plans and video tutorial

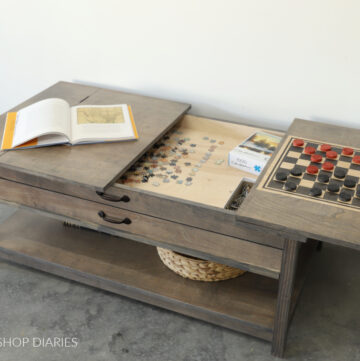
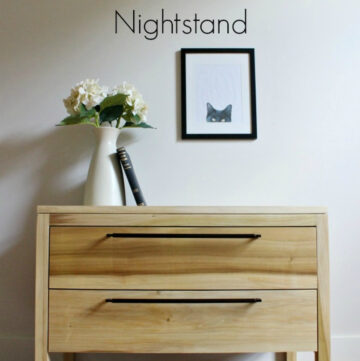
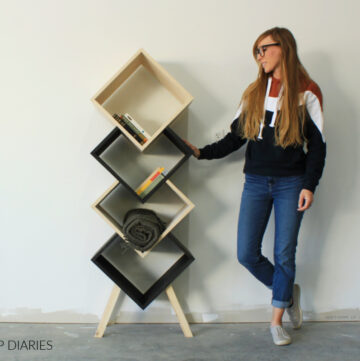
Check out these other “faux” projects:

Faux Drawer Dresser

DIY Fake Drawer Dresser Cabinet--Faux DIY apothecary cabinet

Faux Drawer Vanity

Faux Brick Fireplace

How to DIY a Faux Brick Fireplace and you'll never believe how easy it is!!

And Here’s a Few More DIY Toy Box Ideas:

Simple Toy Chest

Free building plans to make your own DIY Storage chest

DIY Storage Chest

DIY Hope Chest

So if you’re ready to get building, head over to Build Something for the printable plans for this toy box and for hundreds of other free plans and designs to build for every room in the house.

Pinterest collage of faux slatted toy box--finished at top and 3d sketch on bottom

Until next time, happy building!! 🙂

« How to Choose the Right Appliances for Your Kitchen
New Home, Smart Home–The Smart Products We Used in our New Home Build »

Related Posts

How to Build a Puzzle Coffee Table
DIY Modern Two Drawer Nightstand
DIY Modern Geometric Bookshelf

Comments

  1. Kathleen Conery says

    December 18, 2018 at 3:29 pm

    A place to sit, or to put on shoes, and attractive hidden storage? I think a small place needs this!

    • Shara, Woodshop Diaries says

      February 08, 2019 at 5:43 am

      I agree!! 🙂

Hi! I'm Shara, the designer, maker, and videographer behind Woodshop Diaries. Let's get building, friends :)

Learn more →

Woodworking Tips & Guides

  • How to make simple Shaker style cabinet doors!!
    DIY Simple Shaker Cabinet Doors
  • 5 Tools To Get Started Woodworking
  • DIY Kitchen Cabinets–From Only Plywood
  • How to Square Board Edges and Make Your Own 2x2s

Footer

↑ back to top

Tips to Take Your Projects to the Next Level

--5 Secrets to Professional Looking DIY Furniture

--How to Properly Paint Wood Furniture

--How to EASILY Cover Plywood Edges

--How to Sand Wood

--10 Must Have Tools for Furniture and Cabinet Building

Printable Building Plans

Check out our shop to browse printable PDF building plans!

Website Policies

This website is for entertainment purposes. Using any information provided is to be at your own risk.

This site uses cookies to provide you with a better experience.

All images and text on this site are property of Woodshop Diaries, LLC. Please be respectful and don't steal this content.

See Policies and Privacy page on this site for more information.

Want to get in touch? Contact Us Here

Copyright © 2026