Woodshop Diaries

  • Shop
  • About
    • Work With Me
    • Frequently Asked Questions
  • DIY Projects
    • DIY Furniture Plans
      • DIY Bed Plans
      • DIY Dresser Plans
      • DIY Nightstand Plans
      • DIY Desk Plans
      • DIY TV Stand Plans
      • Coffee and Side Table Plans
      • Tables
      • Shelves and Bookcase Plans
      • DIY Storage Trunk Plans
      • DIY Bench Plans
      • DIY Storage Cabinet Plans
      • DIY Bathroom Vanity Plans
      • Kids Projects and Furniture
    • DIY Scrap Wood Projects
    • DIY Workshop Projects
    • DIY Home Decor Projects
  • Getting Started
    • Cabinet Building
    • Woodworking Basics
    • Furniture Finishing Tips
    • Tool Guides & Reviews
  • Blog
menu icon
go to homepage
  • Shop
  • About
    • Work With Me
    • Frequently Asked Questions
  • DIY Projects
    • DIY Furniture Plans
      • DIY Bed Plans
      • DIY Dresser Plans
      • DIY Nightstand Plans
      • DIY Desk Plans
      • DIY TV Stand Plans
      • Coffee and Side Table Plans
      • Tables
      • Shelves and Bookcase Plans
      • DIY Storage Trunk Plans
      • DIY Bench Plans
      • DIY Storage Cabinet Plans
      • DIY Bathroom Vanity Plans
      • Kids Projects and Furniture
    • DIY Scrap Wood Projects
    • DIY Workshop Projects
    • DIY Home Decor Projects
  • Getting Started
    • Cabinet Building
    • Woodworking Basics
    • Furniture Finishing Tips
    • Tool Guides & Reviews
  • Blog
search icon
Homepage link
  • Shop
  • About
    • Work With Me
    • Frequently Asked Questions
  • DIY Projects
    • DIY Furniture Plans
      • DIY Bed Plans
      • DIY Dresser Plans
      • DIY Nightstand Plans
      • DIY Desk Plans
      • DIY TV Stand Plans
      • Coffee and Side Table Plans
      • Tables
      • Shelves and Bookcase Plans
      • DIY Storage Trunk Plans
      • DIY Bench Plans
      • DIY Storage Cabinet Plans
      • DIY Bathroom Vanity Plans
      • Kids Projects and Furniture
    • DIY Scrap Wood Projects
    • DIY Workshop Projects
    • DIY Home Decor Projects
  • Getting Started
    • Cabinet Building
    • Woodworking Basics
    • Furniture Finishing Tips
    • Tool Guides & Reviews
  • Blog
×
Home

Sliding Doors–The Sequel

February 4, 2016 by Shara, Woodshop Diaries

Oops, I did it again.  I played with your heart.  Got lost in the games. Oh baby, baby.

Oh I’m sorry, I got carried away with that a little bit…I’m so embarrassed.  Back in my day, Britney was not crazy and still had her hair.  Of course, NSYNC will always have my heart and I liked Christina better.  And my friends and I watched the Spice Girls movie like every weekend at sleepovers.  I was Sporty Spice, but I got to rap all the Scary Spice parts in the songs when we sang them.  Oh the early 2000’s.  Those were the days.

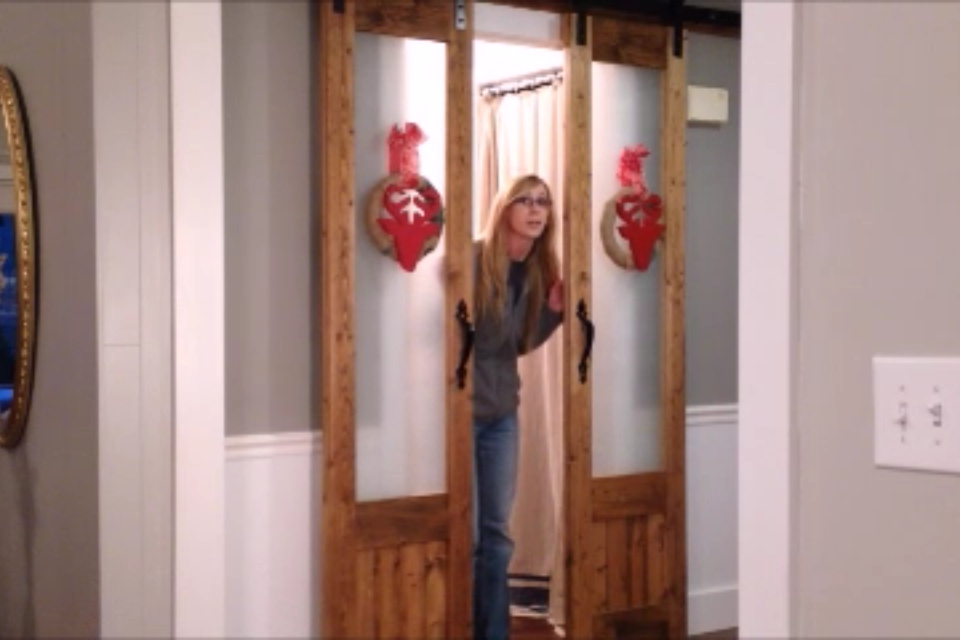
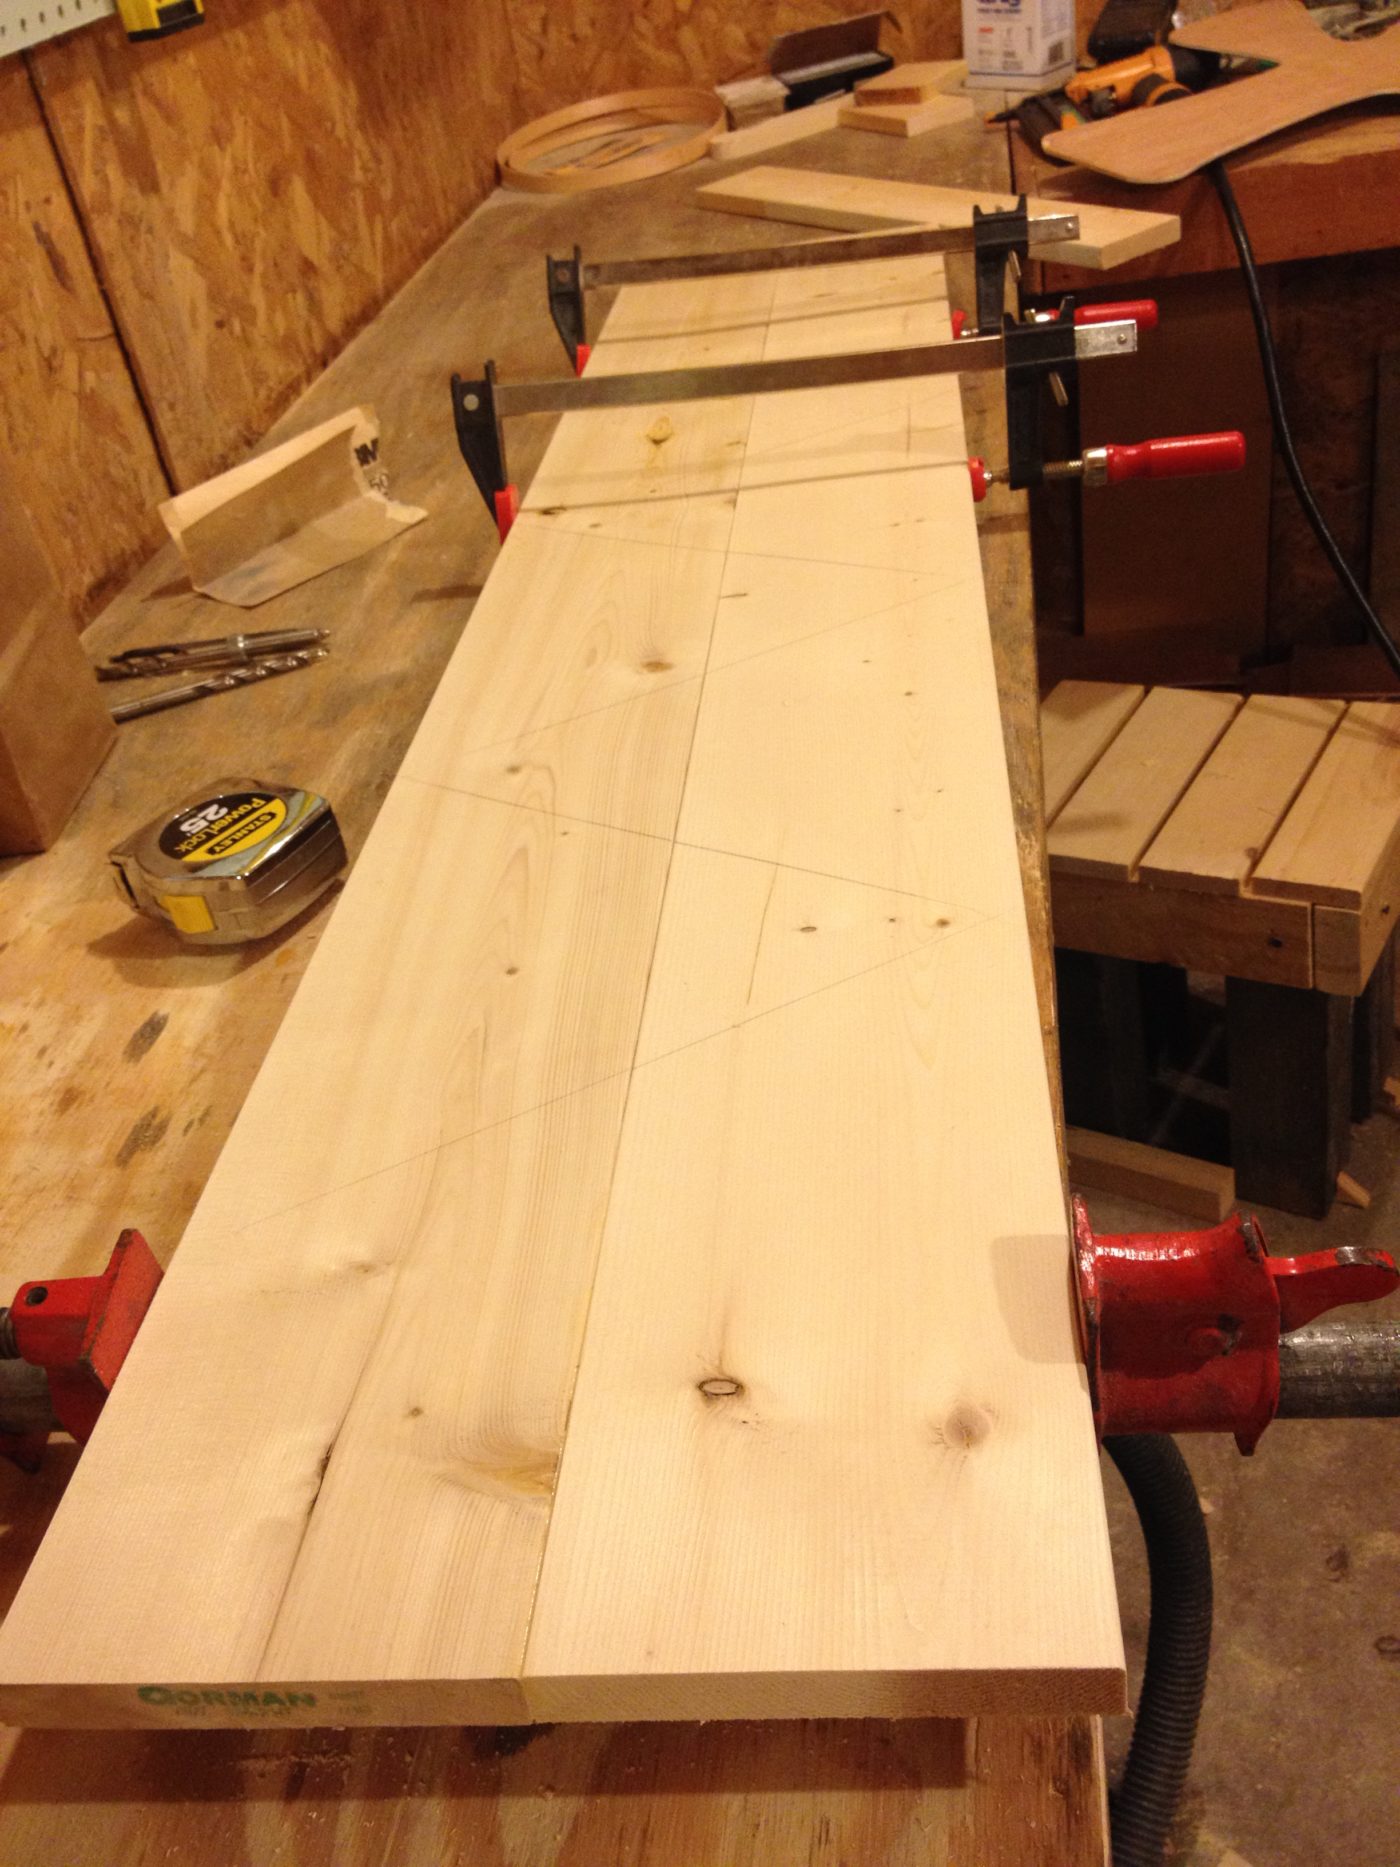
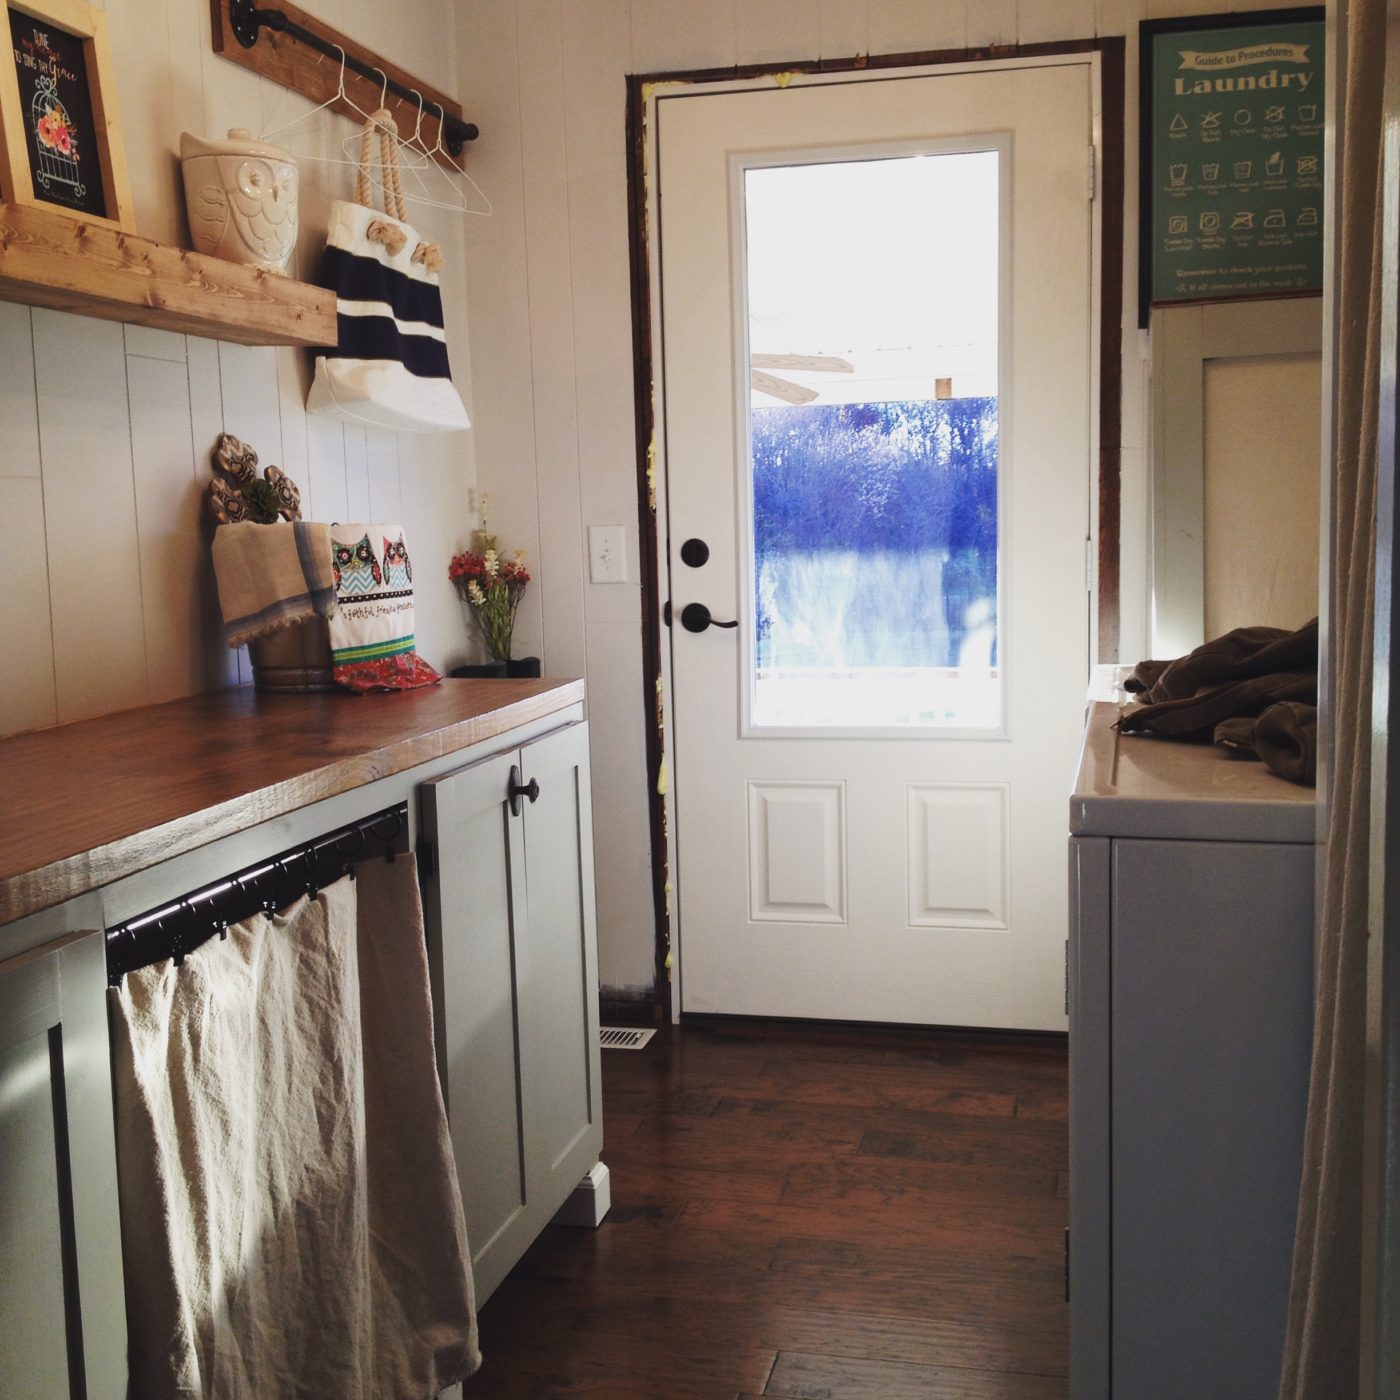
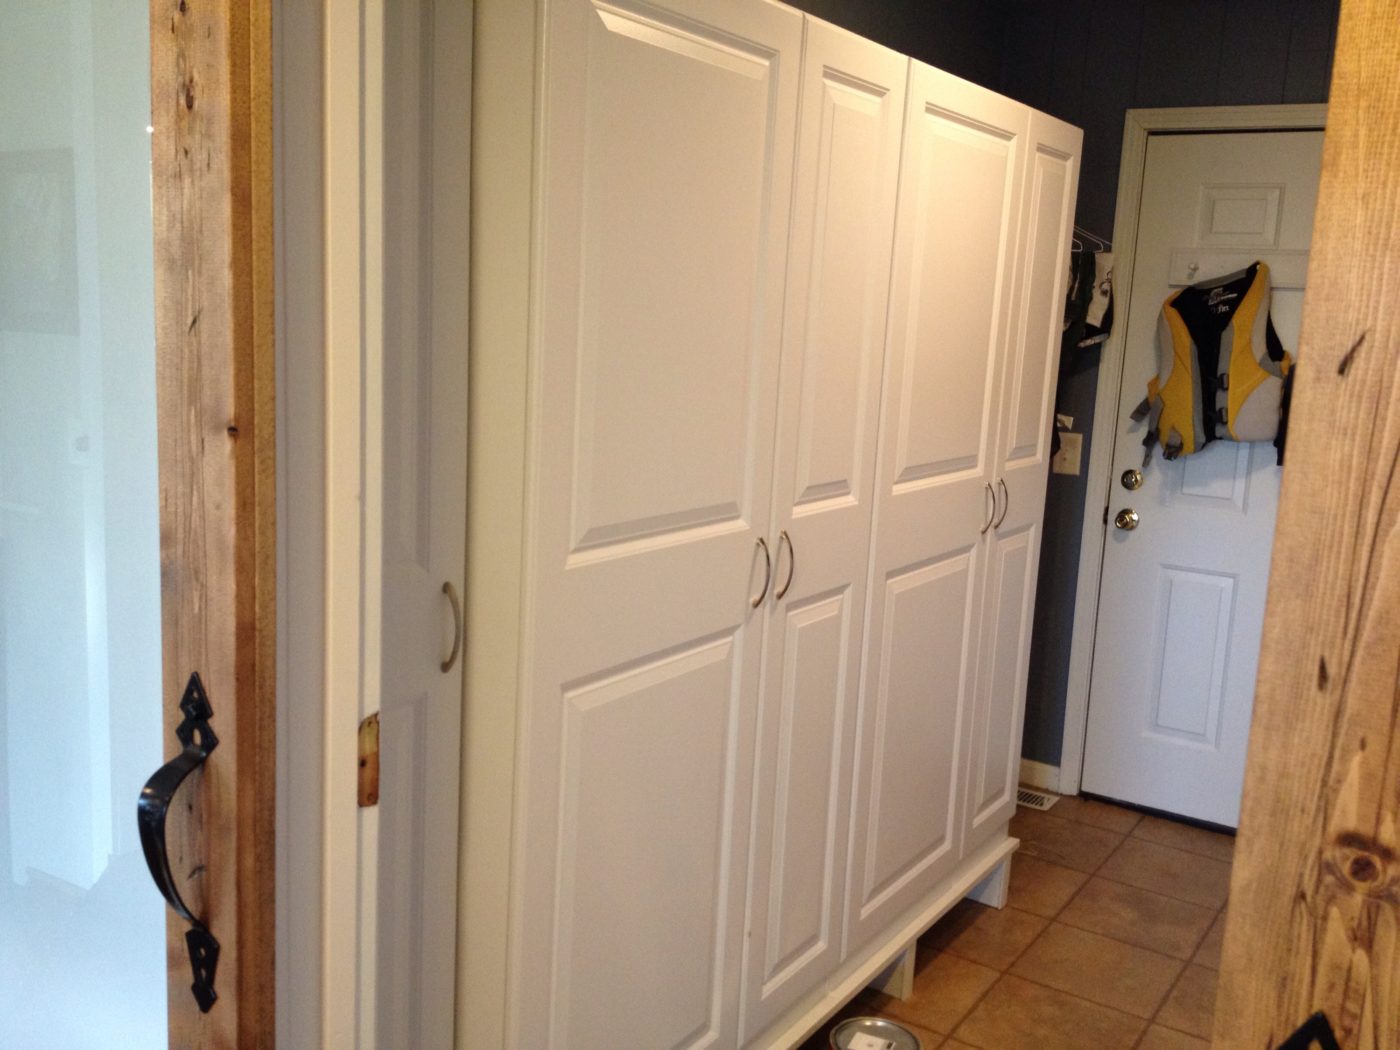
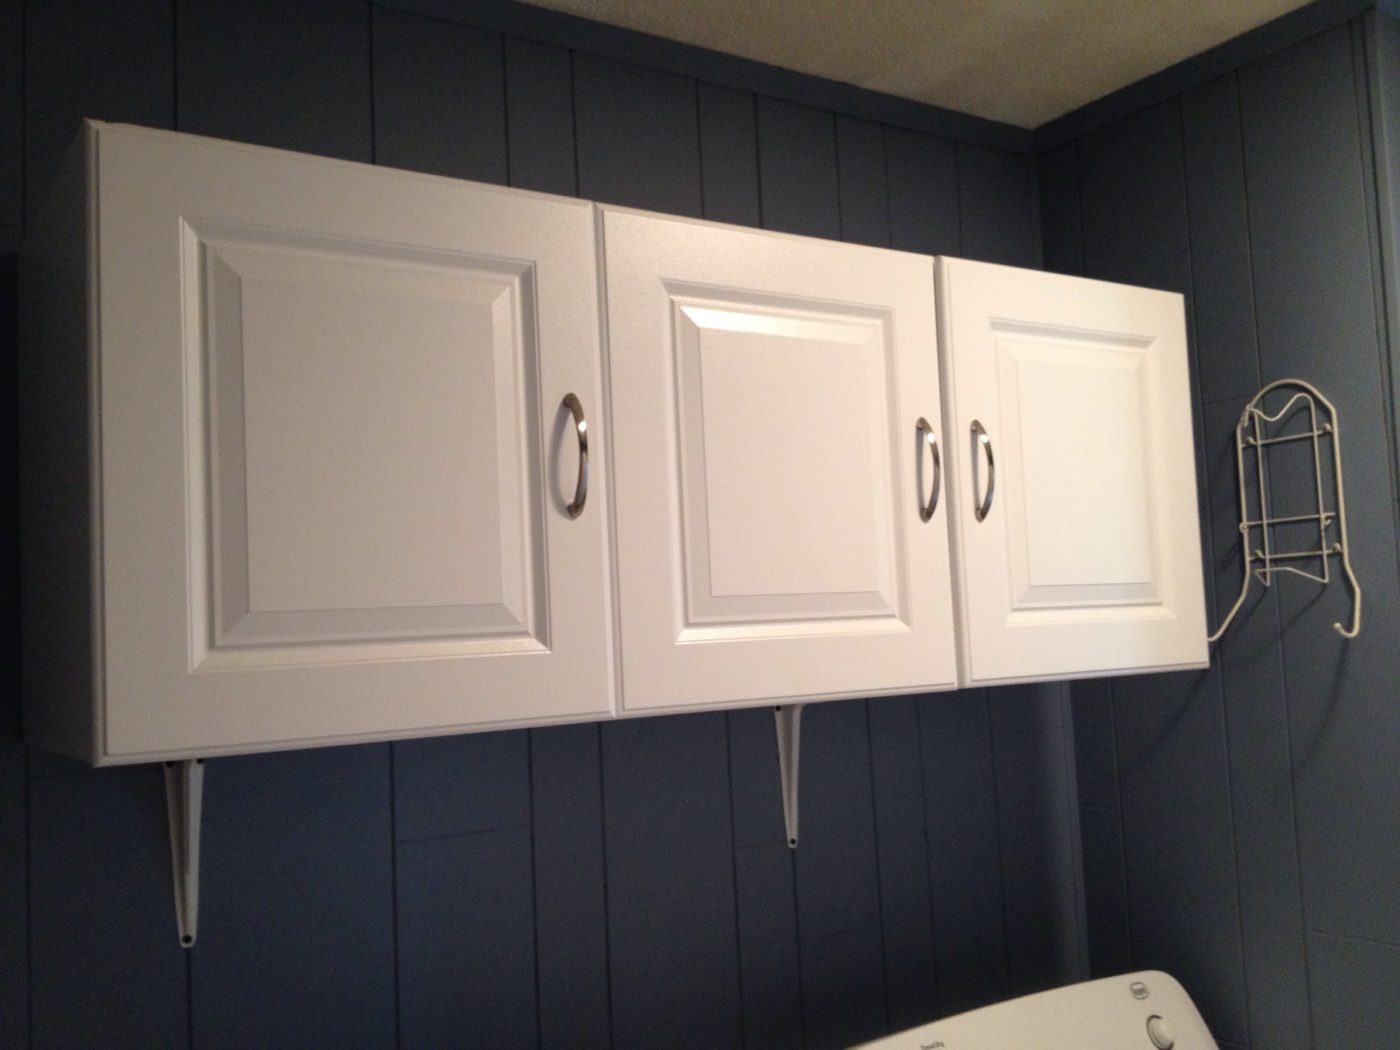
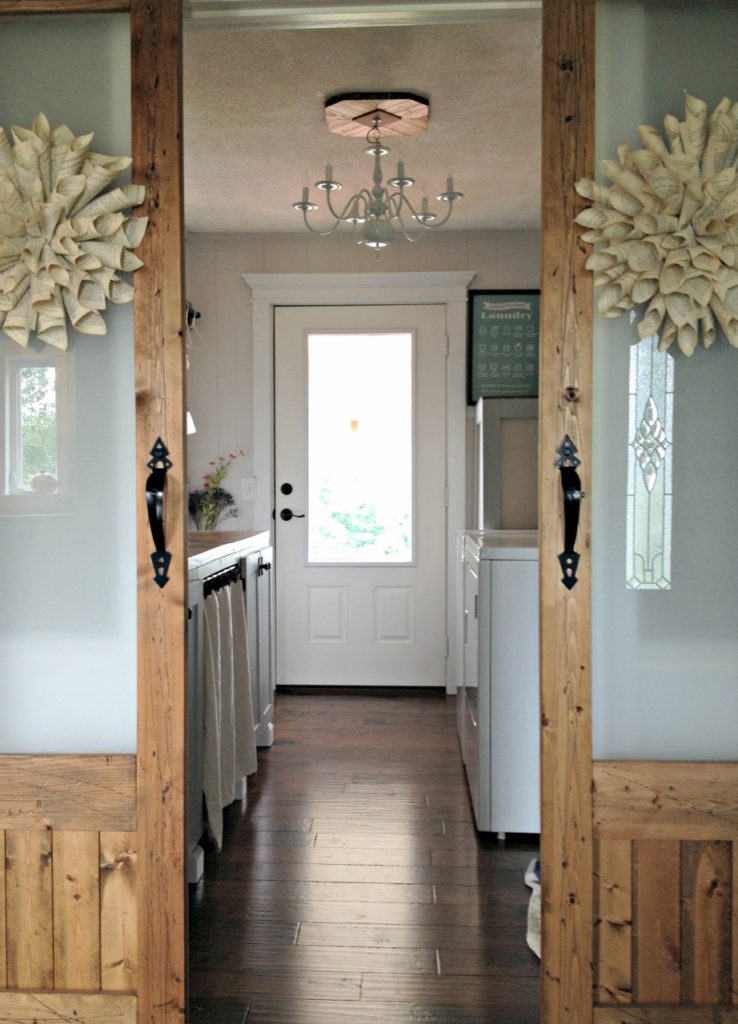
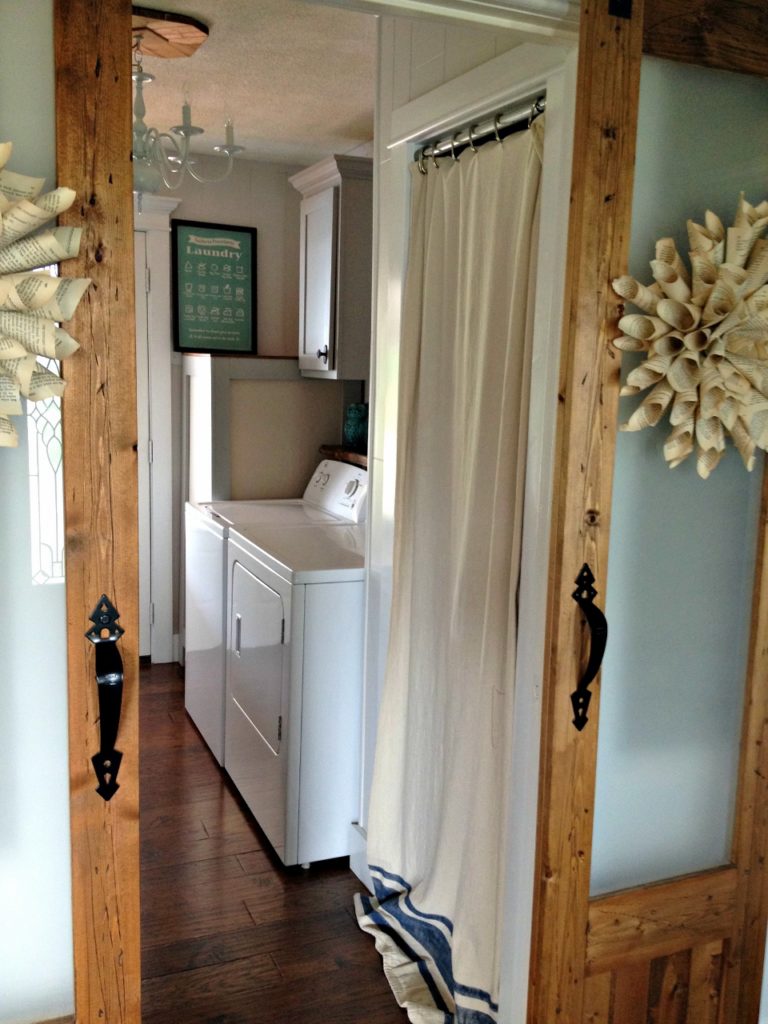
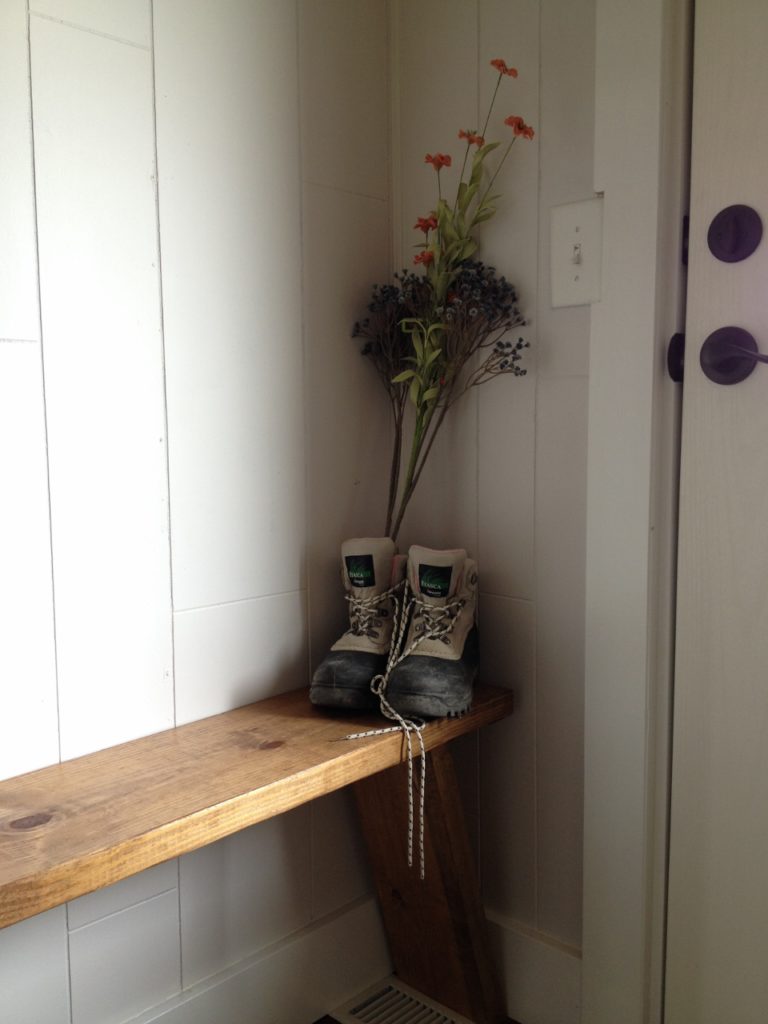
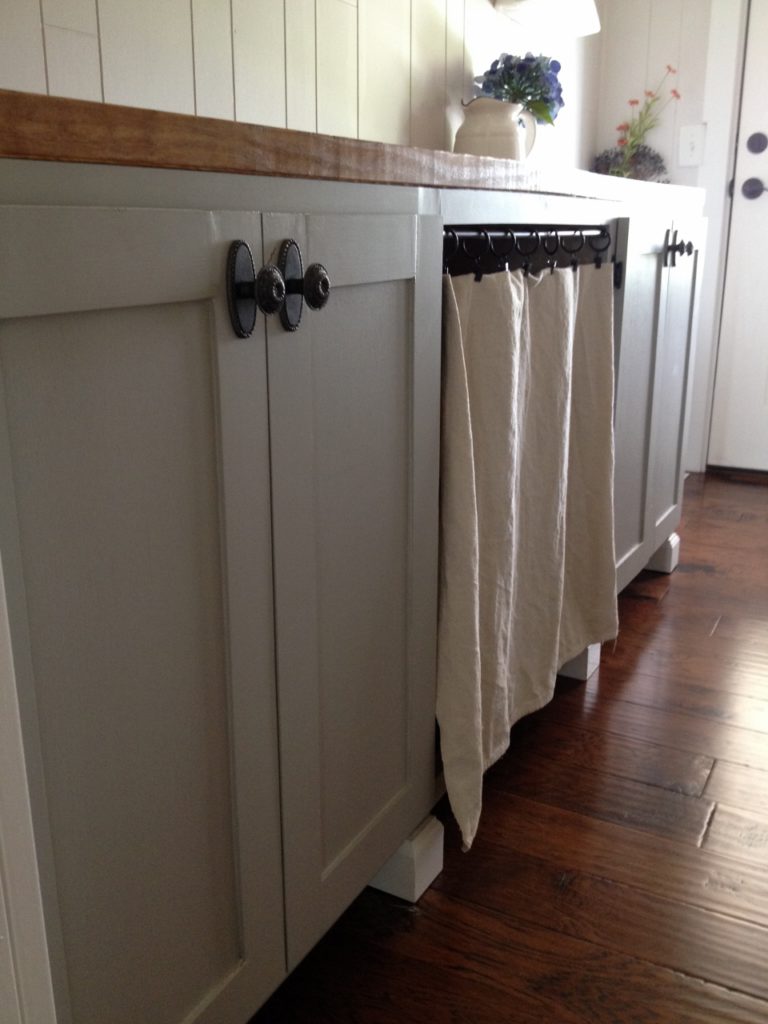
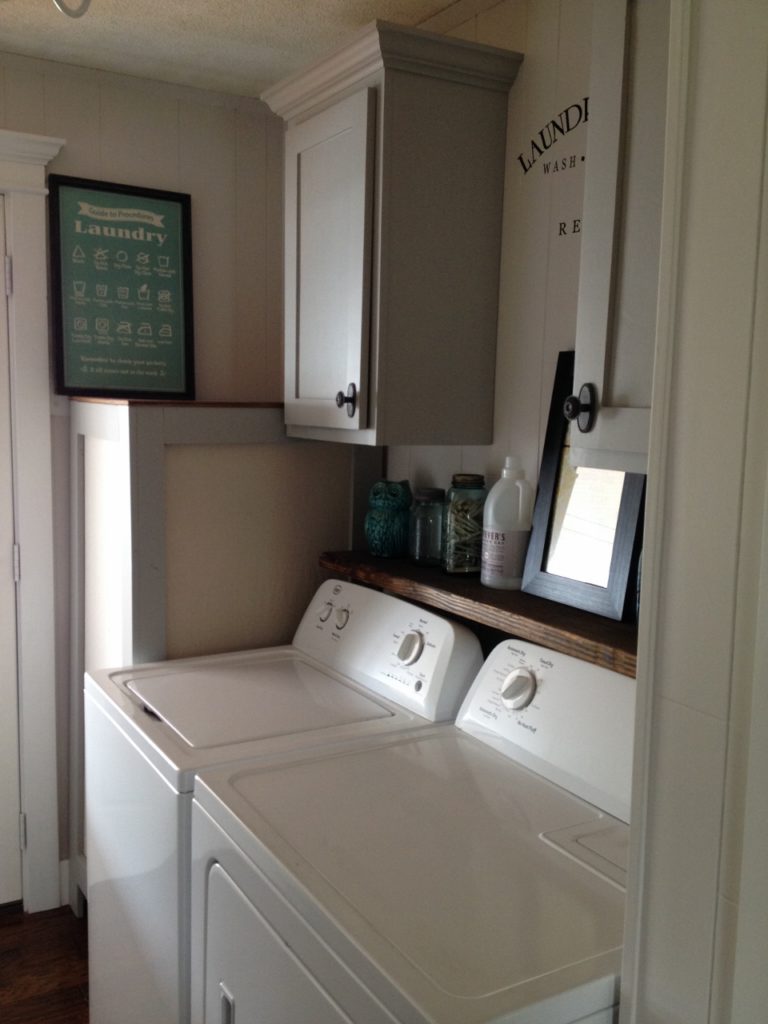
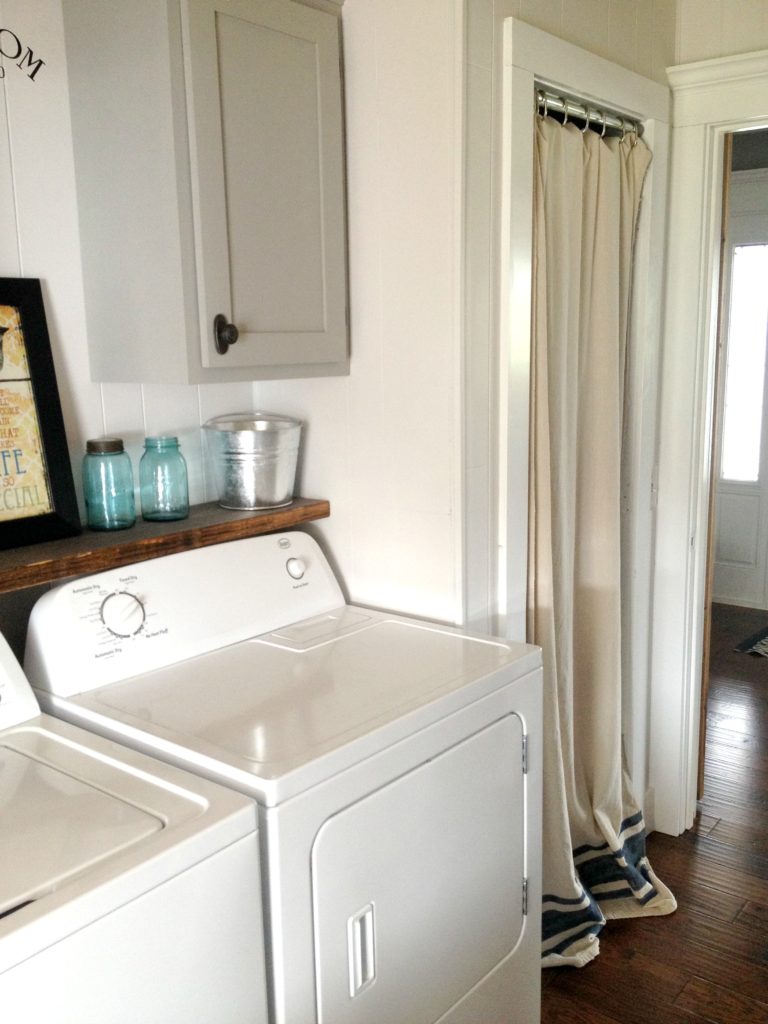
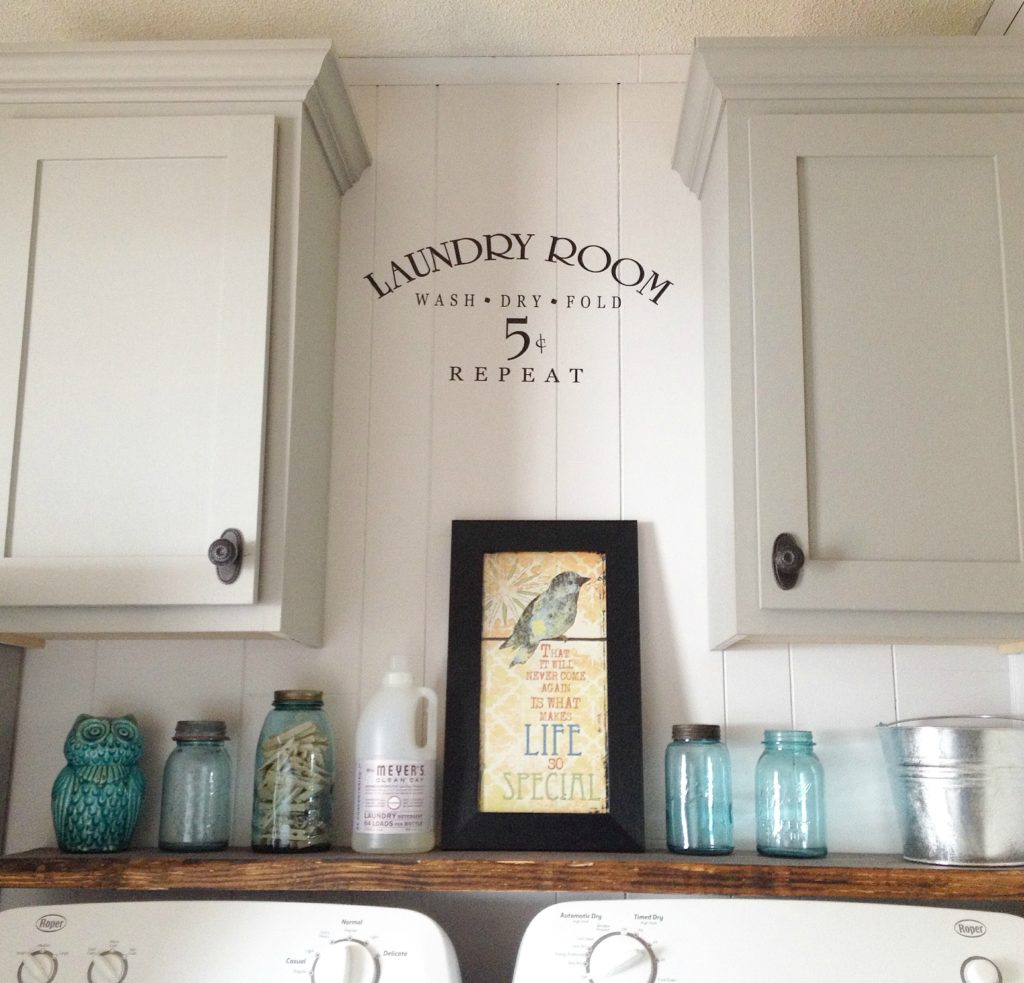
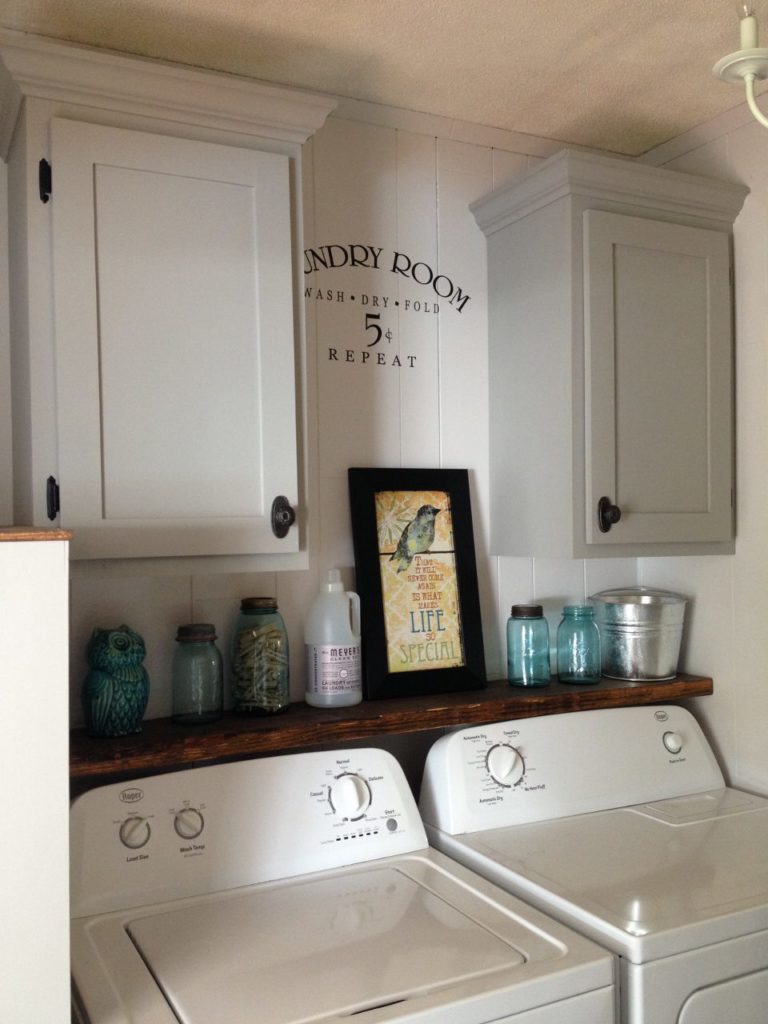
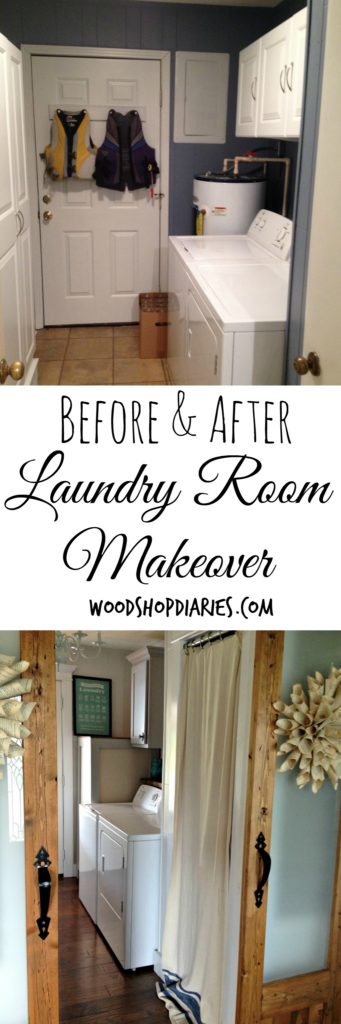
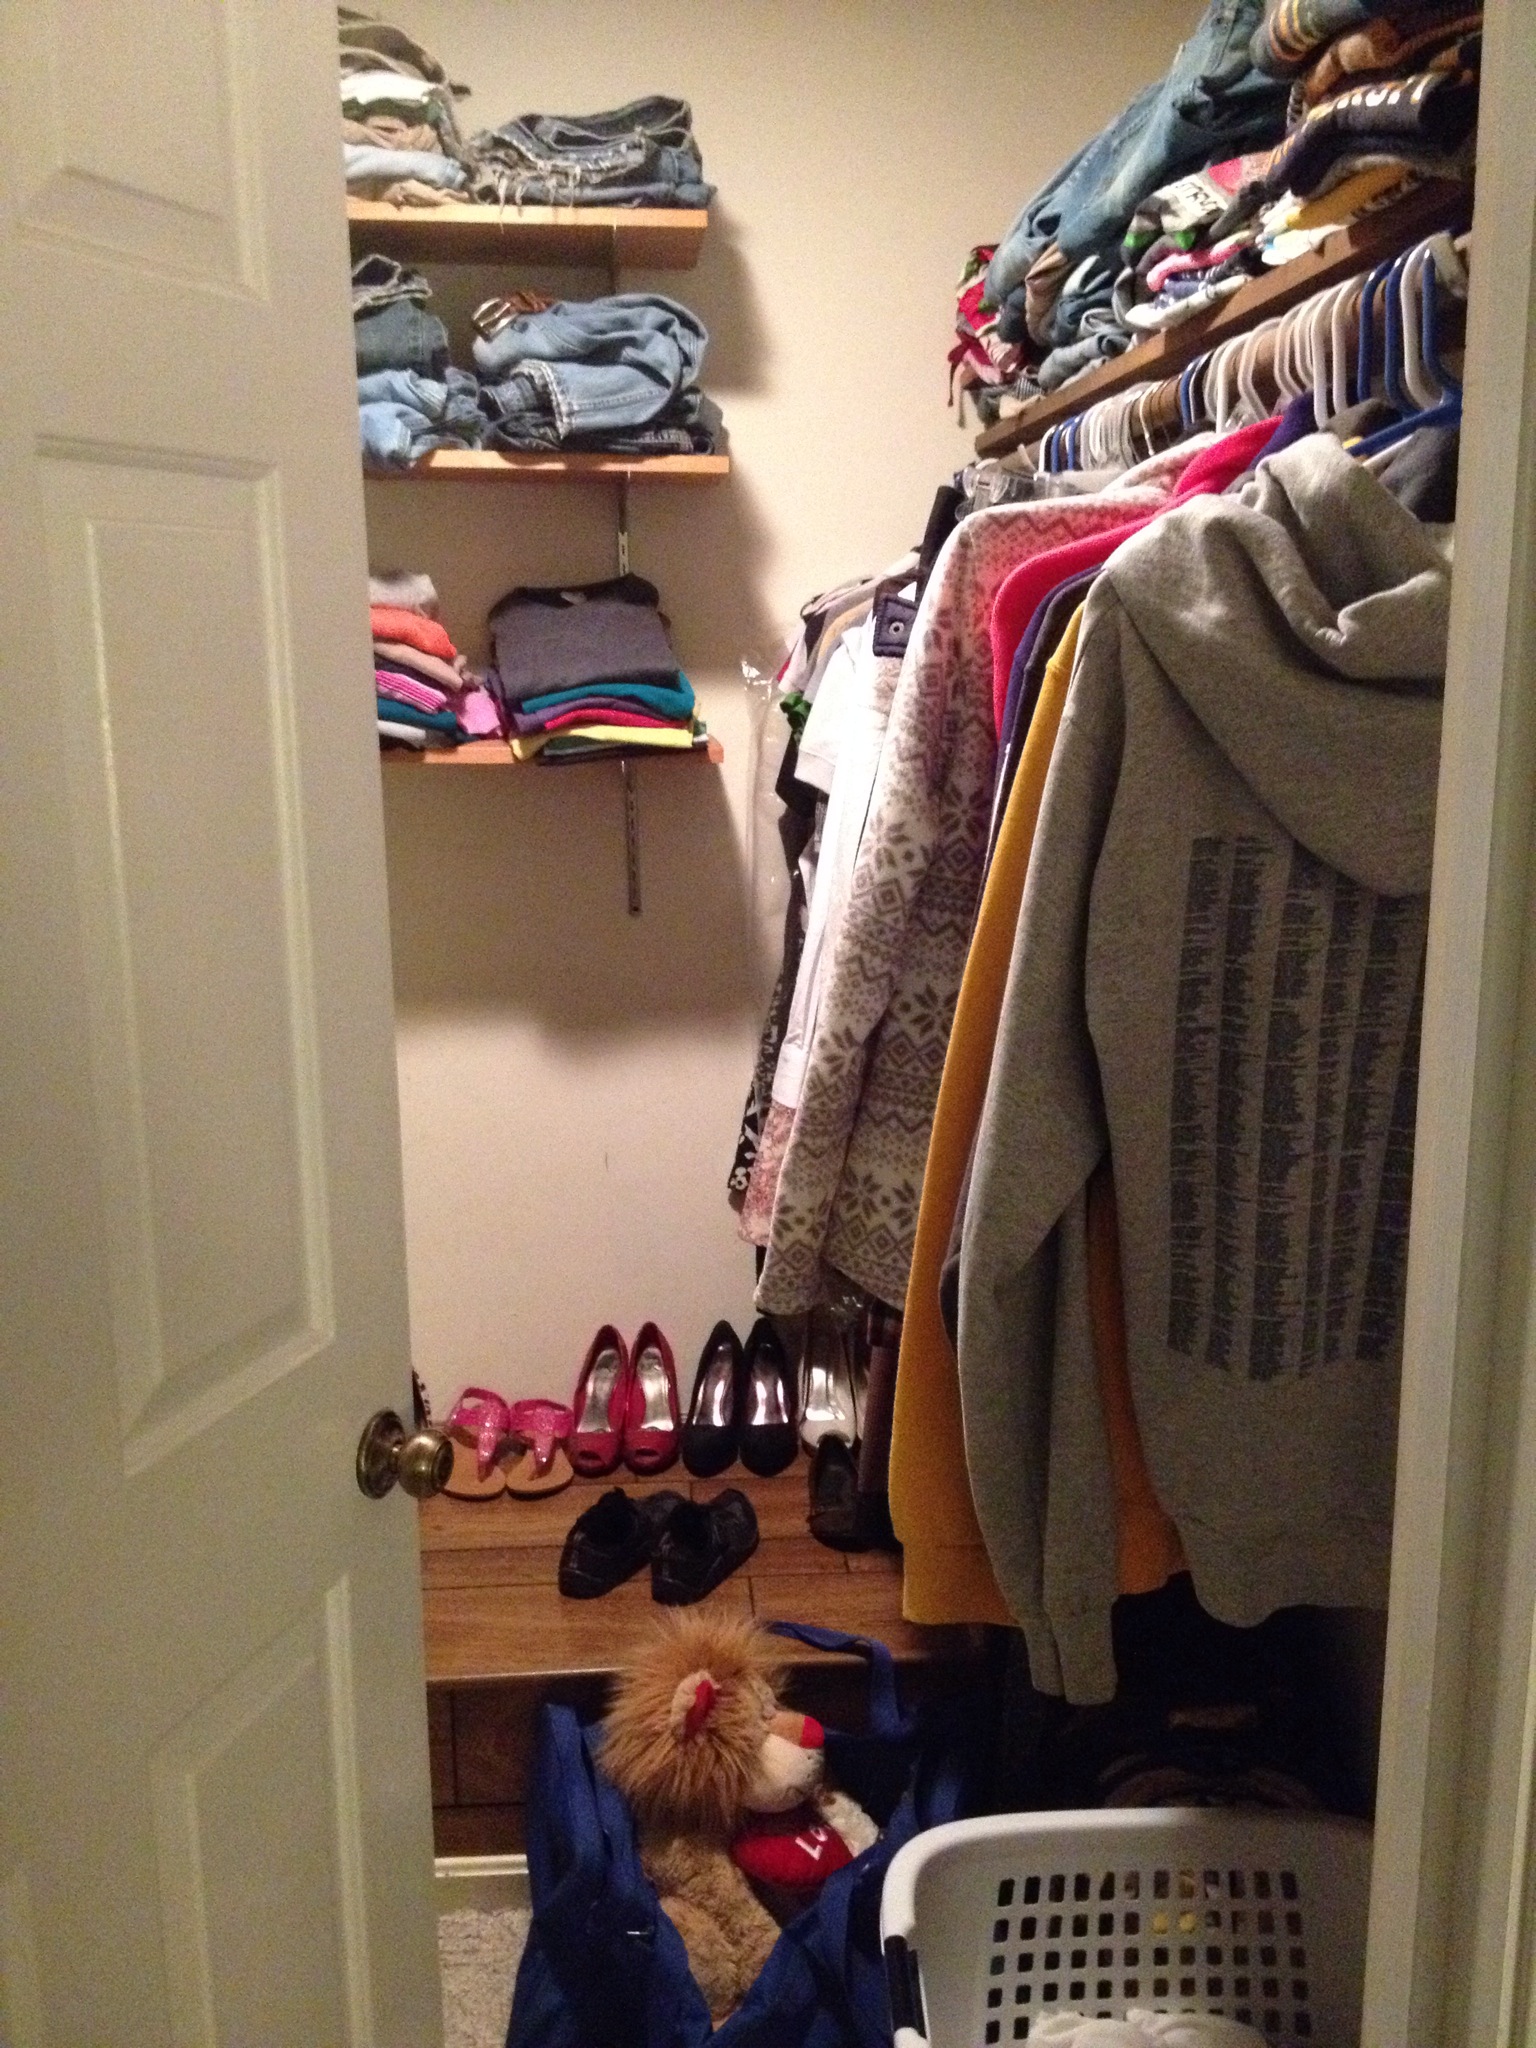
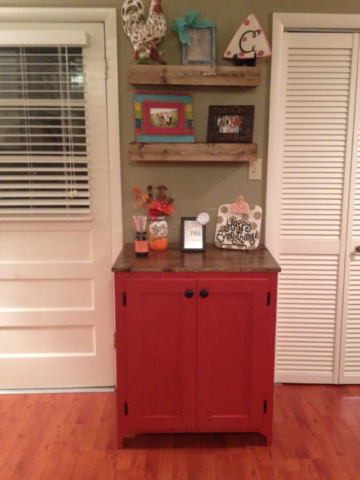
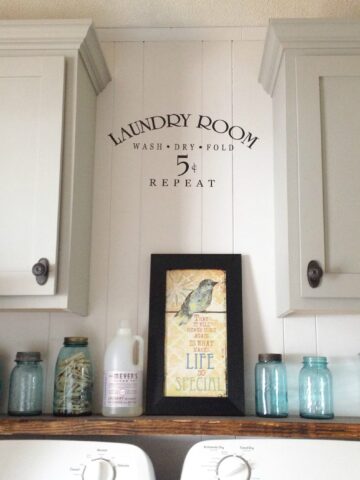
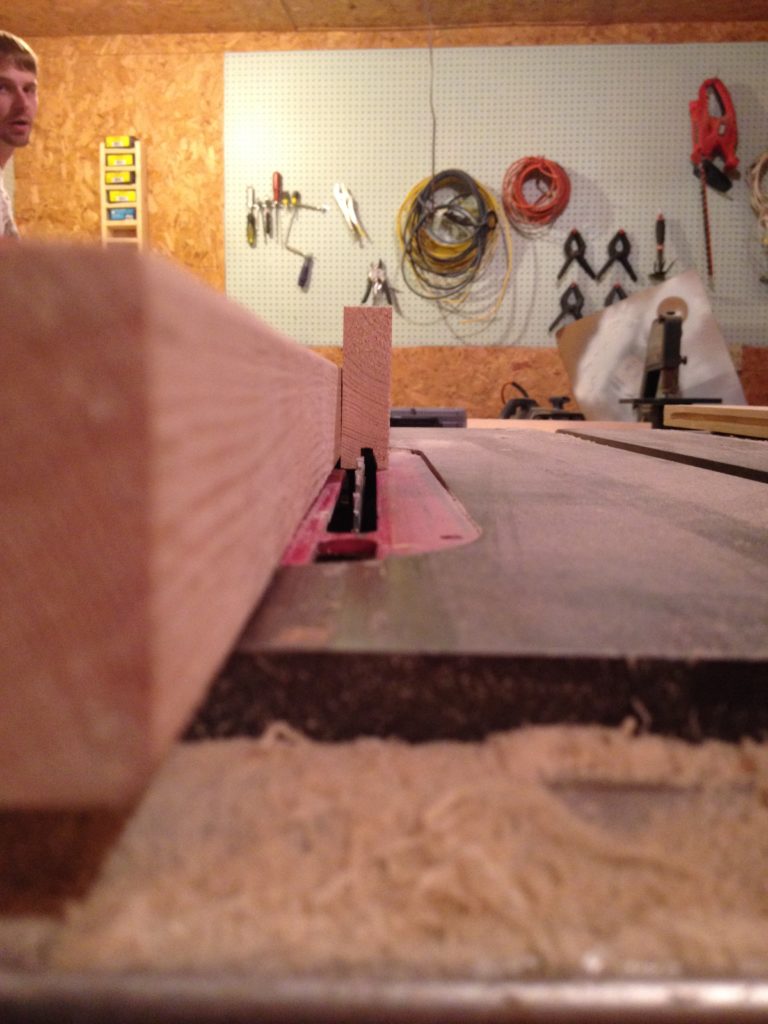
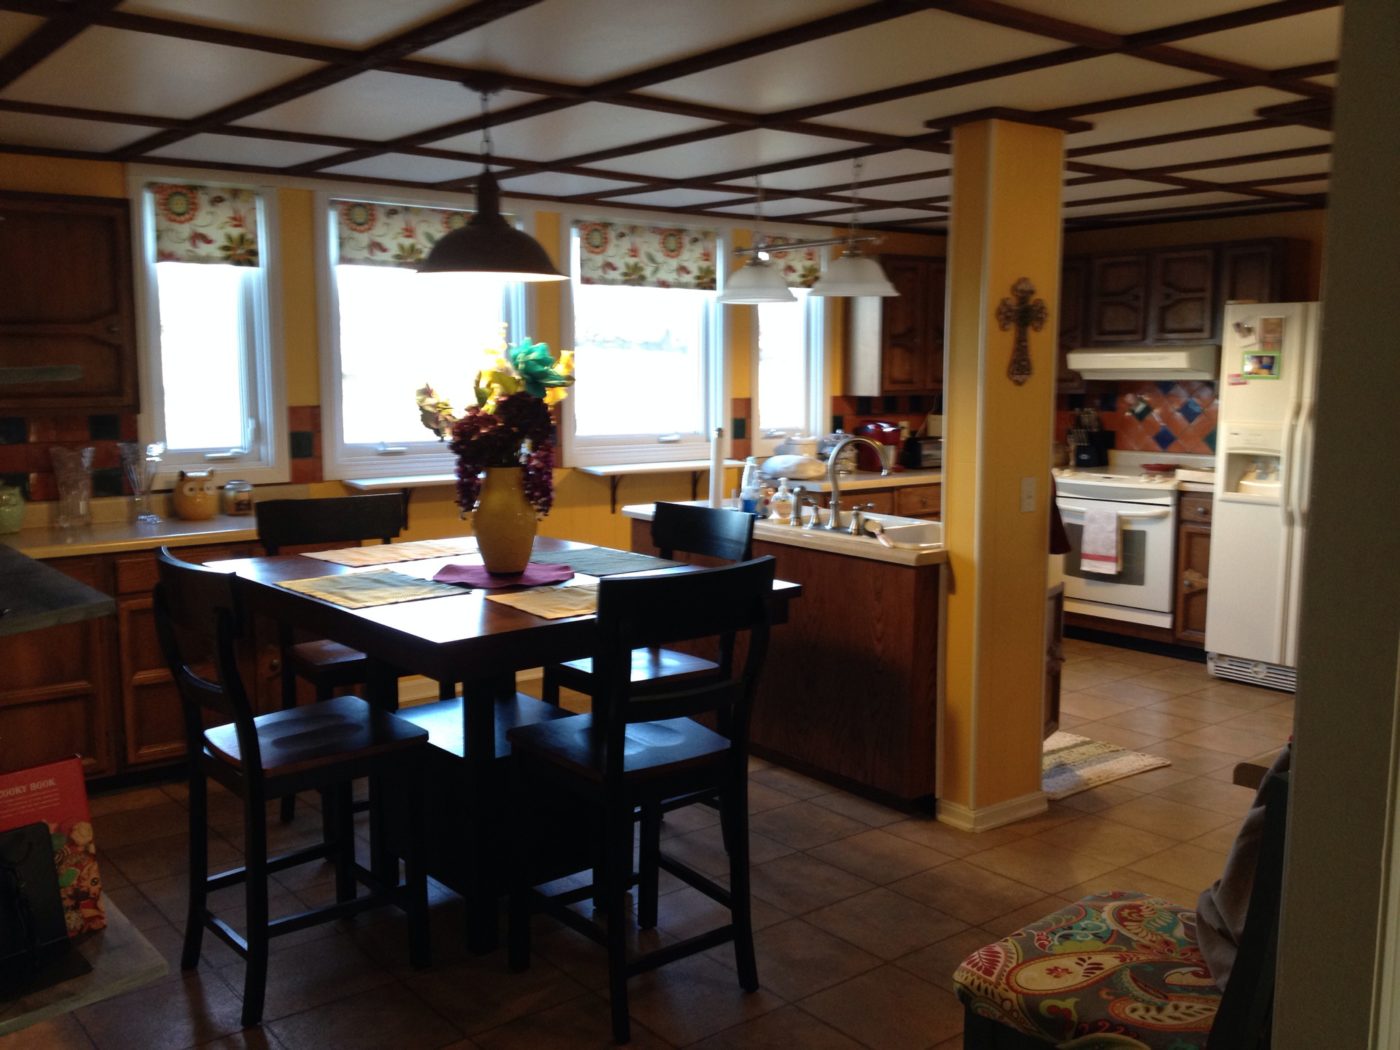
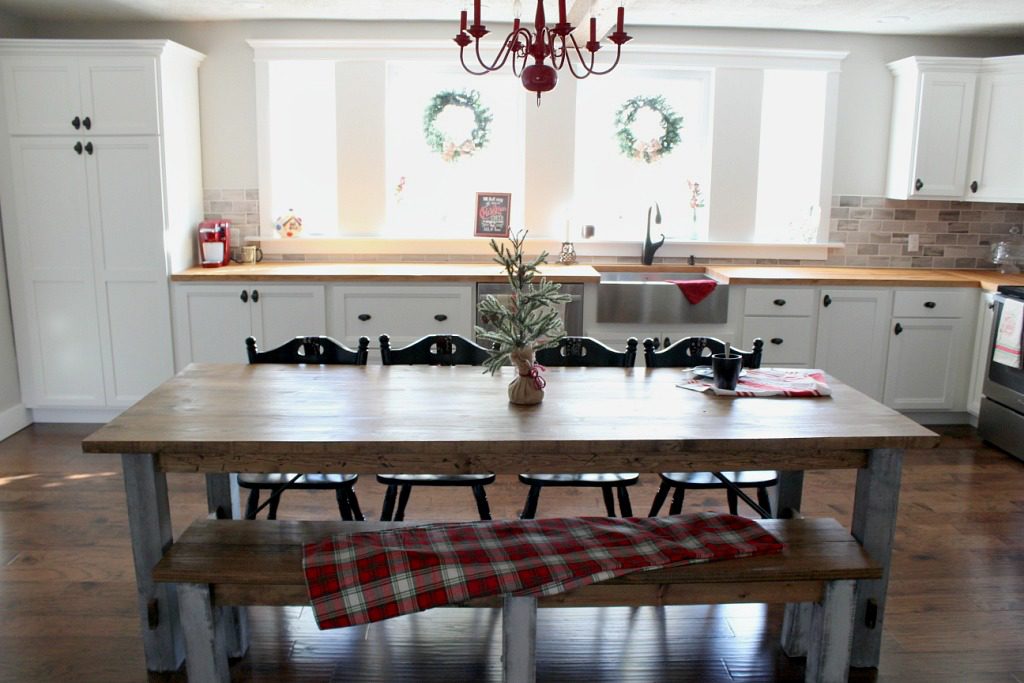
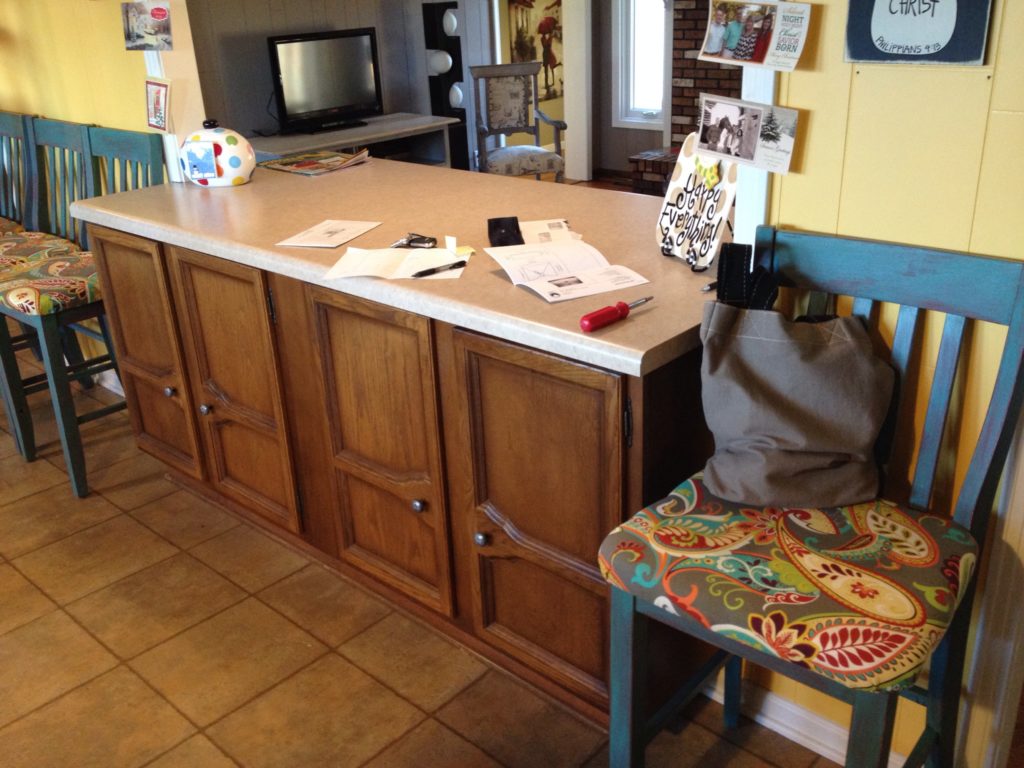
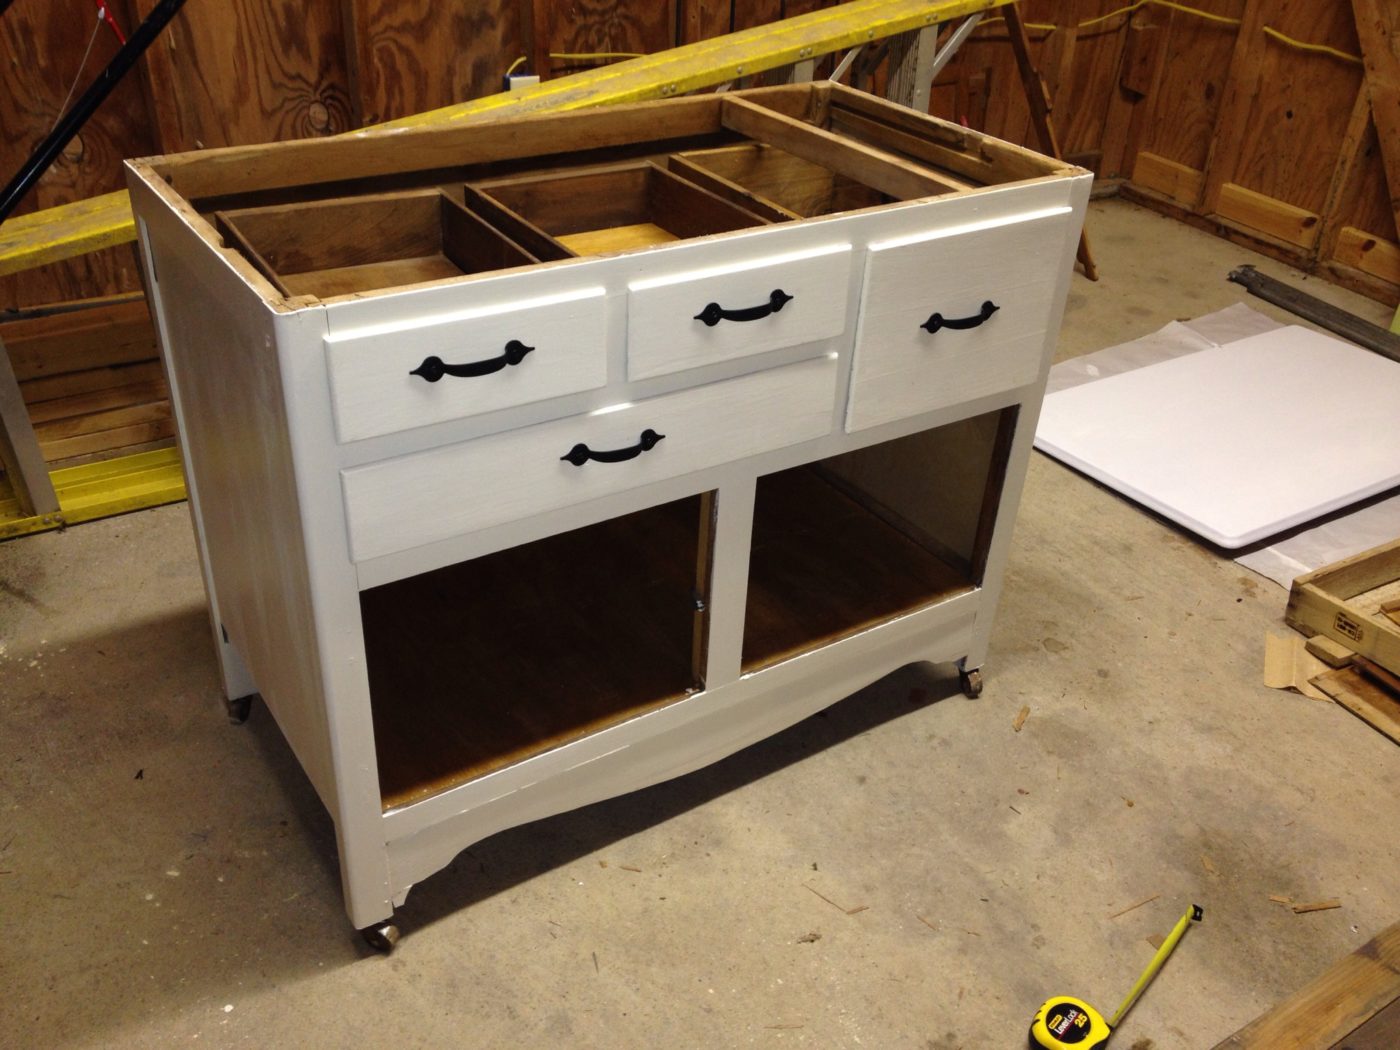
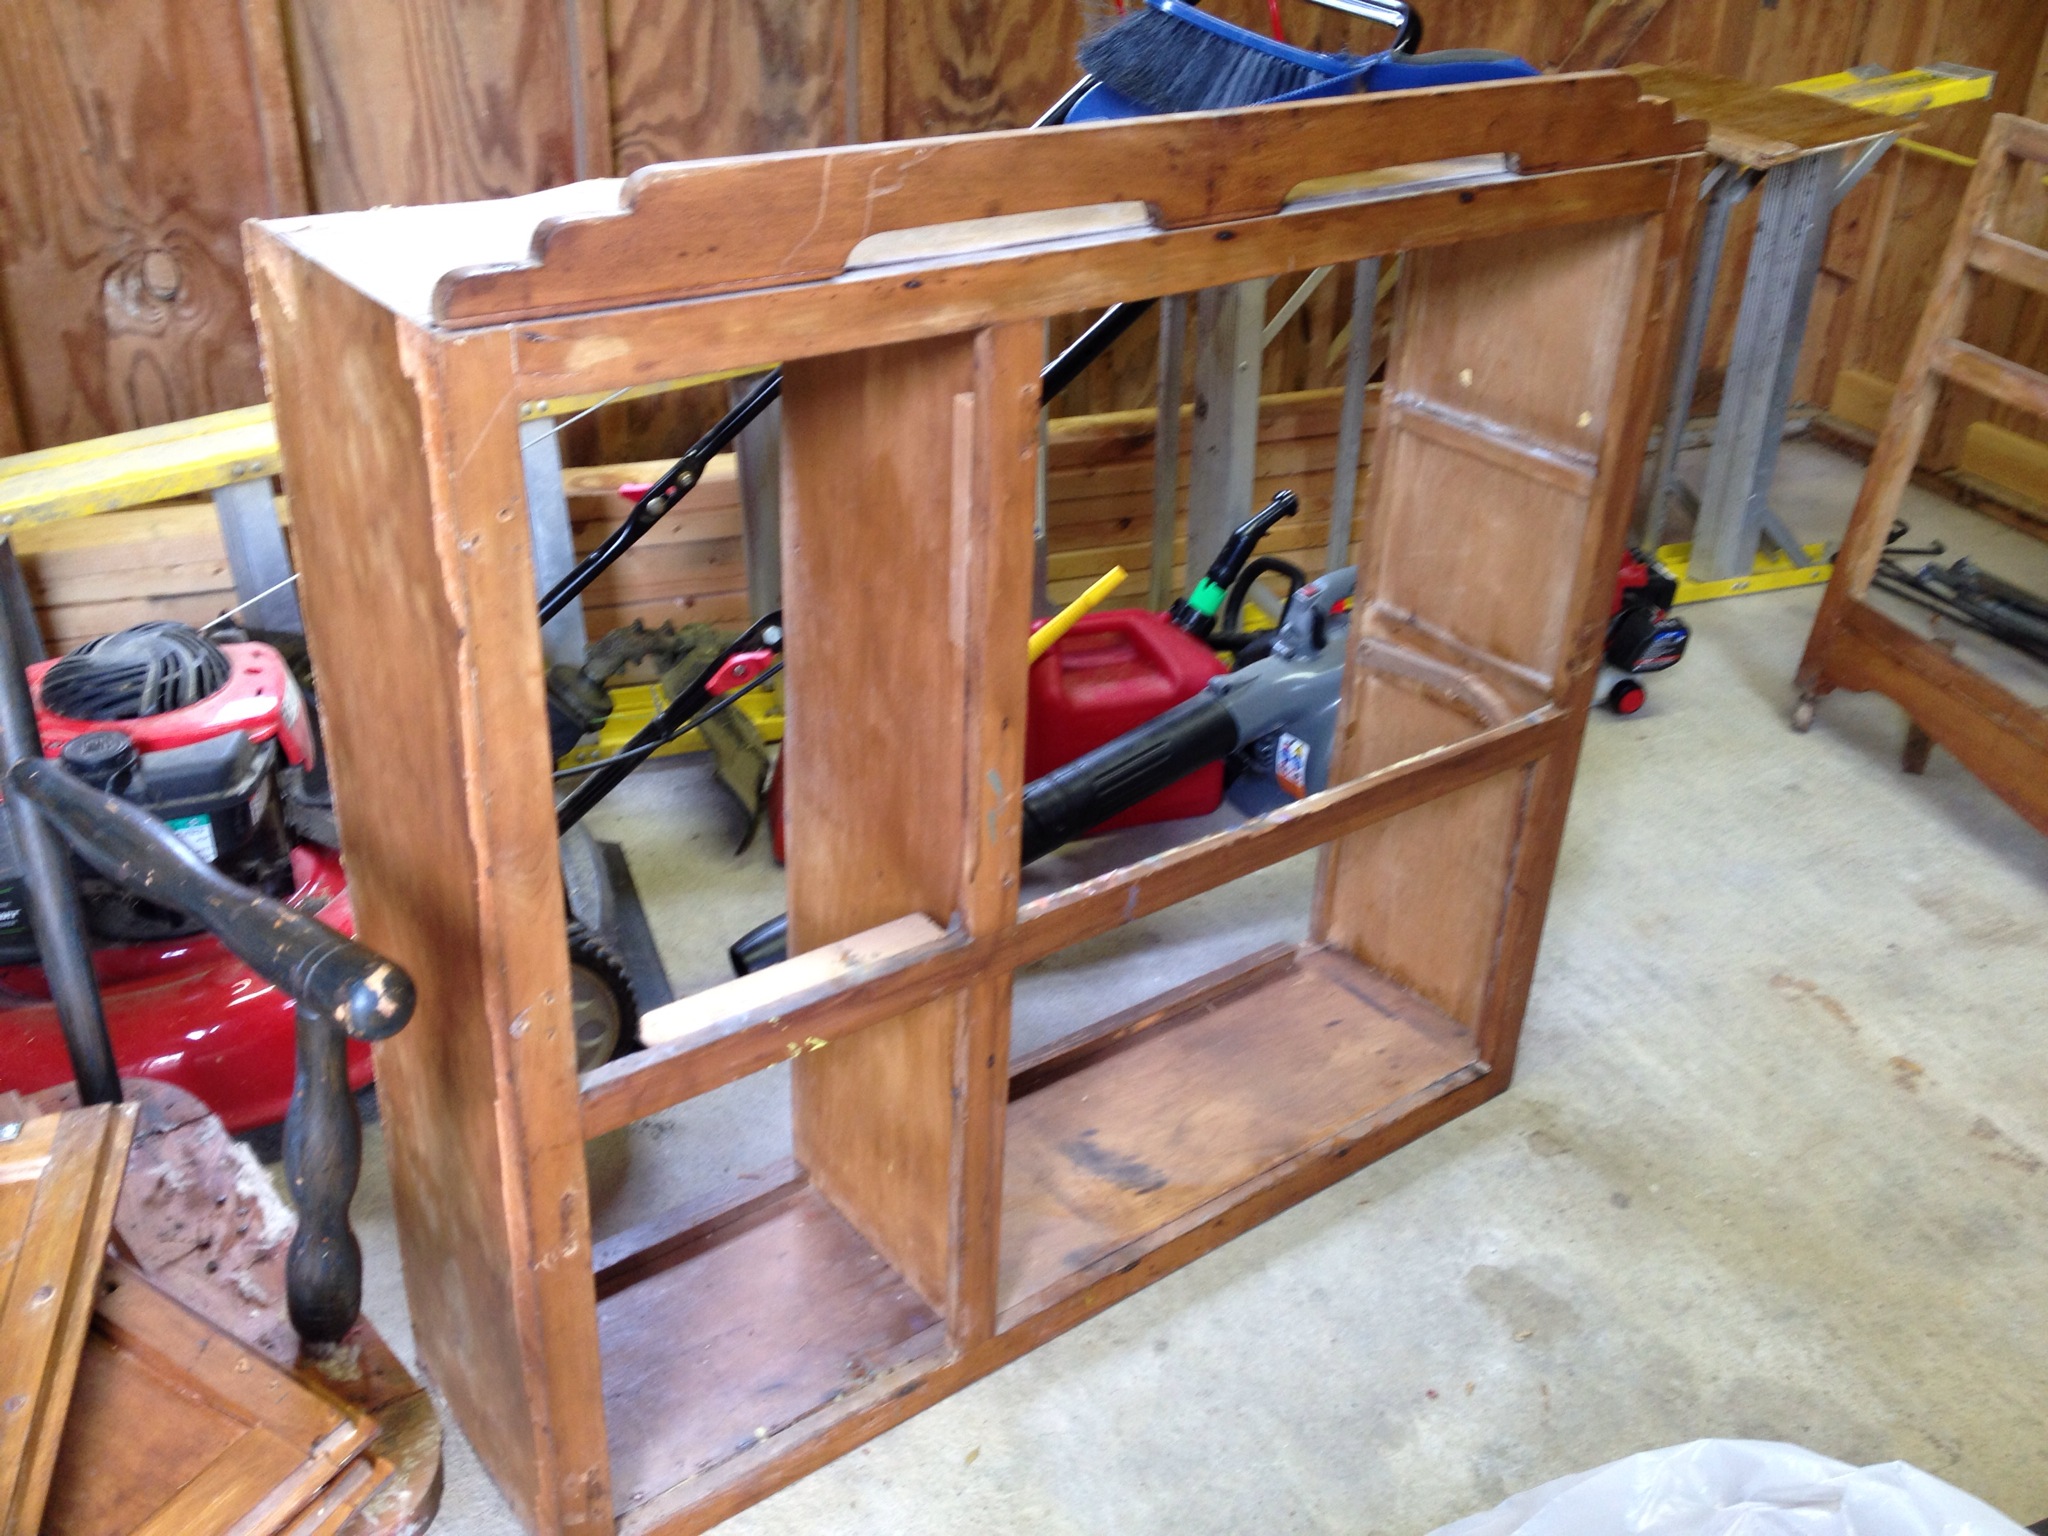
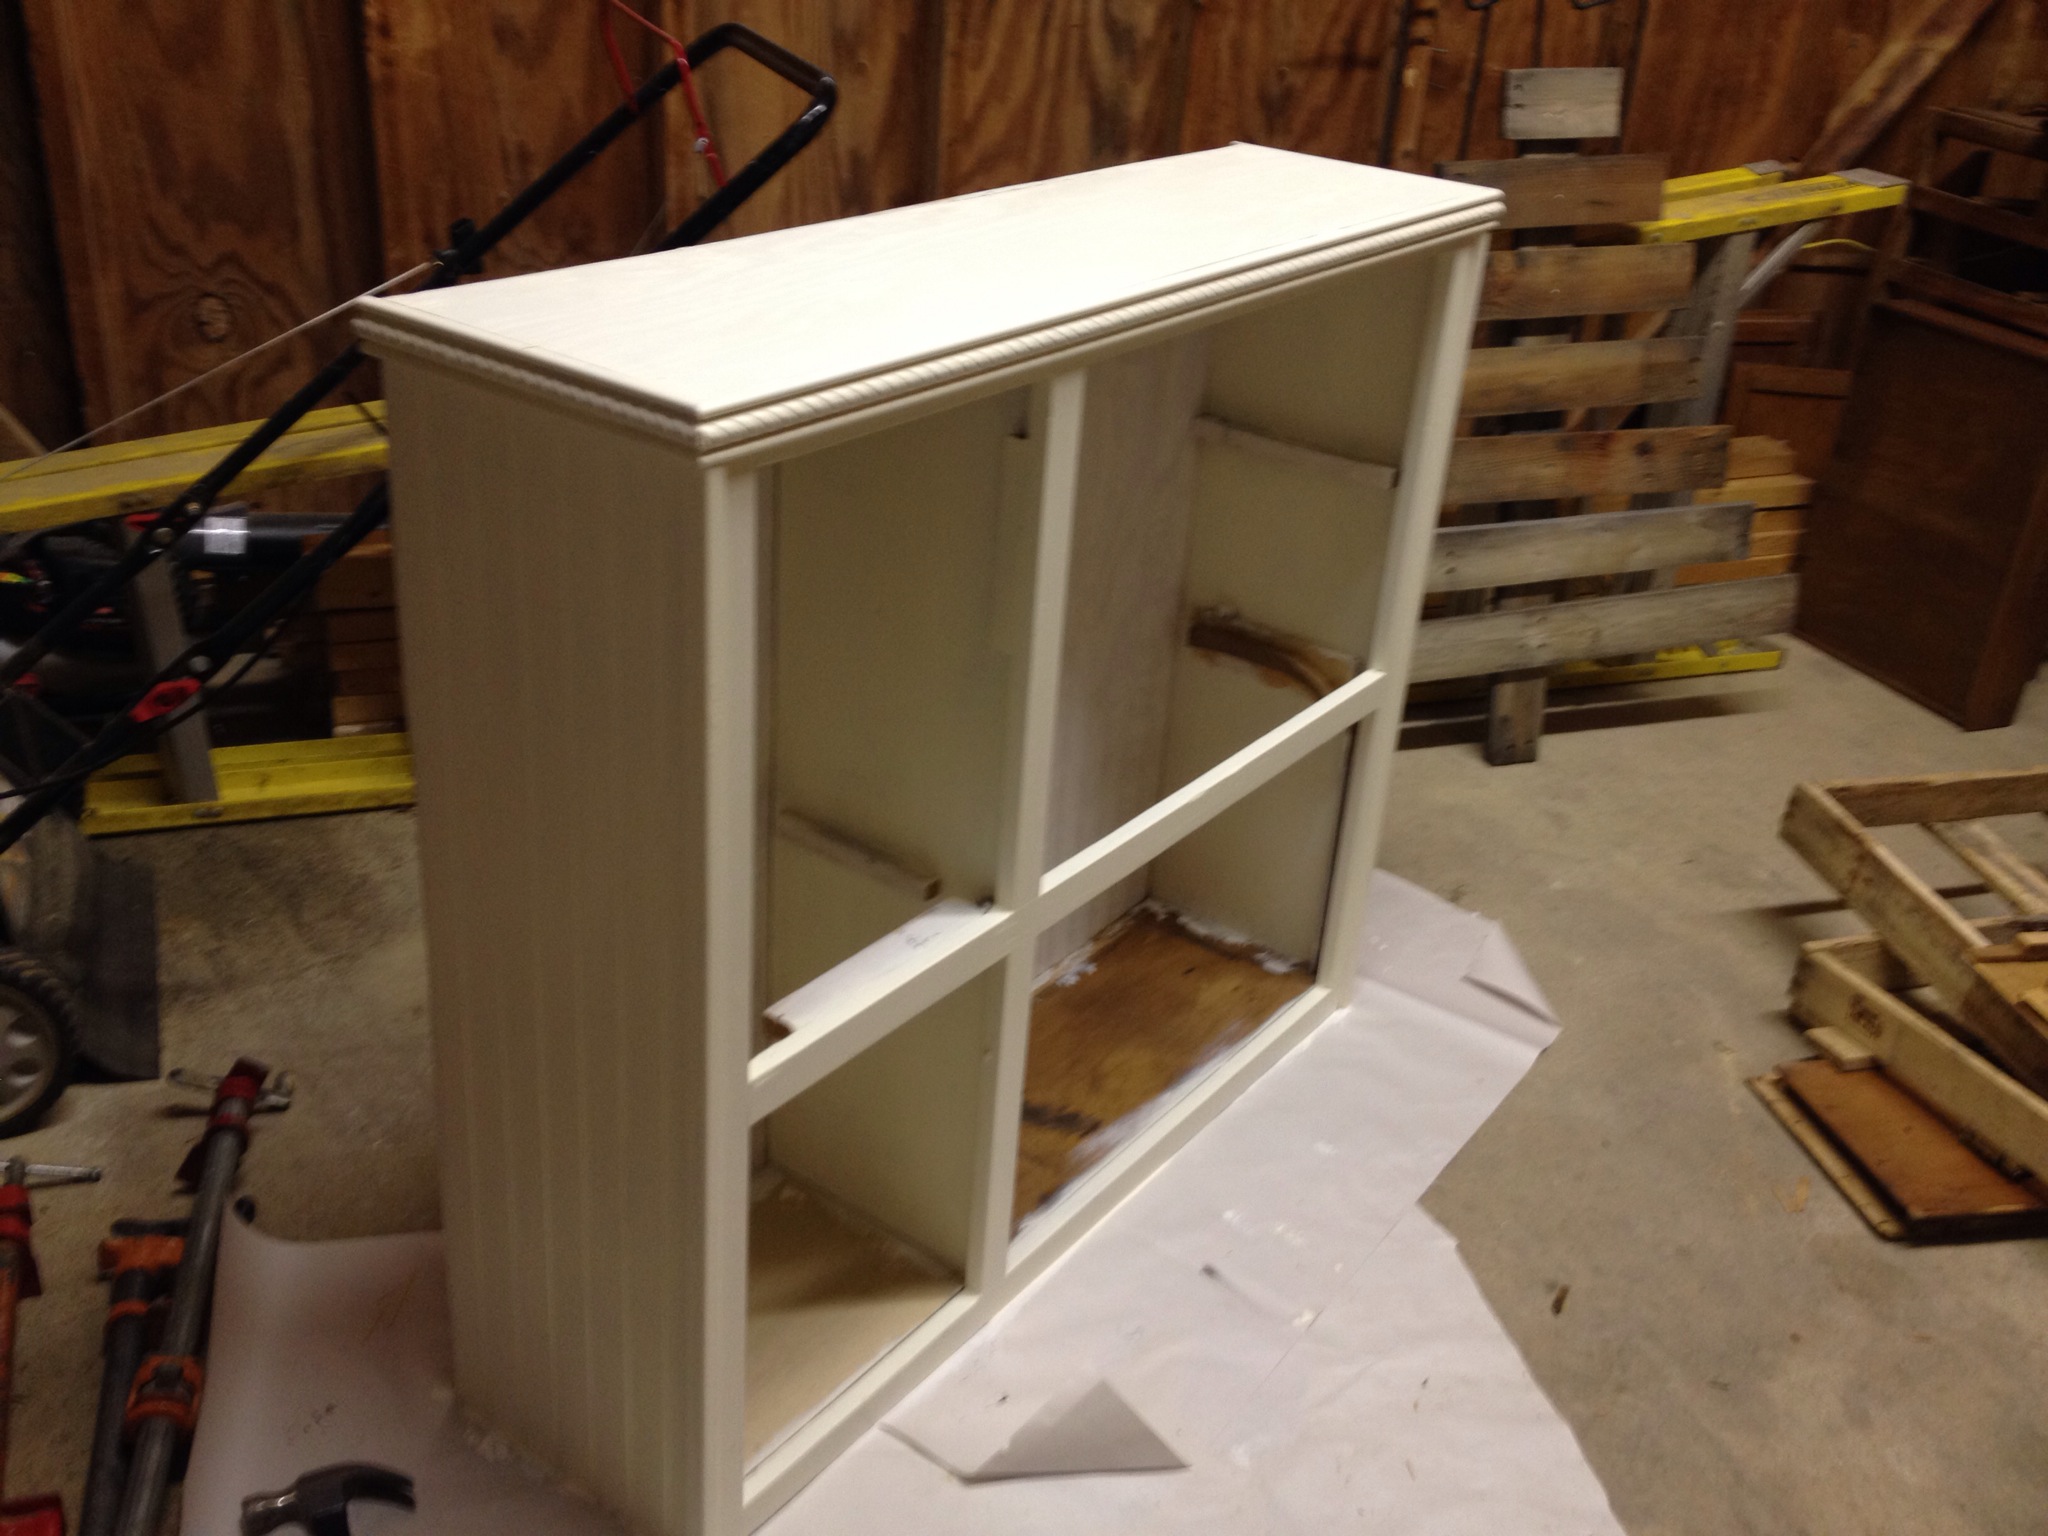
But, anyway, I did do it again.  I built sliding doors number two.  Remember the first ones I made?  They go to my newly remodeled laundry room.  They are my fav.  Even more than the Spice Girls 🙂

IMG_5449

Keep Reading

The Octotrisquaragon-Another Geometric Project

February 1, 2016 by Shara, Woodshop Diaries

It’s me again.  Long time no see–uh, I mean write??  I said on my first blog post of this year that my goal was to be more consistent this year with posting.  Obviously I don’t do very well with new year’s resolutions.  Let’s just pretend the last two weeks hasn’t been post-less, okay?  They sure haven’t been project-less.  I promise 🙂


Before we move on, let me remind you about the big news from the last post.  I’M A FINALIST IN THE MRS. MEYER’S HOMEMAKER HUNT!!!! Like what?!  Yes, and I need your help.  You can vote for me–Shara M (here)–and my video every day until Feb 15th.  That’s only 2 more weeks!  I’m the underdog in this competition (all other finalists have TONS more followers than me) so I could use all the votes I can get.  If I win, you will be seeing more of my DIY projects on their blog as well.  Which, for real, that would be AMAZING, right?


So anyway, back to business…way back when (I think it was in December), I was searching for “geometric tables” on Pinterest, just out of curiosity.  I’m such a math nerd.  I like to try to figure out how they make all the weird angles.  Hey, it passes the time…


So while I was searching, I came across this weird looking table/cube thingy.  NOTE: People get their panties in a wad when you “steal” their pictures, so I am not even going to go there and copy and paste the original picture from Pinterest to show you all.  But here is my finished product, and I really don’t mean to brag, but it looks exactly like the original, only a different stain color.  Of course, you can search “geometric table” on Pinterest and find the original idea.


IMG_5488


So what do you think?  Yay or nay?  I’m a fan of the geo stuff.  I can’t help it.  I want to be a single “style” and stick with the country/rustic thing, but I have a soft spot for modern/geo shapes.


Okay, so I’m going to attempt to tell you how I did this, but be forewarned.  I made A LOT of mistakes.  Well, I made two mistakes.  The word “a lot” is relative.  I have saved you the trouble of finding the angles.  They are weird.  Don’t ask how I got them, just trust me.  They’re right.  I can show you my doodle papers if needed 🙂


Let’s get started.  The following directions will give you a table that is about 17″ tall.


First, I glued two 1x4s and a 1×6 board all a little over 6 ft long together and clamped it.  These will become your squares.  For this table, you will need 6 identical squares and 8 identical triangles.


IMG_4980

Once the glue dries, set up your table saw to a bevel of 35.2 degrees.  Unless you have a SUPER accurate table saw, you’ll just have to eyeball the 0.2 part.  I have an old hand-me-down table saw from my grandpa, so it’s not that accurate.  We are working with wood–it’s never going to be PERFECT unless it’s fake.  I could write a book…Life lessons Learned Through Woodworking 101:  Nothing is ever perfect unless it is fake.


Set up your rip fence/guide so that the distance between it and the tip of the blade is 12″.  You want your squares to be 12″ long on all sides from the longest points.


Run the 6ft boards you glued together through the table saw so that you have six identical squares 12″x12″ on top and ALL sides beveled toward the center on the bottom.  See pictures below.


IMG_5006

IMG_5007


Here is where I “messed up” the first time.  If I could do it over, I would screw all these pieces together so it would be more sturdy.  But, I didn’t.  I nailed them.  I’ll show you what I did–and it works okay.  But the next time I make one, I will not assemble until I have all the pieces cut, then I would screw them together piece by piece.


I measured the diagonal of one of the squares and subtracted 1.5″ and cut four 2x4s this length.  I drilled pocket holes on each end of the 2x4s and attached two squares with the pocket holes and screws like the picture shows below.  I put the 2x4s in each corner, but not overlapping the bevel.


IMG_5009

Then I nailed the four remaining squares on like the picture below.  I tried my best to match up the corners, but if they aren’t perfect, it’ll line up better once you get the triangles in.  This is another reason I should have screwed everything instead of nail.


IMG_5015IMG_5018IMG_5019

Do you like my sneaks?  I know…I’m so weird.  I’m a big fan of Rocket Dog shoes.  Google them 🙂


Orange Baby (our orange kitty) thought this was his new hiding place.  How adorable 🙂


IMG_5029

IMG_5060

Now, you need to make your 8 triangles.  This is where I messed up the second time.  I tried to save lumber so I would make less scrap.  Hello, my name is Shara and I’m cheap.  I screwed up a bunch of wooden triangles because I didn’t want to scrap wood.  That’s dumb.  Don’t be like me.


I glued two 1×6 boards together so that I could cut out 8 triangles and not waste hardly any wood.

IMG_5040


DON’T do that.  Cut your boards about 9 ft (this will give you a little extra) and glue them together.  Once the glue is dry, cut that board into pieces about 13″ wide (you really only need 12″, but this will give you a little extra).  You’ll need 8 of these pieces.


If you cut your squares from earlier exactly 12×12, then your triangles should be 10.4″ tall (from center of base to the tip).  Have you ever tried to find 10.4 on your tape measure?  It’s not there.  You’ll have to guesstimate it haha.  Set up your table saw to bevel 19.6 ish degrees and set your rip fence to about 10.4″ from the tip of the blade.


I used a scrap piece of 2×4 mitered at 30 degrees to help me with my triangles.  I pocket hole screwed it to my piece while I ran it through the table saw.  You want 8 triangles with 60 degree angles and bevels all going toward the center of the bottom side.


IMG_5054


Pretend the above picture has the 2×4 attached to one of your 13″ pieces you cut, not this huge long piece.  Again, bear with me…I’m trying to tell you how to do it correctly…not exactly how I did it haha.


Flip the piece from the picture above over and run through the table saw using the 2×4 as a guide.  The mitered end of the 2×4 should run smoothly along the rip fence.  You should end up with a shape that looks something like this.


IMG_5055


Take the 2×4 off, and attach it (like shown above) to the side you just cut on the saw. Line up the tips so they match. Don’t screw too tight, since it is beveled.  You want it the 2×4 to still be flat.  Flip it over again and run through the table saw again with the 2×4 as your guide.  You will end up with a triangle with two beveled sides and one flat side.


Remove the 2×4 once more, and attach it to the beveled side you just cut.  Run that through the same way, using the 2×4 as a guide along the rip fence.  Now you should have a triangle with all sides on top 12″ and all bevels going toward the center on the bottom.


Because I messed up on mine, the last side I cut on my triangles didn’t cut just right and caused me to have a few gaps in my finished product.


Once my triangles were cut, I fit them in between my squares and nailed them together.  Again, I should have screwed the pieces together, but what’s done is done.


IMG_5062


I sat on it to see if it would hold me.  This is what happens when I give Danny my camera and I start playing around in the shop…


I stained it in Minwax Weathered Oak.  It was a new stain color I hadn’t tried before.  I think I like it. I haven’t 100% decided yet.  I kind of wish it was a little bit more “brown.” But it’s growing on me.


I LOVE this little table…even though I want to go back and make another one the RIGHT way this time.  It totally doesn’t fit in my house, but it makes me happy, so it’s staying.


IMG_5113IMG_5120IMG_5316IMG_5236


So did you get all that?  I need to consider making videos of these things.  I think a lot of it would be easier if you could see it instead of reading it.  Do you agree?  Maybe I’ll give that a try 🙂


So seriously…the table…yay or nay?  My mom thinks it’s too “out there.”  But I’ve had compliments on it too.  I have several more geo things in the list to make soon, so if you’re a fan, stay tuned 🙂

Big News!!…And Some Video Bloopers

January 18, 2016 by Shara, Woodshop Diaries

You guys I have some big news!!!  Okay, well it’s not THAT big…but it’s HUGE for me.  Let me give you a brief background…

Back in September, Mrs. Meyer’s hosted their first ever Mrs. Meyer’s Homemaker Hunt.  They asked followers to submit a short (15 second) video of a craft, project, recipe, something you grew, etc with the hashtag #MrsMeyersHunt.  So I submitted SEVERAL projects, not thinking any of them would even compete with the thousands of other people out there.


IMG_5441

Keep Reading

My Take on Butcher Block Countertops…”Woodn’t” You Like to Know

January 14, 2016 by Shara, Woodshop Diaries

Since we remodeled our kitchen almost a year ago, I have had several people ask me about my butcher block countertops.  Where did I get them?  Do I like them?  Did I make them?  How do I take care of them? Etc.


Pros and Cons of Butcher block Countertops in the Kitchen

Keep Reading

A Look Back at 2015

January 5, 2016 by Shara, Woodshop Diaries

Is it too late to be doing a “year in review” post?  I mean it is like January 5th.  I’ve been “blogging” for a year and a half and I’m still totally clueless.  I’m so clueless that I put blogging in quotes because I’m not sure I can really call myself that when I have no idea how to even blog.  I know there are rules….I just don’t know what they are.  Whatever, I guess I can’t be THAT BAD.  You’re reading it 🙂 HA Sincerely, thank you for reading.


So, 2015 was big.  SO BIG.  I started DIYing/crafting/building in 2013 (I think???), but BY FAR 2015 was the year I learned/grew/built the most.  Looking back, I’m like WHOA.  How did I get here?

Keep Reading

I’m Still Here!! Plans for 2016

January 4, 2016 by Shara, Woodshop Diaries

Good grief! It’s been over a month since I last posted on here. Please please please forgive me. I promise I’m not being lazy…I’m just swamped with this and that. I know you know how that goes…
I’m so excited to start off 2016 with a long list of ideas and plans and hopes and dreams! I’m curious to see how much of those actually happen this year haha! 
First, I’d like to share with you some upcoming plans for the year. Hopefully they will peak your interest 🙂
Building plans–I’ve actually made a few things since I last posted, I just haven’t had time to get a how to together for them. I plan to soon show you how I made an octotrisquareagon. 
  
And a tractor shelf. And possibly a porch swing. And some board and batten. And nightstands. The list goes on. Just know that I plan to show you lots 🙂 
Room remodels–this year I am remodeling our office, our master bathroom, our guest room, and possibly our master bedroom (if time permits). Busy is an understatement. Dream big, right? The office is in progress…very early stages–which basically means it’s just a huge mess haha. The bathroom is next. What is wrong with me?!
I also have some exciting news…BUT I can’t tell you yet. I can’t trust you to keep a secret and I was told not to tell…yet. No offense 🙂 but it is exciting. At least for me 🙂 but I’m going to need your help, so keep your eyes and ears ready when I am allowed to spill the beans! Actually this is one reason why I’ve been so absent lately. I have been working on a time consuming project that I was completely clueless on how to do. Well that and the holidays. Those will get ya. 
Anyways, I’m sorry for rambling. I’m just checking in to let you all know I’m still here and I have a lot planned for 2016. And I’m sorry for not posting in forever.  And I really hope you choose to follow along with me on these upcoming new projects. If nothing else, I may be mildly entertaining and you might get a laugh every now and then 🙂 
One last thing…My goal for this year is to continue growing this blog and be more consistent.  I hope to be more consistent in my posting and to be more consistent in my quality.  I’d love suggestions or feedback on what you’d like to see more of so feel free to comment or send me an email. 
Thanks to you all for following so far. You guys make my day. I hope I can reciprocate that into this new year 🙂 

Let It Snow-My DIY Wooden Snowflake Shelf

November 30, 2015 by Shara, Woodshop Diaries

.This post will show you how to build your own DIY wooden snowflake shelf!

DIY snowflake wall shelf

I love seasonal DIYs–and I also love snow. And I also love easy weekend woodworking projects.

So, this DIY snowflake shelf checks all the boxes and makes for the perfect little Christmas project!

This project was inspired by Jaime Costiglio’s Christmas tree shelf . I really loved the idea, but wanted something a little different.

So I made a SNOWFLAKE shelf instead. But this could certainly be used as a freestanding wooden snowflake as well!

(As a side note, this project has been copied multiple times since I made it back in 2015, so take note, mine was the original 😉 )

What to Know Before Building a Wooden Snowflake

The build was pretty simple and only took a couple of hours–mainly because the glue needed to dry.  

The hardest part was getting the nailer into all the weird angles.  

Using Nails to Assemble

You can use either a finish or brad nailer to assemble.

RELATED: What’s the difference between a finish and brad nailer?

But, some of these spaces are small and challenging to get a nailer into. Do the best you can and be sure to use plenty of wood glue.

Be careful when driving nails to drive at an angle that will seat the nail securely into the wood and not through and out the other side.

You don’t want any exposed nail ends sticking out of the finished project 🙂

That said, I recommend using nails 1 ½″ or shorter to help avoid this issue.

Weight Capacity

While this will hold some weight, it is intended for decorative purposes and not heavy duty use.

Exact weight capacity depends on a variety of factors like the condition and type of wood used, quality of assembly, etc.

I hung my snowflake to use as a shelf by tying some twine around two of the arms and hanging it over a screw that was driven into a wall stud.

However, you can also use command strips, mounting tape, etc to hang it. It’s fairly heavy, so make sure whatever you hang it with can hold the weight.

Overall Size:

The size is fairly easy to modify, but mine was about 35″ in diameter.

Overall dimensional diagram for DIY wooden snowflake

This post contains affiliate links.  Please see disclosure policy for more details. 

How to Make a Snowflake Shelf

I’m sharing the plans below, but if you prefer to print your plans, you can grab the printable wooden snowflake plans here:

Tools & Materials

Tools:

  • Miter saw
  • Nail gun (nails no longer than 1 ½″)

Materials:

  • 18+ feet of 1×4 (I used about 18 feet of lumber, but you may want to get a little more in case you make a mistake in cutting)
  • Glue
  • Clamp (optional)

Step 1: Assemble Main Frame of DIY Snowflake Shelf

I cut a piece of 1×4 at the the height I wanted my snowflake long with ends square. Then I cut 4 pieces of 1×4 about half that length with a 30 degree bevel on one end.

Pieces cut and ready for assembly on main shelf frame

Then, I attached two of the short pieces to the center of the long piece with a brad nailer and wood glue.

Close up of installing main wall shelf frame together

The first two will be easy to nail, but with the other two, it’s hard to get the nailer into the angles.  

Glue them to the other side of the long piece and drive a few nails in as best you can.

Clamp like the picture below to hold it tight in place until the glue dries.

Clamp main frame together while glue dries

Prefer to print? Grab the printable plans for this wooden snowflake here!

Step 2: Cut and Assemble Snowflake Points

While the glue dries on the main frame of the snowflake shelf, I cut 12 short pieces with 30 degree bevels on each end parallel to each other.  

These can be any length, but six inches seemed to work well.

triangle pieces cut and ready to assemble

I paired these pieces and glued and nailed them together like the picture below.

snowflake shelf sub assemblies laid out on workbench

Find the cut list and all the project dimensions in the printable plans here!

Step 3: Attach Snowflake Triangles to Main Frame of Shelf

Once the glue had dried, I attached these triangles to the main body of the snowflake from step 1.  Again, I used both glue and nails.  

Sometimes the angles will be difficult to get the brad nailer into, but it is doable. Make sure you use plenty of glue in case your nails do not hold very well.

Add the triangles one at a time around the flake.

Close up of shelf triangles being installed onto shelf frame
wall shelf assembly in progress--triangles attached to main frame

Step 4: Add Final Details on End of Shelf Frame

While that glue was drying, I cut 12 pieces with a 30 degree bevel on one end to go on the tips of each branch of the snowflake.

detail pieces cut and ready to assemble

I attached these pieces to the end of each flake “arm” like the picture below.  Again, I used both glue and nails.

Close up of pieces nailed onto shelf arms

I let the glue dry well before handling.  

You could paint or stain (if you didn’t get glue everywhere while you were making it haha), but I liked mine natural.

I tied twine around two of the arms to hang it from, but you could use ribbon, sawtooth hangers, mounting tape, Command strips or picture frame hangers to hang yours.

You can decorate however you would like.  I kept it simple and used ornaments, pine cones, and fake gift boxes.

If you’re reading this now, this project is 10 years old, so bear with the decorations in the photos.

I’d like to think I’ve gotten better over the years, but I gave this snowflake away, so I can’t redecorate and take new pictures of it haha.

Wooden snowflake shelf decorated and hanging on wall

It’s kind of a beast. I could have made it a little smaller, but it’s big enough to make a statement, right?

Large DIY snowflake shelf wall decor made from 1x4 boards

Look at all those angles!!  Don’t be intimidated.  Angles never hurt anyone 🙂

If you’d like to print the plans to build it, you can grab them here.

DIY snowflake shelf made from 1x4 boards

So what do you think of the GIANT wooden snowflake shelf??  You can make it deeper by using a 1×6 or 1×8 (although that would be much heavier).  

Please share your wooden snowflake shelf with me when you make it. I would love to see your pictures!

Don’t forget to pin for later!

Snowflake shelf with decorations for Christmas and text overlay "DIY Snowflake Shelf"

Until next time, happy building!

DIY snowflake shelf hanging on the wall decorated

DIY Snowflake Shelf

Yield: 1 snowflake shelf

Build this easy DIY snowflake shelf perfect for decorating for Christmas!

Materials

  • 18+ feet of 1x4 (I used about 18 feet of lumber, but you may want to get a little more in case you make a mistake in cutting)
  • Glue
  • Clamp (optional)

Tools

  • Miter saw
  • Nail gun (nails no longer than 1 ½")

Instructions

  1. Cut and assemble the main frame of the snowflake shelf using wood glue and nails.
  2. Cut and assemble snowflake points.
  3. Attach snowflake triangles to main frame of the shelf.
  4. Add final details on end of shelf frame.
  5. Paint or stain in the color of your choice. Or just leave it natural.
  6. Hang on the wall and decorate.
© Shara, Woodshop Diaries
Project Type: Seasonal Decor / Category: Christmas

It’s Beginning to Look A Lot Like Christmas

November 23, 2015 by Shara, Woodshop Diaries

I have been looking forward to Christmas since July.  Seriously…I was looking at ideas and saving them on my phone  while I was still painting our deck rails this summer.  This will be our second Christmas in this house, but this year was going to be totally different than last.

Danny and I got married five years ago in December.  He will be the first to tell you that my “style” has changed A LOT since we first made a home together.  I’ve never been a “decorator” and I couldn’t define my “style” if my life depended on it, but our first home looked something like a futuristic art gallery/science museum where everything was multicolored and blindingly bright.  Our home now is in the transition to this old, country, rustic, industrial, neutral (I’m working on that part), farmhouse (?? I think….) thing.  Who even knows….

That being said, ever since we got married, our Christmas tree looked like a giant peacock that didn’t match ANYTHING ELSE IN THE WHOLE HOUSE.

IMG_1915

And as much as I LOVED those tree decorations and the bright shiny deco mesh and glitter ornaments, I needed a change….something that would actually match the rest of the house.

This year we went a little traditional and a little rustic and I don’t know what else you would call it.  But when I put up the tree and got it decorated, Danny’s response was that he thought it looked like we were at the mountains and we needed a big bear beside the tree.  Thanks dear….I’m not sure how to take that.

Because the rest of the house hasn’t been “remodeled” yet, I mainly focused on decorating the foyer, living room, and kitchen.  So without further blabbering, here is our first Christmas “rustic style.”

Isn’t Danny adorable?  He asked me if he could put his tree up in the kitchen this year since we have room now (we didn’t before we remodeled) and of course I said yes.  I added the tree skirt and the “gifts.”

He is staring at it while he eats oatmeal in his old man sweater.  He’s my favorite 🙂

IMG_4747

IMG_4740

IMG_4717IMG_4716

IMG_4773

IMG_4774

IMG_4775

IMG_4776

IMG_4752

IMG_4777

IMG_4719

IMG_4706

IMG_4705

IMG_4749

IMG_4708

IMG_4715

IMG_4726

IMG_4709

IMG_4727

So, what do you think of our “homemade Christmas” style this year?  While I was adding pics, I decided that’s what I would call it this year…homemade Christmas.  Fake wrapped presents, homemade sleigh, simple homemade wreaths everywhere, homemade ornaments, burlap sack tree skirts.  I’m cheap…can you tell?

I promise all of this will change 50 billion times between now and Christmas day…I can’t ever decide where to put stuff.  But I was so excited about it that I had to go ahead and show it off!  I think this matches the rest of our house better and feels more like me.  Of course, “me” could change again next year and want my peacock tree back, who knows!  HAHA

So from us to you, Happy Thanksgiving!!! Got ya! No, seriously.  Happy Thanksgiving in like three days.  THEN…AFTER THAT…Merry Christmas 🙂

Airing My Dirty Laundry–Laundry Room Makeover Reveal

November 19, 2015 by Shara, Woodshop Diaries

You guys! I have to show you this new laundry room.

IMG_4519

BAM! There it is…my new laundry room in all it’s glory…missing a knob on the cabinet door, a dirty coat on the dryer, and missing baseboards and trim.  To be honest, I think this is the best picture I have of it because of the lighting, so despite the imperfections, I wanted to catch your attention right off the bat.

.

Okay, so now that I (hopefully) have your attention, I want to show you the details of my new laundry room.  This has been a long time coming.  Just don’t even get me started…Life gets busy and full time jobs, plus holiday preparation, plus a million birthdays over the last two months, plus orders for projects for friends of mine (for which I am VERY thankful and I hope that continues) just take up a lot of my time.  Nevertheless, the room is DONE…for now.

.

Let’s recap.  This is what the laundry room looked like when we first moved in.

IMG_1920[1]

The first thing that was done “to this room” was putting on new sliding doors.  You can see them peeking out on the left picture 🙂

Danny liked all the storage–it had these utility cabinets and a closet with a door so you could store ugly things and not have to see them.  The closet was actually our pantry until we remodeled the kitchen and then HALLELUJAH we got a pantry actually INSIDE the kitchen.  Which was (and still is) awesome.  But, (there is always a but…) I didn’t like how cramped the room felt and I didn’t like the cabinets–they were cheap MDF and I just have a “thing” about these kinds of utility cabinets.

.

Let me tell you something, though.  I sold those cabinets for $300 and that paid for the entire laundry room redo (and still had some leftover), except for the new back door.  We would have gotten a new door anyway because the old one was leaking air and needed to be replaced. So there’s that….this was basically FREE.  Um, yes, please!

.

I’m really dragging this out, huh?  Okay, I’m almost done blabbering.  Really quick, you should check out the part 1 of the redo here.  I’ll spare you all the details here and just show you the finished pictures.  Are you ready?? Okay here goes!

.

Ta Da!! This is as you walk into it from the foyer.

laundry room from foyer doors

laundry room washer side doors

laundry cabinet side from foyer

This room has little touches of my granny all over it.  She gave me this little tea towel a while ago that was hers.  The owl one was a gift from my mother in law.  SUPER CUTE!

Granny also gave me that old washboard hanging on the wall.

What? You don’t use your dirty boots for decoration in your house?  At my house they do double duty 🙂 Is that weird?

IMG_7548 (1280x960)

Oh, and please excuse my wrinkly curtain…character is what I like to call it 🙂

.

On the other side of the room, I made the shelf above the dryer, the cabinets, the water heater cover, and replaced the door on the closet with a curtain and made it our new broom/vacuum cleaner closet.

curatin

Laundry Room Makeover on a Budget--How my laundry room became my favorite room in the house--Woodshop Diaries

I used the big Guide to Procedures picture to cover up the electrical panel cover.  I made the medallion from scrap wood…it wasn’t supposed to look like that originally…but that’s another story. Long story short–that chandelier took us all day to hang and there may have been a few tears involved.  No pain, no gain, right? HAHA…no.  The bird picture was a gift from my other granny.  I have the best grannys ever!

A few of these blue mason jars were my granny’s, too.  She has so much cool old stuff!!

IMG_7530 (1280x960)

Speaking of granny, when Danny and I moved into our first apartment when we first got married, granny came over to help clean and she brought us all kinds of cleaning stuff and snacks.  She’s so funny.  She brought a roll of paper towels and wrote Love, Granny on the outside towel with a smiley face.  I tore it off and have kept it in my Bible for five years.  I finally took it out this Sunday and have been thinking of how I can frame it and put it in this room to remind me of her.  She probably has no idea that I kept that piece of paper towel.


So anyway, back to the laundry room…It is so much brighter in here now and I can honestly say that I don’t dread folding laundry in here nearly as much as I used to.  It’s actually kind of fun to hang out in here and have a cup of coffee.

Or you know….TOTALLY STAGE drinking a cup of coffee in here to get a good picture.  Folks, you are looking at THE world’s greatest do it yourselfer (wannabe).  No autographs, please.

So besides the fact that I was really hoping to stay neutral in here, but it ended up looking like someone pooped a rainbow all over it, I’m pretty pleased with the totally 100% DIYed, and practically free laundry room redo.  What do you guys think?

.

I’ve created this awesome Pin, so you should totally pin this for later 🙂

Laundry Room Makeover on a Budget--How my laundry room became my favorite room in the house--Woodshop Diaries

Danny says I have to take a break over the holidays and can’t do another room redo until next year.  Fair enough.  But I still have plenty more projects to show you in the mean time, so be sure to follow along on Instagram, Facebook, and this blog itself!

One Year After Moving Day

November 13, 2015 by Shara, Woodshop Diaries

We closed on our house last year on November 14 at 4:30 in the afternoon.  It was a day that we will always remember (at least I think so…).  We were living in a rental house like two houses down from my parents and we wanted to be out by the 15th because that would be the end of our “rental month” and I didn’t want to owe any more money.  Cutting it close, huh? That’s how I roll…

IMG_1757

It was a whirlwind of a weekend.  Closing day was a Friday and we both took the day off work.  We rented a U-Haul first thing that morning and Danny, Dad, dad’s friend Johnny, and me (and a little help from mom) all started loading it as full as we could.  We had three vehicles (two compact commuter cars and a truck specifically for pulling the trailer when needed and hauling my lumber) and we loaded them all full and loaded our trailer too, along with mom’s car, and dad’s truck and trailer.  Surprisingly, it went pretty quickly.


Then we had to go to two different banks to get cashier’s checks for the down payment….which is a long story I wont go into.  One was in the town of our rental house and the other was in the town we were moving to.  We got the first check, then headed to the next town.


We drove my car and our truck and trailer to our new house and parked it in the driveway, and took my car into town. We got the check at the bank, then we ate lunch at Captain Ds.  I specifically remember us talking about how funny it was that we were eating at Captain Ds on a weekday and the restaurant was full of older people who were most likely retired.  We are old people at heart, so we fit right in.  I also remember keeping those checks in my pocket all day scared to death I would lose them.


We quickly ate and headed to the house again for our “final viewing” before we closed.  It looked different than I remembered when we first looked at it before we made an offer.  It always does look different the second time….we have been through this process a couple times before…


Then it was go time! We headed to the lawyer’s office to sign the papers.  We signed SO MANY PAPERS!!!! I bet five trees died for us to close on our house.  And, who knew you had to sign a paper from the bank saying that you understood it was a bad idea to put carpet in a bathroom.  NO. JOKE.


As soon as the papers were signed, I called mom and dad and they headed over with the U-Haul and mom’s car.  We unloaded everything as fast as we could. Then, we went back to the rental house and went to bed there for the last time ever!  The next morning we loaded up the remainder of our stuff, cleaned the house, gave the keys back to our landlord, and headed to our new home for good!


It was a whirlwind of a day unloading and finding places for all our random stuff and trying to get the washer and dryer hooked up and everything cleaned.  I took pictures that night with my phone.  Awful quality….awful lighting…awful decorating and placement (I’m here to tell you, folks, I still haven’t gotten much better haha!).  Here was our home almost exactly one year ago:

IMG_1924 IMG_1898

IMG_1899

IMG_1877

IMG_1876

IMG_1868

IMG_1861

IMG_1871

IMG_1864

IMG_1866

IMG_1917

IMG_1870

IMG_1872

IMG_1863

IMG_1919

IMG_1920[1]

A LOT has changed in the first year since moving day.


First was our master bedroom closet.  If you remember from way back last Christmas, we tackled it on a whim while we were off work.

IMG_2075


Then, we painted the living room.  After the kitchen remodel, we rearranged furniture.  I also painted the brass on the fireplace.  Then I built a few new pieces of furniture. The living room has been constantly changing project after project.

IMG_3300[1]

IMG_3616[1]

IMG_3445


IMG_3927


I gave the foyer closet a makeover right before our biggest project in the house.

IMG_2432

In March and April, the kitchen was torn apart and put back together.

IMG_3157[1]


Once it got warmer outside, we cleaned and stained the deck and painted the handrails.  The “deck makeover” was the least fun, but was worth it.

IMG_3414[1]

IMG_3405[1]


Although I didn’t start my laundry room redo until recently, I went ahead and made the grand entrance for it this summer.


IMG_3939[1]

Notice how the hallway was painted here?  No post on that, but we did away with the green and went with the grey and white thing…pretty much my theme throughout the house 🙂

And now, we are almost done with the laundry room redo.


IMG_4296[1]


In addition to visual improvements, we have also installed new windows, (soon to be installed), new back doors, new gas logs.  Countless tubes of caulk have been used to seal “gaps” in various places.  Some electrical has been improved both in the house and the shop.  And, speaking of the shop….want to see another before and after?

 IMG_2979[1]


IMG_3123[1]

I need more shelves….actually I “need” a lot of things in there that will just have to wait…I’m trying to learn patience and self-control.  Those are things I should have more of.


So here we are.  One year later, I can honestly say that a lot has indeed changed.  One thing I forgot to mention is that we got some new pets this year…two kittens to kill mice and moles…and to keep us entertained 🙂  Sadly, our black cat died on my birthday this year, but we got another super sweet kitten to keep our other one company.  Black cat completed our fall front porch this year.  Danny was just added decoration 🙂

IMG_3963[1]

IMG_4008[1]

In the year since we moved here, the house has definitely changed.  And, if all goes as planned, the house will change a lot more in the next year, too.  But, more importantly, in the last year, WE have changed.  We have learned, we have grown, we have gone through tough times, gone through good times, and good grief! We’ve gone through a kitchen remodel!  And survived!  This house is where our life happens….and we love that.  We look forward to coming here every day after work and being in the place we call home.  And I (not so much Danny) look forward to many more updates and opportunities to learn and grow in the year to come 🙂

The Ruby Red Slipper Cabinet

October 28, 2015 by Shara, Woodshop Diaries

Sometimes you live with something for a while because it is convenient, but it’s not exactly what you wanted.  And NO I AM NOT REFERRING TO SPOUSES!  Although, when the shoe fits…..I’m kidding, I’m kidding.  I love my hubs.

Speaking of shoes, I have a friend who has a lot of shoes.  But, this is not the story of her shoes.  Although, that may be a story worth telling….and it may be a story I will eventually tell. But not today. This is the story of her new ruby red slipper cabinet.  I know, I said this isn’t about shoes.  Ruby red slippers is the color I painted the cabinet I made for her.  See how I tied all that in?  I know, I need practice.  But she’s actually using the cabinet to store a microwave.  Totally not the same thing as shoes.

So back to the introduction…she had a cabinet for her microwave for several years, but it wasn’t really what she wanted.  However, it was convenient and buying something new wasn’t.

IMG_4241

IMG_4240

She asked me to make her something to replace this old cabinet with.  First, she wanted a pantry.  Then maybe some type of hutch, then we settled on a small cabinet with floating shelves.  So before her mind changed again, I started building haha.  Just like my sister and her faux fireplace.

I made the overall dimensions 30″ wide, about 35″ tall and about 21″ deep.  It just fit perfectly in her space.

Instead of doing traditional legs, I made the sides curvy at the bottom.

IMG_4072

IMG_4074

I used pocket holes and screws to attach the shelves.

IMG_4076

IMG_4084

IMG_4086

I used scraps for the front and back support and attached the ¼″ backing (I used luan…the cheap stuff because it’s just the back side) with finishing nails.  Before attaching the back I made sure everything was square.  Then I attached the face frames.

IMG_4087

Next, I made two doors.  You can learn how I make simple shaker style cabinet doors here.

IMG_4117

IMG_4133

I glued some 1xs together for the top.  While that was gluing, I painted the cabinet and the doors.  Two coats of primer and a million (literally maybe like 5 or 6) coats of paint–Ruby Red Slippers by Valspar.  (I’ve said a million times before that I always recommend Sherwin Williams paint when possible.  It saves you so much time.  It could totally be operator error, but I always have to use twice as much Valspar paint as I ever do Sherwin Williams.  Wish I got paid to say that, but I don’t.  So take my word for it…I’m not getting paid to tell you that.)

The next day, I sanded the countertop completely smooth and stained it my favorite color–Minwax Dark Walnut.  A couple coats of Polycrylic made it really shiny 🙂

IMG_4140

IMG_4141

I also made some floating shelves.  I think I will write a separate post on those later.  (AKA I forgot to take any pics of how I did it to show you.) I was so excited when I got done, I modeled it for her so I could send her a pic of it.  See how good a big framed picture of me would look on that first shelf?  I can make that happen 🙂 Christmas is coming up and that gives me a good idea!!! #bestgiftever

IMG_4143

But then she sent me a pic of it after she decorated it at her house.  And I have to admit….maybe it does look pretty good without my big head on it.  I guess we will see after Christmas 😉

IMG_4239

She wanted to be able to put her microwave INSIDE the cabinet instead of on top of the cabinet, so I cut a hole in the back for the cord to go through.  And it fits well with plenty of room around it for ventilation.  That worked out well.

IMG_4244

My shelf decorating skills are terrible.  So I’m going to hire her out to come decorate mine because hers look so good.

IMG_4245

And now I’m kind of jealous and want my own cabinet like this in my kitchen….

 IMG_4243

So I said all that to say this: we all live in our houses.  They are our homes.  If you don’t like something, change it.  Even if it’s a little change like replacing a cabinet you aren’t in love with for one that you are in love with. Life is short. Come home after a long day at work to a place you love, not one you just live in.  And while you are filling your home with things you love, don’t forget to also fill it with the people (and pets) you love, too.

Okay, okay…Enough mushy stuff…Now get to building 🙂

NOTE:  As with any tutorial and how to on the site, I am happy to provide you with the instructions for free in the post.  I enjoy inspiring others to make their own furniture and crafts.  However, since I receive no compensation for these “plans,” I ask that you respect the time that was put into writing these instructions and please ask permission before using them to make and sell for profit.

DIY Simple Shaker Cabinet Doors

October 26, 2015 by Shara, Woodshop Diaries

How to make simple Shaker style cabinet doors!!

I recently showed you all the beginning of my laundry room remodel.  But, I still had to make shaker cabinet doors for the big cabinet that I built.  And while I was at it, I needed to make two doors for a cabinet I have been working on for a friend.

.

These are simple “shaker style” cabinet doors and are not very expensive to make, but I warn you–they are a little time consuming.  BUT, they are simple and I’ve got you covered with the how-to 🙂  (PSSST! This post shows how I USED to make cabinet doors.  I recently started using a different technique to make doors and you can check that out here.)

.

But first, take a look at them on my laundry cabinets I made.  Cute, right?  I LOVE shaker cabinet doors–they’re simple and elegant and cheap to make.  Saving some $$$ is always a good thing 🙂

Shaker Cabinet Doors on Laundry Room Cabinets Above Washer and Dryer

This post contains affiliate links.  If you purchase from one of these links, I may receive a small commission at no extra cost to you.  Thank you for supporting this site so I can continue to provide free content.  See disclosure policy for more details.

 First, you will need:

1×3 boards for the frames

¼″ plywood for the panel

Wood Glue

Kreg Jig & 1 ¼″ pocket hole screws (optional)

Wood putty

Sand paper

Table saw

Miter or chop saw

Clamps

.

Because I was painting, I used spruce (or whiteboard) planks for the frames and luan for the panel (it’s like the cheap of the cheap ¼″ plywood).  If you want to stain, I recommend getting a hardwood or a very smooth pine plywood and matching wood type 1x3s.

.

I ripped 1x6s on my table saw to make the 1x3s, but you can buy 1x3s at the local home improvement stores already cut.

.

Okay, now to the how to…

Step 1: Cut shaker cabinet doors frames

I’ve got a detailed explanation of how to determine your door size in this post.  For this particular tutorial, take the total width the door needs to be and subtract 5″.  (NOTE: Make sure your 1x3s are actually 2 ½″ wide.  This is standard, but make sure you double check.  If it isn’t, then subtract 2 x the width of your 1×3 instead of the 5″ I said earlier.)  Cut two 1x3s this length.

.

Next, take the total height the door needs to be and cut two 1x3s this length.

.

Cut these frame boards for all the doors you need to make so you can do the next step with all the boards at one time.

Step 2: Cut dadoes in the frames

Now, I usually set up my table saw to cut dadoes for the inside panel.  You could also use a router for this step, but I figured the table saw was easier to set up for this.

.

If you have a dado blade, it will save you time, but you can also do it this way without one.

.

I like to place a piece of ¼″ plywood flat next to the blade and adjust the height until it is BARELY above the top of the plywood.  I want the blade to stick up only about ¼″.  I adjust the rip fence to about ¼″ to 5/16″ from the blade.  My rip fence is broke, so we clamped a 2×4.

Rip fence on table saw set to ¼ inch from the blade to cut dadoes into cabinet door frame

Anyway, I run all the short boards through the saw like the picture above–cutting all the way from one end to the other.  Then I turn it around and run it through again so that when you are done, both sides of the board will have run along the rip fence.

.

Big picture: Basically, I need to cut a groove big enough to slide the ¼″ plywood in.  The blade is ABOUT ⅛″ wide.  I’m just trying to cut ⅛″ from the center on each side.  Does that make sense?

.

On the longer boards (the vertical sides of the doors), I don’t want to run them through all the way.  I only want to cut the groove to an inch or two from each end.  See picture below.  We did this “trial and error style” until we found a good starting and stopping point.  I say we because the safety manager was supervising 🙂

Stack of cabinet door frame pieces with ¼" dadoes cut for panels

We made a mark on the 2×4 rip fence we were using to show us where to start and where to stop cutting.  So I just carefully pushed the board down onto the blade and run through until I needed to stop, then lifted the board away from the blade.

.

  I do this the same as the short boards…run one side, then flip and do the other.  You can see the marks we made in the picture below.

Stop and start marks on table saw rip fence for cutting vertical frame pieces for shaker cabinet doors

I usually end up having to run the boards through on each side THEN adjust my blade again slightly to cut out a small section left in the middle.  Just adjust and cut until your groove is large enough to fit the plywood.

.

Then I have a ton of pieces that look like this:  Stacks of shaker cabinet doors frames with dadoes cut for inside panels

Step 3: Cut panels for the shaker cabinet doors

I cut the inside plywood panels as follows:

.

Width= (length of the top and bottom 1×3) +½″

.

Length: (length of the side 1×3) – (5″ OR 2 x 1×3 width if they are not 2 ½″ wide) + ½″

.

When I cut it, I make sure the grain in the plywood is going to run up and down on the door panel.  It will look better this way.  Before assembling, I dry fit it together to make sure everything will work.

shaker cabinet doors dry fit together with inside panel

Step 4: Glue Up Shaker Cabinet Door

Here I have two options: glue or screw.  That is the question.  You could also use dowels if you’d rather–that’s typically what I do lately.

.

To glue, place the plywood in the grooves of the sides and liberally squirt glue along the inside of the top and bottom (where the top and bottom 1x3s will go).  Then slide the top and bottom 1x3s in place and clamp.  Clamp tight, but not so tight that the door bows.  Wipe excess glue off.

.

OR, to screw, you can drill pocket holes in the top and bottom pieces and screw in like the picture shows.

¼" plywood panel sitting in ¼" dado cut on door frame pieces

plywood panel dry fit in dadoes on cabinet door frame pieces

Shaker cabinet doors dry fit into side frame dadoes

Shaker cabinet doors assembled with pocket holes and screws on back side of door

Allow the glue to dry (if you used it) and sand and putty (and sand again once the putty is dry) all the joints and the pocket holes (if you used pocket holes).

.

Also, if I am painting, I run a small bead of caulk along the inside corners of the front of the door where the plywood goes in the grooves.  This serves two purposes–keeps the panel in place so it doesn’t slide around, and conceals any gaps and makes for cleaner painting.

front of shaker cabinet doors caulked between inside panel and outside frames

It takes forever for the putty in the pocket holes to dry–be patient!  Like the pot calling the kettle black–I’m the worst at patience!

Shaker cabinet doors back side puttied pocket holes

Once the putty has dried, sand everything smooth and prime.  I recommend two coats of primer (on both sides).  I also recommend sanding after priming and before painting.  Everything gets so much smoother and feels so much nicer.

.

  Just a quick light sanding is all it takes.  I wish I had taken my own advice when I redid my trim in my house.  Trust me…I learn from my own experience.

.

You can install using several different types of hinges, but I like to use concealed hinges lately because they have so many adjustment options.  You can see how to install them in this post. Here are the finished doors for my friend’s cabinet.  Looking good, right?

Small red cabinet with shaker cabinet doors

And here they are in my laundry room:

Laundry room cabinets above washer and dryer with shaker cabinet doors

And on my mom’s built ins:

Built in kitchen nook with shaker cabinet doors

And in my office:

Home office built ins with shaker cabinet doors

And I used the same technique for the drawer faces on this desk:

DIY Corner desk with large storage drawers

And on my friend’s side table:

DIY Farmhouse Side Table with Storage for Diapers and Other Random Stuff You Want To Hide

I obviously make these doors all the time.  Simple, stylish, and quick.

.How to make simple Shaker Cabinet Doors Pin Image

I know this is super long and detailed.  I wanted to make sure I was clear on instructions.  It’s a little time consuming, but it’s a rewarding project.  Because now you can hide the mess in your cabinets with super cute doors that you made yourself for a few bucks 🙂

.

If you want to see a different way of making shaker cabinet doors, check out this post where I built new cabinet doors for my sisters kitchen.

White kitchen with shaker cabinet doors

Until next time, happy building! 🙂

Airing My Dirty Laundry–Part 1 of the Laundry Room Redo

October 19, 2015 by Shara, Woodshop Diaries

Okay, so it’s been another two weeks since my last post.  I really had hoped to post SEVERAL things since the twisty table story, but I haven’t yet learned that things always take longer than expected.  I’m really not sure that is a lesson that anyone ever REALLY learns 🙂

So, some backstory…Danny and I went on vacation a month ago to celebrate our 5th anniversary (which is actually in December, but December is always busy, so we celebrated early).  I cannot believe it has been 5 years already!!!  In those five years, we have lived in four different places, (between the two of us) we have had five different jobs, and LOTS AND LOTS of other “life changes.”  Last year I actually tried to come up with a “12 Things Since We Have Been Married” song to the tune of “12 Days of Christmas,” but I was missing something for one or two of the numbers.  I will try again this year 🙂 ha!

Oh, anyway, so I told you that we went on vacation last month, because that is when Danny finally agreed to let me redo the laundry room under two conditions: we keep the paneling, and we keep the closet.  Of course…there are ALWAYS conditions…  So this was A MONTH AGO.  Remember we tore apart our entire kitchen and put it back together (not 100% finished, but at least back to functioning normally again) in about a month and a week??  Why is this stupid laundry room taking so long?!!?  I cannot answer that.  All I know is I had planned to show you all my 100% finished laundry room at least a week ago.  But we are still probably about a week or more away from the “final reveal.”  So, I thought I would at least show you the progress so far.

A little more backstory…When we bought this house, I was sooooooo excited to have a real laundry room.  Our first apartment had a washer and dryer in our bedroom closet…convenient, yes, but not very pretty.  Our first house had a laundry “closet” and that was it.  I HATED IT.  Our rental house had a little larger laundry closet, but it was still TINY.  But, this house has a real ROOM for the laundry.  However, it was full of utility cabinets that took up all the space in it.

IMG_3775

IMG_3776

These were nice and clean and excellent storage…..but not what I was going for.  Plus they were made of MDF and I HATE MDF.  These things were about $700 if you bought them brand new from Lowe’s–which it appears the previous owners did.  We were able to sell them for about $300, which made my laundry room redo practically free.  Win!

Next step was painting.  Danny said we had to keep the paneling because he didn’t want to deal with drywall.  And, also because there are ALOT of wires in the wall of this room going to the panel and he just didn’t want to mess with nicking one with a screw.  I don’t know if you have ever painted paneling, but let me tell you…IT IS THE DEVIL.  I puttied the holes and took a paint brush and brushed all the grooves in the paneling.  I have yet to find an easier way to paint it besides having to brush the grooves.  Is there a better way?? If you know of one, I would love to hear it.

IMG_3782[1]

IMG_3807[1]

By the way, look how much bigger the room looks without those massive cabinets!!!

I removed the trim and baseboards.  This is one of my favorite parts of a room redo.  I love prybars.  In fact I love them so much that I have punched a few holes in the wall with them because I got in such a hurry to rip out the baseboards in the hallway.  Danny wasn’t happy 🙂 No problem…I can totally fix that.  I once heard that the difference between a amateur and a professional is that a professional knows how to cover up their mistakes.  I am totally on the road to professionalism.  I spend half my time making and fixing my mistakes….and looking for where I put my tape measure (I swear I JUST had it in my hand!!!)…

PS Props to whoever can find the tape measure in the photos below.  Hint there it is in 7 of the pictures below, but one of them I’m pretty sure you will never find.  I looked for about 15 minutes for it right after I took the picture.

 IMG_3820[1]

After the paneling grooves were painted, we (I say we because at one point Danny helped me get the last coat on the wall) finished painting the rest of the room and then I started laying the floor.  We had just enough flooring left over from our kitchen remodel to put it down in the laundry room, so that saved us on expenses.  It took a few days to lay the floor because we kept having to move the washer and dryer around and cut boards like every other piece.  Slooooow going…

By the way, please note this is NOT a fashion blog as I am clearly breaking every rule possible with this outfit.  All my clothes were dirty and the washer was unplugged 🙂  Legit excuse.

IMG_3833[1]

IMG_3844[1]

Confession: the floor is still not 100% finished.  We are replacing the exterior door in a few weeks, so the last part in the back of the room will be put in at that time while the existing door is out.  Also…it would be a pain in the butt to put the floor under the water heater, so we cut the boards up to it and will finish underneath it whenever we have to replace it.  When I am done with the room, it will make more sense.  I will show you….if I remember 🙂

I used pocket holes and screws to add a 2×10 floating shelf above the washer and dryer.  One good thing about paneling….the studs are SUPER easy to find.  Just find where they nailed the paneling into them.  And be sure you screw the shelf into the stud…this thing is a BEAST and wont hold unless you do.

IMG_3918[1]

I wanted to build my own cabinets to save us some money.  And, who are we kidding, I wanted to be able to say I did it myself.  Cabinets aren’t hard to build…BUT you have to be able to make very precise cuts.  I quickly found that I wasn’t very good at that with my circular saw.  I survived, but I learned a few lessons the hard way.

I made two upper cabinets according to this plan.  I made the following changes: I made my cabinet 16″ wide, I nailed my face frame instead of using pocket holes, and I set my supports in ¼″ so that my plywood back set “inside” the cabinet so you couldn’t see its edges from the side of the cabinet.  See pictures below.

IMG_3937[1]  IMG_3952[1]

IMG_3957[1]

Then I wrote my name in all the sawdust 🙂

IMG_3938[1]

For the side of the room where the huge cabinets used to sit, I wanted a counter height cabinet with a countertop.  I wanted it to look more like a vanity than a kitchen cabinet, so I built it using this idea in my head.  I don’t like toe kicks, so this didn’t have any.  I made it in three sections.  The two on the outside are identical and the one in the middle is a little bigger.

IMG_3951[1]

IMG_3955[1]

I ripped a bunch of 1x4s and 1x6s to make the face frames and door frames.  I wanted to get birch planks (since that is the type of plywood I used) and stain the cabinets, but I couldn’t find birch anywhere (I called cabinet places and they would never call me back) and I was almost afraid to because I knew it would cost a pretty penny.  So I just used spruce.  Wood selection around here stinks.

  IMG_3962[1]


I made the face frames as one solid piece pocket hole screwed together on the back side, then I nailed them onto the cabinets and I added crown molding to the upper cabinets and baseboard molding to the bottom cabinet.  I primed and painted.  That’s what takes so long….it took days.  I only have a couple hours a day at the most to work on it and you paint one coat, then you have to wait for it to dry, so then you come back tomorrow and add another coat…see how this goes?

IMG_4035[1]

IMG_4036[1]

I glued two 2x12s together for the countertop.  The boards were not cooperating, so I showed them who was boss.  I should probably wear a helmet in the shop…

    IMG_4039[1]


I apologize, I did not take pictures of making the cabinet doors, but I will when I make the rest of them.  I only made the ones for the uppers so far.  When I made the bottom cabinet doors, I will take pictures and give instructions.  We finally got the cabinets hung and doors on.  It only took like two weeks…not breaking any records here, but at least they are pretty!

IMG_4060[1]

I stained and polyed the countertop and got it put on.  Now, if I can just get the doors made, it will be done closer to being closer to done 🙂

IMG_4059[1]

Remember the closet I mentioned earlier that Danny said I couldn’t get rid of?  Well it had an old plain hollow core door on it, so I took it off and replaced it with a drop cloth curtain that I painted stripes on.  Not bad for like five bucks.  And now my vacuum, brooms, and mops are well covered.  I had originally wanted to rip out this closet and put a sink here.  I guess it was a good idea to keep it because if we hadn’t, I don’t know where my vacuum would go…sometimes Danny’s rules turn out to be a good thing.  Don’t tell him I said that.  And I will eventually put a sink in the new cabinet, so I still win.

IMG_4032[1]

There’s a really big sneak peek for you all.  I think that’s more than a “sneak peek.”  I really just wanted to remind you that I am still here although I haven’t posted in a couple weeks.  I am still at work and I’m just in over my head in projects.  I have a long list of them that I hope to bring to you soon.  I just have to get this room done first!  I am excited about the progress and can’t wait to show the finished room! By the way, if you haven’t already checked out the snazzy barn doors I made for the grand entrance to the laundry room, you should!  Keep your eyes open for more updates to the laundry room hopefully coming soon 🙂  Be sure to follow along on Facebook and Instagram @chasingadreamblog  I’d love your feedback!

How to Build a Twisty Table

October 5, 2015 by Shara, Woodshop Diaries

In this post, I’m sharing how to build a unique DIY twisty table from a single board!

This was one of my very first DIY woodworking projects and makes such a fun conversation piece that you can use as a plant stand or a side table.

This project from the #oneboardchallege was made with a single 1x8x8 board that cost about $6! You've got to try this!--Woodshop Diaries

If the angles seem intimidating, don’t worry! One of the coolest parts about this project is that you don’t have to figure any angles and you barely have to measure anything.

I’m sharing all my “secrets” to building this table (quite easily) in the steps below, so if you’re ready to get building, let’s dive in.

*This post contains affiliate links. See website policies.

**This post was originally published on Oct. 5, 2015, but was updated Sept. 2025 with more in depth instructions and a video (video is linked below).

What to know before building

I originally built this project way back in 2015 as one of my very first DIY projects.

That said, this is not a difficult project to build, but due to the angles, it can be a bit tricky to visualize. So take your time to think it through as you cut your pieces.

I don’t have a “plan” for this project as only one step actually uses any dimensions and even then, they don’t really matter. You’ll see what I mean in the steps below.

Material Choices & Sizing

This project requires just one eight foot long board. I used a 1×8 board, but a 1×10 or 1×12 board would also work fine for a wider table.

You can use just about any wood type you’d like for this. But, to keep things simple, I used basic construction lumber from the big box store. This cost me roughly $8.

1x8 spruce whitewood board on workbench

This twisty table can be made just about any height you’d like (within reason) by simply adjusting your leg lengths in step 1. I made mine roughly 22″ tall and the top and bottom pieces measured about 7 ¼″ x 8″.

Overall dimensional diagram of DIY twisty table

Tool Options

To cut the “twisted” legs for this table, you can use different methods with different tools. I’ll share below how to cut them using a circular saw OR a table saw.

If you cut them with a table saw, you need to build a jig using some scrap wood, a jig saw and a pocket hole jig. I highly recommend watching the video linked below to see both methods in action.

Are DIY projects your thing? Sign up for our newsletter for priority access to the latest projects and build plans!

How to Build a Twisty Table

If you prefer to watch, I’ve shared the full build video with tons of tips, behind the scenes, and additional details on my YouTube Channel here.

YouTube thumbnail of twisty table with text "it took me 10 years to make this"

Love watching how-to videos? Subscribe to my YouTube channel for plenty more where that came from!

Tools & Materials

Tools:

  • Circular Saw OR Table Saw
  • Miter Saw
  • Clamps
  • Brad Nailer
  • Drill/Driver

Materials:

  • (1) 1x8x8 board
  • 1 ¼″ brad nails
  • Wood Glue
  • 1 ¼″ wood screws (optional)
  • Wood Plugs or Dowels (optional)

Step 1: Trim Leg Pieces to Length

The first step of this project is to cut two pieces from the 1×8 board that will be used for the “twisted legs.”

I cut my two leg pieces 22″ long and once complete, this gave me a table 22″ tall. But, if you wanted a shorter table, you can cut your two leg pieces shorter. And, if you wanted a taller table, you can cut them longer.

*I don’t recommend cutting the table legs longer than 24″ long just to keep it from being unstable (too tall to be sturdy).

The length of these leg pieces won’t change the following steps, it will only change the overall height of the table once complete. You will still build it exactly the same way.

two pieces of 1x8 board with line drawn on diagonal placed on workbench

Once these were cut, I used a straight edge (a level, yard stick, or a straight scrap board) to draw a line across one diagonal on each piece.

Step 2: Cut Leg Pieces

To make these legs “twisted,” I essentially need to notch out a V shape down the length of the diagonal lines I marked so that the pieces can fold together.

This can be done multiple ways, but two of the easiest are using a circular saw or a table saw. I’m sharing both methods below.

Cutting with Circular Saw

To cut these with a circular saw, first, I set my board on some scrap blocks (so I don’t cut into my workbench), and clamped a straight edge on top.

Shara Woodshop Diaries measuring straight edge placement to cut twisty table legs

I adjusted my circular saw’s bevel angle to 45 degrees and made sure my straight edge was clamped so that when I ran my saw along it, it would cut right along the diagonal line (see image below).

After I cut along the line, I placed the piece shown on the right side of the photo below to the side. This is my first good piece.

Shara Woodshop Diaries running circular saw along straight edge to cut down diagonal of 1x8 board

Then, I rotated the other piece 180 degrees and set up my straight edge on some scrap blocks. I clamped the board at the back and nailed some scrap pieces at the front to hold it in place while I made the second cut the same way.

I encourage you to watch the video to see this in more detail.

Shara Woodshop Diaries making second cut for twisty table with circular saw on 45 degree bevel

After both cuts were made, I had two triangles like shown below. Notice that there is a V notched out down the diagonal. This allows these pieces to fold together in the next step to make one leg.

Twisty table leg pieces cut and placed on workbench to show V notch down diagonal

Repeat the same process to cut the other board to make the second leg.

Cutting with Table Saw

To cut these with a table saw, first, I needed to make a jig. This jig will allow me to accurately slide the piece through the saw to cut down the diagonal.

To make this, I clamped a scrap piece of board about 2″ wide (it doesn’t have to be any exact measurement here, just something roughly 1 ½″ – 2 ½″ wide) across the diagonal line I drew in step 1.

Then, I found a scrap piece of ¾″ plywood about 10″ x 20″ (again, this doesn’t have to be an exact measurement, but needs to be roughly the same size as the 1×8 leg piece), and laid this against the board like shown. I traced the shape of the 1×8 onto the plywood.

Shara Woodshop Diaries tracing cut for twisty table jig

Then, I cut along these lines with a jig saw. After cutting, I drilled two pocket holes into the jig along the cut lines.

This allows me to secure the piece into the jig with pocket hole screws (make sure these screws are not too close to the diagonal so they won’t interfere with the blade when cutting).

Shara Woodshop Diaries securing board into twisty table jig with pocket hole screws

I adjusted my table saw blade bevel to 45 degrees and adjusted my rip fence so that when the jig was placed against it, the blade would cut right along the diagonal mark.

Shara Woodshop Diaries running twisty table jig and board through table saw to cut legs

After I made my first cut, the piece attached to the jig is the good piece, so I unscrewed it and set it aside.

Then, I placed the off cut piece into the jig to repeat the beveled cut. Just like with the circular saw method, this gave me two identical triangle pieces with beveled ends cut down the diagonal.

Shara Woodshop Diaries making second table saw cut of twisty table leg
two twisty table legs cut on workbench showing v notched out along diagonals of each

Step 3: Attach Twisty Table Legs

Next, I “folded” each pair of triangles from step 2 down the diagonal and brad nailed them together. I recommend using wood glue and brad nails at least 1 ¼″ long.

Shara Woodshop Diaries nailing twisty table legs together on workbench

I was careful to keep the nails at least 1 ½″ away from the ends of the board because I have to trim them in the next step and I didn’t want to trim into a nail.

Step 4: Trim Table Leg Ends

Now that the two twisted legs are assembled, I needed to trim the ends so they would slant on the table.

Figuring the angle here would be complex and would vary based on your leg length (see step 1). So instead of doing the math, I just kept my miter saw’s bevel and miter angles set to 0 degrees and placed my leg into the saw like shown.

twisty leg placement in miter saw

Then, I just barely trimmed the edge off. I repeated for both ends of each leg cutting exactly the same way.

Once both leg ends are trimmed, I made sure my two legs were exactly the same length. If they’re not, trim the longer one a little more until it matches the shorter one.

Step 5: Attach Top and Bottom Pieces

Next, I pulled out the rest of my original 1×8 board and placed my legs on top so that they were flat on the bottom and they just barely touched in the middle.

Shara Woodshop Diaries test fitting twisted table legs together on 1x8 board

Then I marked on the board where the end of my leg hit and trimmed this on the mark.

Shara Woodshop Diaries marking where to cut top and bottom plates of table

It ended up being about 8″ long, but yours will vary if you used a wider board. I recommend marking and cutting vs measuring for best results.

I glued and brad nailed this piece into the ends of the legs, then, cut a second piece the same size to glue and brad nail onto the other end.

Shara Woodshop Diaries nailing top and bottom onto twisty table project

Glue and brad nails should work fine, but once I got them tacked together, I also countersunk holes in the top and bottom to screw these pieces on as well.

Countersunk screws in top of twisty table board

Once they were snug, I glued and plugged the holes with dowel pins and flush cut them smooth once dry.

Step 6: Finish Twisty Table

Finally, I applied some wood stain to the table (I used Minwax Early American, but you can paint or stain however you’d like) to finish it up.

RELATED: How to stain wood

Finished DIY twisty table made from a single 1x8 board stained Minwax Early American with a flower vase on top

This fun little table is such a unique idea for a little side table if you’re low on space, or a plant stand in front of a window.

Looking for more unique DIY projects?

If you enjoyed this this project and are looking for more unique DIY project ideas, here are a few favorites you may enjoy browsing. Click the image(s) below to see the how to:

Modern Plywood Shelf
DIY Puzzle Table
DIY Corner Floating Desk
EASY DIY Desktop Picture Frames
DIY Book Holder
Cutting Board Drink Coasters
DIY Rotating Bookshelf
Sliding Door Storage Cabinet

If you enjoyed this project and want to save it for later, don’t forget to pin it or share it to your favorite social channel!

Completed DIY twisted side table with flower vase and text "how to build a twisty table" for Pinterest graphic

Until next time, happy building!

DIY one board side table with twisted legs

A Simple DIY Project–Two Toned Wood Box

September 14, 2015 by Shara, Woodshop Diaries

Last week I was so excited to show you all my sister’s new faux fireplace.  I had a lot of good response from that post, so I thought I would post a “follow up” project.  This week has been so crazy that I haven’t had time to make anything big or fancy, but this is a simple “build it yourself” project that was really fun to make.

A little backstory: when I took pictures of my sister’s faux fireplace (by the way, if you haven’t seen it, you totally should! It’s one of my top 5 fav projects 🙂 ), I used several of my own props to decorate with.  When I left after the “photo shoot,” my sister was left with a big lantern and some candles for her fireplace.  Obviously, that wasn’t very fun, so she decided she wanted a box full of sticks to put in the middle of her fireplace.  The problem was, she didn’t have sticks or a box.

Luckily for her, I will at least try to make her whatever she wants.  So here we go….a two toned wood box….full of sticks 🙂

IMG_3702[1]

First, I built the frame from 2x2s on the corners and 1x2s on the bottom.  I made the 2×2 corners 11 ¼″ tall, and the 1×2 long bottom sides 19 ½″ long.  The small 1×2 bottom sides were 6″ long.  I pocket hole screwed the bottom long pieces to the corners.  Then, pocket hole screwed the short bottom sides on.

IMG_3686[1]

IMG_3687[1]

Then, I cut 1×4 pieces for the sides of the box–6 pieces 6″ long and 6 pieces 19 ½″ long.

IMG_3688[1]

I took the frame inside to “black wash” it.  I could have stained it with Ebony Minwax stain, but I didn’t have any, so I did this instead.  First, get a bowl of water, some black paint, and a small craft paint brush.

IMG_3689[1]

Dip the brush in the water and rub the brush across the top of the bowl to get the excess water out.  Then lightly dip the brush into the paint.  Brush onto the wood and smear around as it will be very thin and will “wipe” around easily.  Be sure to brush over any drips so it looks smooth.  then flip over and do the other side.

IMG_3690[1]

IMG_3691[1]

IMG_3692[1]

While this is drying, I stained the boards for the sides with Minwax Provincial.  I tried Minwax Espresso, but it was so dark, you couldn’t tell much difference in the black wash and the side boards.

Once everything was dry, I glued the side boards onto the frame and clamped it.

IMG_3699[1]

Do this on all 4 sides.  Note: make sure your boards are as close to the EXACT same length as the bottom 1×2 boards.  If your side boards are a little short or a little long, it will be hard to glue.

I would have pocket hole screwed the boards on, but I didn’t want the pocket holes to show (and I am not very good at patching those holes or patient enough to wait for the putty to dry).  As long as the boards are tight, the glue will hold just fine.

IMG_3700[1]

For the bottom, I ripped a board long enough and wide enough to fill the hole and pocket hole screwed it in.  I forgot to take a picture of this….SORRY!

Then I gathered some sticks I had leftover from a tree that fell in our yard a month or so ago.

IMG_3703[1]

IMG_3706[1]

IMG_3704[1]

IMG_3707[1]

IMG_3705[1]

IMG_3708[1]

Such a simple project, but so cute!  She plans to put some lights and ribbon around the sticks for the seasons.  Once she does, I will get some better pictures….I’m still learning this whole picture taking thing haha.

Now it’s your turn to build this super simple two toned wood box.  If you build one, I would love to see your finished product and how you plan to use it! Happy building!

PS Be sure to check out my Facebook page and follow the blog for more simple DIY tutorials to come! 🙂

Wood Grain and Pretty Stain–Making a Chunky, Stained Fireplace Mantle 

September 10, 2015 by Shara, Woodshop Diaries

Look it’s another fireplace post! How exciting! I can’t help myself…all this fall decor and fall weather is making me daydream about fireplaces….among a slew of other things.
Earlier this week, we discussed my sister’s new faux fireplace, but today I want to talk about my own. One reason I love my house is this huge fireplace in the living room. I don’t love every detail about it, but I love that it is huge and eye catching. I also love that it is right in plain view as you walk in the front door. First, as you walk in, you will notice my laundry doors, but then the fireplace will command your attention.

I think it’s so eye catching because the house is so light and the fireplace is so dark, so you can’t help but notice it. I both love that and hate that about it. The wood above the mantle is rough lumber painted white. I’m not sure how I feel about that, but I don’t hate it enough to change it at this point. However, the white painted mantle has been getting on my nerves. You can see the wood grain under the paint protruding out and it irks me that it’s covered in paint. Apparently prior to selling the house, the previous owners paid some big bucks to have a lot of the dark wood in the room (including the paneling) painted. It makes me sad….well painting the beams and mantle and above the fireplace, not painting the paneling…to that I say “good riddance!” I hate paneling.

Nevertheless, I was getting a stained wood mantle. But, as usual, Danny put restrictions on this fireplace. He said I could not demo anything, including the existing mantle. As for lightening the color, I could not paint, or whitewash the brick. For whatever reason he likes the dark 80s red brick and it has to stay.

So my only option was to cover the existing mantle with new wood because stripping the paint wouldn’t even be worth the trouble.
I removed everything from the mantle and cut a 1×10 board to fit on the top of the existing mantle. I had to cut knotches out on the corners. Yes these are crooked. They had to be in order to fit.

Then I nailed on some 1×6 boards for the sides.

And another 1×6 on the front.

I made it so that it would slide onto the existing mantle just in case I didn’t like it, I could take it right off. Right…like I would decide I didn’t like it…funny.

After some stain, I put everything back in place and I really like it 🙂

It blends in with the dark brick a little more, but I’d still rather have that than painted rough lumber. Now you see all the pretty wood and it looks more rustic. It’s not perfect, but with my restrictions and a few bucks, I’m okay with it 🙂

fireplace

fireplace 2

Any thought? Opinions? Ideas? I’d love your feedback!

I have plenty more projects on my to do list so stay tuned! Also, I’m looking for a new blog name if you creative people out there could help me out!

Happy building!

Fake It Til You Make It–The Making of a Faux Fireplace

September 8, 2015 by Shara, Woodshop Diaries

Look at me trying to sound fancy by using crazy words like faux. I mean I could have totally used “fake,” but I opted for the more classy “faux” instead. Let’s be honest, I totally googled the definition for both before I wrote this post just to see the difference. And, I totally googled the spelling of the word “til” as well to make sure it wasn’t 2 Ls. Look, I didn’t major in English.

.

Last week I took you back to high school geometry with my coffee table.  This week we are going back to elementary school spelling and grammar. Everybody on the bus! Just kidding…

.

So on to the fireplace…my sister had asked me to build her a “faux” fireplace to set her TV (massive TV I might add) on to replace the metal and glass stand she had but didn’t like.  Simple enough, I thought. But, then she started sending me a gazillion pictures of fireplaces like “can you do this, but make this part like that, then do the moulding like this, but not make this part so big? Oh, and I want it to come in at this point but stick out here.”

.

Oh. Em. Gee. “Um, why don’t I come over and we can draw out a picture and get the design settled?”  Is this what having “clients” is like? Love my sister, she’s just a little picky…

.

NOTE: This post contains affiliate links for your convenience.  Please see disclosure policy for more details.

.

Anyway, so I went over and measured the space and we drew out a picture of what she wanted. Don’t laugh, it’s drawn by hand and on a church bulletin and totally not proportional and I drew it in a hurry. Don’t judge me. Here’s the rough idea:

Some things changed in the process of the build, but this gave me a good idea and I made her sign off on it so she couldn’t complain when it was done that it wasn’t what she told me she wanted. Just kidding…but I did think about it 🙂

.

I didn’t have a plan that was exactly what she wanted built, but I used some inspiration from Ana White’s version of a faux fireplace. Ana White is amazing. I want to be her, but I’m not cool enough.

.

For this build, I used:

Miter Saw

Kreg Jig

Nail gun and Compressor

Drill

1 ¼″ Pocket Hole Screws

.
My sister wanted her fireplace surround and mantle on a platform, so I built that first.

I used my kreg jig to drill pocket holes in pieces of 1×12 about 6″ long and used pocket hole screws to screw them into a 1×12 piece the length she wanted the platform to be (about 55″) on each end and the middle. I used my nail gun to attach a piece of 1×6 (it didn’t go from top to bottom, but this isn’t supporting weight, so it didn’t matter) onto the front then attached the baseboard.

.

She wanted the surround to sit back from the front a couple inches, so I used 1×10 pieces for the sides and pocket hole screwed them into the platform making sure they were spaced so that the 1×12 front would fit (11 ¼″ from outside to outside).

Then I attached the shelf for the middle part using pocket holes and screws on the bottom side and used my nail gun to attach the crown moulding around the top. In hindsight, I would have attached the mantle before putting on crown moulding, but I wanted to make sure the mantle was wide and deep enough to cover the crown. No big deal doing it backwards, just makes it a little harder to line up the edges.

I cut the front doors to fit and glued the moulding on. I attached the mantle top using pocket holes and screws from the inside of the side sections while the glue was drying. Once the glue was dry, I attached the doors and middle with  two hinges per door. Both sides swing out and the middle folds down (just like the Ana White one).

Painting is the devil, so since I was doing this for free labor, I told sissy that she could paint. I was nice and puttied, caulked, sanded, primed, and sanded again before I gave it to her to paint. I can be nice 🙂

.

I’m sure she had fun painting it and I didn’t want her to miss out on some fun!

She’s a trooper…it’s a bazillion degrees outside right now.

.
And now she’s got a beautiful new faux fireplace and tv stand combo!


These are my sisters dogs, Rufus and Wally. Roo is my fav. He’s so cute and photogenic.

.

I love this fireplace and she’s so excited to decorate it for holidays. It’s always good to have a place to hang your stockings 🙂

The best news of all? She liked it, too. Whew glad to have that one checked off the list! I have a feeling that’s not the last project I will do for my sister, though haha. That’s okay. She goes clothes shopping with me, which is a nightmare, so I owe her a few 🙂

.

Your turn! If you don’t already have a fireplace, why not fake it and make it before it’s time to find a place to hang your stockings?  Happy building!!!

.

Don’t forget to pin for later!

Build your own faux fireplace with hidden storage--DIY fake fireplace--Woodshop Diaries

See It, Like It, Go Home and Make It–a DIY Pumpkin Wagon Knockoff

August 27, 2015 by Shara, Woodshop Diaries

Build an Adorable Pumpkin Wagon for Fall from scrap wood

Fall is my favorite. Tobacco barn smells, pumpkin spice EVERYTHING (except keurig coffee because I tried that once and it was NOT good…), colorful leaves, corn mazes, chili, and hoodies. Plus fall is my birthday season. Yes, I celebrate my birthday for an entire season….not just one day or one month, but the whole season! Just kidding! I’ll be 26 this year in October and once you get that old, your idea of a good birthday is eating leftover chili and a pumpkin pie blizzard from Dairy Queen while watching Charlie Brown and the Great Pumpkin on DVD and going to bed early. And who could do that for an entire season? Well, actually, I probably could….
Anyway, speaking of pumpkins, my husband and I went shopping this weekend to get out of the house and ran across this cute little thing at Kirklands.

And it could’ve been all mine for the low price of…..$50. Ugh. Nowadays, since I work to live (and not live to work….trust me, there is a difference), I think of prices in terms of hours at work. So in order to buy this wagon, I would have to work how many hours to pay for it? Ugh too many….
So I did what any normal person would do, and I took some pictures and went home and made my own. For free! Well, I mean the wood costs some, but I had scraps and paint already on hand.
So here’s what I did:
I grabbed some 1×4 scraps (about 8″ long) and laid them on my work bench side by side and traced out a “pumpkin” on them with a pencil. Then I used the jig saw to cut each board on the markings. I got in a hurry and already cut one piece when I remembered to take a picture. Note: this image is upside down.


Once all pieces were cut out, I sanded the edges smooth. Then, I cut a scrap piece of 1×6 a little longer than the width of the pumpkin, so about 16″. I used a nail gun to nail the bottom of the each piece of the pumpkin to the 1×6. I took two more pieces of 1×6 scrap about 6″ long and nailed it on the sides as shown below.

I did the same steps for tracing and cutting out the pumpkin again and nailed them on the other side the same way.
Then I took three 1x4s about 7″ long (a little shorter than the pumpkin that is nailed on) and traced out the middle part of the pumpkin. I basically made two “crescent moon” shapes (one for each side) and cut curves on both sides of the middle piece so it looks like this:

I traced these shapes onto another set of three 1×4 about 7″ long for the other side and cut them out. Then I used wood glue and glued and clamped the pieces on each side and waited for the glue to dry (basically I went to church, then came home and resumed haha).

I realized at this point that I didn’t have anywhere to put the wheels, so I took some small scraps and nailed them on the bottom so they stuck out a little from the sides.

Then I took some more scraps about 1×1″ and nailed them on for the handle. It doesn’t swivel obviously, but it’s just for decoration, so I wasn’t concerned.

For the stem, I cut two small pieces of scrap 1x and glued them on the top.

I used a compass (seriously  from like fifth grade) to draw out small circles in some scrap plywood and cut them with a jigsaw.
Before I attached the wheels, I painted it in the living room while watching Last Comic Standing….the only show I make a point to watch. Last season was my fav. Rodman was hilarious!
Anyway, I mixed orange acrylic paint with a little brown for the pumpkin, and painted the bottom and the wheels black. The stems I painted with green acrylic paint mixed with a drop of brown as well. I didn’t paint I perfect…just kind of brushed it around. It’s not supposed to look perfect. That’s my favorite kind of project haha.

During commercial break, I took it to the shop and screwed on the wheels and ta da! Pumpkin wagon 🙂


So it may not be a 100% match to Kirklands’ version, but for a few bucks worth of scrap wood that I needed to find use for anyway, I’d say it’s pretty cute.

How to make a DIY pumpkin wagon from wood scraps
If I can build it, so can you. Now it’s your turn! Happy fall building and decorating! I’m going to put on my hoodie and pretend we are already there! 🙂

If You Give a Mouse a Cookie–A DIY Tutorial on Window Trim and How One Thing Always Leads to Another

August 24, 2015 by Shara, Woodshop Diaries

We’ve all heard the story of If You Give a Mouse a Cookie. Then he wants some milk, then a straw, then a napkin….And eventually you wind up giving him another cookie and on and on the story goes. Seriously this is my life. I start one thing then that gives me an idea to do this, then I have to do that, then what if we did this, but then I’d have to do something with that. It’s a vicious cycle.
So, making the above introduction relevant, we got new windows in our house….which of course leads me to thinking “now we have to redo all the window trim.” Which will then lead me to “now we have to do something different with the curtains.” Which will then lead to “I think I want a window seat there.” See how this goes?
Good news for you is that this provides me an opportunity to give you a tutorial on window trim…maybe that’s good news, maybe not ha!
So to begin, let’s discuss my previous window. They were old, single pane windows like I’ve never seen before. I can almost guarantee that your windows will be easier to trim than mine were because these are so weird. Most windows will sit back from the drywall some and provide a little place for a sill. Mine did not…in fact, mine had this jamb that was acting as the trim. That’s it.

Normally you would have this piece around the outside of your window, but it would be flush with the drywall…mine wasn’t. By the way, first pic is old window, second pic is new–the old widow sat back a little, but the new one comes all the way to the front of the jamb, so I couldn’t cut this off to be flush with the drywall. So we had to make this work.

By the way, I know this is like rule number one of how not to hang curtains. I just haven’t figured out yet what I want to do here. See second paragraph.

I wanted my trim to match what I did with the kitchen windows when we remodeled. You can check those out here.
If you have a normal window (where your window sets back from the drywall some), you’ll need a 1×6 or a 1×4 (depending on how deep you want your sill) the length of the window opening PLUS about 10″ or 11″. If your windows are like mine and come flush, use a 1×4 or smaller.
You’ll also need:

(2) 1x4x length of window opening+7″

(2) 1x4x height of window opening

Crown moulding and half round moulding x the length of window opening plus a foot or so for angled cuts and any screw ups while cutting (it happens)

Wood putty and sandpaper

Primer and paint

Miter saw

Jig saw (optional)
I recommend measuring and cutting as you go as not all windows will be perfectly square so the measurements above are only guidelines so you know how much wood to get.
First, remove your old trim with a pry bar and a hammer. (I didn’t have to do this since my window didn’t have any to begin with.) if you have a piece of wood where the sill should be, remove it also. Itll look something like this: (this was my kitchen, not the one I’m doing now)

Next, install the sill. I apologize, I don’t have good pictures here because I didn’t do it this way for this window, but I did for my kitchen.  Measure the window opening and add 7″ for the side trim pieces, plus another 1 ½″ to 2″ for EACH side for an overhang.
If your window sets back a little, you will need to trim notches off the ends so it will sit back flush to the window. Center your board to your widow and make a mark where the opening is and measure the depth from the front of the drywall to the window. Using a jigsaw, cut the notch so it will slide into the window opening and the end pieces will sit flush against the drywall.

  
These don’t show it well, but I had to notch out every place between widows so it would sit flush to the window and then leave some overhang on each end.  Once you have your window sill in place, use a nail gun to nail the sill on. (And don’t worry if you have some small gaps or if everything isn’t perfectly flush…some times houses aren’t square and you can get it perfect no matter how hard you try. You can caulk this later.)
If you have a widow like mine, you take the 1×4 sill and drill pocket holes along one end.  Then, screw it into the bottom window jamb. Be careful to go slow so you don’t crack the jamb.


I had a gap between my sill and the wall, so I needed to fill that later.
Once the sill is on, attach the sides. Measure from the sill to the top of the window opening on both sides. Since things aren’t always square, these may be slightly different. Cut 1x4s to these lengths. Attach these so that they are resting on the sill and they are flush with the opening of the window. Mine had to be even with the jamb since mine are weird. Yours should be over the jamb on the sides. Nail them on with a nail gun.


Next, add the apron. This is the piece that goes under the sill. It should be the length of the window opening plus 7″. Cut another 1×4 this length. Using a nail gun, attach it and make sure it is centered.

Then attach the top. Measure the distance between the outsides of the trim pieces at the top and cut a 1×4 that length. Make sure it fits, but don’t attach it yet.
Cut a corner off your crown moulding. To cut crown, place the piece upside down on the miter saw and make sure the flat parts are square against the bottom and back rests of the saw. Turn the saw to cut a 45 degree angle.


Do not cut it like the picture shows !!! Turn it 45 degrees in the other direction!! Sorry, I was cutting a different piece when I took the picture.
Remember when cutting crown that is going on the outside corners, the top should be longer than the bottom. Once your corner is cut, place it on the 1×4 for the top trim piece, lining up the corners. The inside of the corner of the crown should be flush with the corner of the 1×4. Mark the uncut end of the crown where the corner of the 1×4 hits it. Turn your miter saw to cut the opposite 45, and cut the crown where the INSIDE corner of the bottom of the crown is at the mark you made. The piece should measure the length of your top trim piece from inside corner to inside corner on the bottom of the crown.
Now attach the top trim piece to the wall with a nail gun and attach the crown to the top of the 1×4 making sure to line up the corners.

Cut the small pieces for the corners so the bottom from end to inside corner is ¾″. Put glue on the pieces and tape them in place.

I need my table saw to cut the half round moulding and it is currently out of order. If you are lucky enough to find any half round precut, you can add that across the bottom of the top piece to cover any gaps between the top piece and the sides. Mine will have to wait 🙁
If you have any gaps between your sill and the wall, you can slide a small spacer piece between the top and glue and tape it.

Once the glue is dry, remove the tape and putty all the nail holes. Once that is dry, sand it smooth. Apply two coats of primer, then caulk all the joints where one board butts against another. Once the caulk is dry, apply two coats of paint and you’re done!

Window selfie! See me in there?

Ignore my gap between the top and sides…my window jamb was off square and it’ll eventually be covered by half round so that it looks more like this:

I hope I didnt lose you anywhere. It gets a little hairy in the wording, but it’s really not too hard. And about the half round, you can order it online or check your local lumber yard. Lowes has stopped carrying it. You can cut a ¾″ dowel rod down the middle or use 1x board, a router and a table saw to make your own. Or you could just caulk it and leave it.


Now I’m on to figuring out how to do my curtains, deciding how/if I want to put a window seat in, then deciding whether I want to put built ins or a fireplace next to the window seat
If you give me a project, then I’ll have another one, then another….
Stay tuned 🙂


DIY Laundry Hamper-Because Dirty Laundry Belongs in the Basket, Not on the Internet

August 14, 2015 by Shara, Woodshop Diaries

Okay, so I couldn’t resist with the title. I used to be on the high school newspaper staff and one of my favorite things about it was coming up with “creative,” off-the-wall titles for things so you could get the readers’ attention quickly. I know….I’m a nerd. I’m also have a math degree and sometimes solve problems using calculus when I could easily use algebra to get close enough. When I was in college, my engineering teacher would pick on me and make jokes about the “differences between an engineer and a mathematician.” Basically the bottom line was that engineers live in the real world and eventually they say “close enough” but mathematicians live in a fantasy world and always say “but that’s not exact.”  Whatever…I’m the best of both worlds I guess….
Okay, so enough about me…I’d much rather be building something than reminiscing about college. That being said, my latest creation was a wooden laundry hamper. A friend of mine requested this and sent me a picture as an example.
She wanted it to be between 15-18″ deep x 25-28″ wide x 32″ tall (without the lid). So I did the math really quick on what size boards to use that would be the cheapest option. The picture looked like 1x6s, and that turned out to be the cheapest option that got the closest to the right dimensions. I could have used any size, but my table saw is out of order right now, so I couldn’t rip any boards down.
I ordered the lumber and got two hinges for the lid. Simple enough. I used about 3 ½ sixteen foot boards of 1×6.

I looked online to try to find a plan. I came across the picture on Ana White’s website with project information but, of course, no plans. So I just did it the best way I knew how…it’s a fairly simple build.

I cut the boards for the sides first. I needed four 32″ long boards for the back. (I decided on four because that made it 25″ wide. One more board would have been too wide.)  I also needed three 32″ long boards for each side (making it 17 ¼″ deep). Finally I needed two 32″ long boards and two 29″ long boards for the front. In the picture, I have extra…I screwed up and cut too many. I reused them later.

Then I assembled the sides with pocket holes and screws. I screwed each side together as one big piece, then attached all the sides together to make a “box” without a bottom.


Notice the boards are butted together so that the front and back of the side panels are attached to the sides of the front and back panels. This was because I didn’t want to add extra depth to the piece because it couldn’t be bigger than 18″ deep.
Once the sides were attached, I measured and cut the pieces for the bottom. It was four pieces about 15″ long. I drilled pocket holes and attached them from the bottom.

Then I put the base trim on the bottom using a nail gun. I used some scrap 1×2 that I had. I didn’t put it on the back because I assume this will be against a wall and if I put it on the back it would just be a dust collecter haha.

Then I measured for the lid. I cut three 1×6 boards the length of the total width of the top (about 23 ½″). I had some scrap 1x?? (It was thin) so I cut it to length and attached it to the boards around the front and sides using my nail gun again. Then I screwed the hinges to the lid and the back of the box.


My friend also requested a divider in the box. So I cut five boards the length of the total depth of the opening from front to back (about 15″) and used pocket holes and screws to attach them.


And it was complete! I sanded down the insides around all the pocket holes because I didn’t want clothes to snag on them since this will be used for laundry.


She wanted to finish it, so right now it is just natural, but I kind of like it that way 🙂

Once I was done, I cleaned I the shop and vacuumed the saw dust. I smelled somethin funny coming from the shop vac, so I opened it and WOW. This is what a full sho vac looks like haha!!


So I took care of that 🙂 Don’t tell Danny where I dumped it. Just kidding he already knows. I’m not very sneaky.
I hope you enjoyed a quick building project “how-to.” I have a lot of to dos on my list, so I will have many more to come I hope!
In the mean time, remember to keep your dirty laundry in the hamper and not on the Internet 🙂 Have a great weekend! Happy DIYing!

Business in the Front, Party in the Back–Our Back Deck Makeover

August 12, 2015 by Shara, Woodshop Diaries

So, it happened again. I went three weeks without a post. Ugh. I’m a terrible blogger! What have I been doing all this time? A little bit of everything.

It’s been HOT lately. Like, I mean, I sweat just looking out the window while sitting in the AC at work. I don’t have AC (or even a fan) in my little workshop, so it’s pretty well miserable out there working in sawdust and paint and who knows what else. That being said, I’ve been slacking.

I did manage to touch up some paint spots in the kitchen and hallway one day, though (in the AC:) ). That’s exciting. I’ve also made some planters for my front porch, a table for my sister to go with the Adirondack chairs I made her a while ago, a house for our kitties, and we cleaned up a tree that fell in our yard and dug up some bushes that needed to go. Oh yeah and I made my parents a set of corn hole boards, a couple “mail organizers”–one for me and one for a friend… ANNNNND I burnt up my table saw. So I guess I haven’t been TOTALLY slacking….I just haven’t felt anything I’ve done was blog worthy. Looking back, umm, I guess a lot of that was, I just didn’t take good pics to post. Oops.

So let’s move on to my latest project that I have finally completed–our back deck. I have been working on it since Memorial Day! It’s now mid August. Wow.

We have a pool in the back of the house and it looks like a great place for a party (hence the title of this post). Bad news is I hate cleaning (both before and after) a party so we don’t have any haha. Hey, every day when I come home from work is a party to me.

This is what our deck looked like before:


Nice space, nice porch, nice yard, nice pool.  I can’t complain. My only issue is that the deck is a little weathered and a little….umm green? Ew.

My first thought was “how do you clean this?” Then, “let’s stain it a pretty brown.” Then, “what about the rails?”  See how things quickly escalate?

Long story short, we decided to stain the deck and rail ledge (not sure that’s the right term) and paint the railing white. I did not know it would be this much work when I started. I would probably not have done this if I had known that then haha.

I spent a couple weekends cleaning the deck. Let me tell you, unless you use name brand bleach in a 1:1 mixture with water, then don’t even bother. Trial and error taught me that. Take my word for it. Deck cleaner worked well, (I tried it) but bleach is much cheaper 🙂 I put it in a garden sprayer and went to town on the deck.  IT WAS AWESOME!!!!

I wish I had taken a video of it to show you, but I was seriously so engrossed in spraying that I couldn’t stop.  It was like magic. Everywhere the deck was grey or green or dark black (mold) just disappeared when you sprayed it! Like within seconds, I’m serious.  If you notice in the before pictures, one part of the deck rails are one color and the other rails another color.  By the time I got done, it all looked like brand new wood–well color-wise.  The condition was still weathered, and cracked a little–that’s just part of it.

After the bleach, I rinsed it good with water from the hose.  Then, I waited a few days for it to dry before I stained it with Olymipc Brand Canyon Brown Toner Deck Stain:

Olympic Maximum Canyon Brown Semi-Transparent Exterior Stain (Actual Net Contents: 128-fl oz)

http://www.lowes.com/pd_15211-86-57505A/01_0__?productId=3014087

I wanted something BROWN.  I am not a fan of orange-y stains.  I also didn’t want a solid color–I wanted STAIN–I wanted transparent so you could see the wood grain….as ugly and weathered as it may be haha.  I used a large brush and brushed every square inch of the deck and top ledge of the rails.  Once the deck was stained, I moved on to the railings.

I expected painting the deck rails to take a couple days max.  Boy was I wrong.  It took me SEVERAL days to get one coat of primer on them.  Then ANOTHER several WEEKS to actually get the paint done.  Now, granted, I wasn’t doing this 24/7.  But I would spend a few hours here a  few hours there–when it wasn’t blaring hot outside.  UGH don’t ever paint deck rails with a brush!!

All the work has paid off and it is finally finished.  It’s not a major change, but I think it looks a lot better–and it better protected from the elements 🙂

IMG_3405[1]

IMG_3403[1]


Haha I got a picture of Danny swimming when he wasn’t watching 🙂

IMG_3404[1]

I interrupt this post to introduce you to Black Kitty (yes that’s his real name–we don’t really like cats so we didn’t spent much time on the name thing…he’s supposed to be killing mice…but instead he just follows us around….)IMG_3406[1]

IMG_3407[1]

IMG_3408[1]We always use Sherwin Williams.  Obviously we used exterior latex paint for this since it is outside (and because latex cleans up A LOT easier than oil based paint).  I used Extra White paint for a bright white–no yellow tints 🙂

IMG_3409[1]

IMG_3410[1]

IMG_3411[1]

IMG_3412[1]

IMG_3413[1]

IMG_3414[1]

This is just the beginning of the projects to be done out here.  I LOVE the white rails and warm stained wood, but this space needs some help still.  I hate this red/orange-y stain on the concrete, but that project will have to wait until another year.

And I can’t decide to keep this table or not.  It’s cute, but it doesn’t seem to fit very well.  It’s just an awkward layout.  And the big plastic storage thing will eventually be traded for a big wood box or something prettier…I just haven’t gotten around to making it yet. And the fence by the pool will be redone somehow differently for next year. For now, we will have to settle for painted deck rails and fresh stain 🙂 But keep your eyes out for MANY more updates to our outdoor space over the next few months (or more likely) years.

Dress Up the Mess–Sliding Doors to Laundry Room

July 20, 2015 by Shara, Woodshop Diaries

Wouldn’t it be a dream come true to walk in your front door and the first thing you see is this?

IMG_3224.JPG

Who doesn’t love poor lighting, and hollow core doors that don’t match the trim paint? Oh and did I mention that’s the laundry room? I’ve been on a “let’s-take-all-the-doors-off-because-they’re-ugly” kind of mood for a while, but considering our laundry room is atrocious….umm, I’d rather you just see a ugly discolored hollow core door. That’s saying a lot.  UPDATE:  The laundry room is no longer atrocious!!  You can check out the major changes here.

.

(Speaking of taking off doors, check out how pretty things can become when you remove unnecessary doors in my foyer closet redo post.)

.

Believe it or not, it actually looked worse at one time…

IMG_1865.JPG

I know, right? Let’s just not talk about that…

.

So back to the door. This terrible, ugly, annoying door NEVER stays where you put it. It always closes. And it also takes up a ton of space in this room because it opens INTO it.

.

I said all that to say: this door had to go. I needed that space in my laundry room more than it did. But I also needed the mess in the laundry room behind it covered up.

.

Perfect solution: sliding french doors!

.

I could totally DIY that. So I did. There are TONS of tutorials out there on this, so I’ll just give you a quick run down of what we did. I built the doors myself for around $60 ($20 lumber, $40 glass panes) and the hardware probably cost around $40.

.

This post contains affiliate links.  If you purchase from these links, I may receive a small commission at no extra cost to you.  Thank you for supporting this site so I can continue to provide free content.  See disclosure policy for more details.

.

Materials needed:

1×4 boards (amount depends on size of door)

1×6 boards (amount depends on size of door)

Glass panel(s)

Frosted glass spray paint

Wood glue

1 ¼″ pocket hole screws

⅛″x2″ steel bar for door(s) to hang on (length depends on size of door)

pulleys (two per door)

⅛″x1 ½″x9″ steel bar (two per door) to attach pulleys

1″ screws

washers

Lag Bolts

Black Spray Paint

Tools needed:

Kreg Jig

Router

Drill and assorted bits up to ½″

.

I made the doors from 1x4s and 1x6s. I used my Kreg Jig  and 1 ¼″ screws to drill pocket holes in the 1×6 boards to attach to the 1×4 sides.

IMG_3022.JPG

I bought two long narrow glass panes from a local glass shop and spray painted them with “frost” spray paint.

.

I routed out the back of the door frame (just like this post) so they would fit snug. I never take all the pictures I plan to….sorry no picture of that.

.

Once the glass panels were fit into the routed part of the door, I cut 1x4s (the same length as the sides for the front) for the back of the door. (The doors are basically 1xs glued together.) I stained the boards first, then glued them onto the back of the first frame so that the glass was “sandwiched” between the boards. See the picture here?

IMG_3108.JPG

I cut a 1×6 and stained it and glued it to the top of the back side, but for the middle and bottom sections, I did 1x4s. Then, I glued 1x4s vertically on the bottom. You can see this in the picture above. Once everything was glued and dry, I brought them inside and waited three weeks before hanging them…no seriously.

IMG_3119.JPG

I waited a while because I wasn’t sure what to do about our doorbell. It was right in the way, stuck out 2 ½″ from the wall, and Danny wasn’t going to move it without a fight. Soooooo, I waited because I didn’t know what I was doing (I do this a lot.)

.

Finally I got tired of looking at it, and just did it haha (I do this a lot, too.) I measured out how long I needed my rail to be.  I went with 7′. And I measured how far my door needed to be from the wall so it wouldn’t hit the doorbell.

.

I cut a 1×4 the length of what I wanted the rail to be and got ⅛″ x 2″ flat steel bar that length (I actually got two pieces of 3 ½′ scrap from work…it all works out the same). I got 4 garage door pulleys (2 each door), a flat ⅛″ x 1 ½″ x 36″ steel bar, eight 1″screws, lock washers for those screws, four ⅜″ x 6″ lag screws, ⅜″ washers (I got 8, you may want more), and four galvanized 2 ½″ nipples for spacers. Hang with me….I know it’s getting hairy.

.

I found my wall studs and figured out where these would hit on my steel bars and drilled holes for the ⅜″ lag bolts to go through. These are what will mount the bar to the wall.

IMG_3223.JPG

Once the holes are drilled, I spray painted the bolts and bar black.

IMG_3227.JPG

While those were drying, I predrilled holes in the 7′ 1×4 I cut earlier where the studs would be and I predrilled holes in the studs themselves. We were using LONG lag bolts so our door will hang out far enough to miss the door bell, so we wanted the bolts to go into the studs pretty far. Predrilling helps prevent the studs from cracking from such a large bolt.

.

Then I put the bar together like this: first put the 1×4 down on a work surface, then a ⅜″ washer, spacer (which looks like this)

IMG_3228.JPG

Another washer, flat bar, washer, lock washer, ⅜″ lag bolt. I had the lag bolts in four places across the board (where studs were) and I tightened them down into the 1×4 with a ratchet so everything would stay in place while I transported it. Then I took it inside, lined it up, and screwed them into the wall.

IMG_3230.JPG

IMG_3231.JPG

IMG_3234.JPG

You can see I added several washers before the flat bar to make sure it was out far enough to miss the doorbell. I actually would have been fine without those, but hindsight is 20/20. Maybe some day I will take them out and fix it, but not today because it’s like a bazillion degrees out and if I sweat any more I’ll become a raisin. TMI I’m sure. Moving on.

.

Then, I cut my 3′ flat bar into four 9″ pieces and drilled holes in them to attach to the door and the pulley. (Helpful hint: wear safety glasses when cutting metal. I got a piece in my eye and it wasn’t fun.) I drilled the pulley holes first then measured how far up to drill the holes for the door. Make sure you attach the bar to the door so that it’s off the floor when you hang it. I spray painted those bars, the pulleys, and the bolts, attached them and hung the doors.

IMG_3236.JPG

IMG_3237.JPG

IMG_3238.JPG

IMG_3235.JPG

IMG_3239.JPG

And there they are…sliding doors!! Don’t you love them?! I still have to add stops on each side so the doors don’t slide off the end or run into things.  
Whew that was a long post. I apologize for the lack of pictures. This was honestly a trial and error process most of the time and I didn’t think to take pictures of everything I should have in the mess of it all.

.

Another Helpful hint: make sure you measure twice and drill once 🙂 or you may end up with crooked doors that meet at the middle in the bottom but not at the top.

.

I’d never make such an amateur mistake.

.

I totally made that mistake.

.

I will fix it and no one will know…so let’s just forget that ever happened….okay? Okay.

.

Your turn!! Happy DIYing! You will be seeing these doors again when I show you our laundry room remodel coming soon!! Keep your eyes peeled!

.

UPDATE:  I heard a lot of feedback (some good and some bad) about the green hallway.  As much as I like a little color in my house (it is SOOOO HARD to be 100% neutral), I decided the hallway stuck out like a sore thumb and needed to be painted.  To match the kitchen and living room, we went with grey on top and white on bottom.  It took a while to decide if I liked it, but I think I made the best decision 🙂 and if not, paint color is always easy to change 😉

IMG_5907

Don’t forget to pin for later!

How to build sliding French doors with glass panels AND your own hardware for about $100

Turn an old hollow core door into French sliding doors AND DIY hardware for about $100

NOTE:  As with any tutorial and how to on the site, I am happy to provide you with the instructions for free in the post.  I enjoy inspiring others to make their own furniture and crafts.  However, since I receive no compensation for these “plans,” I ask that you respect the time that was put into writing these instructions and please ask permission before using them to make and sell for profit.

Heart Transplant Part 5–Remodeling our Kitchen, the Heart of the Home FINAL REVEAL

July 13, 2015 by Shara, Woodshop Diaries

Christmas Home Tour 2016--Woodshop Diaries

I’ve never done a remodel before.  Like ever.  When we took on a kitchen remodel, I had no idea what to expect.  I mean, did you guys know that you can’t gut a kitchen and rebuild it in like two weeks when you only work on it at night after work during the biggest snow fall you’ve ever seen in your area in ten years?  Well neither did I.  I mean, WHAT’S THE BIG DEAL?!  Why does this stuff take so long?

.

It’s been quite the learning experience.  And quite the adventure.  Do you want to know all the dirty details?  Well, here’s a couple just for kicks and giggles…we found at least three whole mouse skeletons behind the paneling, vacuumed up my weight in mouse droppings after we took down the ceiling tiles, and found out that the wiring to our oven probably could have burned the house down any second.  And that’s just the tip of the iceberg of all the fun stories and details I could tell you about the remodel.  But that does also explain why we now have six cats….

.

BUT, we all know you don’t care about that.  You’re all like SHOW ME THE PICTURES!!!  So let’s get to it 🙂

.

Long story short, when we bought our home about 8 months ago, our kitchen looked like this.  Yellow (nacho cheese to be exact) walls, Spanish style backsplash, 7 foot (SEVEN!!) ceilings, dark and dated cabinets.  THAT COLUMN.  But seriously…..let’s go back to the NACHO CHEESE WALLS AND SPANISH TILE…whaaaaaaa??  Oh and Dad kept hitting his head on the light fixtures when he came over…because you know….7 FOOT CEILINGS.

IMG_2164

IMG_1899

IMG_2162

Not to mention the layout was SO WEIRD.  The room was so big, but the layout made it feel so small and cramped.  And those metal stairs to the never used attic took up half the kitchen!

.

So we began in March with the demolition and ended the majority of the remodel in April. It was so nice to rip out all these things I didn’t like.  Putting things back was another story.

.

We bought new cabinets, and replaced our old appliances.  That was the largest part of our budget.  We laid our own flooring, and I did all the trim work.  Danny, my dad, and his friend did the wiring for the new lights and moved the plumbing for the sink.  Dad’s friend taught us how to do drywall and that was a nightmare (SO. MUCH. DUST.).  I kind of understand why people use paneling now haha….I said KIND OF.

.

Anyway, here are the “initial” final reveal pictures.  Further below you will find more recent pictures–from two years later 🙂

IMG_3157[1]

IMG_3163[1]

IMG_3164[1]

IMG_3165[1]


Here are some more recent pictures of the kitchen (about two years after the remodel) all decorated at Christmas 🙂

Christmas Home Tour 2016--Woodshop Diaries

Christmas Home Tour 2016--Woodshop Diaries

Christmas Home Tour 2016--Woodshop Diaries

Christmas Home Tour 2016--Woodshop Diaries

Christmas Home Tour 2016--Woodshop Diaries

Christmas Home Tour 2016--Woodshop Diaries

Christmas Home Tour 2016--Woodshop Diaries


I am honestly surprised that it turned out as well as it did considering the only thing we’ve ever remodeled before was a hall closet and a master bedroom closet.  We had no experience with installing trim, or cabinets, finishing drywall, or putting down flooring, putting up backsplash, or designing kitchens.  But despite our lack of know how, it got finished, and it looks and functions so much better.  And it’s held up great, two years later 🙂  AND now I am addicted and want to remodel everything!! (You can check out what else we remodeled after this at these links: Laundry room, office, bathroom, bedroom.)

.

So what’s my favorite part?  Don’t laugh, but it’s the windows.  They were already here before the remodel, but with the trim on them now, it’s like totally different windows!  Plus it was my FIRST EVER trim work.  And Danny was impressed.  And it takes a lot to impress Danny.  What’s your favorite part?

.

If you’ve missed any of the remodel, you can read the whole story in these links here:

.

Part 1: Getting Ready

Part 2: The Demo

Part 3: Putting it back together

Part 4: Almost done

Dark and Yellow to Bright and Airy Kitchen Remodel Reveal--Kitchen Remodel Part 5 Final Reveal--Woodshop Diaries

Keep your eyes peeled…we are staying super busy and have lots to show you soon!


Re-Fabbed shares her Re-Fabbed Dining Room

July 6, 2015 by Shara, Woodshop Diaries

I’m so excited to share Brooke’s refabbed dining room with you all! Brooke is a friend and fellow blogger with so much talent. She has completely flipped her house and can decorate like a pro. She also has a knack for finding the neatest stuff at the strangest places and re-fabbing them into something amazing!! You’ve got to check her out!!

Without any more blabbering from me, let me introduce Brooke:

Brooke is a Child of God, wife and mother of 2 of the most adorable and crazy kids! She loves all things thrifty, and there is nothing she loves more than to go “junkin’” and find her next prize! If she is not working her full time job at the electric co-op, you will find herdecorating, re-fabbing furniture or doing some sort of project around the house!

And let me also introduce her blog, Re-Fabbed:
Re-Fabbed is a site designed with the everyday wife, mother, college student, thrifty, money minded woman (or man) in mind! It is full of renovated rooms, decorating on a budget, DIY projects, re-fabbed furniture and more!

Don’t forget to check out her Facebook page, too!

Now check out her re-Fabbed dining room (While you’re on her blog, take time to check out the other rooms she’s flipped in her home!):

When we bought our most recent home 2 years ago, it was, well…AWFUL. I don’t really know of any other word. Every inch of it needed completely renovated! It was a foreclosure and had been sitting empty for a couple of years. It needed major “re-fabbing”! In the next few weeks, I want to showcase a few of the different rooms of our home in their before state…and after! The transformation is amazing. I hope it shows you that ANYTHING can be beautiful with just a little work 🙂

Here was our dining room. Do not ask me what they were thinking with the orange/brown trim! Yuck!! Look how they spilled the hideous paint on the carpet and just left it! There is nothing about this room that even looks presentable in this state!

10308364_10100535595878879_2038077621711613975_n

This is what it looks like now, with some slight changes DAILY (mostly with the built in). I literally change up the shelves all the time. I have issues.

WHAT A DIFFERENCE!!!!! It still amazes me what paint and new flooring can do. That is literally all it took! (And a new pretty light fixture!)

We painted the main walls with a medium/light gray, and the wall behind the built in with a darker slate to give it an even more of a WOW factor. I love it.

Renovated dining room with white painted built in shelves

I love to decorate shelves. Actually, I love to constantly change shelves, as I mentioned a moment ago. I think what I enjoy most is just finding random things that I love and putting them together in a space to make them “work”. This aqua elephant is just too darn cute, and the pewter apple…well, I just liked it! Both came from TJ Maxx for $7.99 each.

elephant and apple shelving decoration

I make these modge podge letters all the time, but I actually didn’t make these. I found these for $2.00 at a consignment sale, and I thought they were super cute, so I snatched them up. (I couldn’t even buy the materials for $2.00!)

modge podge eat letters on decorative shelving

Just another cute addition to the built-ins was this over-sized coffee cup and platter. I found this at Cracker Barrel, and I loved the bright color and fun attitude it had!

over sized yellow coffee cup with white polka dots

One thing I love in this space is the simple basket on the table (maybe basket isn’t the right word, but what would you call it?). It looks rustic, which is not really the look of this space, but I think it goes perfectly. One thing I love most about decorating is to me, there is no right or wrong. It is what YOU love…all pulled together!

And what about that fun tree on the wall?? I think I may keep it forever. I just love all of those colors!

Renovated dining room

I can honestly say that I am very happy with the way this dining room turned out. It is a fun, cheerful space that we can make lots of memories in!

Foyer Closet Makeover

June 30, 2015 by Shara, Woodshop Diaries

You don’t have to google for long before you find a bazillion foyer closet makeovers. Everyone’s blog has one or two or ten. Pinterest is LOADED with them. So I’m not telling you anything new with mine.

BUT mine was simple and easily done in a couple hours on a Saturday morning. So if you’re looking for some inspiration for a very quick and very cheap closet makeover, feel free to read on.

When I decided to redo our foyer closet, I was looking for an attractive way to store our JUNK in there and a good place to drop our nasty shoes.

We moved in in November and we had bulky coats and gloves and hats just thrown in the closet. One day it occurred to me that these need to be organized and that closet door was ugly. Funny how long it takes you to realize something can be improved ha!

IMG_2377.JPG

IMG_2376.JPG

The foyer closet at our old house was where we kept all cleaning supplies, vacuums and tons of wrapping paper and gift bags (we are not the only ones who reuse those are we?????). So when we moved in, I automatically threw those things back in the front closet just by habit. (I forgot to take a before picture, so I already had the closet pretty well cleaned out by the time I remembered to take the ones I have above…again with the forgetting to take a before pic!!!)

With so much junk in the closet, it was getting to be annoying, so I moved the vacuum and cleaning stuff to the laundry room…why didn’t I think of that before???!!! And I moved the gift bags and paper to an unused closet in the back bedroom–we have like four unused closets in the house…hello!!!!use them!!!

So then all we had were coats, gloves, and hats 🙂 I can deal with that.

IMG_2378.JPG

I threw the remaining stuff in the closet on the floor and proceeded to paint the walls and trim. You can’t tell from the pics, but the white trim in the hallway is more of a pinkish tinted white. Half of the house trim is white and half was this pinkish white. Ew. So I painted the trim white white…which looks much cleaner (and recently redid all the hallway trim so now it matches…hooray!!!)

Once the paint dried, I screwed 2x4s in the studs to support the bench and then pocket screwed a couple 1x6s together with a piece of 1×3 on the front, stained it, then set it on the 2x4s to make the bench. I used a couple 4x4s in the middle as supports because the 1xs don’t hold too much weight…I just used what I had on hand 🙂

IMG_2381.JPG

The original closet had a shelf board, so I painted it and added wood supports on the wall (instead of using the old ugly metal supports) from some scrap 1x6s. Then I added some hooks for coats and some galvanized brackets (for looks). Then I was done. Quick and easy, but I think it looks nice.

IMG_2386.JPG

IMG_2432.JPG

IMG_2617.JPG

I added a cheap boot tray with some white rock for our boots and muddy shoes and a little bicycle decor 🙂 and a couple baskets to house our gloves and hats. Functional and cute…my kinda closet!

We could have done the whole tear out a wall and make a massive closet/mudroom (I see it on Pinterest and think “I need to do that”, then I realize it isn’t necessary ha) , but we don’t plan in spending a whole lot of time in the foyer….who does??….so I spent a Saturday morning and a few bucks to make our little foyer closet pretty and efficient. That’s all it needed 🙂

Does your foyer or coat closet need a facelift or some organization? Don’t put it off….it can be a simple fix and much worth the effort!!

IMG_2984.JPG

Almost doesn't count–only in horseshoes and hand grenades…and my projects

June 29, 2015 by Shara, Woodshop Diaries

It’s been over a month since my last blog post. I keep doing this….waiting month(s) between posting something new on here. I have been SWAMPED with projects since my last post, but the problem is that nothing I’ve worked on is really finished and who wants to read about my half finished projects? Umm no one. So I don’t bother you with it.

Until now. Now I’m going to let you in on the last month’s worth of stuff I’ve done, am doing, have been thinking about doing. I don’t feel like I have enough stuff completed to write a post dedicated to one project, so let’s just talk about everything. Sound good? Probably not, but I’ve already written it so you might as well read it, right?

Since my table was completed, I reupholstered my favorite yard sale find:

IMG_2807.JPG

To this:

IMG_2892.JPG

By the way, the pillow cover was made from drop cloth and painted with acrylic paint…neat, right?

I rearranged my living room:

IMG_2922.JPG

IMG_2833.JPG

Let’s see, oh yes, the deck. As Memorial Day came and went I realized outside of our house is awesome…the sun is there, the wind is there, the pool is there, and we have a decent view off our back porch. But, our deck was filthy…green and dirty, old and weathered. Just generally neglected. See? Yuck….

IMG_2852.JPG

IMG_2849.JPG

IMG_2853.JPG

Long story short, I spent DAYS and weekends scrubbing and bleaching the deck. It was awful. I don’t even have an after picture, but I assure you, it’s now so clean you can eat off of it. Then I spent a weekend staining it…again no after picture, BUT you can see it here:

IMG_3027.JPG

I am still working on the deck rails. Once I’m finished, I’ll do a final reveal on that. PSA: Don’t EVER paint deck rails with a paint brush. It takes at least 17,564 hours PER COAT. Seriously. I never exaggerate.

Referring again to the picture above, that’s another thing….our deck had no furniture, so I worked on making some adirondack chairs, lounge chairs, and a picnic table with benches. I haven’t finished laying out my deck and porch yet, but here’s at least a picture of them on the porch:

IMG_3040.JPG

One reason I kept putting off posting these on my blog was because I haven’t decided how to arrange them on my deck. I was going to make a little “coffee table” to put between the chairs and then I thought about making a loveseat and then I wanted to decorate some. Then I rearranged it all…It never ends….if I wait until I “finish,” I’d never ever post anything. Almost finished projects must be good enough for now 🙂

Speaking of almost finished, I still haven’t finished our kitchen. We have yet to put on backsplash and my table chairs are still not finished being painted. I still have to put outlet covers on and covers on the ceiling where we cut holes for lights then decided no to put any lights there. Oh and we need moulding on the floor in two spots where it goes to the living room. These little things never seem to get done. But I can’t say the kitchen is finished until they are!

Good news is that we started on the backsplash AND I finally finished making my chair cushions:

IMG_3055.JPG

IMG_3086.JPG

I redid the hallway trim and painted…but once again, I haven’t finished my final touchups on the paint so I didn’t want to “reveal” it yet, but here goes:

IMG_2984.JPG

IMG_2377.JPG

Nice pose right? I know I’m such a goob, but whatev…It makes a good blog pic :). Notice the closet there? I still need to write a post about it…note to self. Don’t you think it’s adorable? Maybe not, but it’s much better than looking at a door 🙂

I’ve also been redoing my workshop. I want to write a big post about it, so I’m saving that for later…keep your eyes open because I’m excited about that one!!

So, see? I stay busy constantly, but it’s not always post-worthy. Or maybe it is, i just don’t have enough details or pictures to make a whole post. Or I don’t think you’re interested in whatever I’m doing. Either way, I vow to try my best to not keep waiting until I finish a project completely before posting about it. You just have to promise not to judge me if every little thing isn’t in it’s place or has it’s final coat of paint 🙂

Farmhouse Kitchen Table–for a family of two

May 24, 2015 by Shara, Woodshop Diaries

So when we got our kitchen put back together after our recent remodel, I wanted a big, long kitchen table to put in the middle of it. One of those tables that seats like ten people…with chairs and a bench and a rustic “farmhouse” thing going on. This raised some curiosity when I explained what I had in my mind to others because we are a whopping family of two with no plans for children.

BUT I want what I want and I made it anyway…

How to Build Your Own Dining Table with Plenty of Seating

I loved it! It fills up just enough space in my kitchen to not be crowded, but not be empty–which was the goal here. Plus, I can slide the bench under the table and out of the way. Awesome!!!!!  And when we have family over, everyone can sit at the same table 🙂

It cost me maybe $150 total for the lumber and hardware. Seriously, an 8ft table with seating for 8 for $150. Talk about a steal!

I have a pallet full of old 4x4s I got from work several months ago and I cleaned a couple off, whitewashed them and used them for legs. (Much cheaper than turned wood legs at Lowes.)  I cut the legs about 29″ long so that my table would be a total of 30 ½″ tall (about standard height). I built the frame one Saturday morning and waited patiently until the next weekend to buy the tabletop wood.

For the frame, I pocket hole screwed 1x4s into the 4×4 legs on all four sides.  Then I pocket hole screwed 2x4s between the 1x4s in the middle for extra support and for having a place to screw the top into when I added it.  (NOTE:  This was one of my first build and I apologize for the lack of details as I was mainly figuring it out as I went haha.  I’m editing this now a year later with a few more specifics.)

IMG_2681.JPG

Since I’m too cheap to buy pipe clamps (which is like woodworking number one basic tool), I waited for dad to bring his over to borrow. (NOTE: It’s now a year later and I am proud to say I am the owner of FOUR pipe clamps…moving on up in life haha).  So about a week later, we FINALLY (everything feels like an eternity when you want to finish a project and you can’t yet) got the table top glued and screwed together and I could stain it. I love staining. I love the smell, the process, the colors. I dream about staining all the time…no joke…is that weird?

For the table top, I used (4) 2x10s and squared them off on the table saw.  Once they were square, I glued the edges and clamped it up overnight.  I belt sanded the table really good before staining.

I saw a table online (I can’t find the link anymore 🙁 sad day!) that had used turnbuckles purely for decorative hardware on the underside of the table. I thought it was the coolest thing! But, as cool as that might be, NO ONE carried massive turnbuckles. I went to five different hardware stores and looked all over the internet. I finally found some (for a pretty hefty price) at Falders and was so relieved, I paid $50 without thinking. Looking back, I probably wouldn’t have spent that much seeing as you don’t really see much of it under the table…but whatever it’s there whether you notice it or not. See???

IMG_2738.JPG

DIY Farmhouse Dining Table for Cheap

They do add a little something extra I suppose…

To attach these, I had to add another 1×4 between the bottom legs on the short side.  I didn’t want to see the pocket holes, so I glued and clamped that piece there instead of screwing it.  I just nailed a little piece onto the sides to make it look like it was notched out all the way through the leg.  FOOLED YA!  I used a little U hook to go through the eye on the turnbuckle and screwed it into the 1×4.  I screwed an eye screw into the 2x4s I showed you in the frame under the table top and attached the hook of the turnbuckle in there.

I found these chairs at my favorite local junk store for $8 each!! Deal! I clearly haven’t finished painting them here yet. Actually I STILL haven’t finished them and they’ve been in my kitchen for over a month 🙂 that’s how I roll. Priorities, right?

IMG_2747.JPG

After thinking about it for weeks, I finally made this cute little bench.  I made the bench similar to how I made the table…it’s just got six legs.  I pocket hole screwed 1x4s between all the legs, glued the top, and attached the top using pocket holes in the 1x4s from the underside.

IMG_2826.JPG

I made Danny sit on it with me to make sure it would hold us both up haha. Good news…it did. Not even a little wiggly 🙂  (NOTE: it’s now a year later and we’ve sat at least 700 lbs on this bench in my kitchen on multiple occasions and everything still holds.  This is what we do at family dinners–see how much weight we can put on things I build…)

I’m so excited about my new table. I’ve never had anything that had more than four seats and now I’m glad I can have my family over and we can all fit at the same table. And to top it off, I like that I can say, “why yes, yes I did build that myself (with a little help from dad).” Nothing beats homemade 🙂

And now, a few more recent pictures:

Danny loves when I take pictures of him eating 🙂 hahaha

DIY Farmhouse Dining Table for less than $150

How To Build a Ten Person Dining Table for Less Than $150

Don’t forget to pin for later!!

DIY farmhouse dining table with matching bench and four chairs for less than $150!--Woodshop Diaries


Heart Transplant Part 4–Remodeling our Kitchen, the Heart of the Home

April 23, 2015 by Shara, Woodshop Diaries

Look at this!!!

IMG_2639.JPG

Bet you thought this was FINALLY the final reveal post. Fooled ya! Try to think of this as the first part of the final reveal….there will be a sequel.

The kitchen is finally functional and back together and looking good, but it’s still a long way from finished. I have decorations scattered everywhere and haven’t decided where to put them all yet. I’m playing with ideas in my head but haven’t done anything yet….I’m so indecisive it’s ridiculous.

Danny says the counter and the floor is cluttered and I just keep repeating “I’m not done yet! Everything’s going to be moved to its place, but I haven’t figured out where that is yet.” Ugh decorating and I have a love hate relationship. I love to decorate, but I hate that there is no “right” way to do it so every way I do it always seems wrong! The struggles of a type A, need structure, black and white kind of girl…..

Anyway, enough of my rambling. Let’s get to the kitchen!

IMG_2522.JPG

When we last left off, my house was full of wood floor, butcherblock counters, rough lumber, and a bunch of wood to be used for the trim. Above is some of that wood put to good use as new window casing. Now, here it is finished with moulding and shiny white paint!!

IMG_2532.JPG

I am so proud of this project because:
1. I did it myself
2. It was my first time ever cutting moulding and caulking
3. This is the only project I’ve ever done that made Danny say (and I quote) “wow, I’m impressed.” (Which means…..maybe I can convince him I let me do this to all our windows :))

Oh and do you notice the wood beam? Let me tell you that story…

In my last post I mentioned that I had gotten rough lumber to cover the beam. Well, after I had stained it and cut it and screwed it all together, Danny decided it’s too much weight to hang from the ceiling. (I agree it was pretty heavy.) He didn’t bother to mention that BEFORE I cut and screwed and stained it even though he had helped me move it around several times so he knew how heavy it was….oh Danny…..

Anyway, it all turned out for the best because I had ordered more 1x6s than I needed for the baseboards, so I took three and beat the crap out of them with a hammer, pry bar, and this scraper thing with rough metal bristles (I’m sure those have a name, but I don’t know it) and used them to cover the beam. After I beat them, I stained them. I thought they looked kind of like rough old wood but not nearly as heavy.

IMG_2529.JPG

Then I accidentally spilled like a whole can of stain all over my driveway. It was my new fav color and practically a brand new can!!! I may have gotten so mad I shed a tear and Danny told me not to cry over spilled stain…..true story. Don’t laugh.

After I gained my composure (and waited for dads help the next day) I nailed it together and we hung it and it was beautiful!

IMG_2530.JPG

The cabinets came in and we learned how to install them trial and error style 🙂 luckily we had mostly trial and not much error. I think we (mainly Danny) did pretty good for our first time installing cabinets (we had some help from dad and his friend, too).

IMG_2546.JPG

IMG_2536.JPG

IMG_2533.JPG

Once the cabinets were in, we installed the sink. That was STRESSFUL. You buy a brand new cabinet and a brand new sink and you have to cut the cabinet for it to fit and neither the sink nor the cabinet were cheap….

I didn’t take any pictures of that process because I was so nervous I couldn’t watch. No joke. Dad and Danny took care of it and it looks great (thank goodness).

IMG_2539.JPG

We had a local guy (who knew a lot more about how to install them than I did) come put in our countertops. I felt like a stalker because I just sat and watched the whole time. It was very educational haha.

IMG_2560.JPG

IMG_2563.JPG

IMG_2562.JPG

After we got the plumbing done, we laid the floor and put in the appliances and we celebrated by cooking bacon on the new stove and watching our dishwasher run so we could check for leaks. Entertaining stuff.

IMG_2573.JPG

IMG_2574.JPG

IMG_2570.JPG

During the dishwasher installation, dad and Danny took a short nap.

IMG_2572.JPG

We laid wood floor in the kitchen, foyer and hallway since they are all attached and flow together. It took us DAYSSSSS and was super frustrating. But it’s done and it looks nicer than the old stuff 🙂

IMG_2617.JPG

IMG_2586.JPG

Once the floor was laid, Danny hung my red chandelier….and when we flipped the switch nothing happened. Long story short, we had to cut a hole in the attic floor to reattach a wire….See how I squeezed a whole night of work into that one sentence? Lesson learned: keep your junction boxes accessible. Now we know…

I cut, painted, and attached the baseboards and attached the cabinet hardware and we are basically finished except for adding our new farmhouse table (currently in process in my garage) and finishing decorating.

Can we all just shout hallelujah?!!! It’s been almost two months since we started and we are ready to be DONE. (Let’s face facts, here. I will never be “done.” As long as I have a house I can fix, update, rearrange, it will never end.) At least we are ready to be done with a major renovation and just tackle little things for a while 🙂

IMG_2643.JPG

IMG_2639.JPG

IMG_2644.JPG

That’s it for now. Be sure to check out the final reveal of the kitchen here!

Cabinets are up, countertop is on, appliances are installed--The Kitchen is ALMOST DONE!

Heart Transplant Part 3–Remodeling our Kitchen, The Heart of the Home

March 23, 2015 by Shara, Woodshop Diaries

Putting Things Back Together After Gutting Our Kitchen

Ok, WHOA. We are still doing this thing. Like, it’s still happening. Still in process….still a long way from finished. I’m already at the end of my budget, end of my sanity, and the symbolic “end of my rope.”

I can’t say I regret starting this, but I’m really starting to question my judgement on thinking we could live in a remodel, get any sleep, keep anything clean, keep our sanity, afford what I’ve already bought, survive for weeks off whatever we can cook in a crockpot and microwave, and still function at our full time jobs during busy season (hey someone’s gotta pay for this remodel).

But, here we are….making progress. Isn’t it awesome?!

IMG_2509.JPG

IMG_2483.JPG

I know, still not much to see. But, the drywall is hung and finished and the ceiling is now finished and we have can lights!!!! I cannot tell you how happy I was to flip the switch and have enough light in the kitchen that I could actually see what I was doing! I used to cook in the dark….now I can see when I cook (which may not always be a good thing….I do not claim to be a good cook…).

So when we last left off, our kitchen was a mess and we had half the walls ripped down and some Sheetrock on and the column in the middle of the kitchen was still there and I still had a fully functioning kitchen. Since then, we moved the fridge in the foyer…

IMG_2464.JPG

Then, we removed the stove, and the rest of the cabinets.

IMG_2465.JPG

So now I’m left with a sink in the middle of the kitchen…and a dishwasher that has had the wire cut…what a tease. I put my dishes in, get it full, go to start it, and remember “oh, I can’t turn it on” and proceed to hand wash an entire dishwasher full of dishes. This is the life….

Meanwhile, Danny, being “Mr. Safety” and also our electrical expert on the project (he is an electrical engineer at his day job…or so he tells me haha) finds out the fridge is not on it’s own circuit (apparently that’s a problem…glad he knew that because I didn’t). He also finds out the stove was hardwired and had some loose connections and could have caught our house on fire!!! (I told him “see, there’s the reason we did this whole remodel!” He didn’t think it was funny…)

Here’s Danny doin’ what he does best…

IMG_2466-0.JPG

We crawled under the house to run wires for the new circuits we needed to the panel in the basement. I say “we”….let me explain. I’m claustrophobic and I could make it to the point where you had to crawl under a duct and it was a tight squeeze. Then I told Danny I’d stay there and be moral support and shine the flashlight, but I wasn’t going further unless it was life or death. I kept imagining if I crawled under that I’d have a panic attack and end up getting stuck. Someday I’ll face that fear….but not today 🙂

Let’s see, what happened next? Well, we got the drywalll up and patched he holes in the ceiling from the can lights. Can I just tell you how amazingly better this kitchen is with these lights?! I literally screamed from excitement when we turned them on for the first time. I have a problem…

IMG_2482-0.JPG

IMG_2483-0.JPG

You may notice the half-gone column in the picture above. Let’s discuss this column. I hated it. Hate isn’t enough to describe how much I loathe that column. It’s just in the way…right in the middle of the kitchen, ugly, in the way of every layout idea I had for the space. So, I wanted it gone.

All signs pointed to it being NON load bearing. (We looked at everything…) So, we started to cut it down. One side was cut fine…but when dad went to cut the other side, there was some pressure on the saw blade which would indicate some weight on it. Well we didn’t want our ceiling to cave in, so we got a steel I beam for support.

That was fun…

IMG_2475.JPG

IMG_2477.JPG

IMG_2476.JPG

We jacked it up, cut it out, and screwed in the beam. After doing all of that, we’ve since determined it was likely unnecessary for us to actually put any support right there (long story), but whatever. A few extra dollars and now I get to cover it with rough wood and make to look even cooler. No harm done…I guess.

IMG_2479.JPG

IMG_2478.JPG

Sneak peak to the rough lumber I got for the beam!

IMG_2519.JPG

Anyway, we sanded the walls and ceiling (worst part of the whole thing…dust everywhere!) and painted walls and textured ceiling. Please enjoy the pictures I took of that process:

IMG_2485.JPG

IMG_2499.JPG

IMG_2502.JPG
br />
IMG_2501.JPG

IMG_2500.JPG

Cabinets should be in this week, the countertop is in my floor in the process of being finished (it’s butcherblock!!!!!!!), the wood floor is acclimating in the living room, and the wood trim lumber is inside so it’s handy for me to cut to size.

Between the wood for the trim, the rough lumber for the beam, the butherblock countertops, and the wood floor, my house is currently full of random lumber. Danny said many trees died in the making of our new kitchen. Sad day…I didn’t think about that until now! Too late ha!

IMG_2510.JPG

Sorry for the extremely long and rambley blog post. I’m just so excited…and busy that I haven’t had time to sit down and organize anything. BUT, within the next two weeks I hope (hope is a strong word…) to have a final reveal. I’ll try to update as I get time.

Up next: window and door trim, cabinets and countertop, then comes flooring and baseboards. And I need to make a new table. And touch up some paint and backsplash and….well it never seems to end.

Keep your eyes peeled for updates soon!!

Follow along the whole remodel!  Part 4 is next!

Putting Things Back Together After Gutting Our Kitchen

Heart Transplant Part 2–Remodeling our Kitchen, the Heart of the Home

March 4, 2015 by Shara, Woodshop Diaries

Ripping Out the Heart of the Home--Kitchen Demo

When I left off last time, we were in the planning stages. Tensions were high and ideas were many. The “to do” list and the “to figure out and make a decision about” list were LOOOONG. It felt like it was never really going to happen. But it’s here! It’s finally here!

By “it” I mean the point of no return…the point where you know this remodel is really happening because you just ripped your ceiling down and your wall off and removed half of your cabinets so there’s no way you can just stop and change your mind. We are going. All. The. Way. With. This.

Note of clarification: in part 1, I said this wouldn’t start until April. Well, I guess I lied. Turns out, we could start earlier, so me, being the impatient one that I am, started early. Nothing makes me happier than being ahead of schedule….except being below budget…oh and extra vacation days….and maybe cookie dough ice cream….and brand new paint brushes….I digress…

So, also during part 1, I promised to explain our drop ceiling.

IMG_2164.JPG

IMG_2392.JPG

There it is. Yeah….

It made our ceiling barely over 7′ tall. The light fixtures hanging from them were at a level that could easily poke an eye out of anyone over 6′ tall. I can’t afford the insurance for those types of liabilities!

It was full of wiring and old fluorescent light fixtures and probably ten pounds (I exaggerate for dramatic effect) worth of other things I’d rather not discuss. Use your imagination 🙂 Good to know that was hanging over our heads as we ate dinner…

If we were going to spend money and time to remodel every other part of the kitchen, I figured (I say “I” because Danny didn’t want to get rid of the ceiling–mainly because it would be a lot of extra work. It took some MAJOR work on my part to convince him.) we might as well redo the ceiling too. So, we did.

IMG_2397.JPG

IMG_2399.JPG

IMG_2398.JPG

My dad, a friend of his, Danny and I got to work taking ceiling tiles and the tile supports down after work one night. After we cleaned up the unmentionables that fell down during this process, it was like a breath of fresh air! Our ceiling was normal height and the room felt bigger and I didn’t have a sea of rough wood and off white ceiling tiles looming over my head. (Although, I did still have unfinished Sheetrock with large holes looming over me.)

In all seriousness. I joke about things being “horrible,” but I admit the drop ceiling wasn’t that bad…just made the ceiling feel too low and when my dad came over, he kept running Into my lights haha.

Continuing the demolition process, we come to the metal staircase:

IMG_2405.PNG


Lots of people have complimented the staircase saying it was “neat.” While I can appreciate the “neatness factor” of the staircase, I can’t appreciate the fact you have to walk around it to get anywhere. It’s big, and bulky, and the only purpose it serves is a way to get to the attic loft….which we never go to. That being said, it was to our benefit to get rid of it for the sake of having more kitchen space. I am still thinking about how I will make a new way to access the attic. I’m leaning towards a wooden ladder. We will see…

IMG_2407.JPG

IMG_2402.JPG

After we got the stairs out if the house (which was a massive undertaking…several door frames were harmed in the process…), we cleaned up for the night and decided to reconvene the following night.

Comic relief: so I’ve mentioned before (in part 1) that our silverware sits on the counter. It was my job to move everything off the counter when I got home from work before they started working on any demolition so nastiness didn’t fall on our stuff. Everything was already off and boxed up except the toaster, my keurig, and the silverware tray (because I used them all that morning for breakfast). So when I got gone from work, guess what I forgot to do? Halfway through the work, Danny asks me what happened to the silverware. Oops. So I ran them through the dishwasher and put them back on the counter the next morning. Guess what happened again the next night? Haha I did it again! So glad I have a dishwasher 🙂

IMG_2412.JPG

The following night we got rid of the cabinets between the living room and kitchen, the cabinets on one corner of the kitchen, and one wall of paneling. We also cut holes for where the lights will hang in the ceiling.

IMG_2415.JPG

IMG_2416.JPG

IMG_2413.JPG

Let me tell you about those cabinets between the living room and kitchen. Here’s what it was before:

IMG_2162.JPG

IMG_2163.JPG

I had originally planned to remove the cabinets and make this a bar with stools and paint the countertop with chalkboard paint. But, then I realized how much I hated that it protruded so far into the living room, so I just decided to get rid of the whole thing. I think with it gone, it opens up the kitchen and living room both a lot more.

My plans are always changing 🙂 Danny loves hates it, but he loves me, so he deals with it haha.

Next steps are finishing the drywall and removing the rest of the cabinets and appliances, then installing the lights. Oh and removing the column in the kitchen and moving the plumbing. There is lots left to do, so stay tuned!

Follow along the whole remodel!  Part 3 is next!

Ripping Out the Heart of the Home--Kitchen Demo

Heart Transplant Part 1–Remodeling Our Kitchen, the Heart of the Home

February 5, 2015 by Shara, Woodshop Diaries

Why We Decided to Gut Our Kitchen

Kitchen remodel–sounds like a dream, right? I mean wipe it clean, start from scratch, sky’s the limit, you can do anything you want. Right….unless you’re paying for it, you’re living in it, and you’re scared that you will come up with a better idea as soon as your last idea was installed. The struggle is real. (Seriously I hate that last sentence, but it’s my husband’s new favorite thing to say.)

The kitchen is called the heart of the home. If that’s the case, we are about to perform a heart transplant on our home. That’s kind of a big deal! What if we do something wrong? What if the “style” doesn’t fit…whatever that means? I want this “heart” to last a long time and make the whole house a better place to live.

Let’s just be honest, I DREAD (did you see those capital letters?!) this remodel. I mean I’m as excited as *insert your favorite applicable phrase here* (I have some funny ones, but they are probably inappropriate). But, despite my excitement, it’s going to be a lot of planning, a lot of work, a lot of questions to answer, and a whole lot of checks to write! Do you get a sense of that stress level rising? So does my mom, sister, and husband…they deal with me on a daily basis. Bless them…

Let’s pause my pointless blabbering to show you some pictures of my current kitchen:

IMG_2164.JPG

IMG_2162.JPG

IMG_1899.JPG

Lovely space, right? Let me just say this first: we moved in in November, and I had ZERO plans for remodeling this kitchen. Why? First reason: cash. After the down payment, the money for a remodel wasn’t there. Second: paint would work wonders so why replace? Third: the cabinet doors are kinda neat so I wanted to keep them.

But then we moved in. And I hated the layout (who puts a sink next to a column where you don’t have any counter space on both sides?), the drawers were too shallow to put anything in (how can I fit my billion pot holders in a drawer that’s like 3 inches deep?), the silverware tray wouldn’t fit in any of the cabinet drawers (three months later it’s still sitting on our counter, silverware and all), and the cabinets just felt….dirty (not even going to explain….you don’t want to know). I told myself to paint them and they’d be okay. I told myself that the layout wasn’t so bad. I told myself to buy a new silverware tray that would fit.

Guess what I did? I did none of the above…however, I did start looking at the potential of this room and the next thing I knew, I was telling Danny we needed to remodel it. GASP! Once I get an idea in my head, it’s like a sticky trap….I can’t get it out and I think about it and obsess over it and the next thing you know, it’s materialized and we are a little bit more broke because of that. It’s an inevitable process of events 🙂

There was one other factor that finalized our decision to remodel: the appliances. The previous owners told us the appliances were about ten years old. So we already knew they didn’t have much life left. Replacing a fridge and dishwasher was no big deal, but the stove and microwave were a little more complicated. To replace a slide in stove (the kind without the back) would cost twice as much as just getting a regular stove with the controls on the back panel. But then we’d have to modify the cabinets and countertop a little to get the cheaper stove to fit.

Then I wanted an over the stove microwave instead of a countertop one. This would require moving some cabinets and we didn’t think the ceiling was tall enough for us to be able to do that. (I’ll explain our drop ceiling later.)

That just added fuel to the fire. So here we are…

Welcome to my jumbled mess of the beginnings of a major (what exactly defines major? Would you consider replacing cabinets, countertop, appliances, layout, drywall, ceiling, and flooring a major renovation?) kitchen overhaul! I hope you are as entertained by my complete lack of sanity as I am 🙂

Here’s the plan: replace current cabinets with new, white, solid wood cabinets, change layout to make kitchen an L shape with the sink in front of a window, replace countertops with butcher block, new appliances, remove false ceiling, replace paneling with drywall, replace flooring, new lighting, add some outlets, install new backsplash, and build a new island and/or dining table. Yeah…nothing major or anything.

The new plan will include a pantry IN THE KITCHEN. Our current pantry is in the laundry room….which is way too far from the kitchen to make it even remotely practical. It will also include a farmhouse sink in front of our big beautiful windows! I. Can’t. Even! My heart flutters thinking about it. (Really, is this what adults get excited about?)

I’ve already purchased the appliances…the fridge is installed, everything else is being stored in our unused bedroom.

IMG_2244.JPG

IMG_2245.JPG

I already purchased the sink and faucet and can lights. I got the sink out and was comparing the size to my current sink haha. I was soooooo excited…I even found it on sale online! I know, I’m so weird.

IMG_2196.JPG

I’ve thought for hours about lighting. The kitchen right now is so dark and gloomy at night. I want it to be super bright. I’m not sure how it will work out, but I’ve decided to use some of the current light fixtures, add can lights and this awesome chandelier I just painted:

IMG_2290.JPG

Here’s the chandelier story: My sister found a $20 chandelier from a junk store and I painted it for her. In exchange, she gave me her old one for free! So I told Danny I was going to paint it red because it would look good in our new white kitchen. He said no, so we compromised: I painted it red 🙂 if we hated it, I’d then paint it white. Let’s be honest, I knew I wasn’t going to hate it, so I win.

To keep this post from getting ridiculously long (I could go on and on about this remodel), I’ll stop here. There is SO much left to do, so stay tuned. I will have updates often. By the way, we plan to start the actual work in April. I can’t wait to rip out old cabinets! I’ll keep you posted 🙂

You can follow the whole remodel!  Part 2 is next!

Why We Decided to Gut Our Kitchen

Trash Turned Treasure–My New Desk

January 27, 2015 by Shara, Woodshop Diaries

My new house has an “office.” Which basically means that it has an extra bedroom without a closet. TECHNICALLY it’s not a bedroom without a closet, so you have to call it an “office” and charge less money when you sell it because it’s not a fourth bedroom. Those silly technicalities will get you.

I digress…..

Anyway, that being said, I called dibs on the room we now call “the office” (like I’m a professional or something…hilarious, I know). It was already painted yellow (my fav!) and had a super cool ceiling medallion (fancy! You’re welcome if you now have Iggy’s song stuck in your head 🙂 ). It even had some cabinets and shelves already built in to store all my “professional” things–like jars and kiddie paint brushes and picture frames I have had for a year and haven’t put actual pictures in yet. Yes, I’m sure that’s what people with “real” offices put on their shelves, right?

Anyways, here’s a picture so you get the idea:

IMG_1872.JPG

I said all that to say (I know you were wondering where I was going with all this), my new office needed a desk so I could do grown up things like balance the checkbook, pay bills, and gather all our tax information using my laptop. (Growing up is SOOOOOO much fun…..)

I had intentions of making this desk out of some scrap wood I got from work, but hadn’t completely decided on what kind of legs I wanted to use or make. So I kept putting it off and blaming my indecisiveness for the procrastination.

Then one day my grandpa called me and asked if I wanted his old Singer sewing machine table base. It had been sitting in his shed for years and he thought I could put it to good use. Why, yes, yes I can put that to good use 🙂

IMG_2090.JPG

She was a little dirty and really rusty. So I sanded her down and cleaned her up and spray painted her a glossy black. (Funny story–I had an old can of black spray paint to start off with and it was terrible. The can went crazy and splattered paint all over the place. Anything within ten feet of it in my shop had paint splatters. Of course I just wanted to see it done and painted, so I just kept spraying. Then I realized I had just spray “splattered” all of our tools haha oops.)

Of course, I didn’t take any pictures of anything throughout this entire project. I forget every time!

I debated on what to use for the table top and decided to use some 2x4s I had on hand. I nailed them together and screwed them onto the top of the frame. I wanted to stain them, but it had been in the twenties outside the whole week and didn’t want to stain when it was so cold. So I talked Danny into helping me bring it inside to stain.

IMG_2151.JPG

Oh, you didn’t know? Only cool people stain with headbands on their ears inside the house and listen to (sing along with) pandora on their phone…while simultaneously cooking supper and having to pause to go make sure it’s not burning. All while NOT wearing gloves (which is a very bad idea). Yep, that’s me. Super cool…

I honestly can’t tell you what I did to make it come out like this, but here was the final product:

Trash Turned Treasure--DIY Singer Sewing Machine Base Desk

Trash Turned Treasure--DIY Singer Sewing Machine Base Desk

I used a combination of grey and brown stain along with random brushes of black and cream paint, sandpaper and a rag. No rhyme or reason and no particular order. Except grey stain was first. I know that only because Danny took a picture of it haha.

I had originally planned on making the whole desk myself out of wood. But I’m so glad I could use a gift from my pa instead to make it mean so much more to me. His trash, my treasure 🙂 I love it!

What do you think? I’d love your feedback! Leave a comment or send me a message. Keep your eyes peeled for kitchen remodel updates to begin soon!

Don’t forget to pin for later!

Trash Turned Treasure--Singer Sewing Machine Base Desk

Showing Some Love to the Living Room

January 24, 2015 by Shara, Woodshop Diaries

I haven’t posted anything in almost a MONTH! What is wrong with me?!  Time is a valuable thing….and I just don’t have a lot of it.  But, I am FINALLY taking the time to slip in a much overdue blog post 🙂

After our last project (the closet makeover), Danny swore he wasn’t helping me do any more projects for a while.  He said I needed to “slow down and chill out.”  We have been married over four years, but he obviously still doesn’t know me very well.  “Slowing down and chilling out” is not something I am capable of doing.  I will let you know how this turned out.  SPOILER ALERT: he decided to help me paint the living room 🙂

First thing’s first–I never posted about my new living room shelves that I did like a bazillion years ago (more like a month and a half ago, but you know, bazillion sounds better).  What do you think?

IMG_1961

Not a huge transformation, considering it used to look like this:

IMG_1954[1]

I painted the background white so it would stand out more, and replaced the glass shelves with pretty wood ones.  I love the “floating” shelves and the dark stain.  And it only took me like two hours (most of that time was waiting for the paint and stain to dry so I could do the second coats),

Okay, now back to the more recent updates…

I have been trying to convince Danny to let me white wash our SEVERELY BROWN brick fireplace since the day we moved in.  I feel like it literally sucks all the light out of the room.  I love our fireplace, but it needs some……let’s just say it needs some love.

IMG_1861

It’s got the following things going for it: it’s brick.  That’s about it.

However, it has the following things going against it: it’s dark, BRASS, and has those eyesore vents that don’t work anymore. It’s not HORRIBLE, I just think some changes would make it awesome.

But, there is one obstacle: Danny.  He (like most uninterested-in-home-decorating men) doesn’t have a problem with brass and dark, old brick, or the ugly vents all over it.  He does, however, have a problem with me “painting brick,” even though I never planned to “paint” it, just whitewash it.  There is a HUGE difference 🙂

Nevertheless, like all good husband and wife teams, we came to a compromise.  I could change the brass if we kept the brick its natural color (at least for now haha).  Oh and we both decided the vents will go, but we need to find some matching brick to patch up the holes–so that project is on the backburner for now.

I used this can of Rustoleum High Heat Enamel to paint the brass a shiny new black.

IMG_2086I taped everything off and got to work (while Danny was at work so he didn’t complain about the fumes since the paint it oil based…I’m so sneaky).

IMG_2091Much better 🙂  See the decor change on the top of the mantle?  I can’t decide what I want to put up there so I keep changing things out haha.

IMG_2094

Not a huge change, but eventually I think Danny will let me whitewash the brick and it will look AMAZING.  And I am in the process of planning how to make a new mantle with wood that I can stain to match the shelves from earlier.  One project at a time….

Last recent update to the living room was……PAINT!  Look how pretty the new paint looks (of course you could really tell if you actually came over and looked at it.  The lovely iPhone picture taken at night doesn’t really do it justice.)!

IMG_2242[1]

Trust me, it looks even better in person.

It took an entire week (remember me saying I don’t have a lot of time??), but it was totally worth it.  I think the living room updating is still a work in progress, but I am happy with the little changes so far.

Keep your eyes open for MANY more changes to come.  Oh, by the way, there is a complete kitchen remodel in the near future…..I honestly don’t know whether to laugh or cry about that haha.  It should be interesting.

Closet Makeover–An Unplanned Project

December 28, 2014 by Shara, Woodshop Diaries

NOTE: This post contains affiliate links for your convenience.  All opinions are my own.  Please see my disclosure policy for more information.


Okay, so….I never really planned on redoing our closet…at least not spur of the moment and not during the week of Christmas. We had talked about doing “something” with it this spring, but that was about as far as we had planned.

But, I had the week off from work this week (the week of Christmas) and I was itching to do a project. I had two ideas of projects I could reasonably complete in a week, BUT we needed to figure out a couple things to determine how big of a project they really were.

First idea: create a bar area between the kitchen and living room so I can put my cute barstools under it. We already have the space and countertop, we just have cabinets in the way so I can’t put barstools there.

IMG_2163

Long story short, after looking into it, this would require us to demolish the cabinets to remove them….so we decided to wait on that one until we have a better plan. Stay tuned though…..it will happen!

Second idea: remove the eyesore “thingy” in the closet. This did NOT include remodeling the closet, only removing this ugly paneled thing:

IMG_2028.JPG

When we moved in, we wondered what in the world this thing was here for. It was ugly and took up a bunch of valuable closet space. So, first things first, this must go. However, if we removed it, and the carpet didn’t continue under it, we would need flooring for the whole closet.

In order to figure out how big of a project this would be, I asked Danny to help me figure out what was under the thing. We peeled back the paneling on the top and busted a hole in the Sheetrock underneath to look inside. We found no carpet (go figure), and a large hole leading to the crawl space. Really? Who leaves a huge hole in the floor for who knows what to enter into the house?!

While we were at it, Danny wanted to fix this:

IMG_2027.JPG

At some point, the copper pipes in the house were replaced with PVC. I guess it wasn’t high priority to properly patch the holes in the wall after this replacement. So whoever did it, just screwed some plywood over the holes. Nice….

While we were doing all this, we figured we might as well add some shelves. Our closet was annoying. The door opened inside so it took up half the closet when the door was open. There was hardly any storage space. The top shelves were hard to reach.

IMG_2029.JPG

IMG_2030.JPG

IMG_1919.JPG

So we knew we would need plywood to patch the hole in the floor, drywall patches, and new flooring for the closet. Simple enough. Oh, and we needed stuff to build a whole new closet…not so simple. We went to Lowes (the service manager apparently recognizes us now since we are in there so often). We bought plywood, drywall patches and putty, and got a couple boxes of 99 cent laminate wood flooring.

Then, I remembered an idea I had (I have so many ideas, I forget most of them) for cool, cheap wood flooring. Danny disagreed to let me do it for the bedroom flooring because it wasn’t high quality (we want to replace the bedroom carpet with wood, but that’s expensive), so I talked him into letting me do it for the closet floor…it’s wood planks! Sooooo, we bought some 1x4s and put back the laminate flooring. I was SO EXCITED! Danny…well, he had his doubts.

I googled some cheap DIY closet storage/cabinet ideas that I could whip up quick. I found this as my inspiration:

So we bought a ton of 1x4s and some stain and headed home.

The next morning, I drew out a modified and customized plan for our closet based on Ana White’s version. I didn’t take a picture because I’m too embarrassed to show you how awful my “plan” looked on paper haha.

Danny patched the hole in the wall while I started building the frames for the closet storage. Then, we removed the paneling from the “eyesore thingy,” tore up the carpet and alllllll the staples that were left from it.

IMG_2034.JPG

IMG_2035.JPG

I was so excited to demolish the thingy so I busted a new hole in it. Then we realized it was the return air duct. Which means…it has to stay. I may or may not have shed a tear, had a tantrum, said “I quit” more times than I can count on one hand. But, I gained composure, and reminded myself that I am a problem solver and I will make this closet awesome.

After some thought, I decided to leave the Sheetrock on the front and add some trim and wood planks on top. Here is a pic of the trim and the beginning of the floor laying. For the floor, I just cut boards at random lengths and butted them together. For the last piece of every run, I’d measure and cut for an exact fit.

By the way, this was the first project I did with my nail gun and I promise my nail gun compressor combo kit was the absolute best tool I have ever bought.  My nail gun is still hands down my favorite tool.  It makes things so much faster.

IMG_2037.JPG

Then I stained the floor in Minwax Great American.

IMG_2038.JPG

Then I painted the walls and the trim with leftover paint I had from previous projects.

IMG_2042.JPG

IMG_2043.JPG

IMG_2041.JPG

I continued building frames and shelves for the closet and stained them. I brought them inside to make sure everything fit right.

IMG_2045.JPG

IMG_2063.JPG

I had planned to copy Ana White’s idea of using galvanized pipes for hanging rods, but when we saw the price, we started thinking of cheaper ideas. Apparently galvanized pipes are expensive. We had two wooden dowels from the original closet, so we used those. Danny thought of using conduit hangers to hang the dowel rods from the top shelves. He’s so handy when he tries to be 🙂

IMG_2062.JPG

IMG_2061.JPG

I poly-ed the shelves (because Danny was afraid of stain making his clothes smell). And finally got our clothes off the bedroom floor and back in the closet!!!! I cannot stand clutter.

IMG_2075.JPG

IMG_2069.JPG

IMG_2067.JPG


IMG_2068.JPG

I LOVE it. Total cost: about $250. Totally worth it. By the way, the sign will be repainted…it doesn’t show up with those colors.

There is so much more storage now, and without the door, there is so much more room. I think Danny is impressed with my building skills, too.

Four days, well over 700 pneumatic gun nails, and 60 1x4s later, I’m so happy with our new closet. Added bonus: no more holes in the wall 🙂 I’m trying to talk Danny into putting in a pretty light fixture, too.

What do you think? I’d love to hear your feedback. Keep your eyes open for many upcoming projects!! 🙂


Chaos Over Christmas Break--How we Remodeled Our Closet Over Christmas Weekend

DIY Roller Shades–Let the sun in, close the night out

November 25, 2014 by Shara, Woodshop Diaries

IMG_1948.JPG

I love windows! I love as much natural light as I can get. The only thing about windows is that although you can see out, everyone else can see in. It’s not that I necessarily have anything to hide, or that I’m a complete hermit (complete being the key word…), it’s just that it makes me uncomfortable knowing that once it gets dark, I can’t see out, but everyone can see in.

Our kitchen is in the front of the house and it has four huge windows. I. Love. Them.

IMG_1898.JPG

IMG_1899.JPG

However, they make me feel like I’m on display once it is dark outside. It wouldn’t bother me if people always looked in and saw a big happy family at the table eating and laughing like you see in the movies at Christmas. But, me cooking dinner and washing dishes in my PJs and my hair in a towel isn’t exactly what I want broadcasted out my front windows. (We live on a busy highway by the way.)

It just wasn’t practical to install curtains on these windows. Roman shades would have been nice, but reading reviews on the cheap ones made me realize they weren’t a good option either. I wasn’t prepared to spend a fortune, so I kept exploring options.

I LOATHE cheap vinyl roller shades, so I had already ruled those out. But, then I saw a blog and another blog and another who had made their own “custom” roller shades and they were awesome!

I will be the first to tell you that I totally copied this from SEVERAL other blogs I found online. I am not the first, I won’t be the last, and I’m definitely not the best one who has done this. Nevertheless, here are some instructions from my own experience in case you don’t want the world seeing you in your pjs and hair in a towel through your front windows either 🙂

You will need:
Vinyl shades cut to size (Lowes)
Mounting brackets for each shade (Lowes)
Fabric to cover the shade
Spray adhesive (use medium or heavy duty)
Fabric glue
Hammer (to mount brackets)

First, take very accurate measurements of the inside of your window where you will mount your brackets. (Note: we did inside mount. If you mount on the front of your window frame, you will have to measure differently.)

We took our measurements to Lowes and got their cheapest vinyl shade and had them cut it to the correct size. They will need the exact width between your inside frames. (Make sure the person who cuts them knows what they are doing. We had to make two trips because our first ones didn’t fit.) Pick up your mounting brackets while you’re there.

IMG_1900.JPG

Measure the width of the vinyl on each shade and add 2″. Measure the length of your window (from the top where you will mount the shade to however far you plan to pull down your shade) and add about 3-4″. This tells you how much fabric you will need.

I bought my fabric at Hobby Lobby. I needed 3 yds, but I got 3 ¼ just in case I needed a little extra. The fabric rolls are TYPICALLY 45″ wide FYI.

IMG_1901-0.JPG

If you’re like me, you don’t have a good work table (one that’s large enough to lay out 3 yds of fabric), so you have to lay out your fabric on the kitchen floor to cut it to size. Remember to cut 2″ wider than the width of your vinyl and 3-4″ longer than you want the shade to pull down.

Once you cut your fabric to size, you’ll want to dust off your iron (I NEVER use my iron except on occasional craft projects) and iron out the wrinkles.

IMG_1904.JPG

Next, I took everything out to the shop so I could spray the adhesive. You need adequate ventilation because this stuff stinks. I suggest doing it outside but it was raining so I did in in the shop with the door open for air.

Lay out some clean cardboard, trash bags, or paper and roll your shade out on it. Make sure the side of the vinyl you want the fabric to be on is facing up. I wanted my fabric to roll over the top like the picture below.

IMG_1941.JPG

Make sure your vinyl shade is flat with no wrinkles. You may want to tape it down to stay put. I didn’t, but should have.

IMG_1907-2.JPG

Lay the fabric on top and try to let an inch hang off the bottom and each side. You will glue this to the back later. If your fabric has a pattern, make sure it is lined up right.

IMG_1908-0.JPG

Fold back half of the fabric, and spray adhesive on the vinyl shade. Follow instructions on the can. Most say to wait a minute before bonding. Use something flat and straight (I used a clean piece of 2×4) to smooth the fabric onto the shade. It helps to have someone hold the fabric up while you smooth it down a little at a time. Make sure you get out as many wrinkles as you can.

IMG_1909.JPG

Friendly note: I didn’t tape my shade down and ended up having several wrinkles. I also used light duty spray adhesive and ended up having to reglue some of my fabric. Don’t make these mistakes! Tape down and get medium or better spray adhesive.

Do the same with the top half of the shade and let dry for a while. After about thirty minutes, test to make sure the fabric is sticking good to the vinyl. If not, peel what is loose and reglue. If it is sticking, move on to the next step.

Lay your shade out flat with fabric side down. Squeeze some fabric glue down the edges of fabric that are sticking off the sides and bottom and fold over making sure to keep the edge straight.

IMG_1910-0.JPG

IMG_1911-0.JPG

IMG_1912-0.JPG

Let dry overnight. Once the glue is dry, roll the shades up tightly. Then anxiously wait all day until you get home from work to hang them 🙂

IMG_1922-0.JPG

I won’t go I to detail on mounting the brackets. That’s pretty self explanatory. However, I will make some suggestions:

Measure ten times, hang brackets once. Your shades with be much thicker once you put fabric on, so don’t hang the brackets until you can see how thick your shades are.

Make sure the shades won’t rub the back of the window or frame and mount brackets so shades will be able to move freely. I would hold my shade up, hold the brackets up, nail part of it, check to make sure shade still fit, nail the other part, check again. Over and over…keep checking to make sure it’ll fit!

Make sure you mount the right bracket on the right side of the window frame. This will vary depending on which way you want your shade to roll…over or under. Like I said, hold your shade up to make sure you put your brackets on right.

Make sure the shades are level.

I think the shades come with instructions about this, but…hang your shade so that it is already rolled up. If you hang it pulled down, you won’t be able to get it to go back up. You’ll have to remove it from brackets, roll it up, then put back in.

I love the way these turned out! They are so easy and so cheap. I did this whole project for about $50 on a Sunday afternoon and Monday night.

IMG_1948-0.JPG

IMG_1937.JPG

IMG_1945.JPG

If you try this, too, please let me know. I’d love I see how yours turn out! 🙂 Please share this link if you thought it was helpful or interesting or inspiring. I would really appreciate any help in getting my blog out there to people who don’t already know about it. Happy crafting!

Our new home…the pros and cons

November 23, 2014 by Shara, Woodshop Diaries

Our story is complicated. We had an apartment, bought a house in a subdivision, both got jobs an hour away, sold our home with intentions of moving closer to work, moved thirty minutes away, realized we missed being in Murray, bought a house with some land (we learned we aren’t subdivision people) out in the country. (Shout out to our real estate agent, Tracy, for being there with us throughout this whole ordeal.)

There are soooooo many details missing from that brief overview of our lives for the past four years. But I won’t bore you with the details. I’ll just get straight to showing you our new home!

Forgive the fact I don’t have a picture of the outside. I haven’t bothered to get one since everything is dead because of fall so it’s ugly. I don’t like to take pictures of ugly things haha.

I do have a picture of the front door…a house isn’t a home without a cute wreath!


IMG_1924.JPG

Let me just confess…we semi regret selling our previous home. It was much newer than our current home and a little more updated. We loved this house the first time we saw it, but now that we’ve been in it for a week, we’ve realized there were things we didn’t know would be annoying…but they are.

First point: the kitchen. The cabinets are surely original…34 years old. The appliances are showing their age…they’re ten years old. The layout is crazy. I don’t have a lot of pics of the kitchen either…remember what I said about taking pictures of ugly things?

IMG_1898.JPG

IMG_1899.JPG

There are cabinets by the fridge and stove, cabinets between the living room and kitchen, cabinets over in the opposite corner as the stove, and an island with a dishwasher and sink in the middle. Plenty of cabinet space, but very chopped up. I love what this kitchen could be, but not necessarily what it is right now. It is our first remodel to tackle. We just have to save up some $$$ for new cabinets first 🙂

Oh but I do like this:

IMG_1866.JPG

I can’t complain about the bedrooms. I love them! I don’t have a picture of the third one…it’s Danny’s and there isn’t much going on in there yet.

IMG_1877.JPG

IMG_1876.JPG

IMG_1868.JPG

IMG_1867.JPG

Besides the brass on the fireplace and the color (I want something lighter and more bluish grey), I love our living room, too.

IMG_1861.JPG

IMG_1871.JPG

IMG_1864.JPG

Of our three bathrooms, my least favorite is the master. It’s tiny, and feels like a dungeon. There is one light, and no windows. We take showers in the dark. The cabinet is very cute I must admit, BUT there is no drawer. All of our “drawer items” go on this shelf…which is dirty looking and very poorly painted. What an eyesore!

IMG_1918.JPG

IMG_1917.JPG

IMG_1916.JPG

I like our hall bath and my office (currently incomplete).

IMG_1870.JPG

IMG_1872.JPG

No house is perfect, and we plan to stay in this one for a while. That being said, I have big plans to make this the house we want to stay in for many many MANY years.

We will eventually remodel the kitchen, replace the master bathroom vanity and add lighting, update the fireplace, paint some rooms, replace some flooring, and lots of little odds and ends projects. I. Can’t. Wait. 🙂

Oh just have to throw in this pic of our Christmas tree to end on a high note 🙂 hope you can’t wait to see our remodels as much as I can’t wait to do them!

IMG_1915.JPG

Hoosier cabinet part 3…the final reveal

October 15, 2014 by Shara, Woodshop Diaries

We last left off with the cabinet looking like this:

IMG_1684.JPG

IMG_1698.JPG

It’s come a long way, but it still had a lot to be finished. I tend to not be able to focus on one thing at a time…well at least while I’m crafting. So instead of logically finishing the next step–the cabinet doors–I first decide to paint the countertop.

I looked all over the internet for ideas on how to paint porcelain enamel. I didn’t have much luck, so I figured I couldn’t make it look much worse so I just experimented. Since I don’t plan to be rough with it, I decided I’d take my chances on it chipping.

I scrubbed it as long and hard as I could with sand paper…until I got bored with sanding. (Didn’t take too long haha) Then I brushed on some latex primer (latex is NOT the best option, I know, but I already had some and I didn’t want to buy anything else). I put three or four (I can’t remember) coats of primer, and once it was dry, I lightly sanded and wiped it clean. Some of the primer scraped all the way off, so I had to touch up a few places. I never think to take enough pictures while I’m working, so I don’t have a pic of this step.

Mom gave me a can of spray paint a while back because she bought one too many. It was black hammered metal and I thought I’d never have a good use for it, but I took it anyway. It was the perfect color! I sprayed several coats and I loved it!

IMG_1703.JPG

IMG_1704.JPG

I liked it so much, I took the old rusty hinges from the original doors and sprayed them too…saved me from buying new ones haha. I’m so cheap.

IMG_1702.JPG

Once the hinges were dry, I put the doors back on, touched up some places with paint and convinced Danny to help me bring it inside so I could get a picture of it all together 🙂

IMG_1714.JPG

Tada! Here she is!

IMG_1717.JPG

I’m happy with it, but I can’t decide if I’m finished. I’ve been debating whether I should distress it a little or put some antique glaze on it. We are moving in about a month. I may wait until we get into the new house and see what it looks like before I make any changes.

Keep eyes and ears open..,I’m betting this isn’t the last time you’ll see this cabinet 🙂 I can’t seem to ever be done with it!

Hoosier cabinet part 2

October 13, 2014 by Shara, Chasing A Dream

Sometimes I work on projects that are easy. They turn out as planned and I’m pleased with them. Some times they don’t quite turn out as planned, but I love them anyway. Other times I work on projects that are hard and when I get done, it seems like all the effort was a waste and I’m thoroughly disappointed in the result. Well, this hoosier cabinet falls in the last category.

This thing has had me up and down. In my mind I thought of the future…I pictured a before and after picture that would be unbelievable. I would be amazed at the transformation. Unfortunately, Its a but lacking in the “wow” factor. I just feel like it’s missing something. It’s not all I had dreamed of. In the end, it’s still just an old cabinet.

IMG_1564.PNG

Here she is in all her original glory. In part 1 we left off here:

IMG_1673.JPG

Since then I have added shelves, painted the little door, and painted the back beadboard a light blue. I also added fabric to the bottom shelves. I do admit, I like the top part of the cabinet. (The door in the picture needed another coat of paint…it has since been applied haha. Didn’t want you to think I didn’t notice.)

IMG_1684.JPG

We also took the bottom half from this:

IMG_1671.JPG

To this:

IMG_1691.JPG

And when I say “we,” I mean me and Danny and dad. They always get sucked into my projects. Always involuntarily haha.

I’ve added some paint and some hardware and now we are here:

IMG_1698.JPG

I just am not feeling the bottom. The top is good…I’m happy with it. The bottom…not so much. I can’t put my finger on it, it’s just not there yet. I need to finish the countertop (painting porcelain enamel is proving to be challenging) and attach the doors.

Maybe when I get it all together, it will speak to me. In the mean time, I’ve still got work to do. I’m determined to make this cabinet beautiful!! Look forward to the final reveal in part 3 🙂

Hoosier cabinet part 1

October 8, 2014 by Shara, Chasing A Dream

About a month ago, my husband’s aunt asked if I’d be interested in an old hoosier cabinet they had been keeping in their basement. Of course I couldn’t turn it down. You kidding? So we brought it home.

IMG_1564.PNG

This thing has a story…some if which I know, some of which I’ll never know. They had gotten this cabinet when they got married (no telling how old it was when they got it) and had it stripped because they wanted to stain it (it had previously been painted white). But, when they saw the wood wasn’t a pretty wood that would look good stained, they never got around to refinishing it. It had been used as a craft station with their kids when hey were younger, but was now just in the way.

So we brought it home (we really needed more stuff to move once we finally buy a house). At first glance, the cabinet was in good shape. But a closer look showed the plywood on all sides was peeling. I had two choices…paint the peeling plywood, I go ahead and replace it. The reason this thing is still a work in progress is because I chose the latter.

This has been a nightmare. I’m VERY impatient. This cabinet has tried and tried my patience. If I didn’t love it and know it can be made beautiful, I would have given up already.

IMG_1616.JPG

IMG_1615.JPG

The original piece was a mess of wood glue…EVERYWHERE. So when I pried the side panels off, most of it was still stuck where it had been glued. This caused the replacement plywood not to line up right. Screw that. If It won’t line up right anyway, then I’m using beadboard (even though it’s thicker than I need) because it’s pretty and I’ve been wanting to use it on something.

Beadboard was about 0.3xx inches thick vs ¼ inch plywood. So now nothing’s lining up right (already stated) and you can see the edge of the beadboard (which is like plywood) and that’s ugly. I also had to put more wood on the top to cover up the peeling plywood there, too. I didn’t want you to see the plywood edge, so I put like five layers of wood putty over and over and over. That didn’t work. (This is the part where I get frustrated and cry…no big deal…it’s all part I the process haha.)

Dad came to the rescue and we went shopping for moulding to cover up my mess. Good ole dad always saves the day. We added the moulding around the edges where the plywood was showing and I put a coat of paint on her.

IMG_1673.JPG

IMG_1670.JPG

And that’s as far as I’ve gotten in about a month. And that’s only the top half. That’s sad. I hope to make major progress this week and bring you part 2 of the project. We will see what happens. I’ve still got to make shelves for the top and reinstall the “garage door” looking thing (I don’t know the technical term…something about a bread box???)

As for the bottom, it’s got a long way to go.

IMG_1671.JPG

I promise I will have part 2 for you soon! 🙂

Getting out of my box

October 8, 2014 by Shara, Chasing A Dream

I’m not good at thinking outside the box. No, really, I’m not. I’m a mathematical/engineering/scientific thought-type person. I’m not an artist. I think things should follow step by step instructions. There should be procedures and guidelines and if I haven’t seen it before, it’s hard for me to envision.

I have a good friend from work (who is the coolest because he saves the good pallets at work for me :)) who recently challenged me to think outside the box. In return for all the pallets he gets me, he asked if I’d make him something for his front door. Me, being the logical thinker that I am, thought “ok, cool. Front door…he must want a wreath…because that’s the only thing people put on the front door, right?” Nope, that isn’t true.

“What kind of wreath do you want?”

“I don’t want you to spend any money on it. Make me something with what you’ve already got.”

“Well I’m out of wreath supplies so I’d have to buy something to make you a wreath.”

“Then don’t make a wreath. Make something else.”

What?! What else would anyone hang on the front door?

Ok so now I’m limited to a $0 budget and I can’t make a wreath. So I thought and thought and finally made this:

IMG_1668.JPG

Pretty neat, right? I super LOVE it!

I had some pallet wood laying around, so I didn’t have to buy any wood. And I had some chalkboard paint. And a mason jar. And some scrap ribbon. I cheated and bought S hooks and eye screws (I think the technical term is circle thingys that screw into wood haha), and a hose clamp. Less than $3. I didn’t happen to have those on hand already.

I think it’s a little outside the norm…I mean a chalkboard, mason jar, burlap ribbon, and a monogram all in one project! Whoa! Now combining all that together is thinking outside the box! Well, not really too far out of the box…but it’s a big step for me!

Now that that’s done, I think I’d like one myself 🙂 I’m thankful for friends who challenge me. However silly those challenges may be, they make me grow a little more every day.

IMG_1675.JPG

IMG_1681.JPG

IMG_1682.JPG

  • « Previous Page
  • 1
  • …
  • 13
  • 14
  • 15
  • 16
  • Next Page »

Hi! I'm Shara, the designer, maker, and videographer behind Woodshop Diaries. Let's get building, friends :)

Learn more →

Woodworking Tips & Guides

  • How to make simple Shaker style cabinet doors!!
    DIY Simple Shaker Cabinet Doors
  • 5 Tools To Get Started Woodworking
  • DIY Kitchen Cabinets–From Only Plywood
  • How to Square Board Edges and Make Your Own 2x2s

Footer

↑ back to top

Tips to Take Your Projects to the Next Level

--5 Secrets to Professional Looking DIY Furniture

--How to Properly Paint Wood Furniture

--How to EASILY Cover Plywood Edges

--How to Sand Wood

--10 Must Have Tools for Furniture and Cabinet Building

Printable Building Plans

Check out our shop to browse printable PDF building plans!

Website Policies

This website is for entertainment purposes. Using any information provided is to be at your own risk.

This site uses cookies to provide you with a better experience.

All images and text on this site are property of Woodshop Diaries, LLC. Please be respectful and don't steal this content.

See Policies and Privacy page on this site for more information.

Want to get in touch? Contact Us Here

Copyright © 2026