Woodshop Diaries

  • Shop
  • About
    • Work With Me
    • Frequently Asked Questions
  • DIY Projects
    • DIY Furniture Plans
      • DIY Bed Plans
      • DIY Dresser Plans
      • DIY Nightstand Plans
      • DIY Desk Plans
      • DIY TV Stand Plans
      • Coffee and Side Table Plans
      • Tables
      • Shelves and Bookcase Plans
      • DIY Storage Trunk Plans
      • DIY Bench Plans
      • DIY Storage Cabinet Plans
      • DIY Bathroom Vanity Plans
      • Kids Projects and Furniture
    • DIY Scrap Wood Projects
    • DIY Workshop Projects
    • DIY Home Decor Projects
  • Getting Started
    • Cabinet Building
    • Woodworking Basics
    • Furniture Finishing Tips
    • Tool Guides & Reviews
  • Blog
menu icon
go to homepage
  • Shop
  • About
    • Work With Me
    • Frequently Asked Questions
  • DIY Projects
    • DIY Furniture Plans
      • DIY Bed Plans
      • DIY Dresser Plans
      • DIY Nightstand Plans
      • DIY Desk Plans
      • DIY TV Stand Plans
      • Coffee and Side Table Plans
      • Tables
      • Shelves and Bookcase Plans
      • DIY Storage Trunk Plans
      • DIY Bench Plans
      • DIY Storage Cabinet Plans
      • DIY Bathroom Vanity Plans
      • Kids Projects and Furniture
    • DIY Scrap Wood Projects
    • DIY Workshop Projects
    • DIY Home Decor Projects
  • Getting Started
    • Cabinet Building
    • Woodworking Basics
    • Furniture Finishing Tips
    • Tool Guides & Reviews
  • Blog
search icon
Homepage link
  • Shop
  • About
    • Work With Me
    • Frequently Asked Questions
  • DIY Projects
    • DIY Furniture Plans
      • DIY Bed Plans
      • DIY Dresser Plans
      • DIY Nightstand Plans
      • DIY Desk Plans
      • DIY TV Stand Plans
      • Coffee and Side Table Plans
      • Tables
      • Shelves and Bookcase Plans
      • DIY Storage Trunk Plans
      • DIY Bench Plans
      • DIY Storage Cabinet Plans
      • DIY Bathroom Vanity Plans
      • Kids Projects and Furniture
    • DIY Scrap Wood Projects
    • DIY Workshop Projects
    • DIY Home Decor Projects
  • Getting Started
    • Cabinet Building
    • Woodworking Basics
    • Furniture Finishing Tips
    • Tool Guides & Reviews
  • Blog
×
Home

DIY Cake Box Carrier

July 27, 2017 by Shara, Woodshop Diaries

How to build a DIY Wooden Cake Box from Wood Scraps

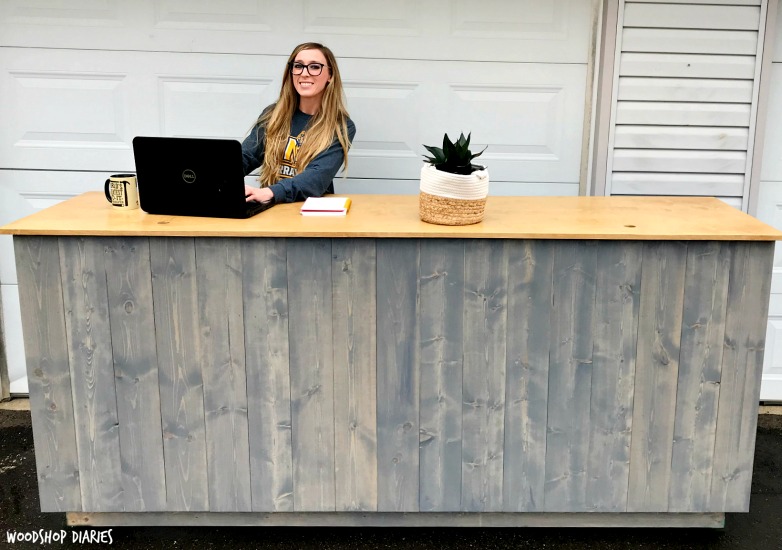
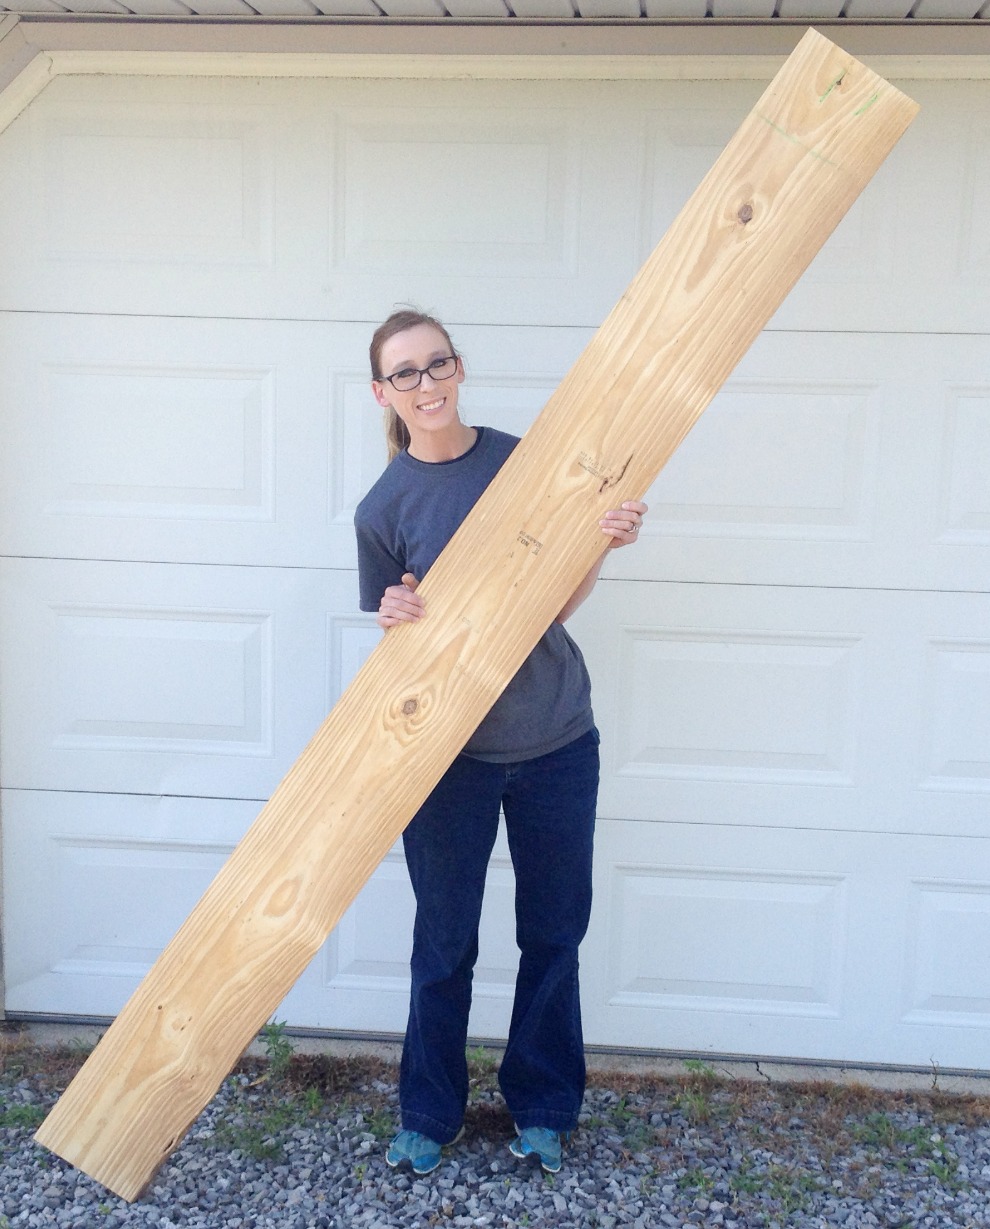
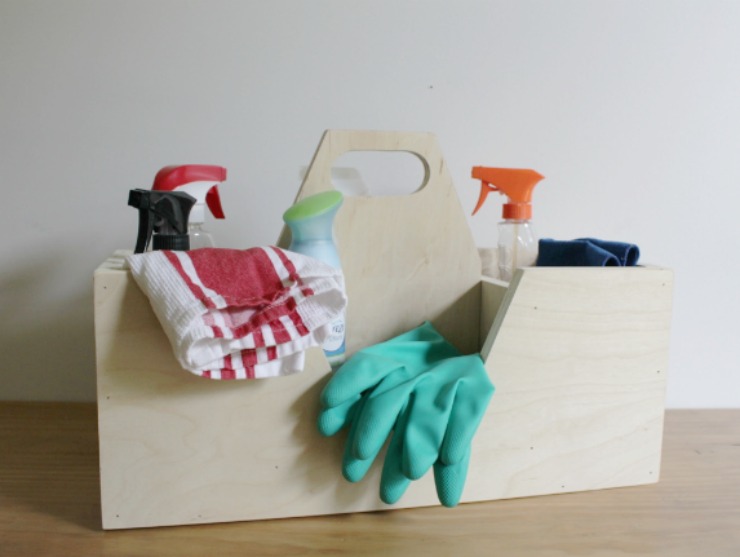
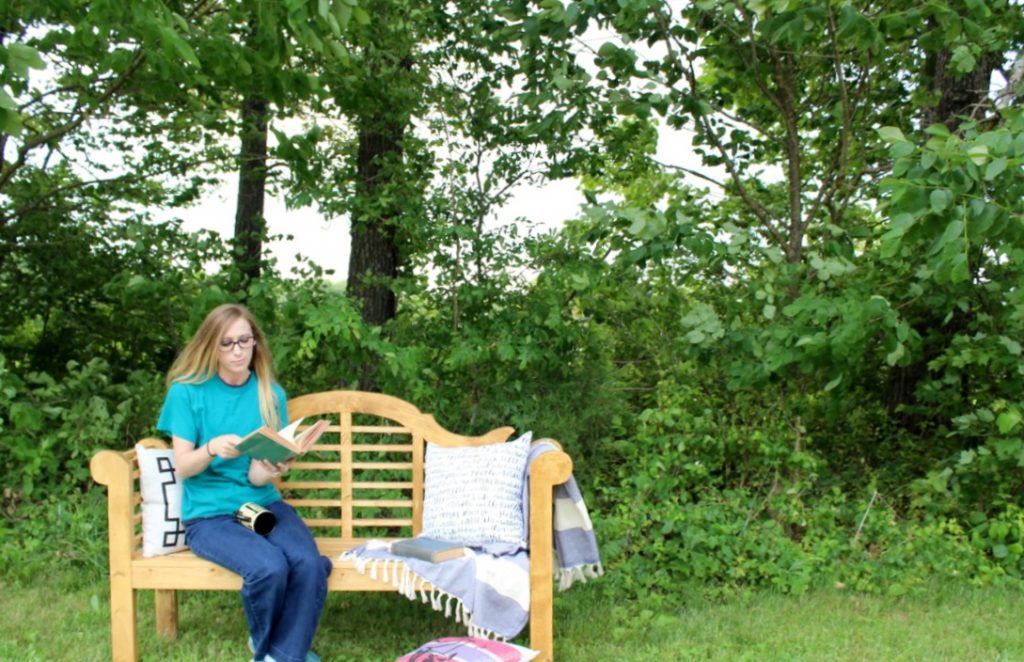
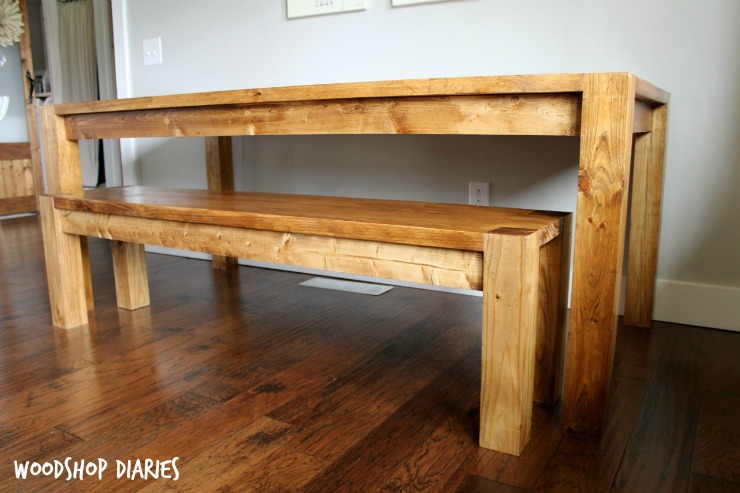
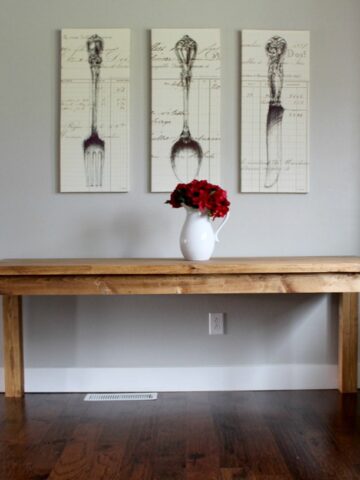
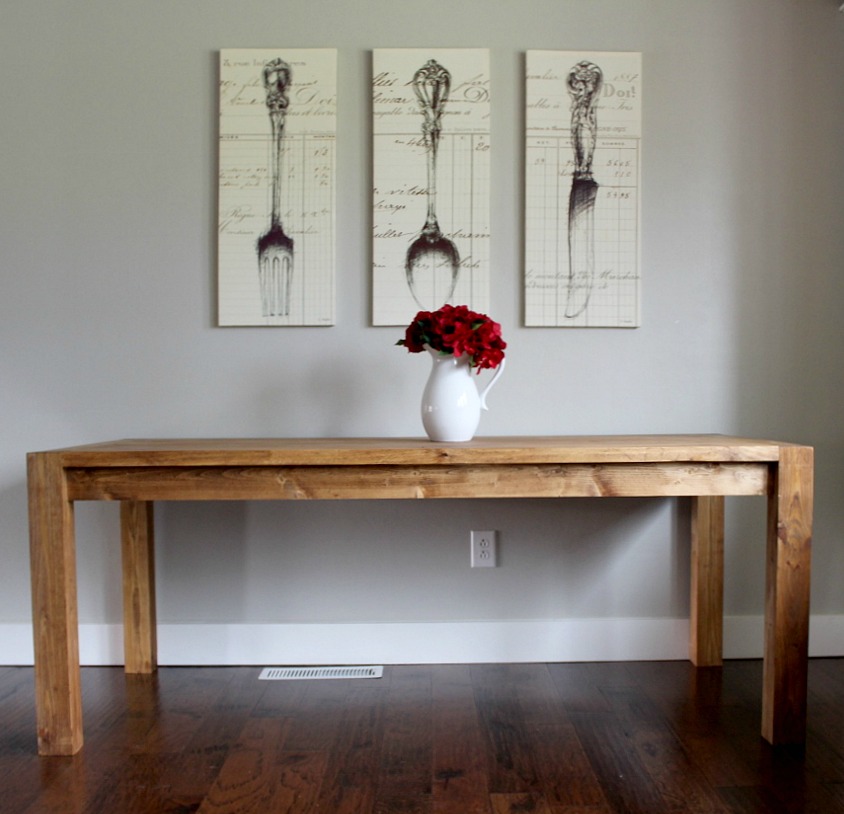
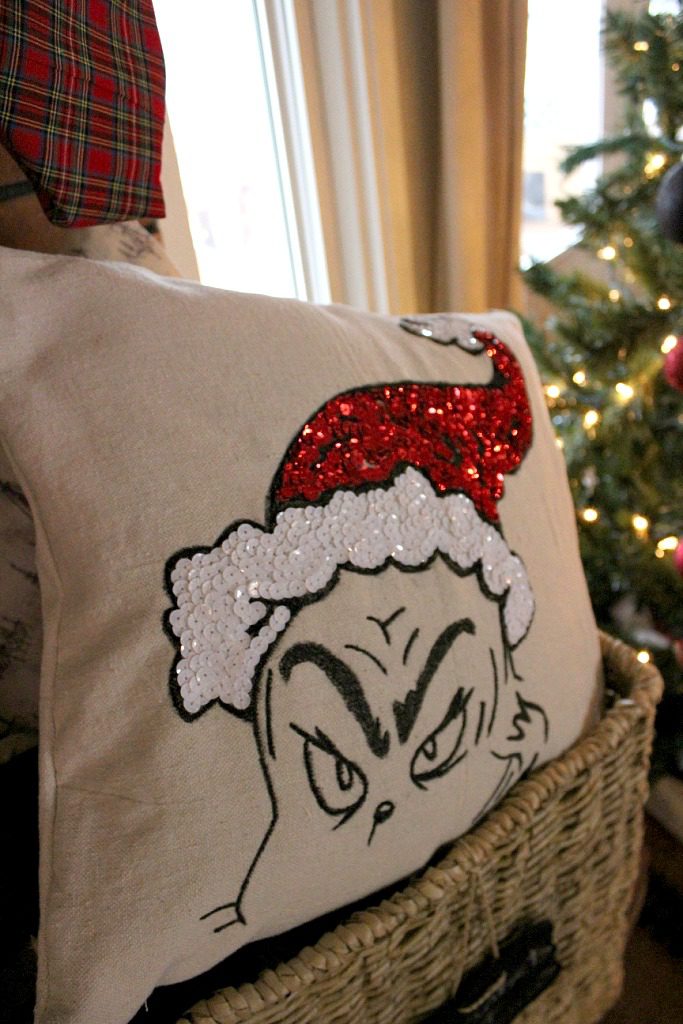
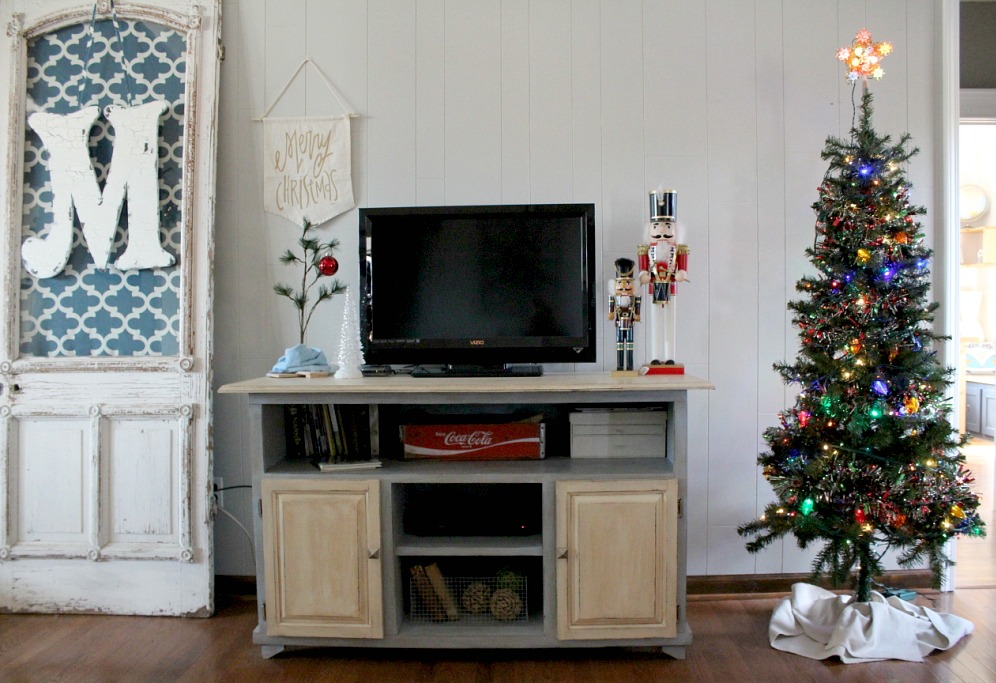
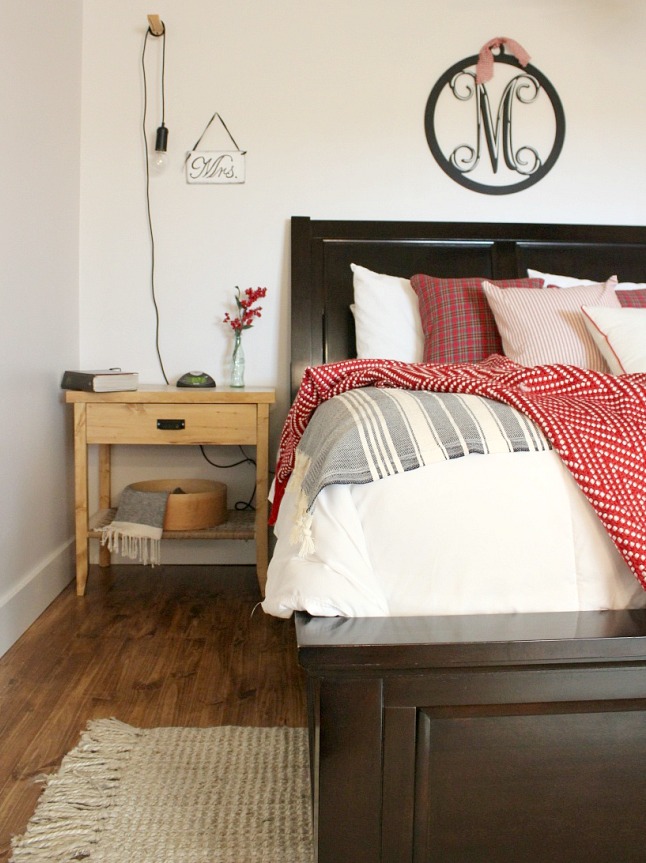
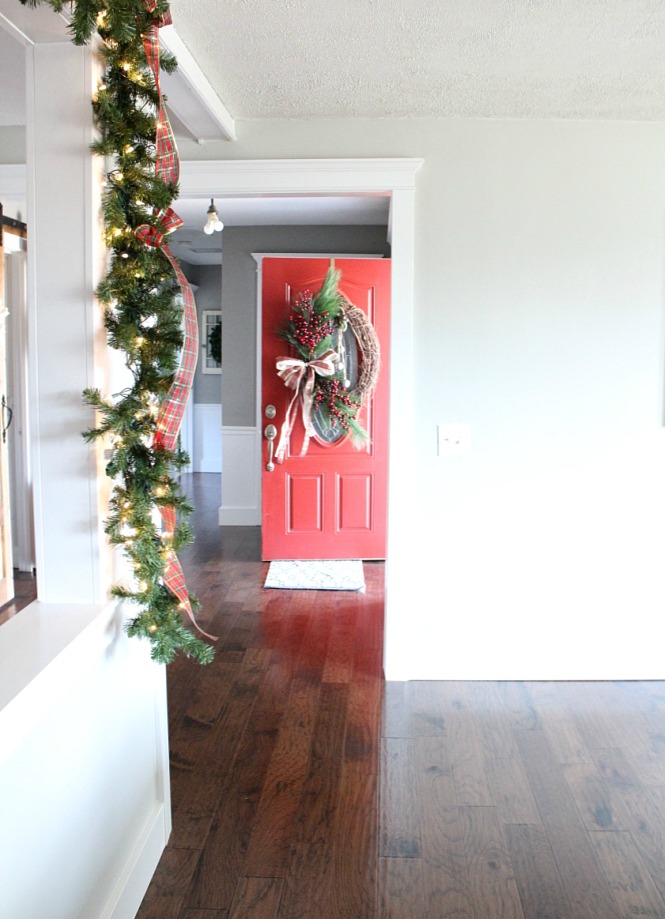
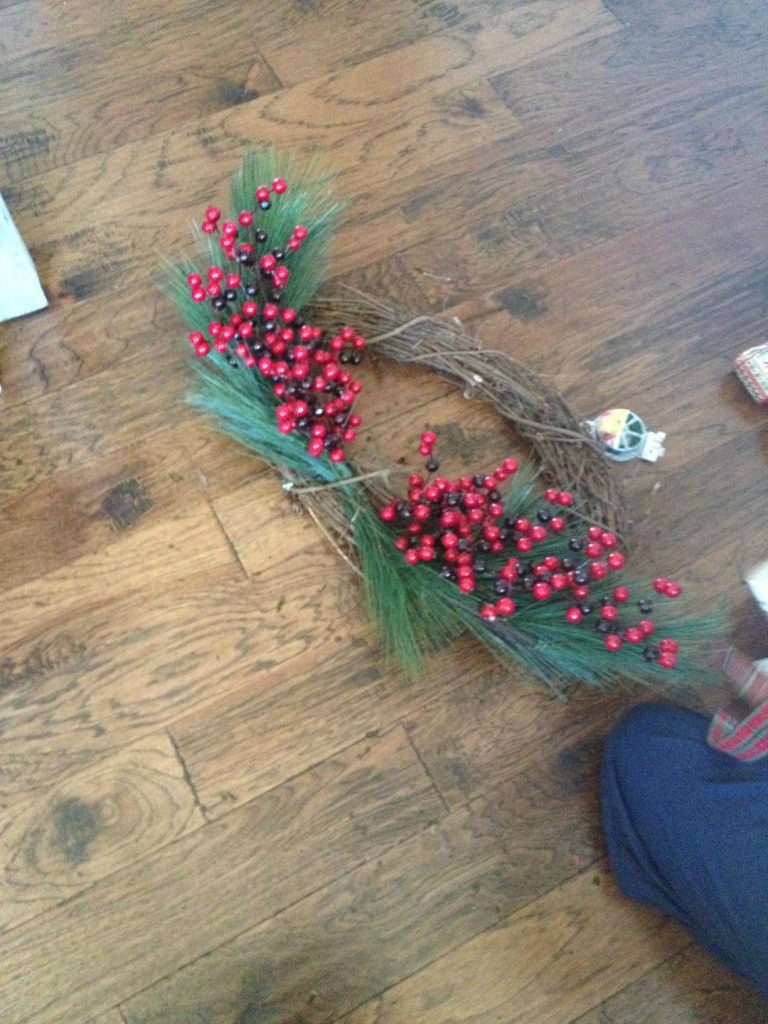
Quick! You’ve been invited to a last minute shindig and you have no idea what to bring. What’s your go to “potluck” dish??

.

Mine is dessert. ALWAYS DESSERT. You can’t go wrong by mixing a boatload of sugar and flour and butter together to make SOMETHING, amiright??

.

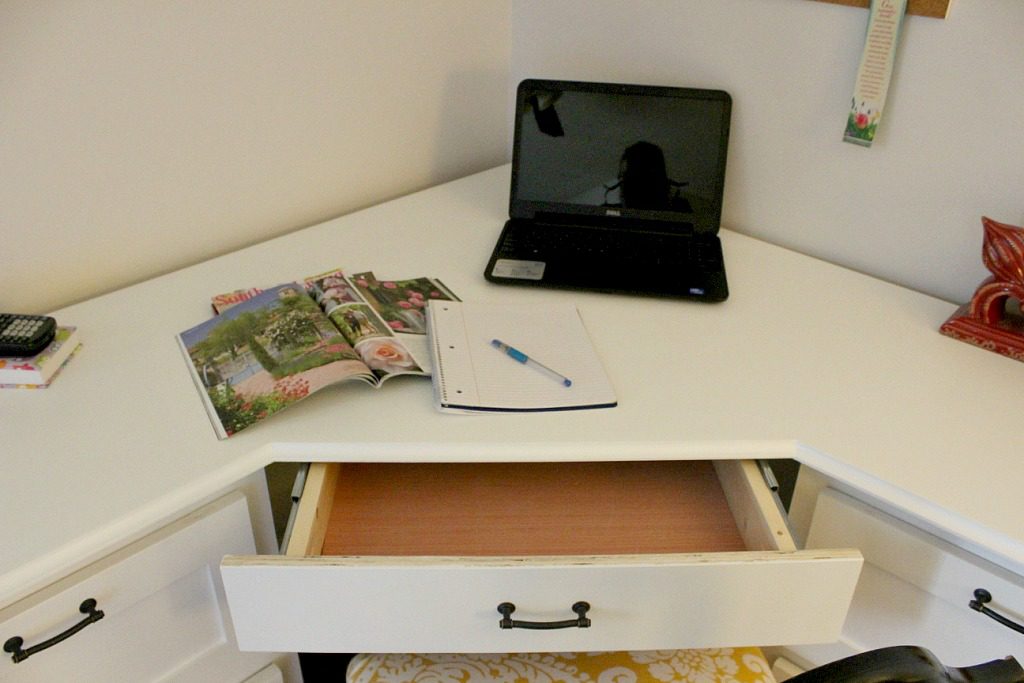
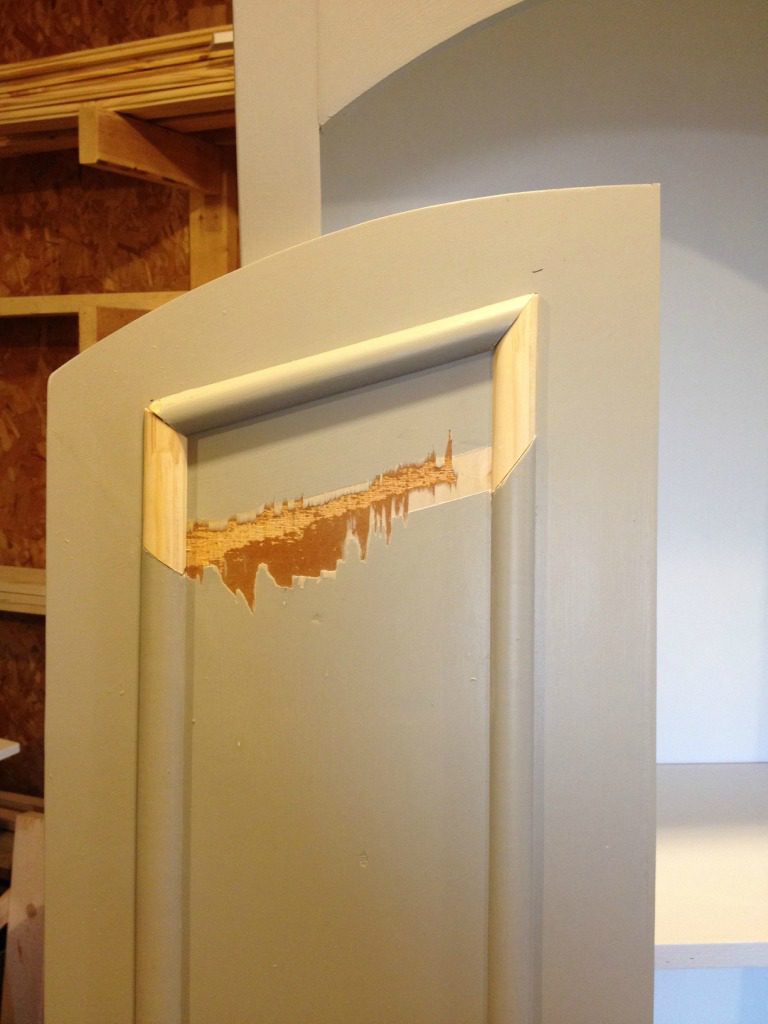
But, I’m not a huge fan of those bulky-plastic-snap-the-lid-on cake carriers. And it’s not the most glamorous packaging to throw tin foil over your pie right before walking out the door to the party. So what’s a “dessert bringer” to do??

.

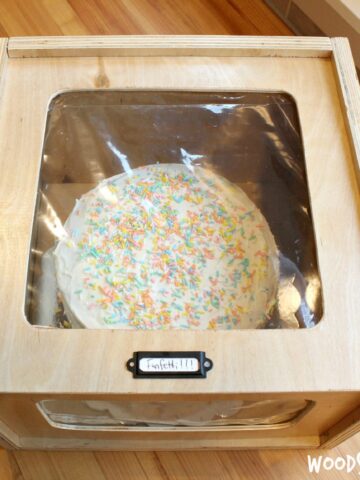
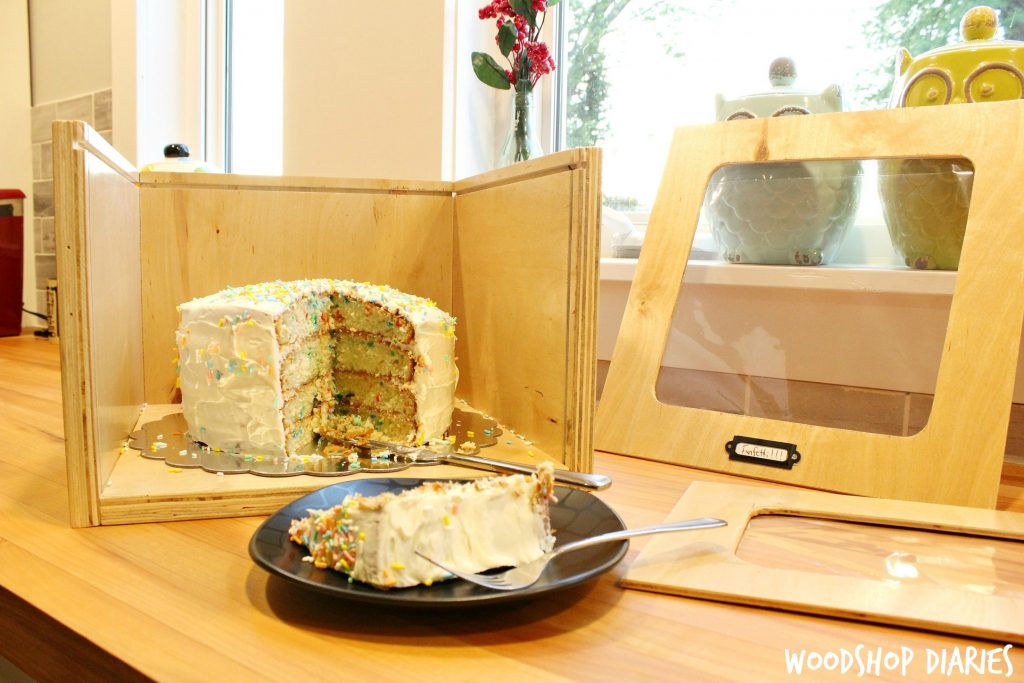
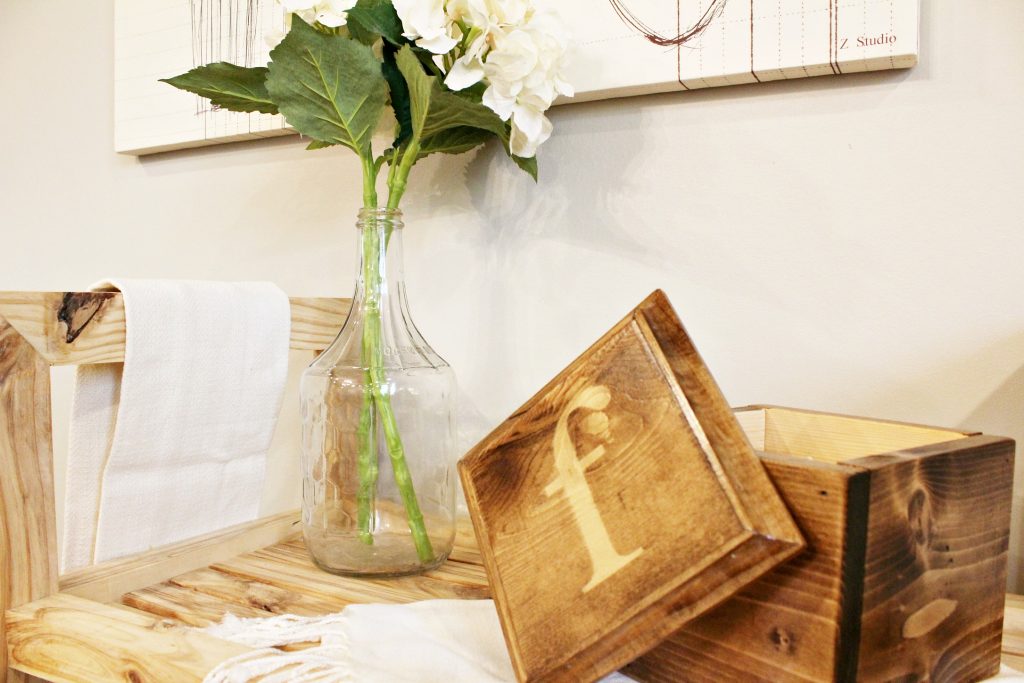
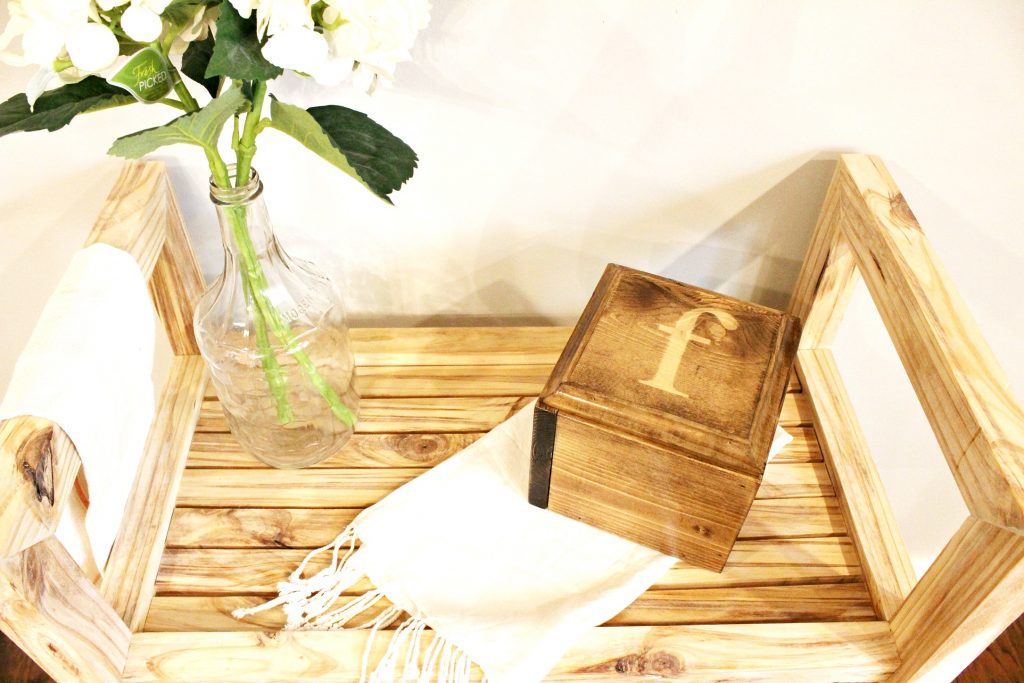
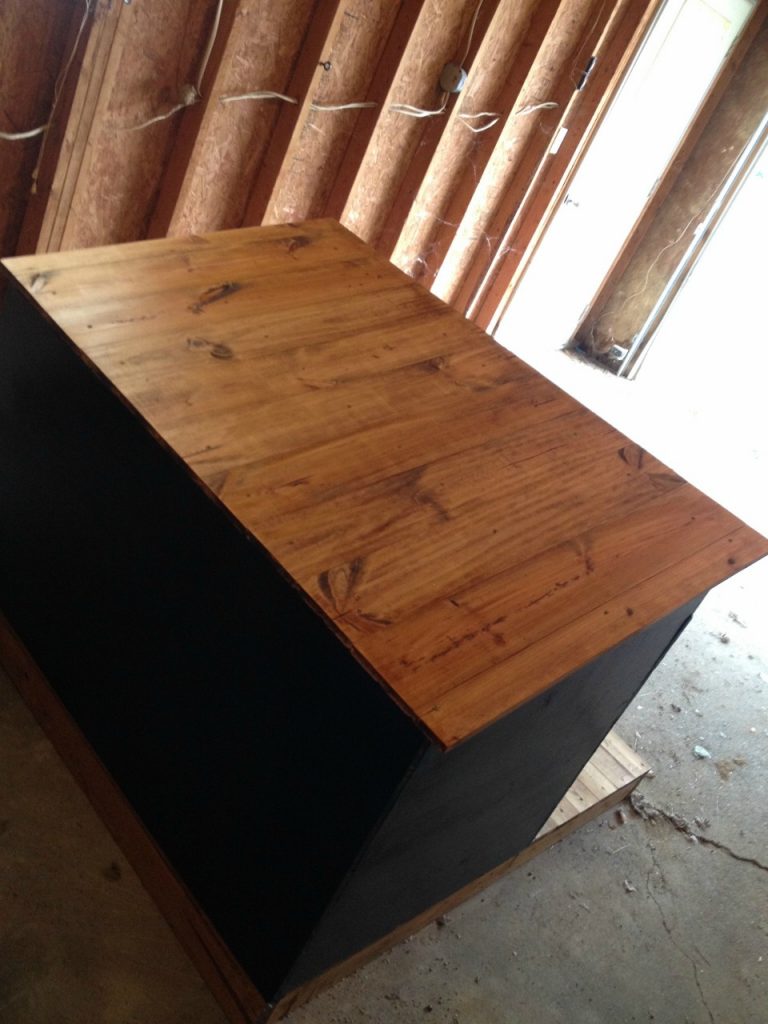
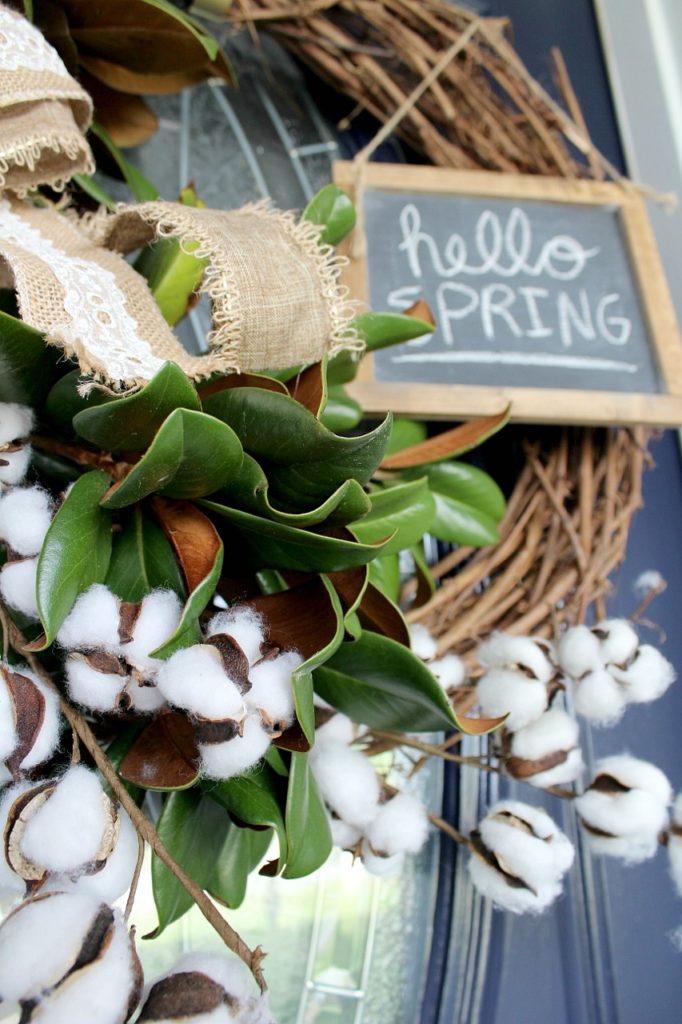
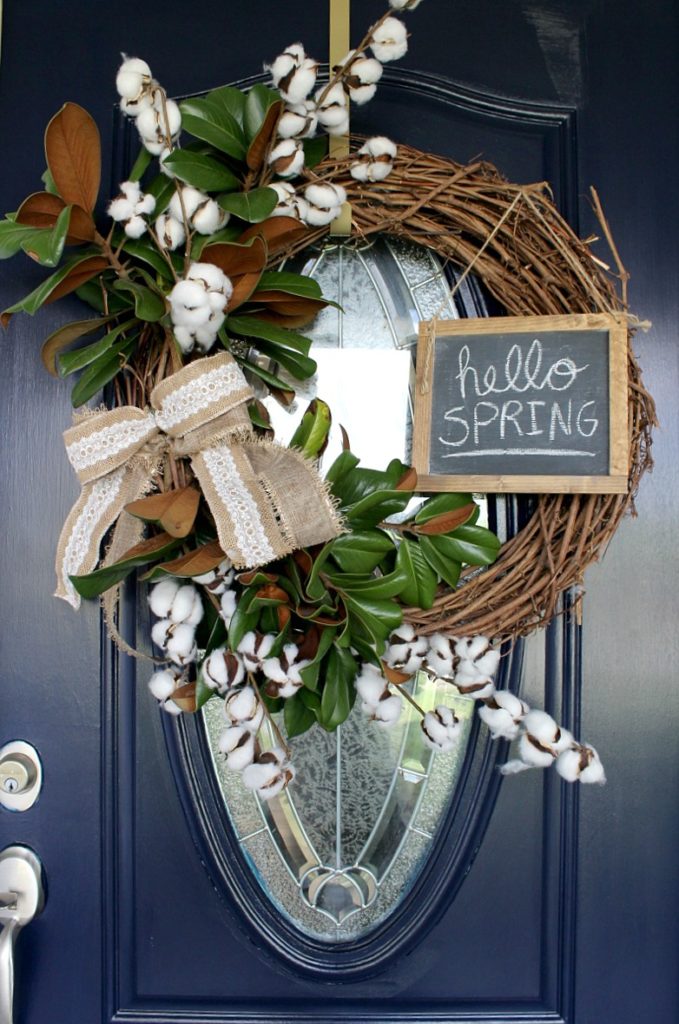
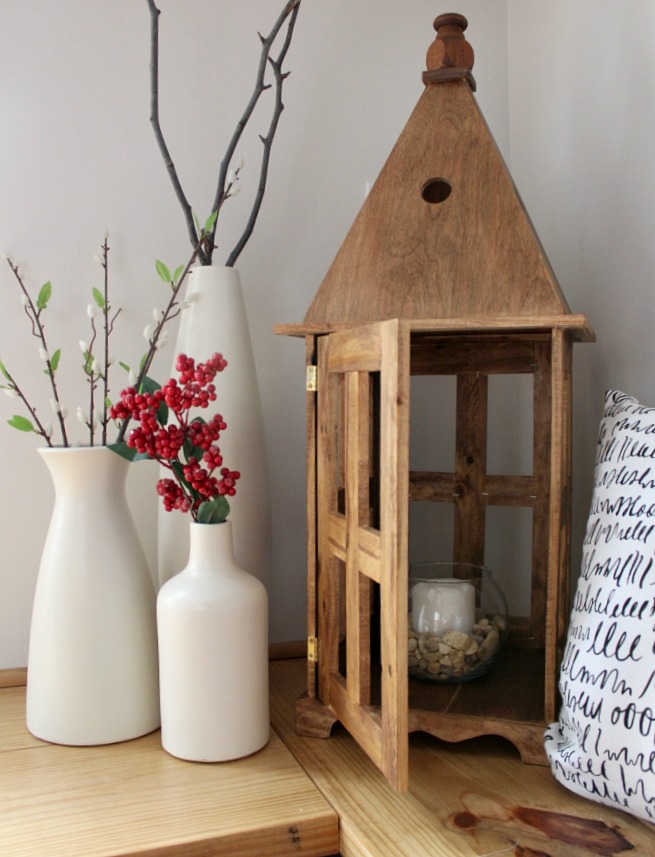
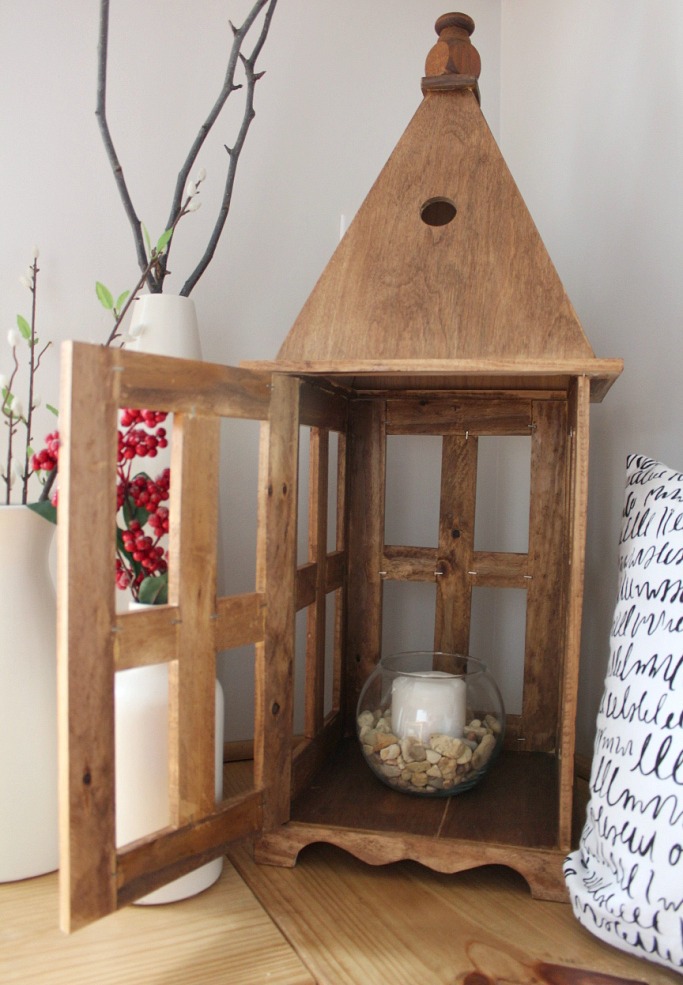
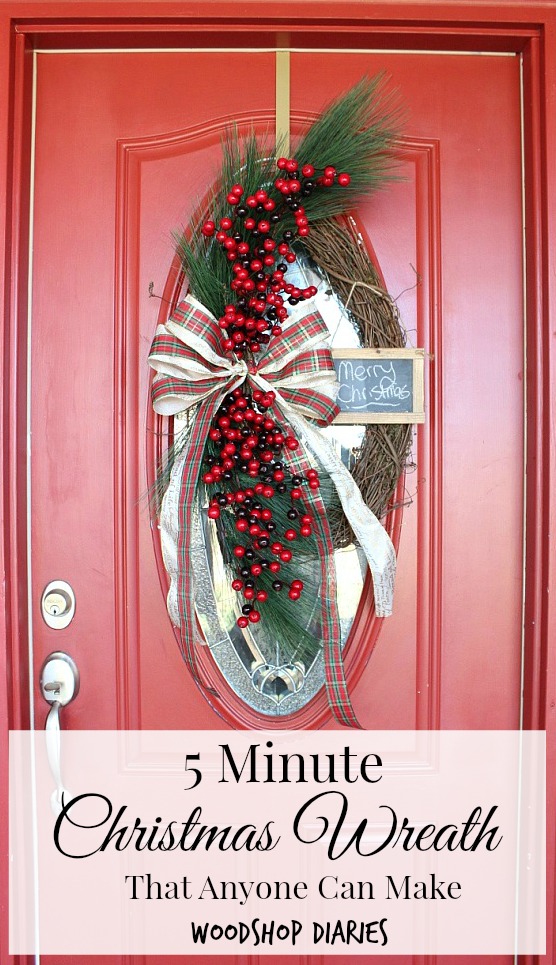
Obviously build a dessert carrier that everyone will be asking about as soon as you show up to the partay!!

How to build a DIY Wooden Cake Box from Wood Scraps

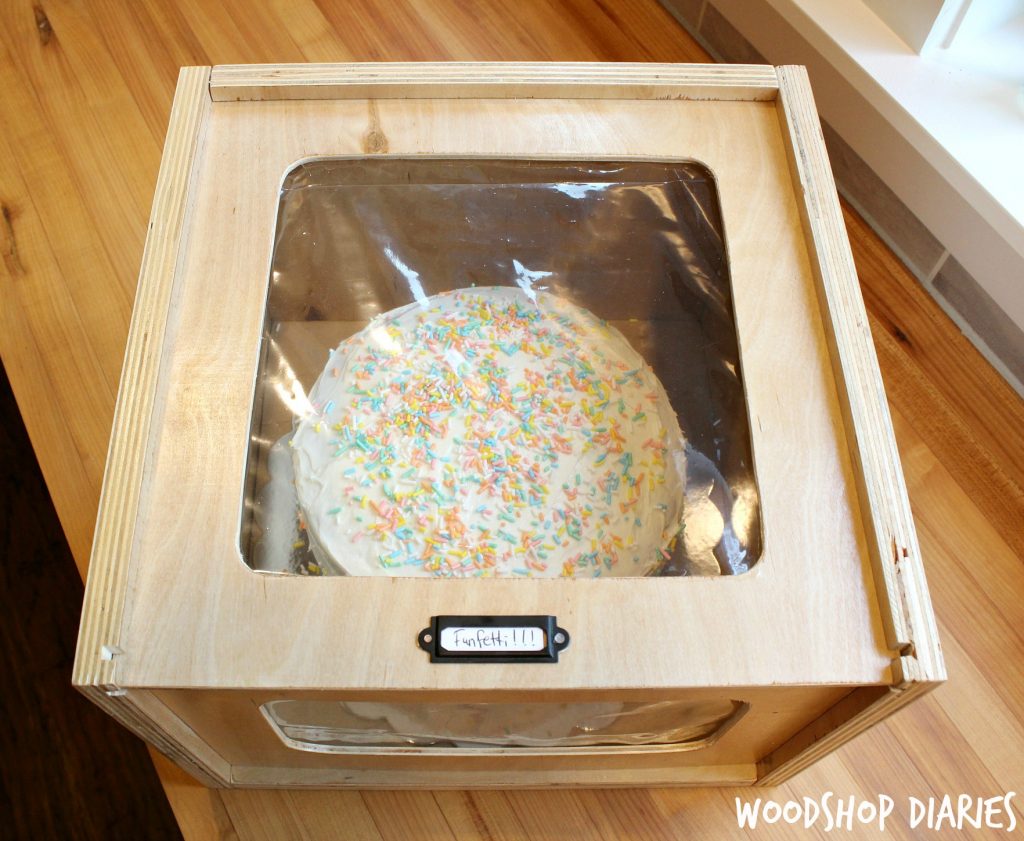
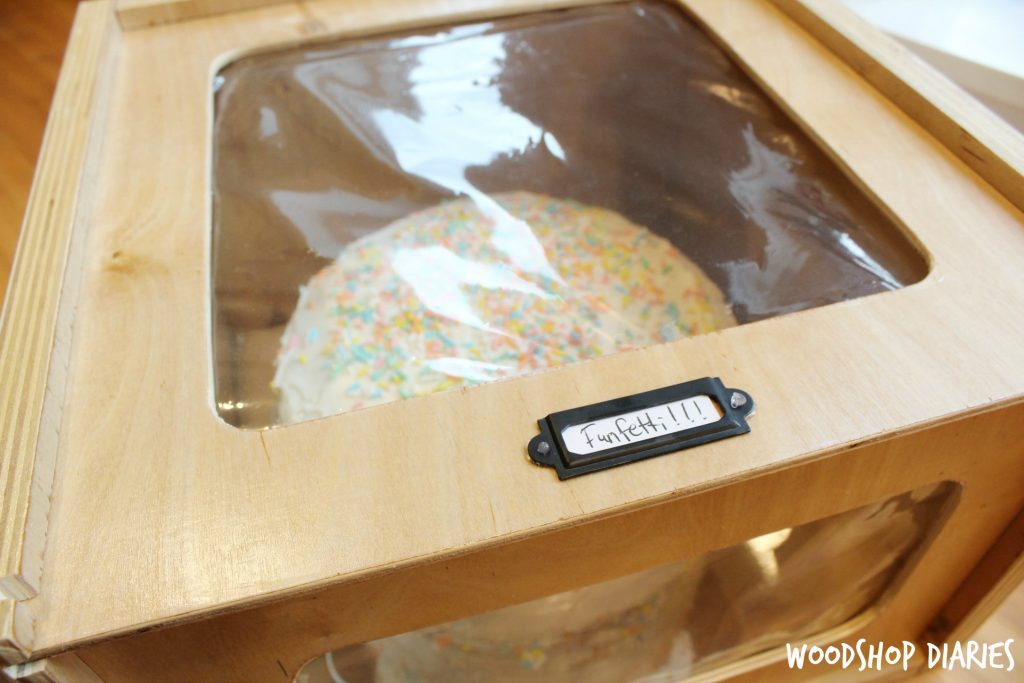
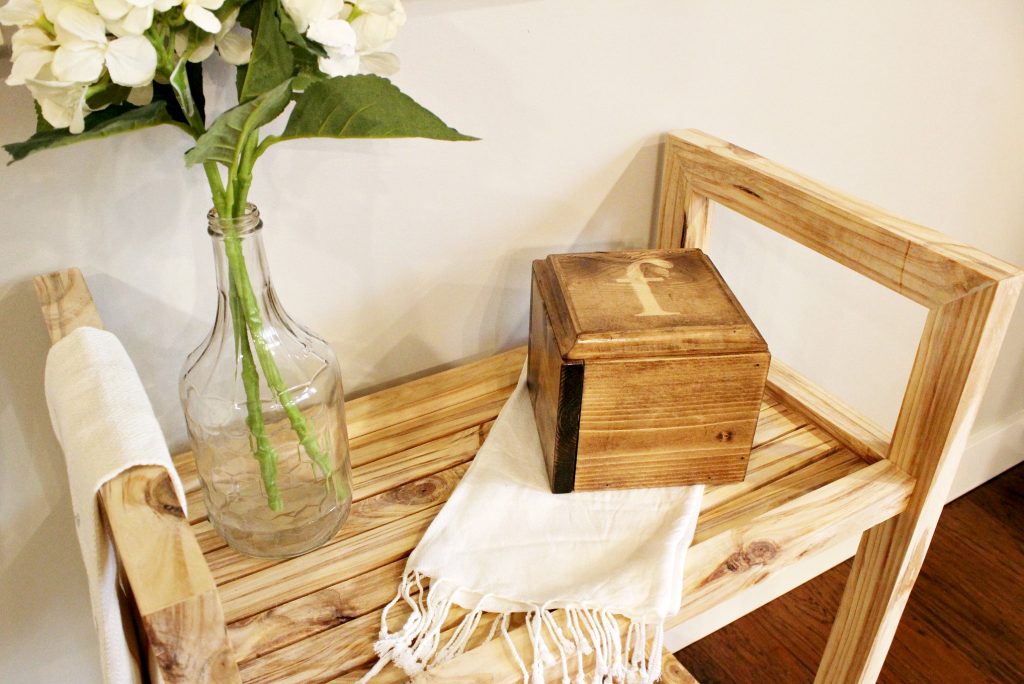
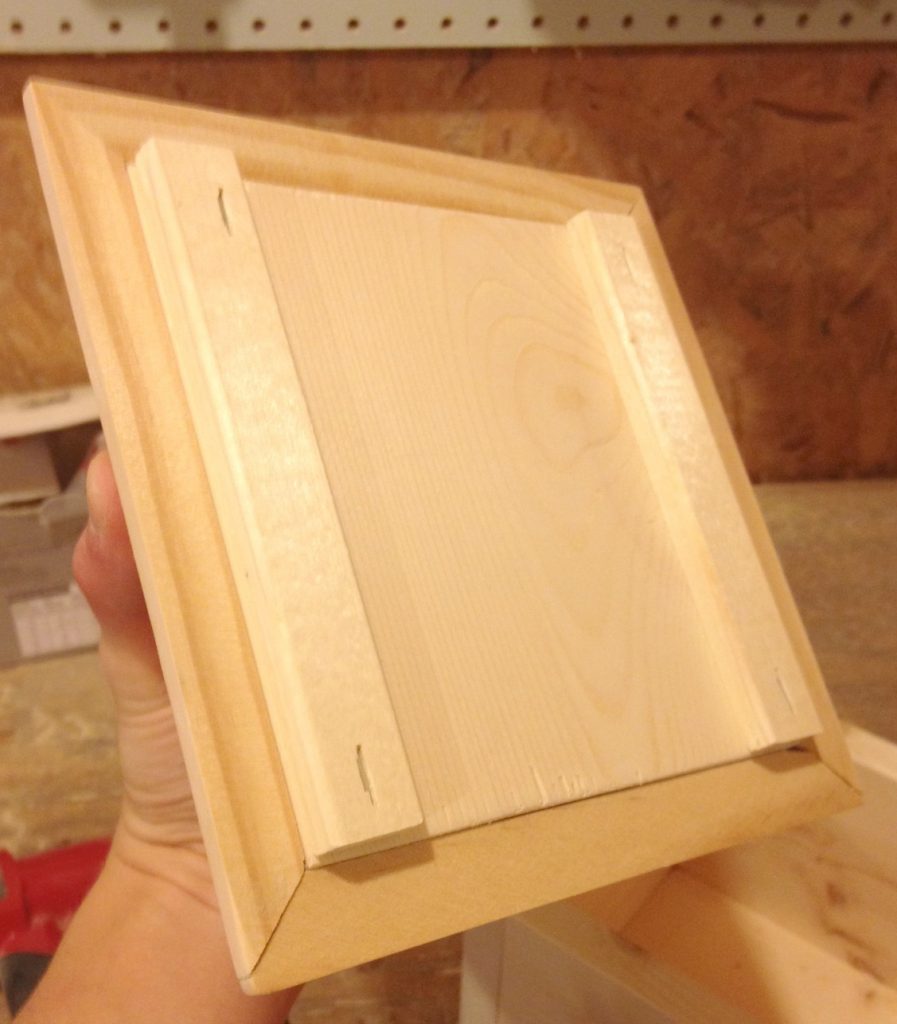
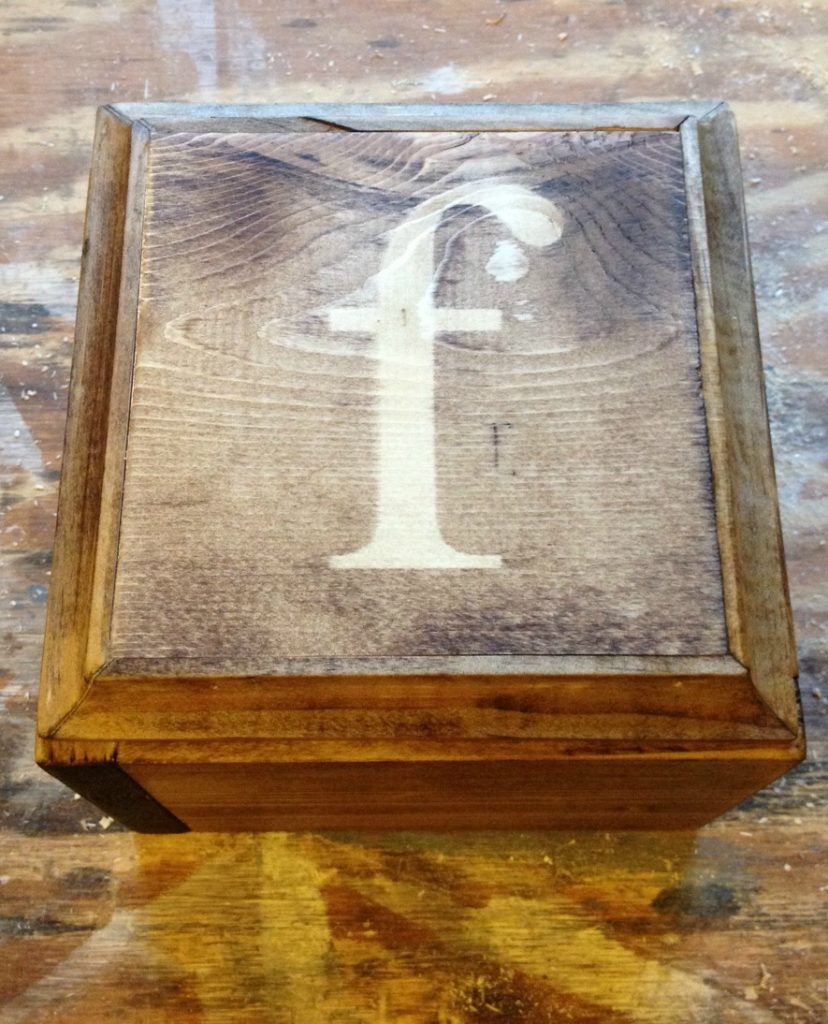
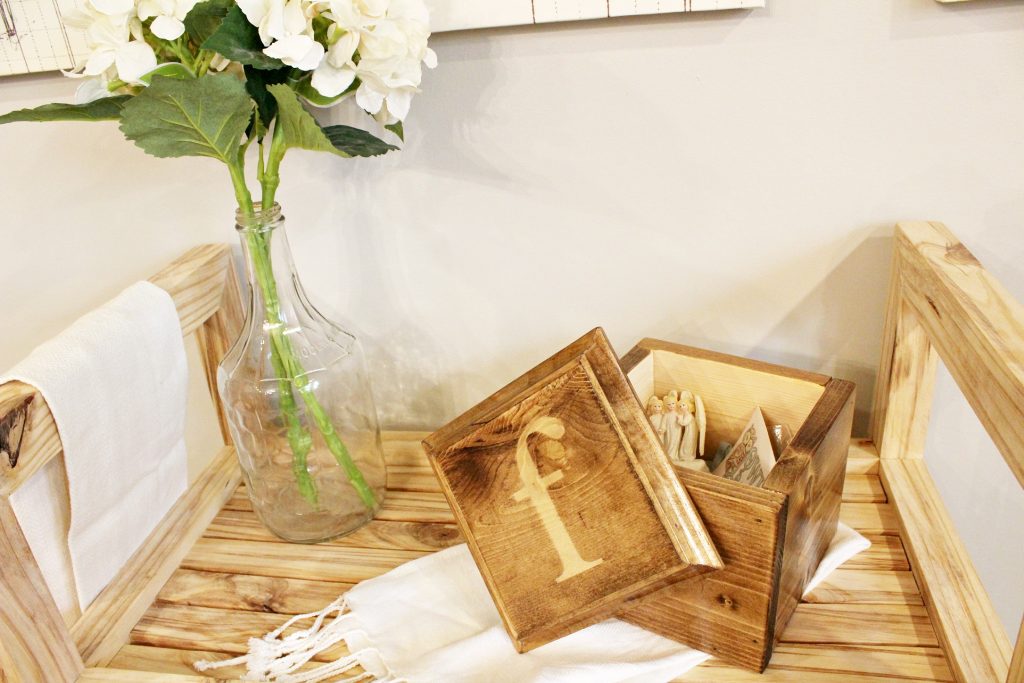
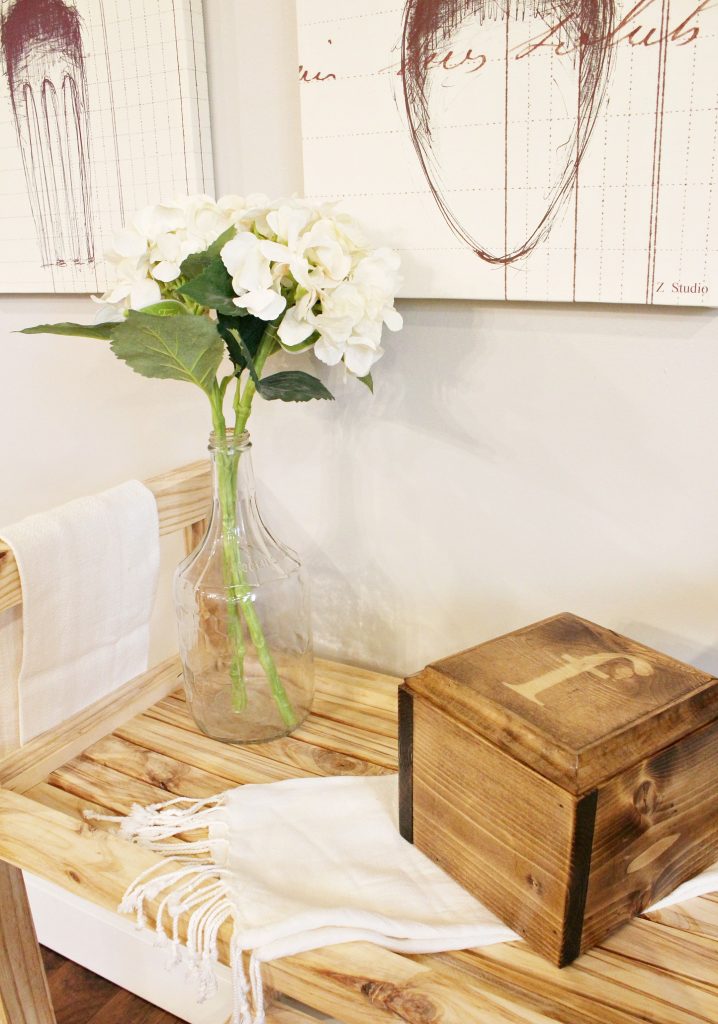
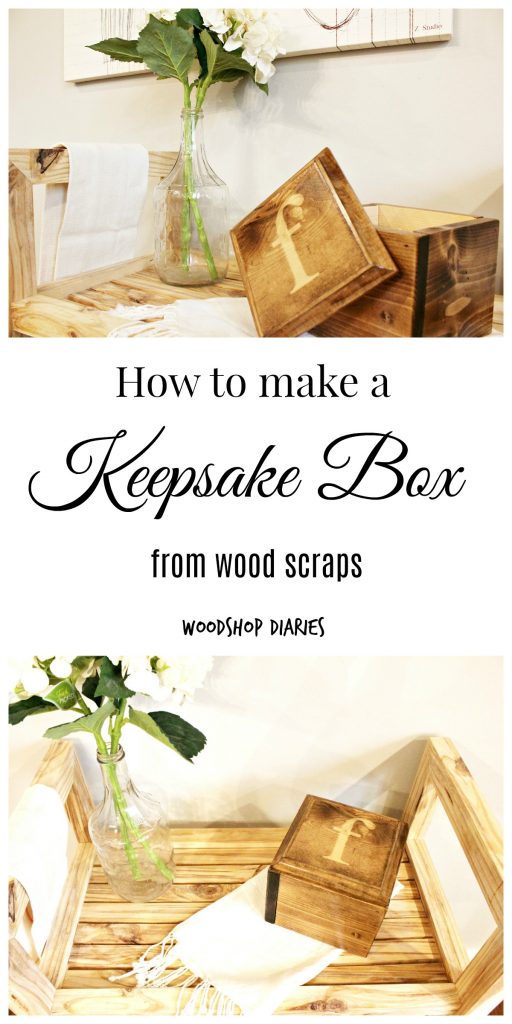
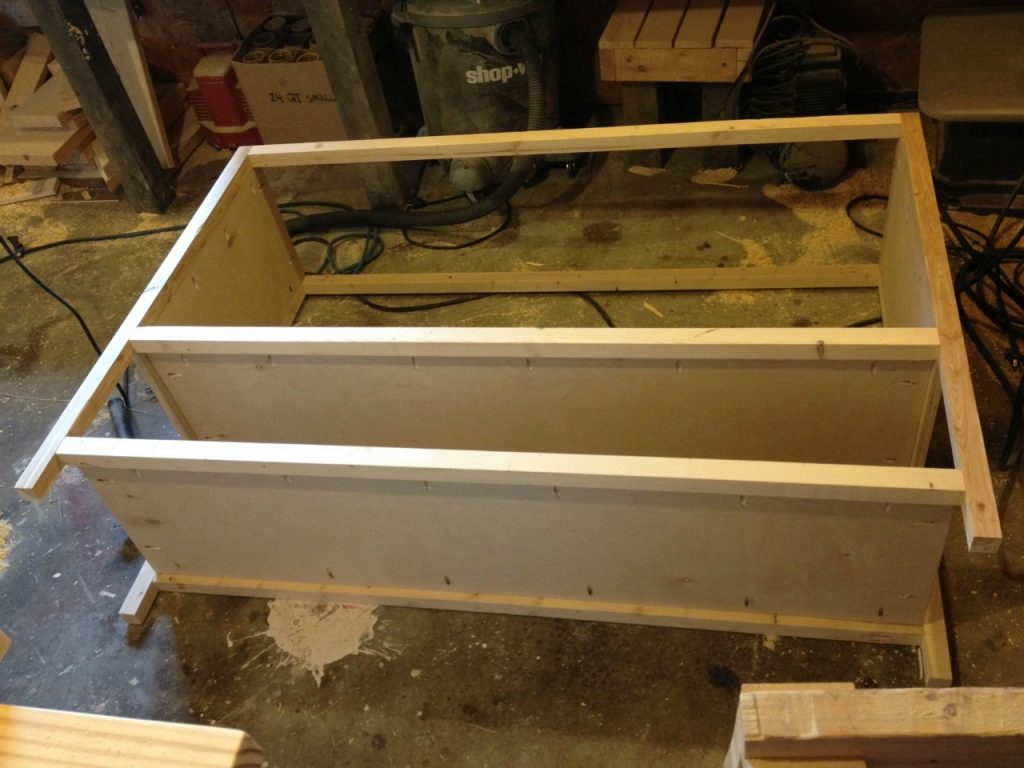
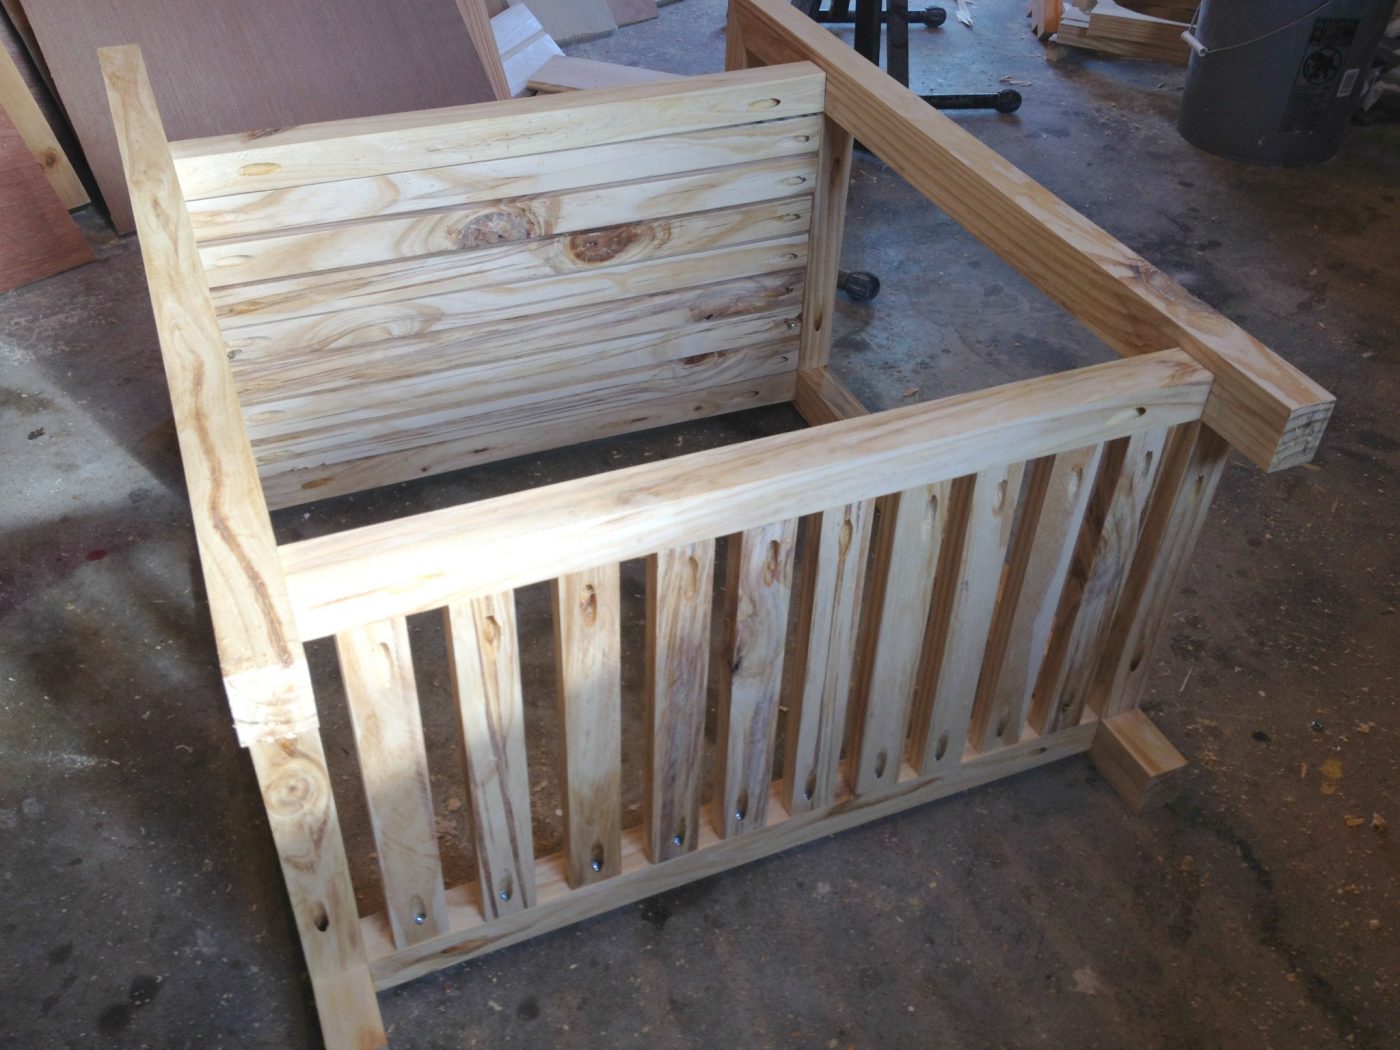
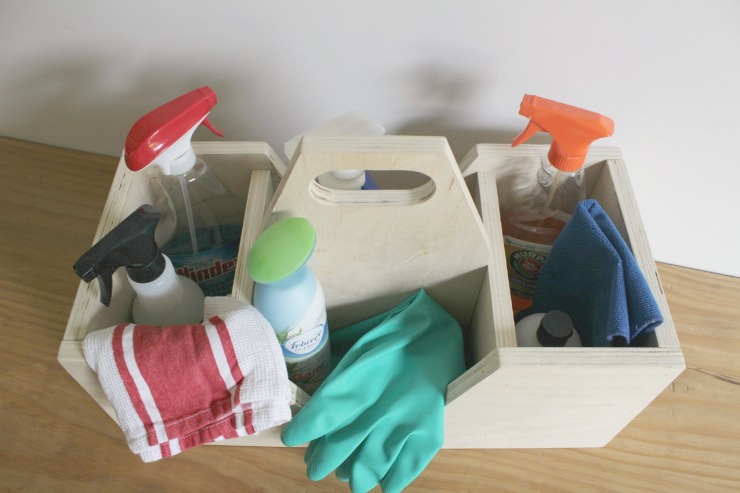
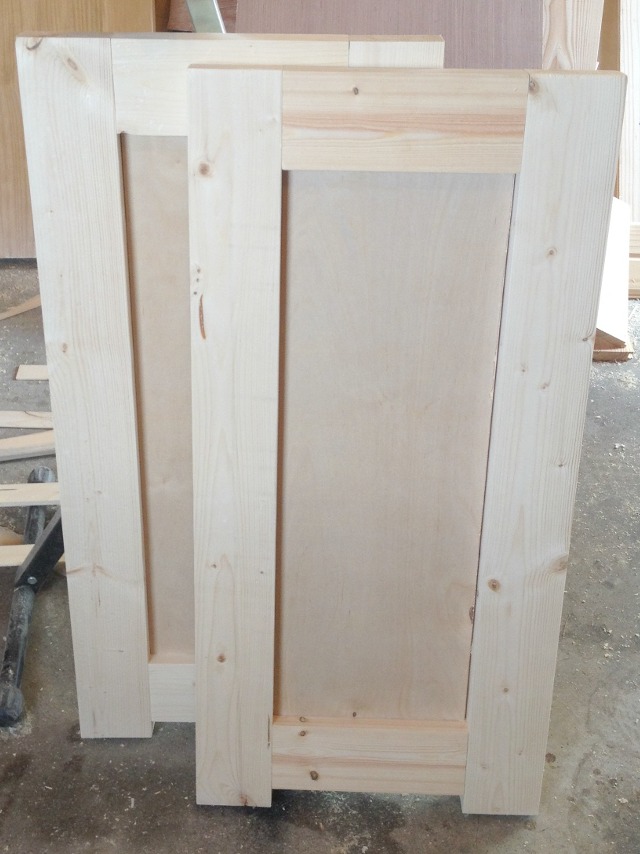
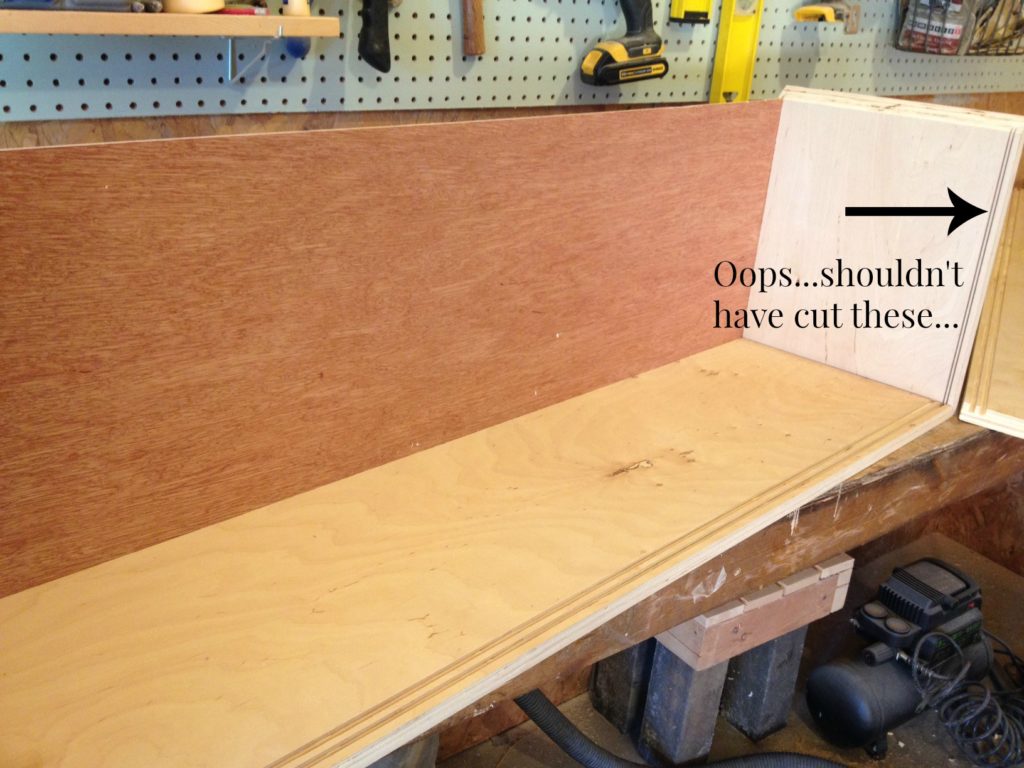
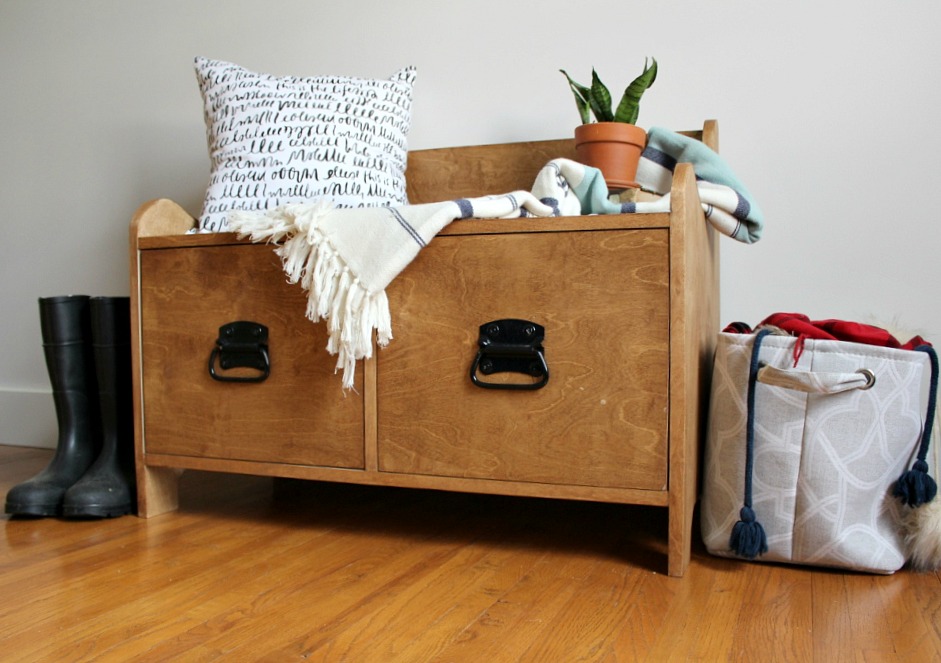
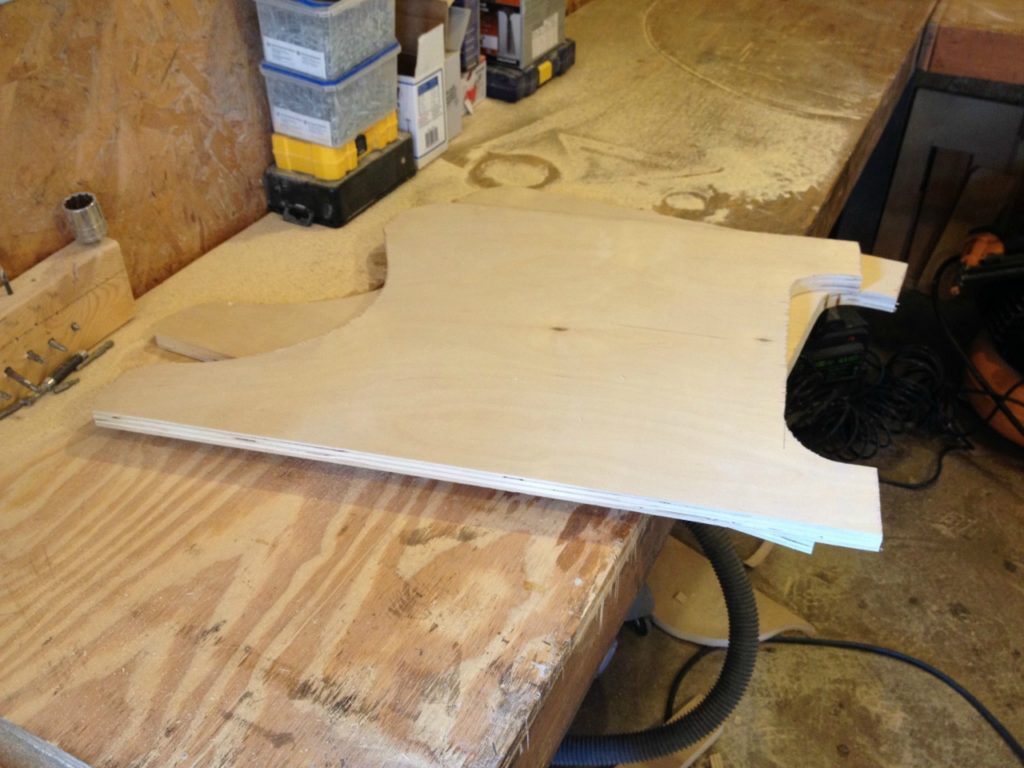
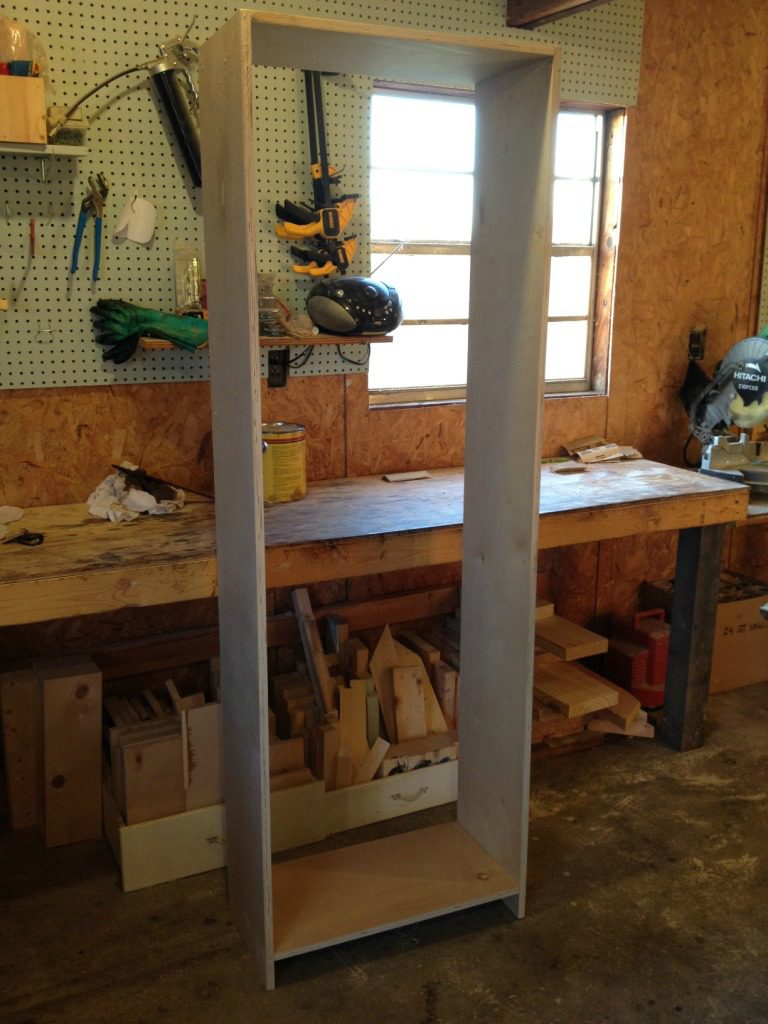
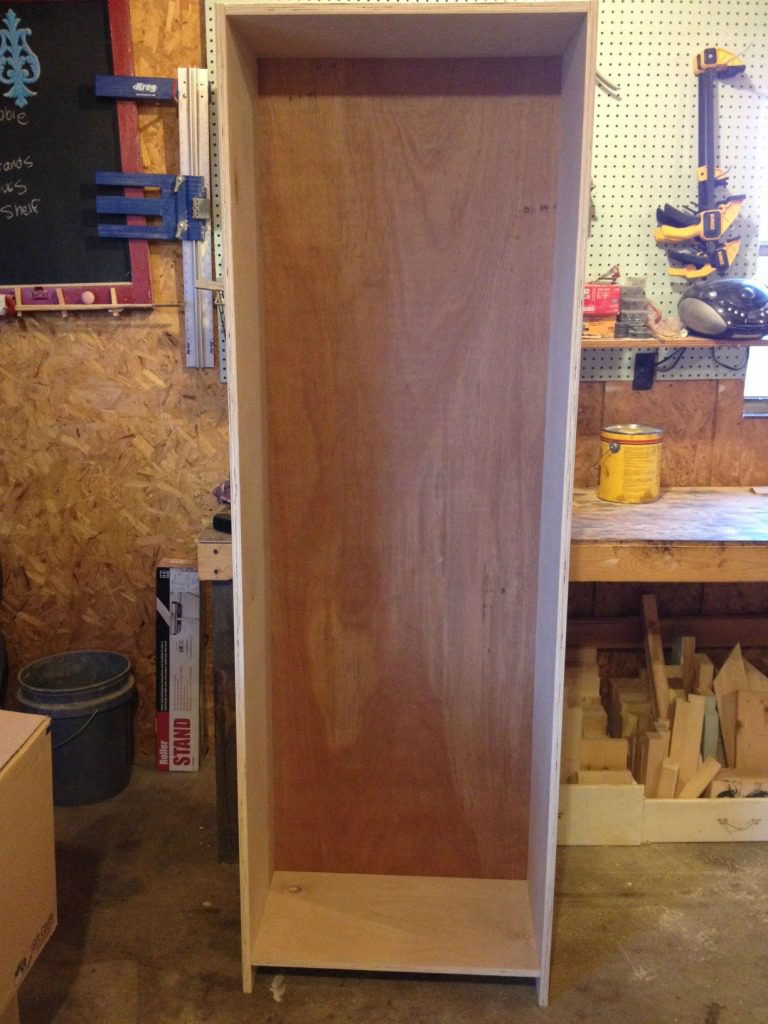
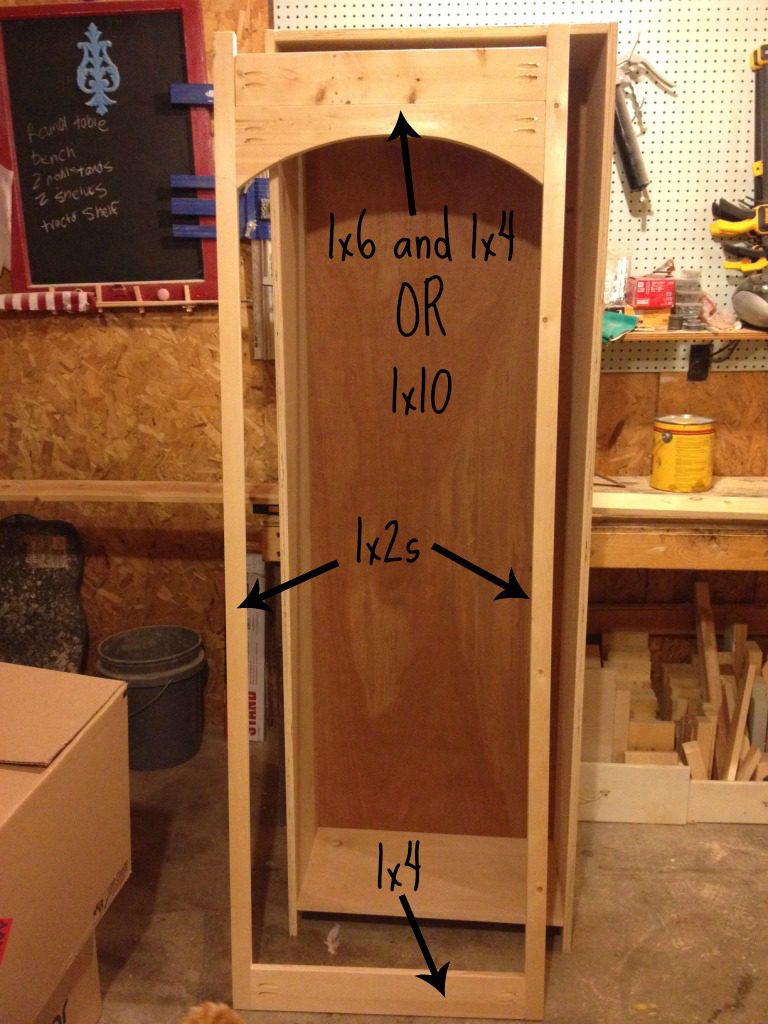
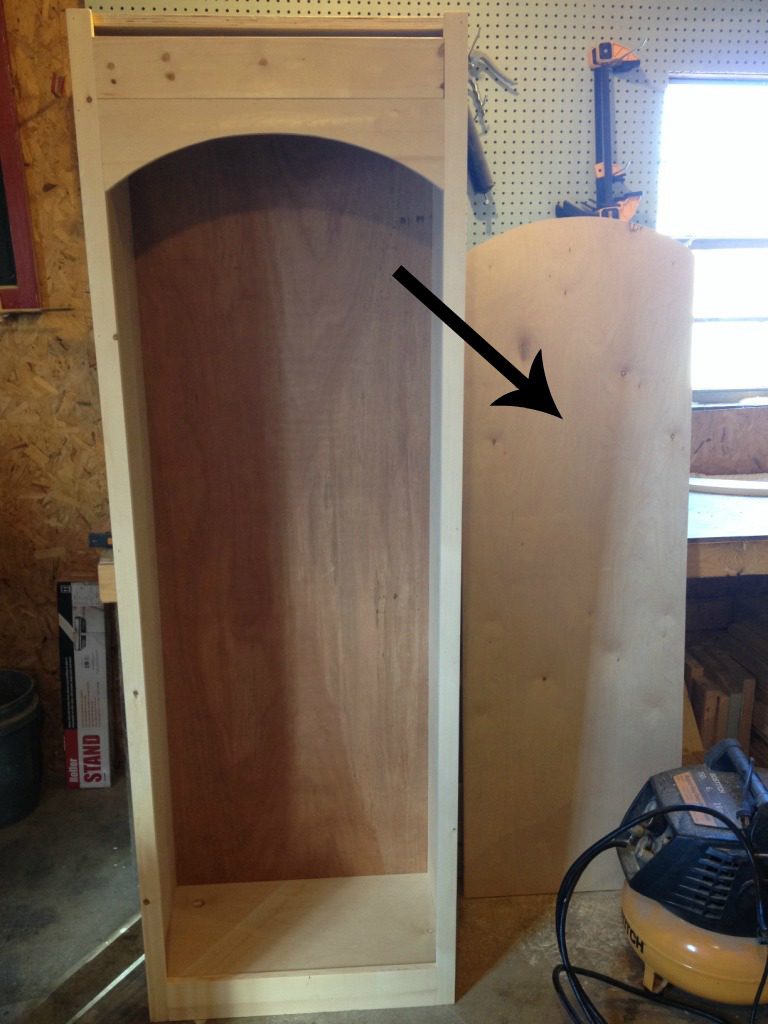
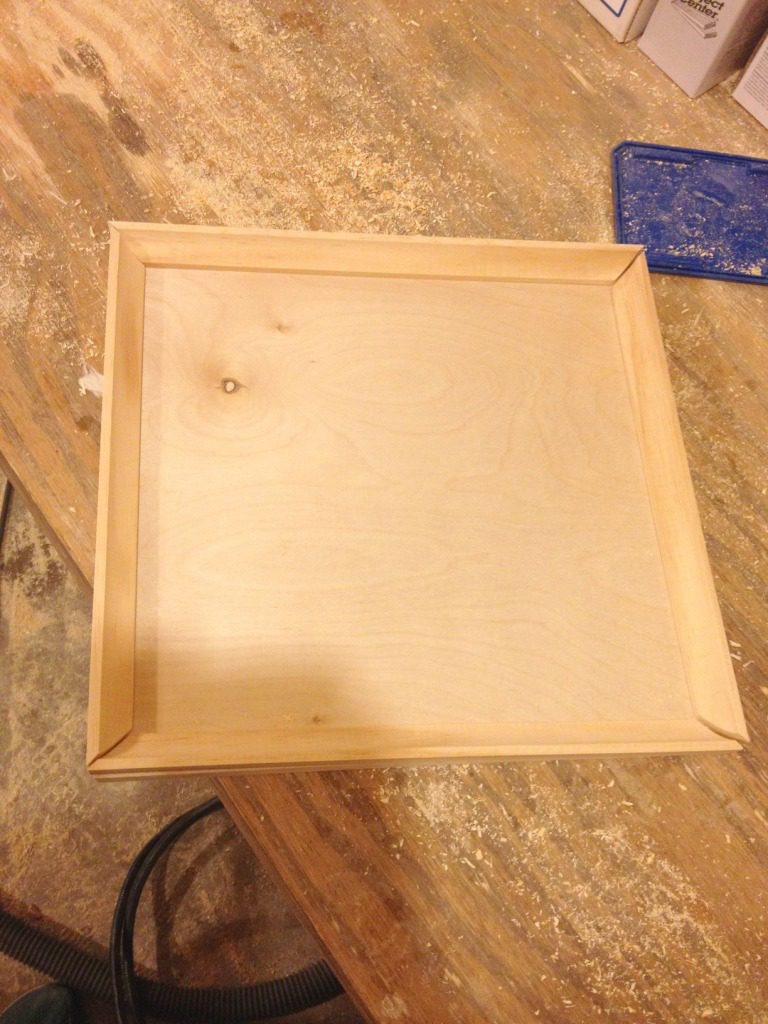
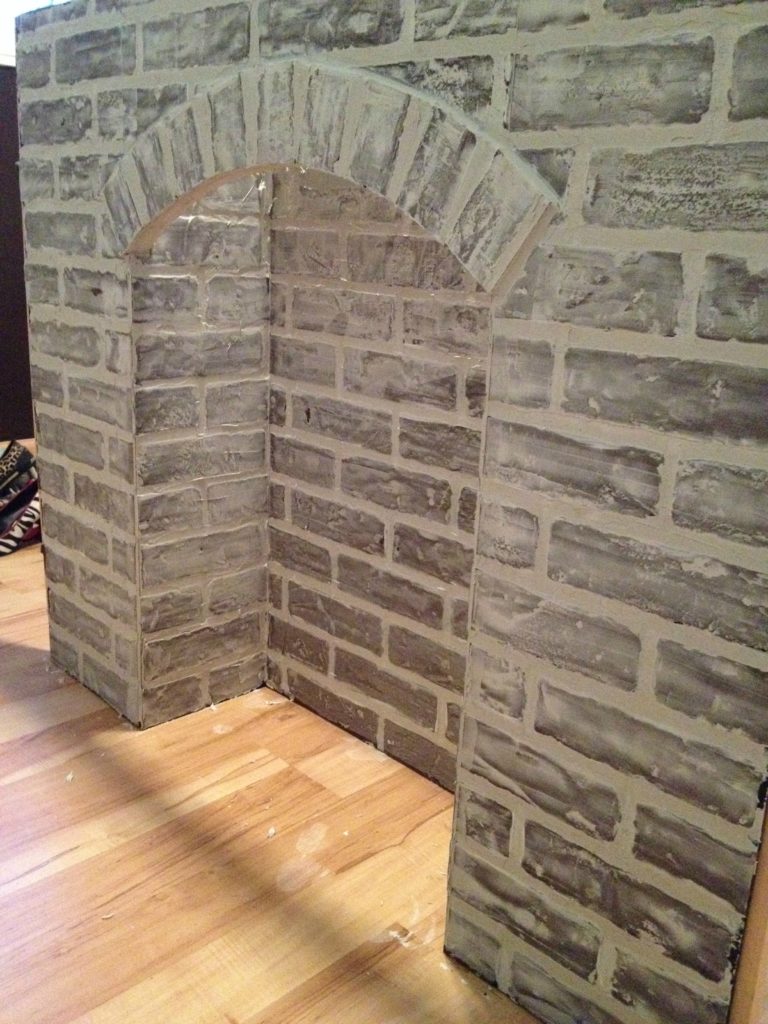
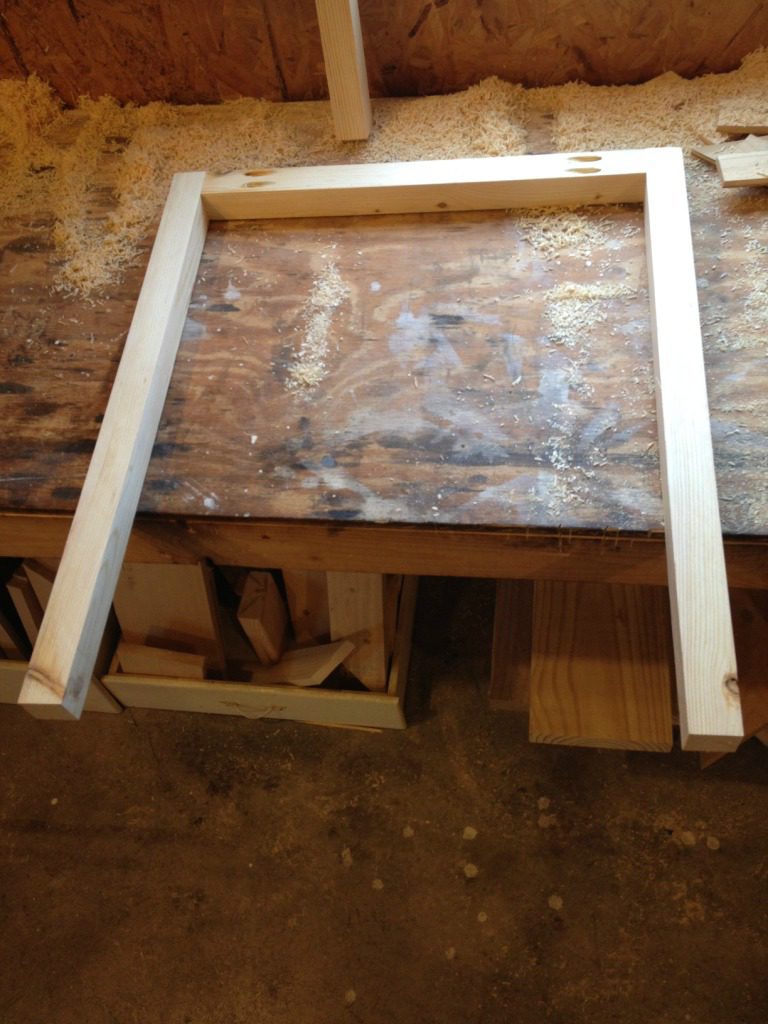
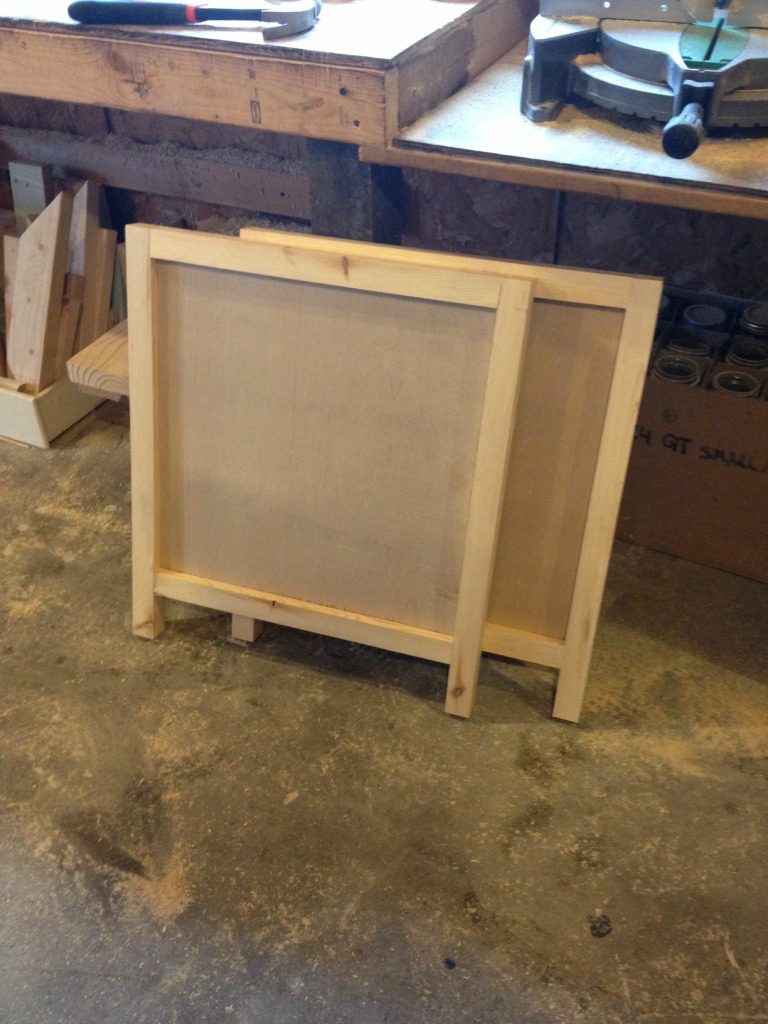
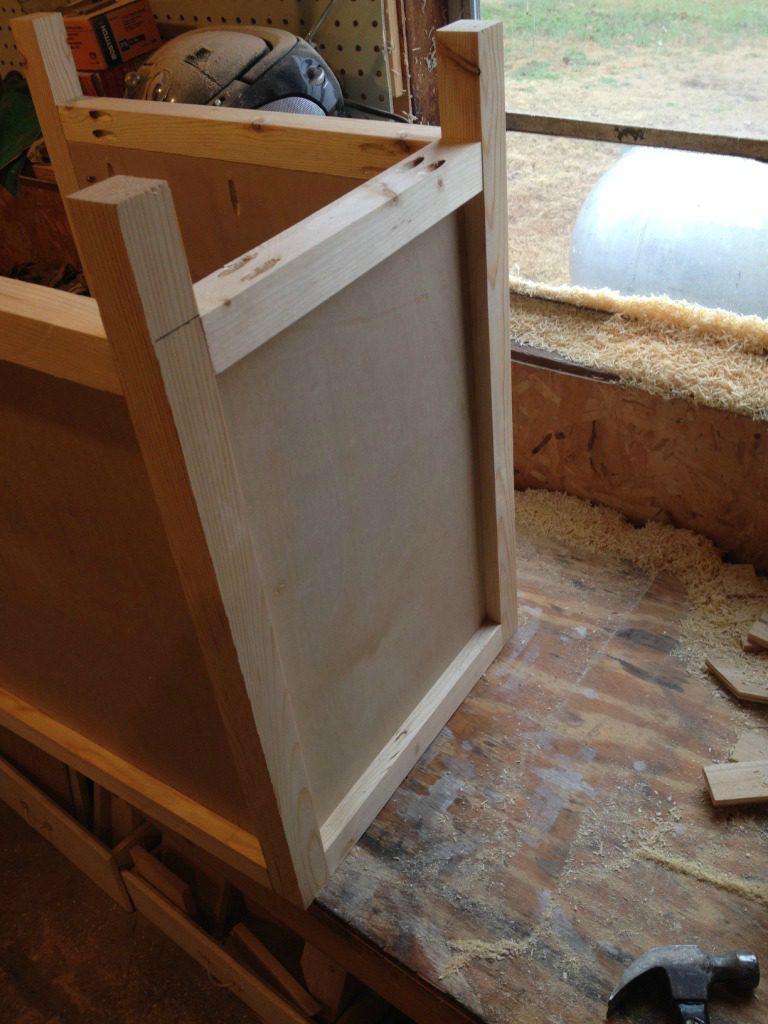
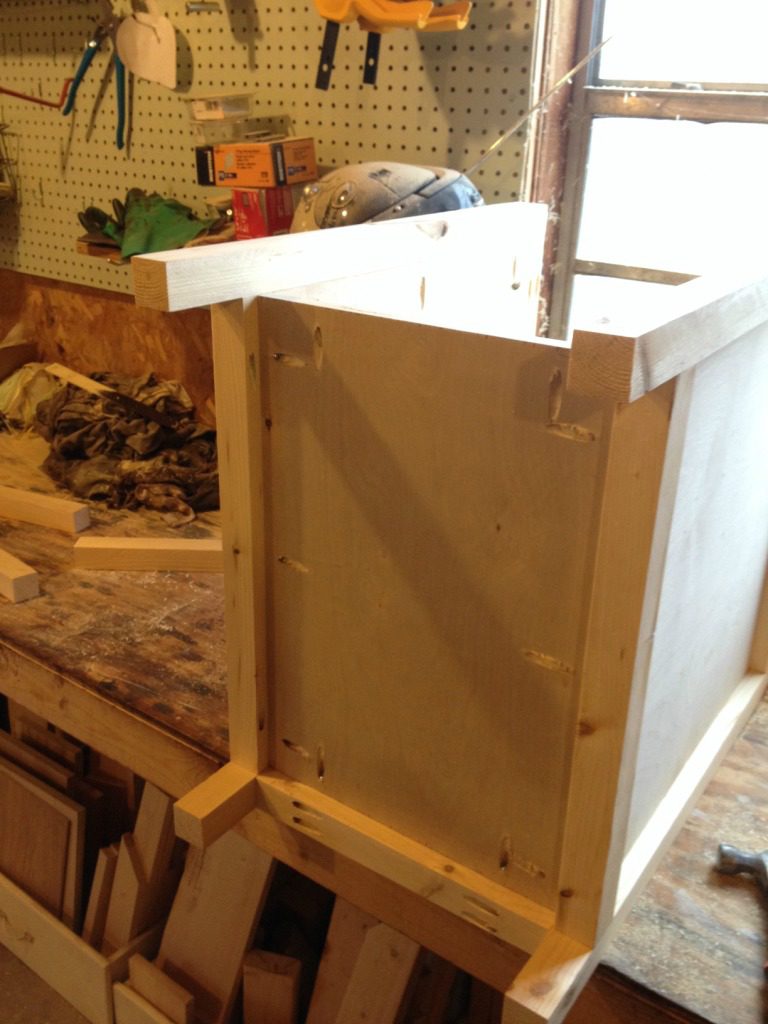
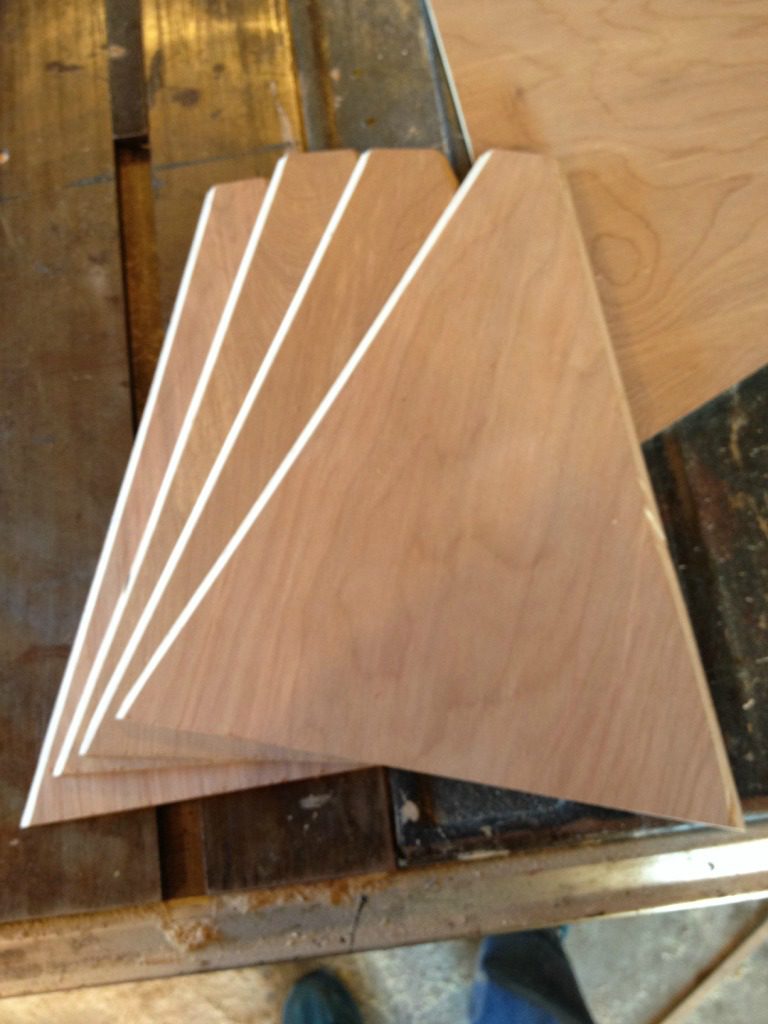
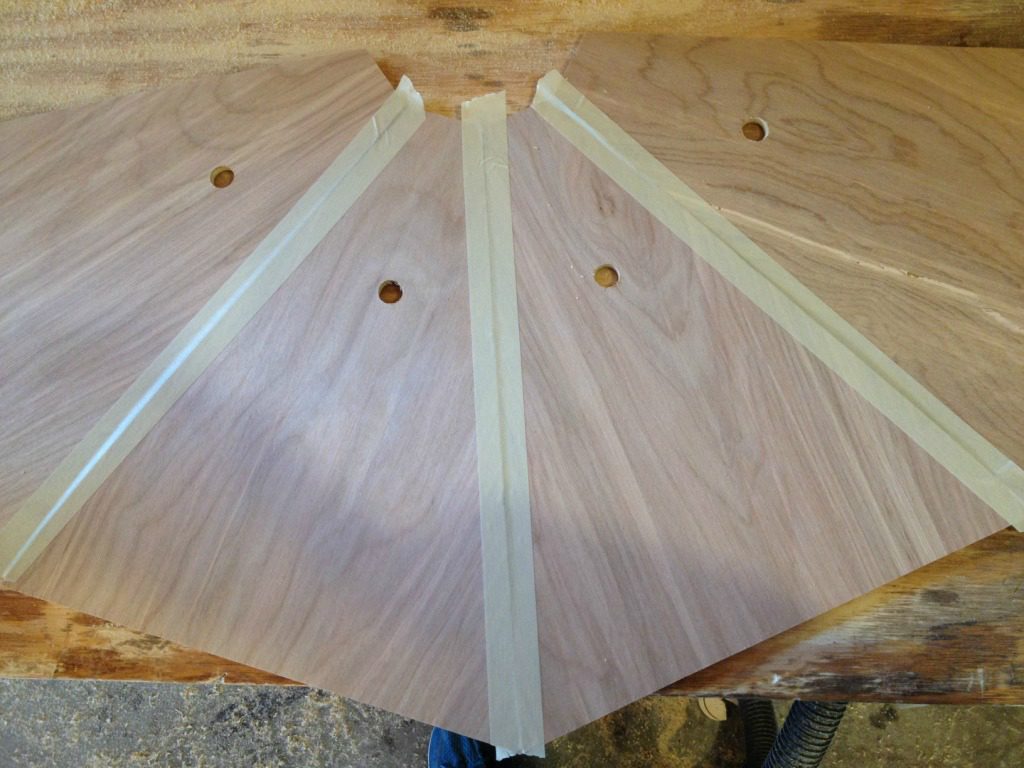
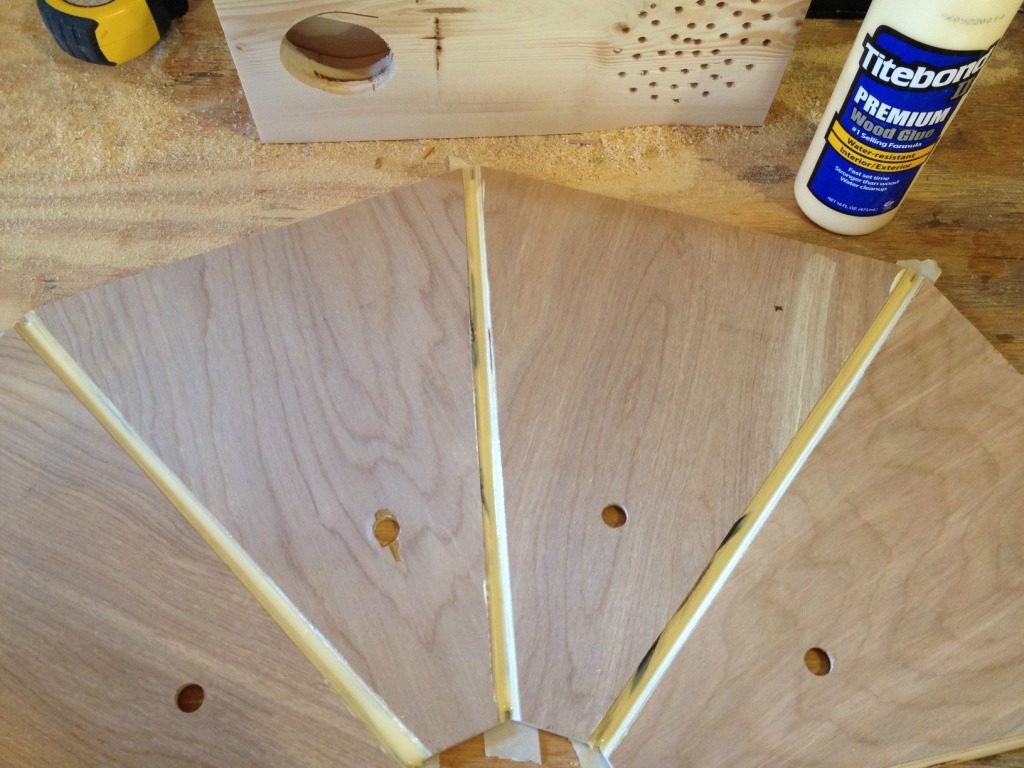
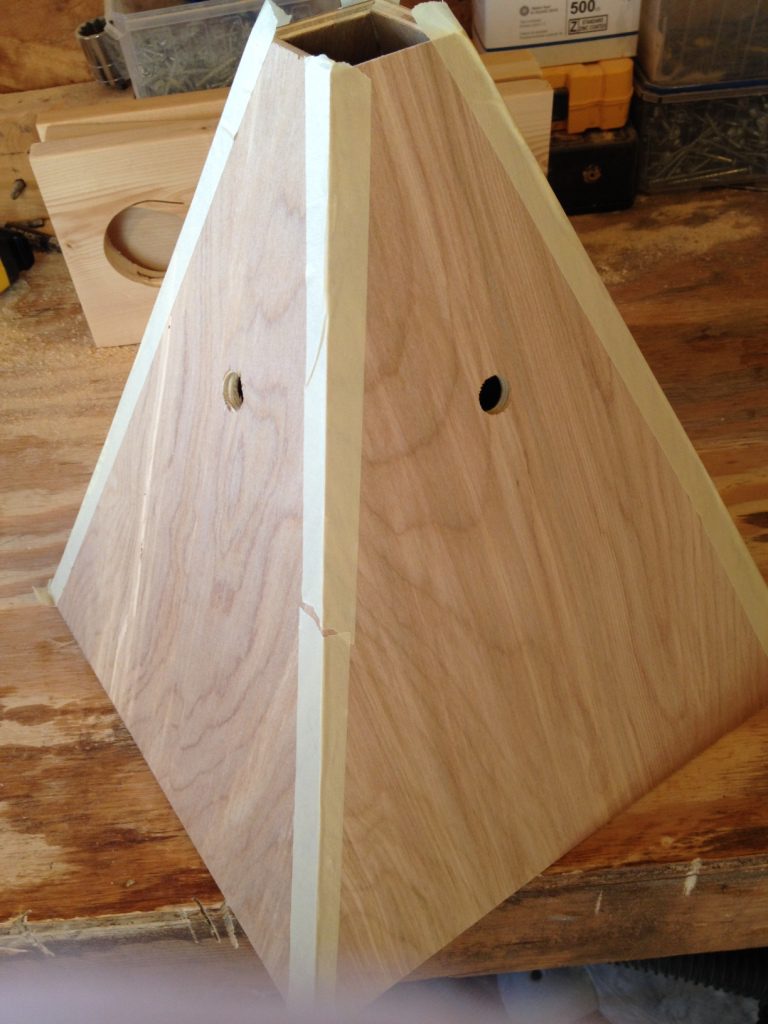
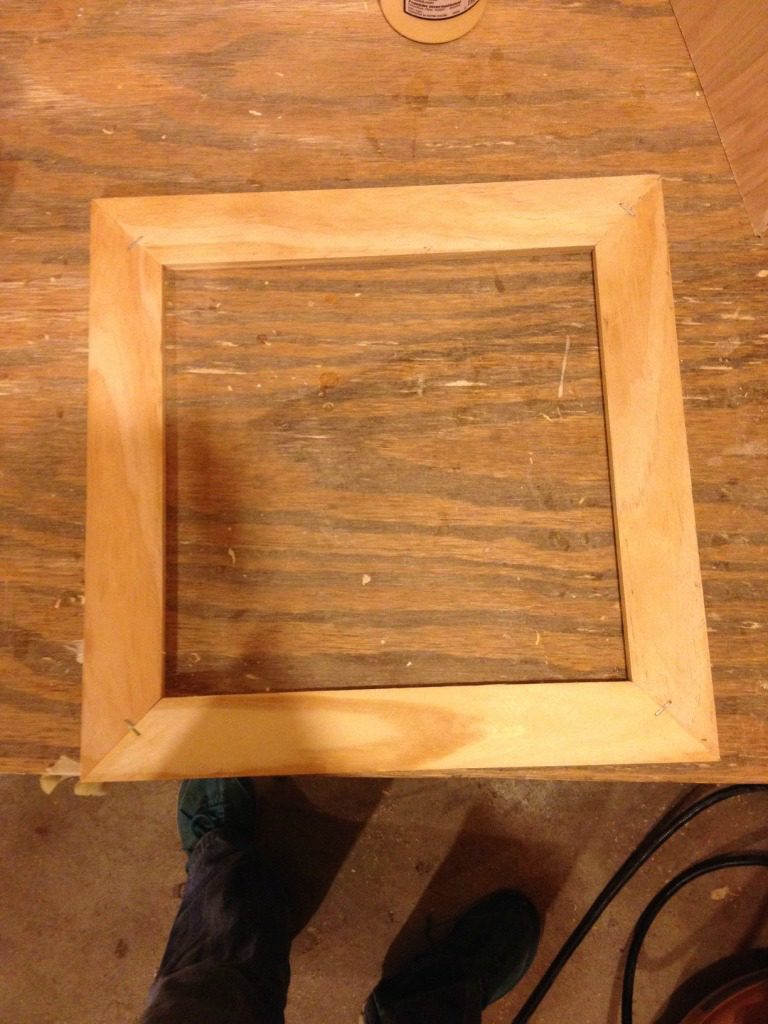
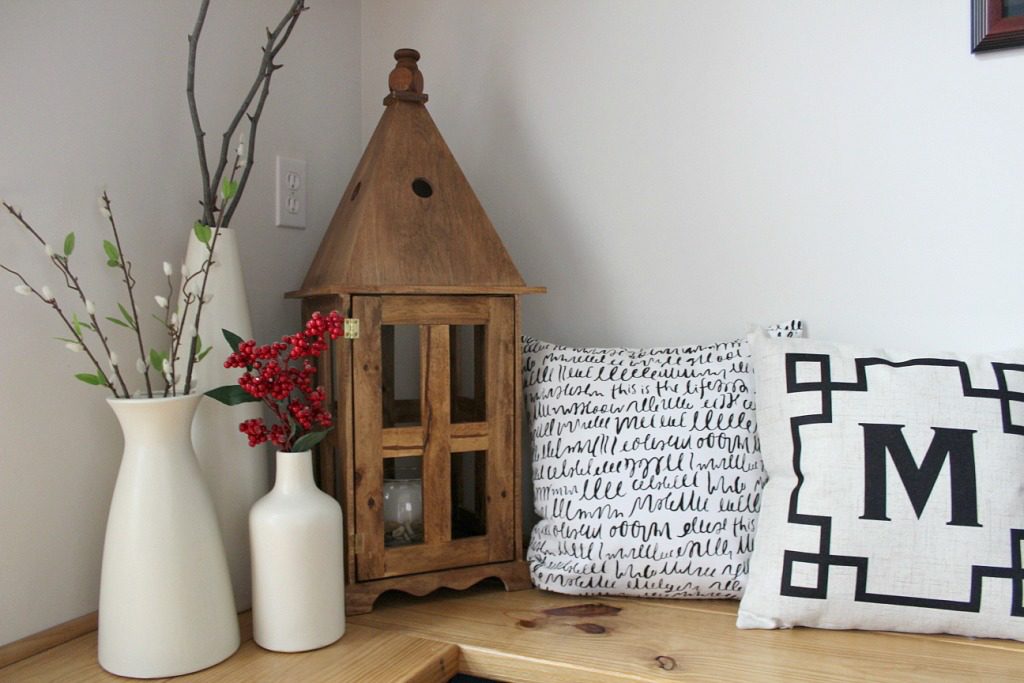
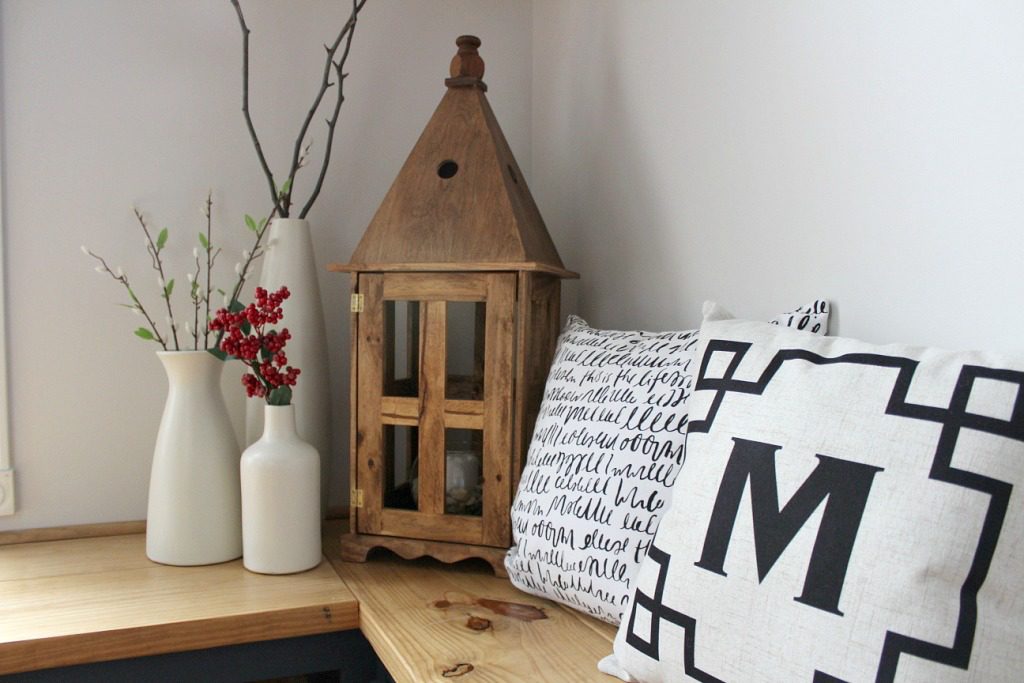
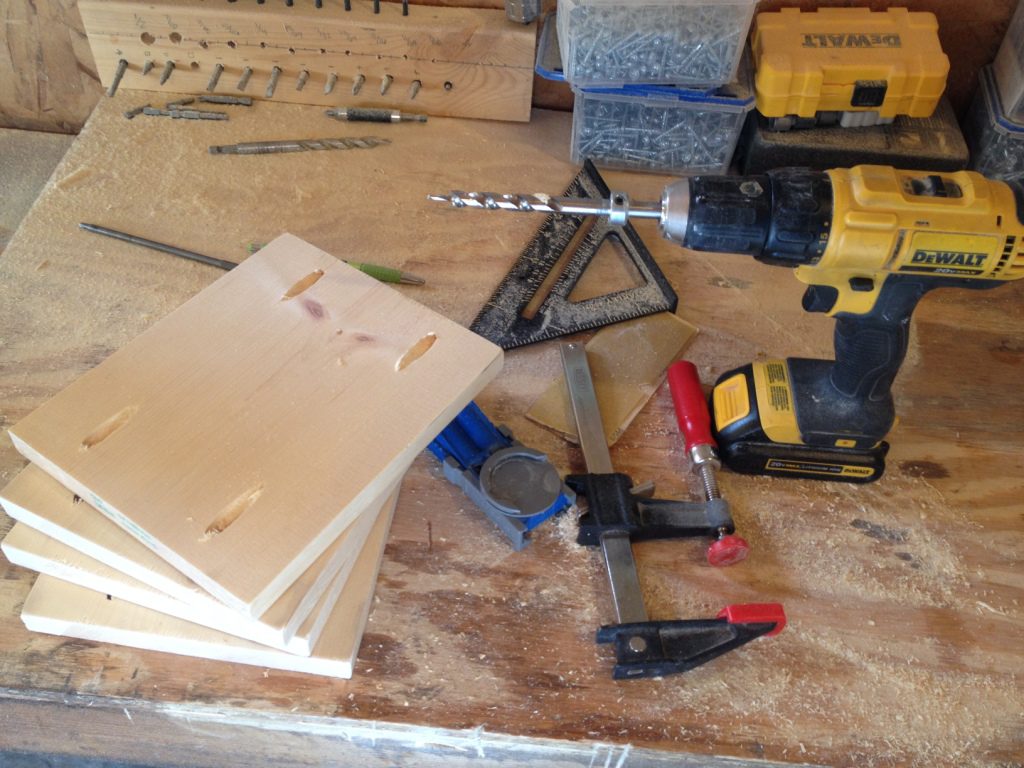
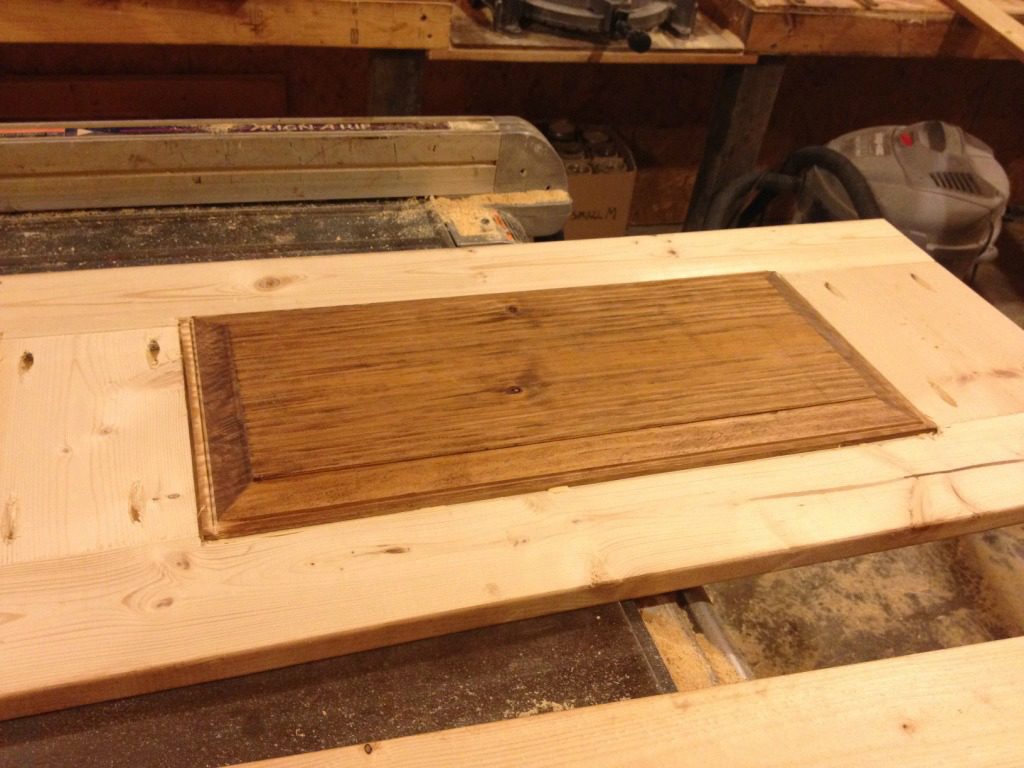
You may have seen wooden cake, pie, and cupcake boxes already. But I have two problems with these (even though they are ridiculously adorable): 1. They are really expensive and 2. You can’t see inside the box.

.

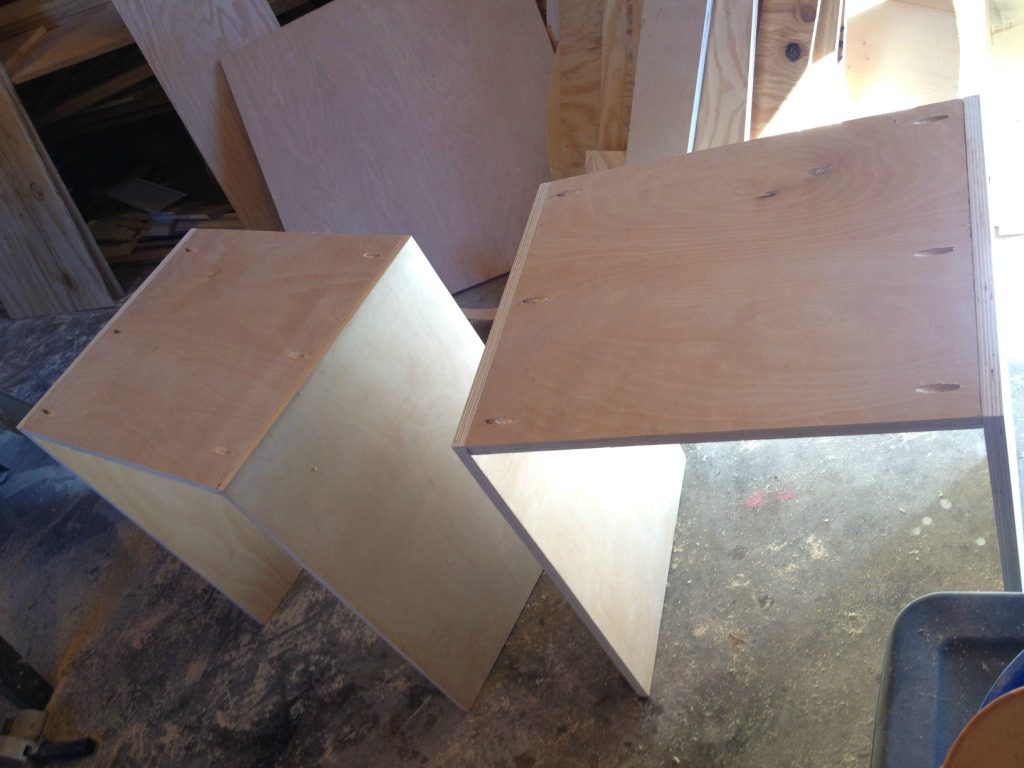
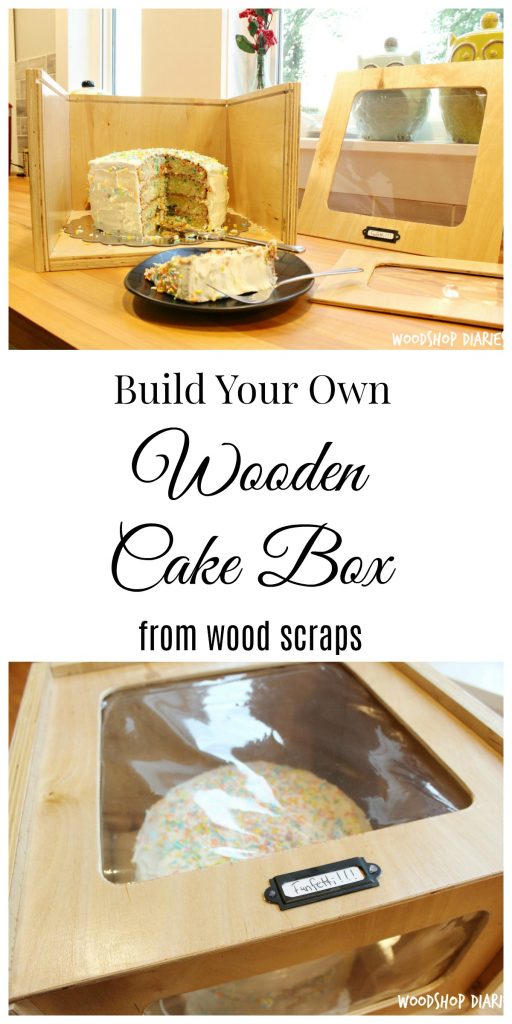
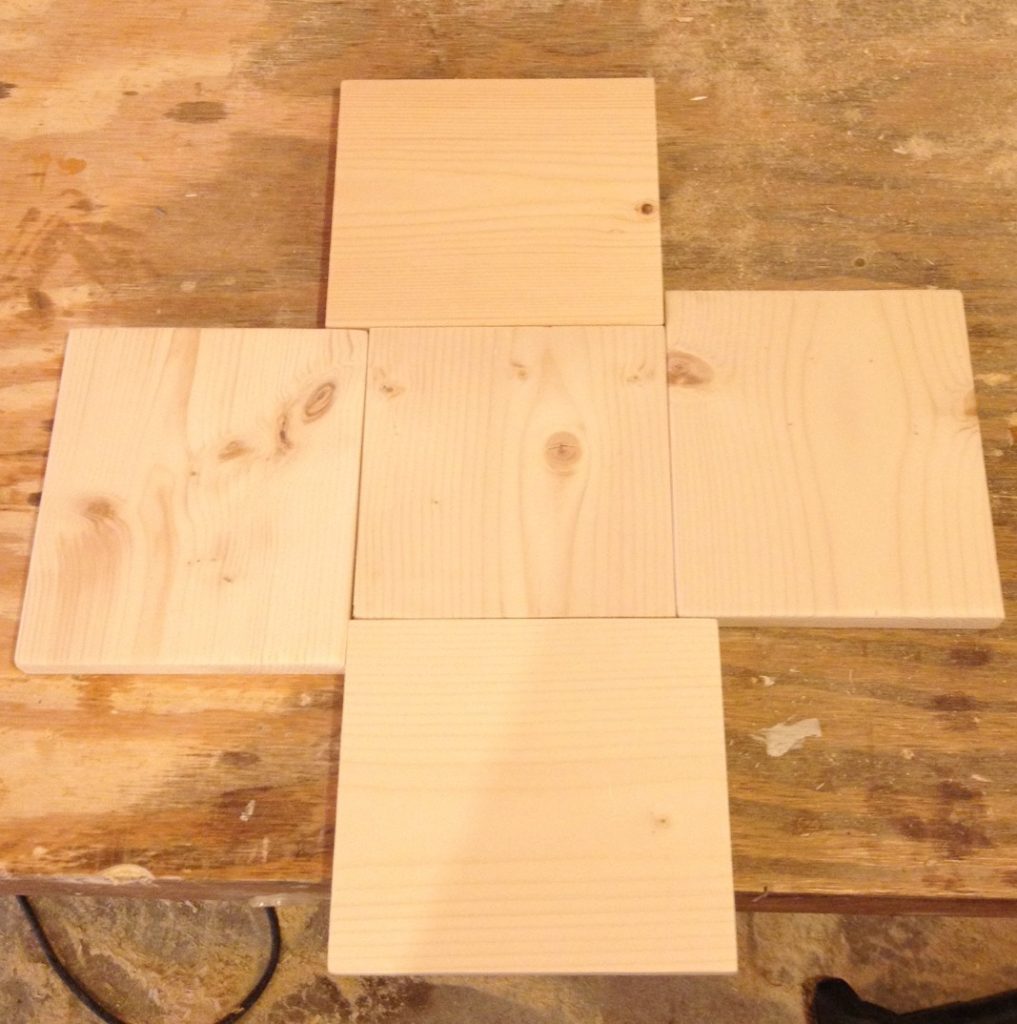
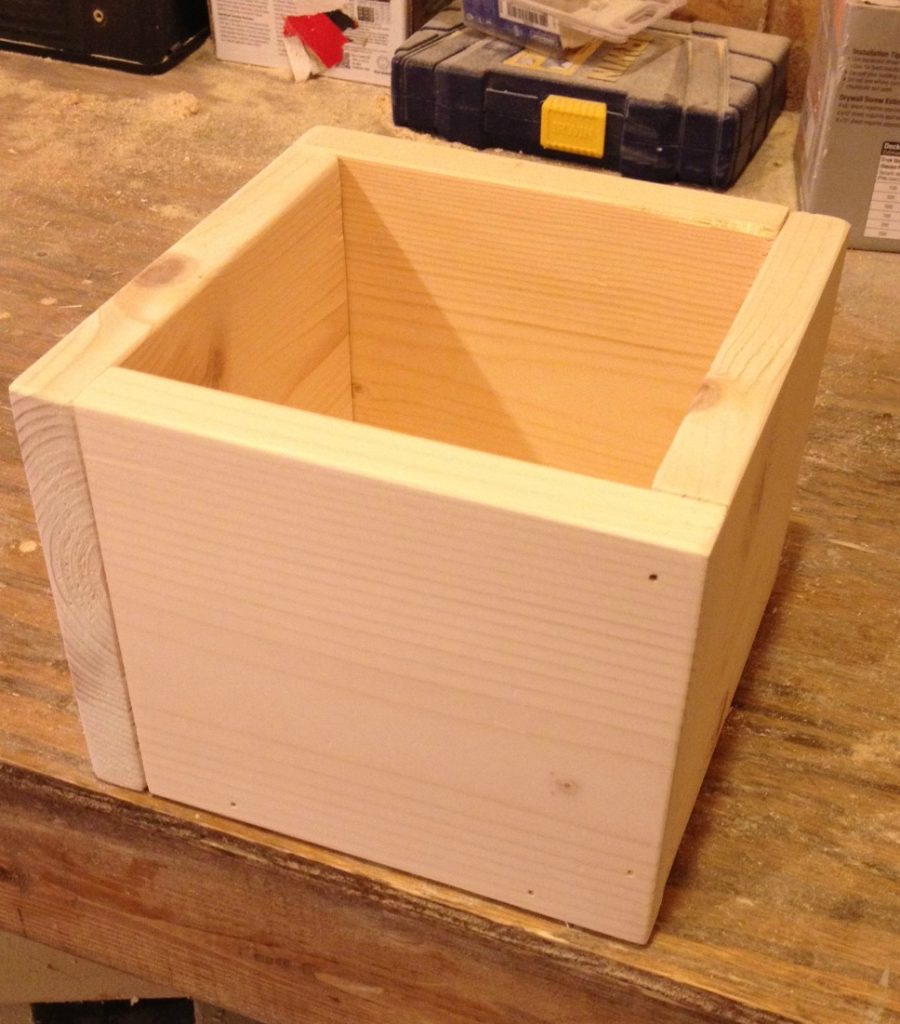
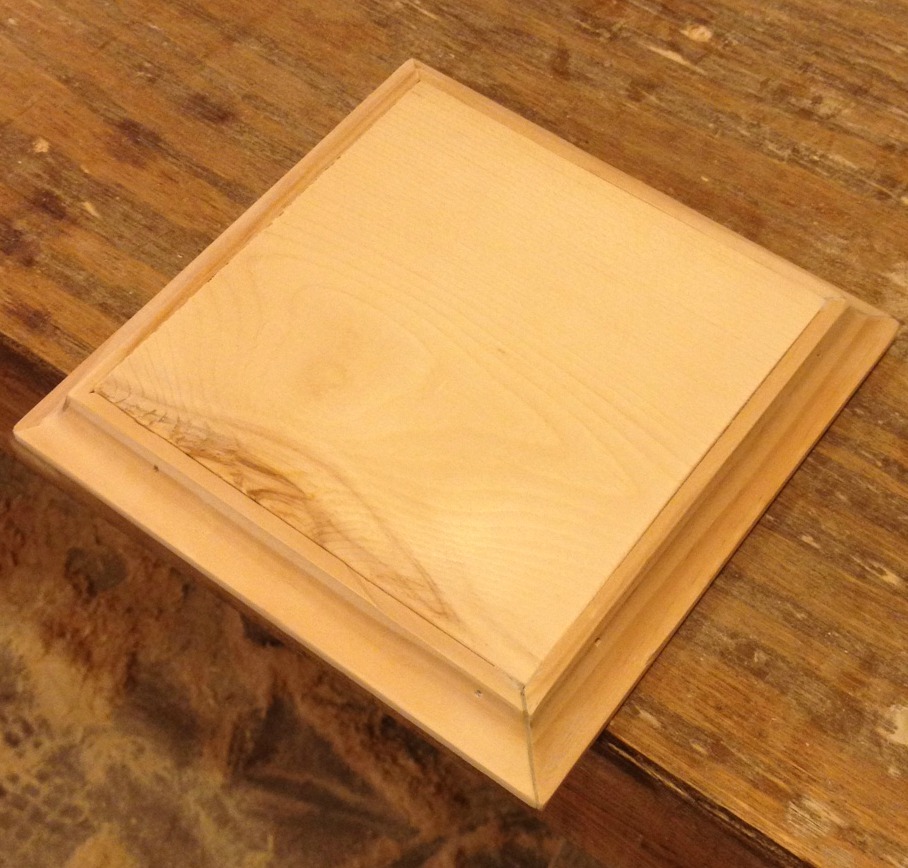
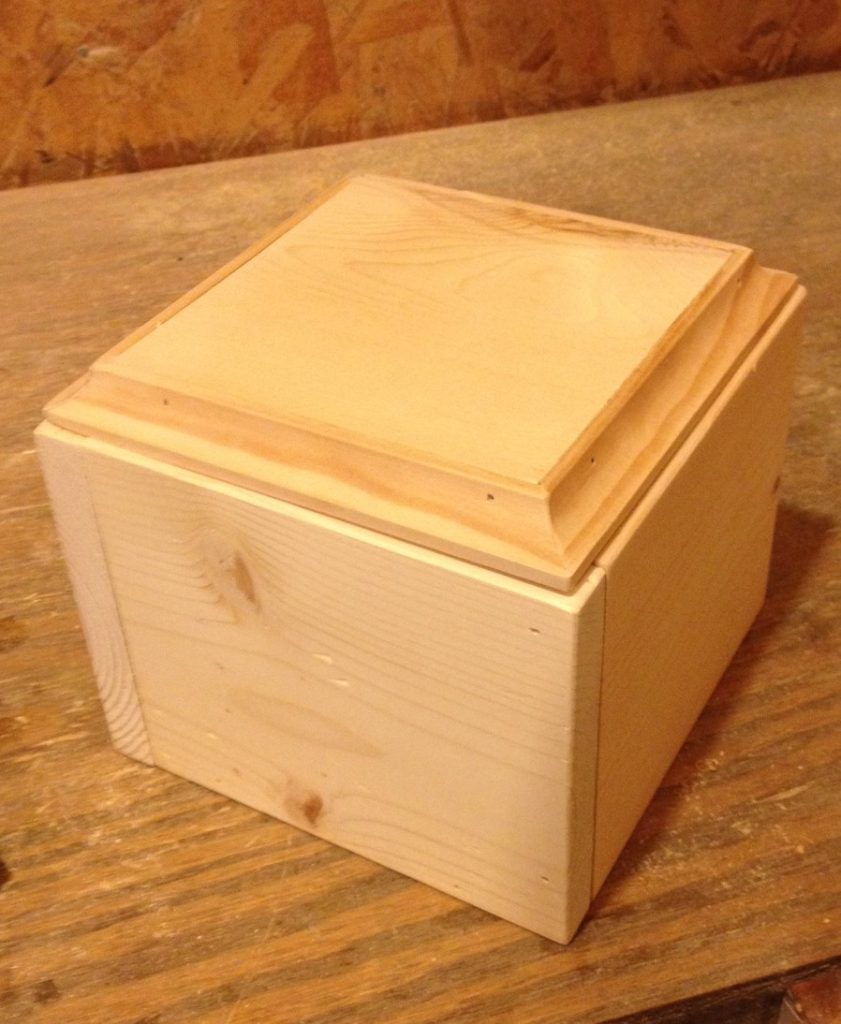
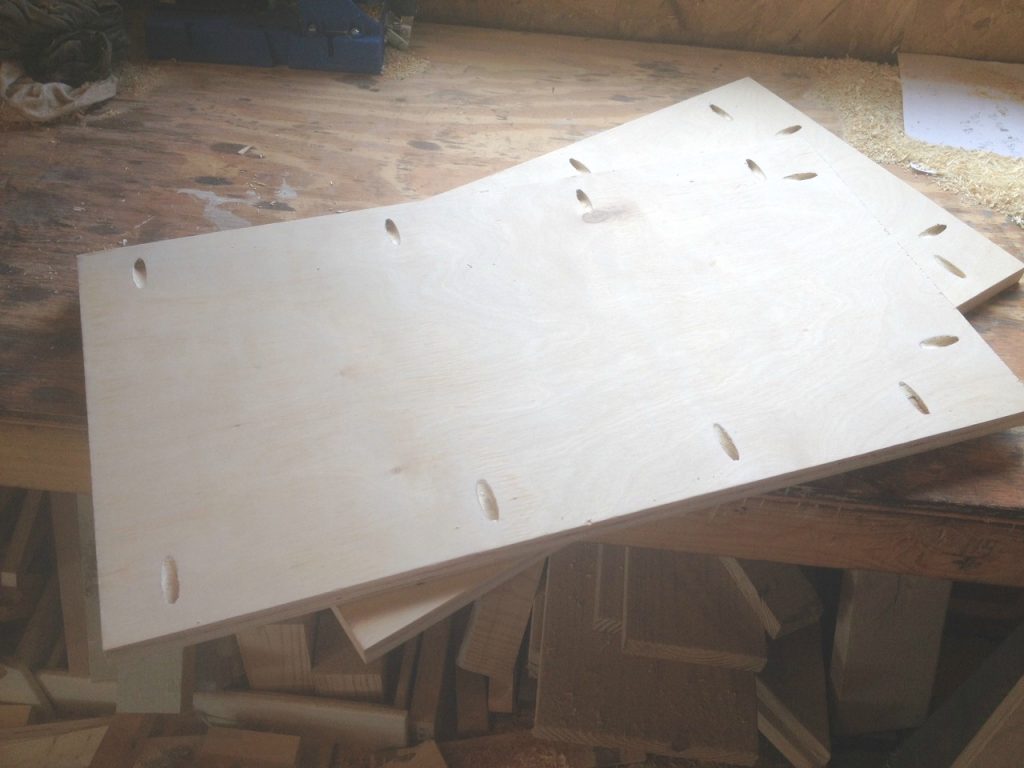
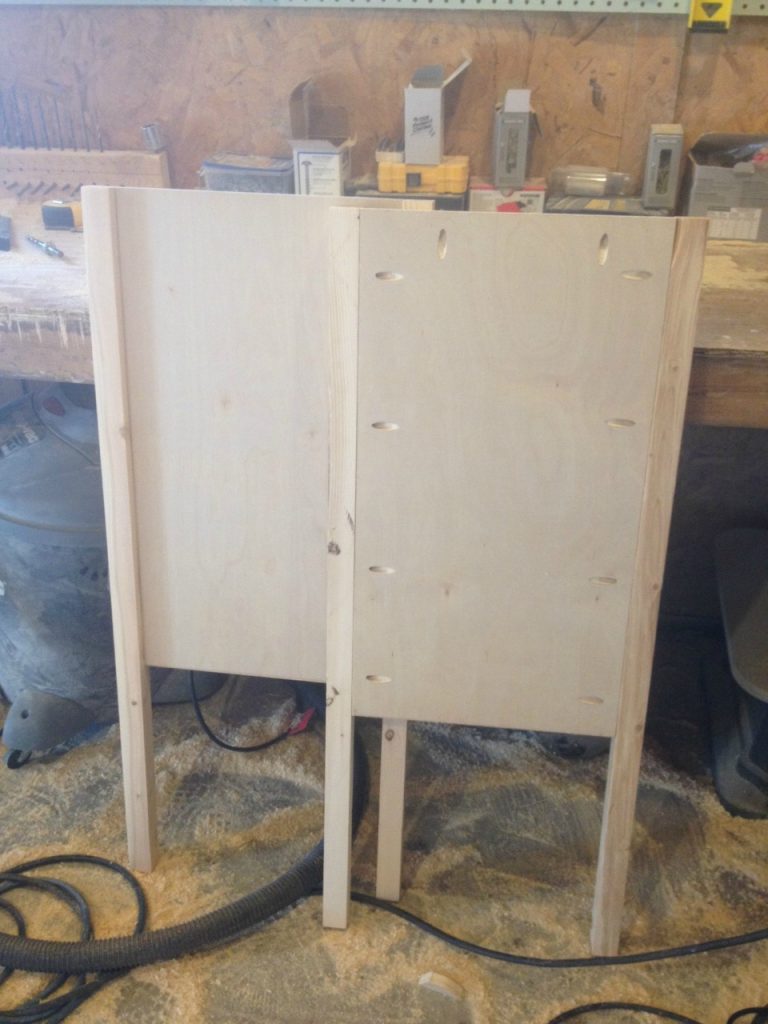
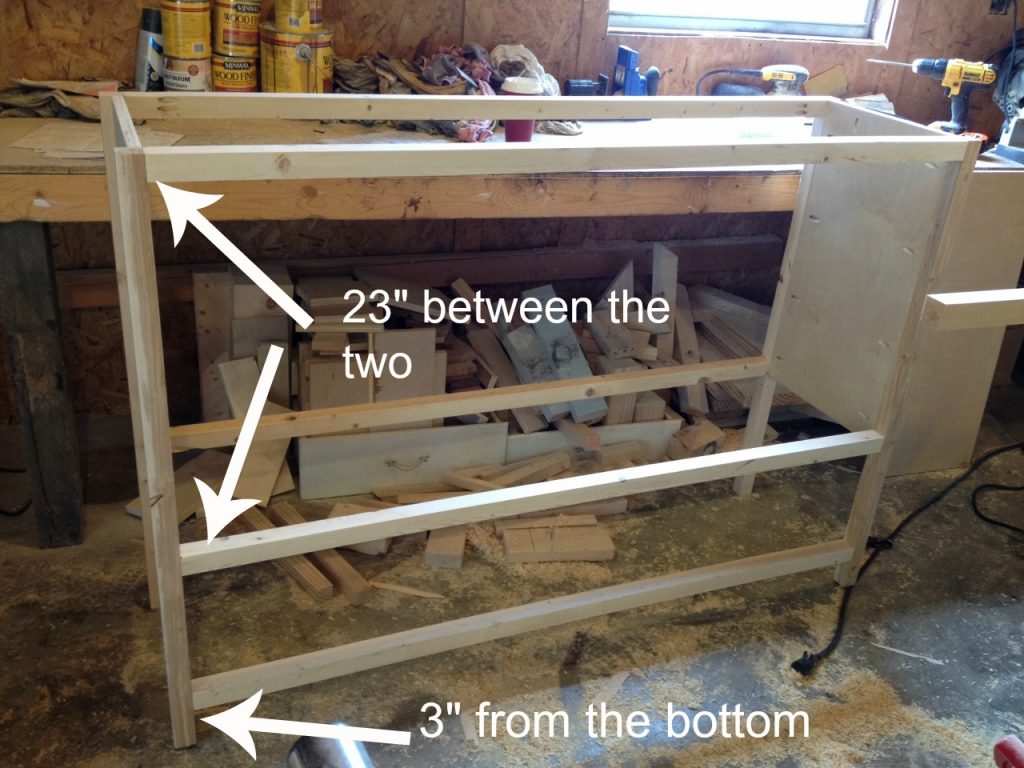
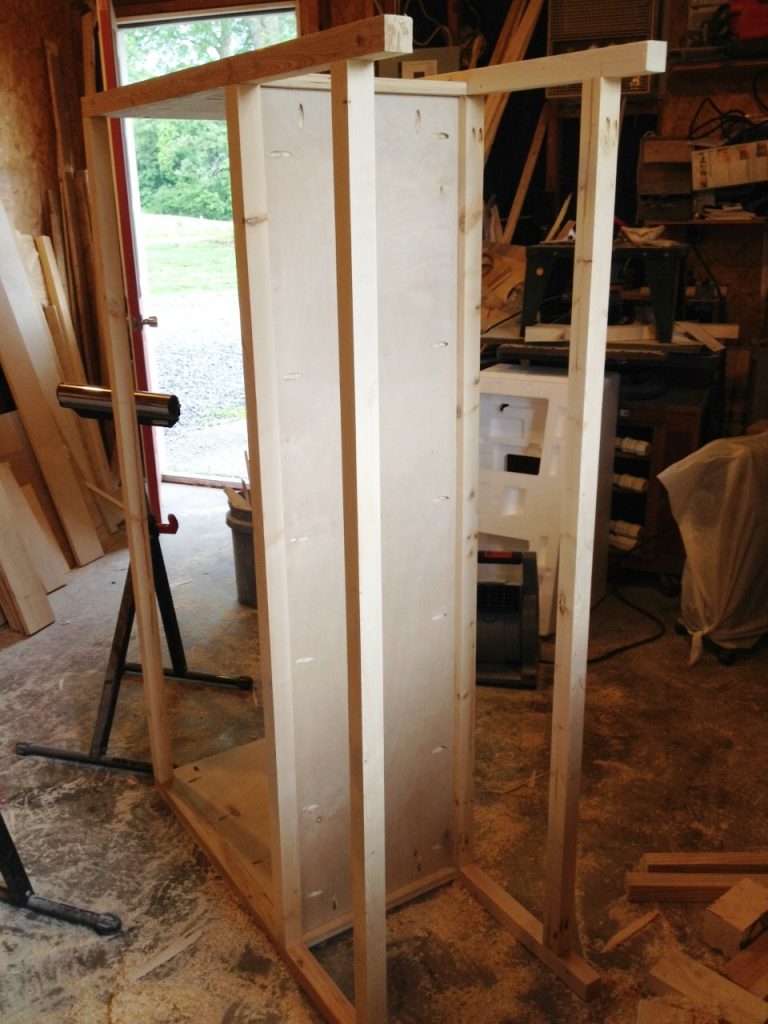
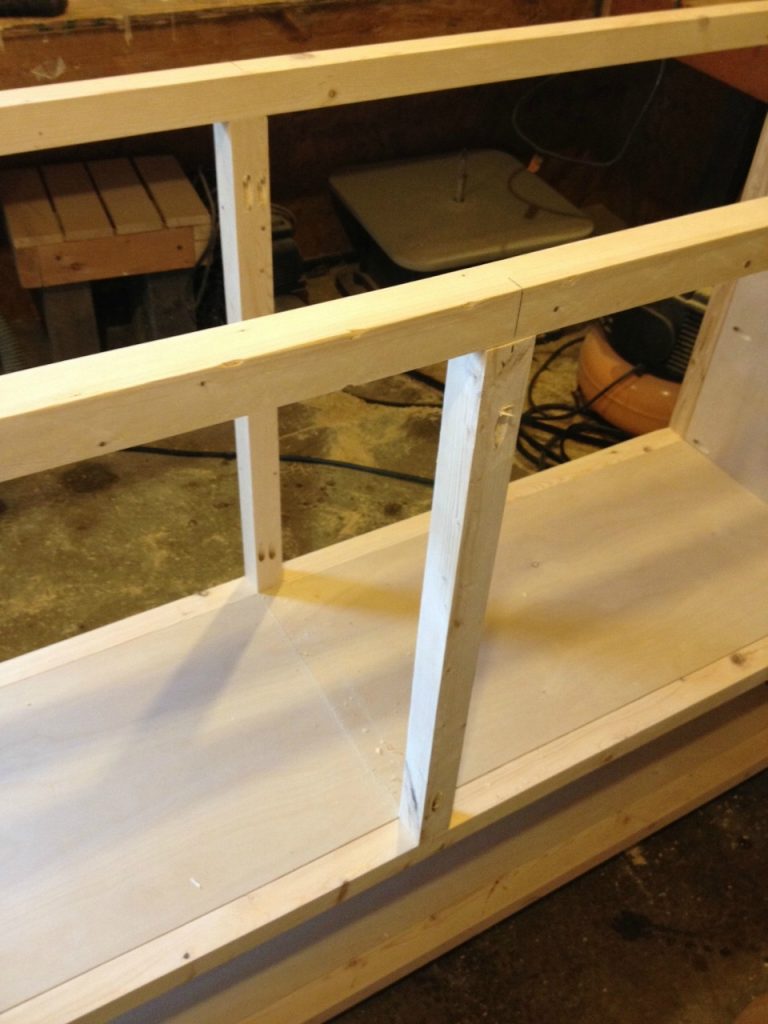
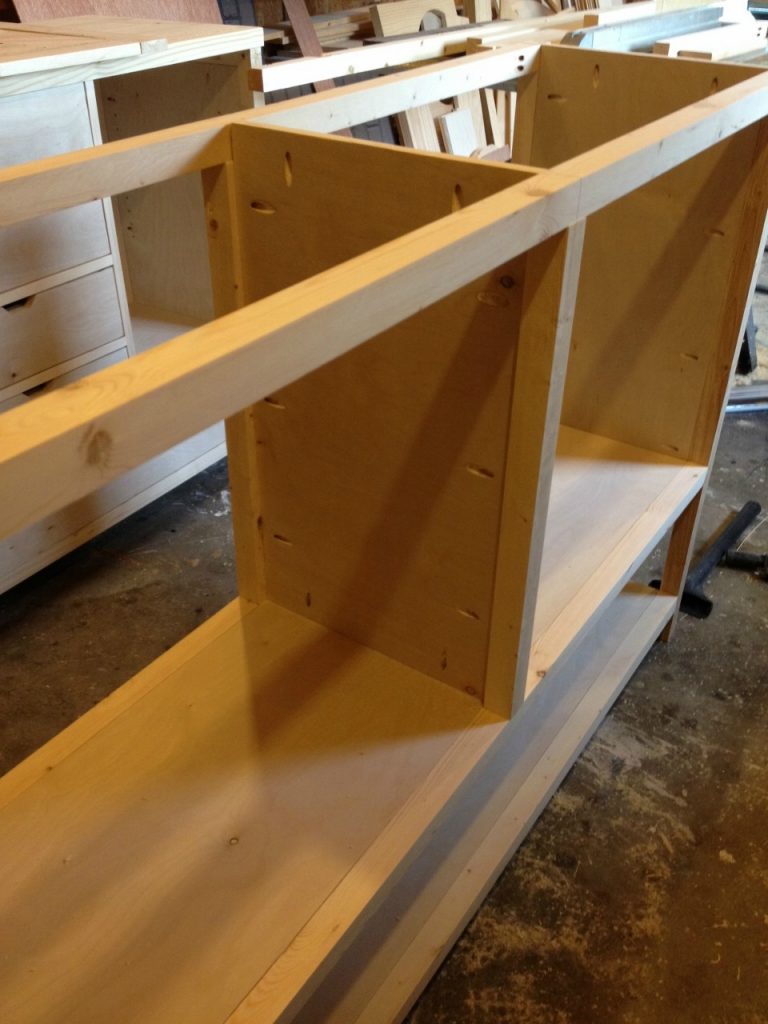
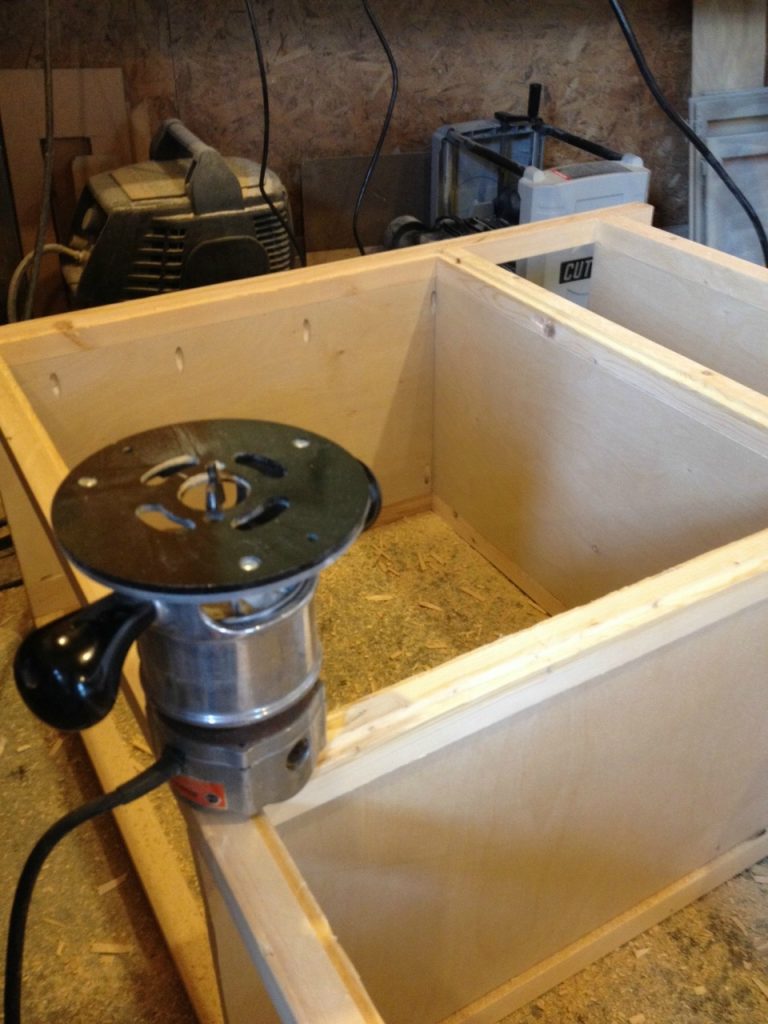
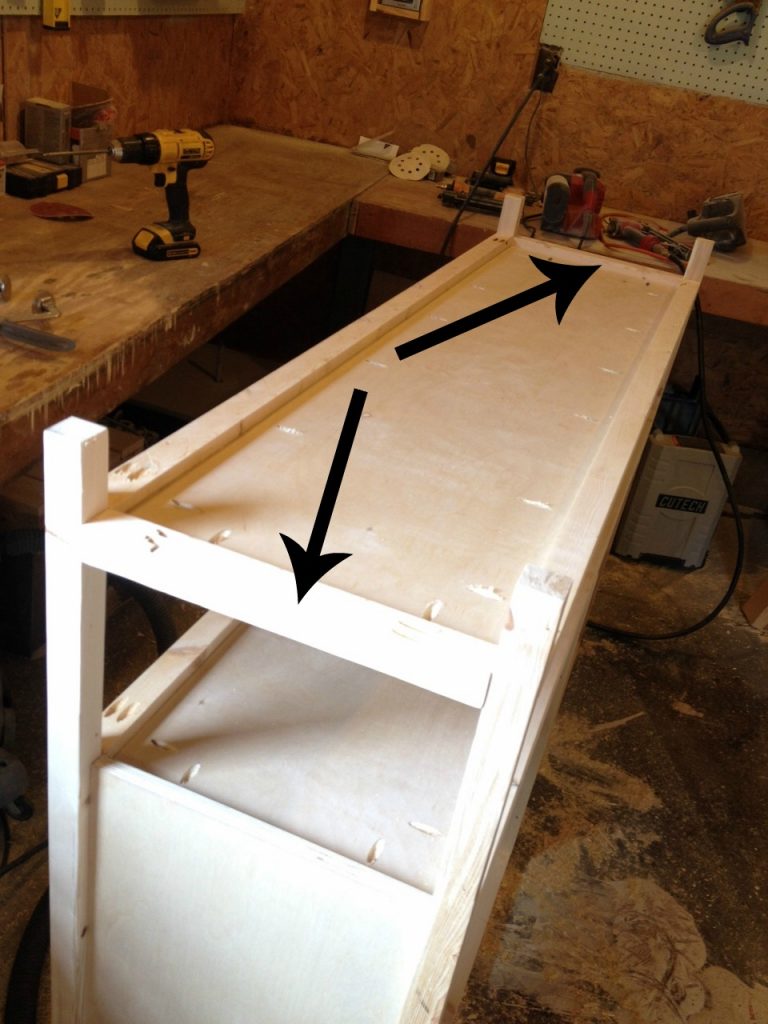
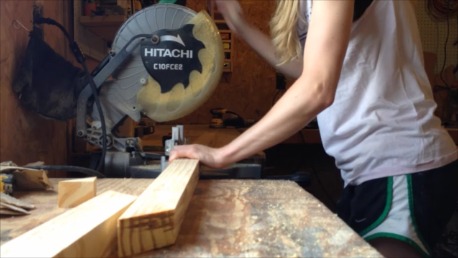
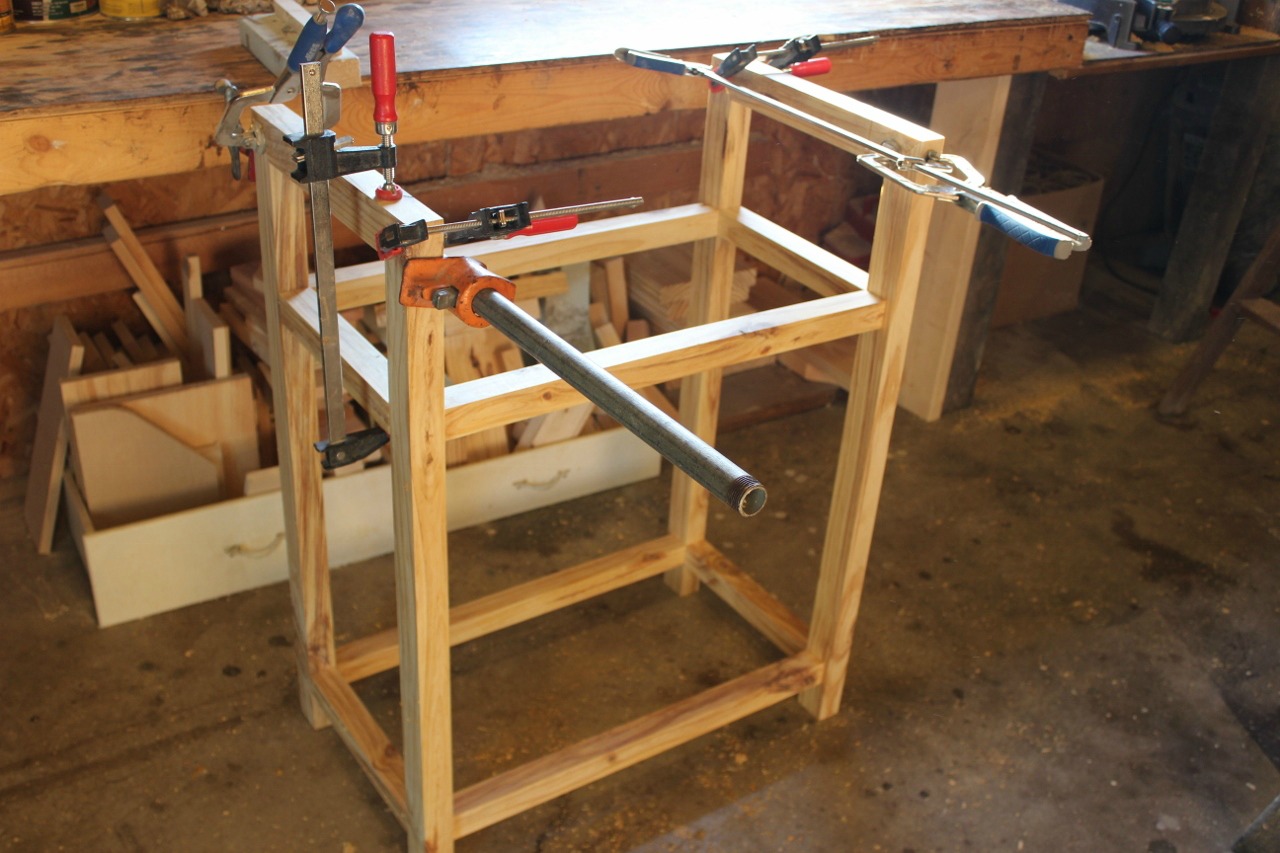
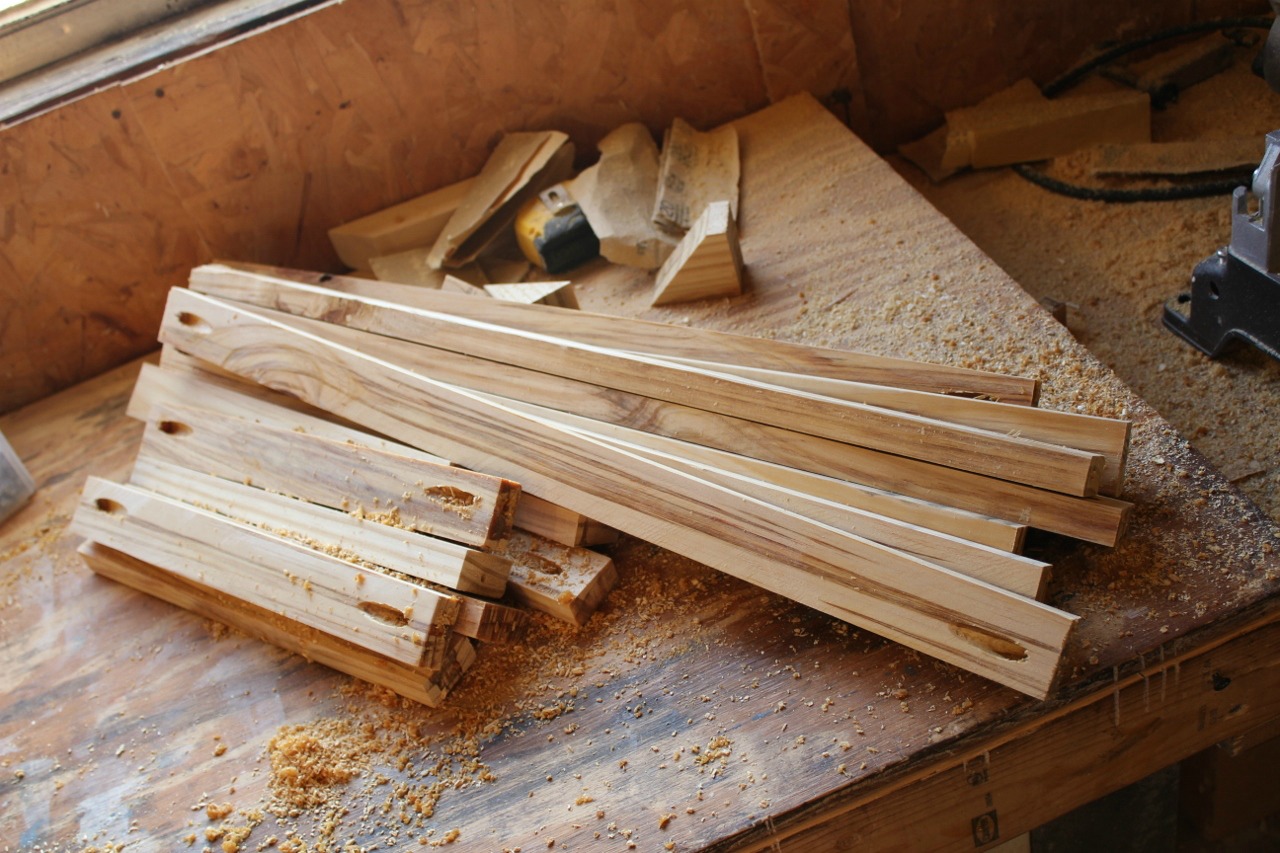
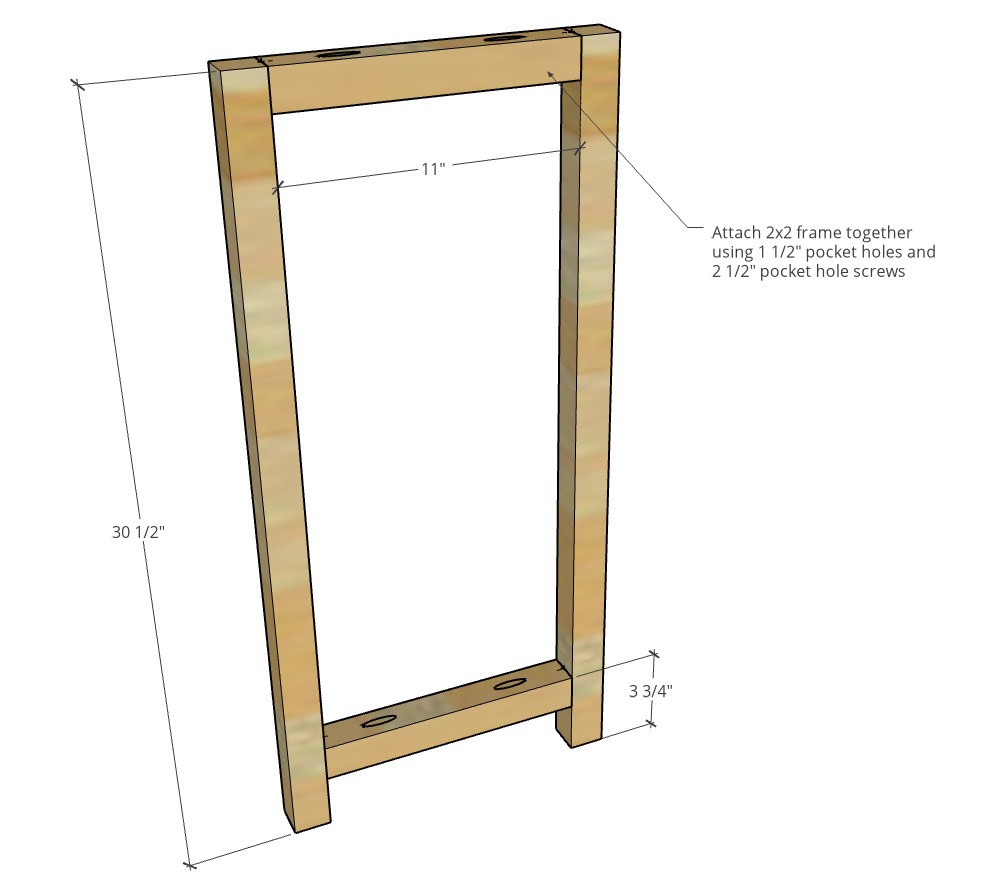
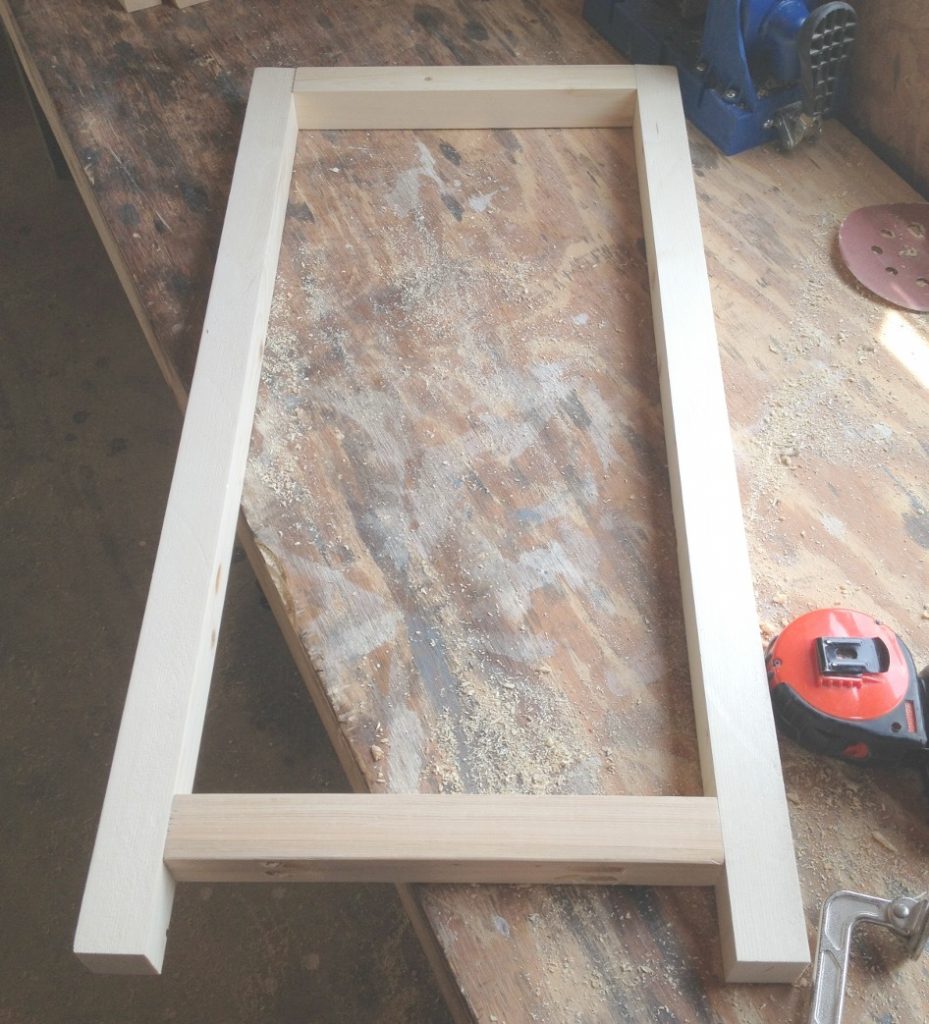
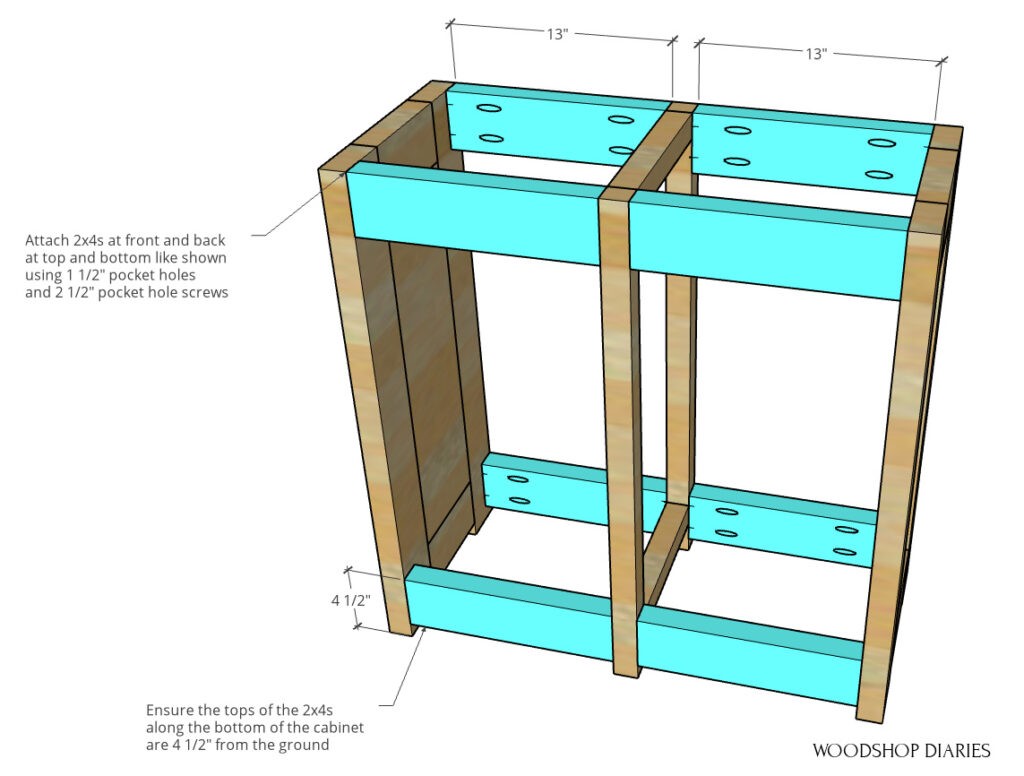
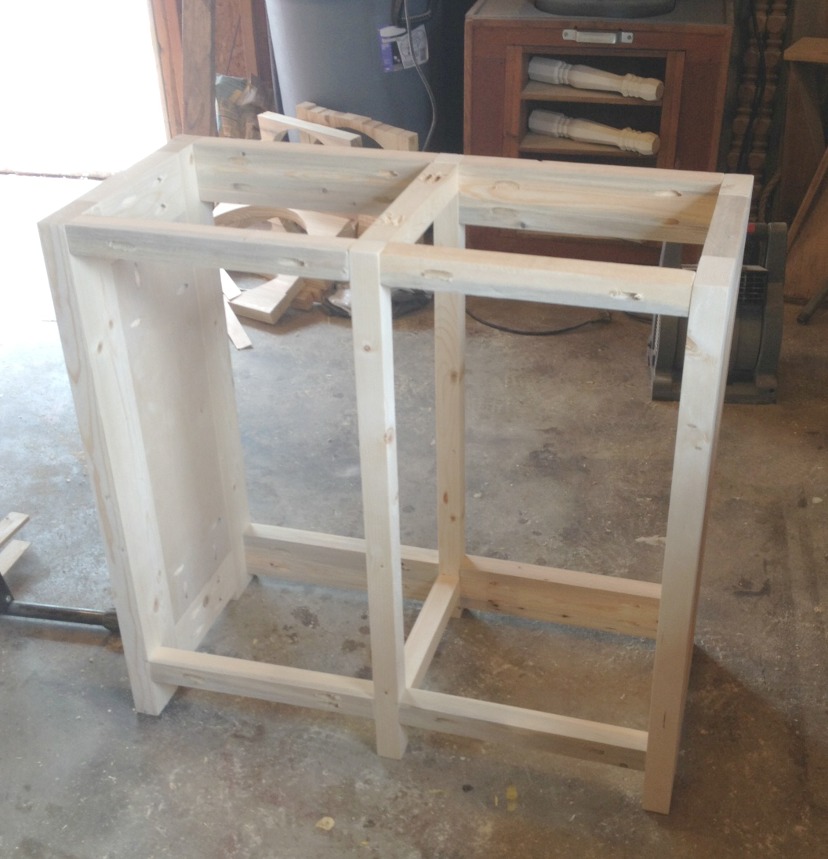
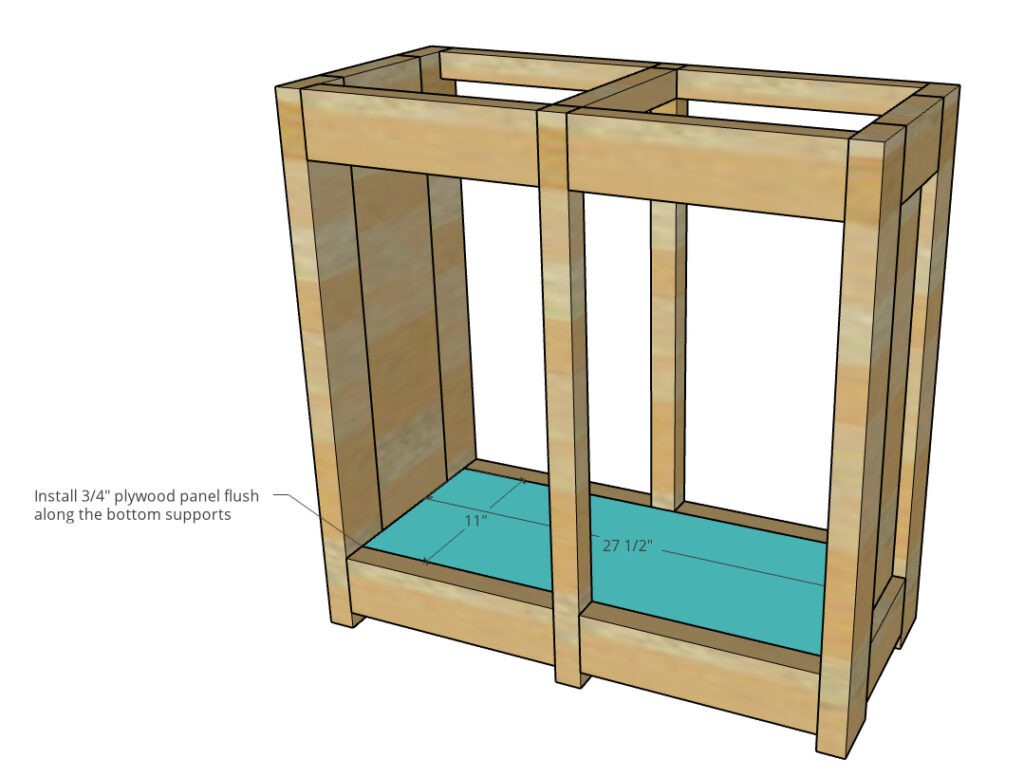
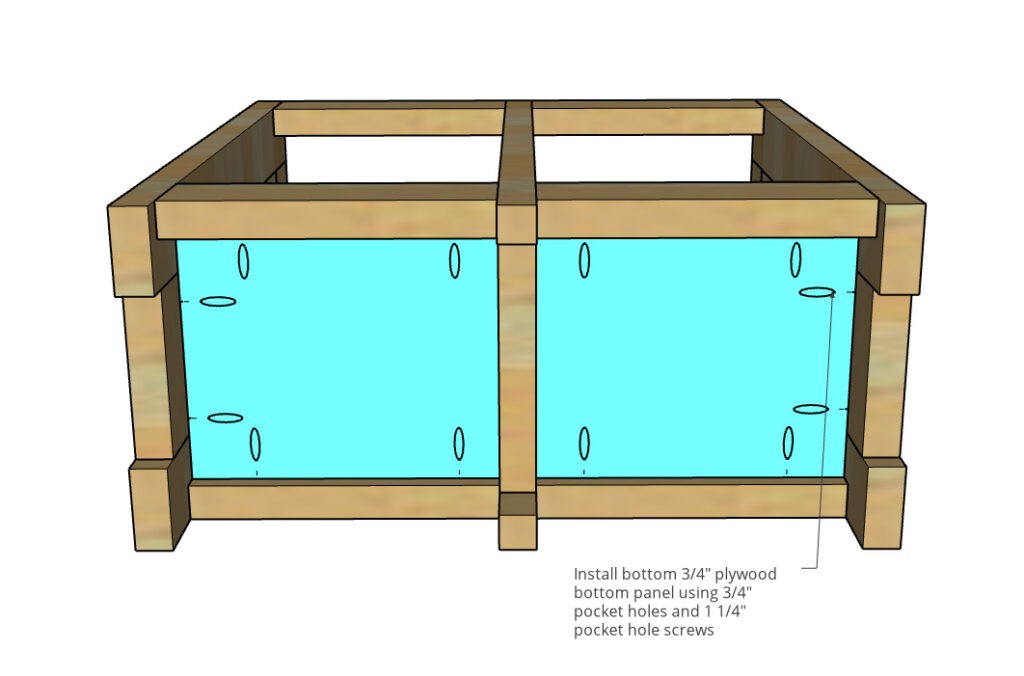
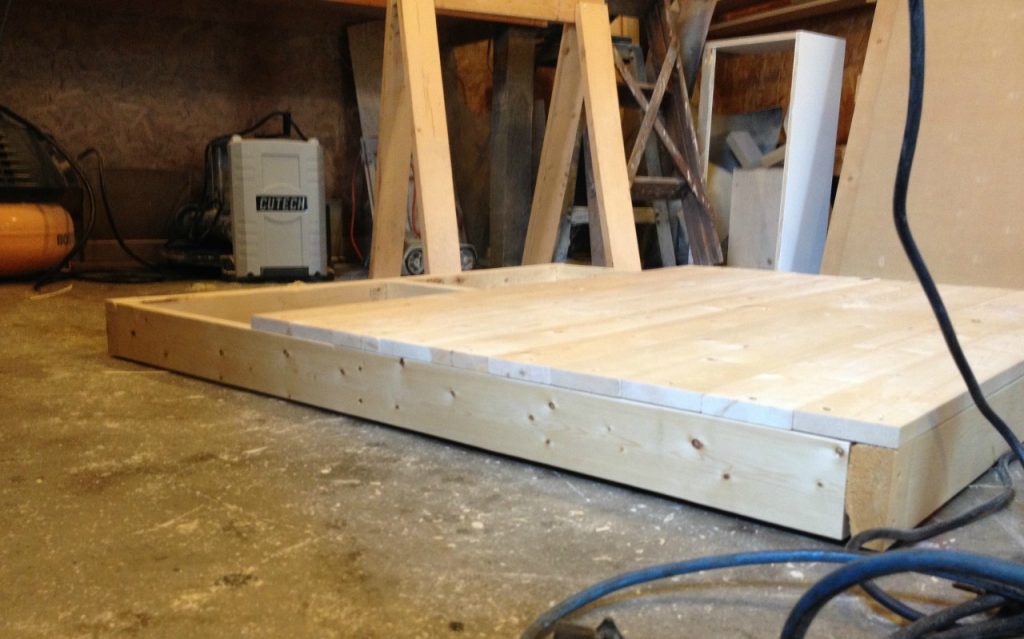
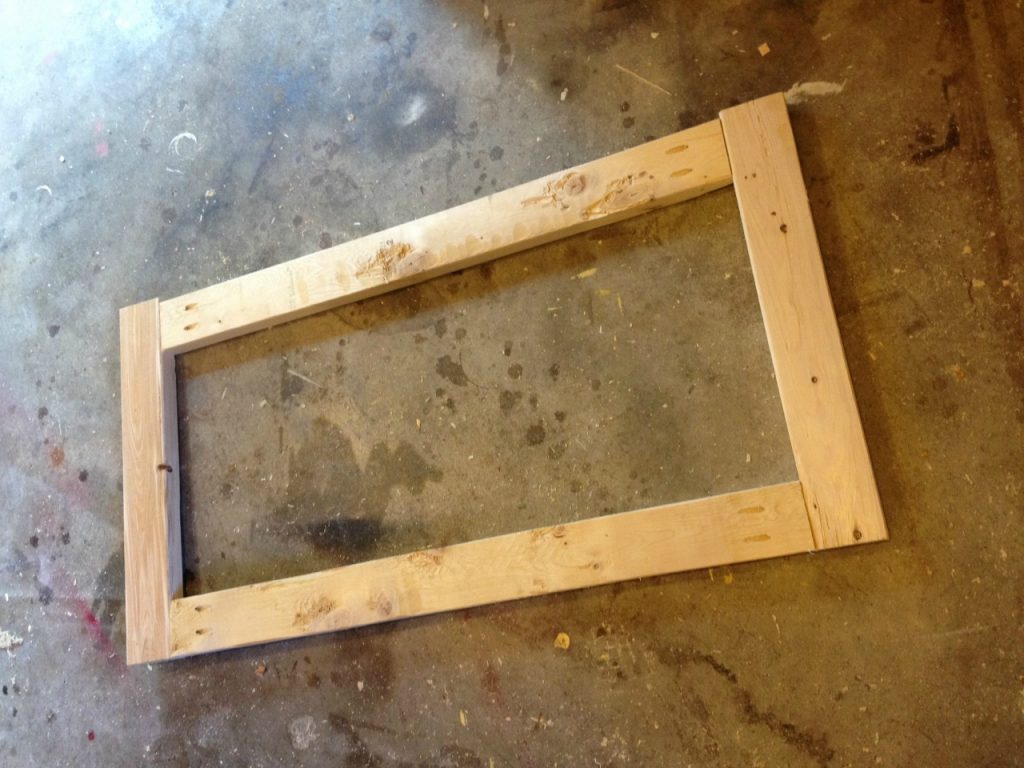
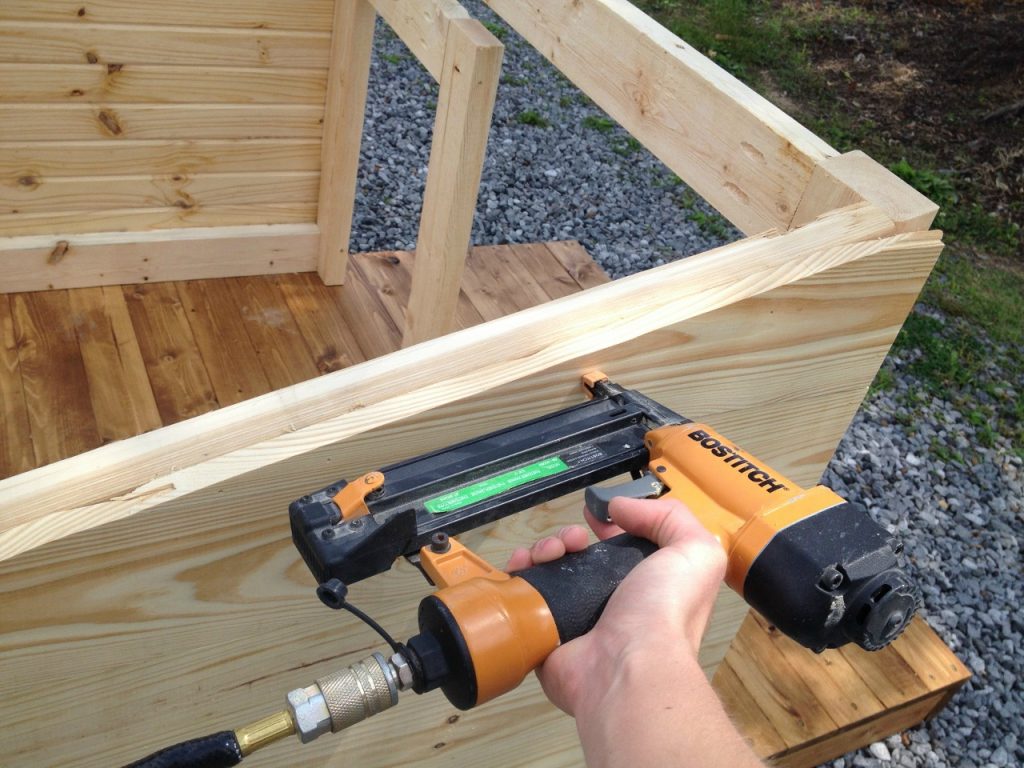
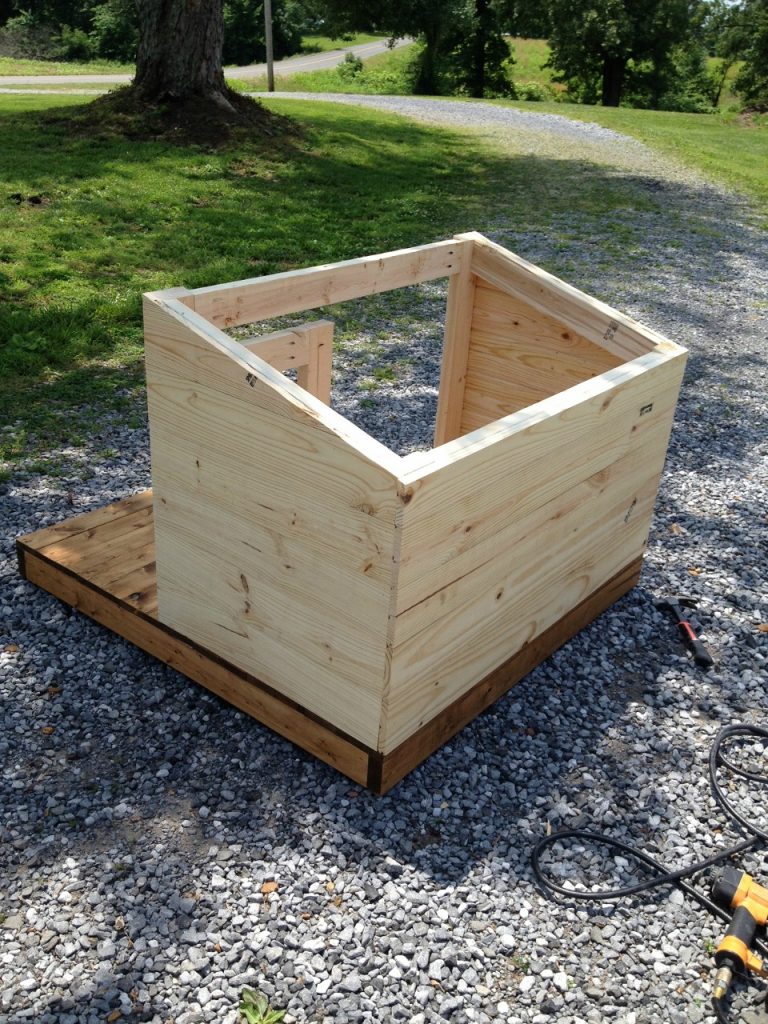
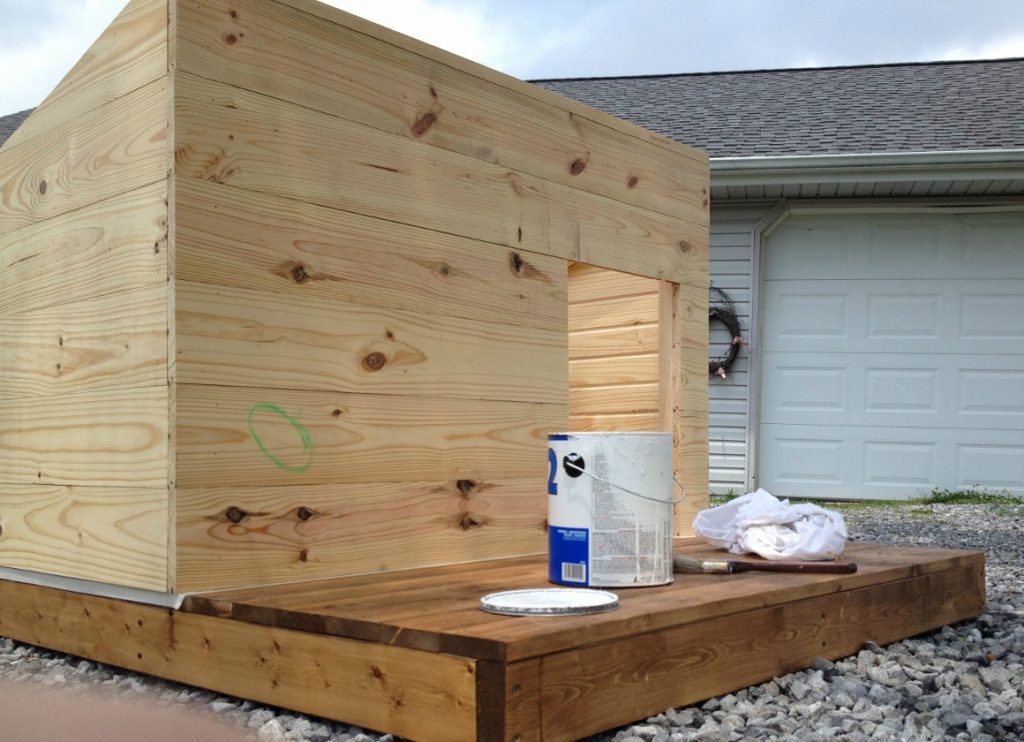
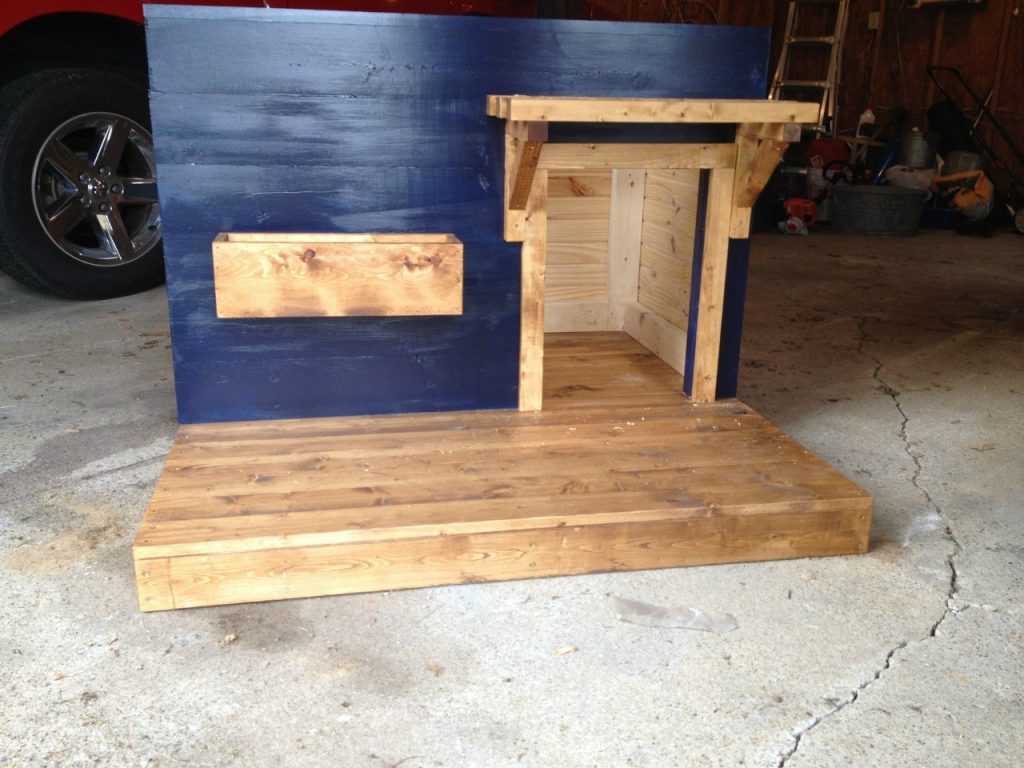
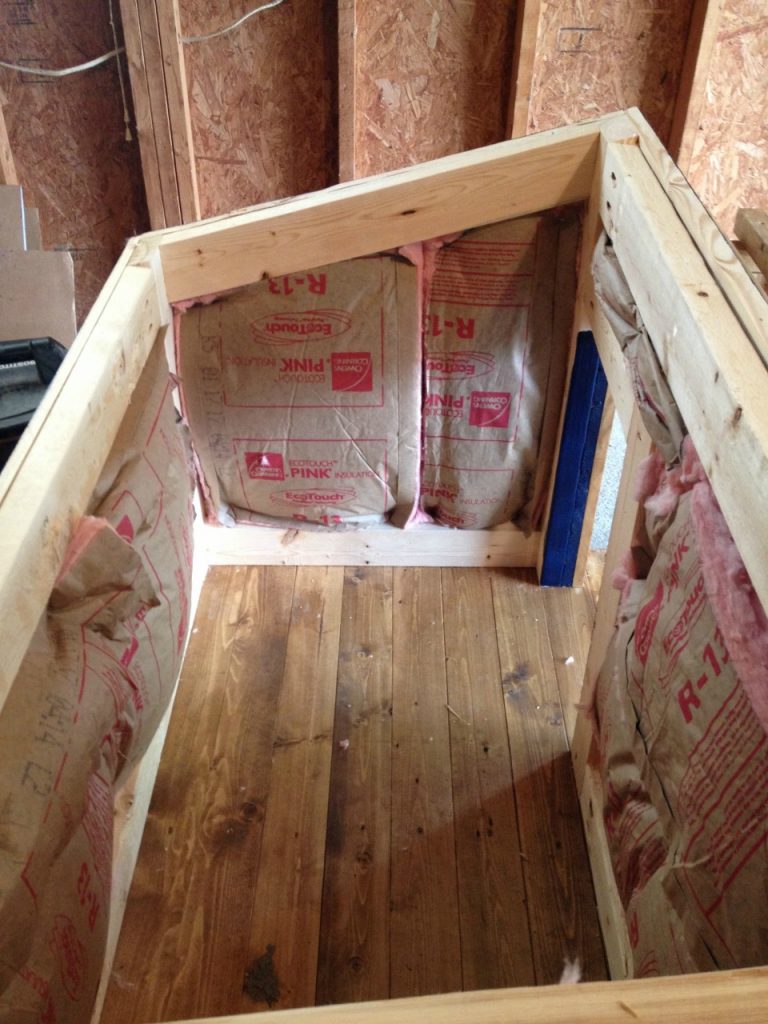
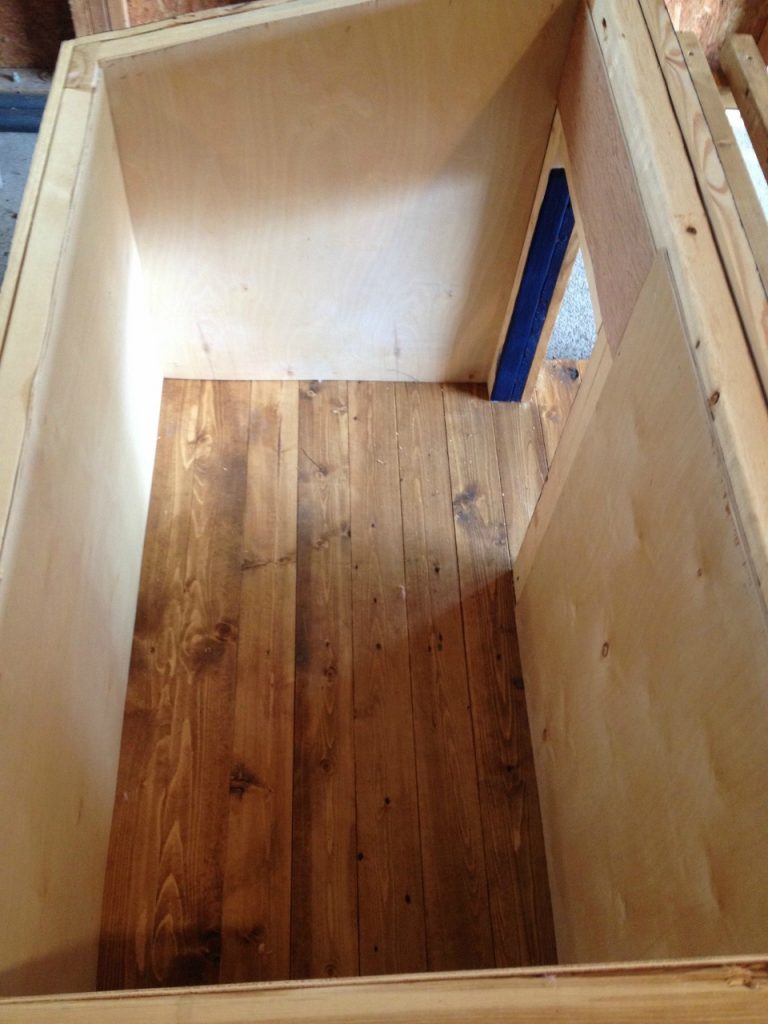
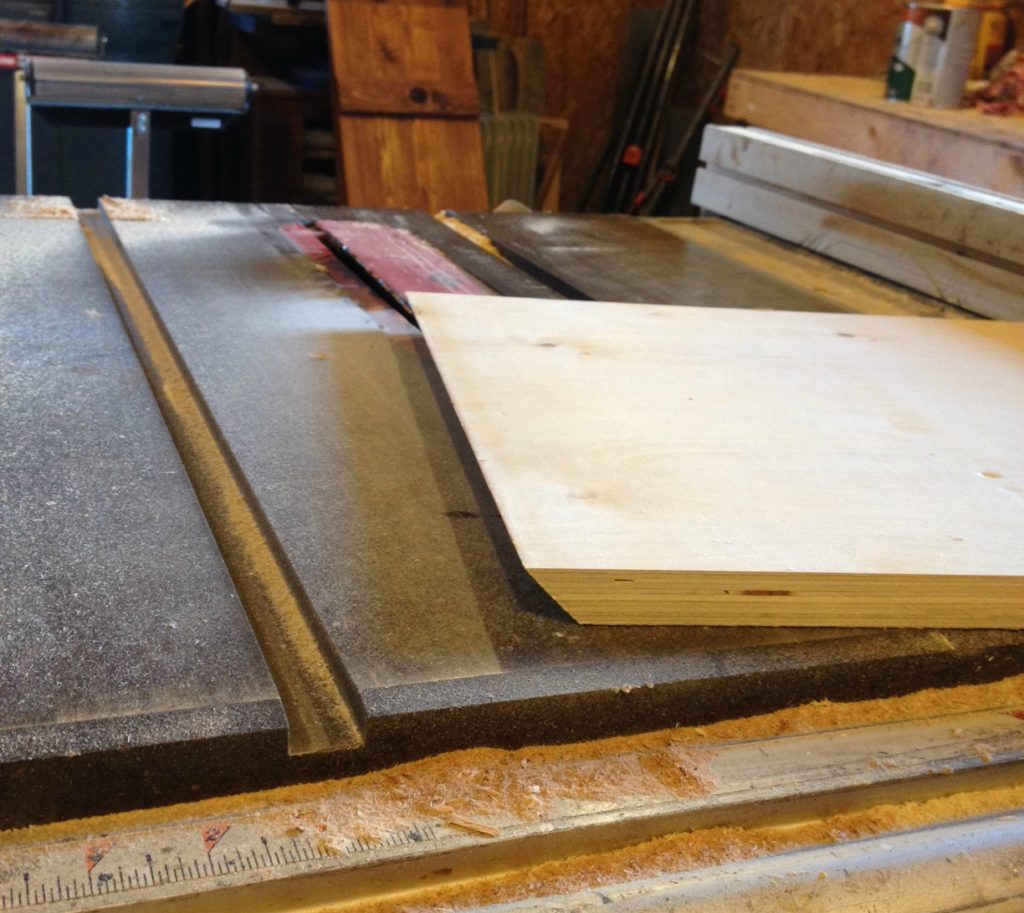
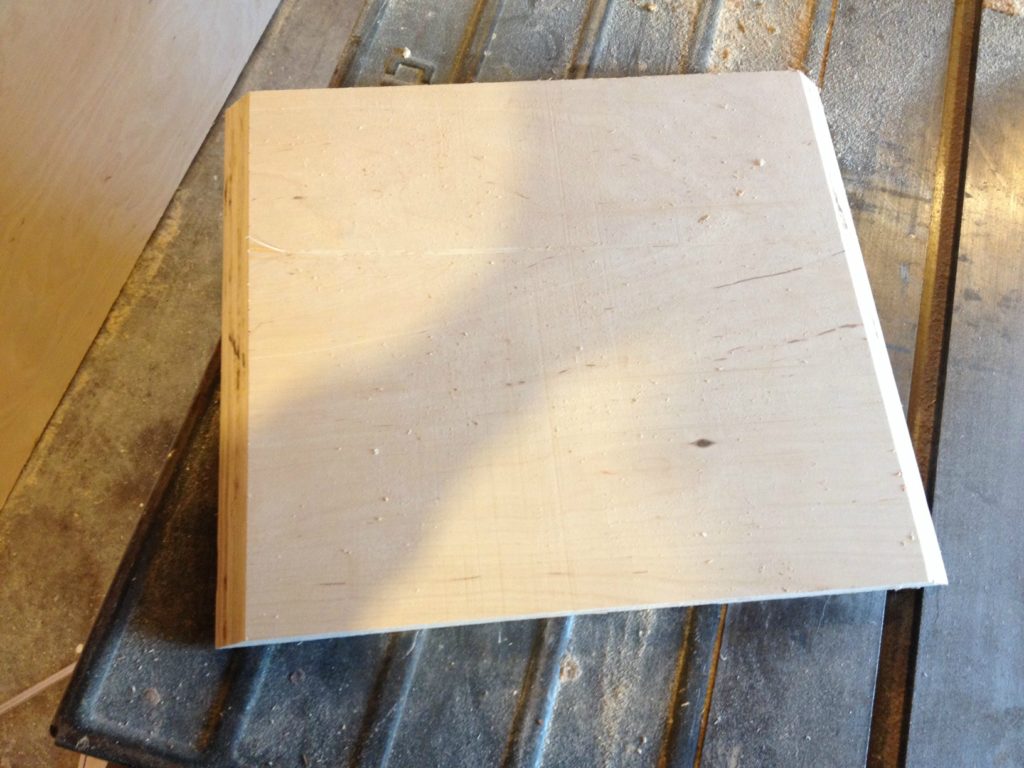
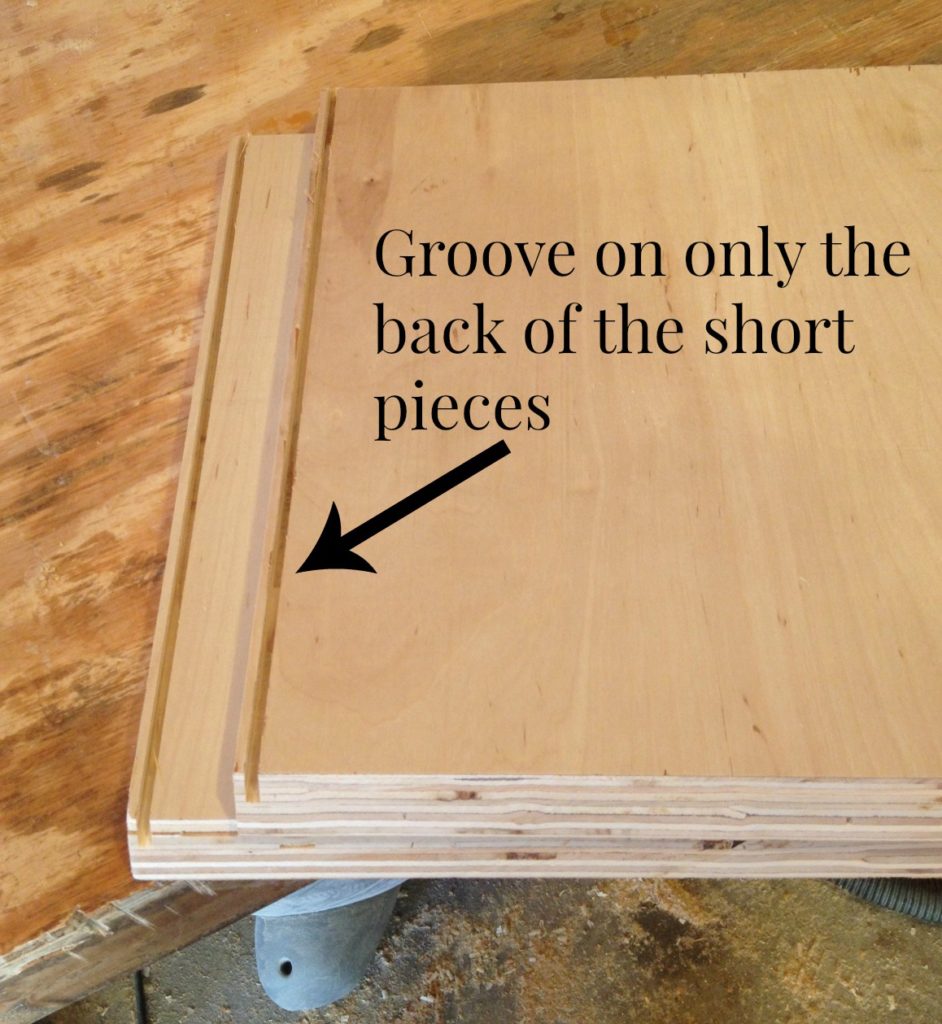
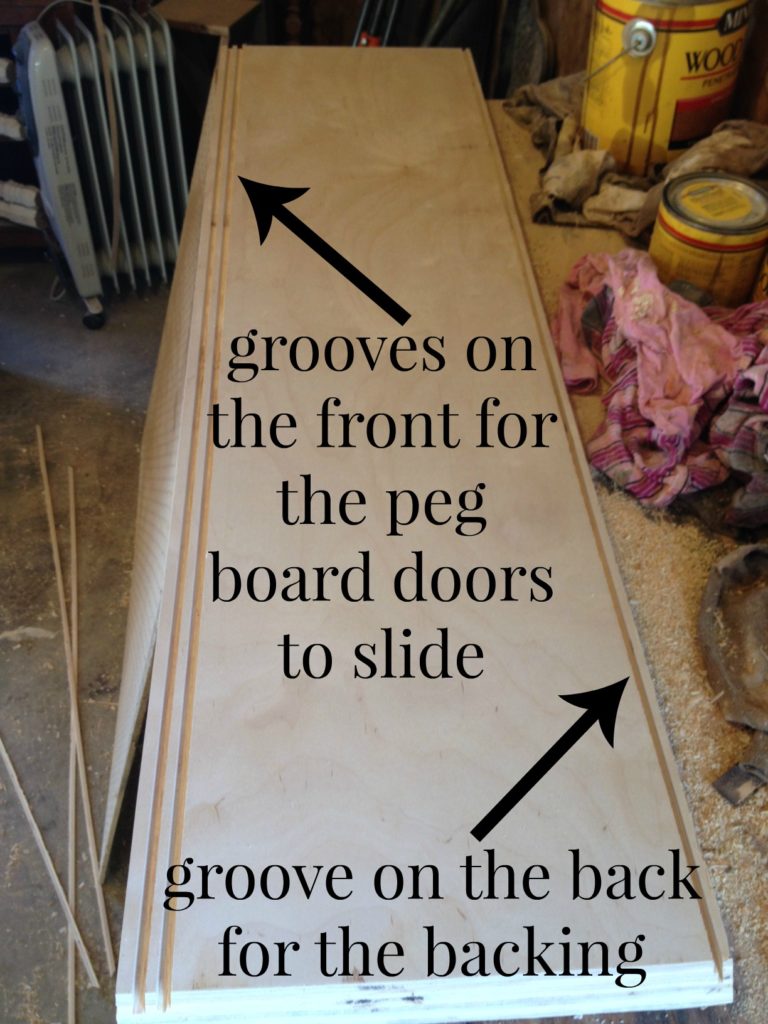
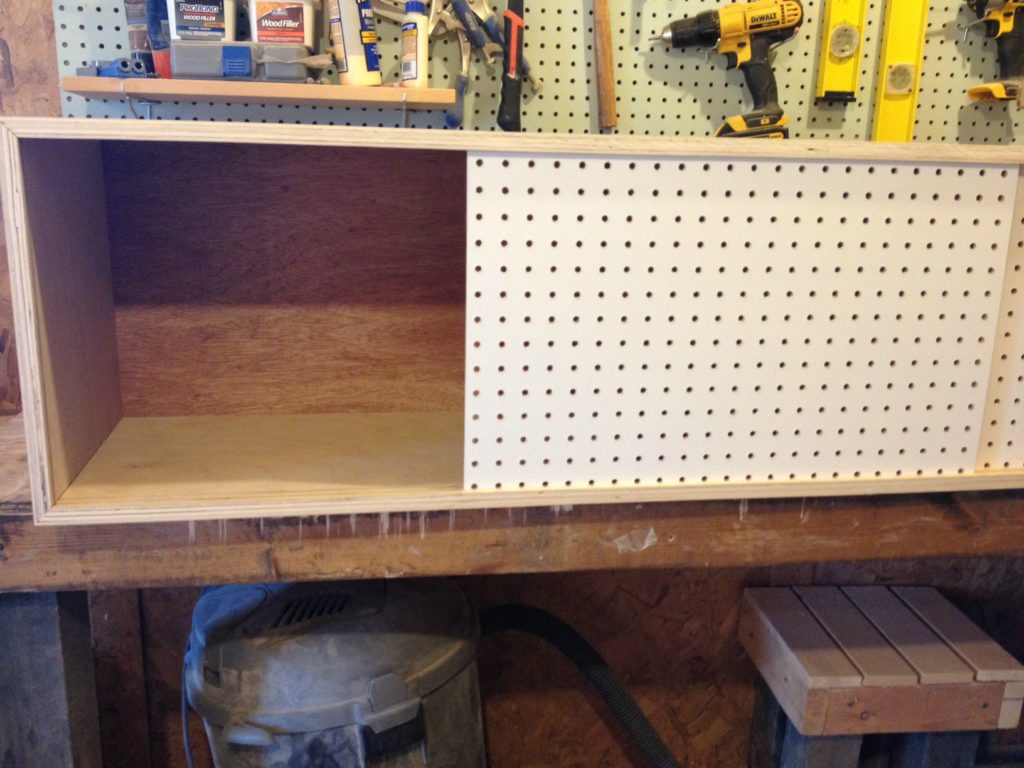
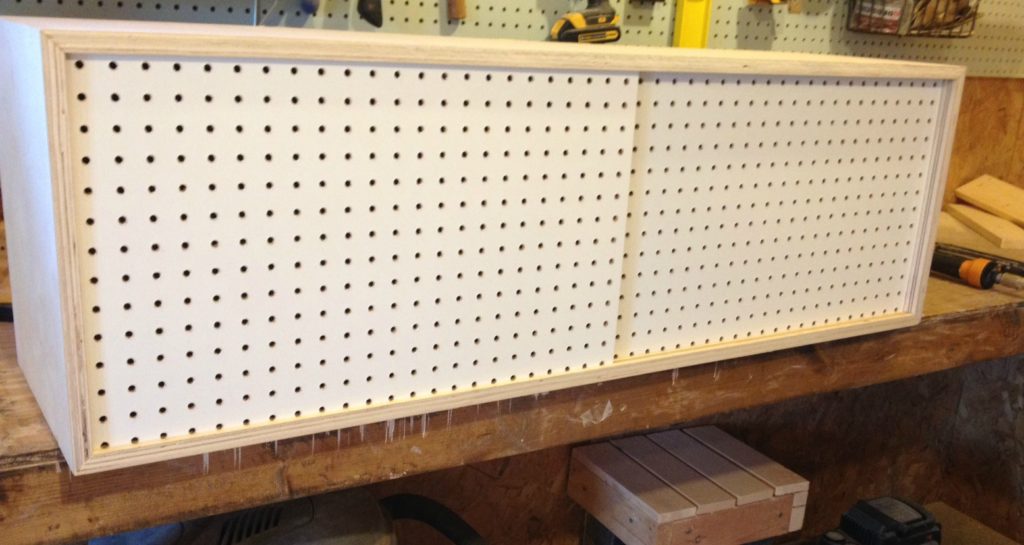
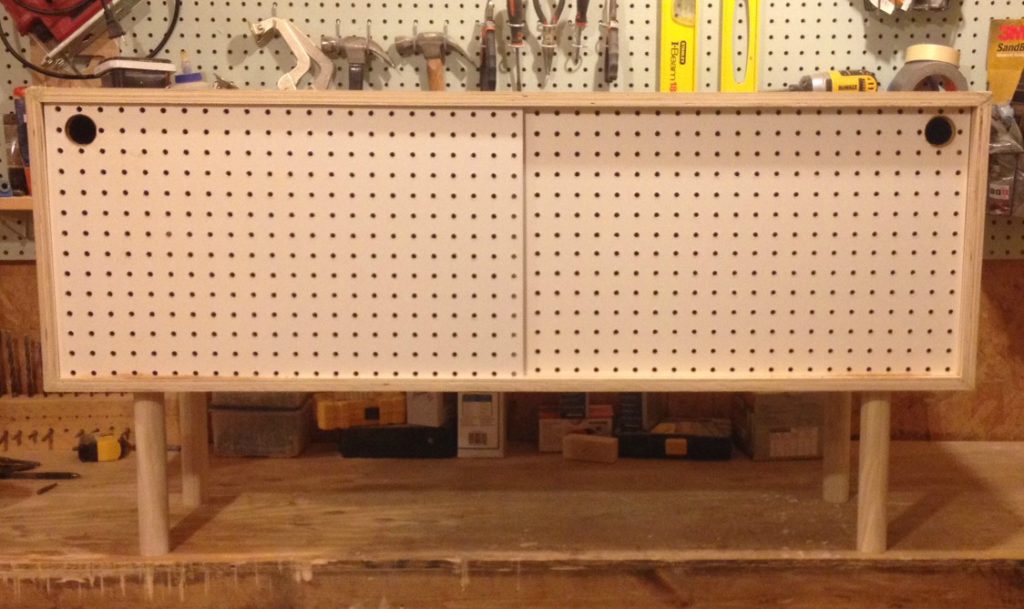
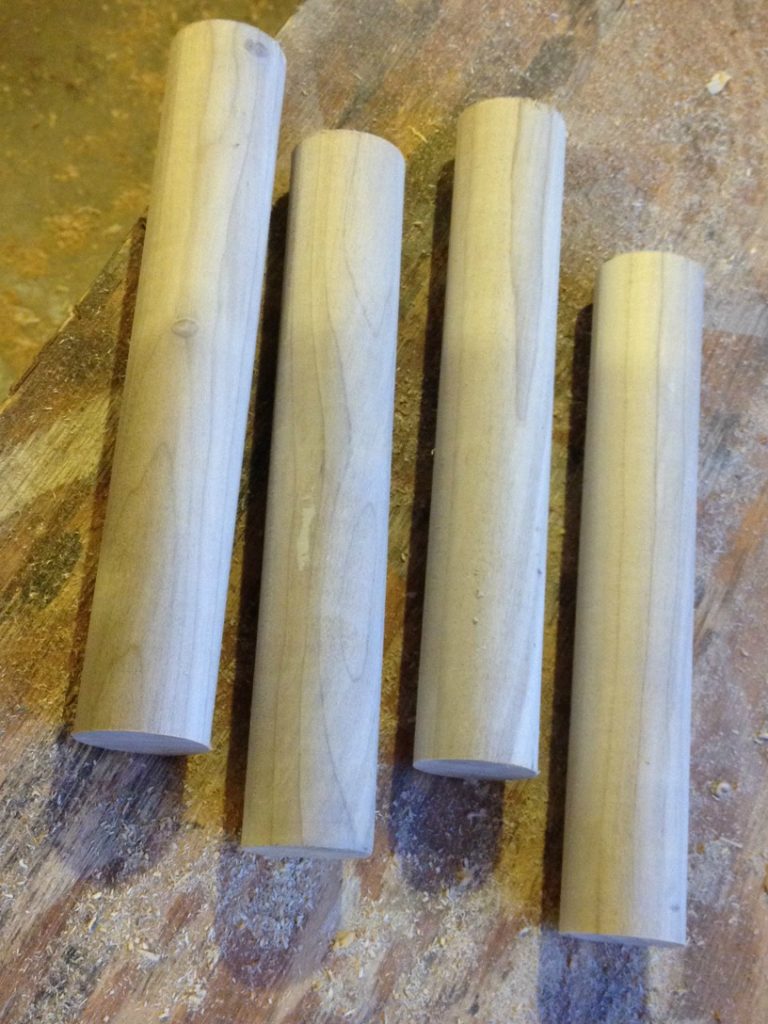
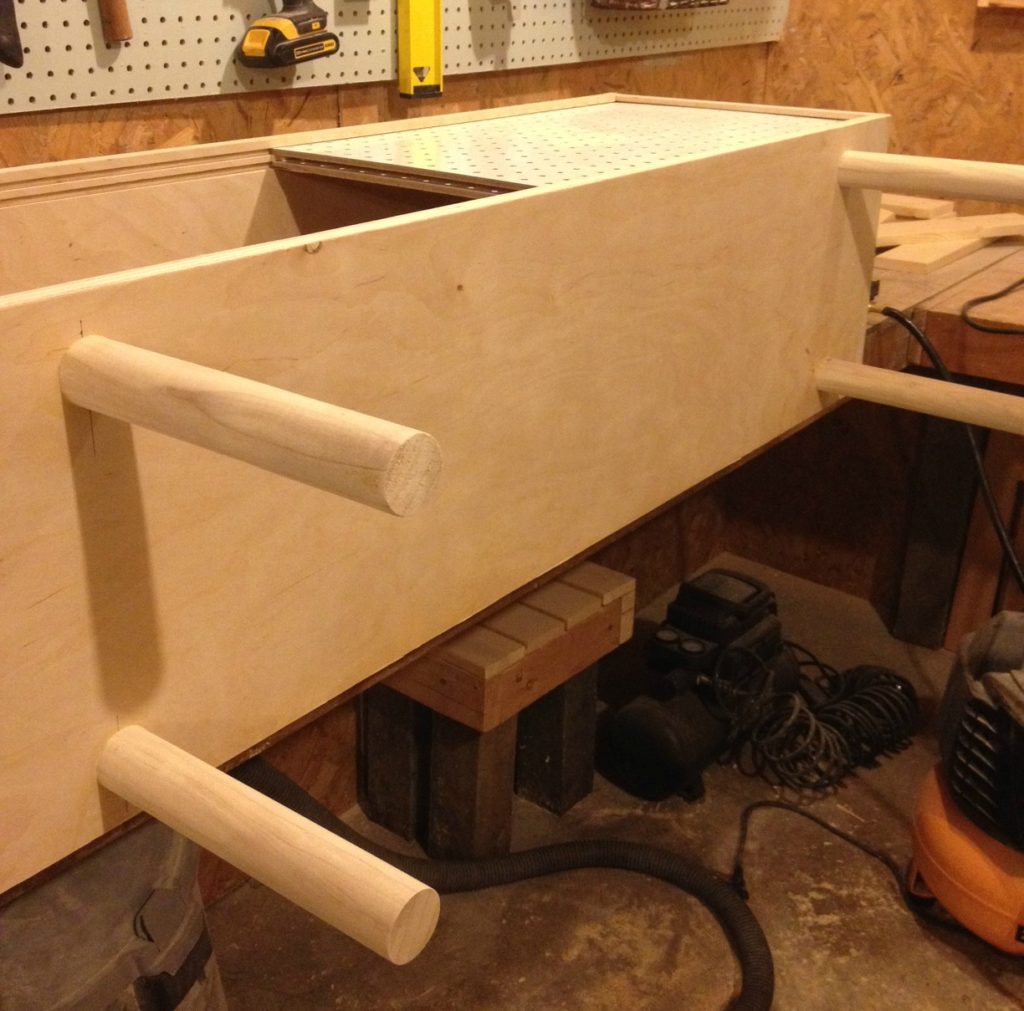
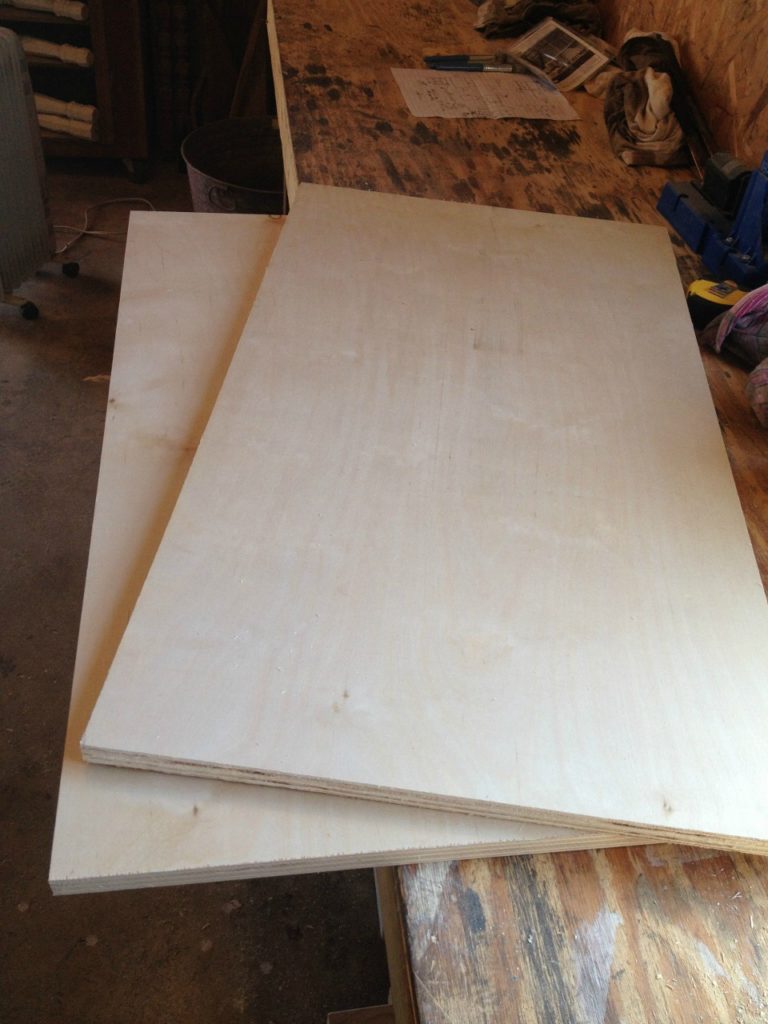
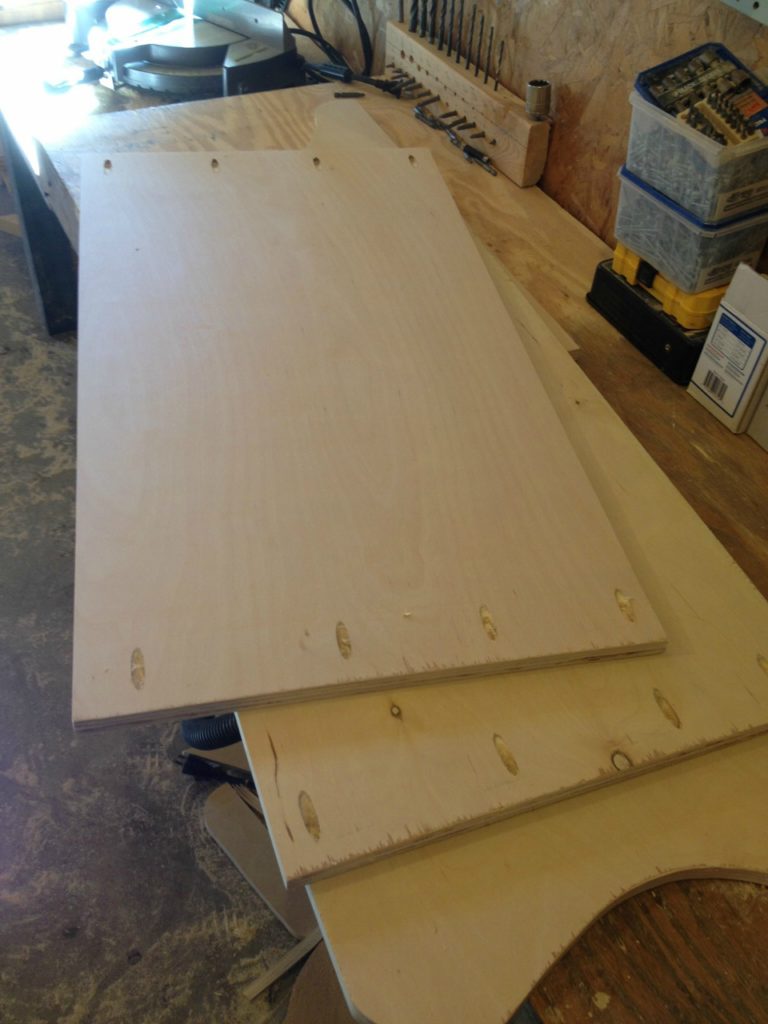
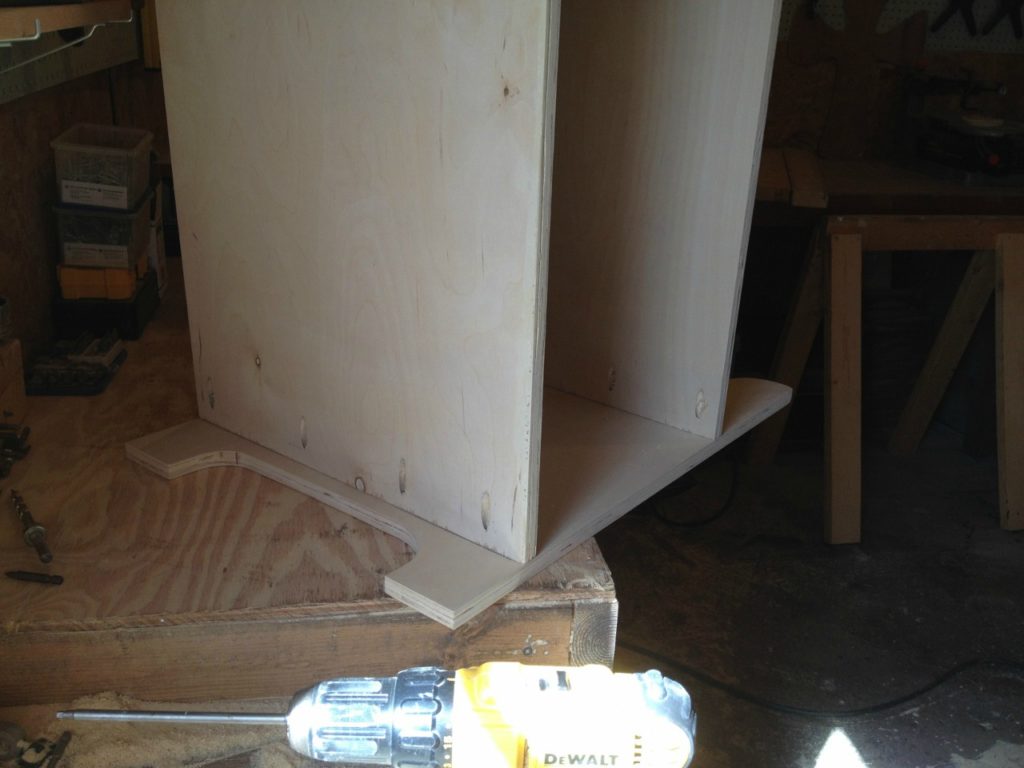
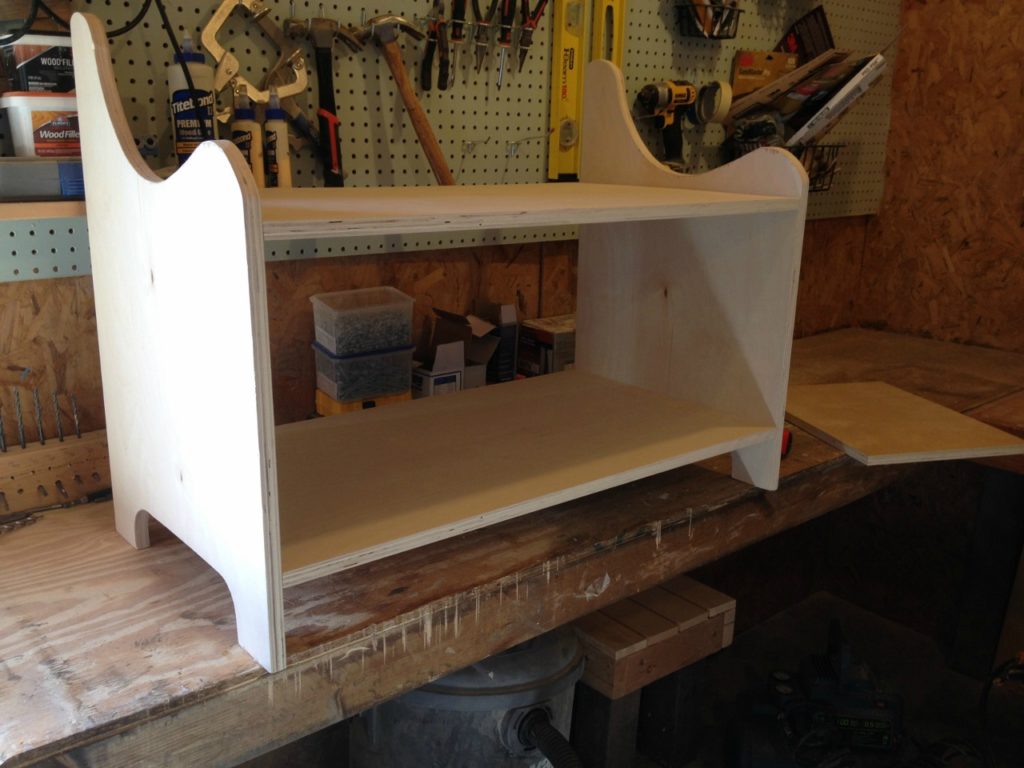
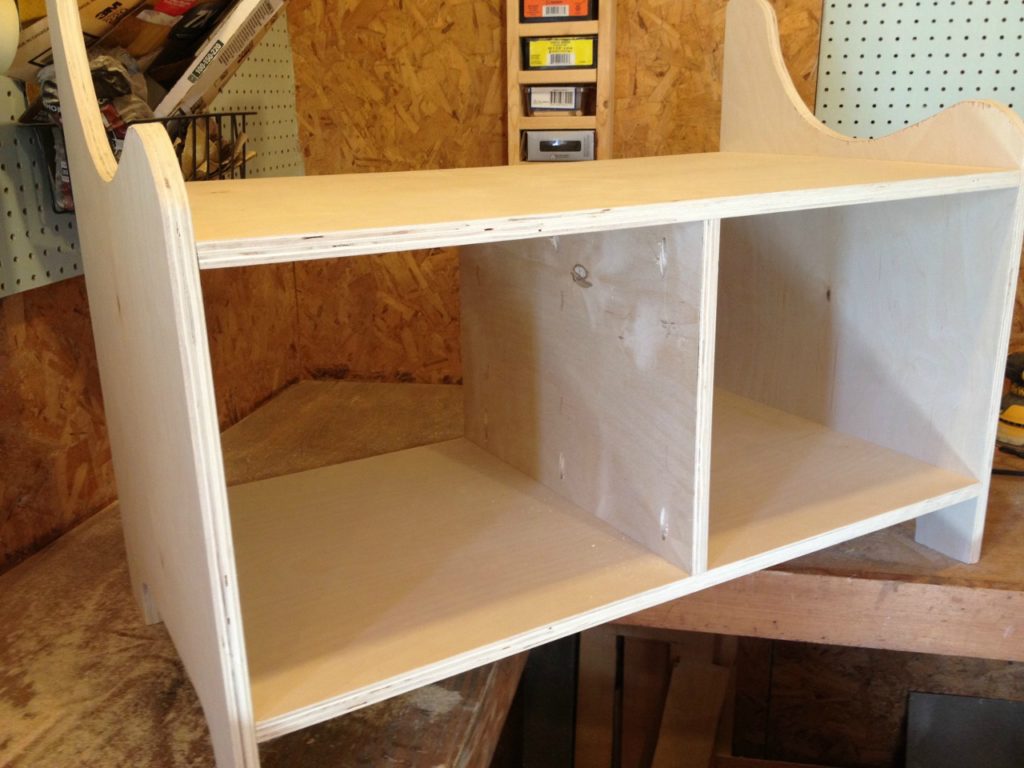
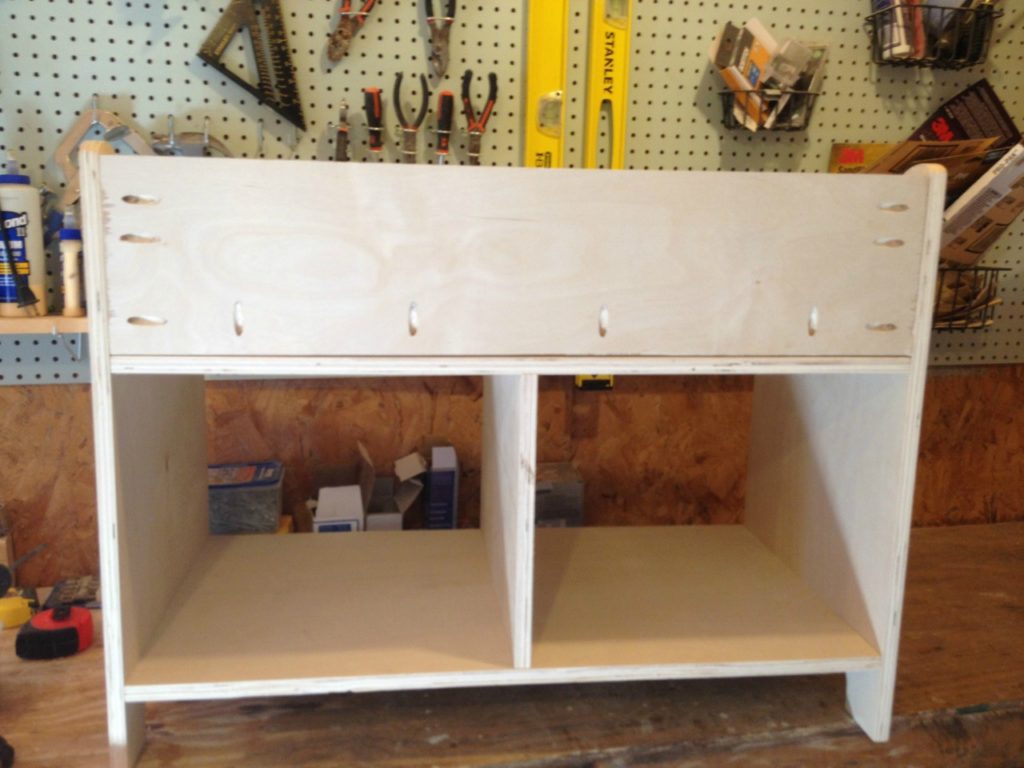
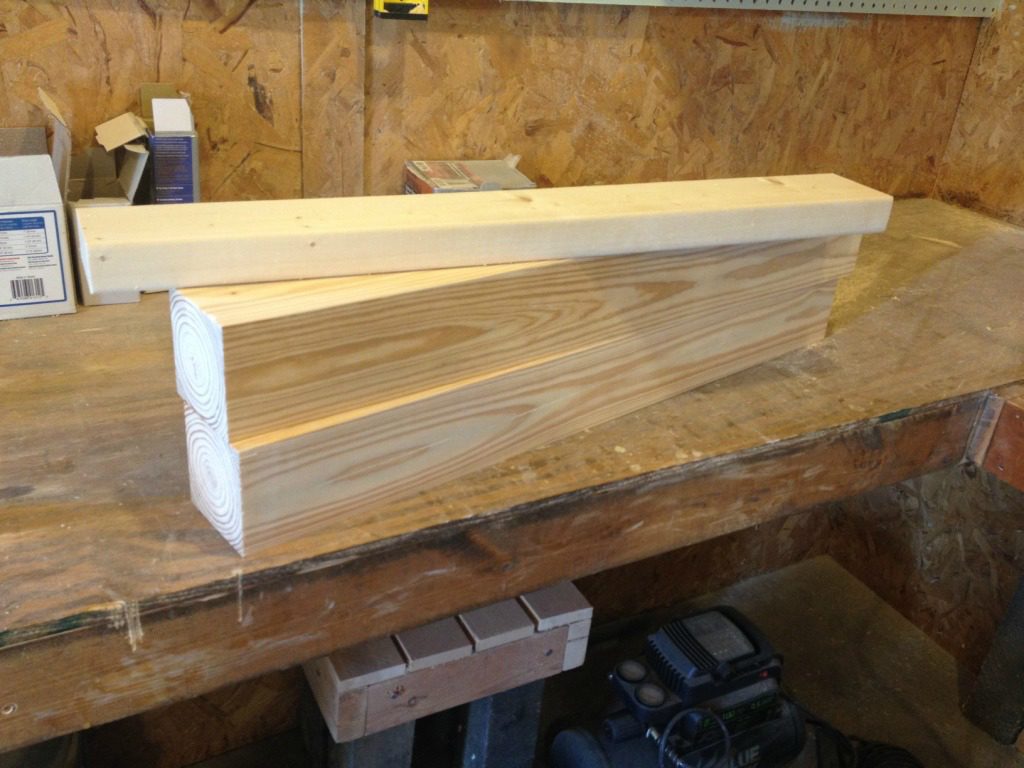
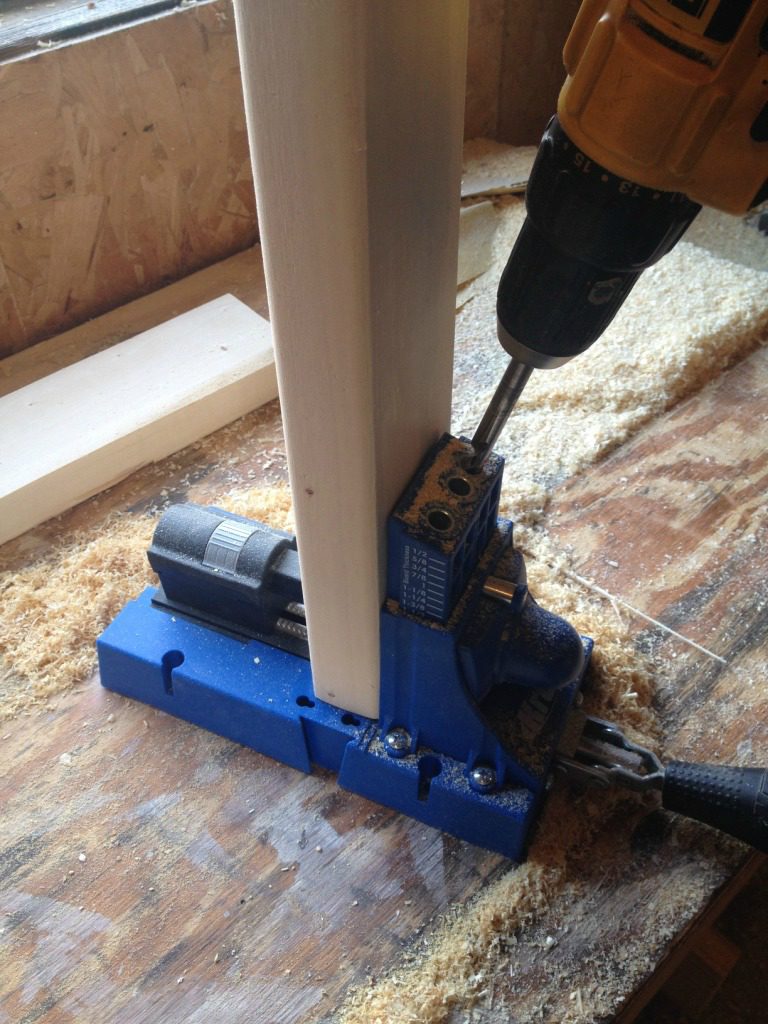
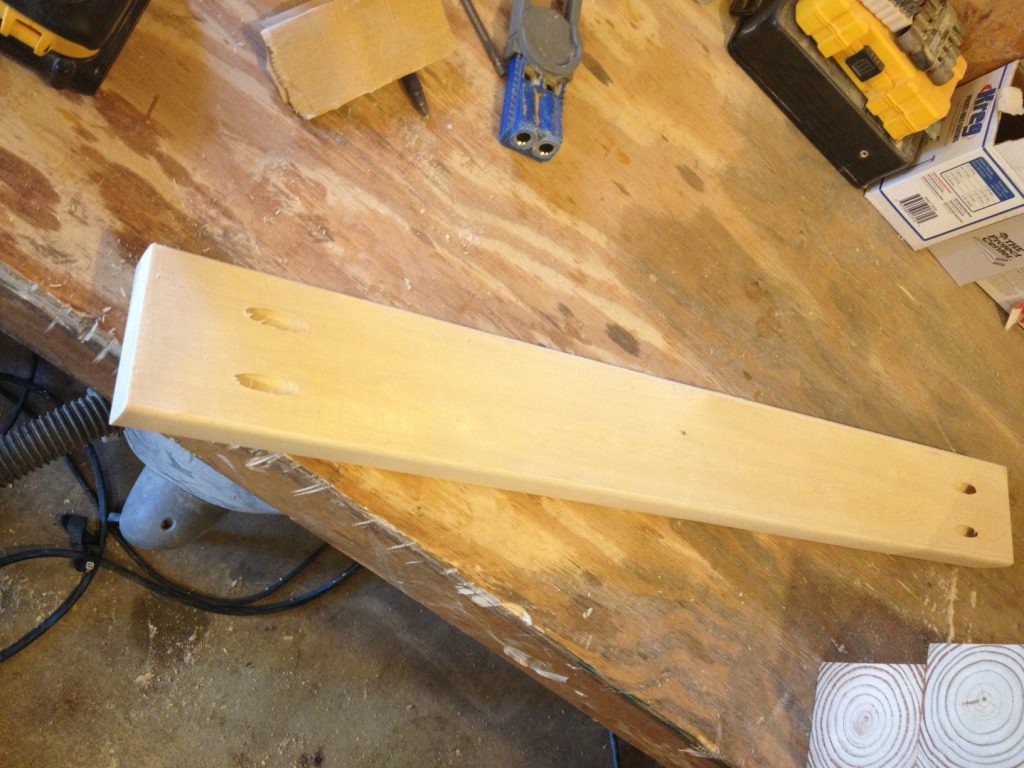
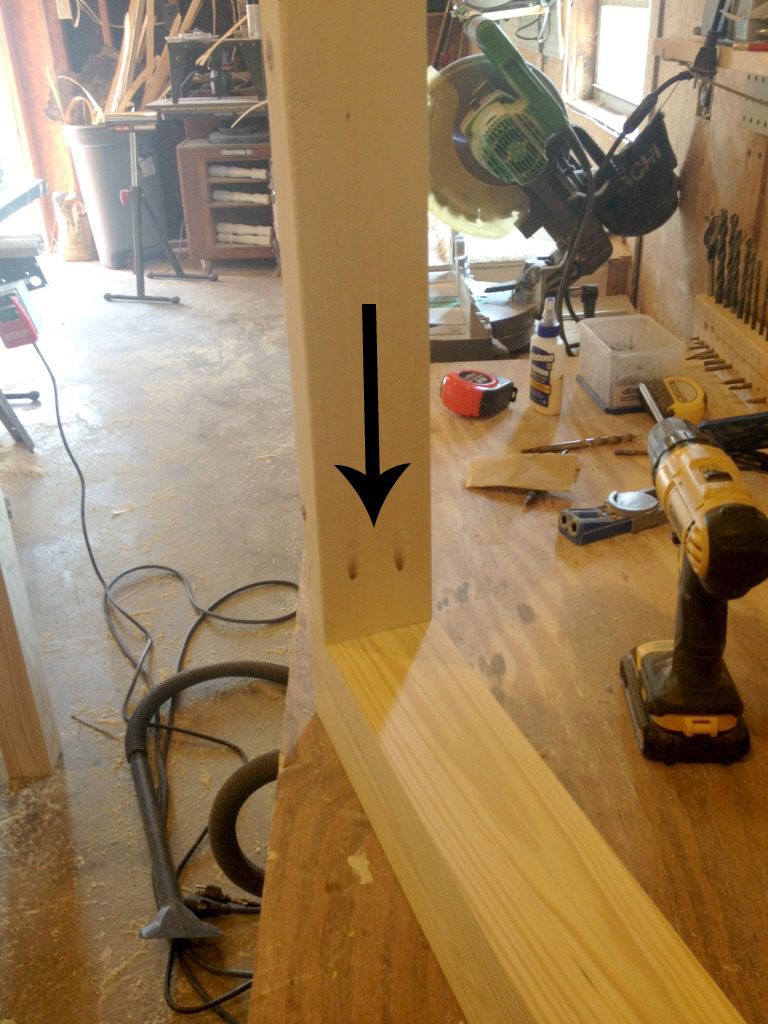
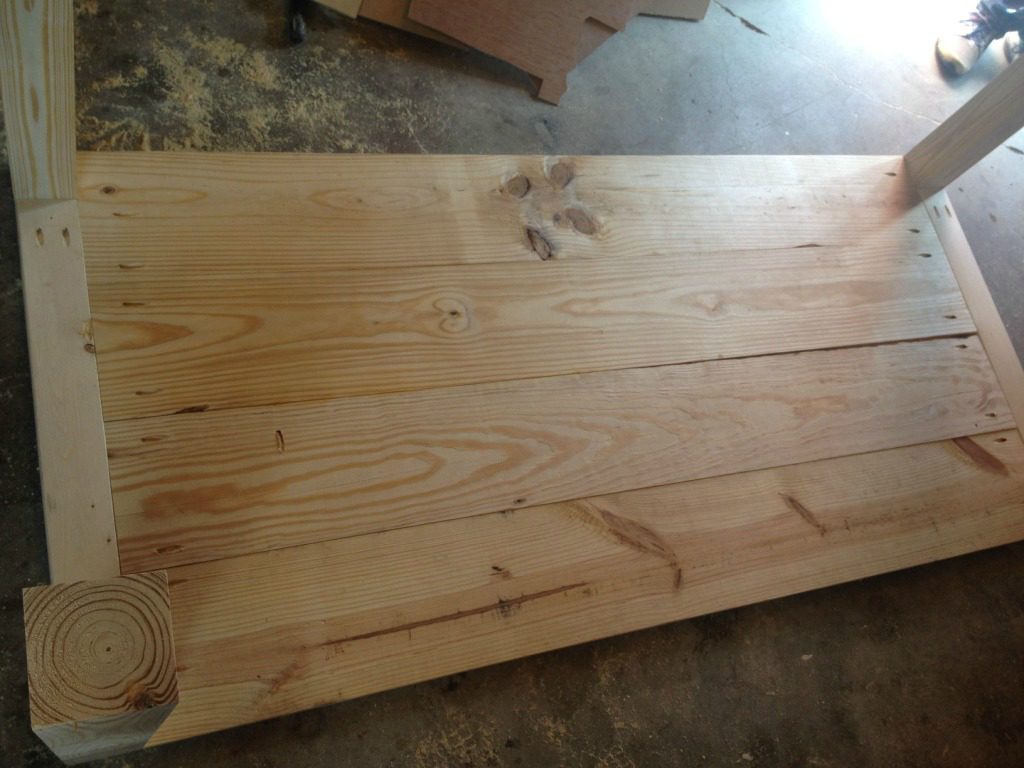
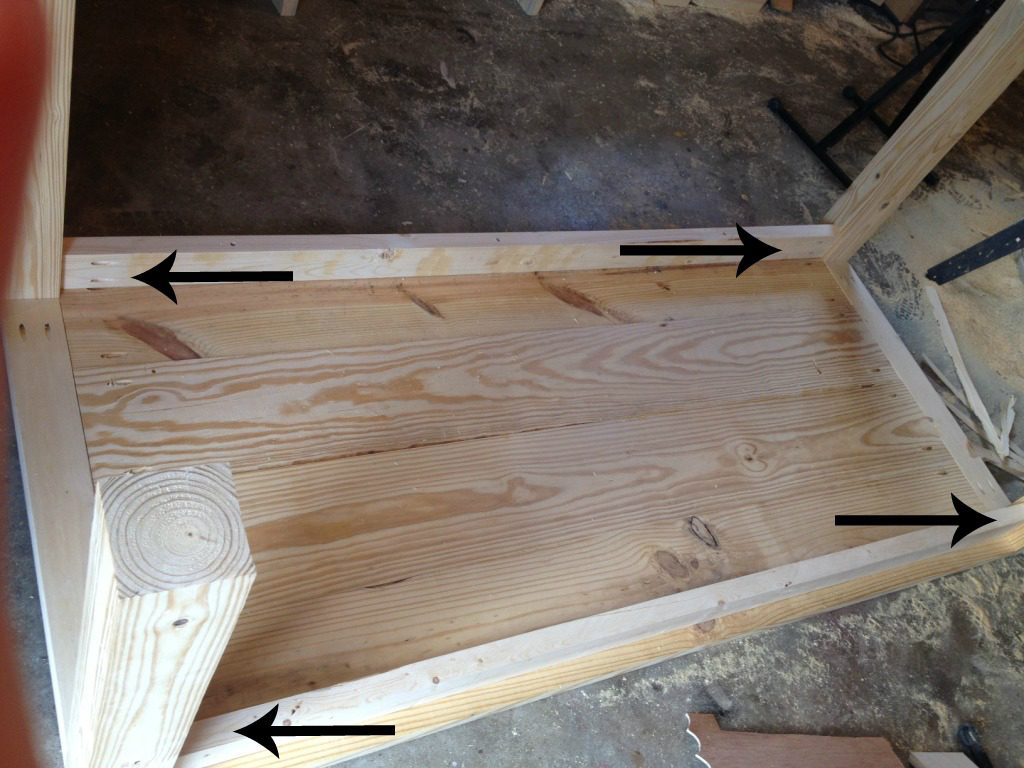
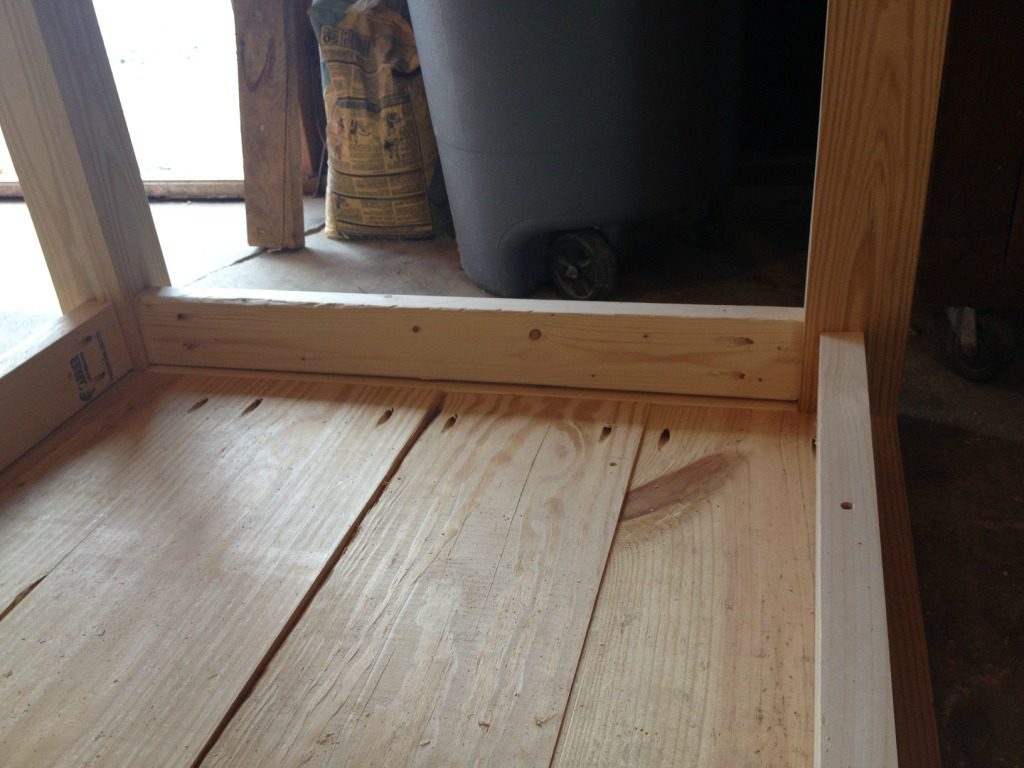
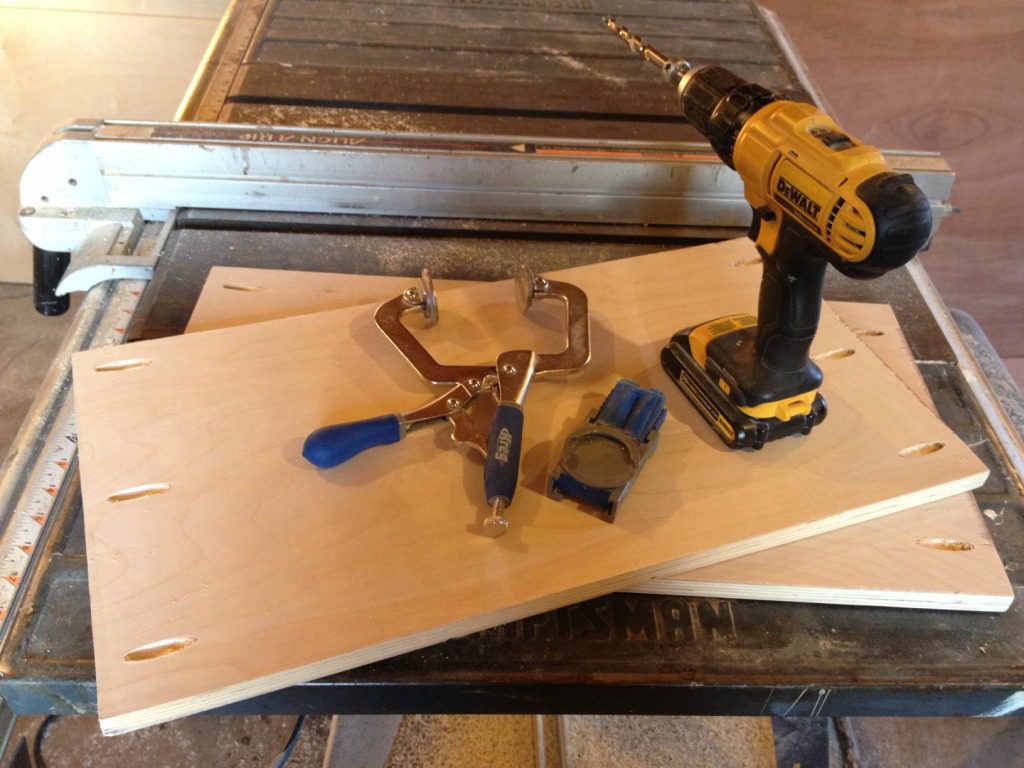
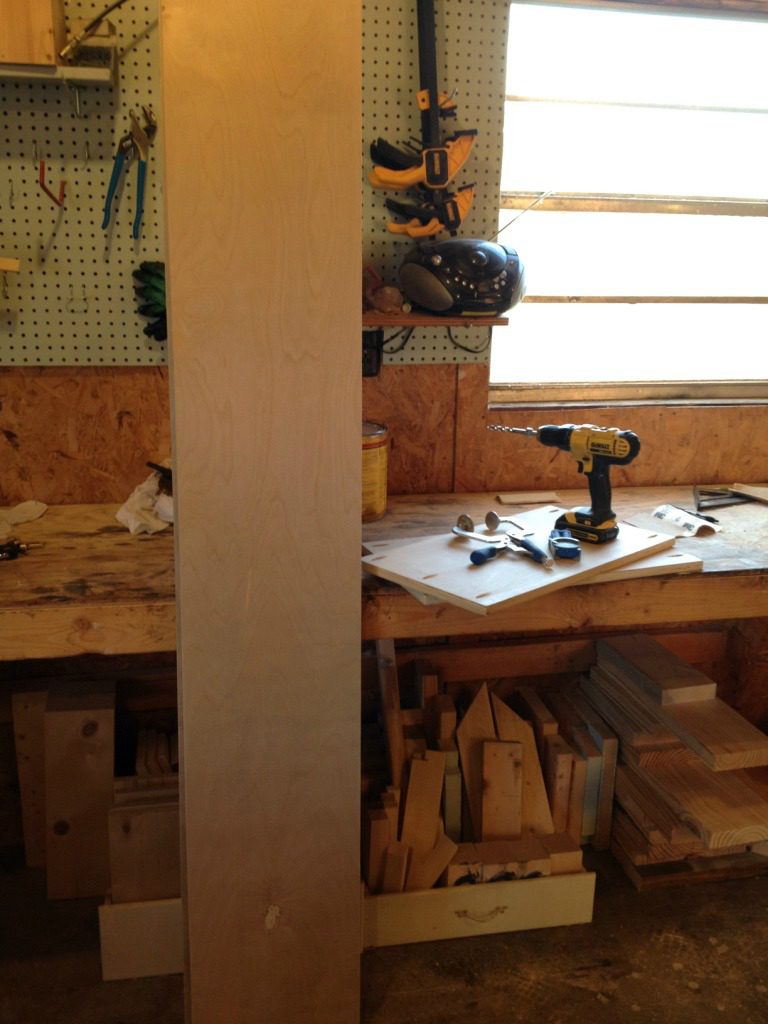
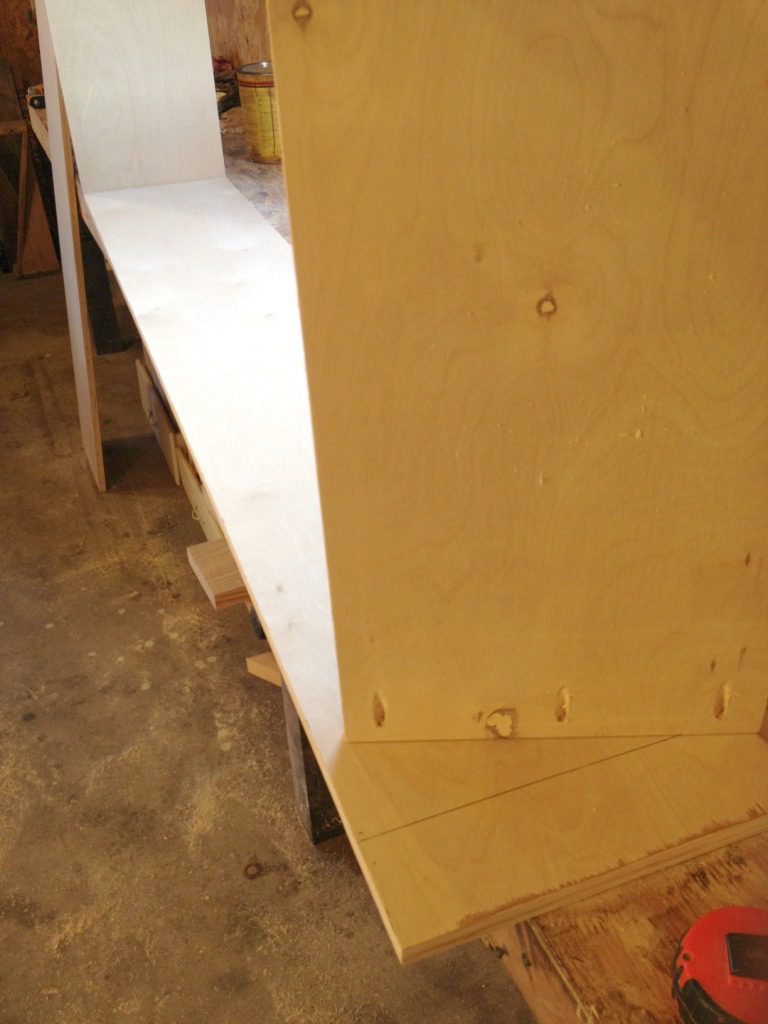
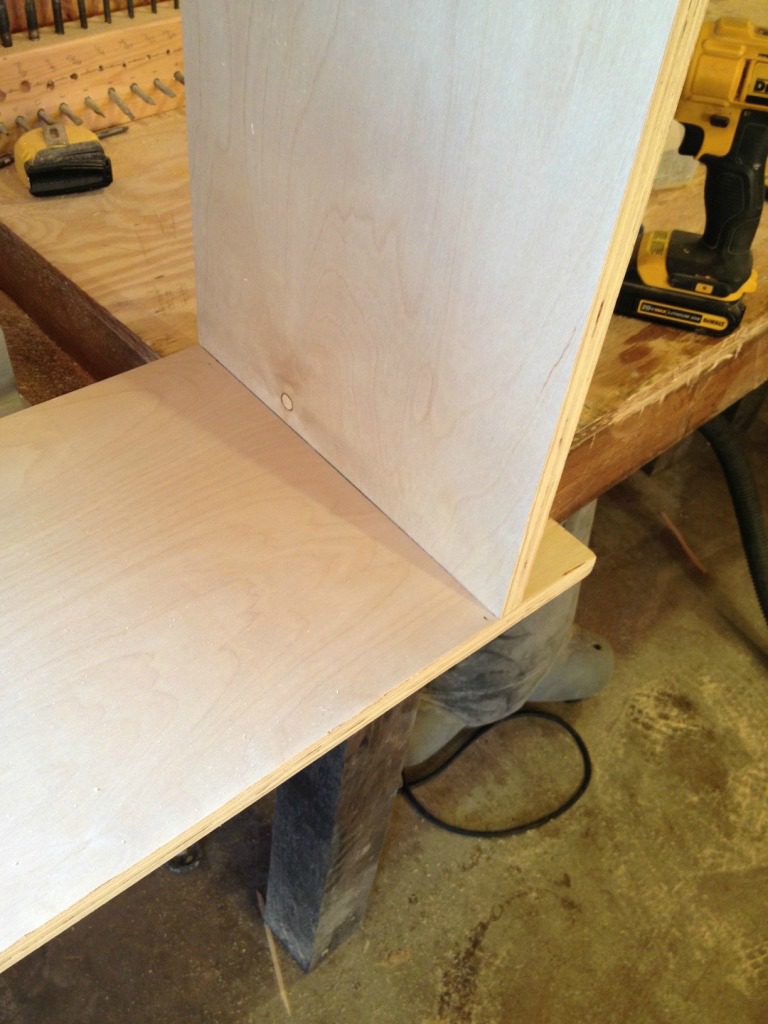
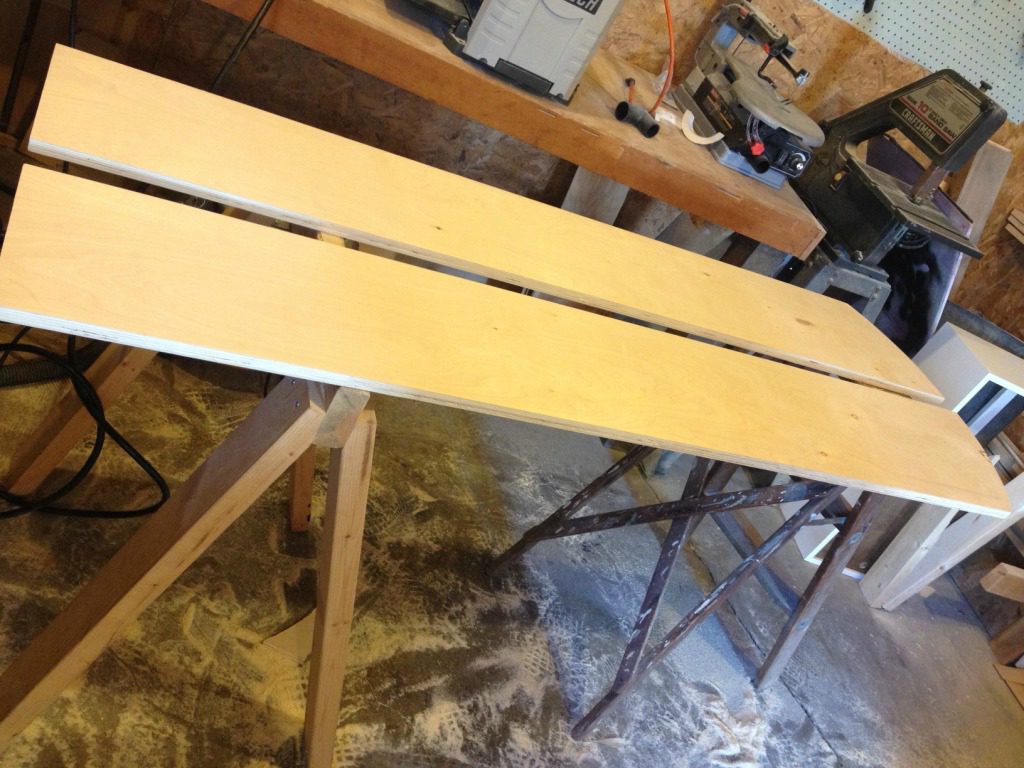
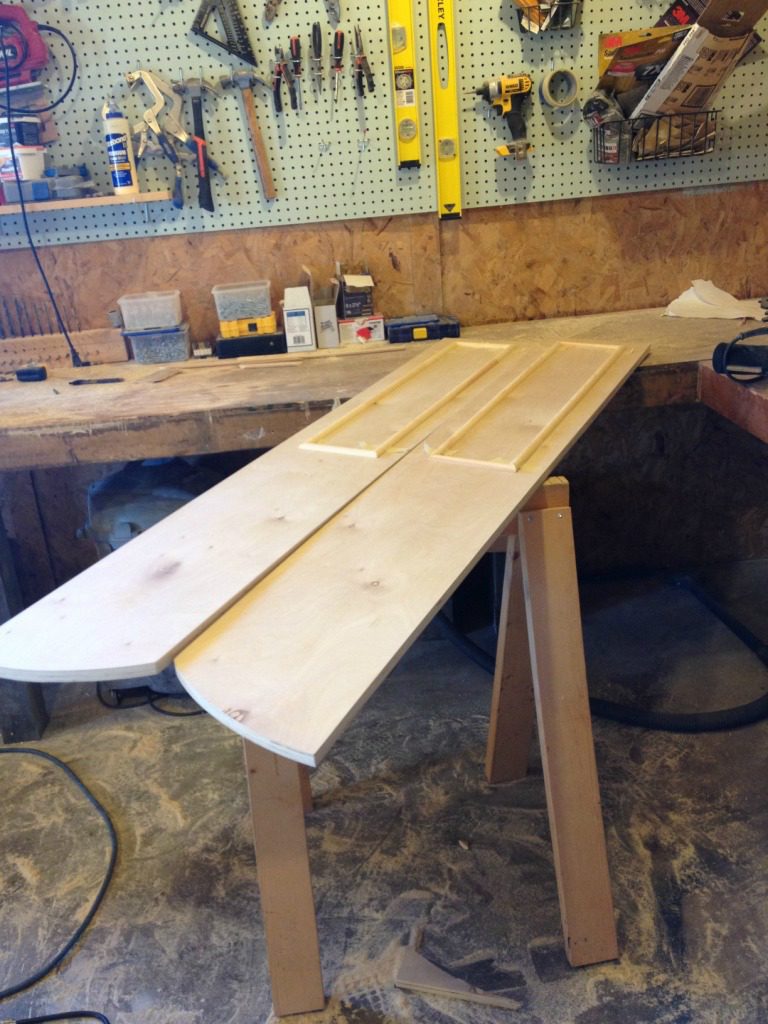
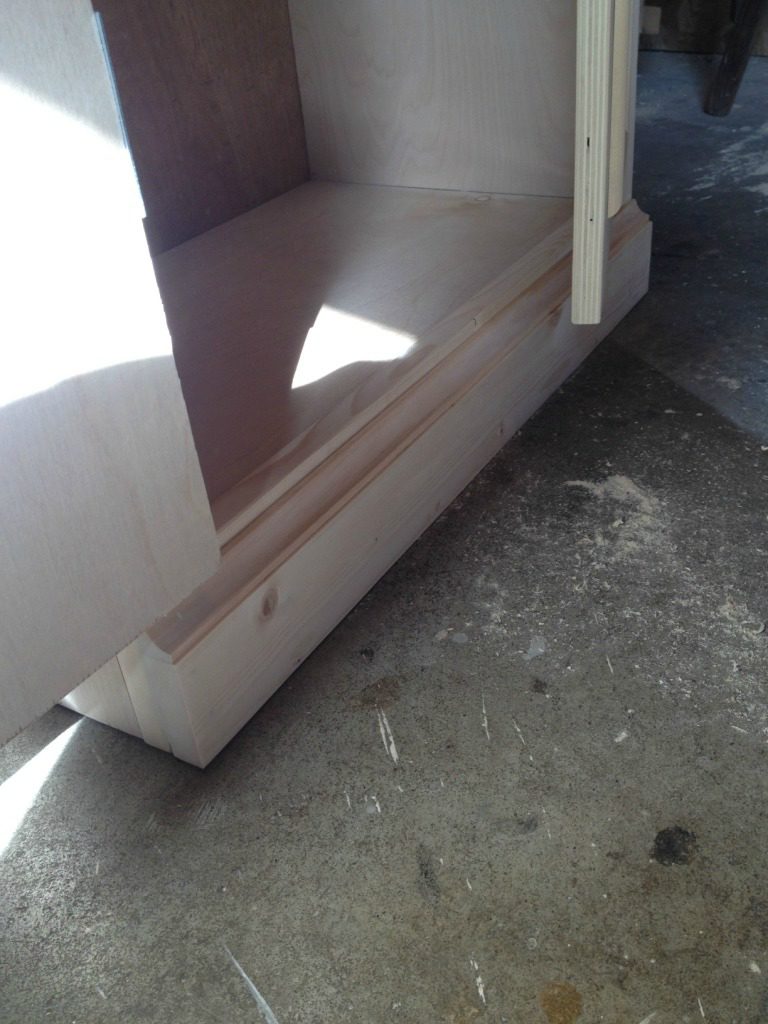
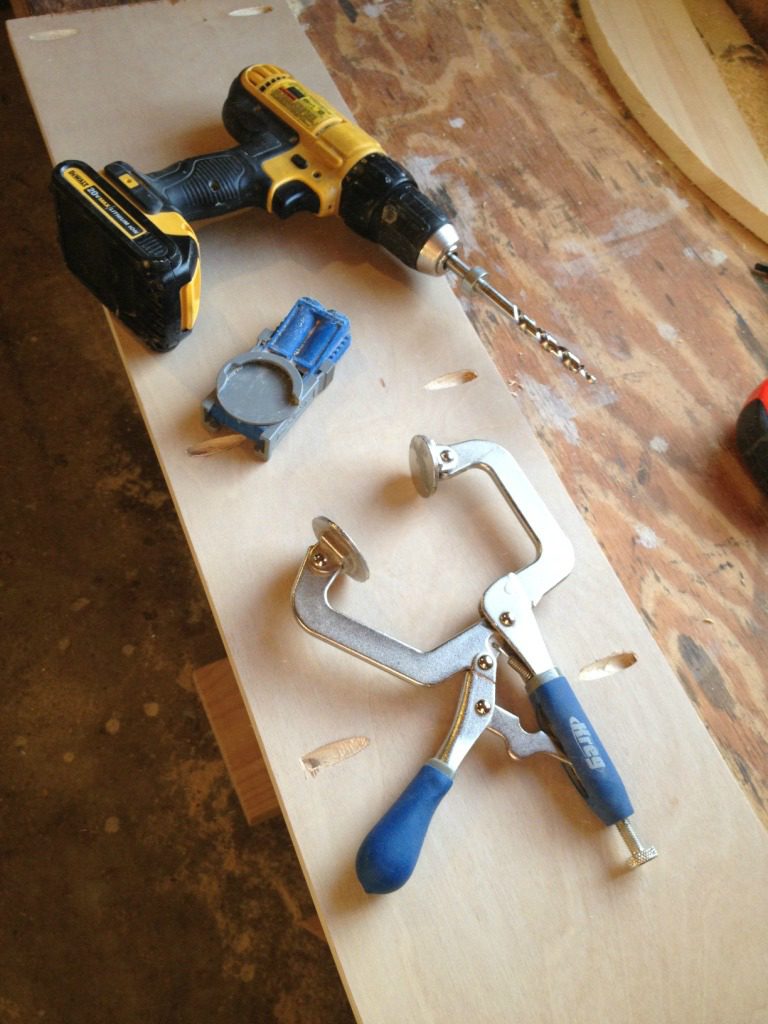
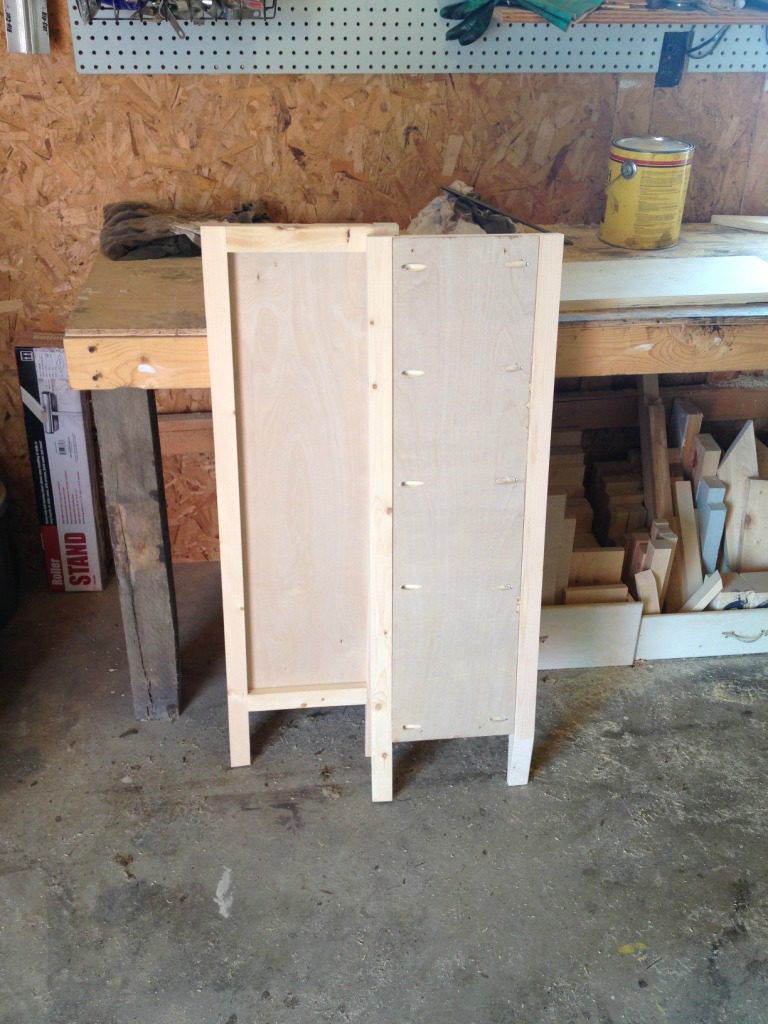
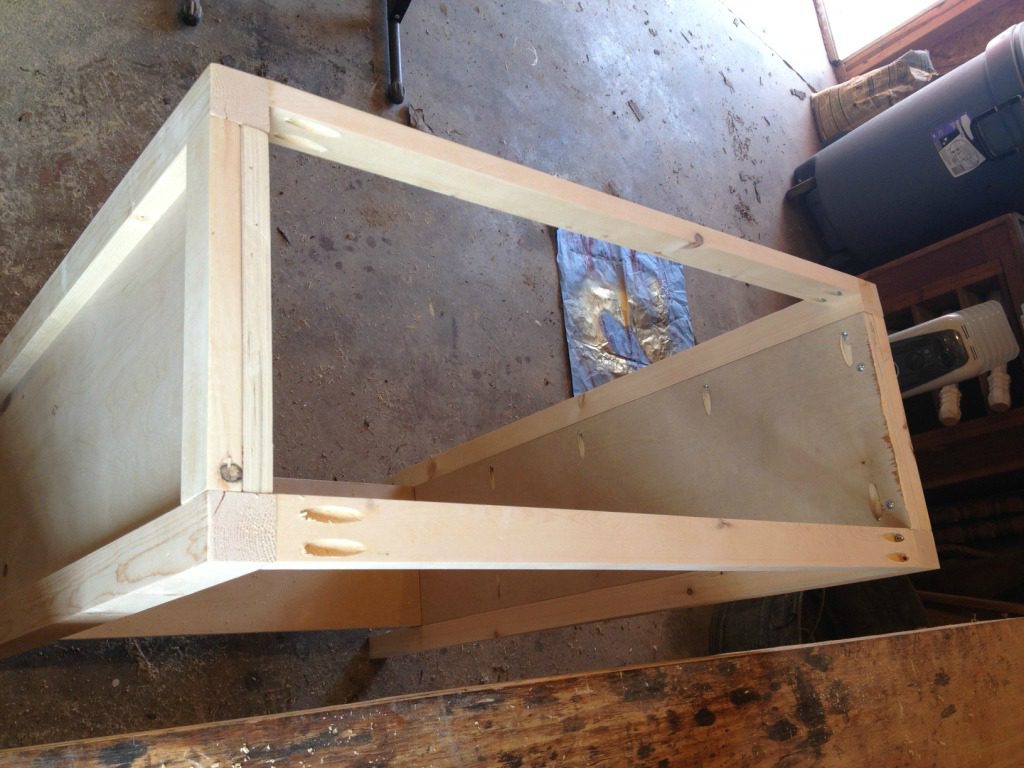
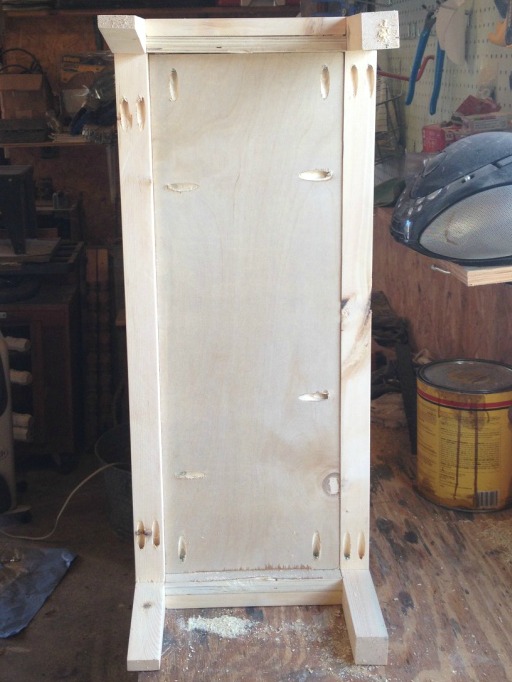
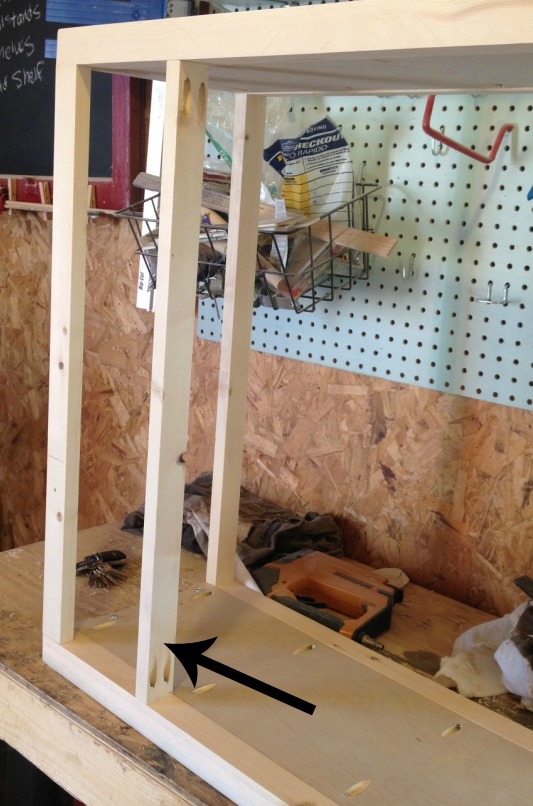
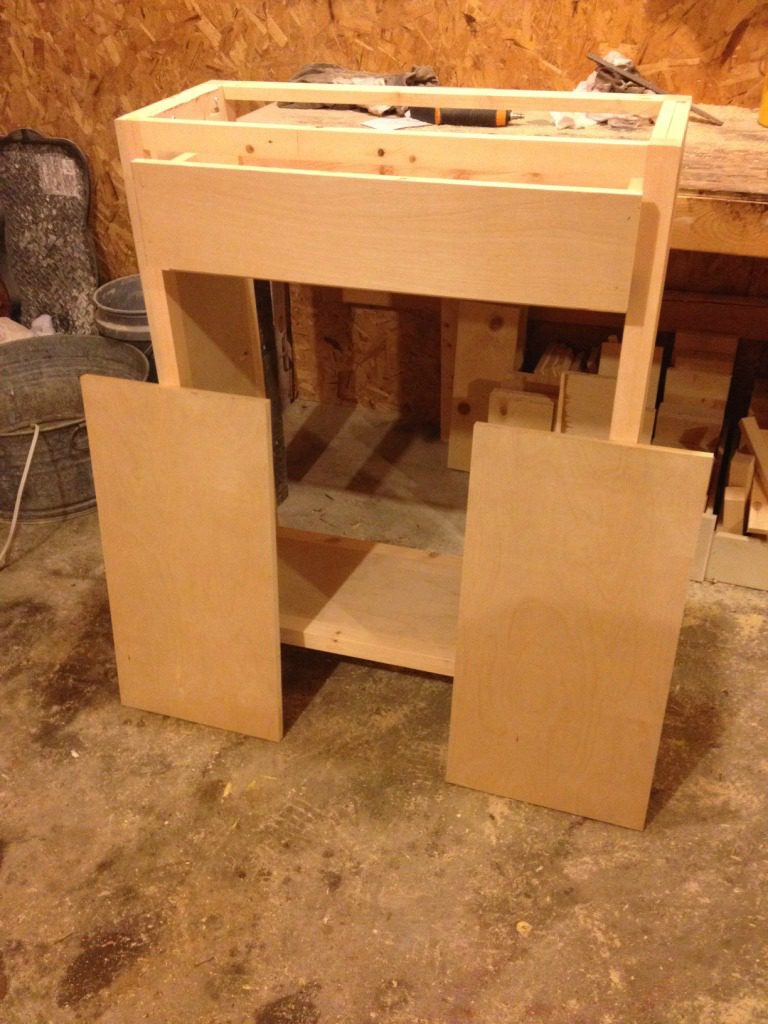
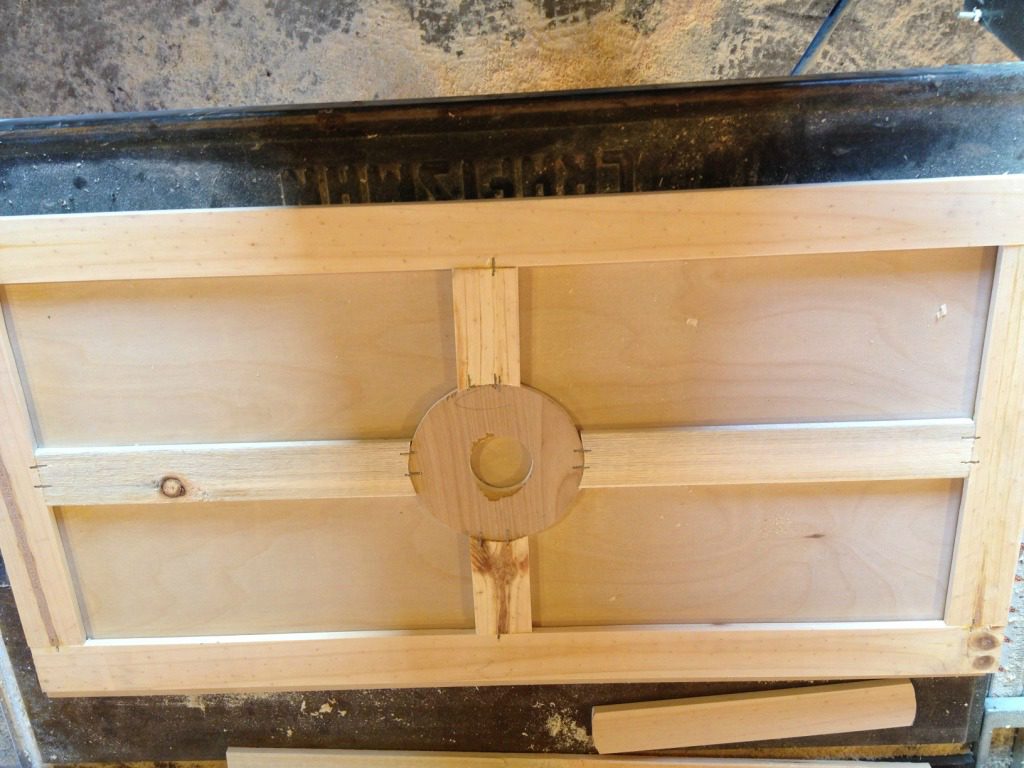
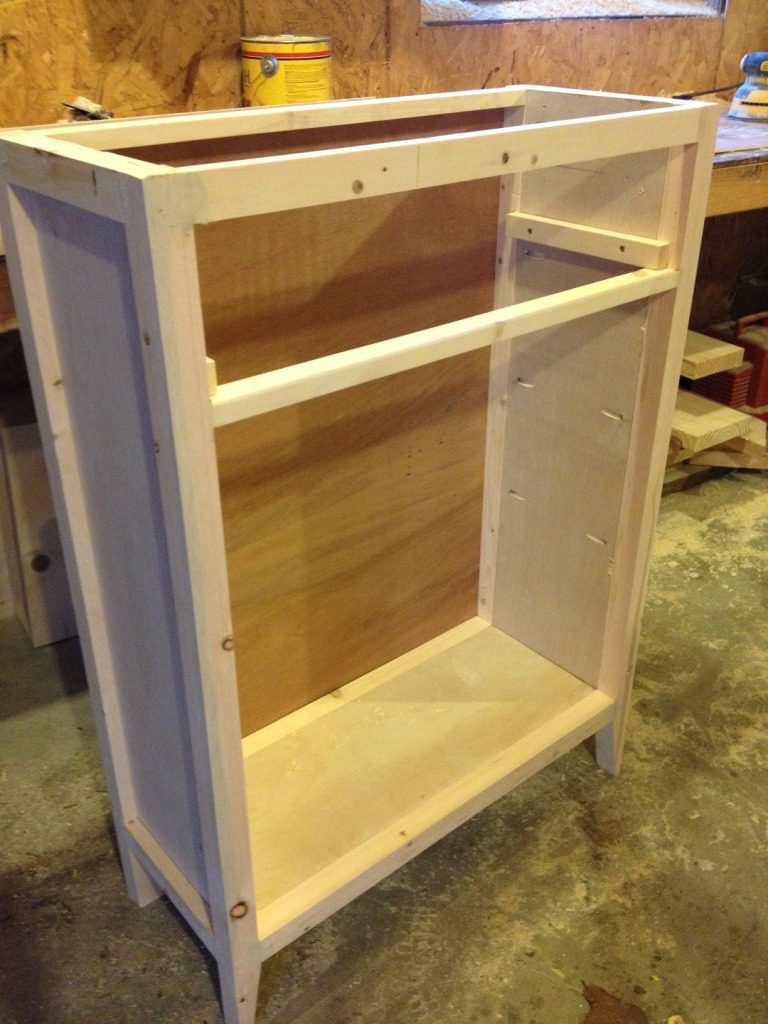
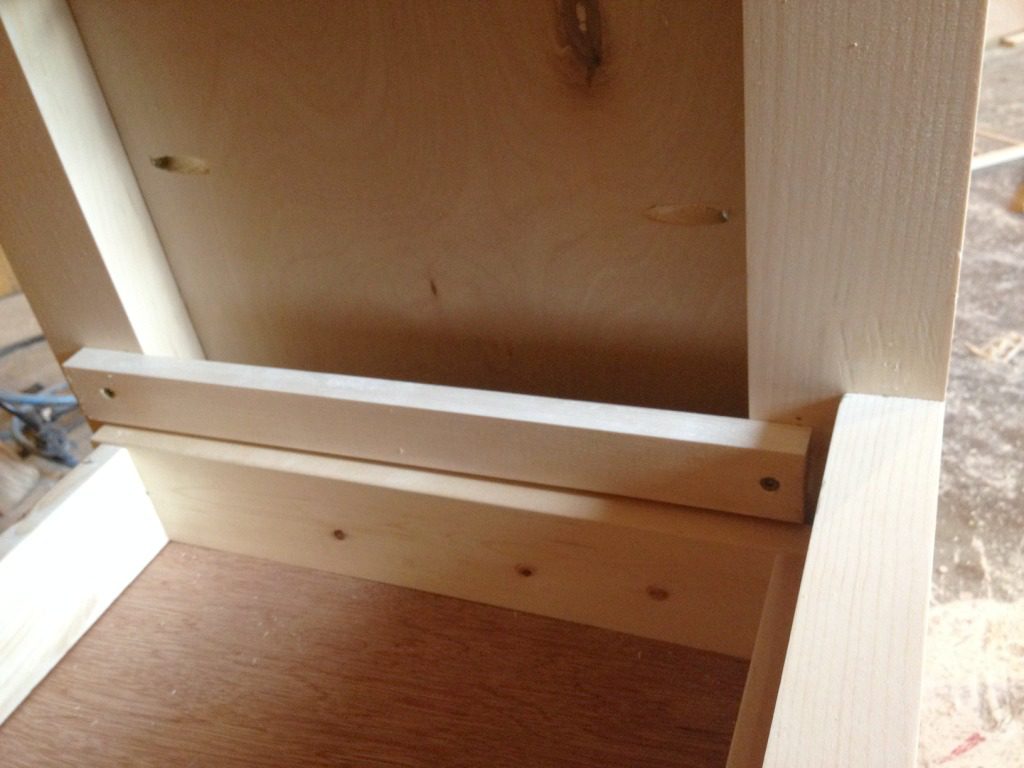
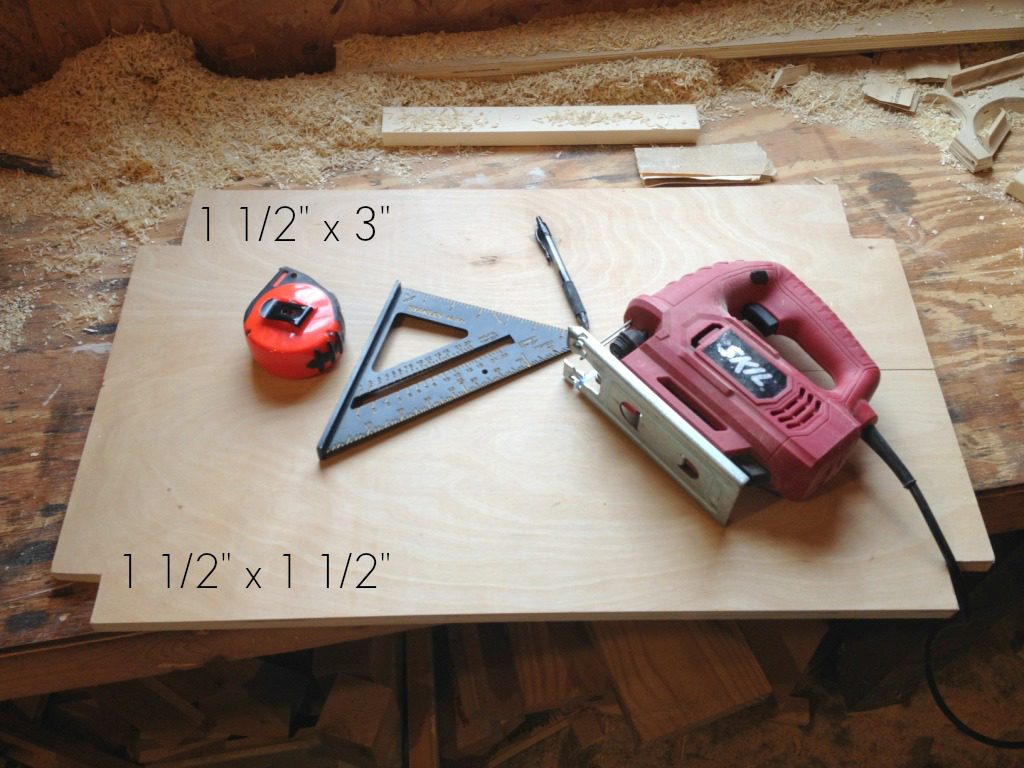
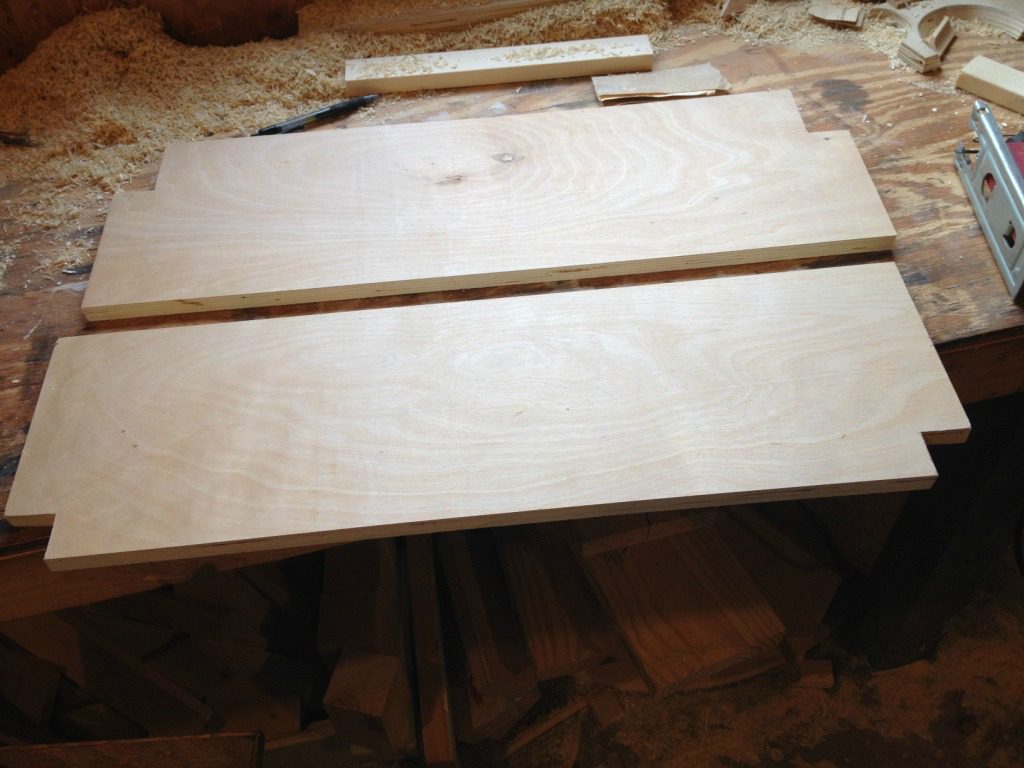
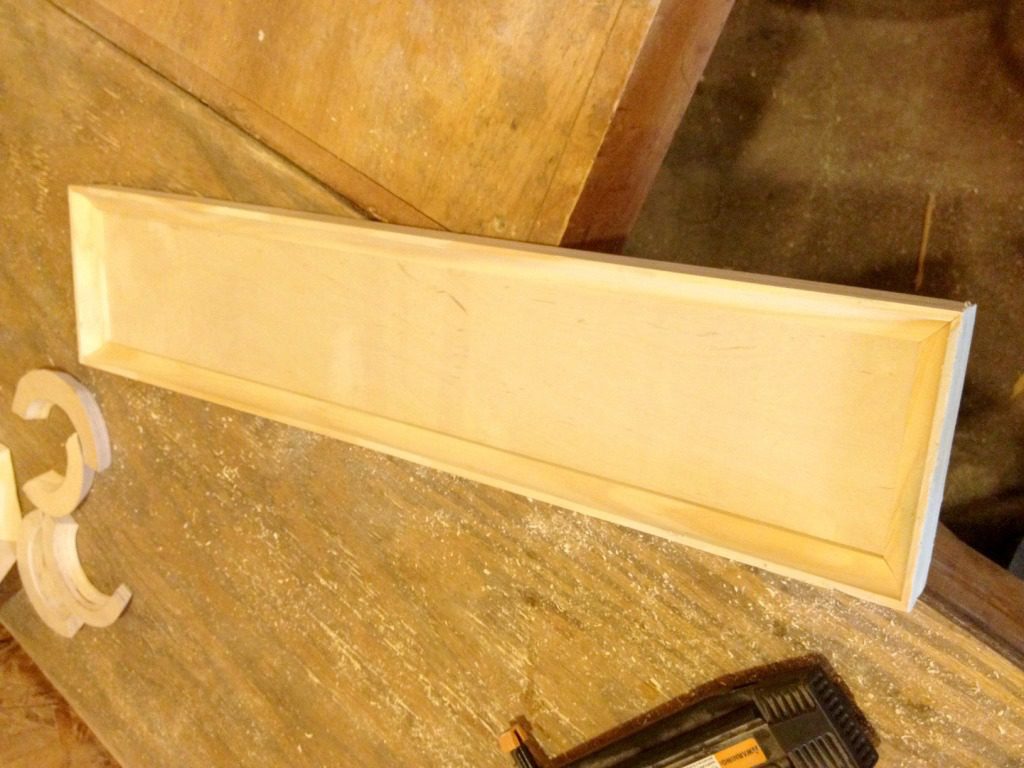
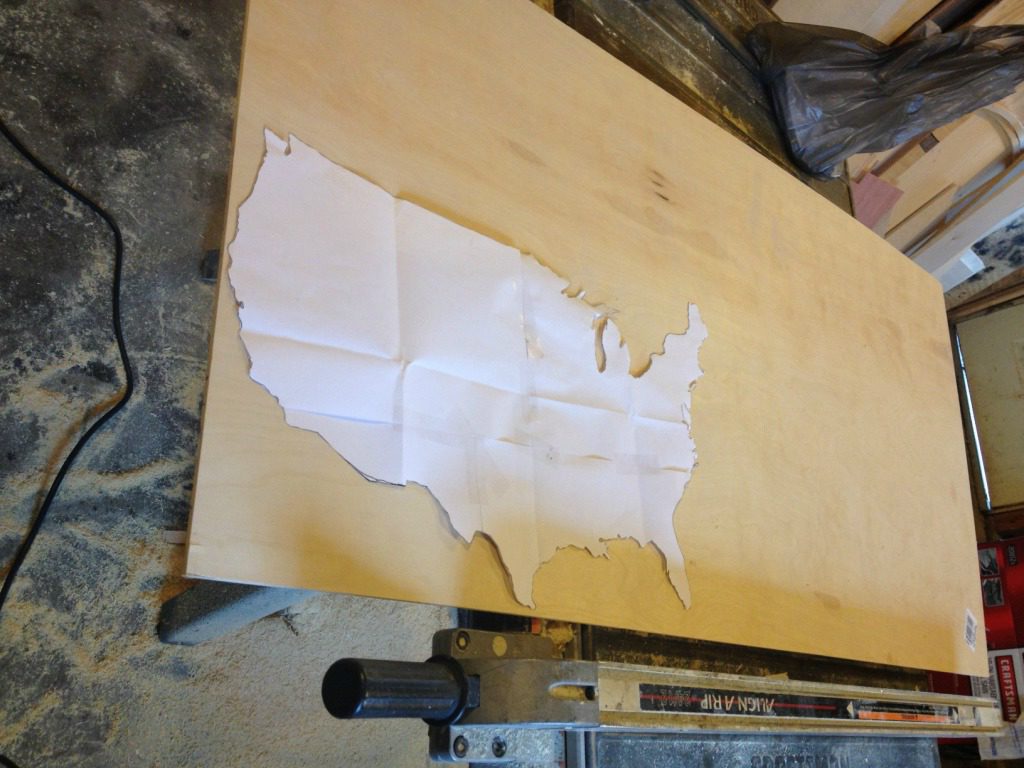
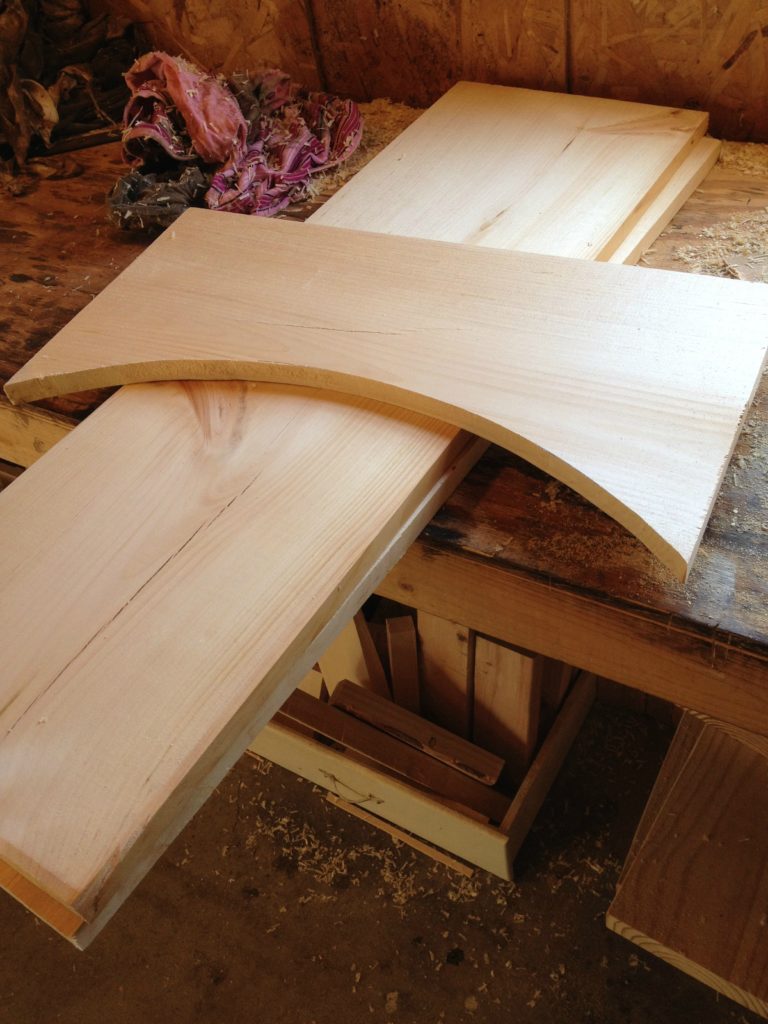
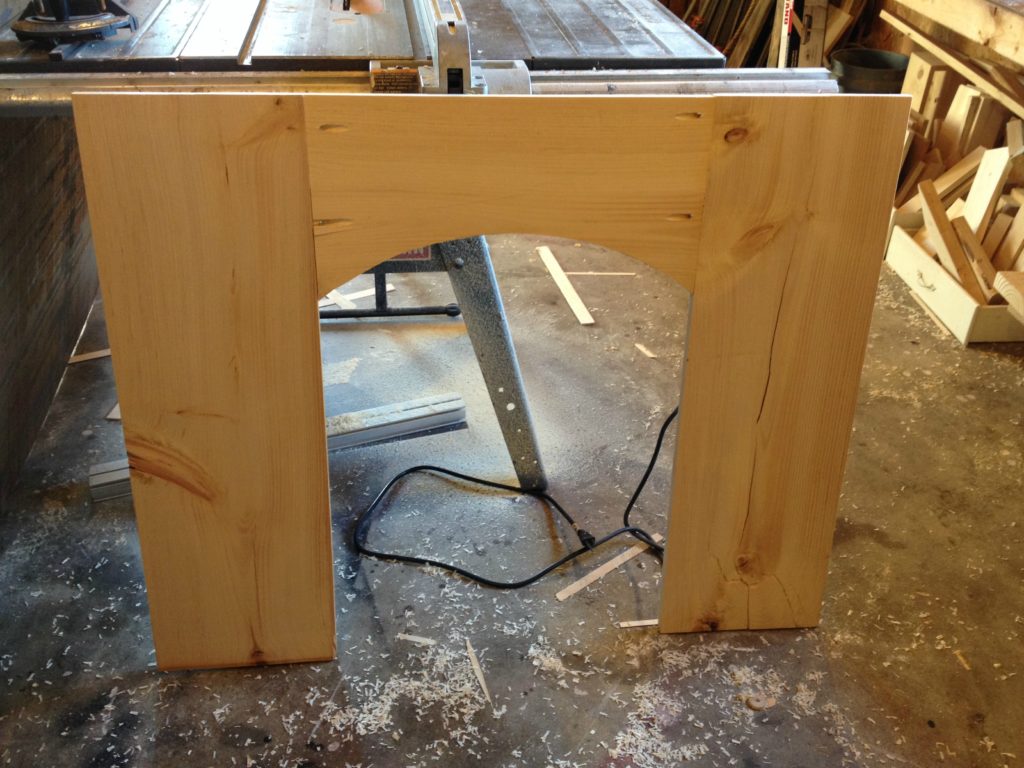
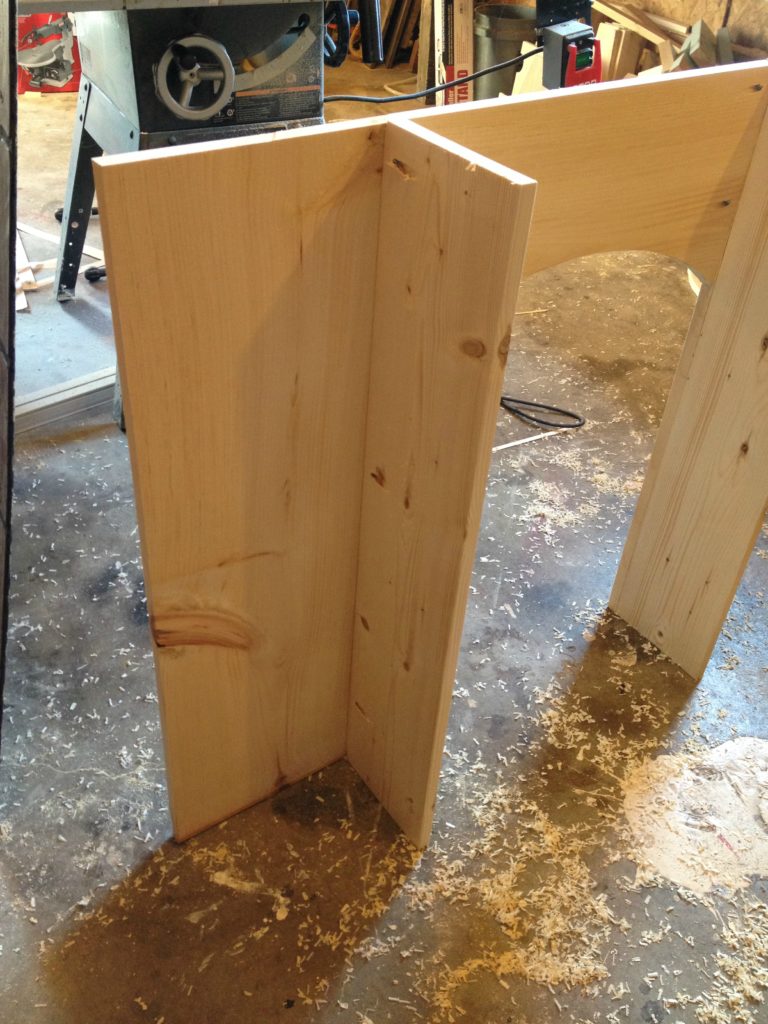
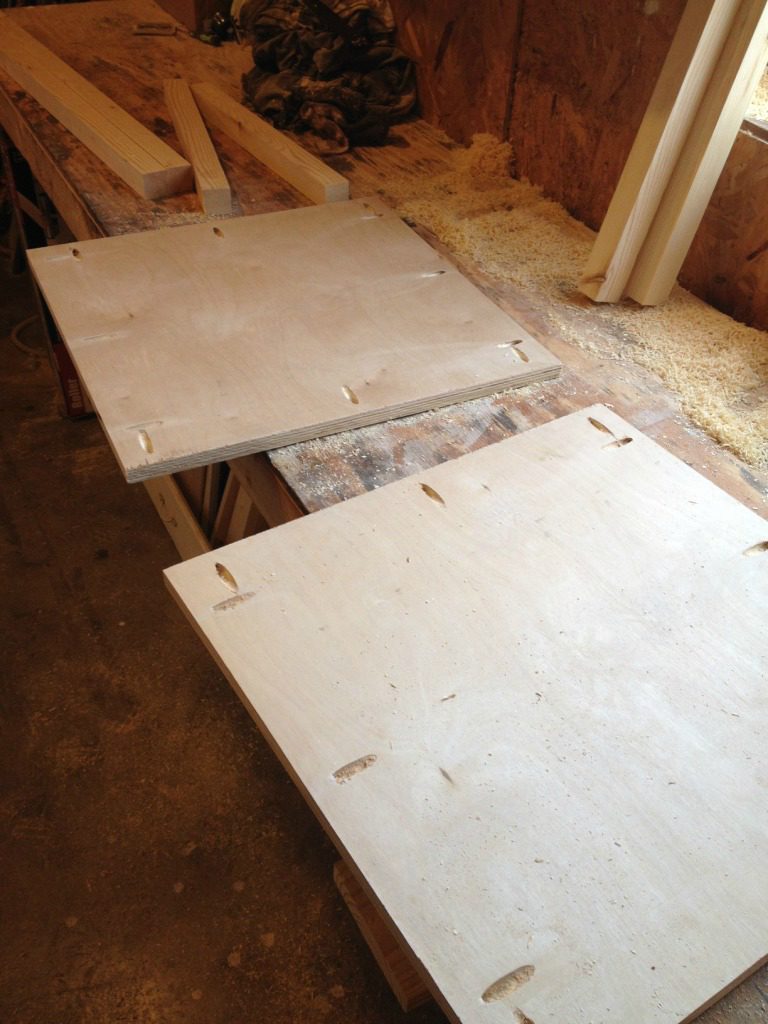
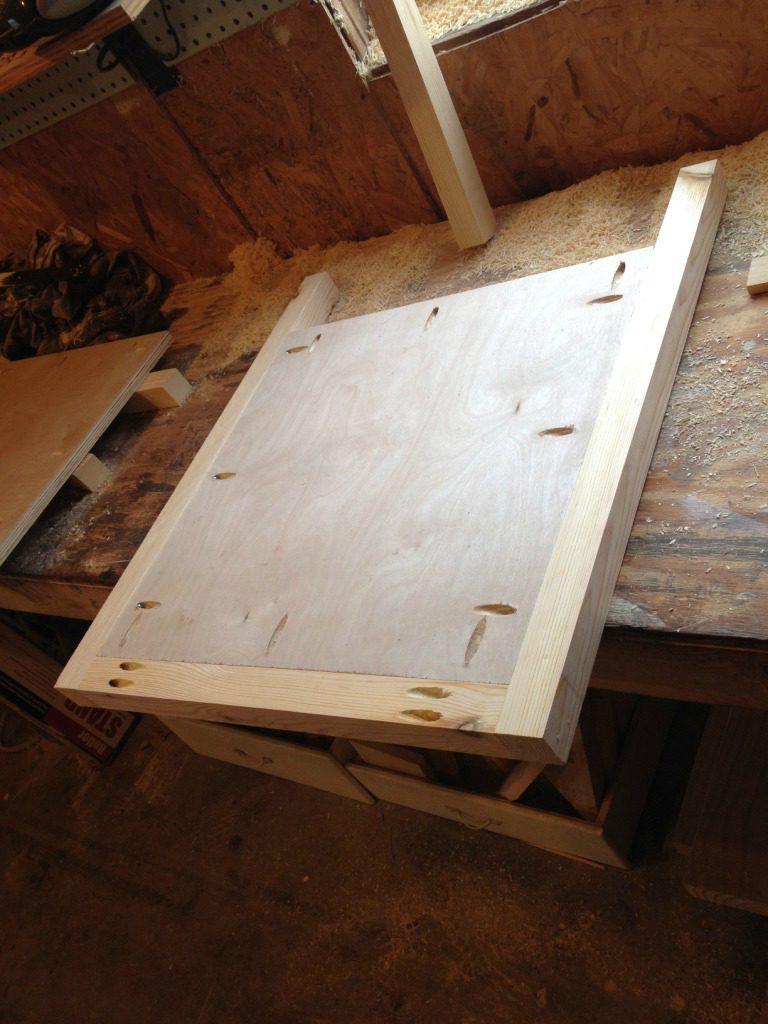
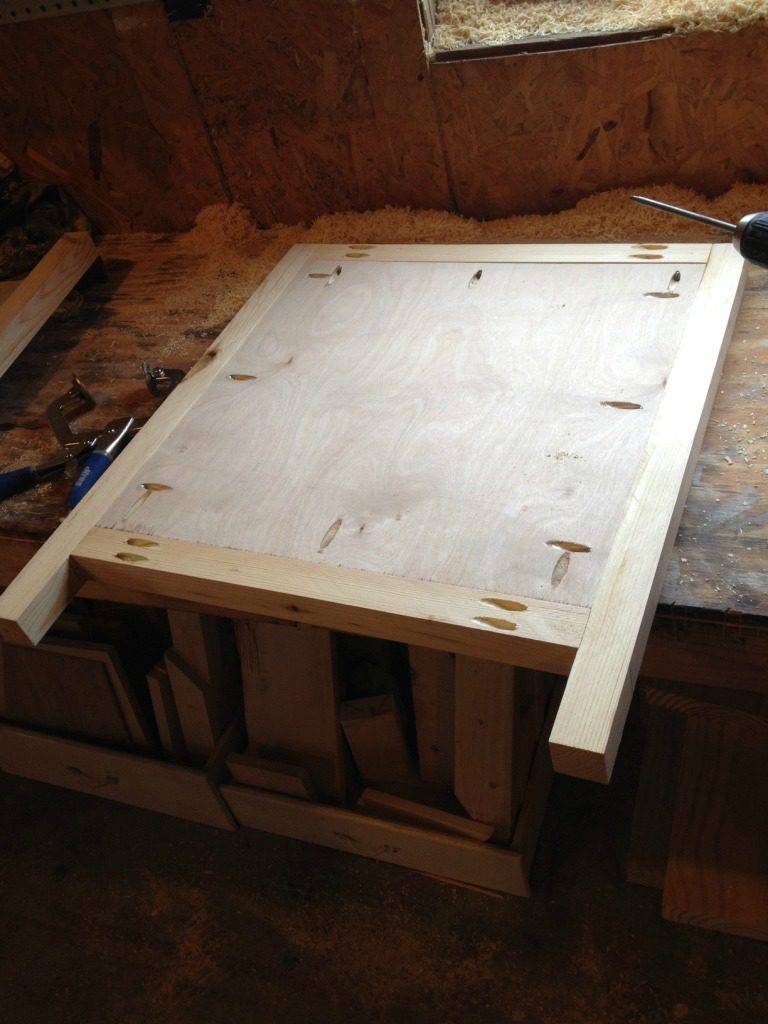
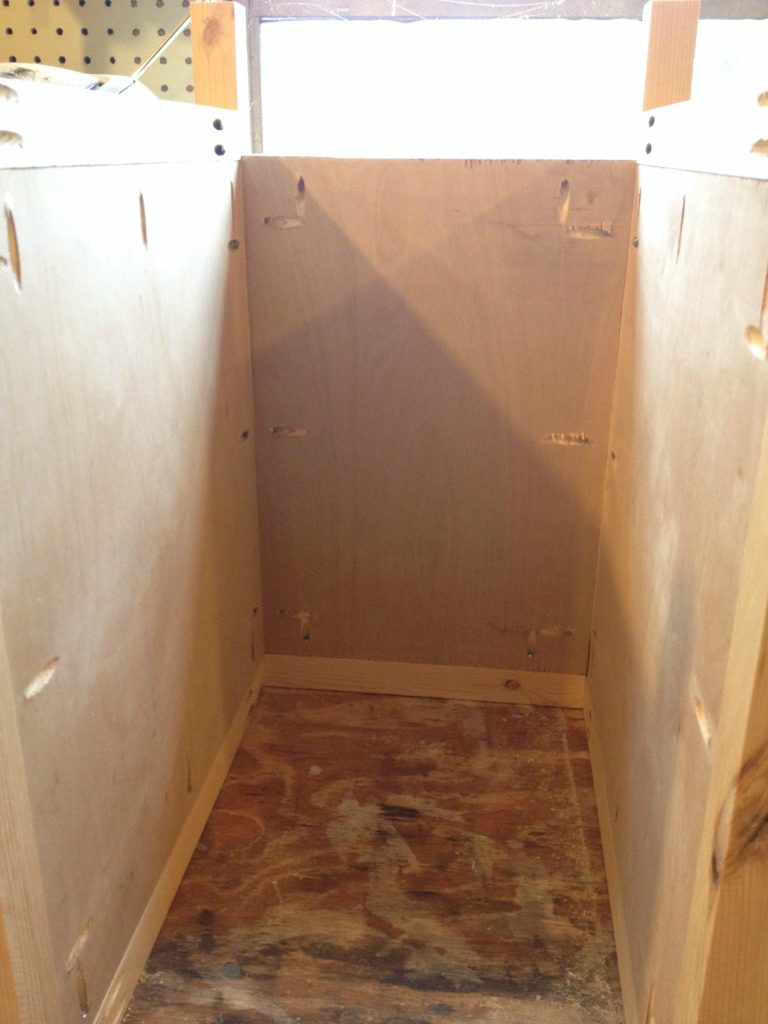
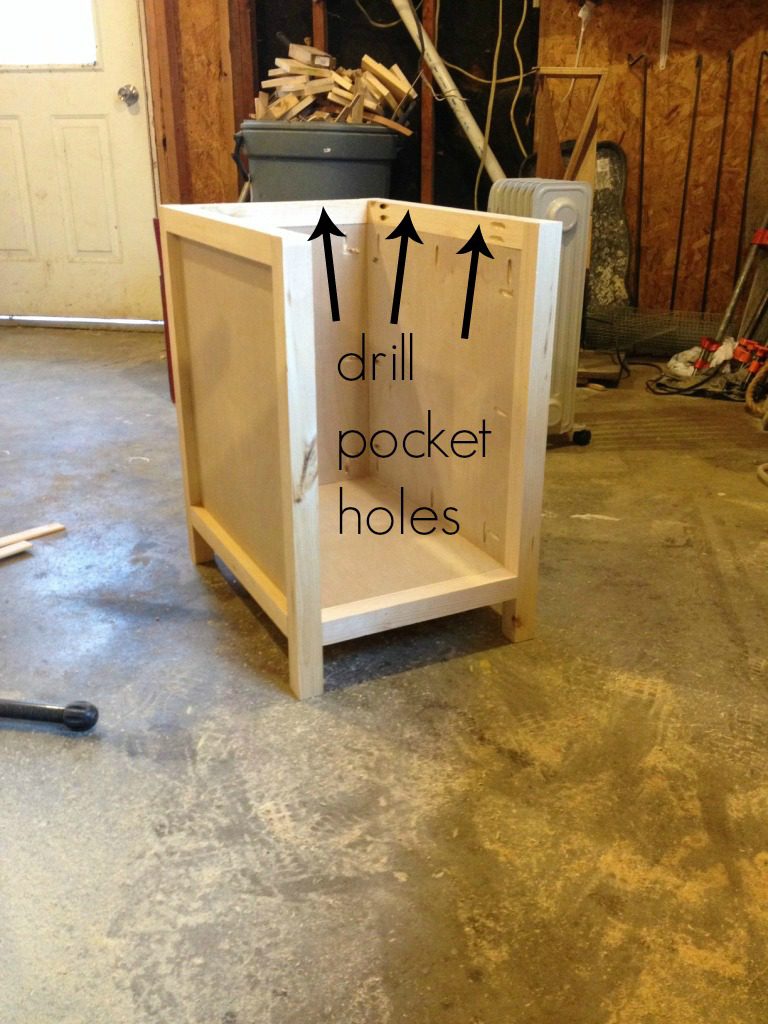
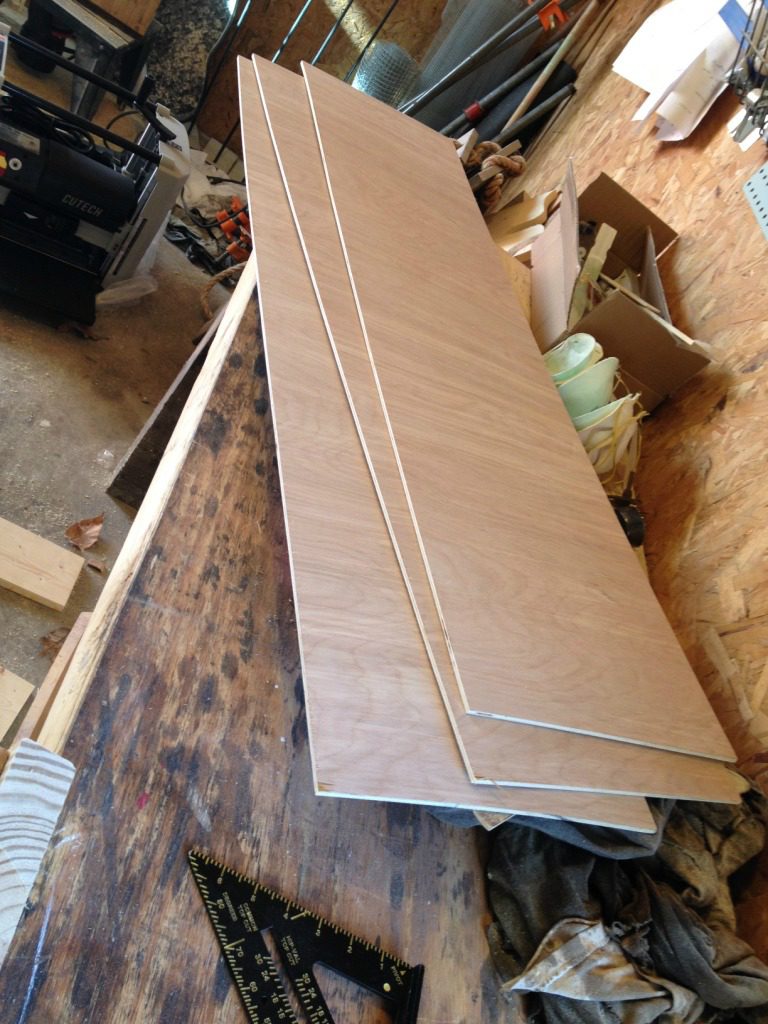
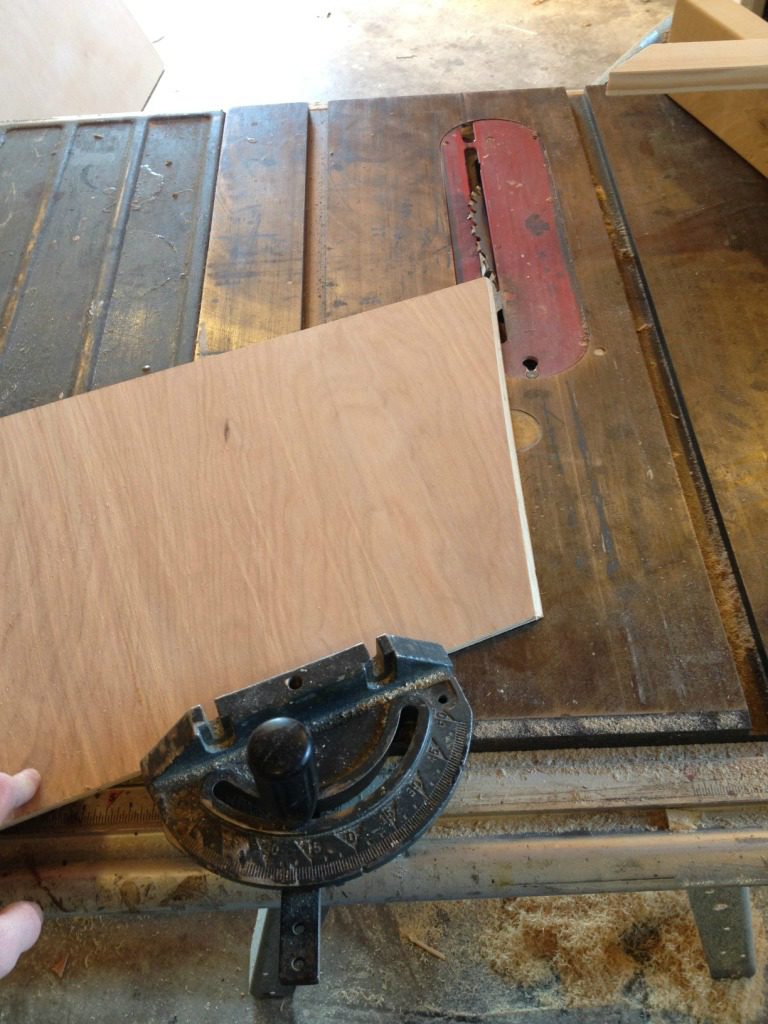
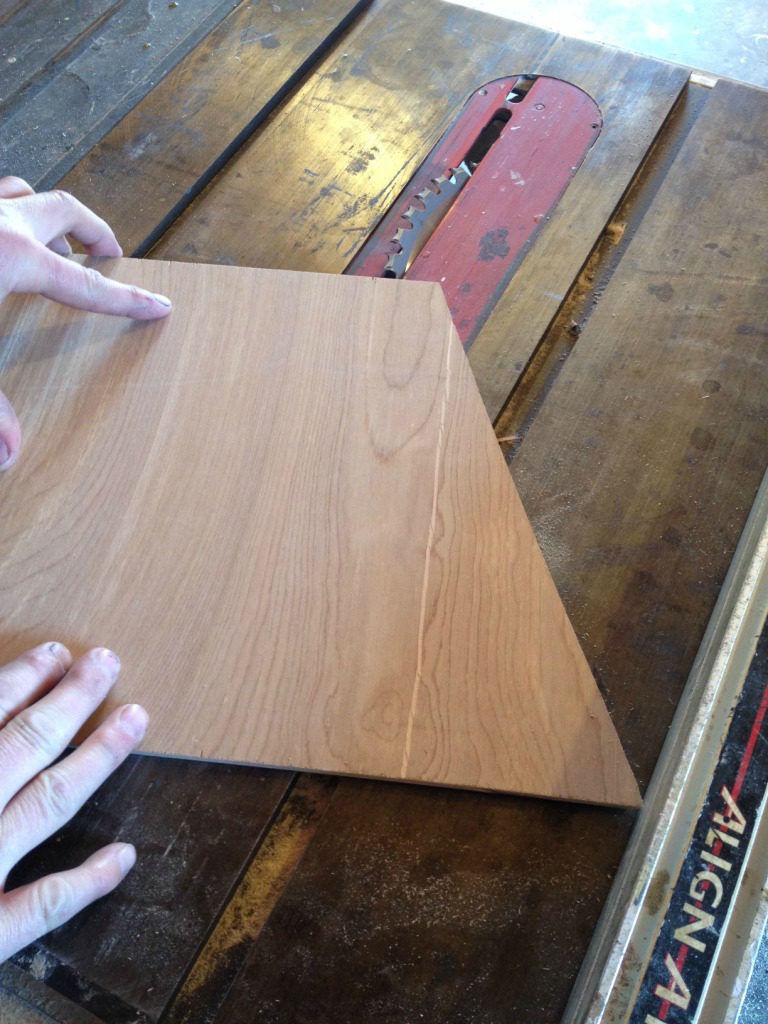
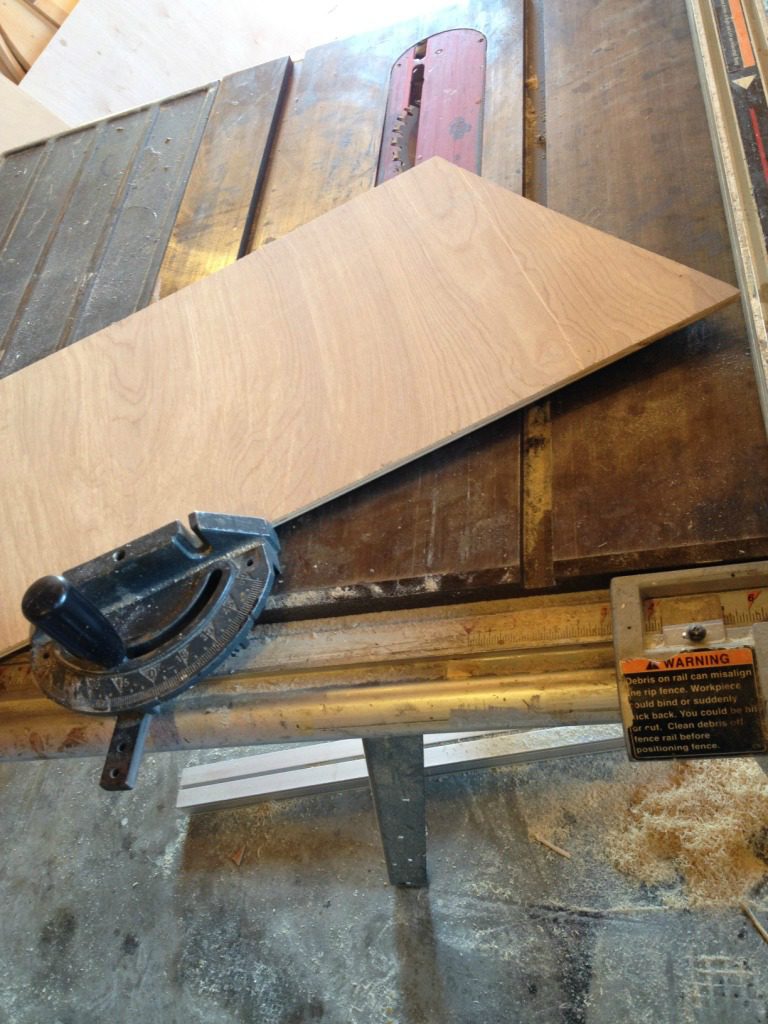
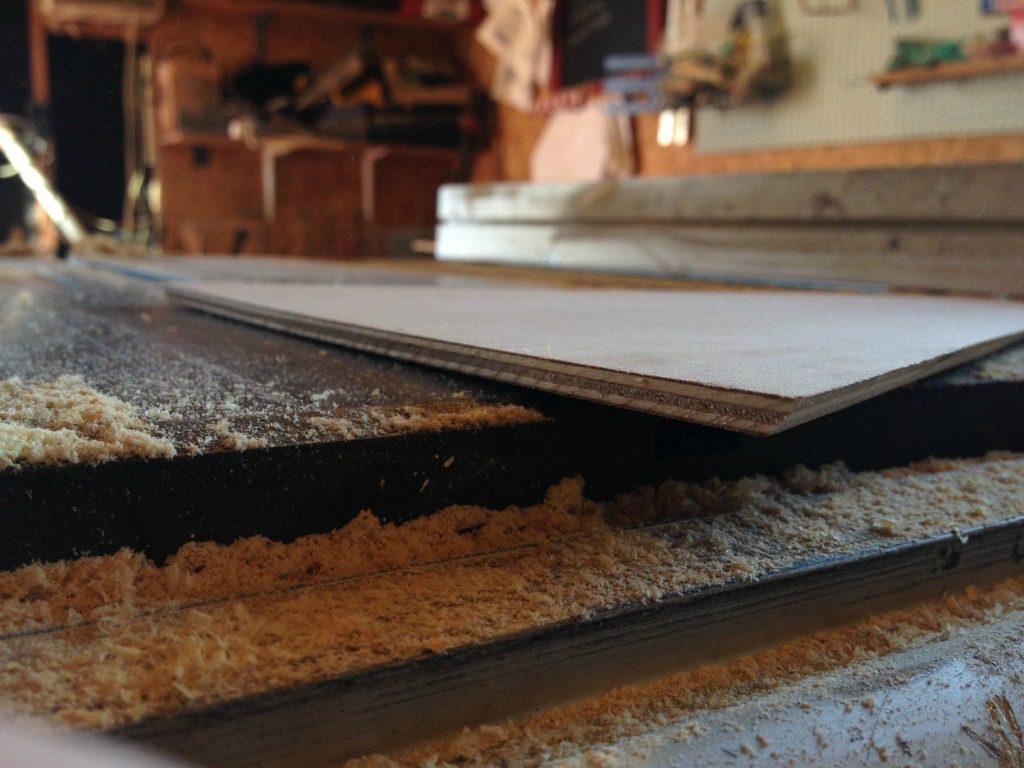
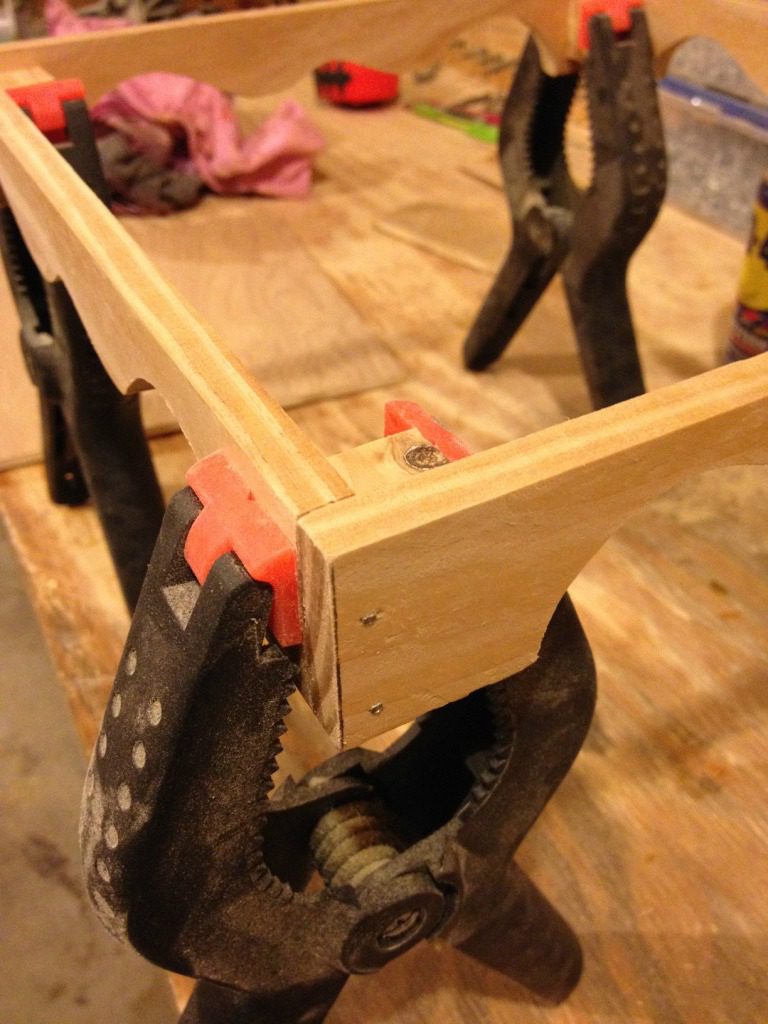
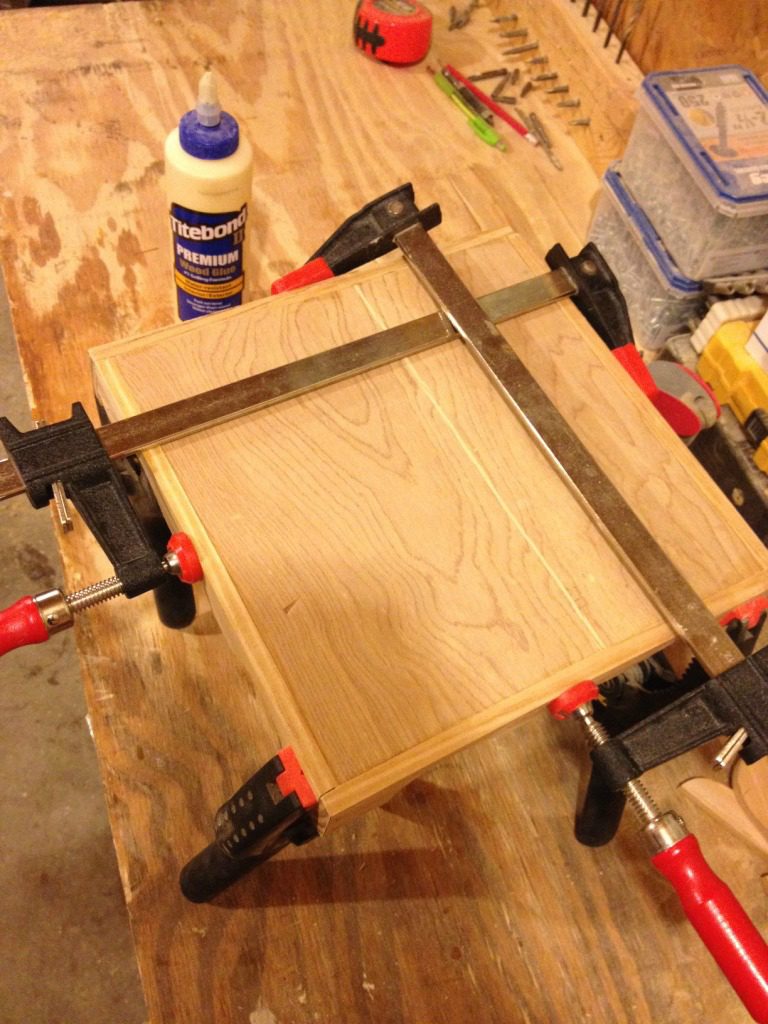
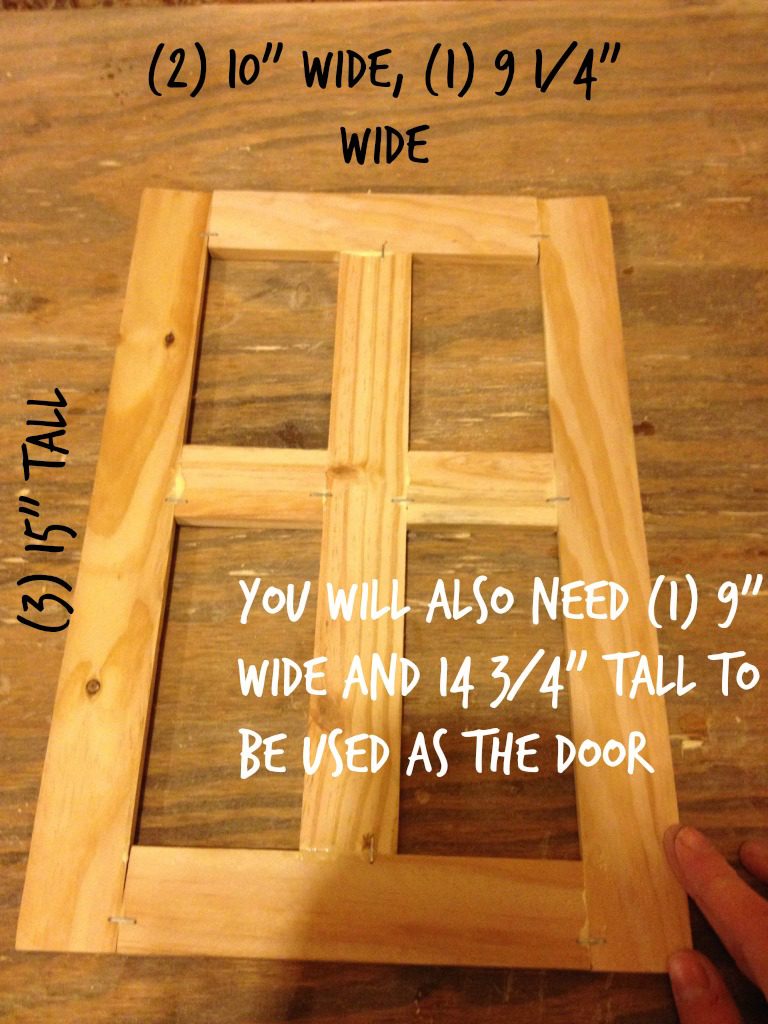
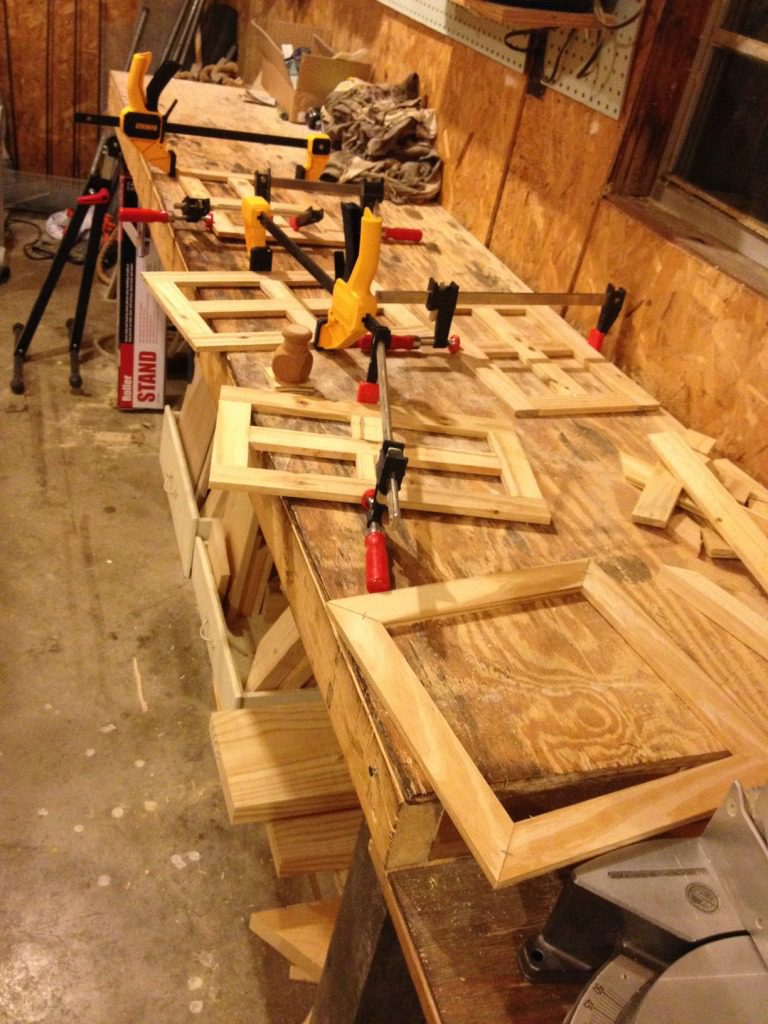
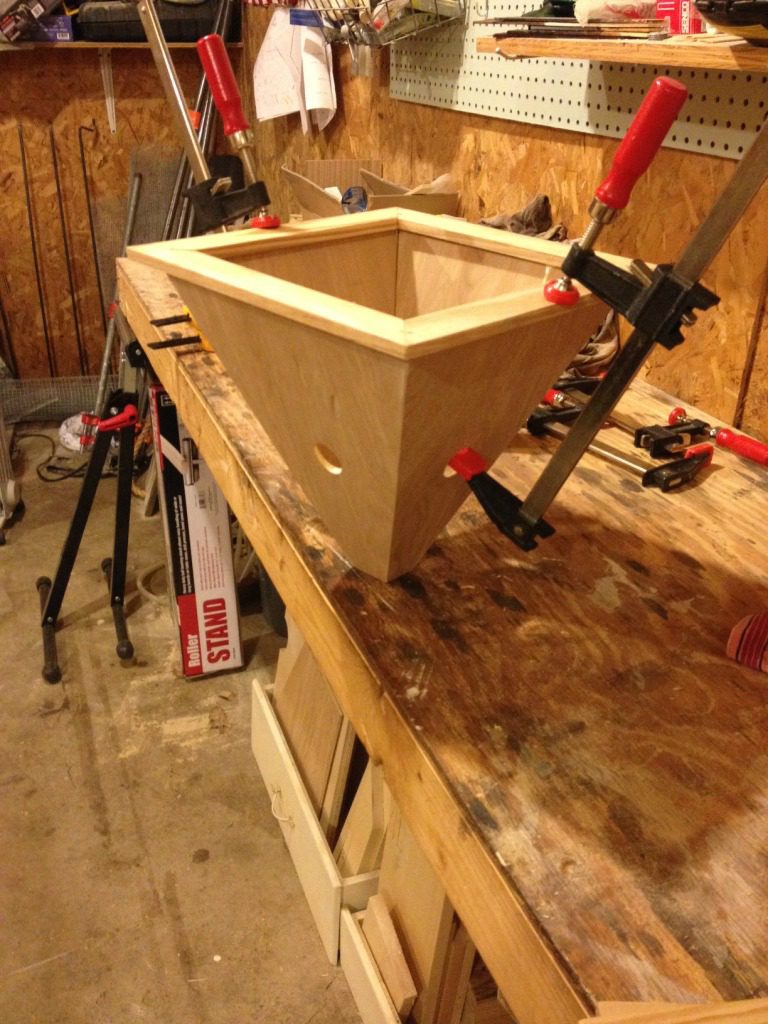
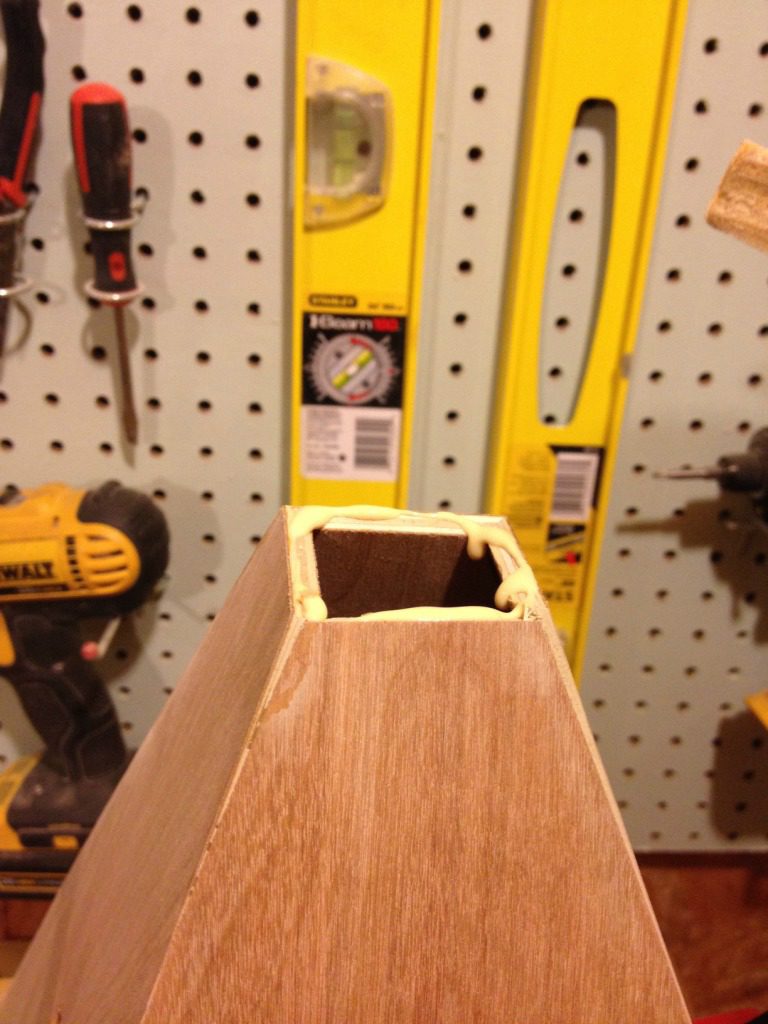
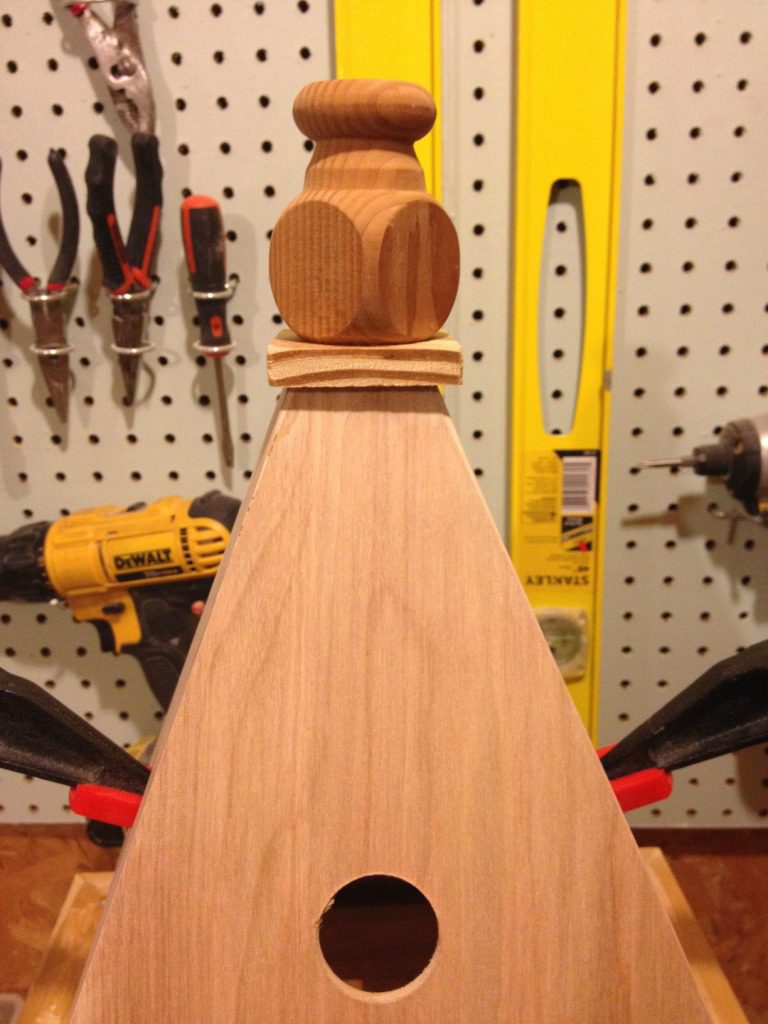
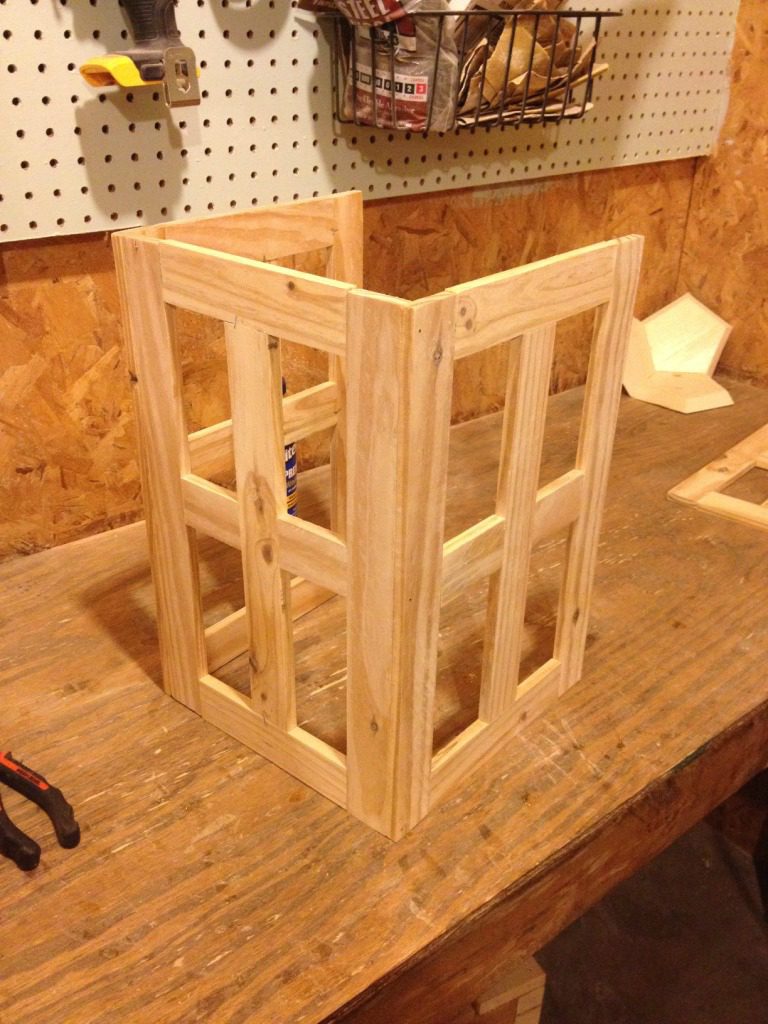
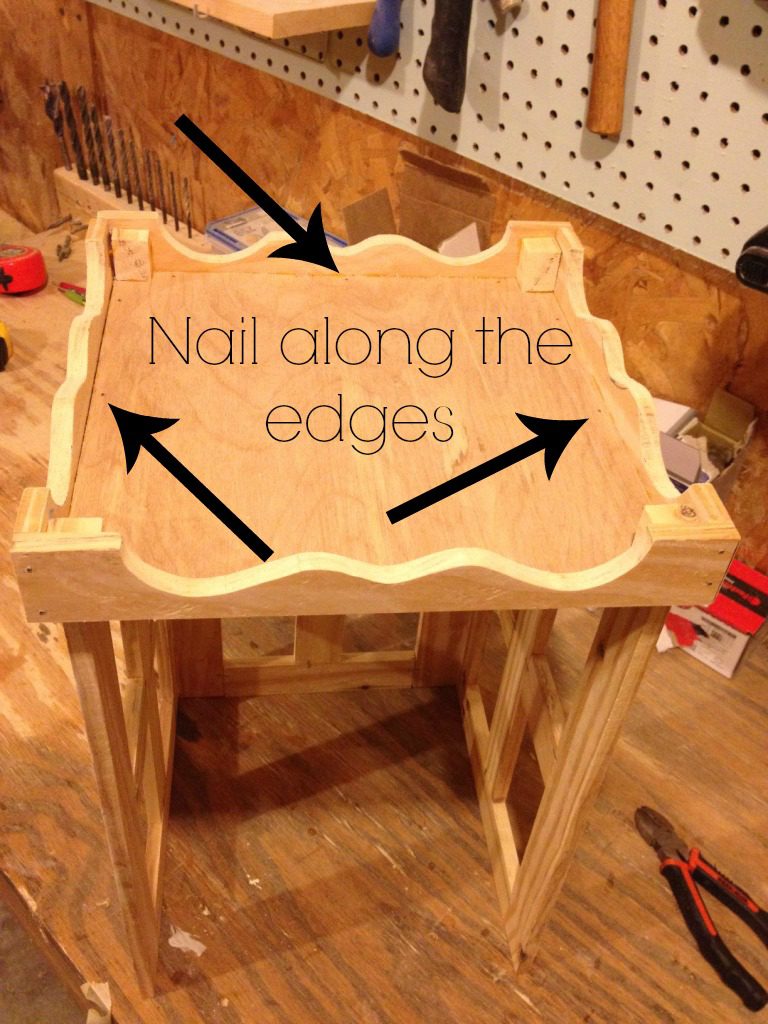
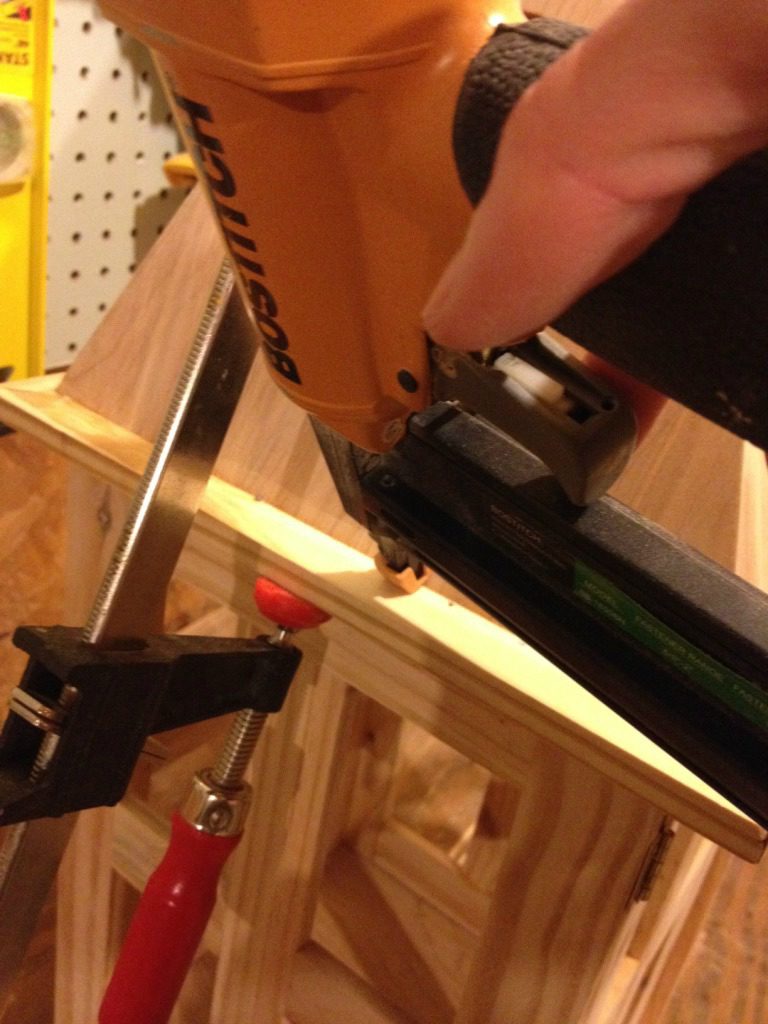
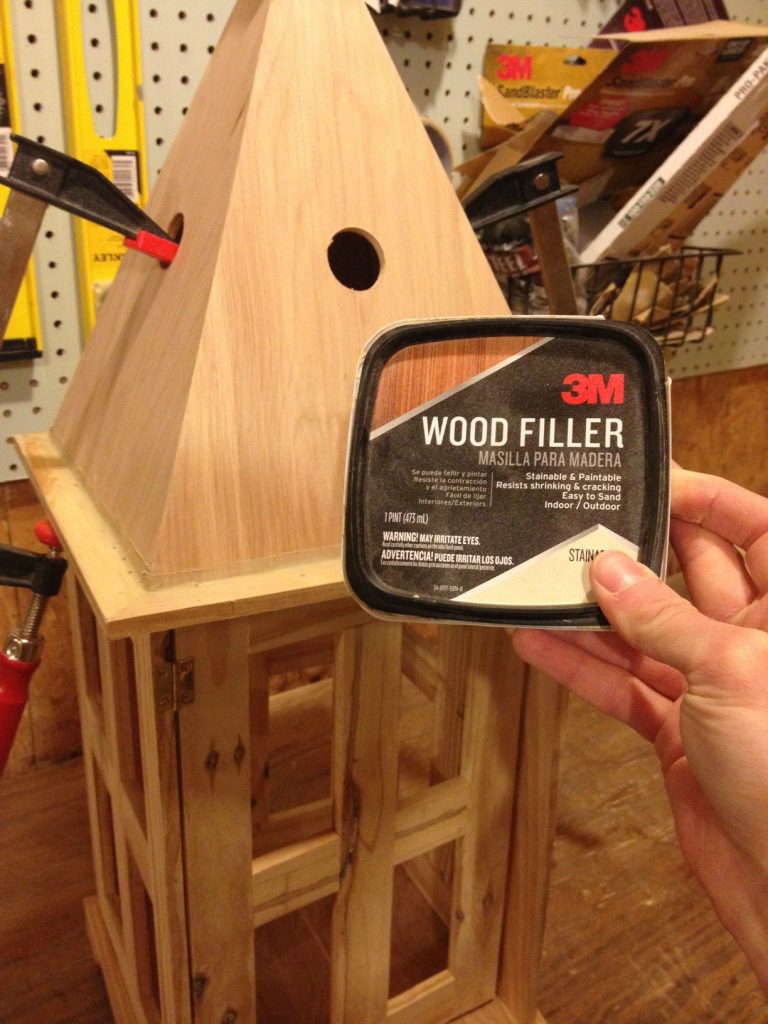
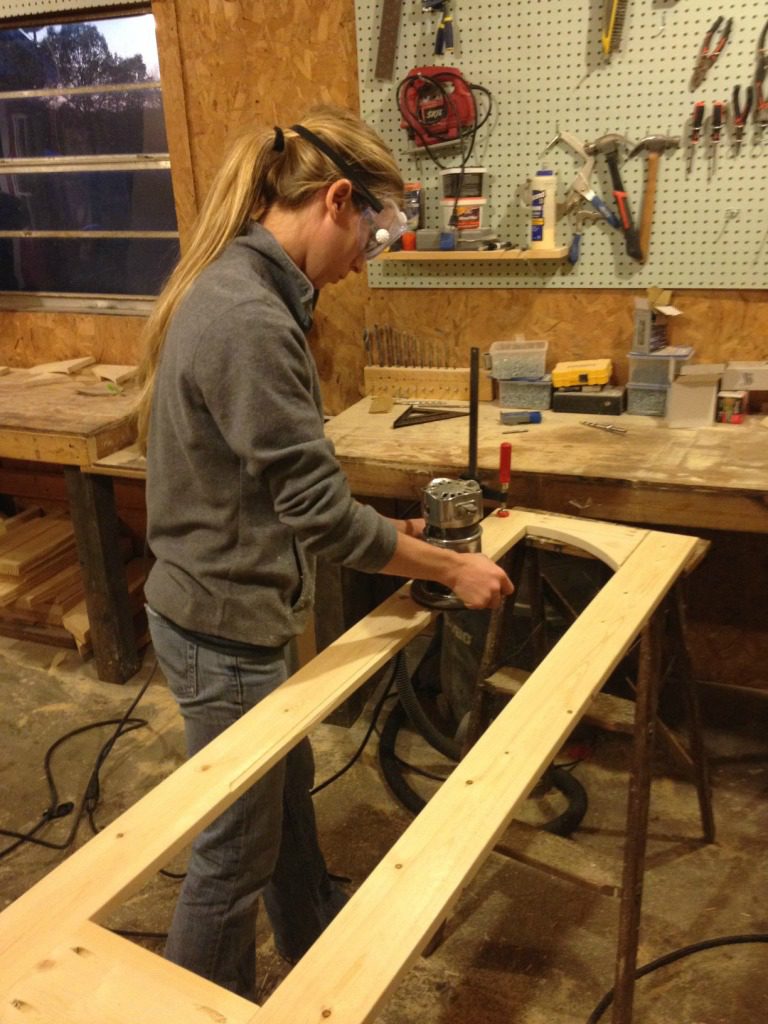
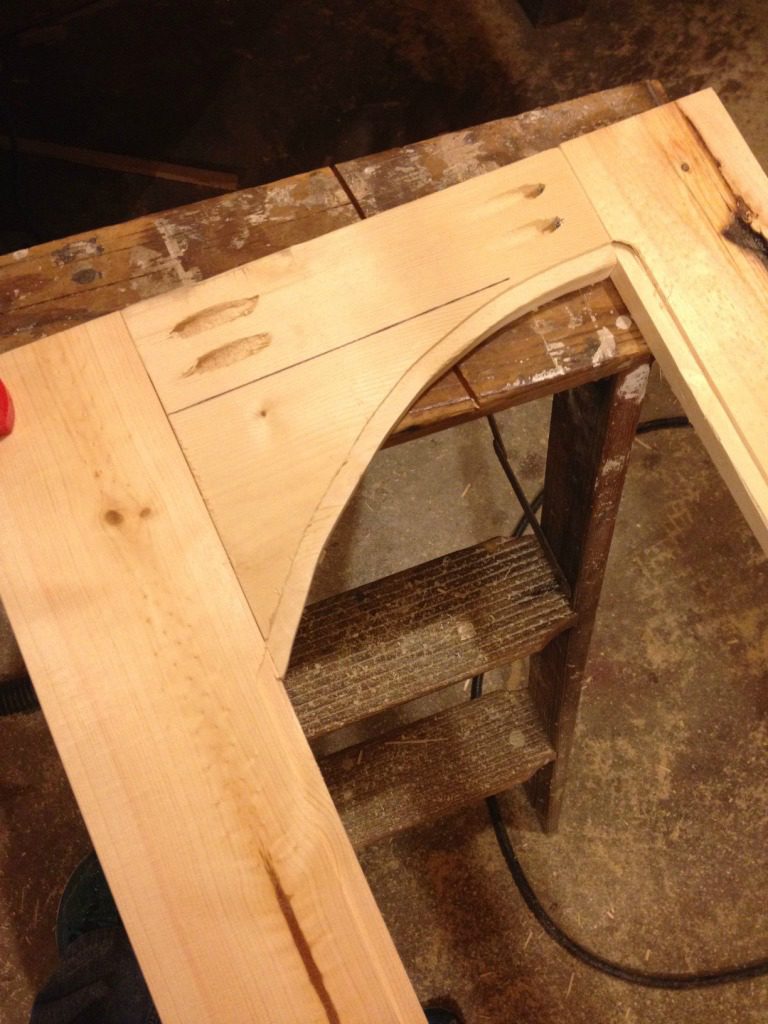
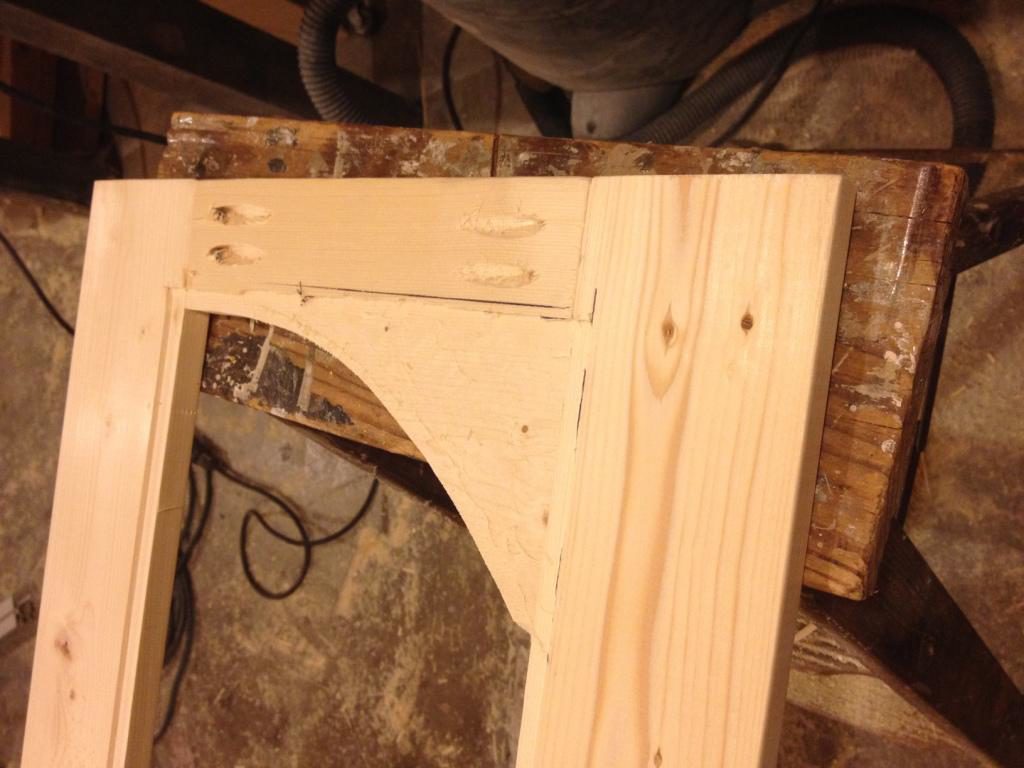
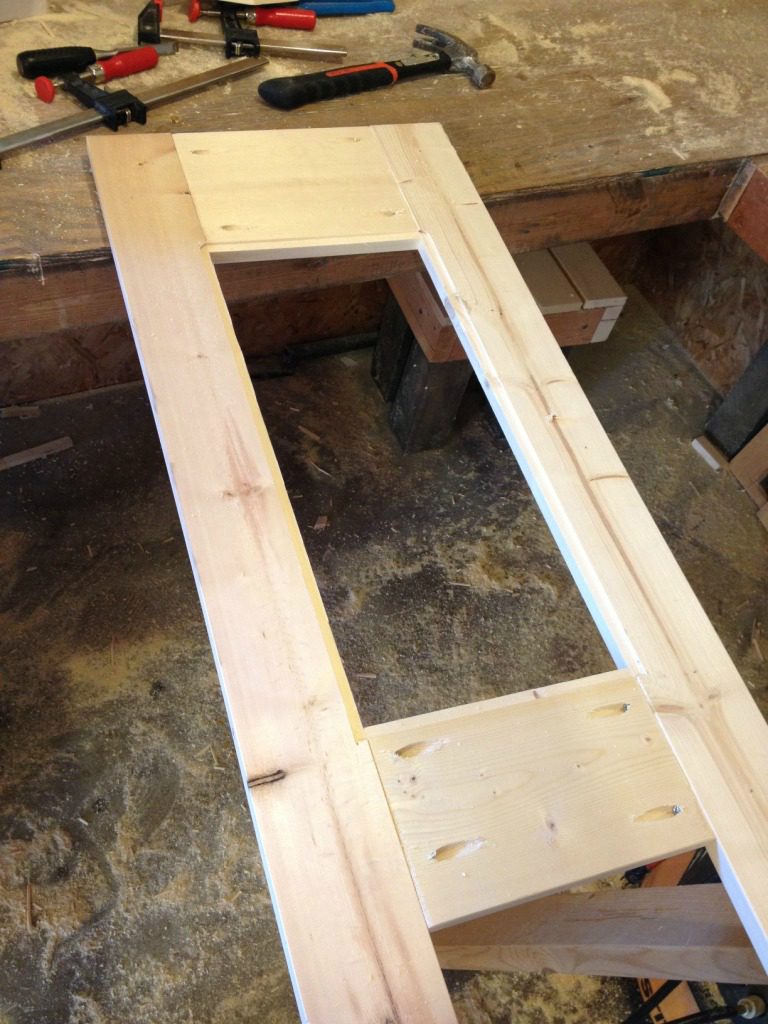
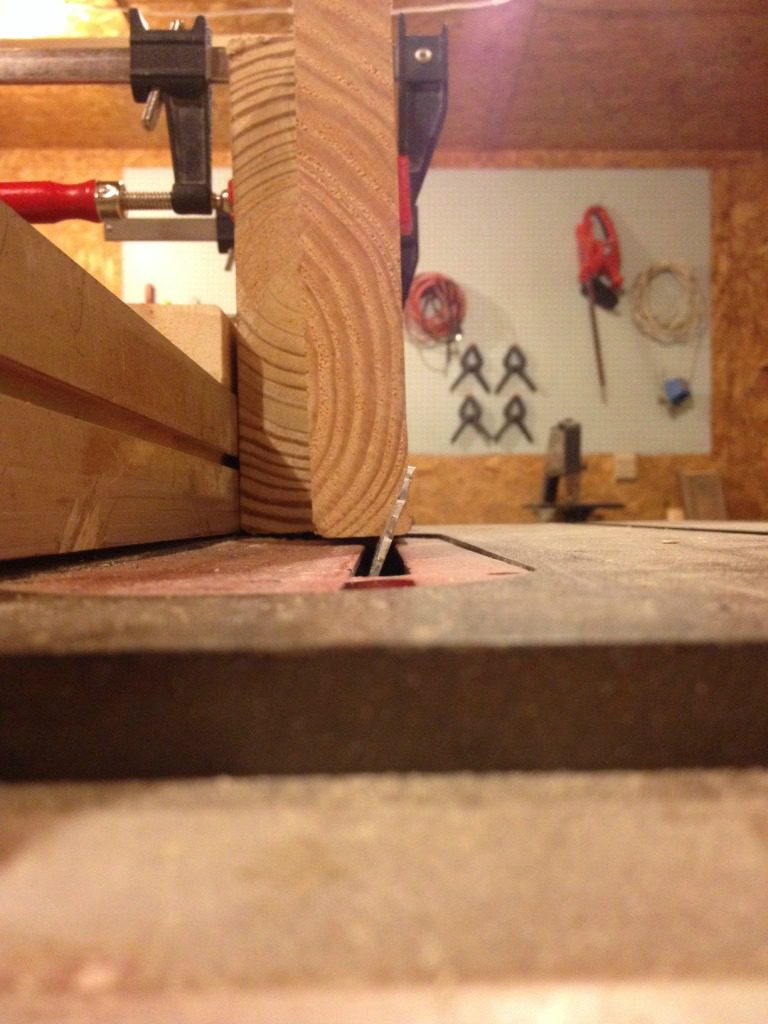
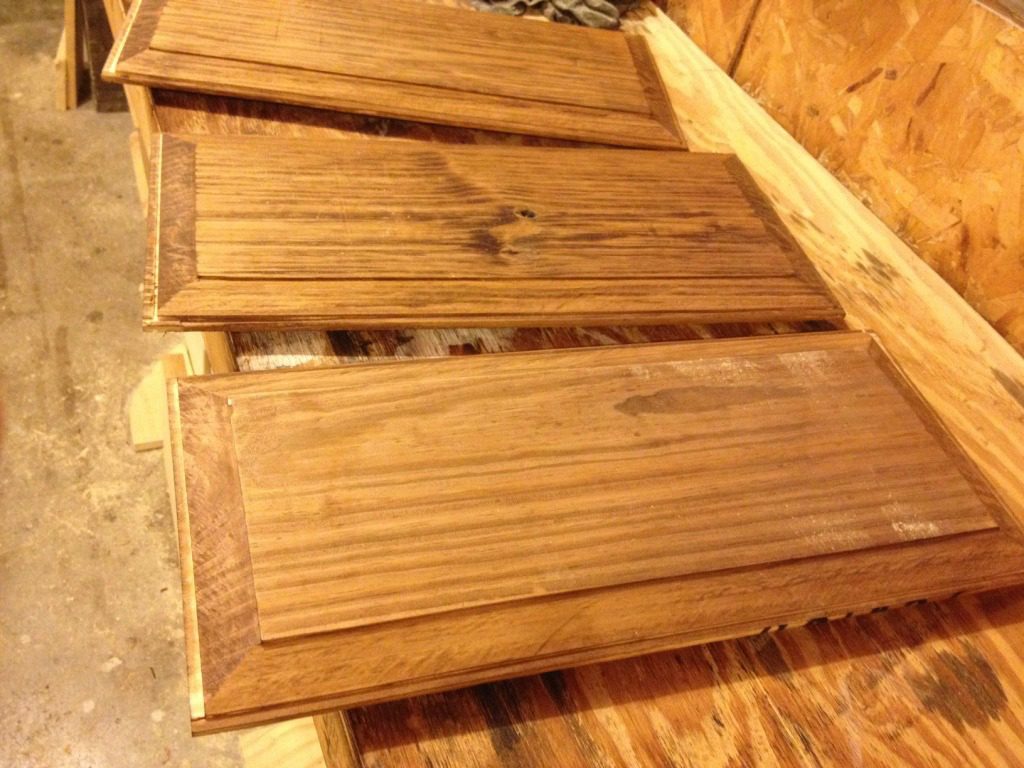
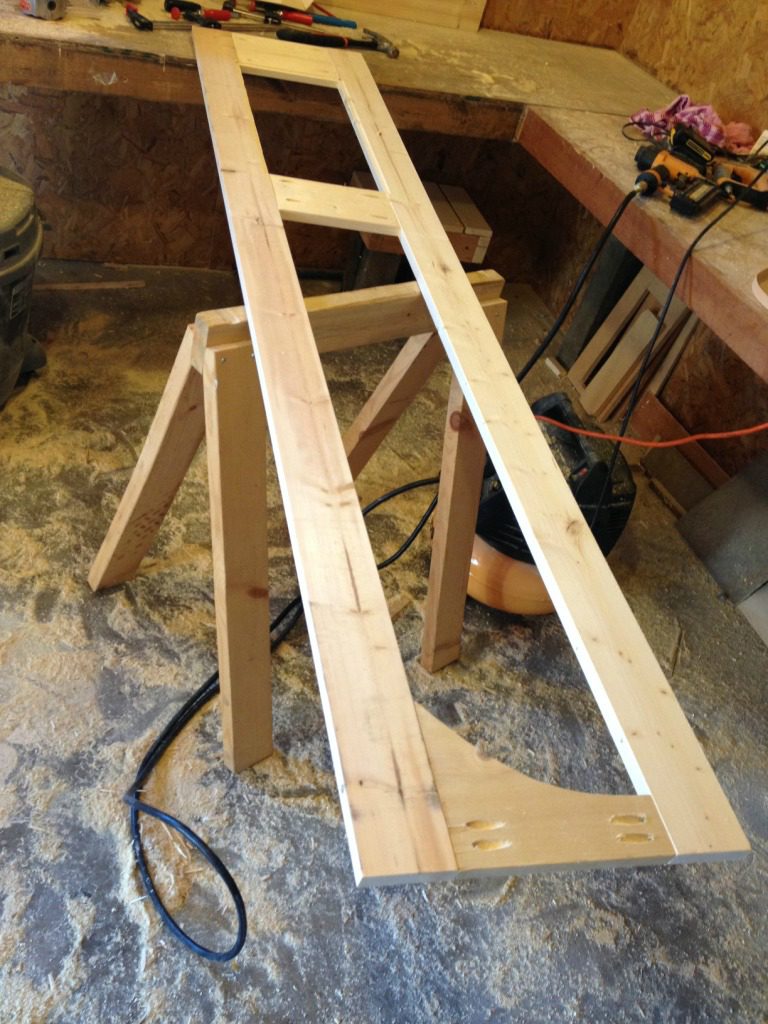
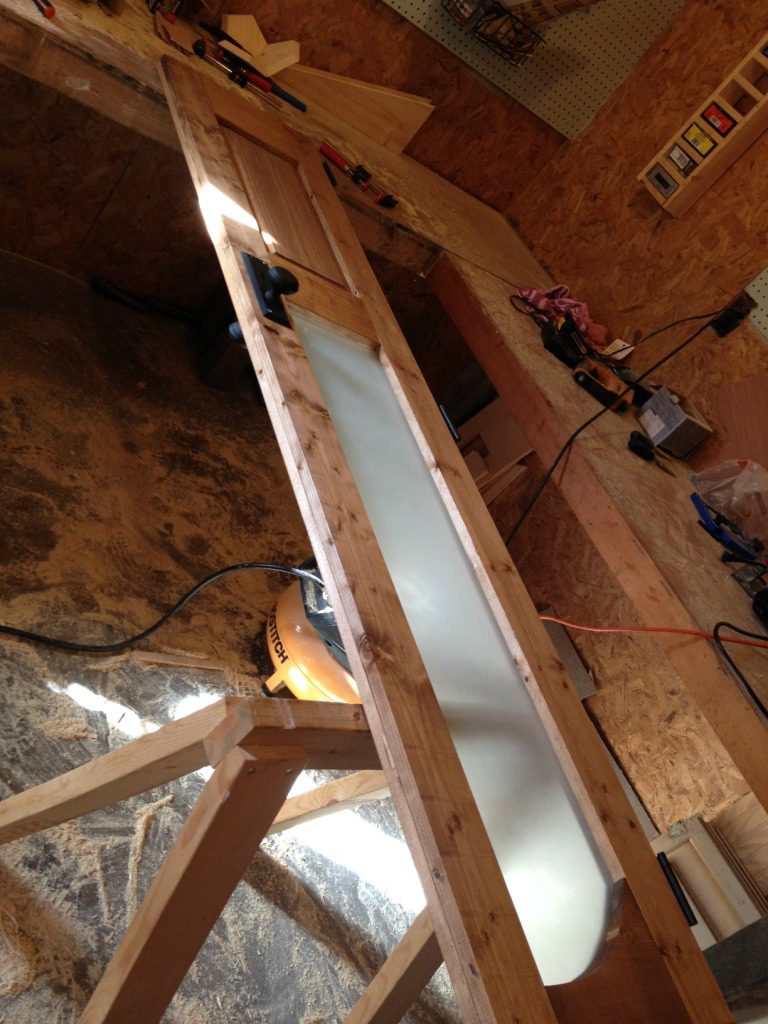
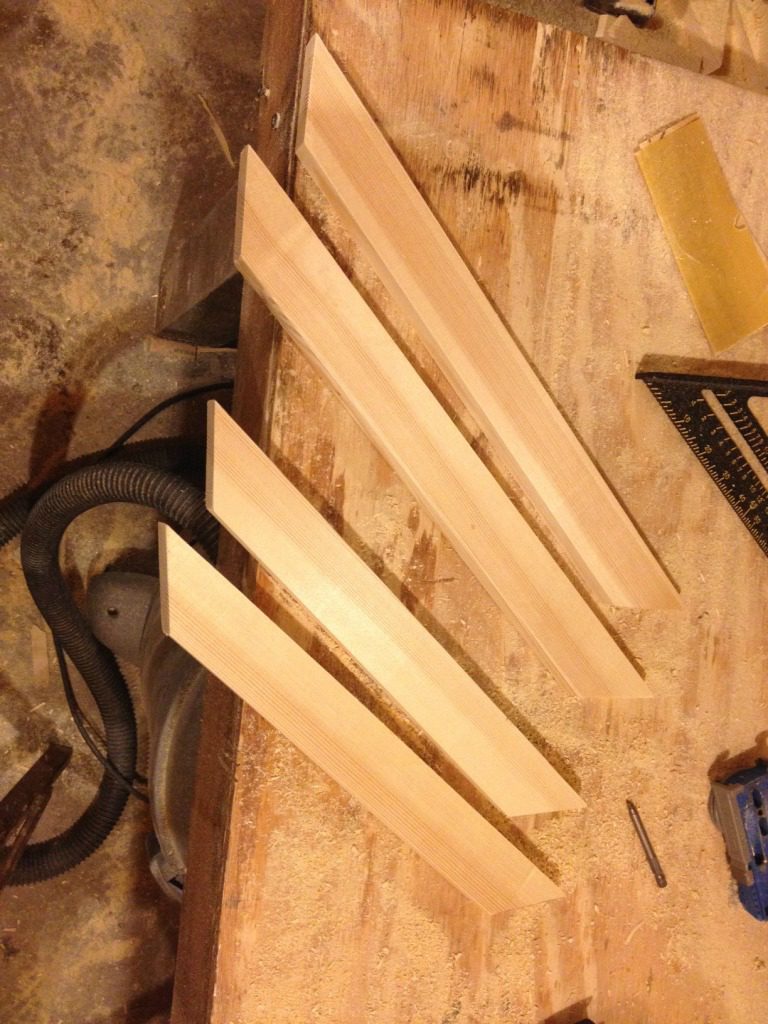
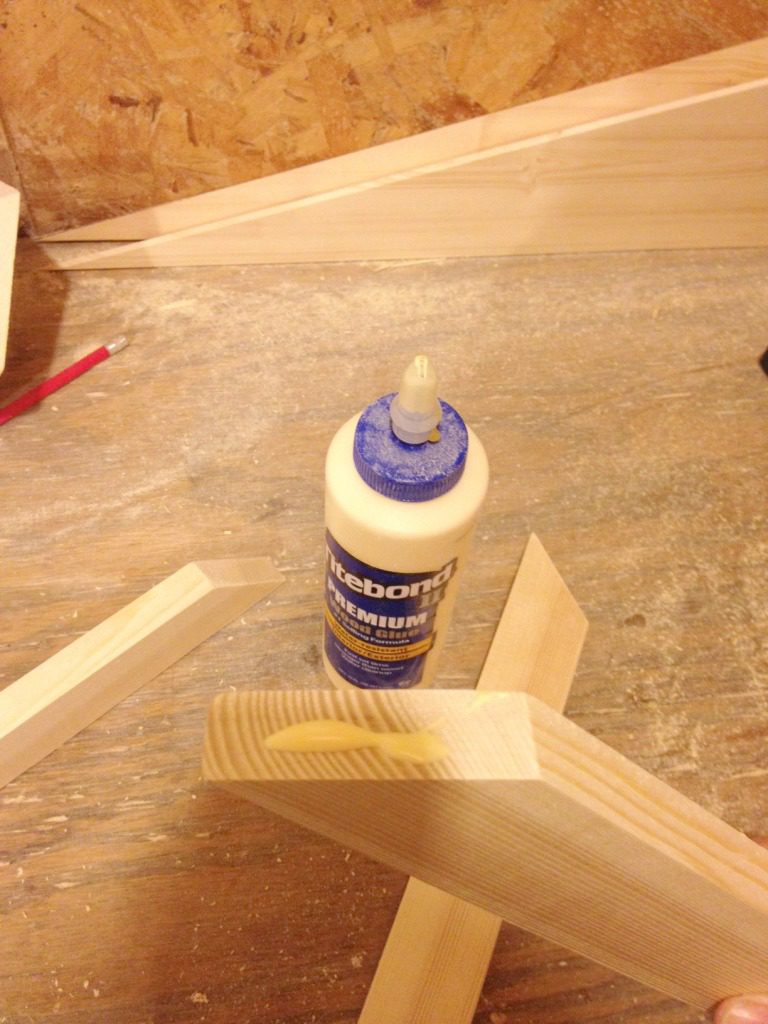
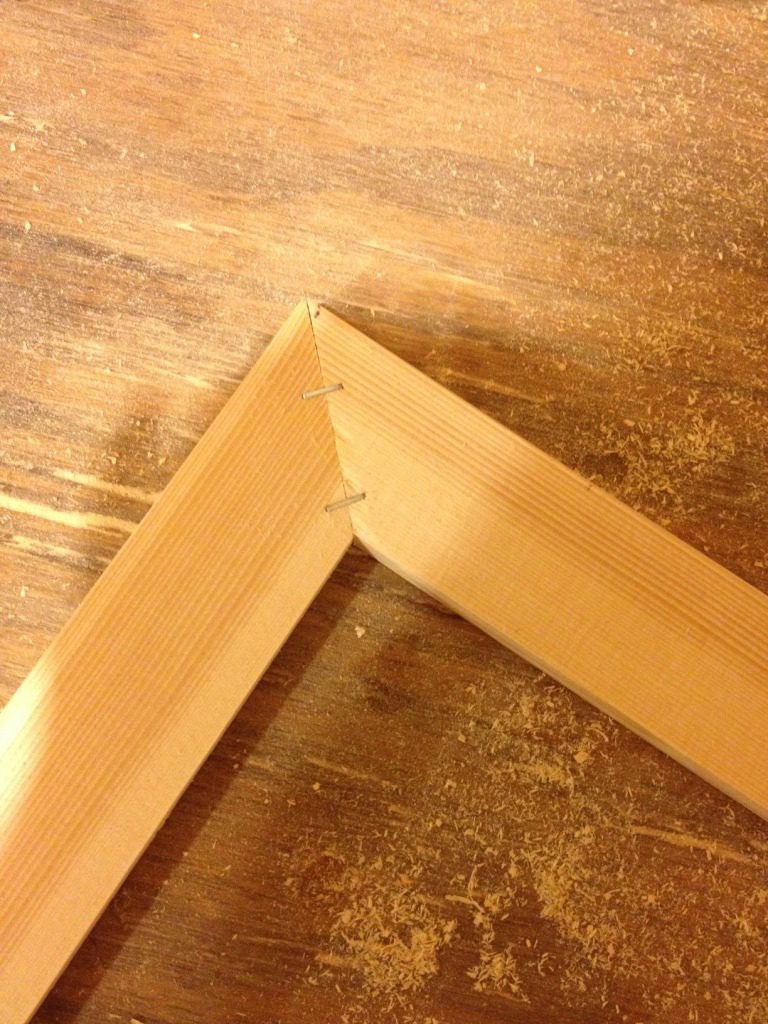
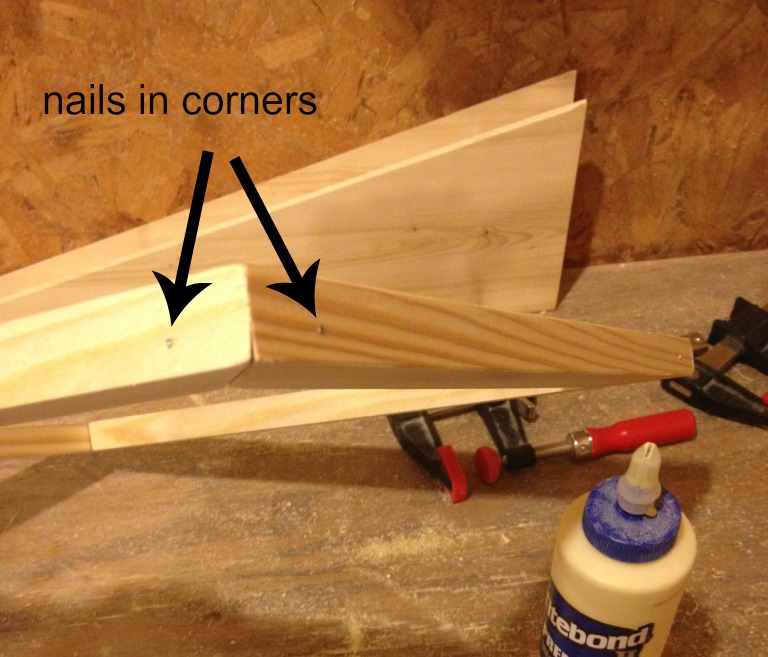
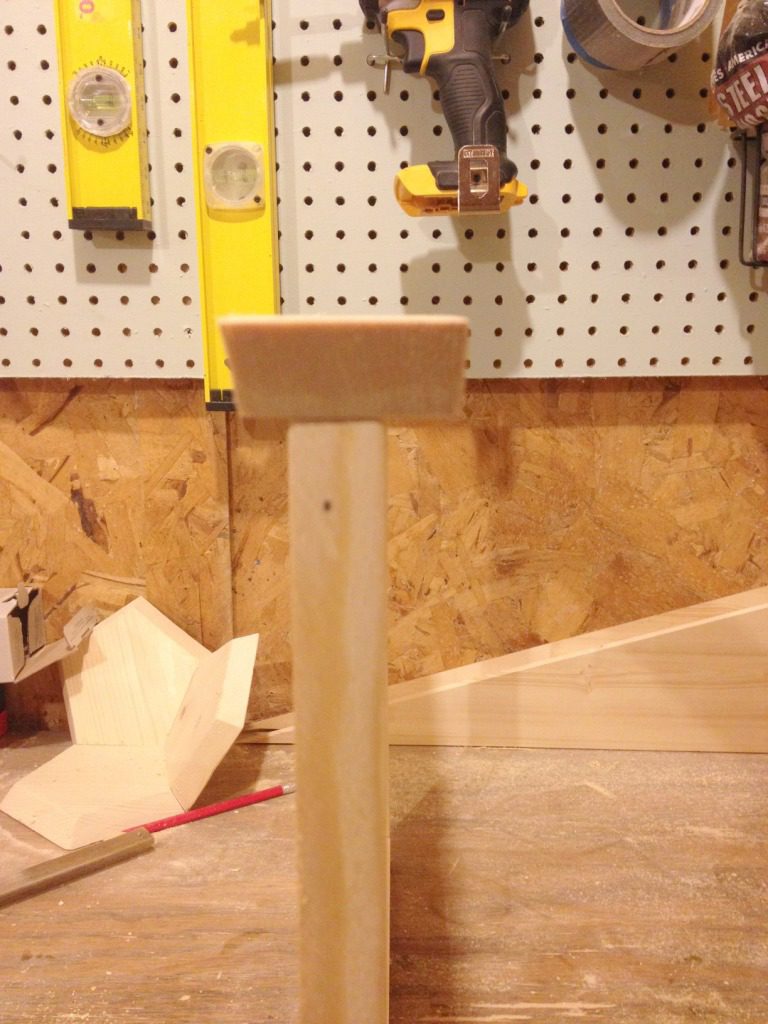
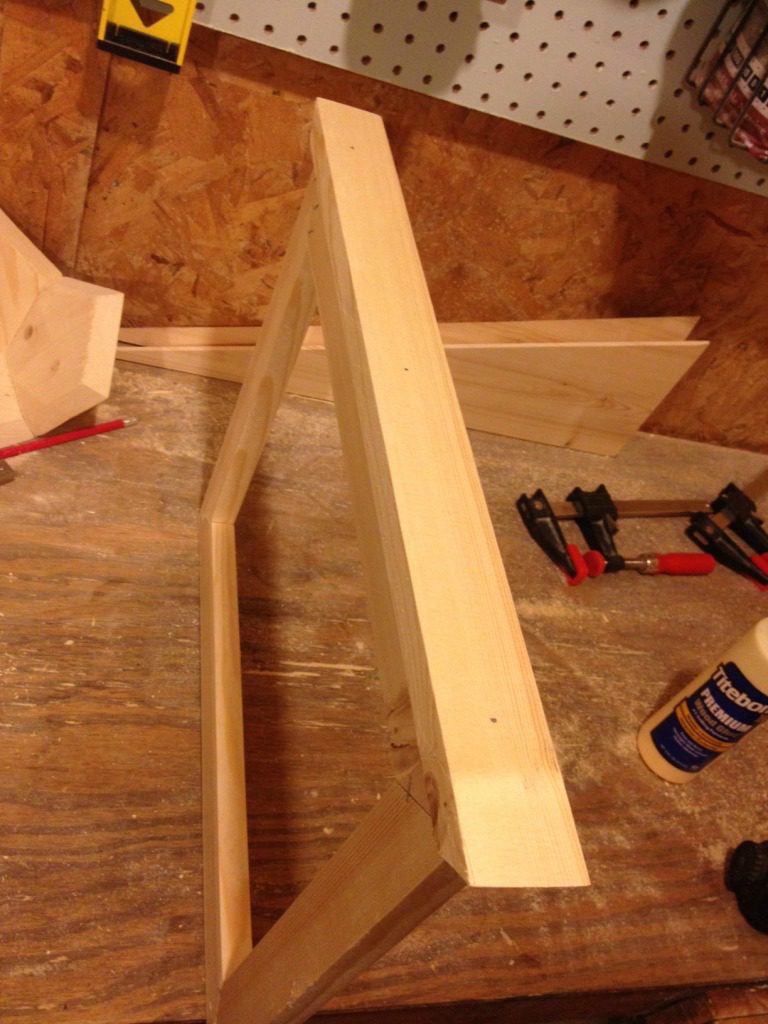
So my solution?? Build one from scrap wood and add windows. So simple! AND BASICALLY FREE!!

How to build a DIY Wooden Cake Box from Wood Scraps

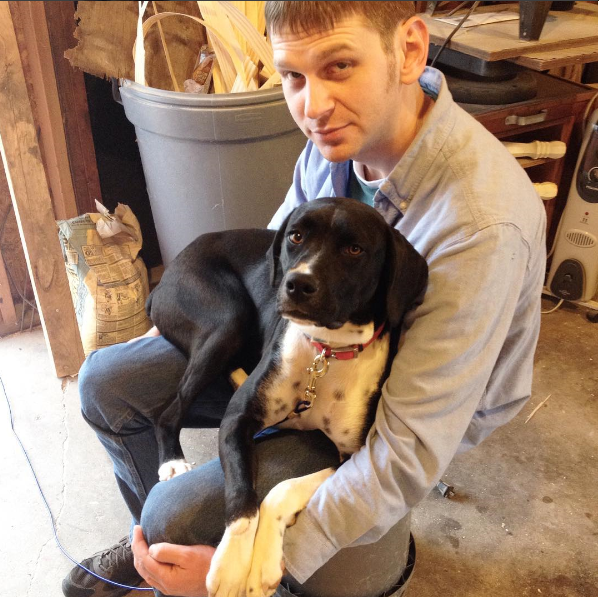
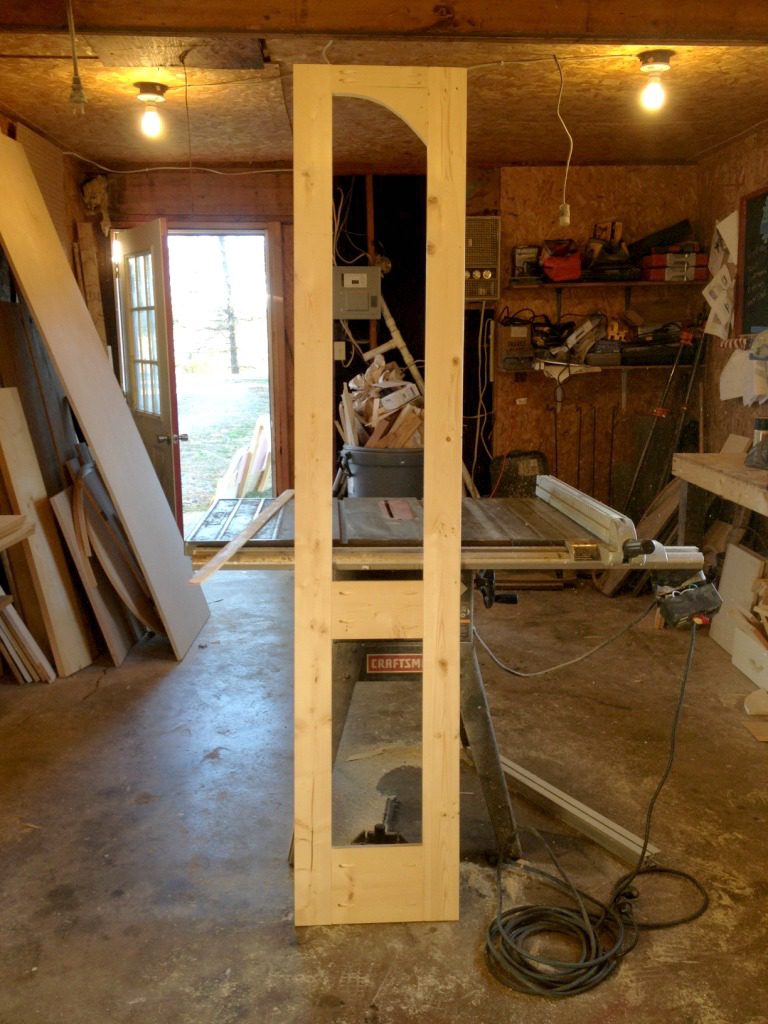
You can totally make different size versions for your pies, cakes, cookies, brownies, etc. But I made this one fairly large to fit large cakes…because my sister makes the most elaborate (and enormous) cakes all the time and I thought she’d like to borrow it on occasion 🙂

How to build a DIY Wooden Cake Box from Wood Scraps

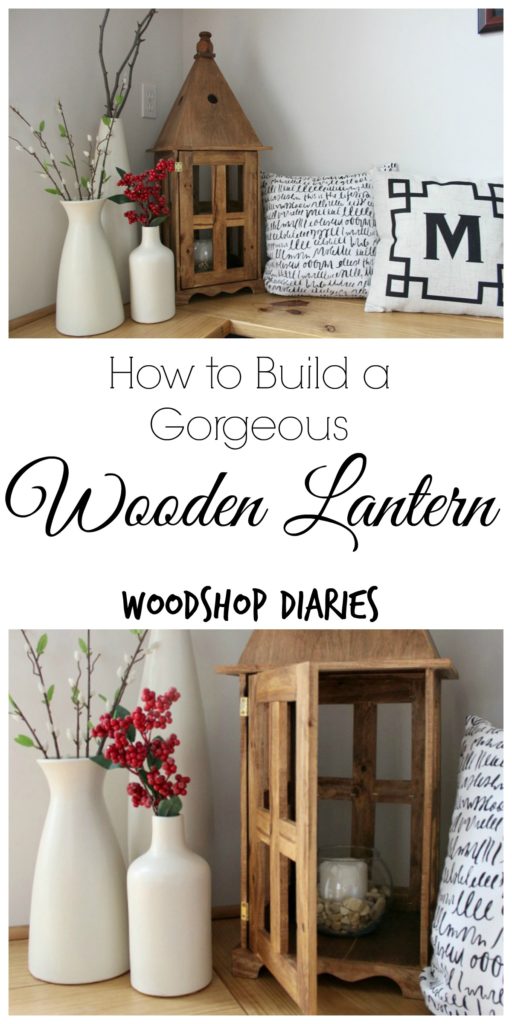
I’ve got the tutorial for you over on The Weathered Fox today, so be sure to click on over and check it out.

.

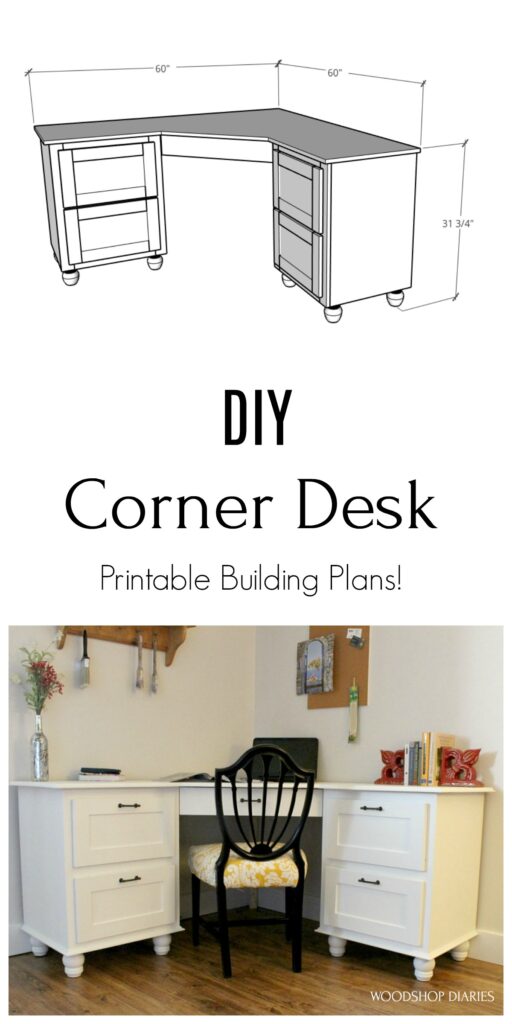
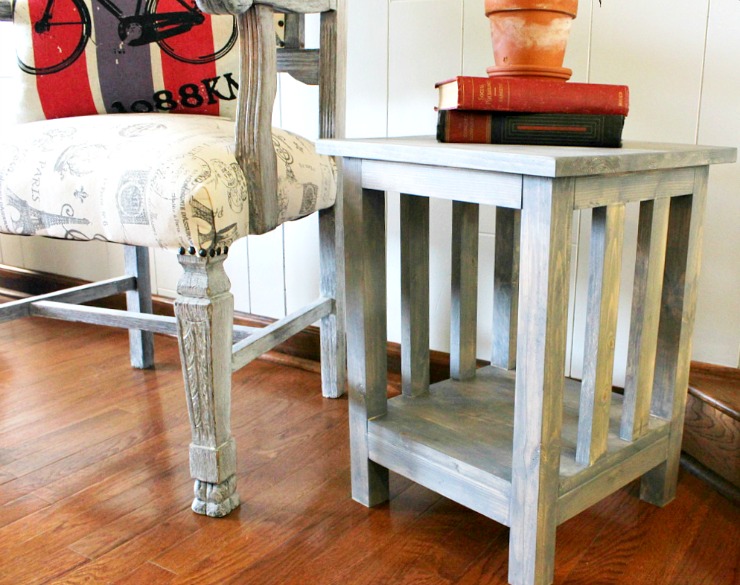
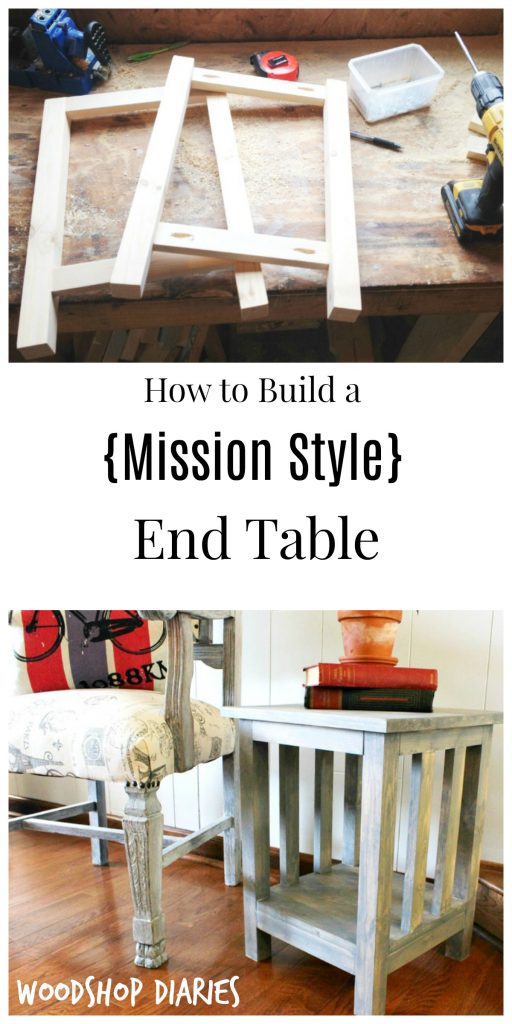
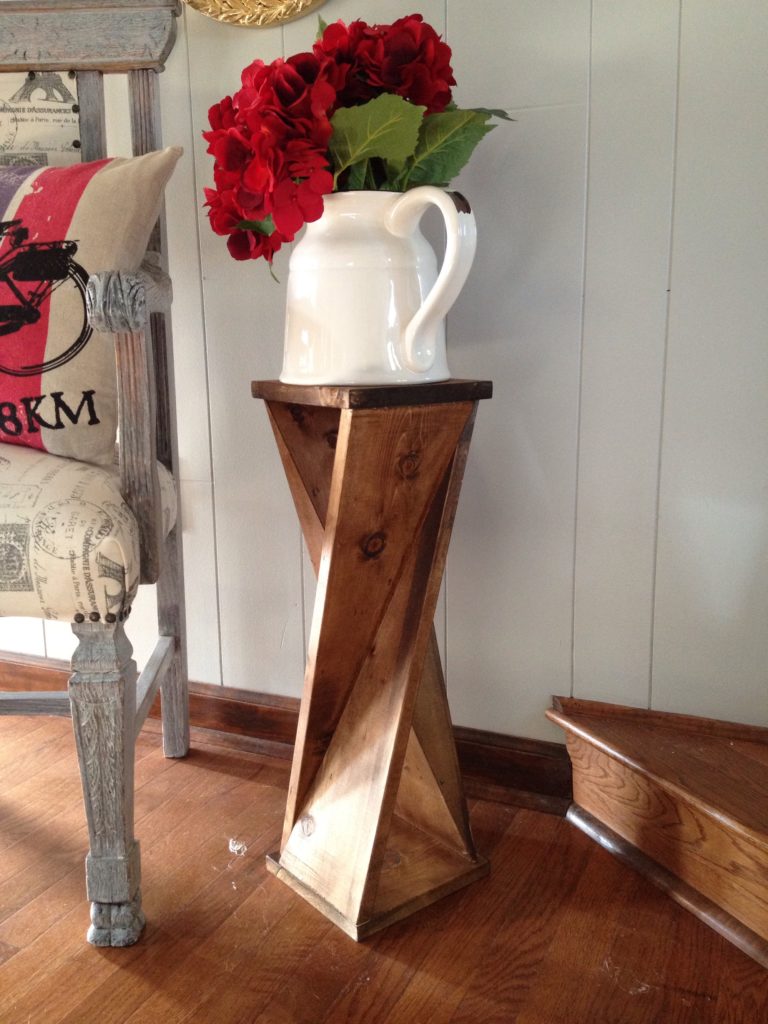
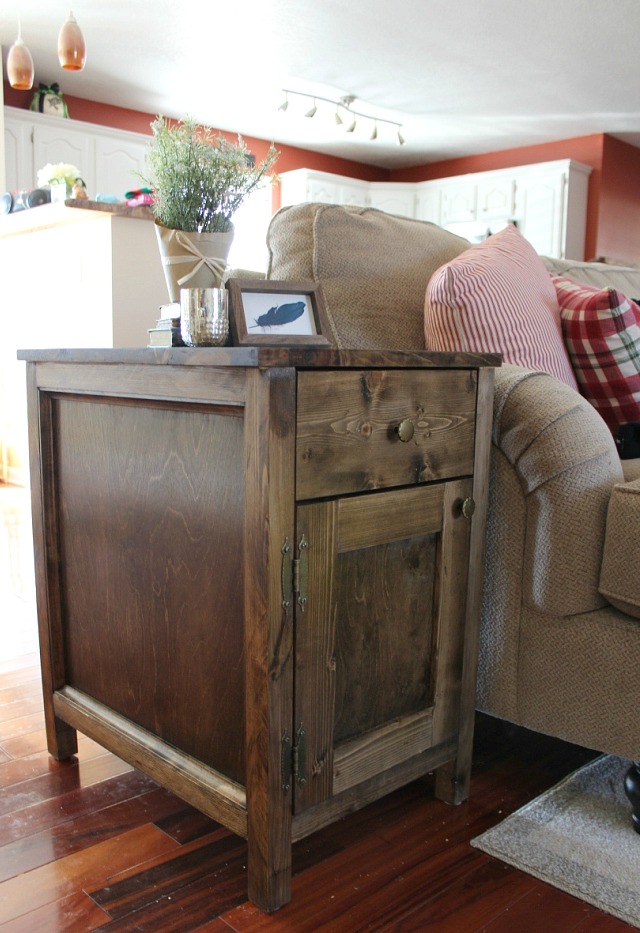
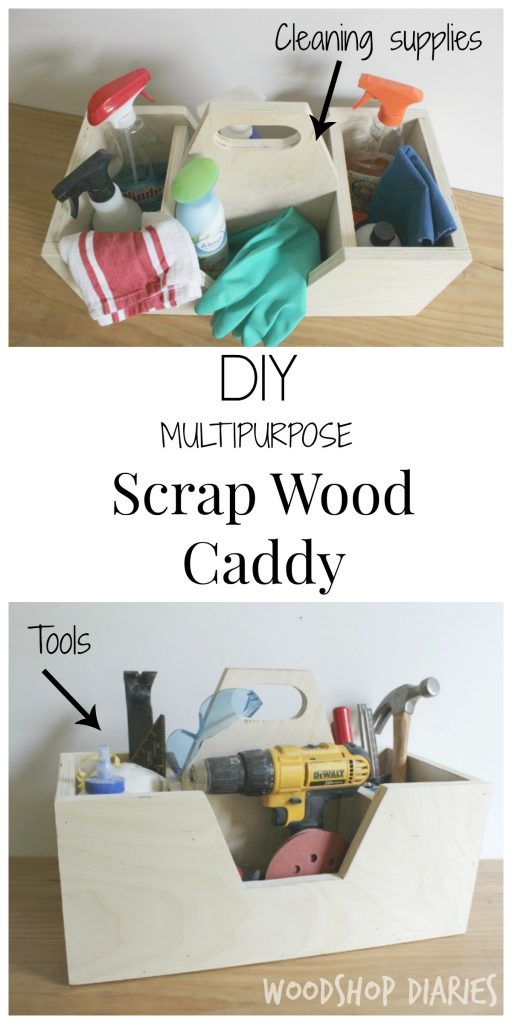
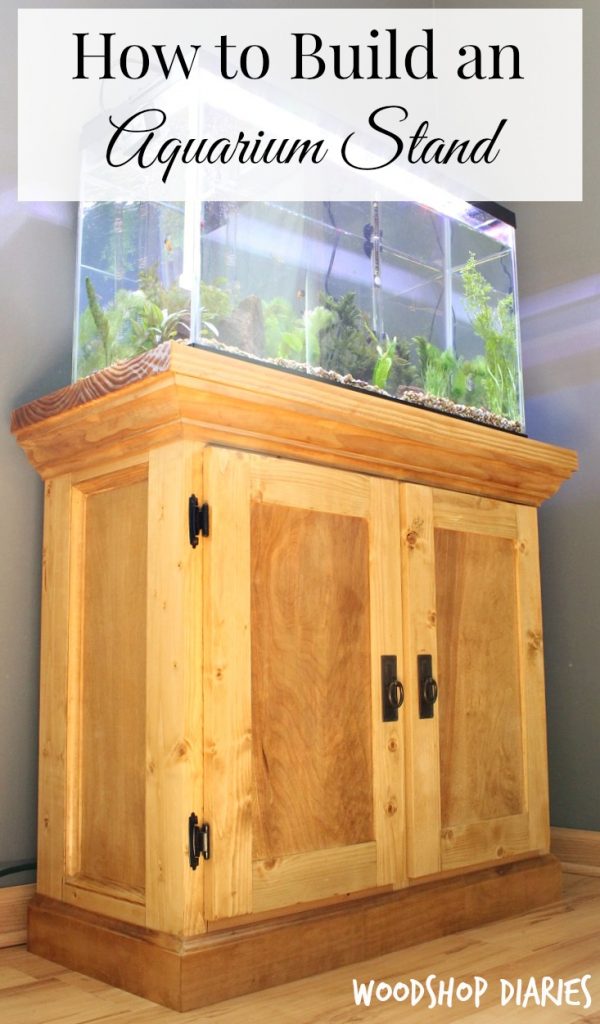
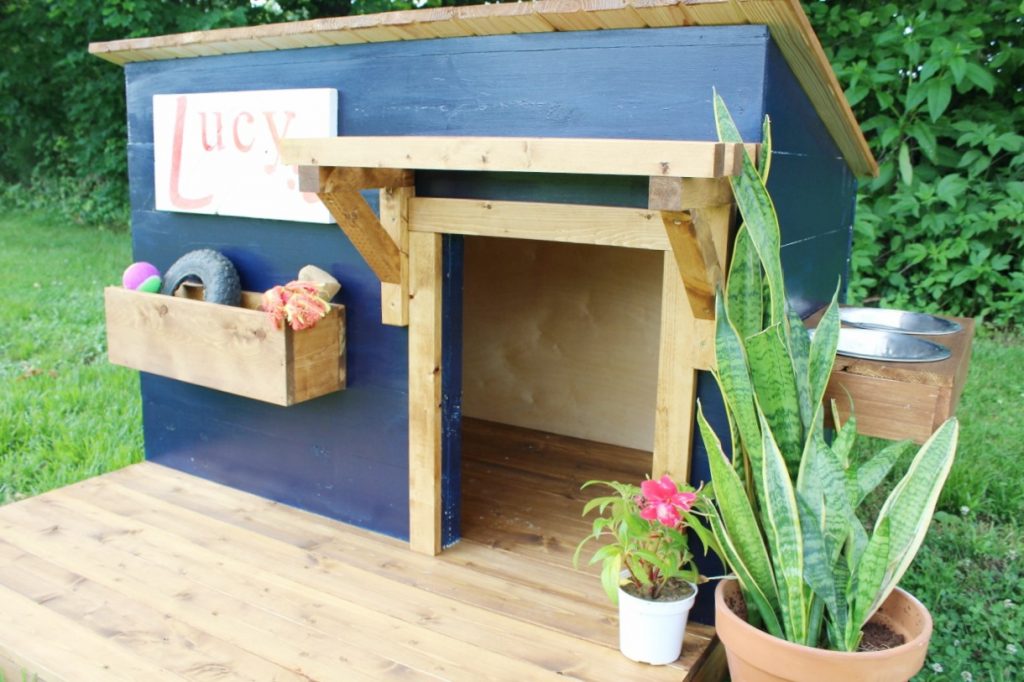
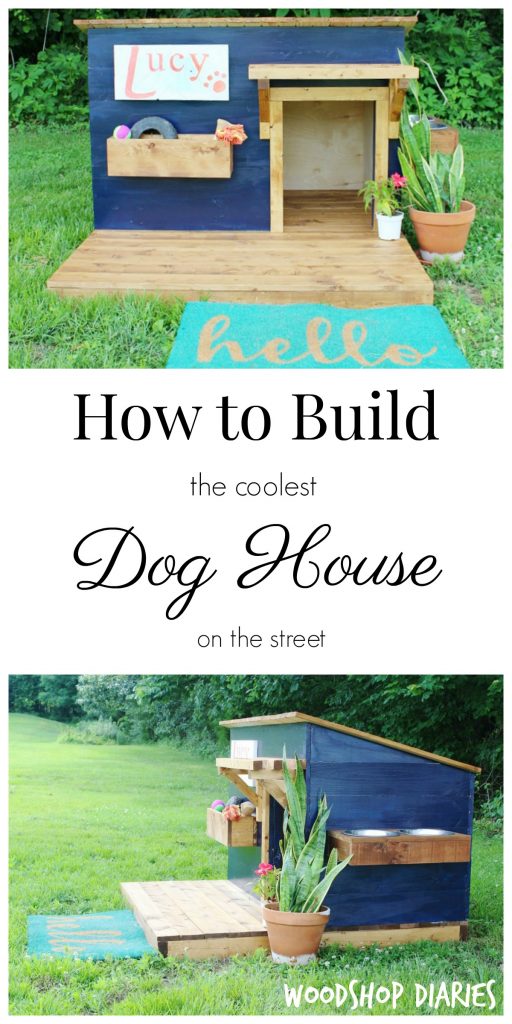
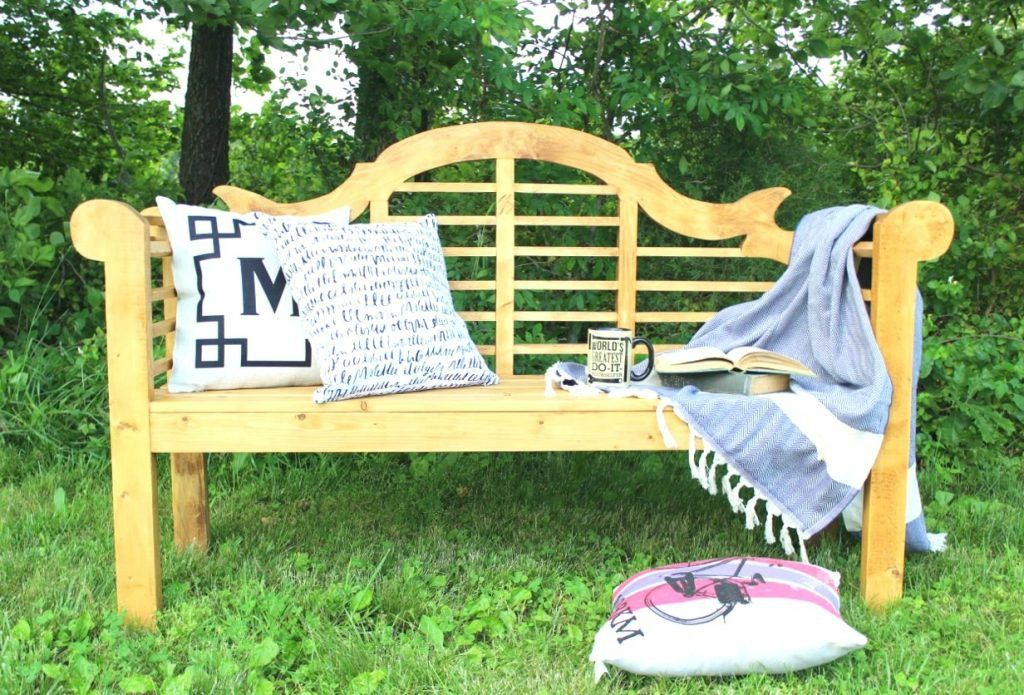
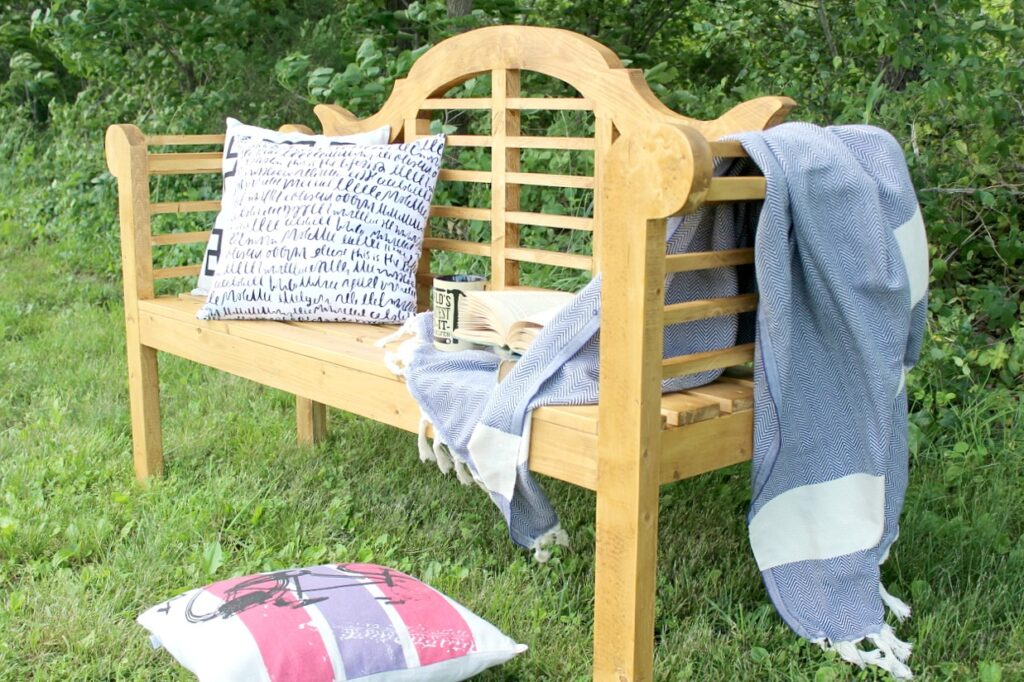
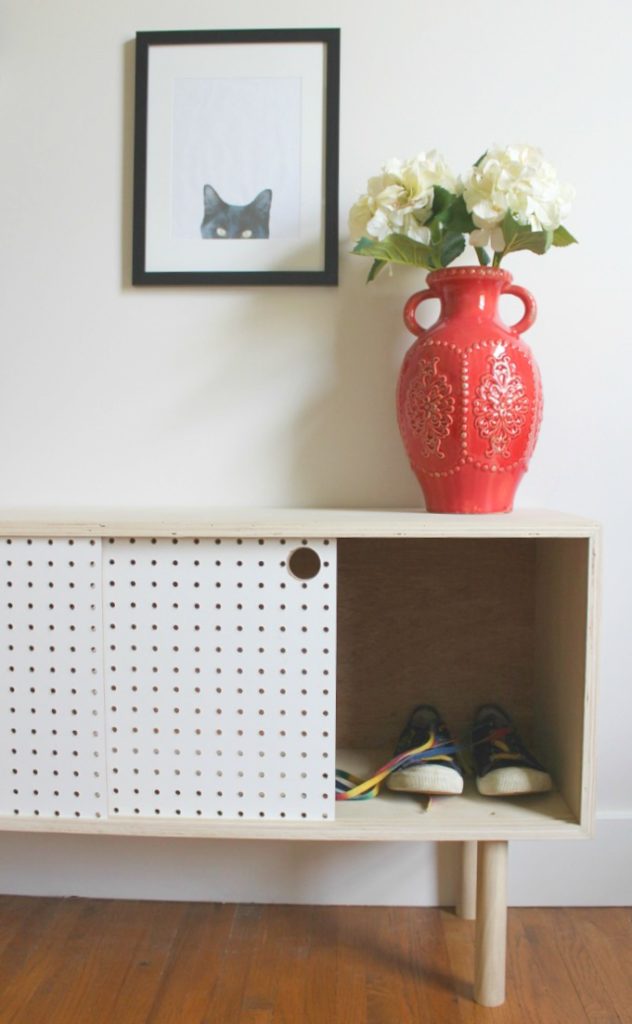
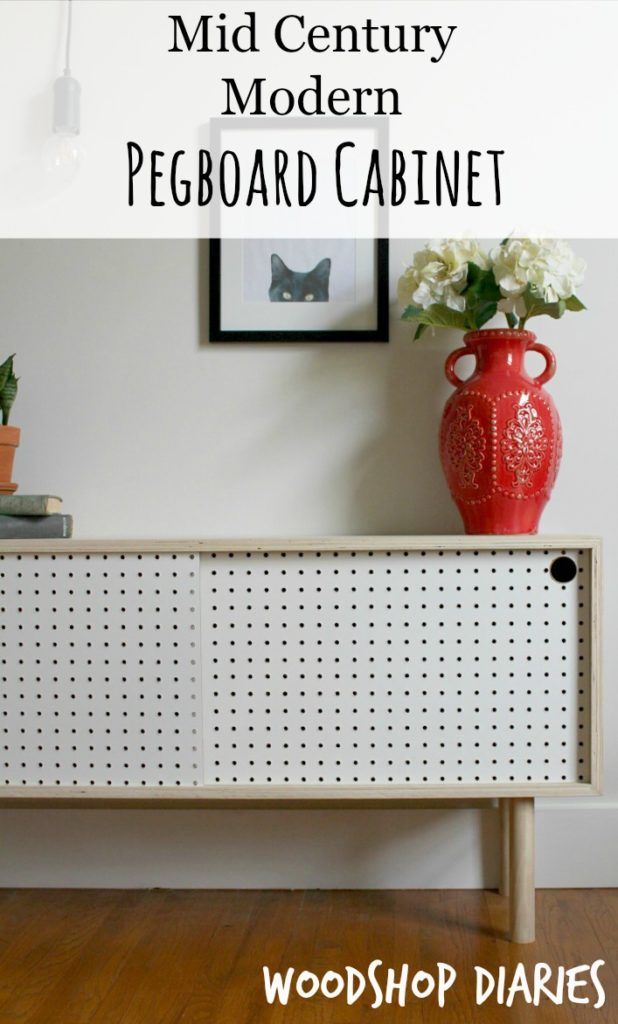
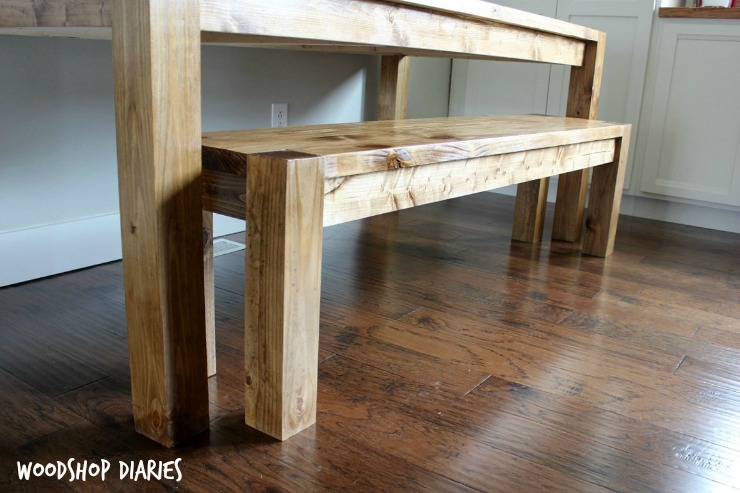
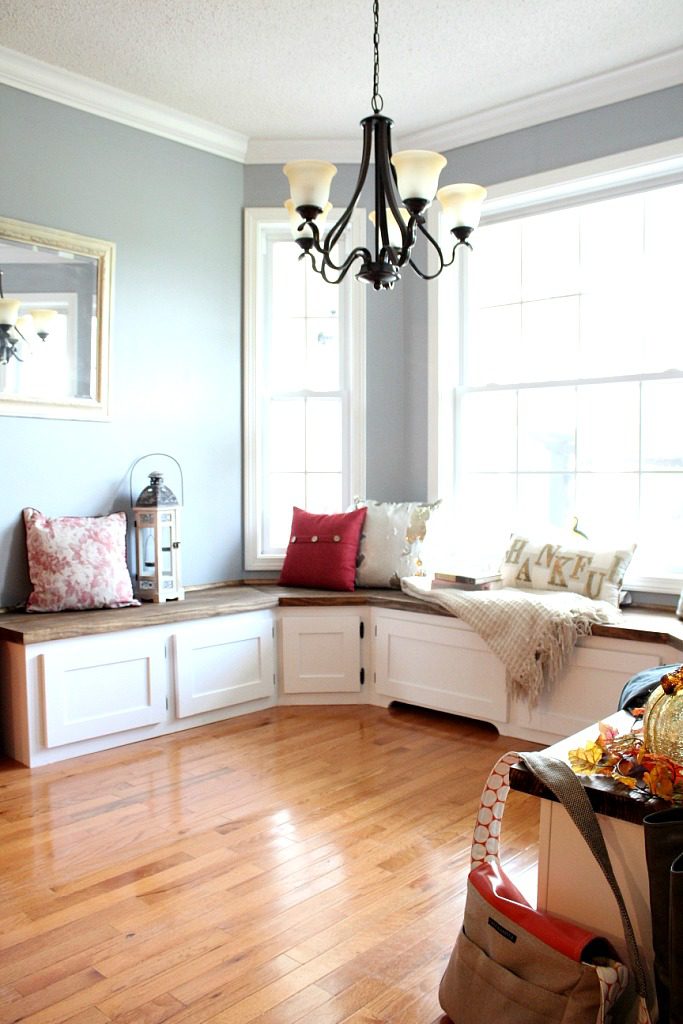
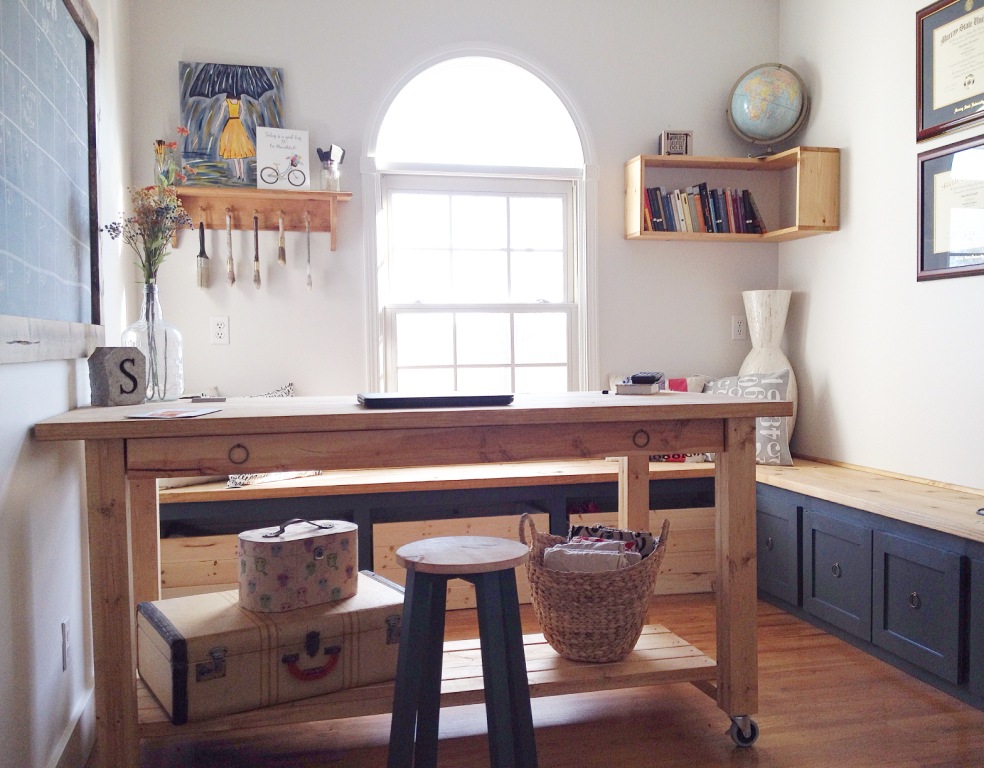
And for more scrap wood projects, don’t miss out on these:

Scrap Wood Keepsake Box

Scrap Wood Carrying Caddy

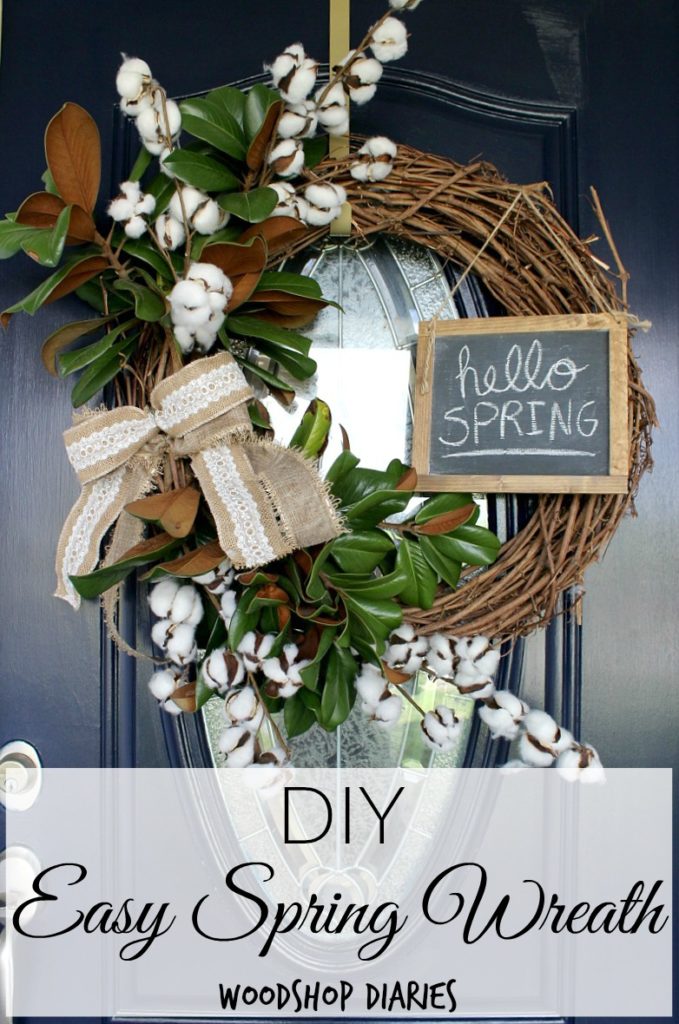
And don’t forget to pin this for later 🙂

How to build a DIY Wooden Cake Box from Wood Scraps

Until next time, happy building 🙂

How to Build a Simple DIY Mission Style End Table

July 26, 2017 by Shara, Woodshop Diaries

How to build a DIY Mission Style End Table

Have you guys ever heard of “mission style” furniture? I hadn’t heard of it until recently, but I’m quickly becoming a fan!

.

If you don’t know what I’m talking about, Google it or get on Pinterest and search “mission style furniture.” It’s very simple and has a traditional feel, but what I love most of all are the clean lines and the “railings” on everything.

.

So when my sister asked for a little side table for her front porch, I thought this was the perfect little piece to try out my new love for “mission style.”

How to build a DIY Mission Style End Table

You know, because if I screwed up or hated it, I didn’t have to keep it anyway hahahaha. But, good news…it turned out super cute 🙂 Lucky for my sister 😉

How to build a DIY Mission Style End Table

See the railings on the sides? That’s my favorite part!

How to build a DIY Mission Style End Table

This is a super quick and easy build that you can finish in just a couple hours in the shop. And it’s a great little size table if you don’t have a lot of room. It makes a great little side table or nightstand.

How to build a DIY Mission Style End Table

I’ve got the how to over on Pretty Handy Girl today so be sure to click over and check it out and get ready to build your own! I’d also love it if you’d pin this for later! 🙂

How to build a DIY Mission Style End Table

Let me know in the comments below if you like mission style furniture too or if there are any projects you’d like to see plans for on Woodshop Diaries! I’d love your feedback!

.

And if you’re looking for more side table or nightstand options, be sure to check out these:

.

modern nightstands

How to Build a Modern Nightstand

twisty table

storage end table

DIY Farmhouse Side Table with Storage for Diapers and Other Random Stuff You Want To Hide

vanity that could double as a nightstand

How to Build a DIY Single Bathroom Vanity

Stay tuned for some really fun projects coming up in August!

.

Until next time, happy building! 🙂


How to Make a Wooden Spoon {That’s Shaped Like a Pineapple!}

July 17, 2017 by Shara, Woodshop Diaries

How to carve a wooden pineapple spoon


Have you ever wondered who comes up with the “next big thing?”

.

Like who decides (this was years ago) that chickens were the cool thing to decorate your entire house with?? (Remember that, mom?? The chicken WALLPAPER?! Don’t do that again.)

.

Then, just a few years ago, it was owls. Then, hedgehogs stole the spotlight shortly after that.

.

But recently, pineapples have taken over. Haven’t you seen them everywhere??

.

So I just want to know. Who decides what’s going to be hung all over everyone’s wall and printed on everyone’s shirts each season?? DOES ANYONE KNOW?!

.

Whoever it is, props to you! I’m loving the pineapple trend. And so are many more, because several other bloggers and I have joined in a Pineapple Blog Hop today which is the kickoff to Pineapple Week over on The Weathered Fox!  See links to the rest of the blog hop projects at the end of this post!

.

So when I was challenged to make a wooden spoon (more about the challenge to come in the next couple weeks!! Sign up for email updates at the bottom of the post or in the sidebar so you don’t miss out!), I knew I needed to get creative if I was going to compete with the others in the challenge.

.

That’s when I decided to not only make a wooden spoon, but make my spoon look like a pineapple!

How to carve a wooden pineapple spoon

Cutest wooden spoon ever, right??

.

I’ve got the how to for you to make your own right here so let’s get started.

.

For this project, I used just a few tools and some scrap poplar wood.

.

This post contains affiliate links.  Thank you for supporting this site!

Tools & Materials:

Band saw

Belt sander

Orbital sander (unless you want to hand sand everything)

Dremel (and carving bits–some usually come with the kit)

Hammer and chisel

Planer (optional)

Sandpaper

Scrap wood for spoon

.

Step 1: Prepare the wood

I had some leftover rough poplar from our kitchen remodel. We decided not to use this lumber, so it’s been hanging out in my shop for a while. You could use whatever wood you want, but typically, hardwoods are best for spoons. Poplar is a softer hardwood, so it’s easier to carve. Plus it’s fairly cheap.

.

It was only 1” thick, so I cut two short pieces (about 20”) and planed both pieces then glued them together to make it a little over 1 ½” thick. If you don’t have a planer, you could start out with thicker wood, or just make a shallower spoon.

.

Step 2: Draw and cut the shape

I wanted my spoon to be a pineapple shape. So I googled cartoon pineapples and used an image I found to help me draw out the top and the bottom shape of the spoon. Then I just drew curved lines to connect them. The total height of my spoon was about 12”.

How to carve a wooden pineapple spoon

Once you have your pattern, you can cut it out on a band saw. Save the pieces you cut off the sides.

How to carve a wooden pineapple spoon

Once the general shape was cut, I wanted to make mine a little more curved on the bottom side. I drew out a shape to make the spoon handle curve up a little. You have freedom here to do whatever shape you want. Once it’s drawn use masking tape to tape a side that you just cut off to the spoon so that it has a flat surface to run through the band saw to cut the shape along the bottom.

How to carve a wooden pineapple spoon

How to carve a wooden pineapple spoon

Step 3: Sand out the shape

Once my shape was cut, I used my belt sander to smooth out the bottom spoon corners to make it more rounded. There was a lot of sanding in making the spoon. You can just sand until you get the shape you want. Once the shape was like I wanted it, I smoothed it out with an orbital sander and a finer grit sand paper. The wood should now be rounded and smooth to the touch. I hand sanded the little leaves as best I could. It’s a little hard to get in all the cracks…I just did the best I could.

How to carve a wooden pineapple spoon

Step 4: Carve out the pineapple design

Obviously, if you don’t want to make your spoon a pineapple, you can skip this step. But I drew out my leaves and pineapple design and used my Dremel and a carving bit to trace the lines.

How to carve a wooden pineapple spoon

How to carve a wooden pineapple spoon

I already started on step 5 here…so just ignore that 🙂

How to carve a wooden pineapple spoon

Step 5: Carve out the spoon

You can do this many ways. In order to get the majority of the material out of the spoon, I used a ½” chisel and a hammer. Because the spoon was already shaped, this was somewhat difficult to do because it wouldn’t sit flat on the work surface. It may have been a better idea to chisel this out BEFORE cutting the shape of the bottom of the spoon. Hindsight is 20/20. But with a little creative clamping, I was able to chisel out most of the material.How to carve a wooden pineapple spoon

Then, I used my carving bit on my Dremel and went to town to smooth it all out. You will not get it perfect no matter how hard you try. Once it got close to smooth, I used some coarse grit sandpaper (I used 80 grit) and sand the shape out smooth. Then I went over it with 220 grit to smooth out all the scratch marks left from the 80 grit stuff.  Then finally, I used 400 grit to sand the whole thing baby’s butt smooth.  400 grit sandpaper is the most amazing stuff…for real.  It smooths out everything SOOOOO SMOOTH.

How to carve a wooden pineapple spoon

How to carve a wooden pineapple spoon

Step 6: Oil

I do not claim to be an expert on finishing, but I know that mineral oil is food safe. So I oiled my spoon with mineral oil. I just wiped it on with a clean rag and let it soak in. You may have to oil it occasionally if you use it a lot, but it’s as easy as wipe on, wipe off. You could also use butcherblock conditioning oil I assume, but mineral oil is much cheaper.

How to carve a wooden pineapple spoon

How to carve a wooden pineapple spoon

What do you think???

How to carve a wooden pineapple spoon

How to carve a wooden pineapple spoon

How to carve a wooden pineapple spoon

I thought it turned out SO cute!  And who wouldn’t love to have a pineapple shaped spoon??  Now, if only it was flavored like a pineapple, too…

How to carve a wooden pineapple spoon

For lots more pineapple projects and inspiration, check out the links below!

.

Check out all the other Pineapple tutorials here:


Craftivity Designs | Pineapple Tablescape and Printable Menu
The Vanderveen House | Pineapple Pillow Cover
Upright and Caffeinated | Stenciled Pineapple Milk Can Planter
Our Home Made Easy | Summer Pineapple Printable
Woodshop Diaries | DIY Carved Wooden Pineapple Spoon
Hey Lets Make Stuff | Pineapple Candy Pouch Card
Happiness is Homemade | DIY Pineapple Candle
Mahles Market | Free Pineapple Printables
Sustain My Craft Habit | DIY Pineapple Succulent Mason Jar Planter
Casa Watkins Living | Pineapple Inspired Wine Charms
Our Crafty Mom | Pineapple Flour Sack Tea Towels
Sense and Serendipity | DIY Driftwood Pineapple Welcome Sign
Not Just Paper and Paint | Pineapple Casserole Recipe
PMQ for Two | Pineapple Wine Charms
Wife in Progress Blog | Homemade Pineapple Sugar Scrub


Until next time, happy building (or, uh…carving)!! 🙂


How to Build a DIY Keepsake Box from Scrap Wood

July 12, 2017 by Shara, Woodshop Diaries

How to Make an Easy DIY Scrap Wood Keepsake Box

I’m not normally a sentimental person. But even the most unsentimental person has a few keepsakes. Most of my “keepsakes” are letters and notes from either Danny or my granny (who are the only ones who ever write me notes haha) and they all reside in a shoe box in a cabinet somewhere.

.

But there has got to be a better way to store your keepsakes than in an old cardboard box with the word “NIKE” written on the side.

.

You know, maybe in something like this:

How to Make an Easy DIY Scrap Wood Keepsake Box

And you can build one of these from a few scraps and about an hour of your time. Have you noticed I’m on a roll lately with all these scrap projects?? Did you miss the scrap wood caddy??  I’ve got another scrap wood project to show you next week, too!

.

The cool thing about this little box is you can use it for keepsakes like trinkets and notes, but you could also use it for jewelry or accessories, or anything really. And since it’s a little more presentable than an old cardboard shoe box, you can display it somewhere for easier access when you want to take a look inside.

.

(PS see that bar cart??  It’s a DIY I made recently from a single board!!  Check it out here 🙂 )

.

So grab some scrap 1x6s and let’s do this thing.

.

This post contains affiliate links. Please see disclosure policy for details. Thank you for supporting this site to keep the content free!

.

You will need:

Tools & Materials

Miter saw

Nail gun (or hammer and nails)

Measuring Tape

Scrap 1x6s (or a 1×6 board)

Scrap cove molding (or a stick of it if you don’t have scraps)

Wood finish

Wood Glue

Stencil (optional)

Step 1: Cut pieces for the box

I made my box a square so all sides are the same size. If you wanted, you could make it more of a rectangle and lengthen one side. Totally up to you. But I cut a piece of 1×6 scrap at 5 ½” long (to make a square bottom piece) and four side pieces at 6 ¼” long like the picture below.

How to Make a Scrap Wood Keepsake Box

Step 2: Assemble the box

Next, I “folded” the sides up and glued and nailed them together.

How to Make a Scrap Wood Keepsake Box

Step 3: Make the top

To make the top, I cut a piece of 1×6 at 5 ½” long and cut scrap cove molding to fit around the edges. I nailed these pieces along the sides of the top.

How to Make a Scrap Wood Keepsake Box

In order to keep the top in place when it’s set in the box, I cut two thin pieces 5 ½” long (you could cut a couple small pieces off another scrap 1×6) and glued them onto the bottom of the top piece. This helps the lid stay in place.

 How to Make a Scrap Wood Keepsake Box

How to Make a Scrap Wood Keepsake Box

Step 4: Finish the box

I wanted an initial on this box. But, I didn’t have a good stencil for stain because it likes to soak into everything, so instead, I taped a plastic stencil on the lid and used spray Poly to spray on the letter. After a few coats, I removed the stencil and let it dry.

How to Make a Scrap Wood Keepsake Box

Once it was dry, I stained it with Minwax Provincial. The stain wiped right off the letter where the poly was sprayed. Once the stain dried, I polyed the whole box. Then it was ready to go.

How to Make a Scrap Wood Keepsake Box

How to Make a Scrap Wood Keepsake Box

The lid is easy to open, but you could even add a small knob or pull to the top if you wanted.

How to Make an Easy DIY Scrap Wood Keepsake Box

By the way, do you recognize the scenery here?? It’s the DIY bart cart I posted recently. I made it from a single board and it’s one of my favorite projects! I thought this little keepsake box fit perfectly right here.

How to Make an Easy DIY Scrap Wood Keepsake Box

How to Make an Easy DIY Scrap Wood Keepsake Box

How to Make an Easy DIY Scrap Wood Keepsake Box


What do you think?? Go grab a few pieces from your scrap pile and get to building…right after you pin for later 🙂

How to Make an Easy DIY Scrap Wood Keepsake Box

Until next time, happy building!

DIY Console Cabinet with Open Shelf

July 6, 2017 by Shara, Woodshop Diaries

How to build a Gorgeous DIY Console Cabinet

In a world where chalk paint is the queen of Pinterest and furniture makeovers are the hottest trend, I’m over here ABSOLUTELY LOVING the fact that the friend who asked for my latest build asked for it UNFINISHED.

How to build a Gorgeous DIY Console Cabinet

HALLELUJAH…once the sanding was done, I was DONE. No staining, no painting, no polying. Best client EVER. In case you can’t tell, I HATE finishing…but mainly painting…I’d rather pluck all my leg hairs out one by one than have to paint furniture. NO. JOKE.

.

I actually kind of like what it looked like unfinished. Sometimes I think the furniture I build looks the best “naked.” But I think I’m in the minority there.

.

I do have to add, though, that after thorough testing (not really), it has been discovered that my “naked furniture” pictures on Instagram get more likes than my finished and styled ones do. That’s for real, so maybe I’m onto something here…

.

Anyway, for all of you who love a good build, I’ve got you covered with the how to AND some “naked furniture” pictures. For those of you who like a good furniture painting project, I got some pictures of it after she worked her magic on it, to.

.

What do you know…it’s a project that suits everyone 🙂

.

Alright, so let’s get to the how to.

.

This post contains affiliate links.  If you purchase through one of these links, I may receive a small commission at no extra cost to you.  This helps keep the content free.  Thank you for supporting this site!

Materials Needed:

1 sheet ¾” plywood

1 sheet ¼” plywood

(2) 2x10x8 boards

(11) 2x2x8 boards

(3) 1x3x8 boards

4 sets hinges

2 double magnetic catches

2 ½” pocket hole screws

1 ¼” pocket hole screws

Staples longer than ¼” or brad nails

Wood glue

Tools Needed:

Circular saw

Kreg Rip Cut (optional, but helpful)

Miter Saw

Kreg Jig for pocket holes

Drill

Table Saw

Router and rabbet bit (optional)

Sander

Clamps

Step 1: Assemble the sides

First, I cut four 2×2 legs at 40” long. Then I ripped two plywood strips from my sheet 14” wide using my circular saw and rip cut. You could use a table saw for this, but it’s easier with the circular saw and rip cut…especially when you are scrawny like me haha.

.

Then I cut a 26” long piece off EACH 14” strip. Don’t cut them both from the same strip, or you’ll have to cut another strip for the next part of the build.

How to build a Gorgeous DIY Console Cabinet

Using ¾″  pocket holes and 1 ¼″ pocket hole screws, I attached two legs to each piece of plywood making two side panels like the picture below. Notice the pocket holes on the top…that’s to attach the top later.

How to build a Gorgeous DIY Console Cabinet

Step 2: Assemble the carcass

I love using the word “carcass.” I think I’ve told you that before??

.

I cut 6 pieces of 2×2 at 60” long and used them to attach the sides together using 1 ½″ pocket holes and 2 ½″ pocket hole screws like shown.

How to build a Gorgeous DIY Console Cabinet

The bottom 2x2s were attached 3” from the bottom of the legs and the middle 2x2s were attached so that the bottom of the 2×2 was 26” from the top of the legs.

.

The picture doesn’t show, because I didn’t add this until later (long story…I had to cut some more 2x2s), but you could also add 14” long 2x2s at the bottom along the sides (front to back) at this point. Or later…whichever.

Step 3: Add the bottom and shelf

The remaining pieces of plywood from step 1 should both be 60” long. Perfect fit for the shelf on the bottom and the cabinet bottom. See what I did there?

.

I drilled ¾″ pocket holes along the edges of both pieces and screwed them into the 2x2s and the sides like shown using 1 ¼″ pocket hole screws. This picture was taken looking from the bottom view.

How to build a Gorgeous DIY Console Cabinet

And here, I still haven’t added the bottom side 2x2s…but I will, I promise!

How to build a Gorgeous DIY Console Cabinet

Step 4: Add middle divider

I cut two pieces of 2×2 at 23” and attached using 1 ½″ pocket holes and 2 ½″ pocket hole screws in the middle of the piece on the front and back. Be sure to measure for the exact center.

How to build a Gorgeous DIY Console Cabinet

Then, I cut a piece of plywood at 14” wide and 24 ½” long and attached using ¾″ pocket holes and 1 ¼″ pocket hole screws like shown.

How to build a Gorgeous DIY Console Cabinet

PS see that other cabinet in the background?? It’s this dresser!

Step 5: Add back

I tried a new way of adding a back using my router. You could do this or simple staple the back on. Either way works just fine. I used a ⅜” rabbet bit in my router to make a ¼” deep groove around the back openings and stapled in the ¼” plywood for the back in so that it sits flush. Or you could just cut ¼” plywood to fit over the holes in the back and staple. It’s just an extra step to use the router. Either way, just get a back on that thing 😉

How to build a Gorgeous DIY Console Cabinet

Step 6: Add those 2x2s on the bottom sides if you haven’t already

Talking to myself here…See?? I told you I was going to add them. If you haven’t already, add these things!

How to build a Gorgeous DIY Console Cabinet

Now we are here…almost done.

How to build a Gorgeous DIY Console Cabinet

Step 7: Build the top

Click over to my post here to see how I make table tops. I made this top 65” long and 18” deep. I used my 2x10s here.

How to build a Gorgeous DIY Console Cabinet

Once the glue is dry, I screwed the top in through the top front and back 2x2s using 2 ½” screws and then used 1 ¼″ pocket hole screws to attach on the side and middle divider panels.

Step 8: Build the doors

Check out my post here on how to build these simple shaker style cabinet doors. I built 4 of them taking into account the width of the butt hinges and leaving a small gap between the doors. Because things can sometimes get a little “off,” it’s best to measure the exact size for these before you make them instead of me telling you. I usually leave ⅛” gap along all the edges for doors. You can do the math 🙂

.

Once the doors were made, I simply attached using small brass butt hinges.

How to build a Gorgeous DIY Console Cabinet

I used double magnetic catches to hold the doors in place. My friend installed her own hardware after she finished it, so at this point, my work was done 🙂

How to build a Gorgeous DIY Console Cabinet

How to build a Gorgeous DIY Console Cabinet

How to build a Gorgeous DIY Console Cabinet

I seriously love it just plain and natural. But in case you like a more finished look, check this out!

How to build a Gorgeous DIY Console Cabinet

How to build a Gorgeous DIY Console Cabinet

How to build a Gorgeous DIY Console Cabinet

How to build a Gorgeous DIY Console Cabinet

So what do you guys think?? Ready to build one of your own??

.

If so, I’d love it if you would pin this for later 🙂

How to build a Gorgeous DIY Console Cabinet

Until next time, happy building!!

DIY Bar Cart from a Single Board

July 1, 2017 by Shara, Woodshop Diaries

How to Build a DIY Bar Cart from One Board

Can you believe you can build a DIY bar cart from a single board?? Read on to find out how.

Shara Woodshop Diaries with 2x10 board

I built this project from a single 2x10x8 board.

Now, the 2x material you find at the building stores is what you typically call “construction lumber.”

It’s probably not the most glamorous stuff you’ve ever seen. You may have to dig through a large pile just to find some straight ones.

But, it’s cheap. And it’s readily available.

And, despite the bad reputation this type of wood gets, most of what I build is made from construction lumber.

When you get a little creative, you can make some really pretty stuff it–like this simple DIY bar cart.

I’m sharing how to build your owns DIY Bar Cart (I guess since I don’t drink, it’s technically a tea cart??) from a single 2x10x8 board that only cost $6.56 (in 2017 when I bought it).

I’ve got the project details, printable plans, and the how to for you below. If you prefer to watch, I even have a video tutorial, too!

To build this DIY bar cart, you’ll need:

This post contains affiliate links. See disclosure policy for details.

Materials:

  • (1) 2x10x8
  • 1 ¼” pocket hole screws
  • 2 ½” pocket hole screws
  • Glue
  • Wood Putty
  • 4 rolling casters

Tools:

  • Table Saw
  • Miter Saw
  • Drill
  • Kreg Jig for pocket holes
  • Measuring tape
  • Sander
  • Clamps (optional, but helpful)

How to Build a DIY Bar Cart From One Board:

Grab the printable plans below after you check out the video here:

You’ll find the step by step building process in the tutorial below, but if you prefer a printable version, I’ve got the complete printable plans available as well.

Prefer to print your plans?

Step 1: Cut down the 2×10 board

First, I had to cut down my board to size using a table saw. 

NOTE: If you don’t have a table saw, you can purchase four 2x2s and four 1×2 to make this instead.

I cut in this order:

First, I ripped two strips of 2” wide board from the 2×10 using a table saw.

I cut 12” off of ONE of these 2” boards with a miter saw and set it to the side.

Then, I cut what’s left of the 2×10 in half (two 4 ft pieces).  I ripped three strips from one of these pieces at 1 ½” wide.

.

Lastly, I ripped the remaining wood and the 12” piece I cut from the 2” wide boards earlier all down to ¾” thick strips.

Board cuts needed to build bar cart

I know that’s a lot of instructions, but once this is cut, it’s easy peesy from here.

If you’d like to check out the cut diagrams, cut list, and printable step by step instructions, grab the complete building plans here.

Step 2: Cut Legs for DIY Bar Cart

The 2” wide strips are the legs.

NOTE: If you are using 2x2s instead, it’s fine that it’s 1 ½″ instead of 2″ wide, but you’ll need to add a little piece onto the bottom to attach the casters because…

I would have made these 1 ½” wide instead of 2”, but the casters had 2” long brackets to screw into the legs. So I made the legs 2”.

I cut two legs and a top from each 2” piece. The legs are mitered at 45 degrees on ONLY ONE END and cut at 34 ½” long at the longest point.

Step 3: Cut out the frame pieces

I cut down the 1 ½” wide pieces so that I had 4 pieces at 11 ⅞” long and 4 pieces at 23 ⅞” long. Why ⅞”??

If you cut at an even 12” and 24”, you won’t have enough board because you didn’t account for the blade width on the cuts.

Your last piece will be too short…helpful hint 😉

I drilled one 1 ½” pocket hole in each end of these pieces.

Step 4: Assemble the Cart frame

I measured up from the bottom of the legs 4” and made a mark, then 26 ½” and made another mark.

You can pick different measurements if you want–this is really just personal preference how high or low you place your shelves. 

I lined the frame pieces up with these marks and assembled the frame like shown using 2 ½” pocket hole screws in the pocket holes I drilled in step 3.

RELATED: How to use a pocket hole jig

I checked to make sure the miters were turned the right way on the legs.

How to assemble bar cart frame pieces

I found it easiest to assemble the two side frames first, then attach them together with the longer pieces.

You can see this in the video.  

Also note that all the frame pieces are flush to the INSIDE of the legs.

Assemble cart frame using pocket holes and screws

Once the frame was together, cut the top pieces from what was left of the 2″ wide pieces from step 1.

The tops are mitered at both ends not parallel to each other and cut at 15 ⅞” long at the longest point.

Cutting bar cart legs to length on miter saw

I glued and clamped on the top pieces between the corner legs. Allow the glue plenty of time to dry.

Gluing on top handles of DIY bar cart

Step 5: Cut the slats for Bar Cart

While the glue was drying, I cut 10 pieces of 11 ⅞” long and 7 pieces of 23 ⅞” long from the ¾” thick boards.

The longer ones will be the top slats and the shorter ones will be the bottom slats.

I drilled one ¾” pocket hole in each end of each board.

Slats cut and pocket holes drilled for cart trays

Step 6: Attach the slats

I screwed the slats in place using 1 ¼” pocket hole screws, making sure to space them out evenly.

I made the tops slats run lengthwise and the bottom run opposite.  

I screwed them in so that the bottoms were flush with the bottom of the frame pieces.

This left a shallow “lip” around the edges so that they were more like a “tray” than a “shelf.”

You can make the top flush across if you’d rather. It’s just personal preference.

All slats installed onto bar cart

Step 7: Add casters to DIY Bar Cart

At this point, I simply screwed the casters into the bottom of the legs.

Screwing casters into bottom of cart legs

Step 8: Putty, sand and finish

I put a little putty around the mitered corners and sanded it down really well.

I’m really digging natural finishes lately, so I chose to leave mine as is with just a coat of poly on it.

Of course, you can stain or paint as desired.

Step 9: Roll DIY Bar Cart in place

Fill up your tea pitcher, grab your mason jars and get ready for a party.

Close up of Iced Tea on Bar Cart Top Tray

I love how it turned out and I think the natural wood color looks great.  

If you plan on leaving your cart “naked,” look for a board with lots of large, dense knots to add some color variation and character.

Simple Modern Bar Cart with natural wood finish on caster wheels
Close up of top tray of Bar Cart

I love this little cart for my kitchen.  

That wood round was made from rough cut poplar I originally bought to cover a steel beam in our kitchen remodel, but changed my mind.  

After I made lazy susans, I had an idea and glued some of that old wood up and cut it out.  

Why I waited so long to make these, I have no idea!!

DIY Bar Cart from 2x10 with slatted trays

Okay that’s enough pictures…I may have gotten carried away haha.  

Be sure to check out the video tutorial and all the 2×4 and More projects below, but first, I’d love it if you’d pin this for later! 🙂

DIY Single Board Bar Cart Collage

Now, check out all these other awesome #2x4andmore Challenge projects from these other talented bloggers!

.

  • garden arbor | Remodelaholic
  • 15 minute coffee table | The Ugly Duckling House
  • tiered corner plant stand | Charleston Crafted
  • single-board rolling bar cart | Woodshop Diaries
  • outdoor bench w/rope detail | At Charlotte’s House
  • wall planter and herb garden | Making Joy and Pretty Things
  • upholstered x-base bench | Frazzled Joy
  • jumbo tic tac toe | Ginger Snap Crafts
  • porch bench | Everyday Party Magazine
  • console table | Hertoolbelt
  • farmhouse patio table | North Country Nest
  • easy flower planters | Our House Now a Home
  • treadmill incline | Practical and Pretty
  • patio side table | Small Home Soul

Easy DIY Scrap Wood Carrying Caddy

June 28, 2017 by Shara, Woodshop Diaries

How to build a Scrap Wood Carrying Caddy for Cleaning Supplies

Hey everyone! Today I have a super (I promise SUPER) easy scrap wood project for you that is not only cute, but super practical. But first, I have to confess something.

.

I was afraid of plywood for the longest time. I’m not really sure why…it’s just big and heavy and I hated asking Danny to help me lift it up on sawhorses so I could cut it up. Plus, I swear, you get like 20 million splinters just by looking at it. And I don’t have enough time (or bandaids) to deal with splinters. #aintnobodygottimeforthat

.

But recently, I make a trip to the lumber yard just about every week for another sheet or two of the stuff. It’s become a staple in my shop and I use it ALL THE TIME. Once I realized how useful the stuff is, I can’t stop using it! (For some of my favorite plywood projects, check out this plywood entryway bench, pantry cabinet, and DIY bathroom vanity.)

.

BUT, what stinks about plywood (besides the splinters) is that no matter what you’re building, you will just about always have random scraps. With all my recent builds using plywood, I have accumulated an entire shop corner FULL of plywood scrap.  See it all back there behind this table in the corner??? (PS if you want to build this table, I have the plans for you here…I’m full of building plans haha)

How to Build a Modern Farmhouse Dining Table

.

So I built this little caddy to make a small dent in my scrap plywood collection.

.How to build a Scrap Wood Carrying Caddy for Cleaning Supplies

I originally made it as a cleaning supply caddy. But after I built it, I realized my drill fits in there perfectly and it would make a great tool caddy, too! Instead of loading up my tools in the floorboard of my car’s back seat when I have to do on site jobs, now I can shove them all in here and look more professional. #winning  I actually found it super handy when installing these built ins in my friend’s house 😉

How to build a Scrap Wood Carrying Caddy--for Tools

.

If you’re a crafty person, you could also use it for craft supplies.

.How to build a Scrap Wood Carrying Caddy for Crafting Supplies

Or if you do gardening, it would be great for that, too! Sorry, no pictures of that because I literally have nothing garden related to stage it with since I have a black thumb haha.

.How to build a Scrap Wood Carrying Caddy for Cleaning Supplies

I’ve got the super simple plans for you over on Pretty Handy Girl today, so if you’re ready to build one for whatever your needs and interests are, be sure to click over.

.

But first, I would love it if you’d pin this for later 🙂

.How to build a Scrap Wood Carrying Caddy for Tools or Cleaning Supplies

If you guys have any scrap wood projects you’d like to see, let me know in the comments!! I’d love to hear what kinds of things you’d like to build with your scraps!

.

Until next time, happy building!

How to Build an Aquarium Cabinet Stand

June 20, 2017 by Shara, Woodshop Diaries

How to Build a DIY Aquarium Cabinet Stand

In this post, I’ll show you how easy it is to build your own DIY aquarium cabinet stand!

How to Build a DIY Aquarium Cabinet Stand Pinterest Image

When my husband, Danny, decided he wanted a “man cave” with an aquarium, that meant I was tasked with building him a new DIY aquarium cabinet stand.

.

He was so excited about his aquarium, though, that it made it worth it…I think 🙂

.

I built this stand to be extra sturdy since it was going to be holding quite a bit of weight with all the water. His tank was 30 gallons and fit perfect.

.

But even if you didn’t want to use this to hold an aquarium, it would also make a great TV stand, storage cabinet, coffee bar, whatever.

.

This post contains affiliate links. Please see disclosure policy for details.

What You Need to Build Your Own DIY Aquarium Stand

Materials:

  • ¾” plywood (½ sheet)
  • ¼” plywood (¼ sheet)
  • 2x10x8
  • (3) 2x4x8
  • (2) 2x2x8
  • (2) 1x3x8
  • Cove molding
  • Crown molding
  • Base molding
  • 2 sets hinges
  • 2 knobs/pulls
  • 2 ½” pocket hole screws
  • 1 ¼” pocket hole screws
  • Brad nails
  • Wood Glue
  • Wood putty

Tools:

  • Miter saw
  • Kreg Jig for pocket holes
  • Drill
  • Circular saw
  • Nail gun

Step 1: Build Sides of Aquarium Cabinet

To keep this cabinet as sturdy as possible, I build the majority of the frame from 2x4s.

.

I used 1 ½″ pocket holes and 2 ½″ pocket hole screws to assemble the 2×4 frame and installed a ¾″ plywood panel in the middle using ¾″ pocket holes and 1 ¼″ pocket hole screws.

.

RELATED: Learn how to use pocket holes in your woodworking project in this post!

Notice that the middle panel is installed FLUSH to the inside of the frame and that the bottom 2×4 is installed so that the top is 4 ½″ off the ground.

.

I made two identical side panels like this.

Two side frame panels built for DIY aquarium tank cabinet

Step 2: Build Middle Support of Aquarium Stand

To help hold the weight in the middle, I built another frame piece from 2x2s.

I assembled this using 1 ½″ pocket holes and 2 ½″ pocket hole screws as well.

Middle 2x2 support frame for aquarium cabinet to support weight

Step 3: Assemble the Aquarium Cabinet

Now it was time to assemble the middle panel and the side panels together to make the cabinet frame complete.

.

I used 2x4s at the top, bottom, front and back to attach it all together. I used 1 ½″ pocket holes and 2 ½″ pocket hole screws to assemble.

Notice that all the 2x4s along the bottom are attached so that the tops are 4 ½″ from the ground.

.

Side note: You can see below that when I built this, I used 2x2s along the back edge and 2x4s at the front. You could do that, but in hindsight, I think 2x4s are better for this project.

Aquarium cabinet frame assembled using pocket holes

Step 4: Add the Bottom of Cabinet Stand

I cut a piece of ¾″ plywood to fit in the bottom of the cabinet and installed using ¾″ pocket holes and 1 ¼″ pocket hole screws so that the inside of the cabinet bottom was flush across the top.

You can see the panel rests on the 2×2 on the bottom of the middle frame.

Step 5: Attach the Top

I used a 2×10 to build a top for the cabinet. I made it 36” long and 16 ½” wide. You can use a circular saw or table saw to trim it down to size. See my post here on how I build table/cabinet tops.

DIY Cabinet top glued up

Once the top was trimmed down to its final size, I attached it to the cabinet.

You can attach this top several ways–you can either “toenail” (drive the screw at an angle) through the top 2x4s and into the top to secure it, drill pocket holes along the top of the frame and secure it with 2 ½″ pocket hole screws, OR use figure 8 tabs.

.

I discuss figure 8 tabs in this post. That is the better method to allow for wood movement, but pocket holes or toenailing will secure it as well.

Step 6: Add Doors to Aquarium Cabinet Stand

You can see my post here on how I build these simple Shaker style doors.

Doors for DIY cabinet gluing up in clamps

Or if you want to get a little fancier, I’ve got a tutorial to make another style cabinet door here.  I made the doors 14” wide and 23 ½” tall.

Step 7: Add Trim and Moldings

Finally, I added crown molding around the top, base around the bottom, and cove to the insides of the side panels. (Note: I added the cove and base before the top…it doesn’t matter whether you do it before or after except for the crown molding.)

Cove molding added to side panels and baseboard added to bottom of aquarium stand
Crown molding added around top of aquarium cabinet stand

Step 8: Finish Aquarium Cabinet

I puttied and sanded where needed then, I stained the cabinet in Minwax Golden Oak and polyed with Minwax Polycrylic.

DIY aquarium cabinet stand finished in Golden Oak Wood stain

I attached the doors with semi concealed ½″ overlay hinges and added these pulls from D Lawless Hardware to the doors.

Then, Danny took it from there and filled his aquarium tank with plants and fish…and water of course.

How to Build a DIY Aquarium Cabinet Stand
Simple DIY Aquarium Cabinet Stand with Aquarium tank stocked

He requested that I didn’t add a back, because he wanted to hide the extension cord and power strip in the cabinet, but if you wanted a back, just staple or nail some ¼” plywood on the back side.

I catch Danny in here all the time just staring. I know he’s not staring at the awesome aquarium cabinet stand I built him–he’s just appreciating the fish.

.

But I know deep down he appreciates the cabinet I made him 🙂 Well, I THINK so anyway haha.

Danny watching fish in aquarium tank sitting on aquarium cabinet stand

We ended up moving into our garage apartment before Danny completely finished his man cave, but whenever we build our future home, he will redesign himself a new man cave so stay tuned for that. 

.

In the mean time, check out the DIY couch I built him for his man cave here.

.

But for now, I’ve got to get back to my to do list 🙂

.

If you enjoyed this project, don’t forget to pin it for later!

How to Build a DIY Aquarium Cabinet Stand

Until next time, happy building!

How to Build a Modern DIY Dresser Armoire

June 16, 2017 by Shara, Woodshop Diaries

How to build a Modern DIY Dresser Armoire

I have a bad habit of wanting to build, like, EVERYTHING. But, like, EVERYTHING won’t fit in my house. Or in my yard. Or in my garage. Or in my parent’s house. Or in my sister’s…

.

You know…all those places I keep trying to add things to.

.

That feels kind of limiting.

.

So I was so thankful that some friends of mine let me build them a dresser I’ve been DYING to build for their new baby. Supportive friends are the best friends 🙂

How to build a Modern DIY Dresser Armoire

A similar dresser idea has actually been on my “to build list” (AKA the screenshot album on my phone) for a LOOOONG time. I kept thinking I would make one for my own bedroom. But I gave up finding room for it. Luckily, my friends had room…so I could finally make it!!

How to build a Modern DIY Dresser Armoire

I LOVE the idea of a “dresser” that also has a cabinet on one side. Sometimes you need more than just drawers, amiright? You could also make a larger version as a kind of armoire or wardrobe….which I’m also DYING to build…any takers?? 😉

How to build a Modern DIY Dresser Armoire

This post was sponsored by Build Something. As always, all opinions are my own.

.

You can find the full plans and tutorial over on Kreg’s site for building plans, Build Something. While you’re over there, check out all the other awesome building plans, including a few others from me like the Lutyen’s Bench and the Louvered Planter Boxes.

How to build a Modern DIY Dresser Armoire

My friends wanted to use this as a baby dresser, but also as a changing table, so I added a little tray on the top to accommodate the changing pillow they had for her. I didn’t have the pillow to actually stage it with, but you get the idea, right??  But you could use it with or without the tray.

How to build a Modern DIY Dresser Armoire

I’ve made similar doors like this for my bathroom vanity and for the cabinet above the toilet in my bathroom remodel, but they were a lot easier to make than this one haha.   But after some trial and error, I got the door glued together and I really love this style. Which means, you may be seeing more like it soon…after I develop a little more patience…

How to build a Modern DIY Dresser Armoire

But, you could also make a simple shaker style door as well.

How to build a Modern DIY Dresser Armoire

The brass pulls were a perfect match to the style and color (Minwax Early American if you were wondering).

How to build a Modern DIY Dresser Armoire

I’ve been digging the modern style lately and love the straight clean lines. What do you guys think?? Let me know in the comments 🙂 I’d love to hear your feedback.

.

If you want to build your own, be sure to click over for the full plans on Build Something.

.

But before you go, I’d really love it if you’d pin this for later 🙂

How to build a Modern DIY Dresser Armoire

Until next time, happy building!!


A New Home for Lucy–Modern DIY Dog House

June 12, 2017 by Shara, Woodshop Diaries

How to Build a Modern DIY Dog House

I’ve always considered myself a dog person. Growing up I HATED cats.

.

But, you guys, never say never. Growing up, I said I would NEVER have a cat and IF I ever did, I wouldn’t like it. Now fast forward past a long story about vicious animals and a ton of mouse turds in our kitchen ceiling (if you want to know the whole story, just ask…I’ll tell it), and now, we have PET…that’s right PET…cats. How did this happen?! Like, they go to the vet and everything…PETS.

Spring Front Door Refresh Worthy of All the Heart Eyes

So, in order to save some of our dignity (you know…after I said I would NEVER…then I did), we discussed getting another dog (because then I could say I was still a “dog person”), but never could bring ourselves to get one. Then one day, Lucy came into the picture.

She showed up skin and bones and filthy. After she stayed around for a week or so, we took her to the vet to see if she was microchipped…no luck. And we posted it all over Facebook and never heard a peep back from anyone claiming her. So, we took her in.  She really loves Danny.  And laying in people’s laps.

Only problem was…we weren’t really prepared for a dog, so we didn’t have a dog house ready for her. And that’s kind of important.

.

So I reached out to Jen Woodhouse from The House of Wood to see if she would want to help me with some plans for Lucy’s new house. Jen is like the best at drawing plans…and designing furniture…and singing…and blogging…I was kind of starstruck working with her. #fangirl

.

Thankfully, she was happy to help me with the dog house and drew up some plans for it. You can click over here to her site for the full building plans. But first,  I have a picture and video (YES, VIDEO!!) tutorial, but all the dimensions and details can be found in the plans on Jen’s site.

NOTE: You will see Lucy in these pictures on a tie out.  As some have questioned this, let me be clear that she is ONLY on a tie out right outside my shop while I am working in there.  That way, she can come inside with me, or go outside as she wishes.  She always has water available and she enjoys just sitting outside my shop door and watching the cats run around the yard.  She comes inside with us when we are inside the house and she only stays outside (under shelter and in a LARGE lean to by our barn–not tied up) while we are at work all day.  Lucy is well taken care of.  Now that you know Lucy’s daily schedule and living conditions, here’s the details on her dog house 🙂

.

This post contains affiliate links for your convenience. If you purchase through these links, I may receive a small commission at no extra cost to you. This helps keep the content here free. Thank you for supporting this site!  See policies here.

For this build I used all the basic tools:

Miter saw

Jig Saw

Table Saw

Drill

Kreg Pocket Hole Jig

Nail gun

.

Nothing fancy was required for this build. But, I will warn you…it’s big and it’s heavy and it’s best to build it outside or you won’t be able to get it out of the door. You’ve been warned 🙂

.

I wanted Lucy to have a place to lay outside the house on those hot summer days. The inside is mainly for winter time when it’s cold (it’s insulated, too…more on that further down). But in the summer, I thought she would like a nice deck to chill on.

.

So first, I built the deck. This is the easy part. I assembled the frame just like the plans show from 2x4s and screwed 1×4 slats in for the top.  You can see more in the video 😉

DIY Dog House with Deck

Before moving on, I moved this outside and stained it with outdoor stain and sealant. It’s easier to finish the deck before attaching the house…especially if you are doing two tone like I did. But it’s not required.

.

Then, I assembled the house frame according to the plans. Meanwhile, Lucy enjoyed her new deck. See? I knew that was a good idea 🙂

I screwed the back frame together first with pocket holes and screws, then attached the side 2x4s and the front frame.   You can see more on this in the video below and in the plans. (You guys!!! I MADE A VIDEO…so go check it out at the end of the post and tell me what you think 🙂 )

DIY Dog House with Deck

I set the frame in place to make sure Lucy would fit. Good news…she does!

.

Then, I screwed the house in place. You could use pocket holes and screws here, but I just “toenailed” screws in at an angle through the frame into the deck.

.

Then, it was time to add the siding. This is where it starts to actually look like a house. In order to make it a little more airtight (it gets cold in the winter, here, so we wanted to keep her warm), I used tongue and groove 1x6s instead of regular 1x6s. Either works fine, though.

How to Build a Modern DIY Dog House

I nailed on the siding along the sides of the house first, and as I got to the top, I marked along the boards where they needed to be trimmed to fit the angle and cut it with a jig saw.

.

Once the sides were finished, I added slats on the back. Once I got to the top, I ripped the last board to fit. I beveled the board at a 15 degree angle when I ripped it, so it would follow the angles on the side.

How to Build a Modern DIY Dog House

Then, I added the front slats the same way, leaving the door open and beveling the top board to fit.

.

Next, I primed and painted the house. Because I was doing a two tone house, it was easiest to paint now. But again, depending on your color scheme, you can paint it later.

How to Build a Modern DIY Dog House

How to Build a Modern DIY Dog House

I painted the house in the same paint I used for my front door refresh—Sherwin-Williams Snap Dry in Anchors Aweigh. I love this navy color. Paired with the wood, it looks like of mid century modern…or is that just me?

.

Once the paint was dry, I added some door trim and a canopy. I also made a small “toy box” with some scraps and screwed it into the front of the house. I would plant flowers here, but Lucy has a tendency to eat everything in sight (she actually was chewing on the house frame when I was seeing if she fit in it…), so I skipped the flowers haha.

How to Build a Modern DIY Dog House

This isn’t in the plans and is totally optional, but in order to keep Lucy warm in the winter, I chose to insulate the house. I stapled insulation between the 2x4s in the frame, then lined it with ¼” plywood. I added the roof without insulation (I was in a hurry), but will go back before winter and do the same on the roof. This should keep Lucy nice and warm 🙂

How to Build a Modern DIY Dog House

How to Build a Modern DIY Dog House

Lastly, I added the roof slats just like the plans show and finished them in outdoor stain and sealant.

How to Build a Modern DIY Dog House

As a finishing touch, I made Lucy a little sign for the front of her house and a floating dog bowl shelf for the side from some scrap pieces.

How to Build a Modern DIY Dog House

Then I talked Danny into helping me move it and realized it was way too heavy, so we drug it across the yard. Whatever works, right?

.

I think Lucy likes it 🙂

How to Build a Modern DIY Dog House

How to Build a Modern DIY Dog House

How to Build a Modern DIY Dog House

How to Build a Modern DIY Dog House

How to Build a Modern DIY Dog House

How to Build a Modern DIY Dog House

How to Build a Modern DIY Dog House

What do you guys think?? The house will be in a lean to by our barn, so it shouldn’t really ever get wet, but if yours will, I would recommend maybe adding shingles to the roof for a little more water protection.

How to Build a Modern DIY Dog House

I’m pretty sure Lucy has the brightest dog house (or actual house for that matter) in the neighborhood. Only the best for our Lou 🙂

How to Build a Modern DIY Dog House

Check out the video below for more of Lucy’s reaction to her new house and for a few more building details. Also, be sure to click over and get the plans from Jen’s site if you plan on building your own! Thanks so much again to Jen Woodhouse for the plans for this build!!  If you aren’t already following her, you should be (and honestly, if you aren’t already following her, WHERE HAVE YOU BEEN?!).  Her builds will blow you away!

.

Oh yeah, one more thing…be sure to pin this for later 🙂

How to Build a Modern DIY Dog House

Until next time, happy building!

DIY Lutyens Outdoor Garden Bench

June 5, 2017 by Shara, Woodshop Diaries

How to Build a DIY Lutyens Outdoor Garden Bench

Hold up. Can you believe that Spring is basically over and Summer is only a couple weeks away?? I feel like I was JUST vacuuming up Christmas tree needles like yesterday…how did we get here??  I’m not ready!!

.

My farmer’s tan isn’t ready for tank tops yet.

.

The garden isn’t planted yet.

.

The pool isn’t open yet.

.

And let’s not even talk about getting into a swimsuit in public yet…

.

But I do have one thing ready for summer.  And that is my outdoor seating situation.

How to Build a DIY Lutyens Outdoor Garden Bench

This post was sponsored by Kreg and Build Something. All opinions are my own and you can see my disclosure policy here.  This post also contain affiliate links for your convenience.

.

I’ve got the plans for you posted over on Build Something, which is Kreg’s site for posting step by step project plans for everything you can imagine.

How to Build a DIY Lutyens Outdoor Garden Bench

I love the detail of the Lutyen’s Bench.  By the way, did you know this is a common garden bench design?  It’s named after an architect who originally came up with this design way back a long time ago (1800s maybe?? don’t quote me on that).  It’s apparently been a crowd favorite all these years because people are still making them.  You can find them for THOUSANDS of dollars on some websites.  Luckily, mine will only run you a small fraction of that 🙂  You’re welcome.

.

PS, I totally want to be remembered 100s of years later for a super sweet furniture design…I should probably start working on that, huh??

.

The size is fairly easy to customize, but it’s big enough to fit 2-3 people comfortably.  I let Danny play around with the camera while I tested it out.

How to Build a DIY Lutyens Outdoor Garden Bench

How to Build a DIY Lutyens Outdoor Garden Bench

I like to throw in my “World’s Greatest Do It Yourselfer” mug when I get the chance….just to remind everyone 😉  hahahaha I wonder how many people have this exact same mug…and which one actually IS the world’s greatest?  Because I’m 100% sure it is not ACTUALLY me.

How to Build a DIY Lutyens Outdoor Garden Bench

One more interesting tidbit of information…I drew out the template for the top design in Microsoft Word.  WHAT?!  I know, right??  I have limited resources and had to work with what I had.  Lucky for you, I provide an easy template in the plans here on Build Something, so you don’t have to waste ten hours making circles in Word.  (Not that I did that….just kidding…I totally did that…).

.

I used my new Band Saw to cut out the curves and it worked out TEN TIMES better than if I had tried it with my jig saw.  Highly recommended.

How to Build a DIY Lutyens Outdoor Garden Bench

I used my trusty Kreg Jig for most of the assembly and finished it in a accidental combination of Thompsons Waterseal in Harvest Gold, and Olympic Maximum Outdoor Stain and Sealant in Canyon Brown.  I tried the harvest gold first and it was way too light, then covered it in Canyon Brown and it ended up being something in between the two.  I like it, though 🙂 and it’s super water proof now haha.

.

The blanket on the bench is also one of my favorite blankets/towels for outdoor.  It’s lightweight and is great for covering up on those crisp mornings or for laying out on in the grass.  But just in case you want to get a good look at the design, I’ll show you a picture of it naked…without the pillows or the blanket.

How to Build a DIY Lutyens Outdoor Garden Bench

Be sure to head over to Build Something to see how I made it and you can make one of your own!  But before you go, I’d LOVE for you to pin this for later 🙂

How to Build a DIY Lutyens Outdoor Garden Bench

For more outdoor projects, be sure to check out these:

Louvered Planter Boxes

Spring Wreath

Front Door Refresh

.

Until next time, happy building!!

How to Build Floor to Ceiling Built Ins

May 19, 2017 by Shara, Woodshop Diaries

How to build floor to ceiling built ins

People always ask me, “what’s the biggest thing you’ve ever built?” I’m not sure why everyone wants to know this, but I never really know how to answer.

.

Are we talking “big” as in the budget?? If so, then it’s the kitchen remodel…which I technically didn’t “build.”

.

Are we talking “big” as in the volume/cubic ft of the piece of furniture?? I haven’t measured exactly, but I guess it would be the farmhouse table.

.

Or “big” as in the thing that took the most time?? Or the most material?? Maybe this pantry cabinet??

.

I give a different answer to everyone who asks.

.

Until now. Now I know for sure what the biggest thing I’ve ever built is. It’s so big I can’t even get it all in one picture…

How to build floor to ceiling built ins

I built these huge 4 ½ ft wide and 10 ft tall built ins in a family friend’s bathroom recently and this is by far the biggest thing I’ve ever built. BUT, it wasn’t too difficult, and I’ll give you a break down of how I did it 🙂

.

Built ins are a bit tricky…every space will require different measurements. So I’ll give you an idea of the HOW I did it, but if you do something similar, you will have to figure out the measurements for your own space.

.

I wanted to build these built ins as much as possible in my own shop, not on site. It’s just easier for me to do things like that with my schedule.

.

So I measured the space to know what I needed. When in doubt, build slightly smaller and cover any gaps with trim.

.

The space was about 54 ¼” at the largest part and about 53 ¾” at the smallest. I measured in SEVERAL places in the front, back, top and bottom of the space. Walls are NEVER perfect, so you want to find where it’s smallest.  It was slightly shorter than 10 ft at about 119″.

.

So, once you have your measurements, build cabinet carcasses to fit the space.

.

At this point, you have to consider the width of your face frames in this part. I used 1×3 face frames—one on each side and one in the middle. When all three face frames are attached, you want the total width to be the smallest measurement you took when you measured the space. That way, you know it should fit.  So my actual cabinet is slightly smaller because the face frames stick out the sides a little.  This is to make it easier to mount the drawer slides.

.

Once the carcasses are together, you can add the face frames EXCEPT the middle one. I didn’t attach the middle face frame until I was on site. Just in case I mis-measured and needed to trim it down a little for the cabinets to fit the space.


Once the carcasses are together, add drawer slides and drawers. You can see my post here on how I make drawers. I almost ALWAYS use the “cut the slit for the bottom” way now that I’m more comfortable using the table saw. This just makes the drawers nice and clean.  By the way, these drawer cabinets were made about 4ft tall.


Drawers are fun, but a little time consuming. My cat got tired just watching me.


Then you can add drawer fronts.  These can be decorative or plain…whichever fits your style.  I added some shaker style drawer fronts. I glued 1x3s together for the frame (you could use pocket holes as well), then routed out the back (like I did when I made these doors…and these doors too), and glued and stapled a piece of ¼” plywood onto the back grooves. Then I glued the fronts onto the drawers.  You want to make sure everything is lined up right before you clamp your drawer fronts because once the glue is dry, that sucker isn’t going to move.  If you are using plain solid drawer fronts, you could glue and screw from the inside instead of gluing only.

.

The cat is apparently still tired from watching me.


The bottoms are pretty much done at this point except for finishing and install.  So it’s time to move onto the top.


But first, cut a piece of plywood to go over the drawer cabinets if they are deeper than the tops.  I made the drawer cabinets 22” deep and the top cabinets only 18” deep. So for the “countertop,” I cut a piece of plywood to fit over the cabinets and put some edge banding on the front. This may need to be trimmed some during install.  Keep that in mind.

.

For the tops, you can do the same thing…build the carcass then attach face frames except for the middle one. For these I used pocket holes to add a shelf about ⅔ of the way up.  You could do more than one shelf or no shelves if you wanted.  I also built these so that (based on my space measurements) the top was about 1 ½” from the ceiling. If you plan to add crown, this will give you some wiggle room that you can cover up later.

Add face frames to the top built ins

The tops were pretty simple.  Once the carcass is built and the face frames added, you can build doors for the openings. You can see how I build shaker style doors in this post.

Gluing up doors for built ins

Because the doors on mine were so large, the design was pretty plain.

So I ripped some strips to glue onto the middle of the doors to break it up some. I had never made doors this large, so I didn’t think about the style looking strange with the doors so large.  Here’s a picture of them installed where you can see the strip.  Hindsight is always better.

Built in shaker style doors

While the doors were gluing, I used my Kreg shelf pin jig to drill holes for adjustable shelves. You could add stationary shelves if you wanted, but the Shelf Pin jig allows for adjustable shelves which is really cool. You will need to cut shelves to fit in the cabinet and then attach the doors after the glue is dry on them.

.

Then it’s time to finish!!  I stained it with Minwax Provincial and polyed with Minwax Polycrylic.

.

I also cut a piece of clear crown, some strips of cove molding, and baseboard a little longer than I needed and stained it as well. I trimmed it all down during install to the exact length it needed to be.

.

Then it’s ready to deliver and install it. You will need to shim up the bottom cabinets and screw them into the wall. This is where you will attach the middle piece of the face front. Luckily mine fit perfect, but JUST IN CASE they are too big, you could always rip a little off one side of the 1×3 in order for it to fit. This was the easiest way I could think of to cut down on any on site work needed in order to install them.

.

Then add the “countertop” with glue and brad nails, and cut the baseboard to fit at the bottom. It was also attached with brad nails. Then put the top cabinets in place and shim them as well. Once they are screwed into the studs, you can add the middle face frame just like on the bottom. It can be ripped to fit as necessary. Once the face frame is attached (with brad nails), then cut the crown to fit and nail it on.

.

Finally, you can add some cove molding along the outside corners to cover any gaps between the built ins and the wall.

How to build floor to ceiling built ins

You may have a totally better way of doing all of that, but that’s exactly what we did haha.

.

A huge thanks to D Lawless Hardware for the drawer pulls and knobs for this project. They looked so good with this color.

Drawer pulls on built ins

Drawer pulls on built ins

Door knobs on built ins

I only had a few feet to step back and get the picture, so I had to take pictures of the top and bottom separately. Ten foot tall is no joke. This thing was huge!!

How to build floor to ceiling built ins

So what do you think??  Something you would try??  The homeowners wanted a more rustic look, but these would look great both painted or stained and could go in a bathroom, living room, or any spare nook you wanted to fill 🙂

.

If this looks like something you’d like to try, don’t forget to pin for later!!

How to build your own DIY floor to ceiling built ins

Keep your eyes out for more fun DIY storage ideas coming soon (smaller scale projects!!) and some REALLY fun outdoor projects too 🙂

.

Until next time, happy building!

Mid Century Modern DIY Pegboard Cabinet

May 8, 2017 by Shara, Woodshop Diaries

How to build a Mid Century Modern Pegboard Cabinet

I’ve always had a bit of a “retro style.”

.

Long, straight, boring hair: check.

.

Likes tie dye: check. (This was taken in 2003…what a great year.  I was 13.)

Plays guitar: check. (So even though I still play, this was the most recent photo I could find…it was also from 2003…)

.

Favorite sneakers have tie dye shoe strings and peace signs: check.

.

Still wears bell bottom jeans: check.

.

Likes furniture that looks like this:

How to build a Mid Century Modern Pegboard Cabinet

Double check.

.

(For kicks and giggles, I’ll also let you know that when I was in elementary school, during the summer, spring, and fall breaks, our school system offered “enrichment classes” and I took all the 60’s and 70’s pop culture classes that I possibly could. Oh, and I spent hours decoupage-ing my first guitar case with old Sunday comics. #coolkidforsure)

.

So, I can’t deny that my style leans a lot more toward the retro mid century modern than the wildly popular modern farmhouse. I’m always the weirdo.

.

So when I saw a picture of a super retro, mid century modern style cabinet using pegboard for the doors, I KNEW I had to make one!! PS Danny HATES this thing. Like he wants to set it on fire and watch it smolder. He says it looks like it came straight out of the Brady Bunch house. I don’t see the problem.

.

If you are on Danny’s side and hate it too, it’s cool. I understand. But maybe I can sell you on it because it’s SO STINKING EASY to make. And of course, as always, I’m going to show you 🙂

.

This post contains affiliate links. If you purchase from these links I may receive a small commission at NO extra cost to you. This helps pay to keep this site running and the content free. Thank you for your support! See disclosure policy for more details.

Materials:

(1) sheet ¾” plywood

(1) sheet ¼” plywood

(1) sheet pegboard

(1) 1 ½” diameter x 48” long dowel rod

2 ½” wood screws

1 ½” (or 1 ¼”) nails for nail gun

Wood Putty

Wood Glue

Tools:

Miter Saw

Circular Saw

Kreg Rip Cut (optional)

Table Saw

Drill

Nail Gun

1 ⅛” hole saw

Step 1: Cut the 4 sides of the pegboard cabinet

I ripped my ¾” plywood down to two strips 13” wide using my circular saw and Kreg Rip Cut. If you don’t have a Rip Cut, you could use a long straight edge. Then from those strips, I cut 2 pieces 48” long and 2 pieces 16” long using my circular saw and a straight edge.

.

Using my table saw, I beveled all the ends off all four pieces at 45 degrees. Make sure your bevels are NOT parallel to each other.

Modern Peg Board Cabinet

DIY Modern Cabinet

Step 2: Cut the grooves for the back and sliding doors

You can do this a million ways. You could simply nail ¼” plywood into the back of the piece once it’s assembled (in which case, you can skip this part about the backing grooves), route out the back so that you can “inset” the ¼” plywood on the back, or do it this way. As long as you get the back on somehow, it doesn’t really matter.

.

I used my table saw to cut a ¼” wide and ¼” deep groove about ¼” from the outside edge of the 4 pieces of plywood. A dado blade would work for this, or you can do what I do and cut one blade width, then adjust about ⅛” over and do another to get the ¼” wide part. (Similar to how I make shaker style doors.)

.

This groove will house the ¼” backing when it’s assembled.

.

I made a boo boo on the next step…I accidentally cut part of the groove in the short pieces before I realized I was an idiot and wasn’t supposed to. So the grooves on the front side of the short pieces were NOT supposed to be there.

This is what I SHOULD have done:

Mid Century Modern DIY Cabinet

Then, I set aside the two short pieces and cut two more grooves (¼” wide and ¼” deep) on the opposite edge of the plywood on the long pieces. This is for the sliding doors. I cut the first groove about ⅜” from the outside edge and left about ¼” between that groove and the next one.

.

When you get done, your pieces look like this:

DIY Peg Board Cabinet

Step 3: Cut the backing and peg board

I measured the short side of my long plywood pieces (the length NOT including the beveled ends) and added ½” and did the same with the short pieces. This is the size the ¼” backing should be. Depending on how close you cut your bevels to the ends, it should be about 47” x 15”. I cut my ¼” plywood backing this size.

.

Then I added an inch to the width of the backing and cut a piece of pegboard this size, then cut it in half making sure not to cut through the circles on either side (this just makes it look nicer).

Peg Board Cabinet Doors

Step 4: Assemble the cabinet

Using wood glue and my nail gun, I pieced the cabinet together at the mitered corners. Before adding the last side, be sure to slide your backing and pegboard into the grooves. Also make sure everything is square.

DIY Mid Century Modern Peg Board Cabinet

DIY Modern Peg Board Cabinet

One piece of pegboard should go in the front groove and the other in the groove behind it.

Mid Century Modern CabinetHow to Build a Mid Century Modern Cabinet

I puttied all nail holes and along the corners, then gave it a good sanding.

.

I also used the 1 ⅛” hole saw to drill holes on the top corners of the peg board doors so you can stick your fingers in to slide the doors back and forth. (I actually did this after the next step…so that’s why there are legs in the picture.)

Mid Century Modern DIY Peg Board Cabinet

Step 5: Add legs

I cut my 1 ½” dowel rod into four 9” pieces.

Peg Board Cabinet Legs

Then I marked on the bottom of the cabinet 4” from the outside edge and 2” from the front and back. I held the legs centered on these marks and predrilled through the bottom of the cabinet into the legs. After it was predrilled, I added some glue and used 2 ½” wood screws to secure the legs to the cabinet base.

Peg Board Cabinet Legs

Peg Board Cabinet Legs

Mid Century Modern DIY Peg Board Cabinet


Step 6: Finish…or not

I left mine unfinished. I’m becoming a fan of the natural wood thing. I liked how it looked with this design. However, you could finish it however you’d like. I plan to (whenever I get time…which is probably never) give it a quick coat of polycrylic, but for now I’m still deciding where to put it, so it’s not getting a lot of use, so it doesn’t hurt to stay bare.

.

I wish SO BAD I had one of those weird, psychedelic posters from the 70s to stage this with. But I don’t. I just have this cat picture, and pendant light.

How to build a Mid Century Modern Pegboard Cabinet

.

This would be great to for a modern TV cabinet, but if you do set your TV on top of it, I recommend adding another support in the middle between the top and bottom pieces or maybe a support along the bottom.

How to build a Mid Century Modern Pegboard Cabinet

I love that I didn’t have to pick out hardware for the doors.  I’m too indecisive when it comes to that.  The holes are perfect for just sliding with your fingers.  Ps no hardware (hinges, pulls or knobs) saved me some $$ too.  #heckyes

How to build a Mid Century Modern Pegboard Cabinet

.How to build a Mid Century Modern Pegboard Cabinet

It would also make a great shoe cabinet, or a great place to house your blankets or extra pillows and accessories. Remember those sneakers??

.How to build a Mid Century Modern Pegboard Cabinet

So do you guys love or hate the mid century modern trend?? I’m loving it, but I may be the only one (according to Danny haha).

.

Let me know what you think of my new favorite furniture build in the comments below and be sure to pin it for later!!

How to build a Mid Century Modern Pegboard Cabinet

.

If you are like me and LOVE the mid century modern trend, be sure to check out this MCM dresser, these modern pendent lights, and our modern bathroom remodel.

.

Until next time, happy building!! 🙂

DIY Modern Farmhouse Dining Bench

April 26, 2017 by Shara, Woodshop Diaries

How to Build a DIY Modern Farmhouse Dining Bench

Remember how I built a modern farmhouse dining table a few weeks ago and showed you how to build your own?? Well, that was great and all, but where are you supposed to sit?! What good is a table if there are no SEATS?!

How to Build a Modern Farmhouse Dining Table

Luckily, I FINALLY got around to posting the how to for the matching bench. I know, right? I’m slacking. You’ve had to stand at your new table for WEEKS while I piddled around not posting the matching bench. Just kidding….I know you probably didn’t think twice about the matching bench…until now, right?

.

But, now that you know there’s a matching bench, you totally have to make one!!

.

First, I want to show you a some pictures of it, though, because I think this part is funny.

How to build a modern farmhouse dining bench

The good thing about this bench is it can be used anywhere and made to whatever size you need. It doesn’t even have to be a “dining bench.” I say this because I staged it as an outdoor bench because I don’t have room in my house to set up the table and bench together for nice pictures hahaha. <–that’s the funny part FYI. So, bear with me and use your imagination 🙂

How to build a modern farmhouse bench

How to Build a Modern Farmhouse Dining Bench

How to Build a DIY Modern Farmhouse Dining Bench

Now that you’ve seen it in all its glory on the front porch (I’m still laughing), go grab the how to.

.

I’m sharing the whole tutorial over on Pretty Handy Girl today as a brand new contributor! I am excited to be working with Brittany and several other very talented (how I got grouped in with them I have no idea!) contributors! You’ll see a new post from me over there once a month, so be sure to follow along!

.

I’ll be back here soon to post some more builds I’ve been busy working on AND some more fun spring projects (speaking of spring projects, don’t miss out on these: front door refresh, spring wreath, and DIY louvered planter boxes)…including how we dug up every living thing in the front yard…fun stuff.

.

But, until next time, happy building!! 🙂

DIY Modern Farmhouse Dining Bench

Let’s Take This Outside–A Front Door Refresh Worthy of all the Heart Eyes

April 19, 2017 by Shara, Woodshop Diaries

Spring Front Door Refresh Worthy of All the Heart Eyes

When we moved into our house a little over two years ago, we really never dreamed we would be remodeling basically….everything. To be honest, the house hunting process was so depressing that we were just happy to find a house we liked, could afford, and was in the right location. Paint colors, cabinets and flooring were the least of our concerns.

.

But, two short years later, almost EVERYTHING on the inside looks completely different. You can see plenty of before and afters here.

.

However, the outside….well, it’s been…let’s see…what’s the right word for this?? Um, neglected?? Have you ever wondered why I literally NEVER show you pictures of the outside of our house?? Well, now you know…YIKES!

House Exterior Before

So this spring, we decided it was time to improve the curb appeal. And it started with the front door.  Here’s what we were working with:

Spring Front Door Refresh--Before.I oftentimes refer to my dad as a “bull in a China shop.” I’m starting to realize he passed this onto me. Moving furniture in and out of the house over the last two years has taken a toll on the front door. Scratches and paint chips everywhere. (You can see them all if you zoom in.)  Oh, and you know that tree slice fall wreath I have??

Spring Front Door Refresh

Yeah, it scratched the paint right off the large majority of the oval trim on the top of the door. NICE. Helpful hint…use felt pads if you make one for your door 😉 You’re welcome.

.

So it was time for a fresh coat of paint. But, instead of going with the original red, I wanted to switch things up a bit (surprise, surprise, right?) and chose to do white and navy.

Spring Front Door Refresh Worthy of All the Heart Eyes

.Disclosure: I received paint from Sherwin-Williams as compensation for this post. All views and opinions in this post are my own. However, I would highly recommend Sherwin-Williams paint whether I was compensated or not.

.

Because my door was in pretty rough shape, first I sanded down all the loose paint and places where it had chipped. Then, because I live in west Kentucky, I wiped off the layer of pollen that had started forming on the door (how nice of spring to bring that as a welcome gift…). You want to make sure your door is clean before you paint it. Trust me!

.

Then, I primed the door. If you have a door like mine, you want to paint in this order.  First, the outline of the decorative panels, then the actual panels, then the horizontal parts and last, the vertical side areas.  PS, I could have/should have taped everything off.  Here’s the deal.  The previous owners got paint ALL OVER the vinyl trim around the door.  So instead of replacing all the trim, I carefully primed over the red that was on it.  I was afraid if I left it, it would stick out against the new white.  That’s why I didn’t tape.  Since the vinyl is such a light color, unless you’re looking for it, you don’t notice it.  One day, when we replace the door, we will replace all the trim too.  But not today…

.Spring Front Door Refresh Worthy of all the Heart Eyes

Now to the good part…the COLOR! I was so eager to see the navy on the door, that I painted it first. I used SW Anchors Aweigh (SW9179) for the door and SW Extra White (SW7006) for the trim and sidelights.

Spring Front Door Refresh Worthy of All the Heart Eyes.

Sherwin-Williams recommended using their Snap Dry paint for my door and sidelights because it literally dries in minutes. How did they already know I was the most impatient person in the world?? It’s like they looked deep inside my soul and found my worst personality trait and made a paint just for it. Or, they just knew that everyone is impatient when painting their doors, so they made the perfect solution. That’s a lot more likely…

.Spring Front Door Refresh Worthy of All the Heart Eyes

I painted my door in the same order as the image above–the border of the decorative panels first, the actual panels next, all horizontal areas, then the vertical side areas. I quickly learned that you have to work fast since the Snap Dry paint dries so fast. It’s completely dry within an hour, but mostly dry within minutes.

Spring Front Door Refresh Worthy of All the Heart Eyes.

To avoid “mixing” brush stroke directions with half dry paint, it was easiest (and cleanest) to work in one area at a time, then come back to it after it dried. For example, after I painted the decorative panels on the doors first, I painted the bottom horizontal piece, then the middle, then the top. Then, when it was time to paint the vertical sides, I started at the bottom, because by that time, the paint on the bottom horizontal piece was already dry, so my brush strokes wouldn’t “mix” and make a mess.

.

I used three coats of paint on the door. In between coats on the door, I painted the sidelights and trim with the Extra White. Because everything dried so fast, I was able to complete the whole door in just a few hours.

Spring Front Door Refresh Worthy of All the Heart Eyes.It really helped brighten up my front porch and my new spring wreath looks awesome against this gorgeous color.

Super Easy DIY Spring Wreath that you can make in 5 minutes!

What a difference a little paint makes!! AMIRIGHT?! The navy was definitely a nice change. I’m obsessed with navy lately if you haven’t already noticed.

.Spring Front Door Refresh

I added some more color to the porch with ferns and a new front door mat. You can find the tutorial to build these modern louvered planters here. You may have also noticed that we changed out our door handle (affiliate link to it here).

Spring Front Door Refresh Worthy of All the Heart Eyes.

Oh and remember me telling you about the Snap Dry paint was awesome because of my lack of patience?? Well, it’s also nice because we have a herd of spoiled cats that hang out with us everywhere we go and they like to go inside (but aren’t allowed). Luckily, I could shut the door shortly after painting to keep them outside with me 🙂

Spring Front Door Refresh Worthy of All the Heart Eyes.

They’re our official welcome committee, so it’s best they stay outside anyway 🙂

Spring Front Door Refresh Worthy of All the Heart Eyes.By the way, just in case you’re rough on your front door like me, I’ve moved several pieces of furniture in and out of the house since painting the door and even with the bumps and scrapes, the paint didn’t scratch or chip. WIN!!

.Spring Front Door Refresh Worthy of All the Heart Eyes

So what are you waiting for? Go grab some Sherwin-Williams Snap Dry in your favorite color (like Anchors Aweigh!) and get that door painted in a snap!

.Spring Front Door Refresh Worthy of All the Heart Eyes

Stay tuned for the other changes we are making to the exterior!! You won’t believe the before and afters!!

.

Until next time, happy DIYing!

DIY Louvered Wood Planter Box–An Easy Spring Project

April 10, 2017 by Shara, Woodshop Diaries

DIY Louvered Wood Planters

I hope you guys are ready for a flood of DIY spring projects coming at you in the next several weeks (or months, who knows?).  I’ve never been much on the “seasonal” projects on here (if you haven’t noticed, I have very few), but this year I got spring fever (you can see my new spring wreath here) and I’m excited for outdoor projects and sprucing up my yard.  (This totally has nothing to do with the fact that I can’t fit anything else INSIDE my house at this point, so I’ve taken to filling up the outside….TOTALLY irrelevant…)

. 

So, in case you haven’t noticed, yet, it’s spring outside!!!  And, this makes me both happy and a little sad.  I’m kind of sad because I had to take down my favorite winter snowman wreath (whose name is George…but we won’t get into that right now), and all winter I hoped for snow and winter came and went with only ONE measly inch of snow (that quickly melted away in the same day it fell).  Sad day. 

 .

BUT, now that it is spring, there are flowers and ferns EVERYWHERE.  And that makes me happy because my porch is naked and needs some life on it like ASAP.  See??  It’s shameful…all that nakedness on display for the whole world to see.


So once the ferns come out for spring, I am the first in line to get some. 

 .

Side note…I kill most flowers (I really have no excuse except I forget to water them), so we stick with ferns on the porch 🙂  Any other black thumbs out there??  #blackthumbsanonymous

 .

But, even with just ferns, my porch still seemed naked…and the ferns needed up off the ground…they’re hard to sweep around.  And if it takes extra effort to clean, I’m probably not going to do it. HAHAHAHA no, seriously.

 .

So, I actually built some DIY wood planters (you can see them in the picture above) to house my front porch ferns during the spring and summer months (and my mums in the fall) almost two years ago and never actually shared the how to on here.  I’ve had several compliments on them and questions about them from you guys, and since my mom needed a matching set this year, it was the perfect time to finally share them with you!

 .

You know, just in case you need plants to cover your porch’s nakedness…and are also a super lazy sweeper.  (Or because the inside of your house is too full, so you want to start filling up the outside…which, again…is totally unrelated to my situation…)

 DIY Louvered Wood Planters

I’ve got the whole how to for you on these DIY louvered wood planters over on Build Something so be sure to check it out!!  Build Something (if you don’t already know) has TONS of awesome building plans for you to look through with easy step by step instructions.  So when you’re done with the planters, look around and see what else you can build!


These louvered planters are such a super easy build, and EASILY customizable to whatever size you need.  Mom needed bigger ones than I did (I have a tiny porch), so hers have five side slats, but mine only have four.  I also made her slats about 2” longer than mine, but that’s so easy to modify.

 How to Build DIY Louvered Wood Planter Boxes

And I love the louvered look…it’s simple, but adds some interest. 

. 

Mom wanted her planters painted black, but I like the unfinished wood color.  They look great with ferns and mums.  I’d tell you they look great with anything, but I only have experience with ferns and mums haha…I kill just about anything else.

 How to make Simple Louvered Wood Planter Boxes

So if you’re ready for a super easy weekend project, be sure to get the plans here and add these to your list 🙂

 Easy DIY Louvered Wood Planter Box

And don’t forget to pin for later.  Let me know in the comments what other plants you would put in your planters…or what other plants are okay in the hands of a black thumbed woodworker 🙂  Or just tell me what other spring projects you hope to see on here soon 🙂  I love hearing from you guys!

 How to Build an Easy DIY Louvered Wood Planter Box

Until next time, happy building!

Super Easy DIY Spring Wreath {using Magnolia and Cotton}

April 6, 2017 by Shara, Woodshop Diaries

Super Easy DIY Spring Wreath that you can make in 5 minutes!

Today, I’m taking you on a trip down memory lane. Well, not really.  Today, I’m showing you how to make a super easy DIY spring wreath.  But wreath making was where it all started.  So it’s kind of like memory lane.

.

Years ago, my sister helped me make a Christmas wreath…my very first DIY wreath. Actually, my very first DIY project in general.  It was literally a GIANT glittery ball of deco mesh (is that even still popular anymore??).

I was about as clueless on how to make a wreath when I was done, as I was when I started on it. BUT, it turned out nice, so when spring rolled around, I made a spring version.  What’s so hard about wadding up a bunch of deco mesh

and throwing in some pipe cleaners and hoping and praying the whole thing stays together?

.

Everything. Everything is hard about that.  Deco mesh and I don’t get along anymore.

.

BUT, since then I discovered a game changer. The grapevine wreath form. Literally life changing.

.

If you remember from my 5 minute Christmas wreath post, grapevine wreaths are the absolute best because you just shove stuff in it and when you’re ready to change seasons, you take it out and shove other stuff in. Not only does it save money, but it’s like the easiest and fastest way to make a wreath.  Like. Ever.

.

And it looks like a million bucks!

Super Easy DIY Spring Wreath that you can make in 5 minutes!

For this super easy DIY spring wreath, all you need is:

A grapevine wreath form

Cotton stems (I got mine from Hobby Lobby)

Magnolia leaves (I chopped them from the tree in the yard)

Some ribbon

Monogram or small chalkboard

Floral wire

 Super easy DIY Spring Wreath you can make in 5 minutes!

First, cut your magnolia. You could buy the fake stuff, but the real stuff lasts quite a long time and since we have a small tree, it’s free!  And Danny hates that tree anyway so he was happy to cut it with me.  I took this picture to document how much fun we were having.

 See his face?  It’s got fun written all over it. SO. MUCH. FUN.  He loves me…he just really hates the tree 🙂

.

So anyway, once you have your magnolia cut (you’ll only need a few stems), then, stick a stem of your magnolia into the grapevine wreath form like the picture below. Kind of weave the magnolia stem in and out of some of the grapevine.  That way it will stay “stuck” better.

.

Then stick some more magnolia in like the picture below so that the stem from the first piece and this piece kind of meet in the middle of the side of the wreath.  Keep adding some outward until you get it as full as you want.

.

Next, add the cotton. You could use something else besides cotton here if you wanted.  I just had cotton leftover from winter and thought it would be cute (and didn’t have to buy anything else).  Stick one stem in beside each piece of magnolia so that you have one on top and one on bottom.

Then, add the other two stems of cotton. You literally just shove things into the form, weaving in and out so they stay in place better. 

You can arrange however you want, but I just fluffed and worked my way out as I went.

.

Next, add a monogram or little chalkboard. Or whatever decorative item you choose to the “empty” side of the wreath.

Finally, you can add a bow on the side between the top and bottom set of magnolia and cotton. You can check out my 5 minute Christmas wreath for one way to make a bow or my super easy Christmas swags for another way to make a bow.

   How to make a Super Easy DIY Spring Wreath in 5 Minutes!

And that’s it! Hang her up and admire 🙂How to make a super easy DIY Spring Wreath in 5 minutes!How to make a super easy DIY Spring wreath in 5 minutes!How to make a super easy DIY Spring Wreath in 5 minutes!

It literally takes 5 minutes and a few bucks. AND when you’re ready to change it up, pull them out and stick some other fake flower (or real flower) stems in the form.  Easy peesy.  Now pin this thing for later 🙂How to make a super easy DIY Spring Wreath in 5 minutes!

PS stay tuned for plenty more spring projects coming soon. I have been BUSY BUSY BUSY working on them so you will not want to miss the excitement!

.

Until next time, happy DIYing 🙂

Pottery Barn Inspired DIY Entryway Storage Bench–#PlywoodPretty Challenge

April 1, 2017 by Shara, Woodshop Diaries

Pottery Barn Inspired DIY Entryway Storage Bench--#PlywoodPretty Challenge

You guys!! I’m so excited to be participating in Remodelaholic’s #PlywoodPretty Challenge along with several other super talented bloggers!  (How I got included in a list of super talented bloggers, I’m still not sure…)  So, what’s the #PlywoodPretty Challenge?  Basically, Remodelaholic challenged us to make something…ANYTHING…from plywood and you won’t believe the super cool ideas we all came up with!  Who knew you could do so much with a simple sheet of plywood?!

.

You can scroll down to check out links to all the awesome projects (and videos!!) from the image above, but first, let me show you which one I came up with for the challenge.  It’s a DIY Entryway Storage Bench!

Pottery Barn Inspired DIY Entryway Storage Bench--#PlywoodPretty Challenge

And, what do you know, it’s also another knock off project. Do you guys recognize this entryway storage bench from the Pottery Barn catalog??  I have no shame in knock offs.  Knock off purses, knock off clothes, knock off furniture and decor.  (If you’re a fan of the knock off, too, be sure to check out some of my other knock offs like the PB Grinch Pillow and the Ballard Inspired Pantry Cabinet.) #noshame #imcheap

.

But, I mean, what’s there to be ashamed of when you spend a tenth of the price tag to make your own version and it looks EXACTLY. THE. SAME?? For real.

.

So, I’m going to show you how to make this DIY entryway storage bench “tutorial style”, as usual, but this time, I have an extra special surprise for you. I made my first “build” video for this project (check it out below)!!  I’m sure it’s terrible, so take it easy on me in the comments 🙂  I’ll get better…I hope… (PS Danny says I’ve got to stop saying “super” so much…do you guys agree??)

.

Now, let’s do this thing.

.

This post contains affiliate links for your convenience.  If you purchase from one of these links, I may receive a small commission at NO extra cost to you.  Please see disclosure policy for more details.  Thank you for supporting this site so I can continue to bring you great content!

Materials:

1 sheet ¾” plywood (I used birch)

¼ sheet ¼” plywood

2 pair 16” ball bearing drawer slides

Edge Banding (optional)

1 ¼” pocket hole screws

Tools Needed:

Circular saw

Kreg Rip Cut (optional, but helpful)

Table saw (also optional, but helpful)

Miter saw

Kreg Jig for Pocket Holes

Drill

Sander (again, optional, but who in their right mind wants to hand sand everything?!)

Step 1: Cut plywood down to manageable pieces

I’m scrawny.   The first thing I do when I get plywood is cut it down to pieces I can manage on my own.  Those are pretty small pieces haha.

.

You can make this whole bench from a single sheet of ¾” plywood, but you have to be smart on how you cut it. Here’s a diagram to help you out.  You’ll cut in the order of the rainbow colors.  Since I just realized how confusing that last sentence is, let me make it a little more clear: red first, orange second, then yellow, green, blue, and the white part remaining will be left to cut to fit the openings for the drawer fronts.

PlywoodPretty Challenge Diagram

I used my circular saw to remove the 12” strip first, then used it to cut off the 26” and 33” pieces. I cut the rest on my table saw, but you could use a circular saw and a straight edge instead.  (You can see me cutting these in the video below 😉 )

Step 2: Make the side panels

After I cut the 26×36 piece from the plywood, I ripped it in half using my table saw (to make two 26×18” pieces). Make sure both halves are the same width!!

Pottery Barn Inspired DIY Entryway Storage Bench--#PlywoodPretty Challenge

Once the panels were cut, I made a mark 8” from the top on both pieces. That’s where the top of the bench seat will be attached.  I cut out a decorative curve shape on the two side panels making sure not to cut below the 8” line.  I tried to use some paint/stain cans to help me draw nice curves, but ended up mostly free handing it.  (You can see this in the video below as well 🙂 Can you tell I’m really pushing you to watch it??)

..

Once the design was drawn, I used a jig saw to cut out the shape on each piece.

Pottery Barn Inspired DIY Entryway Storage Bench--#PlywoodPretty Challenge

I also cut out a design along the bottom of each side panel making sure not to cut further than 3 ½” higher than the bottom.

.

The designs are totally optional, they just add some character to the bench.  But after you cut them, be sure to sand the crap out of them to smooth everything out 🙂

Step 3: Cut and attach the bench seat

I ran the 33×36” through the table saw just like the side panels to make two 33×18” pieces.

Pottery Barn Inspired DIY Entryway Storage Bench--#PlywoodPretty Challenge

Once they were ripped to size, I drilled pocket holes in both ends of each piece and attached them to the side panels with pocket hole screws.

Pottery Barn Inspired DIY Entryway Storage Bench--#PlywoodPretty Challenge

I attached the bottom piece 3 ½” from the bottom of the side panel and attached the top bench seat piece 13” above the bottom.

Pottery Barn Inspired DIY Entryway Storage Bench--#PlywoodPretty Challenge

Pottery Barn Inspired DIY Entryway Storage Bench--#PlywoodPretty Challenge

Step 4: Add the bench seat divider

I used the blue piece from the plywood drawing and cut a piece of 13×18 to fit between the top and bottom bench seat. I drilled pocket holes and attached using pocket hole screws making sure it was perfectly centered.

Pottery Barn Inspired DIY Entryway Storage Bench--#PlywoodPretty Challenge

Pottery Barn Inspired DIY Entryway Storage Bench--#PlywoodPretty Challenge

Step 5: Add back rest

I cut the 7 ½” green piece from the plywood diagram down to 33” long and drilled pocket holes on both ends and along the bottom. I attached it to the bench sides and top seat using pocket hole screws like the picture below.

Pottery Barn Inspired DIY Entryway Storage Bench--#PlywoodPretty Challenge

Step 6: Add Drawers

This step is optional. If you wanted, you could leave this open for storage, or use storage baskets.  I liked the large drawers from the original Pottery Barn version, though, so I made drawers.  You can see my post here about how to make drawers.

.

Basically, I used the table saw to cut grooves in the 12” red piece from the plywood diagram above to accommodate ¼” plywood drawer bottom. Once the groove was cut, I trimmed it down to size to make the drawers using my miter saw.  I attached the drawer back to the drawer sides using pocket hole screws.

.

I used the white part of the plywood from the diagram to trim down two drawer fronts to fit the openings in the bench. Depending on how accurate your cuts are, it may vary slightly, so you will need to determine the size.  I cut grooves in the drawer fronts just like I did with the drawer sides and attached them to the drawer body using pocket holes and screws.

.

Then I installed ball bearing drawer slides and attached the drawers.  You can see more details on this process in the video 🙂

Pottery Barn Inspired DIY Entryway Storage Bench--#PlywoodPretty Challenge

Step 7: Finish

I added iron on edge banding (which is the devil if you don’t already know) to cover the plywood edges. I need a lot of practice with attaching it, but it looks good once it’s on (just don’t look at mine too close).  I puttied and sanded as needed, then stained the entire piece in Minwax Early American.  (You can see all this in the video below, too!!)

.

I attached these large chest handles (that I spray painted black) to the drawers.  I need to add a few coats of polycrylic, but first, I had to bring it inside to take pictures…because, you know….priorities.

Pottery Barn Inspired DIY Entryway Storage Bench--#PlywoodPretty ChallengePottery Barn Inspired DIY Entryway Storage Bench--#PlywoodPretty Challenge

Not bad for a knock off, huh? Looks just like the real deal…AND it’s not even MDF like the original.   Plywood > MDF every time.

Pottery Barn Inspired DIY Entryway Storage Bench--#PlywoodPretty Challenge

Pottery Barn Inspired DIY Entryway Storage Bench--#PlywoodPretty Challenge

Pottery Barn Inspired DIY Entryway Storage Bench--#PlywoodPretty Challenge

I’m loving these huge storage drawers. They are perfect for winter gloves, scarves, extra shoes, purses, whatever you want to shove in there right before guests come over so they don’t know that your house is really a train wreck 🙂  Not that I have any experience with that.

Pottery Barn Inspired DIY Entryway Storage Bench--#PlywoodPretty Challenge

So what do you think??   Don’t forget to check out my first ever build video for this project and all the other super awesome projects in the #PlywoodPretty Challenge below!!  Tell me what you think in the comments!  But, quick! Before you do that, don’t forget to pin this 🙂

Pottery Barn Inspired DIY Entryway Storage Bench--#PlywoodPretty Challenge

Now, find even more inspiration from these awesome #plywoodpretty projects!  This is just the start to Remodelaholic’s #PlywoodPretty week, so go join in on the fun all week long and link up your own projects!

outdoor sectional sofa | Remodelaholic
mini barn door for a crawl space | The Cofran Home
handlettered “hello” sign | Lemon Thistle
easy TV tray | Practical and Pretty
rolling storage drawers | Happy Go Lucky
mid-century modular lego table | The Created Home
farmhouse sign | Our Crafty Mom
mid-century daybed | Paper Daisy Design
produce bins | Anika’s DIY Life
plywood accent wall | Diva of DIY
kids chairs with storage | Our House Now a Home

.

And find all the videos in the playlist:

And my video here:

Until next time, happy building 🙂

How to Build a Modern Farmhouse Dining Table

March 27, 2017 by Shara, Woodshop Diaries

How to Build a Modern Farmhouse Dining Table

Have you guys ever noticed that I have never posted a “farmhouse dining table” on here before (besides this one that doesn’t count because it was my very first build and I didn’t have a clue how to write a tutorial about it)?

.

I’ve posted my mom’s X-base kitchen table, and some coffee tables and end tables, but never a “farmhouse dining table.”

.

It’s not that I’ve never made one.  I’ve actually made a few, but EVERYONE has one on their blog, so I figured I didn’t need to flood Pinterest with another identical dining table.  Plus, they’re all made the same.  Add an apron to some legs, add supports, add top.  Ta-Da! You’re done.  I had nothing to add to the already popular table design.

.

But, what do you know, here I am posting a farmhouse dining table.  But this one’s different.  This one’s a “modern” farmhouse dining table.  “MODERN.”

How to Build a Modern Farmhouse Dining Table

PS Are you guys imagining me finger quoting all these things I’m putting “” around??  If I do one thing too much, it’s quotes…that or say the word “super.”  There I go with the quotes again.  PSS stay tuned THIS SATURDAY for a “super” (<–see what I did there??) exciting post that I can’t wait to show you.  It’s got my first ever build video where I say “super” eleventy billion times in 4 minutes and Danny thinks the background music is hilarious.  So it’s sure to be a great time 🙂  Keep your eyes out for that.

.

Anyway, back to the table.  So here’s how to build a “modern” farmhouse dining table.  And, in case you are wondering what defines a modern farmhouse table, I call it modern because it’s a little bit more straight lined, and clean than a regular farmhouse style.  In other words, I don’t have a clear definition 🙂 hahaha.  But here we go.

...

This post contains affiliate links.  If you purchase from one of these links, I may receive a small commission at no extra cost to you.  This helps keep this site’s content free.  Please see disclosure policy for more details.  Thank you for supporting this site!

Materials Needed:

(2) 4x4x8

(4) 2x4x8

(4) 2x10x8

2 ½″ pocket hole screws

4″ wood screws

Wood glue

Wood Putty/Filler

Tools Needed:

Table Saw (optional, but recommended)

Circular Saw

Miter Saw

Kreg Jig for Pocket Holes

Pipe Clamps

Drill

.Sander (optional, but who in their right mind wants to hand sand?!)

Husband to hold pieces while you attach them (sorry, I don’t have an Amazon link to that)

.

Side Note:  Like I said before, most of the “farmhouse dining tables” are built the same way.  You attach the legs together with the apron, then add supports, then the top.  This table is built kind of backwards.  We will build the top first, then attach the legs, then add the supports underneath.  So are you ready?  Let’s do the thing.

Step 1:  Build the top

Okay, so we are doing this a little backwards, right?  But trust me, it’s better this way.  I give you the whole run down here on how I build table tops.  There are countless ways to do it, but that is what I do.

.

For this table, I squared off the edges of 4 pieces of 2x10x8 on the table saw and glued them together.  Once the glue was dry, I trimmed the top down to 70″ long using my circular saw.  The final table ended up being about 7 foot long.  If you want a longer or shorter table, adjust this length.  I used 70″.

You could attach the boards using pocket holes and screws, or biscuits, whatever.  Just make a top.  After trimming, my top was slightly under 36″ wide and 70″ long.

.

Once it was trimmed, I sanded the snot out of it.  I used my belt sander and got all the boards level and smooth.  Once you have your top good to go, then we move to the legs.  Pause for glamour awkward shot of me with belt sander.

Okay, and resume.

Step 2:  Build the “Side Stretchers”

Anyone else out there like “what the heck’s a side stretcher?”  I don’t know what to call them, but it’s the legs and end piece.

.

Cut four 4×4 legs to 30″ long.  That’s the easy part.

.

Now, measure the width of one end of your table top.  I told you mine was slightly under 36″.  You want exact width…so go to the 16th or 32nd…whatever your tape measure will read.  Cut a piece of 2×4 whatever length needed to get it plus two of your 4x4s to be exactly that width.  For example, if your top is 36 ⅛″ wide, and two of your 4x4s together are 7″, then cut your 2×4 to 29 ⅛″.  I planed my boards, so my measurements were different.  But, whatever you do, when you assemble this, you want it to match the width of your table top.  Do both sides separately to make sure they match each side of the top perfectly.

How to Build a Modern Farmhouse Dining Table

Once you cut your 2×4, drill 1 ½″ pocket holes in each end.

How to Build a Modern Farmhouse Dining Table

Attach the 2×4 to the legs using 2 ½″ pocket hole screws.

How to Build a Modern Farmhouse Dining Table

How to Build a Modern Farmhouse Dining Table

Step 3: Attach the legs to the top

This is where it helps to have the husband, or wife, or anyone willing to help that has a little strength and two hands.

.

Drill 1 ½″ pocket holes into the ends of the top like shown below.  I did two per board.  These are basically just to hold everything together until the glue dries, so one or two, whatever you want to do.

Do both sides separately to make sure they match each side of the top perfectly.

Then, add glue along the end of the top and screw it into the side stretchers using 2 ½″ pocket hole screws.

How to Build a Modern Farmhouse Dining Table

It was easiest when placed on the ground sideways and one person held the top vertical and the other one drilled into the side stretcher making sure everything was flush on the top.

.

Do both sides.  Here’s the view from underneath.

Do both sides separately to make sure they match each side of the top perfectly.

Step 4:  Add the supports

This is the part that usually goes first, but because I like to be difficult, I’m doing it last 🙂

.

With the table upside down, cut four pieces of 2×4 to fit between the legs.  You’ll have two long and two short.  Cut to fit these so they are snug and the legs are square to the top.

.

Drill 1 ½″ pocket holes in each end of these pieces and screw them into the legs using 2 ½″ pocket hole screws like shown.  I attached mine 1 ½″ from the table top edge, but you could do closer or further from the edge.  As long as it’s consistent, it doesn’t matter.

Do both sides separately to make sure they match each side of the top perfectly.

Do both sides separately to make sure they match each side of the top perfectly.

After the supports were in, I used long wood screws (4″) to screw the supports to the top.  You could do pocket holes and screws if you wanted.

.

Lastly, once the supports along the sides were installed, I added two more support pieces between the two long side supports and screwed them in with pocket holes and screws, then screwed them to the top using 4″ screws as well.  I flipped the table over before I got the pictures.

Do both sides separately to make sure they match each side of the top perfectly.

Step 5: Finish

I recruited Danny again to help me flip the table over and puttied any cracks and sanded down any high spots.

Do both sides separately to make sure they match each side of the top perfectly.

Once the sanding was finished, I stained it in Minwax Early American and finished it off with Minwax Polycrylic.

.

This is actually built for a friend of a friend, so it’s not mine, but I had to get some pictures, so I staged it in the only place in the house I could fit another seven foot table haha.  So just imagine it’s in the middle of a beautiful kitchen, not shoved on the only blank wall I can find in my house 🙂

How to Build a Modern Farmhouse Dining Table

How to Build a Modern Farmhouse Dining Table

How to Build a Modern Farmhouse Dining Table

How to Build a Modern Farmhouse Dining Table

How to Build a Modern Farmhouse Dining Table

So what do you guys think of the “modern” farmhouse dining table?  I guess it’s about time I finally posted one, huh??  Do you guys like this style and design?

.

So, I’m really excited about the video that will be posted on Saturday, so be sure to stay tuned for it.  Plus the build on it is spectacular!  You won’t want to miss it!

.

But, in the mean time, don’t forget to pin this build for later, because it’s pretty spectacular, too! 🙂

How to Build a Modern Farmhouse Dining Table

Until next time, happy building!! 🙂

DIY Ballard Designs Knock Off Pantry Cabinet

March 13, 2017 by Shara, Woodshop Diaries

DIY Ballard Designs Knock Off Pantry Cabinet

Want to know how to save $1800 in one weekend?  It’s so easy!  You don’t have to pick up a side job.  You don’t have to create a new budget.  You don’t have to clip a bazillion coupons for random things at the grocery store.  You don’t even have to sell a body part…or a body fluid.  (Everyone together now….) EWWWWWWWW.

.

All you have to do is build this cabinet/pantry/linen storage.

DIY Ballard Designs Knock Off Pantry Cabinet

Now, of course, you’re wondering…how’s that supposed to save me money?  Well, first off, does it look familiar?  Have you guys seen it possibly HERE??  With it’s shiny, flashy, super inflated price tag of (cough cough…I’m choking on my coffee over the insanity of the number I’m about to type) $1,900??  NINETEEN HUNDRED DOLL HAIRS.  Also known as ONE THOUSAND NINE HUNDRED DOLLARS.  Oh, plus shipping…and the extra $30 handling fee for it’s enormous size.  What the?!

.

You guys, I just made it for about $100.  #howboutdat?

.

Let me show you how.

.

This post contains affiliate links.  If you purchase from these links, I may receive a small commission at absolutely no extra cost to you.  This helps keep this site’s content free.  Thank you for your support.  Please see disclosure policy for more details.

.

Due to space constraints, my cabinet is slightly smaller than the original.  The following instructions are easy to modify to make larger if desired.  Final dimensions of my finished cabinet are 12 ½″ deep, 73″ tall and 24 ½″ wide.

Materials Needed:

1-2 sheets ¾″ plywood (this used one sheet, but if you want any larger, you will need two)

1 sheet ¼″ plywood

(1) 1x4x8

(1) 1x3x8

(2) 1x2x8

(1) 1x6x8

Cove molding (one 8 foot stick optional)

Half round molding (four 8 foot sticks optional)

6 hinges

2 door pulls (I got these from D. Lawless Hardware)

Wood putty/filler

Wood glue

1 ¼″ pocket hole screws

Shelf pins

2 magnetic door stops

Tools needed:

Circular saw

Miter Saw

Kreg Jig for Pocket Holes

Kreg Shelf Pin Jig (optional)

Drill

Nail Gun

Jig Saw

Step 1: Build the carcass

Seriously I LOVE building cabinets because you get to say carcass all the time and it’s so fun.  Try it.  CAR-CASS.  Or, if you’re like my mom with the thick southern accent, CAR-CUSS.  Oh, hey mom, thanks for reading 🙂

.

Okay, so…I ripped the plywood using my Kreg Rip Cut down to two 11″ strips.

DIY Ballard Designs Knock Off Pantry Cabinet

Then I cut both strips into a 23″ piece and a 73″ piece.  I drilled pocket holes in the bottom of the two 23″ long pieces.

DIY Ballard Designs Knock Off Pantry Cabinet

DIY Ballard Designs Knock Off Pantry Cabinet

I marked 3 ¼″ from the bottom of the two 73″ pieces and drew a line.

DIY Ballard Designs Knock Off Pantry Cabinet

I screwed the 23″ pieces onto the top of the 73″ pieces and at the bottom.  But at the bottom, I lined the top of the 23″ piece with the line I drew at 3 ¼″.

DIY Ballard Designs Knock Off Pantry Cabinet

That gave me a carcass.

DIY Ballard Designs Knock Off Pantry Cabinet

Then, I stapled a piece of ¼″ plywood onto the back of the opening.

DIY Ballard Designs Knock Off Pantry Cabinet

Step 2: Add face frame

To make the face frame, I cut two pieces of 73″ long 1×2 for the sides.  I cut two pieces of 1×4 at 21 ½″ long for the top and bottom, and one piece of 1×6 at 21 ½″ for the arch.

DIY Ballard Designs Knock Off Pantry Cabinet

I screwed everything together like the picture shows above with pocket holes and screws.  Just a note: I screwed the top 1×4 in 1 ½″ from the top.  It’s a long story.  You could do this, too, or use a 1×6 instead of a 1×4 OR you could use a 1×10 to replace both these boards OR a 1×12.  It really doesn’t matter as long as you have something up there to attach the top of the face frame together and is tall enough to make an arch.

.

Before I screwed the arch piece in, I used a large metal barrel to trace the arch and cut it out with a jig saw.

.

Once the face frame was screwed together, I just nailed it onto the front like the picture shows below.

Step 3: Cut the doors

For the doors, I cut a piece of the remaining plywood to be ¼″ narrower than the door opening and about ⅛″ shorter the tallest part of the arch.  I placed it on the inside of the cabinet and traced the shape of the face frame arch onto the piece and cut with a jig saw.  You can see the piece I ended up with on the right side of the picture.

DIY Ballard Designs Knock Off Pantry Cabinet

Then I ripped this piece exactly in half to make two doors.

DIY Ballard Designs Knock Off Pantry Cabinet

At this point, I attached the doors to the cabinet with three hinges per door to make sure they fit.  Adjust as needed.  You may have to sand the arches to get them to match as good as possible.  I sanded A LOT.  I’m not perfect on a jig saw 🙂  Just sand slowly so you don’t make anything misshapen.

Step 4: Add Trim

I added trim to the doors and the cabinet itself.  Once I made sure the doors fit, I removed them and cut to fit half round molding on the front.  I used wood glue and held it in place until the glue was dry with masking tape.

DIY Ballard Designs Knock Off Pantry Cabinet

DIY Ballard Designs Knock Off Pantry Cabinet

The weight of a shop cat helps hold it in place too…silly shop buddy.

.

While the glue dried, I nailed pieces of 1×3 to the top and bottom.  I cut all these pieces to fit.  Make sure trim on the sides are flush.  I added a piece of cove on top of the bottom 1×3 and on the bottom of the top 1×3.  I also added a strip of half round across the joint in the top of the face frame.  You can see all this in the pictures below.  Putty and caulk around the trim as necessary.

DIY Ballard Designs Knock Off Pantry Cabinet

DIY Ballard Designs Knock Off Pantry Cabinet

Step 5: Add Shelves

I used my Kreg shelf pin jig to drill shelf pin holes for adjustable shelves.  If you don’t want adjustable shelves, you can use pocket holes and screw shelves into the sides for stationary shelves as well.

DIY Ballard Designs Knock Off Pantry Cabinet

I used the remaining piece of plywood to cut three shelves to fit in the cabinet.  I made them about 9″ deep and ¼″ shorter than the width of the inside of the cabinet.

.

I used these shelf pins to hold the shelves in place.

DIY Ballard Designs Knock Off Pantry Cabinet

Step 6: Finish

I primed the entire cabinet with Kilz water based primer, then painted the inside of the cabinet with Sherwin Williams Extra White and the outside with Sherwin Williams Dorian Gray.  Once the paint was dry, I put the doors on and realized I had put the top part of the half round too far down.  (commence horror movie sound effects!!)

DIY Ballard Designs Knock Off Pantry Cabinet

NOOOOO!  So I spent two days convincing myself it was okay, then one day I came home from work hangry (you know….hungry and angry) and I ripped them off.  Which was a mess.  And I made it taller and puttied and repainted.

DIY Ballard Designs Knock Off Pantry Cabinet

So don’t be like me.  Get it right the first time, or just leave it alone.  Five sessions of puttying later, we were good to go.  FIVE TIMES.

.

PS totally tried to bend the half round.  It just wasn’t working out.  I tried kerfs…kept breaking little pieces out of the molding.  Tried soaking in water and bending, broke three pieces.  Tried bending by hand, cried.  So I left it straight.  I don’t think it looks bad straight.  Next time, I may try thinner molding though.  The ¾″ stuff just wasn’t going to budge.

.

Oh and PSS, huge thanks to D. Lawless Hardware for these AMAZING door pulls.  This cabinet needed something long and sleek and these were the perfect fit.  I added these and the magnetic catches after the paint was dry and put the doors back on.

DIY Ballard Designs Knock Off Pantry Cabinet.

Anyway, when all was said and done, it looked like this:

DIY Ballard Designs Knock Off Pantry Cabinet

On Ballard Designs website, they had a whole article on what their cabinet could be used for.  Craft cabinet, kitchen pantry, linen closet.  Pretty much anything.  Oh and side note, I made this cabinet so shallow (due to space constraints) that it wasn’t practical to add the slide out drawers, so I only did shelves.  However, these plans are super easy to customize to make your cabinet deeper and then you could add drawers like the original.

DIY Ballard Designs Knock Off Pantry Cabinet

DIY Ballard Designs Knock Off Pantry Cabinet

DIY Ballard Designs Knock Off Pantry Cabinet

You could also add more shelves in here if you wanted as well.  It’s pretty versatile and can be customized for whatever your needs are.

DIY Ballard Designs Knock Off Pantry Cabinet

So, what do you think?  How about that for saving $1800 in a weekend?  For reals.

.

Do me a huge favor and don’t forget to pin if you plan on tackling this knock off this weekend.  Or, you know, if you just liked the project.  Oh and let me know what you spend your extra $1800 on 😉

DIY Ballard Designs Knock Off Pantry Cabinet

Until next time, happy DIYing! 🙂

DIY Entryway Cabinet–And A Giveaway!!

March 7, 2017 by Shara, Woodshop Diaries

DIY Entryway Cabinet or Shoe Cabinet with a super cool door design!

When I was in college, x years ago (x=more that I care to think about), I got a degree in math.

.

I’m convinced that if you are good at college math, you would probably also make a decent lawyer. College math classes are basically writing long explanations about how this random fact is somehow related to this random fact and that somehow proves this statement (they’re called “theorems”).   SO. MUCH. FUN.

.

Anyway, I feel like that’s what’s going on today. I need to explain how getting a new watch meant I needed a new cabinet.  I promise this all makes sense.  Stay with me.

.

When Jord Wood Watches sent me this awesome new watch, I was ecstatic! I mean, what better watch for a woodworker than a WOOD WATCH?!

DIY Entryway Cabinet or Shoe Cabinet with a super cool door design!

But, I’m not a big jewelry and accessories wearer. So I don’t have a big collection with a fancy storage box.  I literally only have a wedding ring.  And now a watch haha.  Usually, my wedding ring stays on my nightstand in its original box, but when I put this pretty wood watch storage box (that comes with the watch!!) there too, it seemed way too crowded.

DIY Entryway Cabinet or Shoe Cabinet with a super cool door design!

Luckily, I have this random space in my bedroom that’s almost like a “bedroom foyer” that was begging for SOMETHING pretty to cover that boring wall. Plus, it would be nice to have a designated spot (that wasn’t my crowded nightstand) for my glasses, ring, and watch.

.

So that’s how getting a new watch inspired me to build this:

DIY Entryway Cabinet or Shoe Cabinet with a super cool door design!

So if you need a cool place to put your awesome new watch (because I’ve partnered with Jord to host a giveaway at the bottom of this post!), I’ve got you covered with the how to 🙂

.

PS, about that giveaway…here’s the deets: You can enter the giveaway at the bottom of this post.  Everyone who enters will receive a code for $25 towards the purchase of a new super awesome wood watch, but one lucky winner will get a $100 code!  The giveaway ends at midnight on March 26th.  All codes will expire May 31st.

.

Now, onto the building stuff!

.

This post contains affiliate links for your convenience.  Please see disclosure policy for more details.  Thanks for supporting this site and the brands that support this site!

Materials needed:

(3) 2x2x8

(2) 1x2x8

2x8x8

¾” plywood

¼” plywood or other backing material

1 ¼” pocket hole screws

2 ½” pocket hole screws

4 small hinges

Knobs/pulls as desired

Wood glue

Wood putty

Tools needed:

Circular saw (or table saw) to cut down plywood

Miter Saw

Kreg Jig for pocket holes

Scroll or jig saw (optional)

Drill

Staple gun

Step 1: Build the sides of the cabinet

I cut 2×2 legs at 38 ½” long and tapered two of them using my miter saw. I also ripped ¾” plywood to a 9” wide strip and cut two pieces at 33” long.

DIY Entryway Cabinet or Shoe Cabinet with a super cool door design!

Then I cut four 1x2s at 9” long and drilled pocket holes into each and attached two legs together with them and 1 ¼” pocket hole screws like the picture below.

DIY Entryway Cabinet or Shoe Cabinet with a super cool door design!

Then I drilled pocket holes on the sides of the ¾” plywood panels like shown below.

DIY Entryway Cabinet or Shoe Cabinet with a super cool door design!

I placed these between the 2×2 legs and attached to the legs with 1 ¼” pocket hole screws.

DIY Entryway Cabinet or Shoe Cabinet with a super cool door design!

Step 2: Attach the two sides of the cabinet

When I ripped the 9” strip of plywood from step one, and cut two pieces of 33” from it, it left me with a 30” piece. I drilled pocket holes in the ends of it and attached it ¾” from the bottom of the side panels.

DIY Entryway Cabinet or Shoe Cabinet with a super cool door design!

Then I cut 30” pieces of 1×2 and attached at the top front and back using pocket holes and screws.

DIY Entryway Cabinet or Shoe Cabinet with a super cool door design!

I cut another 1×2 and attached at the bottom in the back using pocket holes and screws.  And finally, added a 2×2 on the front at the bottom like the picture below.

Step 3: Add the drawer

I cut one more piece of 1×2 and attached it between the two front legs using pocket holes and screws. You can make your drawer as deep or as shallow as you want.  Just attach this about ¼” further down than you want your drawer height to be.

You can see my post here about how to make a drawer.

.

Because this cabinet is so narrow, I didn’t use metal drawer slides. I screwed some scrap 1x pieces into the sides for the drawer to slide on.

DIY Entryway Cabinet or Shoe Cabinet with a super cool door design!

Step 4: Make doors

I wanted a little different design on these doors.  I cut a piece of ¾″ plywood slightly smaller (¼” shorter and about ⅜” narrower) than the opening for the doors.  Then I ripped it in half.

DIY Entryway Cabinet or Shoe Cabinet with a super cool door design!

I used ¼” plywood and a scroll saw to cut out a ring for the middle of the design. Then I ripped ¼” pieces of 2x material.  You could cut off a piece of the 2×8 you will use for the top and do this.  In hindsight, you could also have ripped 1 ½” wide strips of the plywood as well.

DIY Entryway Cabinet or Shoe Cabinet with a super cool door design!

Then I laid it out on the door and pieced it all together and cut to fit on the door. DON’T ATTACH ANYTHING YET. I marked where I needed to trim the pieces that meet the circle and cut the curve on the scroll saw.  Trust me, this won’t be perfect (that’s what putty is for), but I tried to get it to fit as best I could.

.

Once it was dry fitted together and fit the size of the door, I glued all the joints then stapled them (NOT TO THE DOOR YET).  I clamped them, too, until the glue dried.  Then I puttied the crap out of them and sanded.

.

Once the ¾″ plywood was stained and the design piece was painted (see step 7), I glued the two together and attached them to the cabinet with small brass hinges.

Step 5: Add a backing

This part is easy. Just cut a piece of ¼” plywood to fit on the back and staple it on.

DIY Entryway Cabinet or Shoe Cabinet with a super cool door design!

Step 6: Make a top

I don’t have pictures of this (OOPS), but you can see how I make tops here.

.

I made my top 13×30. You can make this from two 30” pieces of 2×8 and trim it down to 13” wide.  Once everything was finished, I attached the top by screwing 2 ½” screws through the front top 1×2 into the top and 1 ¼” screws through the back top 1×2 into the top.

Step 7: Finish

I stained the top, drawer front, and back of doors with Minwax Puritan Pine, and painted the cabinet and door design in SW Naval.

DIY Entryway Cabinet or Shoe Cabinet with a super cool door design!

I really liked how my new watch matched the cabinet colors.

DIY Entryway Cabinet or Shoe Cabinet with a super cool door design!

I’m super into navy and light toned wood. You can find the same color scheme in my latest bathroom vanity build and my office redo from last year.

DIY Entryway Cabinet or Shoe Cabinet with a super cool door design!

So, it’s no surprise I wanted a navy and wood watch, right?

DIY Entryway Cabinet or Shoe Cabinet with a super cool door design!

And, now I’ve got a super cute place to house it, too!

DIY Entryway Cabinet or Shoe Cabinet with a super cool door design!

Hey, fun fact…when I got my watch, I saw that it was made ON MY BIRTHDAY!!!! WHAT?!  Danny told me I was the only one that thought this was THE coolest thing ever.  But, for reals…it is.

DIY Entryway Cabinet or Shoe Cabinet with a super cool door design!

What do you guys think??

DIY Entryway Cabinet or Shoe Cabinet with a super cool door design!

Don’t forget to enter the giveaway here ->>(GIVEAWAY!!)!! A huge thank you to Jord Wood Watches for providing me with my new watch and for hosting this awesome giveaway!! Don’t forget, either way, you get a $25 credit just for entering, so be sure to get in on that!

.

Until next time, happy building 🙂


Watch Gift Ideas

DIY Baby Gift Idea–Ultrasound Picture Frame

March 1, 2017 by Shara, Woodshop Diaries

DIY Personalized Baby Gift Idea--Ultrasound Frame

THIS IS NOT A PREGNANCY ANNOUNCEMENT.

.

I had to make sure this was clear from the beginning.  Since the day I got married, everyone (except me) keeps hoping that announcement is coming.  However (sorry mom…well, sorry, not sorry), I hate to disappoint (really, I don’t), but this is not it. 🙂

.

But, I have a friend who is expecting her first little girl very soon and, of course, you know me…I’m like what can I make for a baby?!!

.

Wooden diapers??  Probably not very practical.

.

A crib?  Let’s not even talk about shipping costs for that thing.

.

Personalized picture frame for the ultrasound??  Okay, now we are talking.

.

And this is something that I honestly think could go one of two ways…this is either super creepy, or super cute.  SOOOOO, you tell me 🙂

.

Let me explain how I made it, then at the end, you tell me….creepy or cute, okay?

.

This post contains affiliate links.  If you purchase through one of these links, I may receive a small commission at no extra cost to you.  This helps pay to keep this site running and the content free.  Thank you for supporting me and this site!  Please see disclosure policy for details.

.

Supplies and Materials Needed:

Small piece (2×2 is plenty) ¼″ plywood

Small piece (quarter sheet is plenty) ¾″ plywood or 1×10 or 1×12

1x2x8

Jig saw

Miter saw

Scroll saw (optional)

Drill

Paper and pen

Step 1:  Draw the Silhouette for the Frame

This is the part Danny thought was creepy.  I got on Google and searched “pregnant silhouette.”  (As if that’s not weird enough, the creepy factor gets worse…keep reading…)

.

But nothing looked like my friend.  Some were too “cartoony” looking, some of their hair just didn’t match hers, I just wasn’t liking any of them.  So, being the creeper that I am, (here’s where it got worse) copied a picture of her showing off her pregnant belly at 20 weeks on Facebook and pasted it into Microsoft Paint.  I used the eraser tool to erase around the outline of her body so I could see it clearly to trace around.

.

I followed the same steps here as I did when I made the Grinch pillow and just traced the outlined image onto a sheet (it took two sheets to get it as large as I wanted) of paper.  Then I cut it out.  I drew some extra details for a different idea I had, but then changed my mind…so ignore that.  So here is my stencil.

DIY Personalized Baby Gift Idea--Ultrasound Frame

Step 2: Cut out the Silhouette

I traced around this silhouette onto ¼″ plywood and cut it out with my jig saw.

DIY Personalized Baby Gift Idea--Ultrasound Frame

Then I used my wood glue bottle to draw a circle for the ultrasound image to go.  I used a drill to drill into the center of the circle and then cut it out with my jig saw.

DIY Personalized Baby Gift Idea--Ultrasound Frame

Side note, you will need to sand this really well.  The Dremel is awesome for sanding these edges nice and smooth.

DIY Personalized Baby Gift Idea--Ultrasound Frame

Step 3:  Add a Name

Obviously, my friend’s baby’s name is Sophia…because you know I didn’t just cut that name out for fun…

.

For the name, I got on PicMonkey and found a font I liked and typed out the name.  (I used Great Vibes.)  PicMonkey is free for a ton of cool fonts.  You can pay for some extras, but I just use what’s available for free (helloooo, I’m cheap).  It’s super easy to use.  Just go here, click on design and then click the Tt button on the left, then add a font.  You can enlarge the font however big you want it.  Once I got it how I wanted it, I just traced it again onto a sheet of paper and cut it out.  You could also do the same thing in Microsoft Word and just print it, but I couldn’t find a font on there that I liked.

.

Then I traced it onto ¼″ plywood and cut it out on my scroll saw.  You could use a jig saw as well, I just needed some practice, so I used the scroll saw.  Then I sanded the crap out of it.

Step 4: Make a Backing

This is exactly the same as the backing I made for the U.S. Destination Map Frame, except a different size.  You can use ¾″ plywood, or cut a 1×10, or a 1×12 for this.  This piece is only to glue the silhouette and name to.  Cut it however large you want it to be (but make sure it’s big enough to fit the name and silhouette).  Then I framed it out with mitered 1x2s.  I glued and nailed these around the edge, but that’s an optional step.

Step 5: Finish and Attach

I painted the silhouette, the name, and the back piece and once the paint was dry, I used wood glue to attach the name to the back piece.

DIY Personalized Baby Gift Idea--Ultrasound Frame

I taped a ultrasound picture (that my friend sent me….so that’s a little less creepy than stealing that off Facebook, right?) onto the back of the silhouette, then glued it on as well.DIY Personalized Baby Gift Idea--Ultrasound Frame

DIY Personalized Baby Gift Idea--Ultrasound Frame

DIY Personalized Baby Gift Idea--Ultrasound Frame

Okay, so you tell me…cute that this is literally the actual mother’s silhouette??

DIY Personalized Baby Gift Idea--Ultrasound Frame

Or creepy that I stole it from Facebook, traced it out on my computer, and cut it out on plywood?

.

Cast your vote in the comments below!!  I think it’s cute.  She thinks it’s cute (yes, I asked her if she was creeped out…we are cool like that).  Danny thinks creepy…but what does Danny know?? HAHA Let me know what YOU think.

.

Don’t forget to pin for later 🙂

DIY Personalized Baby Gift Idea--Ultrasound Frame

Until next time, happy DIYing!

DIY Bathroom Vanity for Single Sink

February 19, 2017 by Shara, Woodshop Diaries

How to Build a DIY Single Bathroom Vanity

Once upon a time I, alongside a VERY reluctant husband, remodeled a bathroom. And it was a nightmare.  After the bathroom was done and the new bedroom floor was laid, I swore to Danny that I wouldn’t even THINK about another remodel “anytime soon.”


Oh memories, such a fickle thing. How quickly I forget all those late nights covered in crawl space dirt, exhausted and sweaty, and hating myself for ever starting this thing to begin with and turned my thoughts to how much “fun” it would be to remodel our guest bathroom.  Someone PLEASE define “soon” and “fun.”  Apparently I can’t figure it out.


Within three months of swearing off remodels, I’m back at it, already planning the next one—starting with a new DIY bathroom vanity. The actual remodel will probably be in a few more months (Danny takes some time to convince), but I’ve already got the idea in my head.  We are replacing the double vanity cabinet here with two smaller single vanities.

I’ve only made one so far. I wanted to make sure I liked it before I made the other one.  Good news…I do 🙂  So the other one will be coming soon. But I’ve got the whole how-to for you below!

How to Build a DIY Single Bathroom Vanity

A huge thank you to Osborne Wood Products for providing the vanity legs for this project and to D. Lawless Hardware for providing the ring pulls. All opinions are my own.  This post also contains affiliate links for your convenience.  Please see disclosure policy for more information.  Thank you for supporting this site and the brands that support this site!


Materials needed :

4 vanity legs (Osborne Wood Part #5050)

¾” plywood (1 sheet)

¼” plywood (quarter sheet is plenty)

(2) 2x2x8

(2) 1x2x8

Cove molding (optional)

(2) 2x8x8 (for the top)

2 sets of hinges

16” drawer slide

4 brass ring pulls

Wood Putty

Sandpaper/sander

Tools needed:

Circular Saw (or table saw to cut down plywood)

Kreg Rip Cut (optional, but helpful if using circular saw to cut plywood)

Miter or chop saw

Kreg jig for pocket holes

Drill

Jig Saw

Nail gun (if using cove molding)

1 ¼” pocket hole screws

2 ½” pocket hole screws

Measuring tape


Step 1: Build the vanity side panels

Okay, first, let me explain something. Used to, standard height on vanities was 30” tall.  It’s become standard now to do 36” tall (have you guys used both?  36” tall is SOOOOOO much nicer because you don’t have to bend over so far to wash your face, which is nice on the old back).

.

These vanity legs come 34 ½” long to accommodate a 1 ½” thick countertop to make it a total of 36” tall. HOWEVER, I purchased an above mount sink that is 5 ½” tall.  So, in order for the top of my sink to be 36” off the ground, I had to make my vanity 30 ½” tall.  Are we all on the same page?  If you are using an undermount sink or a drop in, you don’t have to cut the legs.  And your measurements will be a little different as far as the height goes.

.

Okay, so now that I’ve explained that, first I cut my vanity legs to be 29” tall. I’m going to be honest.  These legs are so smooth and pretty (unlike my own…HA!), it kind of hurt my soul a little to have to cut them.  But, you gotta do what you gotta do.

.

Then, I cut two pieces of 2×2 at 13” long and drilled 1 ½” pocket holes in both ends. I attached the 2x2s to the top between two legs using 2 ½” pocket hole screws making sure the outside of the 2×2 was flush with the outside of the legs.  See image below.

.

I used my Kreg Rip cut to cut my plywood down to a 13” wide strip. Once I had my 13” strip, I cut two pieces 18” long and drilled pocket holes along the sides with my Kreg Jig.  I slid these pieces in between the vanity legs and attached to the 2×2 and the legs using 1 ¼” pocket hole screws.  See image below.  Make sure the inside of the plywood is flush with the inside of the 2×2.

How to Build a DIY Single Bathroom Vanity

Then I attached another 2×2 to the bottom using 1 ½” pocket holes and 2 ½” pocket hole screws. I screwed the plywood into this at the bottom as well.  That makes two panels that look like the image below.

How to Build a DIY Single Bathroom Vanity

Step 2: Attach the vanity sides together

I made my vanity 33” wide overall. Subtract 1” on each side for the top overhang and 6 inches (3” per leg) for the legs, and that gives 25”.  If you want your vanity to be wider, just adjust this measurement.

.

I cut two 2x2s at 25” long and drilled 1 ½” pocket hole screws in each end and used 2 ½” pocket hole screws to attach the side panels at the TOP OF THE FRONT SIDE as shown below and at the bottom as shown in the next picture.

How to Build a DIY Single Bathroom Vanity

Then I used a piece of scrap plywood (but you can use a 1×2) to attach across the top of the back side using pocket holes and screws. (When installing the vanity, this will be the piece you screw to the wall.)  Notice the bottom front side 2×2 in the image below.

How to Build a DIY Single Bathroom Vanity

Step 3: Add the drawer

I forgot to take a picture of part of this, but you can see most of it on the image below. I cut two pieces of 1×2 at 13” and screwed them into each side panel between the vanity legs using pocket holes and screws.

How to Build a DIY Single Bathroom Vanity

This is so you can attach the drawer slide as seen above. I attached the drawer slide to this 1×2 making sure to leave space in the front for the depth of the drawer front (which is about 1 ½”)

.

You can see my post here on how to make drawers. You can make them lots of different ways, but your overall size of the drawer (without the front) should be 16” deep and 24” wide.  I used 1x4s for the sides of the drawer, but 3 ½” strips of plywood would work just fine, too.

.

Once the drawer was made, I attached it to the slides.

How to Build a DIY Single Bathroom Vanity

Step 4: Add the shelf

I made my drawer front 5 ¼” tall (more on that in a second). So, I cut a 1×2 at 25” and drilled pocket holes in each end and attached it into the legs as shown below.  I measured and made sure the distance between the top of the 2×2 and the bottom of the 1×2 was 5 ½” to allow room for the drawer front.  Sorry, I have the top gluing up in the picture…that’s actually step 6.

How to Build a DIY Single Bathroom Vanity

How to Build a DIY Single Bathroom Vanity

I cut two more 1x2s at about 16” and screwed them into the legs as shown below so that the top was flush with the bottom of the 1×2 on the front.

How to Build a DIY Single Bathroom Vanity

How to Build a DIY Single Bathroom Vanity

Then, I cut a piece of ¾” plywood at 17 ½” wide and 28” wide. I cut notches in each corner like the picture below.

How to Build a DIY Single Bathroom Vanity

Then I attempted to put the shelf in and there was NO WAY I could get it to go in as one piece. So I ripped it in half and put it in as two pieces.

How to Build a DIY Single Bathroom Vanity

How to Build a DIY Single Bathroom Vanity

Here’s why I did this: I have long hair.  Long hair and P-traps don’t get along.  Although I won’t be using this guest bathroom as my main bathroom, inevitably the P-trap will eventually get clogged and need to be cleaned (the fact I wash my paint brushes in the guest bathroom sinks probably won’t help the matter…).  I want to be able to remove this shelf when cleaning the P-trap so that 1. It doesn’t get covered in nasty P-trap grime on accident and 2. So there’s more room to work on it in here when the time comes.

.

If you are totally okay with not removing the shelf, you could do this step BEFORE adding the drawer and screw it all in as one piece that can’t be removed. Up to you.

Step 5: Add drawer front and doors and trim

I already said that my drawer front was 5 ¼” tall. I cut it from the leftover ¾″ plywood and made it ¼” shorter width wise than the drawer opening (24 ¾”) and added cove molding around the edges.

How to Build a DIY Single Bathroom Vanity

I also cut two doors from the ¾″ plywood and nailed cove molding to them, too (my joints look bad below…they aren’t nailed in yet). The size of the doors will depend on the type of hinge you decide to use.  My doors ended up about 11 ½” tall and 12 ¼” wide.

How to Build a DIY Single Bathroom Vanity

Then I nailed cove around the side panels for a little extra detail

How to Build a DIY Single Bathroom Vanity

Putty the cracks and nail holes. Once the putty dries, sand everything well.  Don’t attach the drawer front or doors yet…it’s easier to paint them first.

Step 6: Make the top

You can see how I make table tops in this post, but I made my top 33” wide and about 22” deep. I will likely trim the top down to 20-21” once the vanity is installed.  I’m not sure how far from the wall the top of the vanity will be when it’s installed (because of baseboards and the fact that walls are NEVER perfect), so I’m waiting to trim it down until I know how far off the back it will hang.  I want only 1” overhang in the front.  Sorry, that’s a lot of extra information.  But, it’s free so there you go.

How to Build a DIY Single Bathroom Vanity

I drilled pocket holes along the sides and back to attach the top later.

How to Build a DIY Single Bathroom Vanity

Step 7: Finish

I stained the top with Minwax Puritan Pine and finished it with Minwax Polycrylic. Since this will be in the bathroom, I plan to add SEVERAL coats before it’s actually installed.

How to Build a DIY Single Bathroom Vanity

I primed and painted the vanity in SW Naval (I’m using the same color scheme as my office). Once the paint was dry, I attached the drawer front by screwing it in from the inside of the drawer and attached the doors using small brass hinges.  The sink isn’t installed yet, but I set it on top to get the idea.  Once it’s ready, we will drill the hole in the top for the drain.

How to Build a DIY Single Bathroom Vanity

Then I added these brass ring pulls from D. Lawless Hardware. Aren’t they gorgeous?!  I think they really add so much character to the vanity.  Plus I’m a sucker for brass and navy 🙂

How to Build a DIY Single Bathroom Vanity

I plan to paint the bathroom the same color as my office (SW Eider White), so I took it in here to take some pictures to see what it would look like with that wall color.  I love it!! This sink is gorgeous, too, and I cannot wait to find the perfect faucet to pair it with.

How to Build a DIY Single Bathroom Vanity

How to Build a DIY Single Bathroom Vanity

How about those legs and pulls?  #hearteyes

How to Build a DIY Single Bathroom Vanity

How to Build a DIY Single Bathroom Vanity

How to Build a DIY Single Bathroom Vanity

How to Build a DIY Single Bathroom Vanity

I cannot wait to get the other one made and get these babies installed in the new bathroom!  I’m loving this design and color.  What do you guys think?? Let me know in the comments!  If you love it too, don’t forget to pin for later 🙂

How to Build a DIY Single Bathroom Vanity\

Until next time, happy building!! 🙂

DIY Destination Map Picture Frame Thingy–Yes, You Read That Right

February 14, 2017 by Shara, Woodshop Diaries

How to make a DIY destination map picture frame

Can I be honest for a second? I really hate football.  It’s not that I hate the game, or the players, or the coaches.  I just hate that you run the ball for 5 seconds and it’s 30 more seconds before the next play.  And I’m REALLY impatient.  Guys, what takes that long?  GET ON WITH IT ALREADY!!!!  I just can’t deal.

.

On a semi-related note, do you guys ever watch the Bad Lip Reading videos on YouTube? The football ones CANNOT BE BEAT.  So there is that.

.

But, why am I talking about football? Well, because sometimes you have a friend who likes football (she’s obviously got more patience than me) and she wants a map of all the stadiums so she can put pictures of all the ones she’s been to in it.

.

Which…that’s kind of a really cool idea. So even though you (I) don’t like football, you (I) go with it because how cool is this?

.How to make a DIY destination map picture frame

And I’m going to be honest again, I have no idea what you would call this thing. A destination map picture frame thingy?  Sounds good to me.  Someone is TOTALLY going to search that exact phrase on Pinterest, I just know it.

.

But, what if you’re just like me and hate football? This idea can be used for just about ANYTHING…not just football (phew, that’s a relief, right?).  Vacation destinations, family members who live all over, places you’ve lived previously, or even basketball stadiums (because basketball > football #sorrynotsorry).  The possibilities are endless!

.

Ready to make one?? Great 🙂  You can make this as just the U.S. cutout alone, or you can also add a back and frame like I did.  The backing and frame is optional.

.

This post contains affiliate links for your convenience. If you purchase from one of these links, I may receive a small commission at no extra cost to you.  This helps to pay for the cost of maintaining the site and keeping the content free.  Thank you for supporting this site!  See disclosure policy for more information.

.

What you need to make a Destination Map Picture Frame thingy:

For the cutout only:

¼” plywood (I made my map about 2 ft wide and bought a quarter sheet)

Jig Saw (or scroll saw)

Drill

Boring bit or hole saw (I used 1 ⅛” holes)

Sandpaper

Dremel tool (helpful for sanding)

Orbital sander (helpful, not necessary)

Stencil (I made mine from regular printer paper…details below)

.

For the backing and frame:

¾” plywood (optional for mounting to-quarter sheet is plenty)

1x2x8 (optional—used to make outside frame)

Miter Saw (only needed if using 1x2s for frame)

Circular Saw

Nail gun, or 1 ½” screws, or hammer and nails (if using 1x2s on frame)


Create your stencil

You can probably purchase stencils, but I used the same method as I used with the Grinch Pillow project (because I’m cheap) to get a stencil of the United States. By the way, you can do individual states, countries, whatever for this.

.

I found a picture online of the country and sized it as needed to get it to be about 2 ft wide. I traced it onto printer paper from my computer screen (it took a couple sheets) just like in this post.  Then I cut it out carefully.  And there I had my stencil!

How to make a DIY destination map picture frame.

Cut out the shape

Now that I had my stencil, I traced it out onto ¼” plywood with a pen. (Yes, I know the that in second picture the drawing is mirrored…my bad.)

How to make a DIY destination map picture frame

How to make a DIY destination map picture frame.

I used my jig saw with a scroll blade for careful cutting to cut out the shape. Go slow and be careful.  If you are good with a scroll saw, you could use that instead.  I still need A LOT of practice on my scroll saw (I’m pretty much the worst at it), so I just used the jig saw.

How to make a DIY destination map picture frame

Once it’s cut out, the Dremel tool with the little sanding attachment makes the edges pretty smooth.


Map out and cut your holes

Here’s where it might get hairy (oops, I forgot to mention a razor in the list of supplies! Just kidding…no shaving required for this project.). Depending on what you are mapping, you may have trouble getting all your holes to fit.  With my football example, I mapped on my stencil where all the stadiums were. How to make a DIY destination map picture frame 
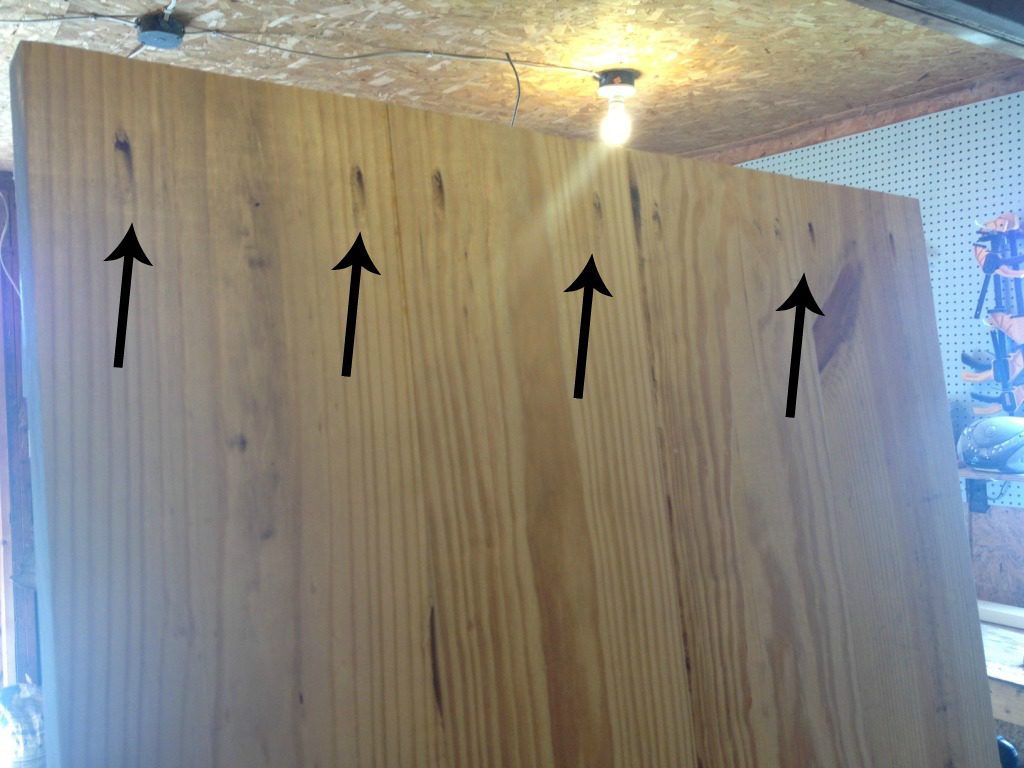
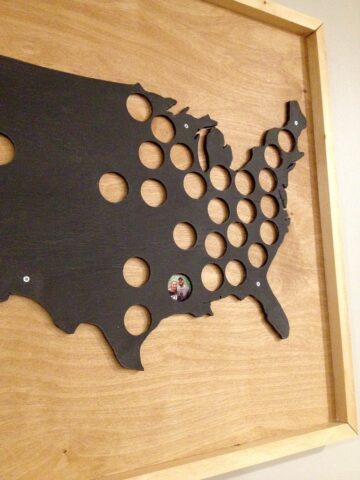
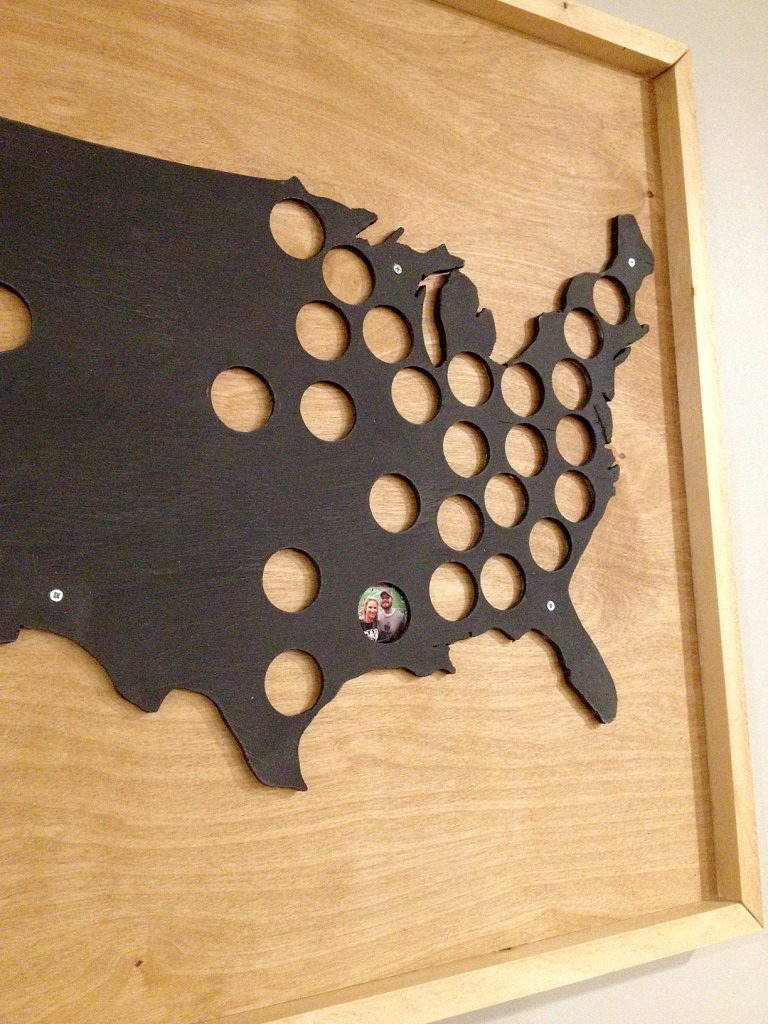
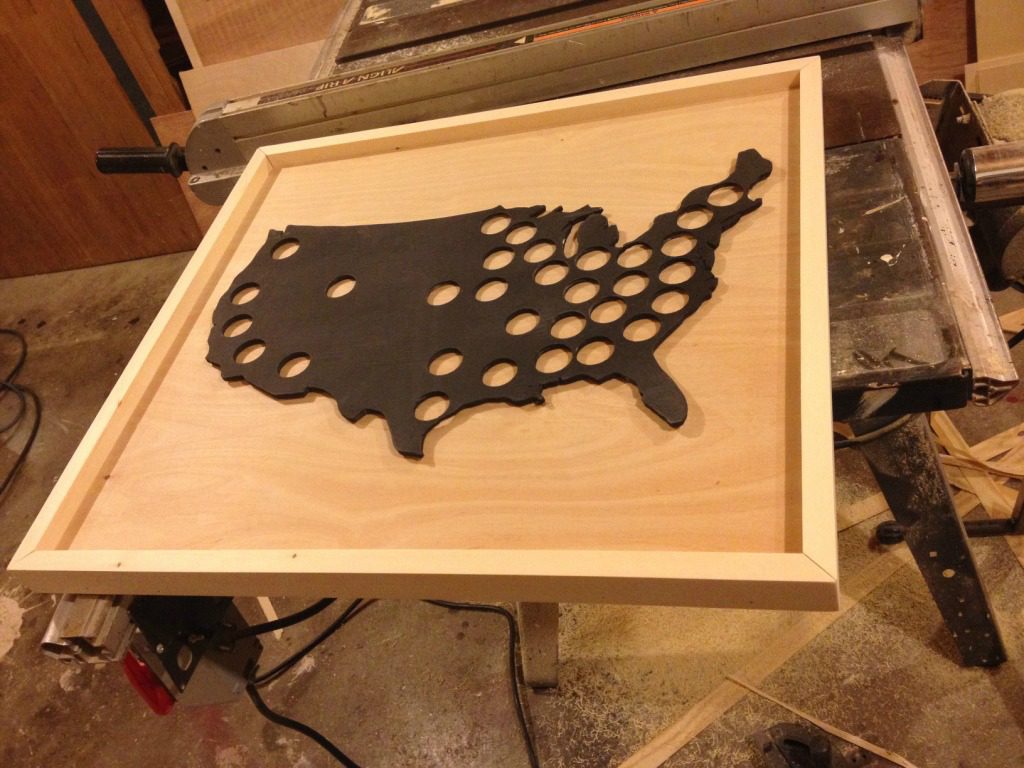
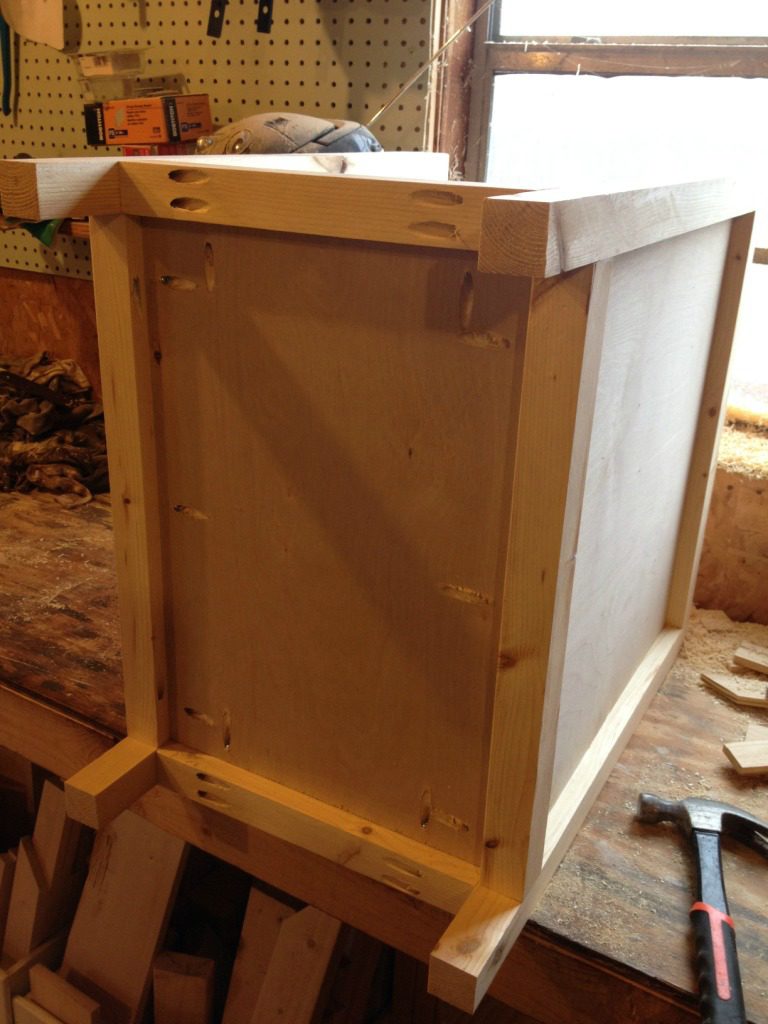
Since most of them are along the east coast, the holes are pretty close together.  My only advice is to be as careful as possible to place the holes where they won’t overlap.  Go slow.

How to make a DIY destination map picture frame

I used a 1 ⅛” hole saw to cut the holes. It took a while, but once the holes were cut, I sanded them really well with the Dremel tool again.

How to make a DIY destination map picture frame

I accidentally sanded a little too far on one hole close to the edge and it broke.

How to make a DIY destination map picture frame

If this happens to you, you can mix a little glue and sawdust and “mold” it in to fill the gap and let it dry really well. Then carefully sand around it with the Dremel again.  Good as new 🙂

How to make a DIY destination map picture frame

Build the Backing and Frame (Optional)

For the backing, I simply cut a piece of ¾” plywood large enough for the cutout to fit on it. I used my circular saw for this.  Then I cut some 1x2s with mitered ends (45 degrees) to fit along the edge of the plywood.  I nailed it on with a nail gun, but you could also screw them in with 1 ½” screws, or use a hammer and nails.  You can see this post for more details on making a similar frame.

How to make a DIY destination map picture frame

Finish

I spray painted the cutout black and stained the backing with Minwax Puritan Pine. Once everything was dry, I used some small screws to attach the cutout and slipped a few pictures in place.  Each year she plans to visit a new stadium and add a picture.  It would be fun to make one and watch it fill up with memories pictures.  Let’s not go getting all sentimental and stuff.

How to make a DIY destination map picture frame

If you didn’t do a backing, you could simply glue or tape the pictures on the back. With the backing, you can just slip the pictures in place and the screws hold it tight so it doesn’t fall out.

.

I also suggested to my friend that when she starts putting pictures in those east cost places, to cut it fairly small, then once it’s placed in the right hole, use an exacto knife or a pocket knife to carefully cut the picture out of any holes it might spill into.

.

So what do you think? Is this something you’d try?  Also does anyone have a term for this?  Something better than “destination map picture frame thingy”?? HAHA

.

Because no one will be searching for that on Pinterest, do me a favor and pin it for me so people out there can see it 🙂

How to make a DIY destination map picture frame

Stay tuned for more fun projects I’ve got in the works in the next couple weeks! Until next time, happy building!

Tips for Surviving a Remodel–And Tetanus Shots

February 6, 2017 by Shara, Woodshop Diaries

Christmas Home Tour 2016--Woodshop Diaries

Three things occurred to me this weekend:

.

  1. It’s been almost two years since we remodeled our kitchen and many of you have followed only within the last several months. So likely, you’ve never seen it before.
  2. I’ve never told the story on my blog about getting a tetanus shot after an incident related to that remodel.
  3. I have several tips to share that will benefit those of you who are considering doing a kitchen remodel in the future.

.

So, let’s kill three birds with one stone and take care of all the above with one blog post packed full of before and afters, funny stories, and helpful tips. By the way, I don’t advocate killing birds with stones.  I just let my cats take care of them…

.

Okay, so…let me first show you the before and after…just so you can’t say you haven’t seen it. And I’ll sprinkle some more pictures throughout…because I love it so.  Also, if you want to check out the final reveal post of it, you can see it here.

.

This was before.  Complete with nacho cheese wall color, Spanish style wall tile, and 7 foot ceilings.

And here is after:

Christmas Home Tour 2016--Woodshop Diaries

Christmas Home Tour 2016--Woodshop Diaries

Now that we’ve seen the power of a remodel, let me give you the important stuff, the tips for surviving one. We learned MANY MANY things during our first ever remodel and several of them may be helpful to you…most will still apply even if you aren’t DIYing your remodel.  So here we go:

TIP #1:  Have a plan

Now, I know this is like “thank you, captain obvious.” But, I mean it.  PLAN THIS THING.  About a month before we actually took a hammer to the walls, I had a list of EVERYTHING I knew of that we were doing to the kitchen and organized it into an order that made sense.

Christmas Home Tour 2016--Woodshop Diaries

That really helped us when we kept getting to the point of asking “what do we do next?”  Well, check the list…we have a plan.

.

For Example: you have to replace/repair drywall BEFORE you can install new cabinets. You want the ceiling to be finished BEFORE you put anything back in the room.  List out every detail and every step then order it.

TIP #2: List (and buy) tools/supplies before starting demo

Once you have a general “plan” for what you’re doing and in what order, make a list of everything needed to purchase for the remodel. YOU CANNOT POSSIBLY PLAN FOR EVERY SINGLE PURCHASE, but making a list of most everything you need and having it purchased and ready to go is a HUGE help.

Christmas Home Tour 2016--Woodshop Diaries

We bought our new appliances, sink, faucets, light fixtures, cabinets, countertop and flooring about a month to a couple weeks before the remodel and stored them in a spare room. This saved time, stress, money, the chance that what you want is sold out when you need it, and it gives you time to research and make the best decision BEFOREHAND instead of buying something when you are desperate and tired and ready for this thing to be over with.  Because, trust me, you will be to that point very quickly after starting.

TIP #3: Make a budget

See how this is working? You made your plan, then used your plan to make your list of supplies, and now you use your list of supplies to make your budget.

.

Here is an example of mine…it’s a complete jumbled mess (and some of the things we didn’t actually do), but I listed out everything we needed and put a price next to it that was our “budgeted” amount for said item. At the end, I added it all up and got our total.  (PS when you get a total, add at least 10% to that for that random miscellaneous stuff you forgot…because you WILL FORGET)  If it’s more than you are okay with spending, go through your items again and see where you can adjust…maybe find a cheaper sink, or maybe choose to keep your existing appliances a little longer.

Start purchasing and searching for those items from #2 that match your listed budget. Every time you buy one of those items, mark out the budgeted amount and write in the exact amount…so at the end you can see if your exact matched the budget.  I did a much better job at this during our recent bathroom remodel and it was so easy to stay on budget…so take my advice…this is so helpful.

TIP #4: Sell your old appliances and cabinets–and anything else you want to get rid of

This is self explanatory. If you’re having a hard time making your budget, this may help pay for some of that extra.  Post your old cabinets and appliances (after you remove them) on Facebook or Craigslist or wherever you can sell locally.  I promise people will buy this stuff.  We made $650 off our old cabinets and appliances and another $500 from a metal staircase we removed from the kitchen that accessed out attic.  It was a win win because these people needed some cheap shop cabinets (and a metal staircase) and I didn’t want to pay to take it to the dump.

Christmas Home Tour 2016--Woodshop Diaries

Christmas Home Tour 2016--Woodshop Diaries

TIP #5: Precook your meals

Speaking of budgets…don’t blow your budget on eating meals out while your kitchen is out of commission. Precook some meals and freeze them to eat while working on your kitchen.

.

Luckily, we were without a kitchen for just two to three weeks and we survived off a casserole I made five minutes before we took out our old stove (for the first week), some frozen leftovers, and a crockpot.  Crockpots are your best friend during remodels.  Just remember that you may have to wash it in the tub since you don’t have a kitchen sink. 🙂 I know from experience.

.

But, take my word for it.  Prepare this food before you get to the I’m-so-exhausted-I-just-want-a-cheeseburger phase.  Once you get to that point, you will have no will to do this part and your “food” budget will be blown.  Oh and you’ll feel like crap from eating fast food at 11PM every night.

TIP #6: Stock the Band-Aid cabinet

Demo is rough. So is drywall.  Keep bandaids handy.  Trust me…you will need far more than you think.  My Dad required AT LEAST two per hour of demo.

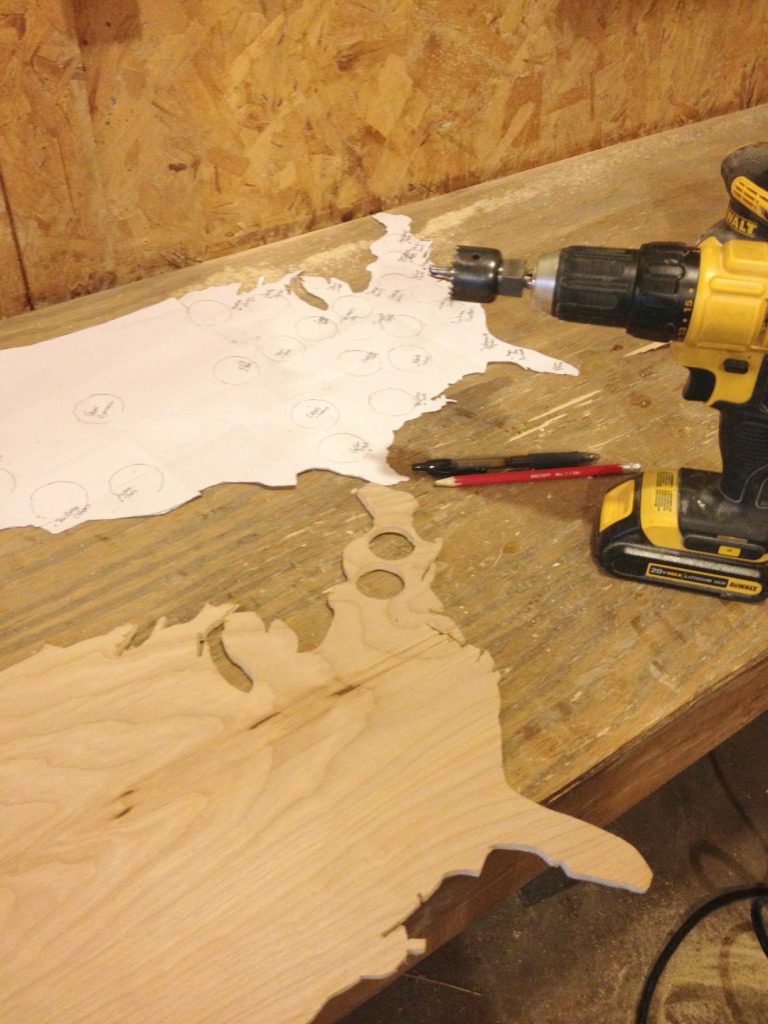
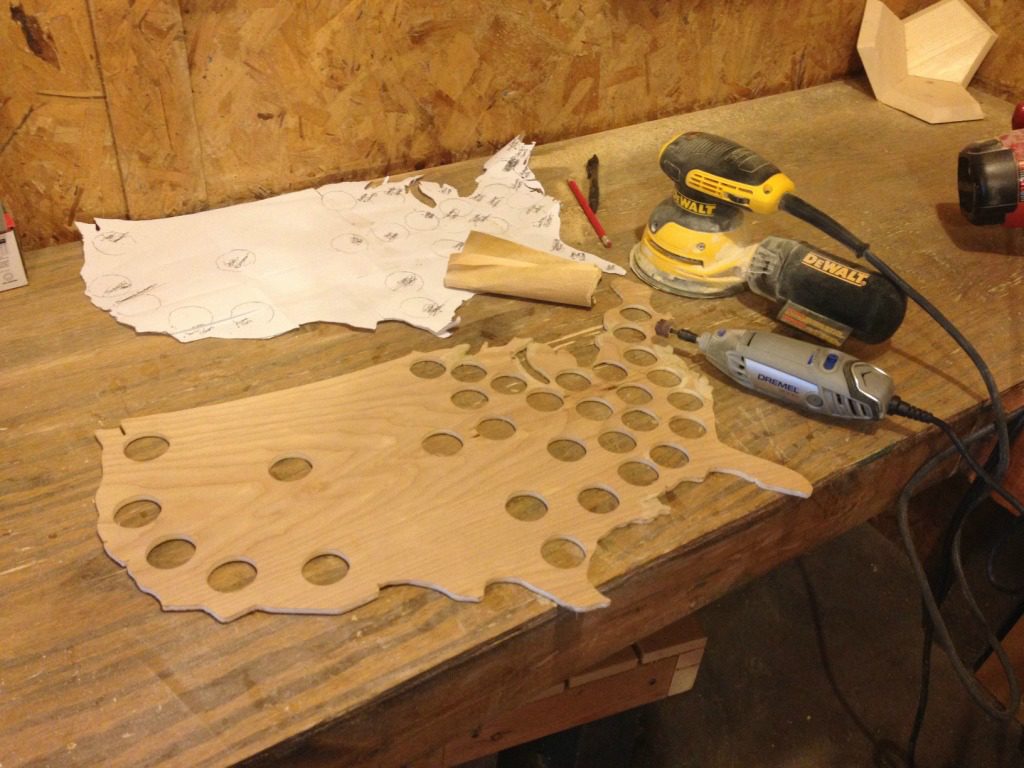
TIP #7: Watch out for rusty nails

And this is the part where I tell you my tetanus shot story. So, let’s start at the beginning…I stepped on a really big, really rusty, really painful nail during this remodel process.  Because I am a clumsy idiot who wears worn out sneakers everywhere and doesn’t pay attention.


After some Neosporin and a couple band-aids (see tip #6), I asked Google what to do.  Google said to get the tetanus shot or die. Google also said the shot was painful–like it’s trying to talk me out of it or something.  What’s up with that?  Silly Google, don’t you know I give blood on a regular basis?  You think I’m going to think a little shot is painful?


So on my morning work break, I find myself in the waiting room of the little doctors office down the road from my work. The sweet little old lady doctor gave me the shot and a cute little bandaid and I laughed at Google for it’s false information.  That shot was painless, Google.  Quit lying just to scare people.  Silly Google.

.

Until a few minutes later when I got to my car.

.

I couldn’t raise my arm.  My shoulder was on fire.  I THOUGHT.  I WAS GOING.  TO DIE.  I went back to work and couldn’t lift my arm to the keyboard to type…I couldn’t even answer the phone.  My arm was going to fall off any minute, I was sure of it.  THE PAIN.  It felt like I had gotten stung by a 100 wasps and been repeatedly punched in the shoulder for hours.  Okay, Google.  You win.

.

This was a Tuesday.

.

That weekend we went to a wedding and I wore a sleeveless dress despite my (STILL…after five days) very red and very swollen shoulder and spent the reception trying to strategically place my hair over the shoulder to avoid questions from strangers asking what bit me.  Resisting the urge to say something inappropriate…or make up some story about how I fought off the beast of LBL, I simply told them I got a tetanus shot and then they looked at me like I had cooties.

So that, kids, is why you watch out for rusted nails when remodeling 🙂  Because then you will go to a wedding and people will think you have cooties.

.

So, if you are planning on doing a kitchen remodel (or any remodel for that matter) any time soon, hopefully these tips will come in handy for you. And hopefully you can avoid the tetanus shot fiasco 🙂

.

Don’t forget to pin for later so you can easily find these tips again when you need them 🙂

7 tips for surviving a remodel and save time, money, and stress

Until next time, watch out for rusted nails 🙂 and happy DIYing!

If You’re Going to Make It, You Better Fake It–DIY Fake Brick Fireplace

January 16, 2017 by Shara, Woodshop Diaries

How to DIY a Faux Brick Fireplace and you'll never believe how easy it is!!

I’ve never been big on “fake” stuff. Fake wood, fake crab, fake friends, fake smiles at that coworker you want to punch in the throat (JUST KIDDING). I just don’t like things that try to be something they aren’t.

.

That’s why I always try to be real with you guys. Honesty is the best policy and I like to remind you all the time that I really have no idea what I’m doing here and am a complete amateur.  Just keepin’ it real, yo.

.

But lately, I find myself embracing the fact that some things are just better fake. Not wood, though.  NEVER WOOD.  You either go real with that stuff or go home, friends.  (Sorry to all my particle board and MDF lovers…it’s just a pet peeve.  We can still be friends, ok?)

.

But things like fake fur are totally cool (because…bunnies!!). And fake antique mirrors.  And fake fireplaces (because sometimes putting in a real one just isn’t worth it).

.

So when I decided I wanted a fake fireplace in our bedroom, I at least wanted it to look as real as possible. If you’re going to fake something, at least make it somewhat believable, right?  Ironically, that required using even more fake stuff. Oh, the hypocrisy!!

.

But nonetheless, the fireplace turned out AWESOME (even if it is a total facade) and I’m going to show you exactly how I did it 🙂

.

This post contains affiliate links. If you purchase from one of these links, I may receive a small commission at no extra cost to you.  Thank you for supporting this site so I can continue to provide free content.  Please see disclosure policy for more details.

.

DISCLOSURE: This is meant to be a FAKE fireplace, just for decoration.  Do not place any heat source in the fireplace as the wood and fake brick paneling is flammable.  For applications where you will be using a heat source, contact a professional for their opinion.  This application is strictly for decoration.

Materials needed:

(3) 1x12x8 boards

(2) 1x8x8

1x2x8

Baseboard molding (optional)

Crown molding (optional)

Fake Brick panel

White paint

Drywall mud or plaster of some sort

Sandpaper

Plastic putty knife

1 ¼” pocket hole screws

Wood glue

Wood putty

Tools needed:

Table Saw

Jig saw

Miter or Chop Saw

Kreg Jig

Nail gun

Step 1: Build the insert for the fake fireplace

This fake fireplace is really two main parts—the inside and the outside. I worked kind of backwards and made the inside first.

.

I cut two 1x12s at about 36” and one at about 22”. I used my jig saw to cut an arch in the 22” piece.  This is optional, but I wanted the fireplace to have an arched top.

Then I used my Kreg Jig to drill pocket holes in the 22” piece and used 1 ¼” screws to attach it to the two 36” 1×12 boards like shown.

I cut two pieces of 1×8 at 36” long and drilled pocket holes in those as well and attached along the inside of the opening.

Step 2: Add the faux brick

I got a 4×8 sheet of fake brick panel from the local big box store. My local lumber yard could order it, but didn’t keep any in stock.  If you can’t find it at the bog box store, check the local places.

I’m going to warn you (here’s me being “real” with you teaching you how to fake something…ironic), don’t do it like I did it.

.

I pieced the front faux brick together in three pieces. Don’t do that…you can see the seams and it took me FOREVER to get things to line up to where they looked halfway normal.

I recommend lying the board face down on the ground and trace out the shape of the front of the insert onto the back of the panel and cut the front brick as one piece with a jig saw.

.

Glue and nail the brick panel onto the insert as you go.

.

I attached the front pieces first, then lined the 1x8s and then nailed a large piece onto the back of the 1x8s so it was all completely lined with brick. I cut my pieces on the table saw so I got good straight lines

For the arch, I cut individual bricks out and cut them in half and just nailed them along the arch. Don’t worry about gaps between them.  We will deal with that later.

Step 3: Make the faux brick pretty

Let’s be honest. This brick is UGLY.  It’s so brown and dark and the mortar is black.  Apparently, back in the day, black mortar was more expensive.  WHAT?! Our real fireplace has black mortar (from the 80s) and I HATE IT SO BAD.

.

So first thing was first, I painted the black lines with plain white paint.

I was messy and not too concerned with it being in the lines. It’ll be covered up later.

.

Once the paint was dry, I took a cheap plastic putty knife and a HUGE bucket of drywall mud and puttied all over the brick.

We had drywall mud leftover from the bathroom remodel, so that’s what I used. You can get smaller containers of plaster and it should work the same.  You don’t need a whole lot, but you will need more than you think.

.

I should have taken a video to show you, but I didn’t. #badblogger I just scooped up some mud on the knife and smeared it all over.  Be sure to get it in all the mortar lines and the little dimples in the bricks.  Then scrape off the excess.  I worked in small areas as I went.

.

Be sure to fill in all the gaps between the bricks in the arch, too.

Just another warning…you will get the mud all over the floor no matter how careful you are.  This floor is cheap and we will replace it soon, so I didn’t care. But I don’t advise you to do this on bare floor…lay down some plastic.

.

Ta da!! Now let it dry…it’ll take a while.

.

Once it was good and dry, I sanded it with drywall sandpaper. You can use regular sand paper too.  After the mud, it was whiter than I wanted, so I just sanded until I liked it.

This is what I ended up with. It will be very dusty…just a warning. Wipe it down with a damp cloth after sanding.

Step 4: Build the outside of the fake fireplace

I cut 2 pieces of 1×8 at about 34” long and one 1×8 at about 48” long. I drilled pocket holes in the tops of the 34” long pieces and attached it to the 48” piece using 1 ¼” pocket hole screws like shown below.

.

Then I ripped two pieces of 1×12 to 8 ½” wide for the sides. You can use a 1×10 or 1×12 for the sides and not rip it if you want.  But I didn’t want my fireplace very deep, so I ripped it.

.

I drilled pocket holes along the sides of the 8 ½” wide pieces and attached them to the front piece using 1 ¼” pocket hole screws.

Then I cut a 1×2 and a 1×12 at 53” long and glued them together. This will be the top.  You could also attach them using pocket holes and screws.

.

I drilled pocket holes along the top of the box I just made and attached top using 1 ¼” screws.

The rest of this is optional and can be customized however you want. I added some interest to the front by nailing pieces on the fronts to make “boxes”, then adding cove molding along the insides, crown molding to the top and baseboards at the bottom.

I puttied, sanded and caulked as needed and gave it two coats of primer and two coats of white paint.

Step 5: Attach the inside to the outside

Once the paint was dry, I simply screwed the inside piece to the outside piece from the back side.   In hindsight, I could have made the 1x8s in the inside piece go all the way to the top and attach there too, but oh well.  It works fine like this.

Step 6: Stress out about decorating then give up and just enjoy 🙂

I’ve always admitted that an eye for decorating is not my strongest asset.  So, like always, I spent hours putting stuff on and taking it off again to decorate this thing.  Then I just quit and said whatever, this is good enough.   So don’t judge my decor…I just wanted to stand back and admire the fireplace 🙂

.

So here are some pictures of that…

How to DIY a Faux Brick Fireplace and you'll never believe how easy it is!!

How to DIY a Faux Brick Fireplace and you'll never believe how easy it is!!

How to DIY a Faux Brick Fireplace and you'll never believe how easy it is!!

How to DIY a Faux Brick Fireplace and you'll never believe how easy it is!!

How to DIY a Faux Brick Fireplace and you'll never believe how easy it is!!

How to DIY a Faux Brick Fireplace and you'll never believe how easy it is!!

SOOOOOOO, tell me what you think?  I have been so excited about this project since I started working on it and COULDN’T WAIT to show you all!!  If you love it too, I’d love for you to pin it 🙂

How to DIY a Faux Brick Fireplace and you'll never believe how easy it is!!

Whew, what a long post.  I’m gonna cut out right here, but I’ll be back again soon with some more fun projects 🙂  Until next time, happy DIYing!!

DIY Farmhouse Side Table With Storage–AKA The Diaper Cabinet

January 9, 2017 by Shara, Woodshop Diaries

DIY Farmhouse Side Table with Storage for Diapers and Other Random Stuff You Want To Hide

Let’s play a friendly game of “Never Have I Ever.”  You’ve played that before, right?

.

You hold up your fingers and go around the circle saying things you’ve never done and whoever has done them has to lower a finger.  The last person with any fingers still up wins.

.

We will make it a quick game and just use one finger and one question. Are you ready?

.

Okay, never have I ever….changed a diaper.  Like, ever.

.

Anyone still have a finger up?  DID I WIN?!

.

Of course I won. Anyone with a finger still up wins…because, you guys, we’ve never changed a diaper.  And that, my friends, is #winning.

.

Okay, okay, enough with the funny business…I’m just making jokes. But in all seriousness, a friend of mine has an adorable newborn. And he obviously requires a diaper change on occasion. Now, I know nothing about changing diapers, but I know that they come in a big box, and you typically require a few other accessories like wipes and cream…I think??

.

And those things are usually not something you want to use as home décor. So my friend (who blogs over at Fun Home Things–and you need to check her out!) asked for my help to hide them so they would still be conveniently located, but you didn’t have to actually see them.

.

So I made her a “diaper hiding side table” that she could put next to the couch.

DIY Farmhouse Side Table with Storage for Diapers and Other Random Stuff You Want To Hide

But, good news for those of us who don’t need to hide diapers…it functions perfectly fine as a “other random stuff you want to hide side table,” too! It’s just got measurements suited to store a typical diaper box.

.

Side story: that pillow in the table was a gift from my sister.  She thought it was funny because it’s got six cats driving a Volkswagon van and if you know anything about me, that just screams “SHARA!!!!!” in all caps and with five exclamation points.  However, I find it somewhat embarrassing, so she jokes with me that I hide it.  It’s a 1200% coincidence that it ended up in this picture, but still kind of funny.  Sissy, I am not trying to hide the pillow, I’m just staging….I promise.

DIY Farmhouse Side Table with Storage for Diapers and Other Random Stuff You Want To Hide

So anyway…ready for the how to? Great 🙂

.

This post contains affiliate links. If you purchase from one of these links, I may receive a small commission at no extra cost to you. Thank you for supporting this site so I can continue to provide free content. Please see disclosure policy for more details.

.

Materials needed:

¾” plywood (1 sheet is plenty)

1×12 board (optional for the top..can use plywood instead)

2x2s (2 8ft sticks or can rip one 2×4 in half)

1×6 board (for the drawer)

¼” plywood (¼ sheet)

Cove molding (optional–3 8ft sticks)

Set of drawer slides

1 ¼” pocket hole screws

2 ½” pocket hole screws

Tools needed:

Miter saw

Circular saw or table saw (to cut plywood)

Kreg Jig

Drill

.

The overall size of the table was 22” deep, 17” wide, and 26” tall.

1. Build side frames

I cut the four legs from 2x2s at 25 ¼” long. Then I cut 2 more 2x2s at 19” long. I attached the 19” piece between the tops of the legs using 1 ½” pocket holes and 2 ½” pocket hole screws like the picture shows.  I made two of these:

DIY Farmhouse Side Table with Storage for Diapers and Other Random Stuff You Want To Hide

Then I cut two pieces of plywood at 19” square and drilled ¾” pocket holes like the pictures shows.

DIY Farmhouse Side Table with Storage for Diapers and Other Random Stuff You Want To Hide

I placed the plywood pieces between the two sets of legs and attached using 1 ¼” pocket hole screws so that the plywood was flush to the INSIDE of the piece.

DIY Farmhouse Side Table with Storage for Diapers and Other Random Stuff You Want To Hide

Then, I cut another two pieces of 19” 2×2 and attached under the plywood on each side of legs like the picture shows. I used 1 ½” pocket holes and 2 ½” screws. Once it was attached to each leg, I screwed the plywood to this piece as well using 1 ¼” pocket hole screws.

DIY Farmhouse Side Table with Storage for Diapers and Other Random Stuff You Want To Hide

That makes the two sides of the table.

DIY Farmhouse Side Table with Storage for Diapers and Other Random Stuff You Want To Hide

2. Attach the back piece

Now, just to be clear, I knew this particular table’s back would be exposed where it would be sitting in the living room. If you know the back will not be exposed, you could skip this step and after you attach the bottom, just nail on a ¼” backing. That’s what most people would do. But since the back will be showing, I wanted to make it look pretty.

.

I cut a piece of 2×2 at 13” and attached at the top between the two side panels using 1 ½” pocket holes and 2 ½” pocket hole screws. Then I cut a piece of plywood at 13×19” and attached just like the side panels with ¾″ pocket holes and 1 ¼″ pocket hole screws. It’s a tight squeeze to drill these screws in. In hindsight, I should have done the back first, THEN the side panels, but using a shorter drill bit for the pocket hole screws worked fine.

.

NOTE: This picture is of the table upside down.  The pocket holes on the 2×2 are on the top side (so you can’t see them here).

DIY Farmhouse Side Table with Storage for Diapers and Other Random Stuff You Want To Hide

Once the plywood was attached, I added another 13” 2×2 on the bottom just like I did with the side panels.  Again, this picture is of the table upside down.

DIY Farmhouse Side Table with Storage for Diapers and Other Random Stuff You Want To Hide

3. Attach the bottom

I cut another piece of 13×19” plywood and attached again using ¾” pocket holes and 1 ¼” screws just like with the side and back panels.

DIY Farmhouse Side Table with Storage for Diapers and Other Random Stuff You Want To Hide

Once the plywood was attached, I attached another 2×2 cut at 13” (just like every step before) on the front and screwed it in.

DIY Farmhouse Side Table with Storage for Diapers and Other Random Stuff You Want To Hide

4. Add top

I apologize, I totally forgot to take a picture of this step, but it’s simple. I drilled ¾” pocket holes (toward the top) along the top 2x2s on all three sides.

DIY Farmhouse Side Table with Storage for Diapers and Other Random Stuff You Want To Hide

I made a top by gluing some scrap 1x12s that I had lying around together, but you could definitely use plywood instead and just finish the edges with edge banding.

.

My top was 22”x17”. This allowed for no overhang on the front and back (my friend wanted it as shallow as possible so it would fit beside the couch), and 1” over hang on each side (width wise). If you want 1” overhang all around, make the top 24×17.

.

Once I had my top, I centered it and made sure everything was square, then screwed it on using the pocket holes I drilled along the top 2x2s and 1 ¼” pocket hole screws.

5. Add drawer and doors

I’m the worst and I also forgot to take pictures of this too, but I have two other posts to tell you all about how to make a drawer and a door that should help.

.

I made my drawer from a 1×6. I ripped the sides on the table saw so they wouldn’t be as tall as the face front, but this is just personal preference. It’s not necessary.

.

I made my door from 1x3s and inserted a piece of ¼” plywood inside. You can see how it’s done in this post.

6. Add Cove Molding (Optional)

I cut and nailed on cove molding around the sides and back, but this step is totally optional. Cove molding adds a little something something and is pretty cheap, so I figured why not?

7. Finish

I stained the finished piece in Minwax Dark Walnut and Polycrylic. I added brass hardware for the hinges and drawer/door pulls. And that’s it!

DIY Farmhouse Side Table with Storage for Diapers and Other Random Stuff You Want To Hide

For those needing a place to hide diapers and such, it works great as you can see.

DIY Farmhouse Side Table with Storage for Diapers and Other Random Stuff You Want To Hide

And for those of us just wanting a cute farmhouse style side table, it works just fine for that too.

DIY Farmhouse Side Table with Storage for Diapers and Other Random Stuff You Want To Hide

DIY Farmhouse Side Table with Storage for Diapers and Other Random Stuff You Want To Hide

DIY Farmhouse Side Table with Storage for Diapers and Other Random Stuff You Want To Hide

So what do you think?  Do you need somewhere to store your diapers?  Or, uh, other random stuff?  Of course you do…who doesn’t need more pretty storage?

.

Get building 🙂

DIY Farmhouse Side Table with Storage for Diapers and Other Random Stuff You Want To Hide

You guys, I have a super, super-dy duper fun exciting project I’m working on RIGHT NOW that I cannot wait to show you (as long as it turns out like I hope it will–cross your fingers for me!), so be sure to stay tuned.  For sneak peeks and other random shenanigans going on in the shop be sure to follow along on Instagram!

.

Until next time, happy building!


How to Turn Ordinary Glass into an Antique Mirror

January 5, 2017 by Shara, Woodshop Diaries

How to turn ordinary glass into an antique mirror!

I have a thing about doors.  If you’ve been around very long, you know that already.  It’s weird.

.

I love doors, I hate doors.  I’ve taken them down.  I’ve put them up.  I’ve even collected a random assortment of them for decoration purposes.

.

But today, I want to tell you about one door in particular.

How to turn ordinary glass into an antique mirror!

I bought this door three years ago from a local “junk store” that I frequent.  I had no idea what I was going to do with it, but when I saw it, I had to have it.  I actually bought another one just like it a few weeks after that, but that’s another door story for another day.

.

So I got it home and it sat in my garage for a while while I decided its fate.

.

I thought about having a large mirror cut to replace the glass panel in this old door to make it a floor mirror.  But I hated to throw perfectly good glass away, so I did some research and found a way to turn regular glass into a mirror simply with spray paint.  I was skeptical, but it worked awesome!  And it was SO EASY.  I’ll show you how 🙂

.

This post contains affiliate links for your convenience.  If you purchase from one of these links, I may receive a small commission at no extra cost to you.  Thank you for helping support this website so I can continue to provide free content.  See disclosure policy for more details.

.

I have to tell you that I completed this project YEARS ago, so I don’t have pictures of me actually painting the door.  But I have “reenacted” the EXACT same process on some small glass picture frames.  The process is exactly the same.  You can do this on picture frame glass, old doors with glass, old windows with glass, and even glass jars.

You will need:

Glass you want to turn into a mirror (for this example, I used picture frames with glass inserts)

Glass cleaner (I used Windex) and rag

Krylon Looking Glass Spray Paint

How to turn ordinary glass into an antique mirror!

1. Clean the glass

I removed the glass panels from the frames and cleaned them with Windex.  For my door mirror, I did NOT remove the glass panel, but just cleaned it in its place. I put the glass jar in here because I was going to spray it, then changed my mind.  Just ignore that.

How to turn ordinary glass into an antique mirror!

2. Spray paint the glass

I really don’t know how much simpler it gets.  You literally spray paint the glass and that’s it.  The only thing you have to remember here is that you MUST SPRAY THE BACK SIDE OF THE GLASS.  For my frame glass, it doesn’t matter because both sides are the same, but if you are spraying a door and you didn’t remove the glass panel, make sure to spray paint the BACK SIDE, not the front.  Once the paint is on, it’s the reverse side that is actually mirrored.

How to turn ordinary glass into an antique mirror!

How to turn ordinary glass into an antique mirror!

The can says it will take 5 coats.  When I did my door mirror, I could still see through it after 5 coats.  I went with 7-8 coats.  I used a little over two cans for the door.

.

You will get MUCH better results if you let each coat dry well before recoating.  If you still see splotches like the picture above, don’t recoat yet–I mean, you CAN, but it won’t look as good.

3. Admire your new mirror

Once you have all your coats done and it’s dry, flip it over and check it out!  It won’t be a perfect mirror (you probably wouldn’t want to do this for a bathroom mirror or anything), but it’s surprisingly really good for spray paint.  It actually looks like an antique mirror, which is even better!

.

I placed my glass back in the frame and took a picture to show you the mirror effect.

How to turn ordinary glass into an antique mirror!

But here is a much nicer picture of the door mirror:

How to turn ordinary glass into an antique mirror!

How to turn ordinary glass into an antique mirror!

I used this same method on an old window years ago after I finished this door.  Yes that’s me and my camera in the mirror….

How to turn ordinary glass into an antique mirror!

I am sorry that I don’t have actual pictures of when I did my door mirror, but that was at least a year before I even knew what a blog was!  But whatever you are turning into a mirror, the process is so easy and is the same whether it’s a huge door, or a tiny picture frame glass.

.

Such an easy project 🙂  What do you guys think?  Will you try it?

.

How to turn ordinary glass into an antique mirror!

Stay tuned for a fun build coming next week, but until then, happy DIYing!

DIY Wooden Lantern

January 3, 2017 by Shara, Woodshop Diaries

How to build a GORGEOUS wood lantern!

I had the hardest time this year deciding on Christmas gifts to give my grandparents and my boss this last year.  They all like when I make them something, but I didn’t know what in the world they would like me to make and didn’t want to fill their homes with useless junk they feel obligated to keep because I made it for them.  Been there, done that before.  You guys do not want to see what I gave people a few years ago for Christmas.  SO embarrassing.  It was in my early DIY years….

.

So, anyway, last minute (like seriously three days before Christmas), I decided to make them wooden lanterns.

.

I spent almost my entire Christmas break (every spare moment I had) in the shop whipping these up.  It was a fun (yet time consuming) project (because you have to let all the wood glue dry after every step).  FYI glue doesn’t dry very quickly when it’s cold and wet outside…just like the weather we had ALL CHRISTMAS BREAK.

.

But, nonetheless, I got them done and they turned out great.

.

So, without further blabbering from me, let’s just jump in to the how to, shall we?

.

This post contains affiliate links for your convenience.  If you purchase from one of these links, I may receive a small commission at no extra cost to you.  Thank you for supporting this blog so that I can continue to post free content.  Please see disclosure policy for more details.

.

Materials needed:

¼″ plywood (a quarter sheet is plenty for one lantern)

Strips of ⅜″ thick x 1 ½″ wide wood (I ripped a scrap 2×10 down to ⅜″ strips on the table saw.  You could buy some ½″ thick stock from the box store instead.  Exact dimensions don’t really matter–I’ll explain further down)

Wood Glue

Decorative Wooden Rail (Optional)

Masking Tape

Wood Filler

2 small hinges

Tools Needed:

Table saw

Jig Saw (optional)

Miter or Chop saw

Nail and staple gun

Clamps (you can never have too many)

Orbital Sander (optional, but VERY helpful)

Small screwdriver for attaching hinges

.

1. Make the top

The top of the lantern is the hardest part.  But, you can do this.  Trust me.

.

I ripped my sheet of ¼″ plywood (I bought a 4×4 sheet because I was making 4 lanterns total) to 11 ¾″ strips (wood grain running perpendicular to the long side).

Build a GORGEOUS wooden lantern!

Then, I tilted my table saw blade to 45 degrees.  I cut a compound angle (those sound scary, but they aren’t) to make four identical sides to form a “pyramid” by cutting the pieces with a 45 degree bevel and running it through the blade at an angle of ABOUT 20 degrees.

.

First, I set my thingy-ma-jig to about 20 degrees (I have no idea what these things are called, but they come with table saws and you can adjust the angles with a twisty knob on top).  I know I’m using super technical language here.  Just see picture below.  You could use a taper jig instead, or make your own thingy-ma-jig.  And I cut off the end of a board at that angle.  (NOTE: Update…I just googled it and the thingy-ma-jig is called a miter gauge)

How to build a GORGEOUS wooden lantern!

Then I flipped the board over and measured and marked 1 ½″ from the top edge.  This is where the next cut will be.  I lined it up with the blade and adjusted the rip fence to where it was just touching the bottom corner.  PS…dad came over to hang out/help me in the shop when I made these, so he’s holding the boards while I take pictures.  Just in case you were wondering when my hands became so manly looking.

How to build a GORGEOUS wooden lantern!

How to build a GORGEOUS wood lantern!

I ran this through the saw just like this with the corner running along the fence, then flipped it over and did it again and again and again and again (does that make four yet?) until I had four identical pieces.

How to build a GORGEOUS wooden lantern!

Then I ran them through the saw again with the blade tilted to about 20.5 degrees.  I ran the tops of the pieces flat against the rip fence, this time trimming only the bottom of the pieces at a slight bevel so it’ll sit flat on a surface once it’s made into a “pyramid.”  You could also do the tops with the bevel, but sanding it flat once it’s assembled is quicker. This step is optional, but will help later when it’s glued.

How to build a GORGEOUS wood lantern!

Once all the pieces were cut, I lined then up and drilled a decorative hole in them.  This step is optional, but it makes it look nice and helps with the gluing later.  Then, I laid them on the work surface and taped the OUTSIDE edges with masking tape.  So the cut bevels are on the bottom side. Don’t worry if they don’t line up PERFECT.  I just got mine as close as I could.

How to build a GORGEOUS wood lantern!

Then I flipped it over and filled the joints with glue.  It will be messy.  Be prepared.

How to build a GORGEOUS wooden lantern!

I put some glue on the two outside edges, then folded it together and taped the final joint.  I feel weird saying “joint.”  I just needed to confess that.

How to build a GORGEOUS wooden lantern!

Then I took them inside to let the glue dry really good overnight.  These things are a little fragile.

2. Make the bottom.

Now at this point, I had already ripped down my 2×10 scraps into ⅜″ strips.  LOTS OF THEM.  I made four lanterns and had some leftover.

How to build a GORGEOUS wood lantern!

As I said earlier, you totally don’t have to do this.  It’s by far the cheapest way of doing it, but you can get ½″ (and I think ¼″) strips at big box stores if you don’t want to rip them down.  If you do that, however, be mindful of your measurements because they will not be the same as mine.

.

So, from the leftover plywood, I cut a 10×10″ square and cut four strips to fit around it.  I used my jig saw to cut a decorative design, but that’s optional.

How to build a GORGEOUS wood lantern!

How to build a GORGEOUS wood lantern!

I glued and nailed them together, then added a small scrap block to the corners ¼″ from the top.  This was so the plywood bottom could be supported.

How to build a GORGEOUS wood lantern!

Then I glued around the edges of the plywood and slid it in place and clamped.

How to build a GORGEOUS wood lantern!

3. Make the sides

This part is so easy.  I just made four panels (one slightly smaller than the rest for the door) and nailed them together.

.

Two panels are identical dimensions (15″ tall x 10″ wide), one is 15″ tall x 9 ¼″ wide, and the last one (to be used as the door) is 14 ¾″ tall x 9″ wide.

How to build a GORGEOUS wood lantern!

I glued all the joints, then stapled them together (only on the back side).  Then I clamped them until the glue dried.

How to build a GORGEOUS wood lantern!

4. Finish the top

While all this is drying, I made a square (I think it was about 12″x12″…as long as your top sits on it, it’s an okay size) from the ⅜″ strips.  I mitered the corners, then glued and stapled both sides to hold it together.

How to build a GORGEOUS wood lantern!

Then I took all the tape off the pyramid and glued and clamped this to it.

How to build a GORGEOUS wood lantern!

While this was drying, I made a decorative piece for the very top.  I cut two triangles from the ⅜″ strips to make a square and stapled them together.  I took an old decorative wooden railing I’ve had in the shop (I’ve been trying to find something to do with it for years) and cut a piece off and glued it on the square.  Did you notice the dead spider?  Don’t worry, I’ll point it out for you 🙂

How to build a GORGEOUS wood lantern!

How to build a GORGEOUS wood lantern!

Once the glue was dry, I glued this to the top of the pyramid part.

How to build a GORGEOUS wood lantern!

How to build a GORGEOUS wood lantern!

5. Assemble the bottom panels

Once the panels are dry, I recommend sanding the glue off the fronts.  An orbital sander is AWESOME for this. Then I glued and nailed everything but the door together.

How to build a GORGEOUS wood lantern!

Then, I nailed the bottom to the panels.

How to build a GORGEOUS wood lantern!

6. Attach the top and door

Then I carefully attached the top by gluing and nailing at a slight angle.  You may have to trim some stray nails if you miss (and you probably will).  But side cutters work great for this and you won’t even notice.  My top is still clamped here…I was getting tired of waiting for the glue to dry, so I let it dry while I moved on to the next step here.  Once the top was attached, I used some small brass hinges and attached the door on the front.

How to build a GORGEOUS wood lantern!

7. Putty, sand, and finish

I highly recommend puttying the corners on the pyramid and where the pyramid meets the square where you nailed the top on.  If you plan to stain, use stainable putty.  I like this stuff, but Elmers is good, too.

How to build a GORGEOUS wood lantern!

Once it’s good and dry, I use an orbital sander and sand off what I can.  And to sand off any remaining glue.  Orbital sanders are life savers.

.

Then I stained it in Minwax Early American.  And I wrapped them up and gave them away 🙂  But not before I got a few pictures of them.

How to build a GORGEOUS wood lantern!

How to build a GORGEOUS wood lantern!

How to build a GORGEOUS wood lantern!

How to build a GORGEOUS wood lantern!

How to build a GORGEOUS wood lantern!

So what do you guys think?  So sorry for such a long post!  But didn’t it turn out beautiful?  I was pretty excited to give them away.

.

I have several more projects up my sleeve to show you guys now that the holidays are over, so stay tuned!

.

But first, pin this baby for later!

How to build a GORGEOUS wood lantern!

Until next time, happy DIYing!!!

Woodshop Diaries First Year as a Real Blog–2016 Year Review

December 29, 2016 by Shara, Woodshop Diaries

2016 Year in Review--My first REAL year of blogging

Before I tell you all about 2016, let me take you back to 2013 real quick.  You’ll understand why in a few more paragraphs.

.

So, cue the cheesy music and swirly special effects to take you back those three years and picture this.  It’s summer…blazing hot.  I’m in a tiny garage in a nice subdivision (with the garage door open by the way) on my hands and knees crying because I just broke the glass I had been painting (for DAYS) in an old window.  Classy, I know.  It was my FIRST EVER DIY project and it was NOT going as planned.

.

So cue the cheesy music and swirly special effects again…now we are back in 2016 (thank goodness!) and oh how far we have come in just three years.  (FYI I do still throw a temper tantrum shed a tear or two over a project occasionally…but I do close the door now.)

.

Why did I tell you all that?  Because that’s my beginning.  This whole DIY journey started with a little chalkboard window that tested my patience just three years ago.  I have grown/learned/changed a lot since then.  But in the last three years, I have grown the most–personally, blogger-ly (totally not a word), and woodworking-ly (totally not a word either)–in 2016.  So what happened this year?

.

I started a blog

.

Okay, so TECHNICALLY I had a blog before 2016.  A SMALL handful of you may remember me as Chasing a Dream Blog–which was started in 2014 and was really really awful.  DO NOT GO BACK AND READ MY EARLY STUFF.  I need to keep some of my dignity.

.

But in June of this year, I took the leap, changed my blog name, and decided to pursue growth.  Because ultimately, I’d like this to be full time.  Since June, my blog has over doubled it’s all time page views, has ten times as many subscribers, and quadrupled it’s social media following.  So, why did it grow so much just this year?  I honestly don’t know.  But these things could have something to do with it:

.

I built more unique things to share

.

I can attribute some of the growth to better content.  This year alone, I posted over 25 “building” projects (but I built far more pieces than I posted, I can assure you), and three remodel projects.  I still don’t really know how that happened.  When I went back and counted, I had to recount several times to make sure haha.  This was definitely the year of building.  And these were some of my most popular builds from this year 🙂

.

Coffee Cabinet

Mid Century Dresser

Built in Benches

And these were the three remodels:

The Office

The Master Bathroom

The Master Bedroom

I took way better photos

.

Have you guys gone back (after I specifically asked you not to) and looked at any of my first couple posts?  Did you notice the horrible photos?  I know things aren’t awesome now, but you can clearly see a big improvement, right?  RIGHT?  If you can’t, just lie to me and say you can.

.

I have DRASTICALLY improved my photography this year with a new camera (not that I have any idea how to use it yet).  However, my selfie game is still slacking.  And yes, of course I purchased an expensive camera to take selfies…  #priorities

No, but really, these are the only selfies in my camera….promise.

I tried new things

Like sewing.  That was weird, huh?  You’re going along like power tools, prybar, new flooring, more power tools…then all of a sudden it’s like…..sequins???  Funny story, though…after I pinned this on Pinterest like five times (I’m a persistent pinner), it just took off and got 1.4K pins in like two days.  Guess sometimes you just need some shiny sequins in your blog posts?  I’ll try that again in 2017…stay tuned.

Grinch Pillow

Check out this awesome Grinch Pillow--a Pottery Barn Knock Off!

And some simple decorating projects.

Christmas Swags

Super Easy 5 Minute Christmas Swags

And I tried my hand at Facebook Live.  Let’s just not talk about that, okay?  Let’s just pretend that never happened.

So now what?  What’s coming for 2017?

.

Honestly, I have no idea.  I have hopes for continued growth and new opportunities.  I have hopes that this will be the year that Woodshop Diaries becomes a full time gig.  (Although my parents do NOT understand how that’s a thing.)  I have hopes that this next year I will build even more, and have even more fun ideas to share.  I also have hopes to start a YouTube channel and get more thumbs up than thumbs down haha.  I just honestly have no idea where 2017 will take me.

.

All I know is that a lot of good things have happened in 2016 with this blog.  And I’m worn out from all the building and blogging. (Did you guys notice it’s been almost a month since the last post?  Totally didn’t mean for that to happen!  But I was WORN OUT.)

2016 Year in Review--My first REAL year of blogging

I just really hope you guys continue to follow along on the ride in 2017 and we can just see what happens together 🙂  I’m just winging it, so you never know what might happen!  Here’s to the new year!  Hope you guys have a great one!

.

I’ve got several projects to get started on in the new year so keep your eyes out!  Until next time, Happy DIYing!

DIY Grinch Pillow–A Pottery Barn Knock-Off

December 6, 2016 by Shara, Woodshop Diaries

Check out this awesome Grinch Pillow--a Pottery Barn Knock Off!

In this post, I’m excited to share with you how to make this super fun DIY Grinch Pillow!!

Close up of DIY Grinch Pillow Cover in basket by Christmas Tree

But first, enjoy a super cheesy poem I wrote when I figured out that this Grinch pillow cover from Pottery Barn was too expensive–plus out of stock–when I figured out that’s what my sister wanted for her birthday. Or…skip the poem and scroll down for the how to 🙂

.

My favorite, only sister loves the Grinch a whole lot.

I, on the other hand, do not.

But she wanted this pillow with all it’s sequins and shine,

I thought she was silly, the price was so high!

.

But, her birthday was coming and I knew what to wrap,

I searched for the pillow, but they were all gone in a snap!

What can I do, they are all sold out?

So I brainstormed and pondered and let out a shout!

.

I can make one myself, I’m a DIYer after all.

So I headed to the craft store right next to the mall.

I bought a few bags of sequins, red and white,

And a Sharpie that on fabric it claimed to write.

.

I traced out a face with a Santa hat dangling,

And my needle and thread repeatedly tangling,

Hand stitching each and every tiny sequin with love,

I sewed her a pillow cover that fit like a glove.

.

What’s better than store bought, you ask so sincerely,

A homemade and thought felt gift, clearly.

So I will show you how I made this cute cover,

Just follow the steps and you will discover.

.

Okay, I’m done.  I can’t rhyme anymore.  There towards the end it got a little weird, so I figured I need to stop while I was ahead.

.

So when I saw that BUYING her this pillow cover wasn’t an option, I put my thinking cap on and decided to just make one.  It was super easy, just a little time consuming with ALL. THE. SEQUINS. But it’s totally worth it.  Trust me.

.

This post contains affiliate links for your convenience.  For more information, see disclosure policy.

.

To Make a Grinch Pillow, You Will Need:

  • Drop cloth (or other fabric of your choice for the pillow cover)
  • Scissors
  • Black Stained Sharpie pen 
  • A couple sheets of plain 8×11 paper
  • Clear tape
  • Red and white sequins (you’ll only need one bag of each. I used 8mm sequins from the craft store, but here is a link to some on Amazon if you’d rather buy online)
  • Red and white thread
  • Needle
  • Pins and sewing machine (if you don’t have a sewing machine you can hand sew instead)

AND LOTS OF PATIENCE 🙂

Materials needed to make DIY Grinch pillow cover

Step 1: Create Grinch Pillow Cover Template

I found the picture of the pillow on the website and copied it into a Microsoft Word document. I set the image to layer in front of text so I could adjust and move it around.

.

I sized the picture of the pillow in Word at 18″x18″.  Then I rotated it sideways and put only the bottom part of the picture on the blank page.  Make sure your view is zoomed to 100%.

.

I placed a blank sheet of paper on the screen and LIGHTLY (don’t damage your screen) traced the outline of the face.

tracing template from computer screen
Trace template from computer screen onto paper

Then I moved the picture so that the top part of the pillow was on the blank page and traced again on a new sheet of paper.

Trace template from computer screen onto paper

Once I had it traced out, I lined it up and taped the pieces together and used a Sharpie marker to make the lines thick and dark.

Grinch template on paper

Step 2: Apply Template to DIY Grinch Pillow Cover Cloth

I wanted an 18×18″ pillow cover, so I cut a piece of drop cloth material (I keep this on hand because it’s awesome for all kinds of projects) at about 18 ½×18 ½″ (leaving room to sew) and taped the drawing onto the back (notice I taped it so the image is mirrored).

Grinch template on paper upside down on fabric

Then I taped it onto my back door when the sun was shining bright outside and traced the image onto the drop cloth with a pen.  Ignore the cat…you’re lucky only one of them got in the picture haha.

pillow fabric on back door to draw trace template

I took it off the window and over to the kitchen table and used my Stained Sharpie pen to color in the lines.

Grinch template applied to fabric

Step 3: Sew on Sequins

Then I began hand stitching the sequins on inside the lines of the hat.  I used red thread for the red sequins and white thread for the white sequins.  I filled all the areas where there weren’t black lines.

Red sequins completed using red spool of thread
Close up of needed stitching sequins onto fabric
Close up of red and white sequins on drop cloth material
Close of of stitching sequins onto pillow cover
Sequins sewn onto pillow cover front fabric

I felt like the Grinch when he is sewing his Santa outfit in the cartoon while I was stitching these on.  Appropriate haha.

Step 4: Sew Up Pillow Cover

Once I had all the sequins on, here comes the sewing part.  I’m just winging it, so you may want to read tutorials on this that are better than mine.

.

I cut two pieces for the back side of the pillow both the same height as the front piece (18 ½″) but, cut their width so that one piece overlaps the other a few inches.

Pillow cover fabric pieces turned inside out ready for sewing
Drop cloth pieces overlapping each other on table

I turned the pieces so the pillow would be “inside out,” pinned around the edges and sewed around all sides with my sewing machine.

Close up of pins in pillow cover fabric ready to sew up

Then turned it right side out.

Finished pillow cover laying on worktable

I stuffed an 18×18 pillow I had laying around into the back and that’s it!

Close up of Grinch Pillow cover with sequins
Grinch Pillow cover in basket next to Christmas tree
DIY Grinch pillow cover with pillow inserted laying on blanket

My sister loves it, and I’m so glad! This tutorial would work well for basically any template design you wanted and would be really cool for making seasonal pillows throughout the year!

.

I hope you’ve enjoyed this DIY Grinch Pillow and if you want to save this for later, be sure to pin it!

Materials needed and finished Grinch pillow cover pinterest collage image

Until next time, happy DIYing! And Merry Christmas 🙂

DIY Interior French Doors

December 5, 2016 by Shara, Woodshop Diaries

I’m back with a building project–FINALLY after all this Christmas stuff. I’m sure some of you are glad that’s over with right?  Joke’s on you, though, because I have one more Christmas post for the year to show you later.  But it will be fun, so stick around.  If you’ve been hating the Christmas thing (I figure there are always a few), bear with me.  I’m back in the shop this week, so I have some fun things coming 🙂

.

So remember when I told you all (I mean ALL) about our bathroom remodel?  And remember a LOOOOOONG time ago, I told you about our closet remodel?  Well remember last year when I made sliding doors how I told you about my hatred of interior doors…especially boring ones?  Well if you put all those pieces together, it would make sense when I tell you that I removed the closet and bathroom door during remodels and they never got replaced.

.

Since we don’t have kids, or inside pets, I really don’t see a problem with not having doors on the master bathroom or closet, but Danny SOMEONE thinks doors are a necessity.  Here is what we had going on before.  The opening in the back is the bathroom and the one towards the front is the closet.  It’s really awful right now after the bathroom remodel chaos, so it’s on the to do list for next year.

img_0897

img_0972

Danny has a thing about sliding doors.  And by “thing” I mean “hatred.”  So sliding doors were out of the question for in here.  But all these stupid doors take up so much space (for real I hate doors) when they open, so I didn’t want normal sized doors.

.

My solution was French doors that both opened INTO the bedroom instead of the closet and bathroom since they are both so small to begin with.  I wanted “fancy looking” French doors, so I did raised panels on the bottom and arched frosted glass on the top.

.

Here’s a general overview of how I made them:

.

First, obviously, I determined the size my doors needed to be and I made a frame using 1x4s for the sides, 1x8s for the tops and bottoms and a 1×6 for the middle.  I cut the pieces to size using my miter saw (affiliate link).  I cut my tops with an arch using my jig saw (affiliate link) and an old metal bucket as a template.

Dress up your closet or bathroom with these gorgeous DIY French doors

I built the frame using my Kreg Jig (affiliate link) and pocket hole screws (affiliate link).

Dress up your closet or bathroom with these gorgeous DIY French doors

See my scrap/trash pile back there?  When my sister quit having bon fires, my trash can started overflowing… #bringbackthebonfires #someoneemptymytrashcan

Dress up your closet or bathroom with these gorgeous DIY French doors

Then I used my router to cut ⅛″ deep and ¼″ wide groove around the opening where the glass will be.

Dress up your closet or bathroom with these gorgeous DIY French doors

Dress up your closet or bathroom with these gorgeous DIY French doors

Ordering glass with an arch to fit in here perfectly would be expensive and it still probably wouldn’t fit right, so I used a straight bit on my router and adjusted it to ⅛″ deep and free handed it to cut out the rest of this rectangle.

.

I just need to confess that this was the most therapeutic thing I’ve ever done.  Freehand routing is where it’s at.  It’s not pretty at all, but boy does the stress just fly away…probably along with all the sawdust…  TRY. IT. (NOTE: The picture is of a different door because the arches are different direction.)

Dress up your closet or bathroom with these gorgeous DIY French doors

After I had all the doors cut like this, I measured carefully and ordered 4 glass panels (I was making 4 doors total) the same size that would fit in the openings.  NOTE: It’s easier to cut first, THEN order the glass to fit than to order the glass and have to chisel here and there to get it to fit.

.

Once I made sure the glass panels fit well, I spray painted them with frosted glass spray paint (affiliate link).

.

In between coats, I worked on the bottom part of the doors.  Just like the top, I used a router to cut out ⅛″ deep and ¼″ wide groove around the openings.

Dress up your closet or bathroom with these gorgeous DIY French doors

There are lots of tutorials out there on how to make raised panels.  I’m not going to show you step by step because I forgot to take pictures in the process, but it’s very redundant…and plenty of people have already posted it before.  Once you get it set up, you just do things OVER AND OVER AND OVER.

.

I used 2x10s for my panels and “raised” them on both sides.  These panels were about ½″ wider and taller than the opening so that they fit inside the grooves I cut.

.

 I set up a simple jig on my table saw to help me run my board through. I just needed something to clamp my panel to that would keep it upright and straight along the rip fence.

Dress up your closet or bathroom with these gorgeous DIY French doors

I tilted my table saw blade at 15 degrees and ran a few test pieces through until I had my rip fence to the location that I wanted.  Keep in mind, I was beveling both sides of the 2×10.  I wanted the bottom between the two bevels to be about ¼″ wide.

.

By the way, it helps to plane these 2x10s before running them through the saw.  This will keep all the bevels the same because most 2x10s are going to have at least a little bow to them.  When I had everything set up, I just clamped my 2×10 to the jig and ran it through.  Then unclamp, turn it, clamp again, run it through.  I did this on all four edges on both sides.  I had four panels, so this was super repetitive.

Dress up your closet or bathroom with these gorgeous DIY French doors

Once that was done, I used the router again (but you could use the table saw) to cut the outside edges flat so they would sit in the grooves of the frame.  I had already stained them when I took this picture, but you can see where I routed them along the outside edges.  I stained the frames and put some glue in the grooves I cut for these panels and placed them in.

Dress up your closet or bathroom with these gorgeous DIY French doors

Dress up your closet or bathroom with these gorgeous DIY French doors

While the glue was drying, I built frames again just like I did at the beginning…same measurements and everything.  Only this time, the arches need to be mirrored because these frames will be glued on the back of the first ones.  Once the frames were built, I routed out grooves on ONLY the bottom opening in the frame.

Dress up your closet or bathroom with these gorgeous DIY French doors

Then I stained these frames.  Once the glue from the panels was dry and the stain on the second set of frames was dry, I laid them out and placed the glass in the grooves on the first set of frames.  Then I glued the second frame on the back of the first one and added a few finish nails from my nail gun to keep them in place while the glue dried.  Basically, you are sandwiching in the raised panel and the glass panel.

Dress up your closet or bathroom with these gorgeous DIY French doors

I attached hinges (affiliate link) and some antique door knobs that I found at the local “junk store.” and hung them in place.  Oh and I was sure to hang some cute Christmas swags on them 🙂

Dress up your closet or bathroom with these gorgeous DIY French doors

I originally planned on mortising the hinges, but wanted to get them hung first just to see how they looked.  Once they were hung, they fit well without mortising, so I decided not to mortise them.  I may later, but for now, I’m just glad they are up and function.

Dress up your closet or bathroom with these gorgeous DIY French doors

Dress up your closet or bathroom with these gorgeous DIY French doors

Dress up your closet or bathroom with these gorgeous DIY French doors

Dress up your closet or bathroom with these gorgeous DIY French doors

I liked how the reflection of the new doors looked in my “old door mirror” (tutorial coming soon) across the room.

Dress up your closet or bathroom with these gorgeous DIY French doors

Dress up your closet or bathroom with these gorgeous DIY French doors

And again with the reflections 🙂

Dress up your closet or bathroom with these gorgeous DIY French doors

We literally NEVER close these doors, but I guess it’s nice to be able to if we wanted.

Dress up your closet or bathroom with these gorgeous DIY French doors

Don’t judge my ugly closet.  It needs some TLC after that bathroom thing.

Dress up your closet or bathroom with these gorgeous DIY French doors

Dress up your closet or bathroom with these gorgeous DIY French doors

Dress up your closet or bathroom with these gorgeous DIY French doors

So what do you think of my new doors?  Sometimes I LOVE them and sometimes I think they are “too much” for this room.  What are your thoughts? I ALMOST painted them white, but I think I’m glad I didn’t.

.

Either way, Danny’s got his doors, and I’m glad they aren’t hollow core 🙂  So I guess for now they are staying.

Dress up your closet or bathroom with these gorgeous DIY French doors

Let me know what you think!  And, if you guys have projects you would like to see in the new year, send me an email and let me know!  I’m looking for some fun new projects to tackle 🙂

.

Until next time, happy DIYing!


Christmas Home Tour 2016

November 30, 2016 by Shara, Woodshop Diaries

Christmas Home Tour 2016--Woodshop Diaries

 It’s finally that time of the year when the turkey is put away and Christmas is in full swing!  The tree is up and the stockings are hung and I don’t feel guilty in the least for the fact that my tree has actually been up for a couple weeks.  (Please no judgmental looks from all of you on team don’t put your tree up before Thanskgiving.)  And I’m so excited to finally be able to give you guys a Christmas Home Tour!!

.

This year, I decorated the living room, kitchen, and bedroom and I took a more traditional theme with lots of red and green and a little gold.  Last year, Danny put his little tree in the kitchen, but this year he wanted it in the living room so he could see it when he watches TV.  It obviously didn’t fit in my original “design,” (you’ll see why in a minute) but sometimes you just have to let it go and remember that there is more to life than having a perfectly designed living room….I would know because I’ve never had one hahaha.

.

Our home isn’t perfect, and I’m not a professional decorator (as I’ve admitted many times before), but I hope you enjoy touring our Christmas home anyway 🙂

.

Let’s start at the beginning…the front porch.

Christmas Home Tour 2016--Woodshop Diaries

Christmas Home Tour 2016--Woodshop Diaries

I’ve had the same Christmas wreath for several years, but this year I made a new one and I am really loving it.  It only took 5 minutes to make!  You can read all about it here.

.

I redid our garland around the door to match the ribbon in the wreath and I love this white and gold ribbon I found at Hobby Lobby.  It’s a great reminder of the real reason we celebrate Christmas.

Christmas Home Tour 2016--Woodshop Diaries

So now that we’ve peeked around the porch, come on in 🙂

Christmas Home Tour 2016--Woodshop Diaries

I have so much to show you, but let me start with the living room. I bet you cant guess which tree is Danny’s. He’s a big fan of the multi color blinking lights….I’m not so much.  But he’s happy and that’s what matters.

Christmas Home Tour 2016--Woodshop Diaries

This year, Danny wanted a train around the tree.  I found one and surprised him with it on Black Friday.  He was SO EXCITED.  It runs on batteries and plays all these Christmas songs and horns and stuff.  Oh boy…

Christmas Home Tour 2016--Woodshop Diaries

Christmas Home Tour 2016--Woodshop Diaries

We have a cat with ALOT of personality and we thought he would love the train, but turns out he HATES it.  But I got a few cute pictures of him before we put the train out.

Christmas Home Tour 2016--Woodshop Diaries

He’s not an inside cat…he just likes to take the shortcut from the front yard to the back through the house occasionally.  I’m afraid we may not have a tree if he was an inside cat haha.

Christmas Home Tour 2016--Woodshop Diaries

Christmas Home Tour 2016--Woodshop Diaries

Christmas Home Tour 2016--Woodshop Diaries

Christmas Home Tour 2016--Woodshop Diaries

I drug out my sewing machine this year and made myself a new stocking from this plaid material and some fake fur.  The mantle felt bare, so I made six more from fabric scraps leftover from last Christmas…for our pets.  I thought they turned out cute.

Christmas Home Tour 2016--Woodshop Diaries

Who knew I could sew?  Let me clarify something–there is a difference in sewing and sewing WELL 😉

Christmas Home Tour 2016--Woodshop Diaries

You can see the tape (OOPS), but for the mantle this year, I tore out pages from an old book I found at the junk store and taped them onto my chalkboard from last year in the shape of a Christmas tree.  I should have used the satin tape instead of the gloss, but it’s too late now.  I liked the little tree accents on the sides.

Christmas Home Tour 2016--Woodshop Diaries

Christmas Home Tour 2016--Woodshop Diaries

Instead of changing out the décor on our hearth, I added a little Christmas swag onto the lantern and it fit right in.

Christmas Home Tour 2016--Woodshop Diaries

Over on the couch, I sewed a few new Christmas pillow covers (again with the sewing…don’t look too close) and used a couple pillows I already had.

Christmas Home Tour 2016--Woodshop Diaries

Christmas Home Tour 2016--Woodshop Diaries

Christmas Home Tour 2016--Woodshop Diaries

Christmas Home Tour 2016--Woodshop Diaries

Oh yes, and I can’t forget the twisty table.

Christmas Home Tour 2016--Woodshop Diaries

I added my favorite little decoration–the Charlie Brown Christmas tree–over next to the TV.

Christmas Home Tour 2016--Woodshop Diaries

Christmas Home Tour 2016--Woodshop Diaries

Now, take a small step up into the kitchen.  I kept it simple in here this year.

Christmas Home Tour 2016--Woodshop Diaries

Christmas Home Tour 2016--Woodshop Diaries

Christmas Home Tour 2016--Woodshop Diaries

I’d offer you some pie and hot chocolate, but I’m pretty reluctant to share my homemade chess pie.  It’s kind of like what I imagine everything in heaven will taste like.

Christmas Home Tour 2016--Woodshop Diaries

I finally got around to painting these chairs black this weekend and I love them!  I added these Christmas swags on the back and they are so festive!

Christmas Home Tour 2016--Woodshop Diaries

Christmas Home Tour 2016--Woodshop Diaries

Super Easy 5 Minute Christmas Swags

I love the simplicity of the little tree on the table this year.  It’s easy to clean around 🙂

Christmas Home Tour 2016--Woodshop Diaries

Christmas Home Tour 2016--Woodshop Diaries

Christmas Home Tour 2016--Woodshop Diaries

We added some garland around the opening, but didn’t change a whole lot for Christmas in this area.

Christmas Home Tour 2016--Woodshop Diaries

Christmas Home Tour 2016--Woodshop Diaries

Christmas Home Tour 2016--Woodshop Diaries

Christmas Home Tour 2016--Woodshop Diaries

Christmas Home Tour 2016--Woodshop Diaries

Christmas Home Tour 2016--Woodshop Diaries

Christmas Home Tour 2016--Woodshop Diaries

Christmas Home Tour 2016--Woodshop Diaries

I think I have shown you a bazillion kitchen pictures, so let’s move onto another room.

Christmas Home Tour 2016--Woodshop Diaries

This year, I added some decorations to the bedroom.  Now that it’s been redone a little with new flooring and a new layout, I thought it would be fun to decorate it a little.

Christmas Home Tour 2016--Woodshop Diaries

I love this new paper grocery sack art on the dresser.

Paper Sack Christmas Art and DIY Frame

Paper Sack Christmas Art and DIY Frame

Christmas Home Tour 2016--Woodshop Diaries

I kept it simple in here too.  A few pops of red make all the difference.

Christmas Home Tour 2016--Woodshop Diaries

I sewed a few more pillow covers with some cute fabric and added this vintage pillow I found at Kirkland’s.

Christmas Home Tour 2016--Woodshop Diaries

Christmas Home Tour 2016--Woodshop Diaries

Stay tuned for the how to to make those French doors.  I’ll post that soon!

.

But for now, that finishes off the Christmas tour.  I hope you enjoyed it!  As always, as you are celebrating and going through all the hustle and bustle of the season, don’t forget to stop and remember the real reason we celebrate.  That is, the gift of Jesus Christ, which was given to all of the world on the very first Christmas night.

Christmas Home Tour 2016--Woodshop Diaries

Merry Christmas and God Bless!Christmas Home Tour 2016--Woodshop Diaries


5 Minute Christmas Swags–Because Every Room Could Use Some Swag

November 28, 2016 by Shara, Woodshop Diaries

Give Your Doors Some Swag with This Five Minute Decoration!

I’m all about these 5 minute Christmas decorations this week, you guys.  For real, my attention span when it comes to decorating is like 3 minutes, so by the time we are at five minutes, if we aren’t done, I’ve already mentally moved onto a new project…one that probably involves demo or table saws.

.

So these quick little projects are my jam this year with my Christmas décor.  Speaking of jamming, do yourself a favor and buy Chicago’s Christmas album (affiliate link).  BEST. CHRISTMAS. ALBUM. EVER.  Just play it on repeat and thank me later 🙂

.

So anyway…back to the swags…I made several of these little Christmas swags one night while supper was cooking and they are so multipurpose, you can find a place for a couple in every room.  And I did.  And I will show you 🙂 Oh and to top it off, because you guys know me…..THEY ARE CHEAP.

.

I can’t believe I’m posting about this, because I feel like it’s so easy, it doesn’t need a tutorial, but mom keeps telling me to post one (though she doesn’t read my blog…what’s the deal, mom?), so here we go.

.

You need:

Small swags (I found mine at Hobby Lobby in the Christmas ribbon section…they have ALL KINDS…Michael’s has some too!)

Wire edged ribbon (I used two colors for variety, but you could just use one if you wanted)

Floral Wire

Scissors

Super Easy 5 Minute Christmas Swags
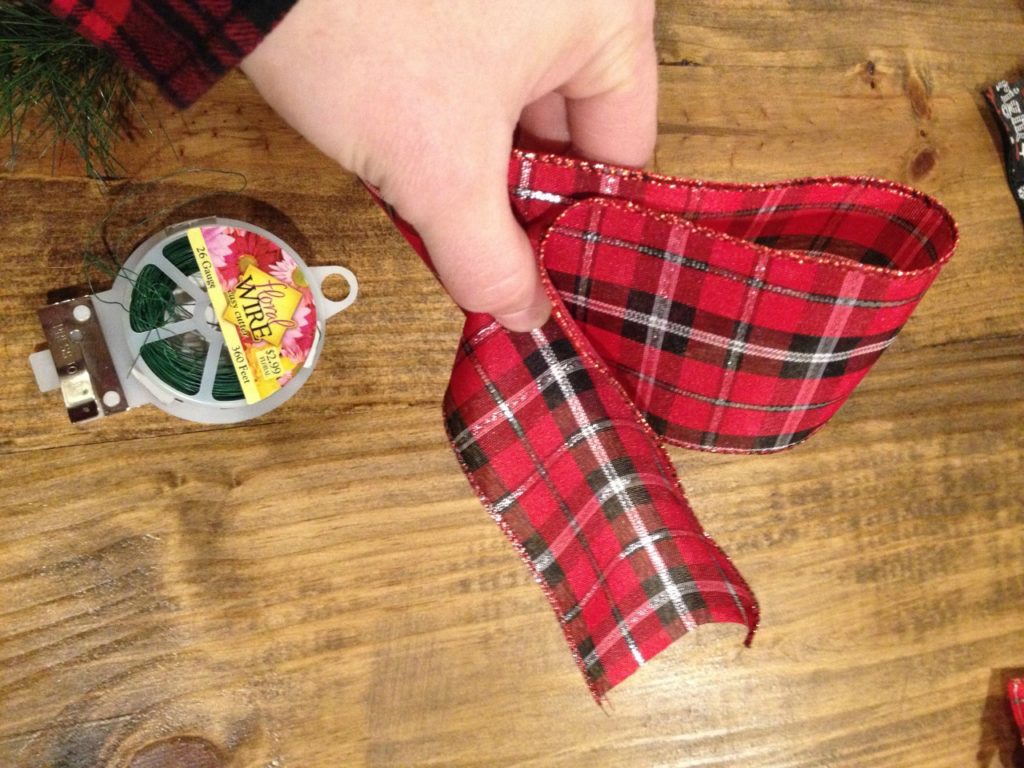
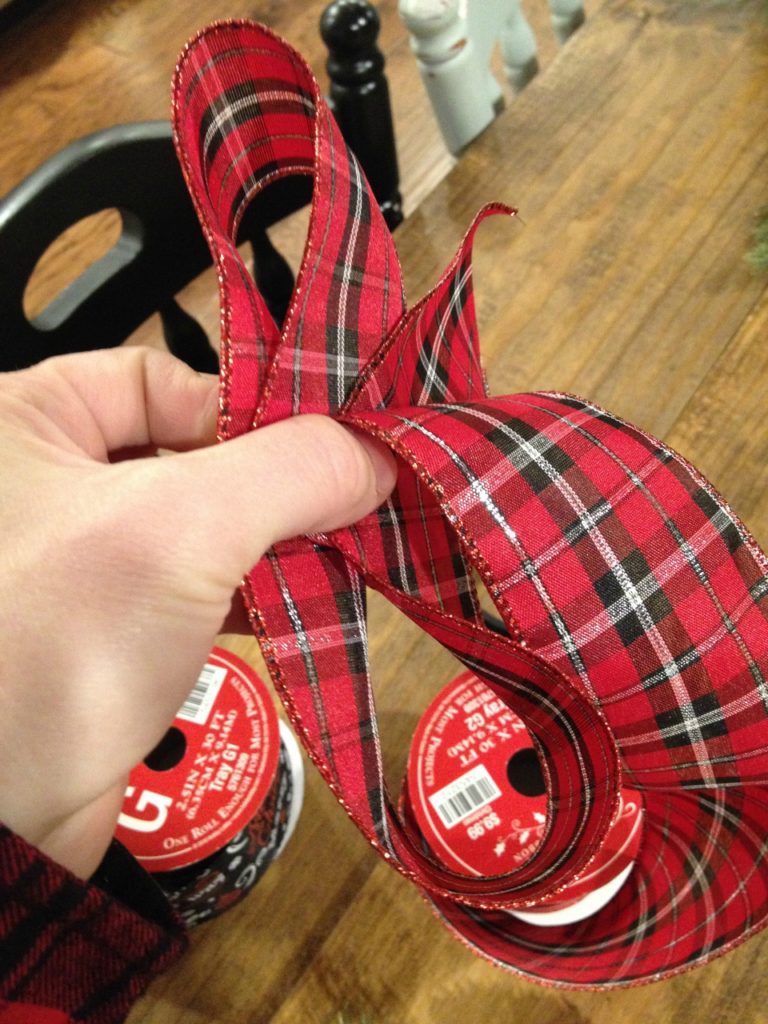
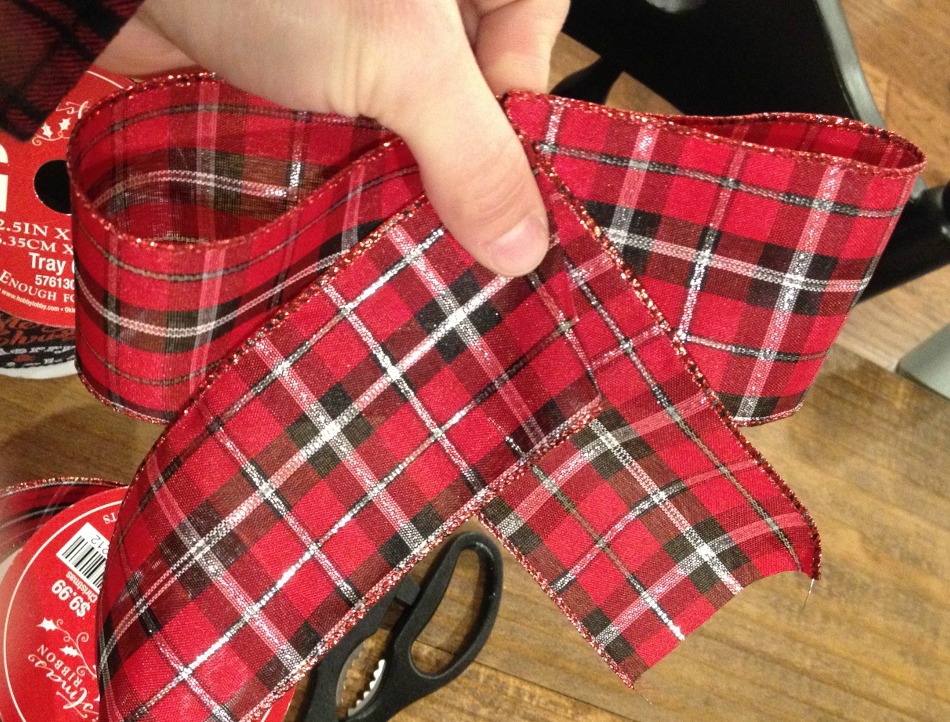
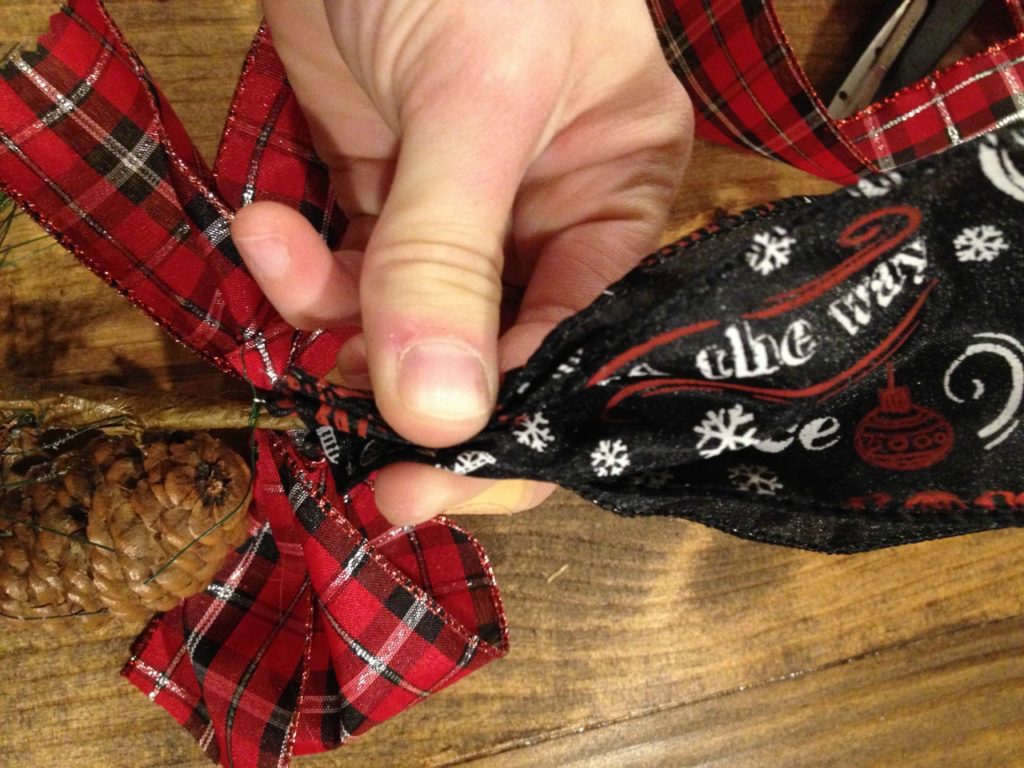
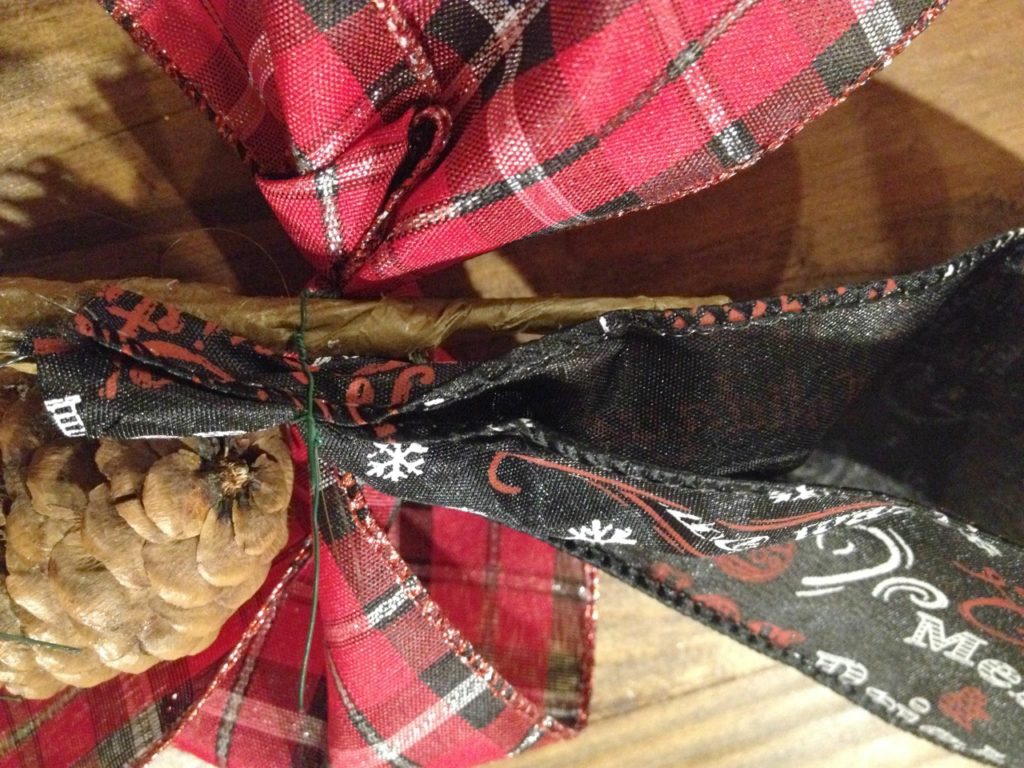
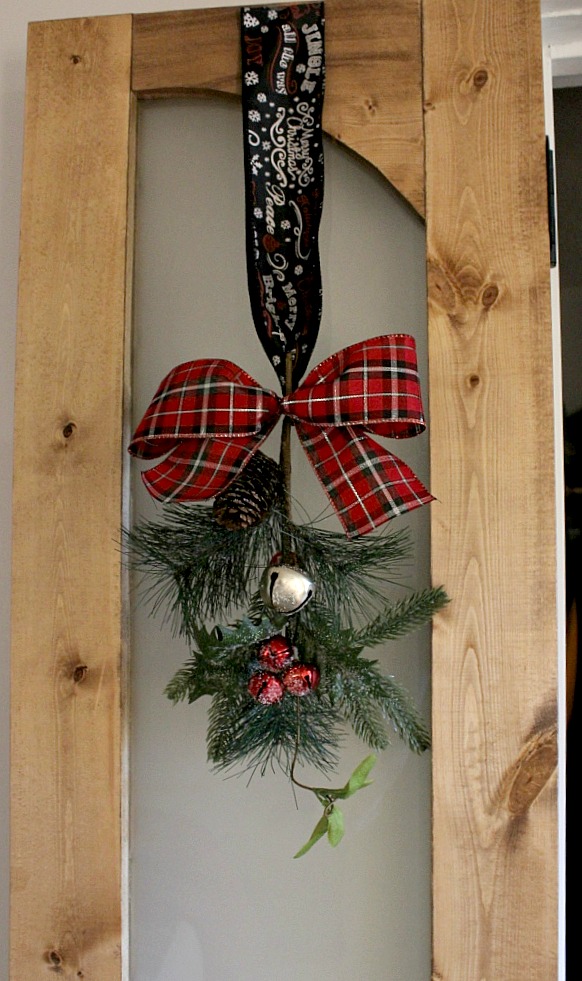
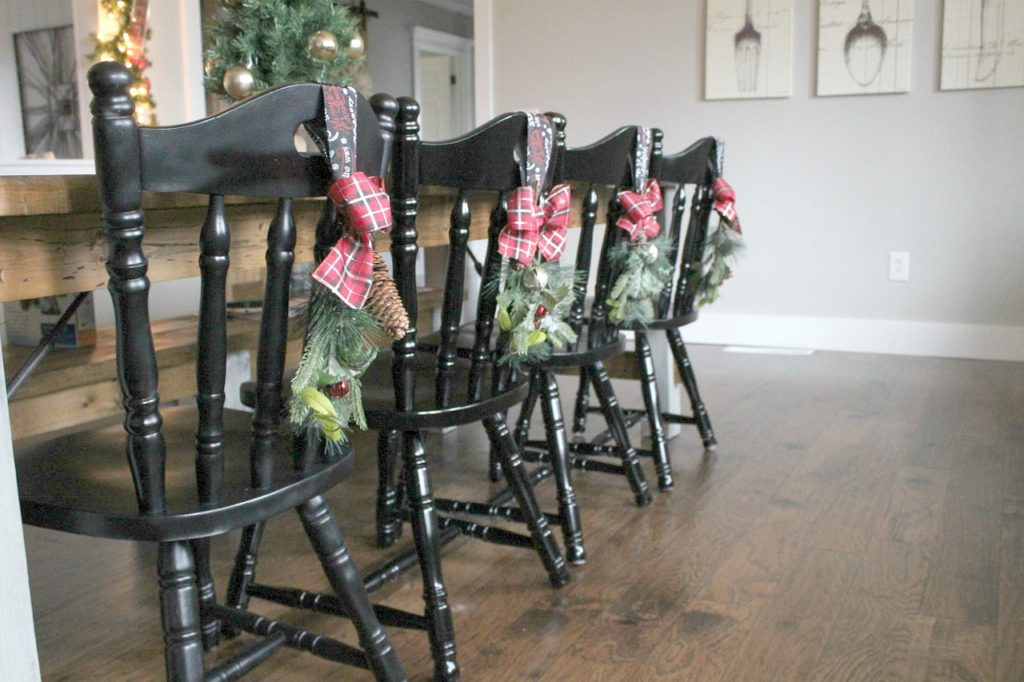
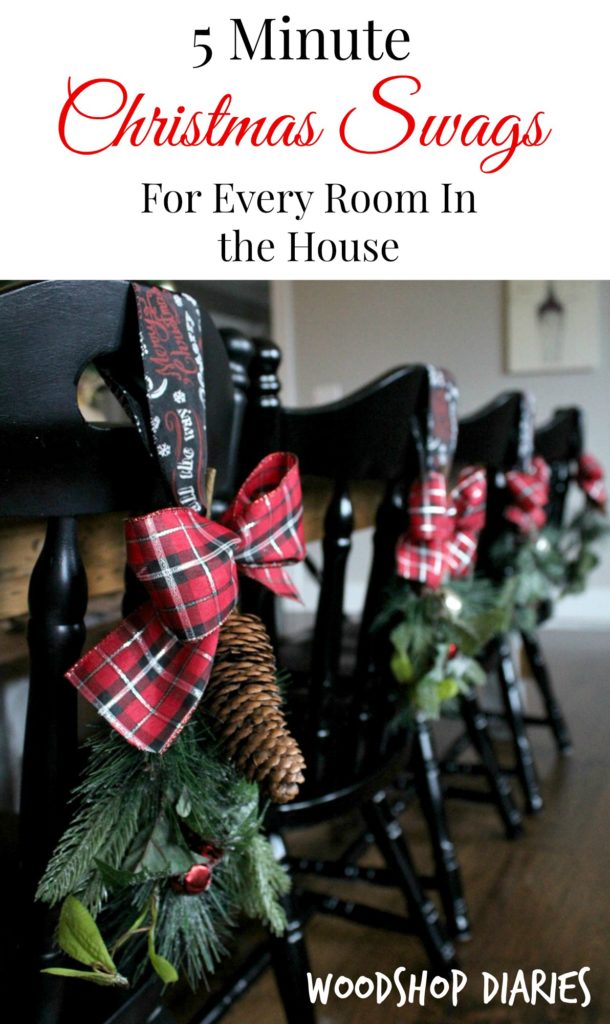
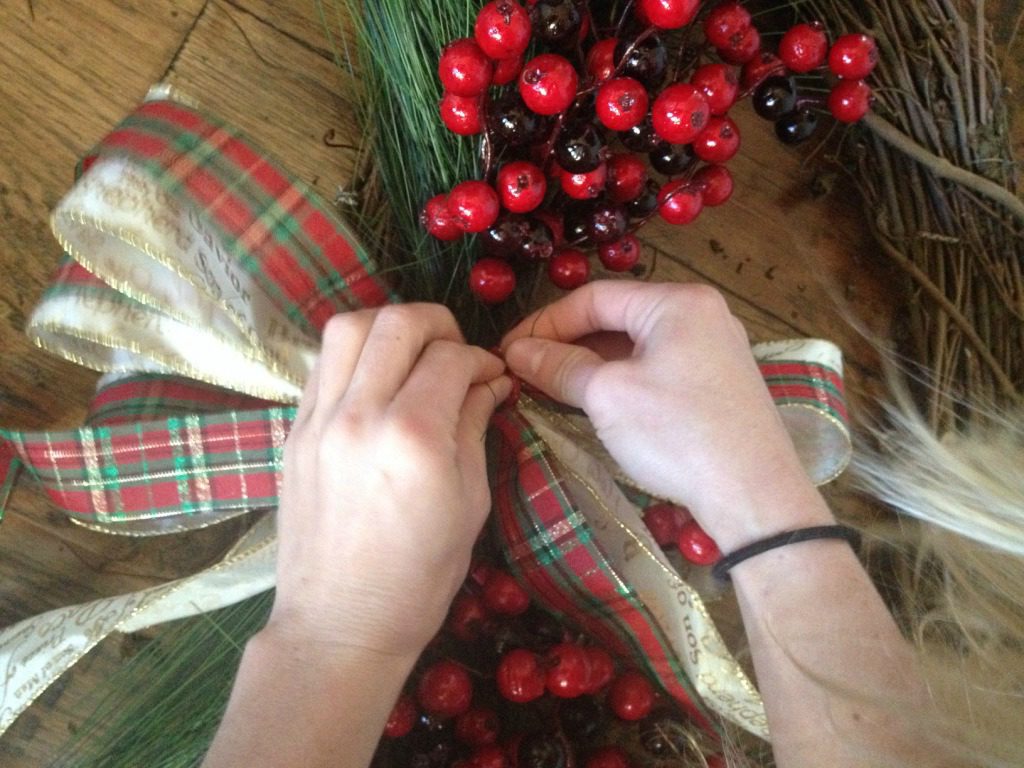
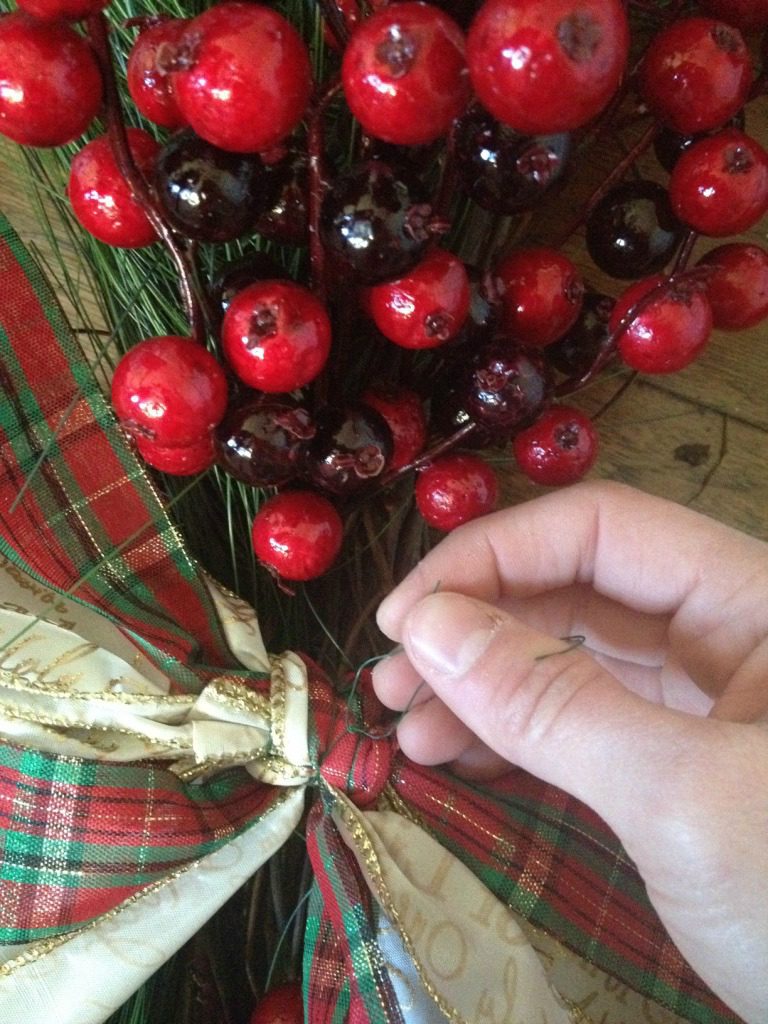
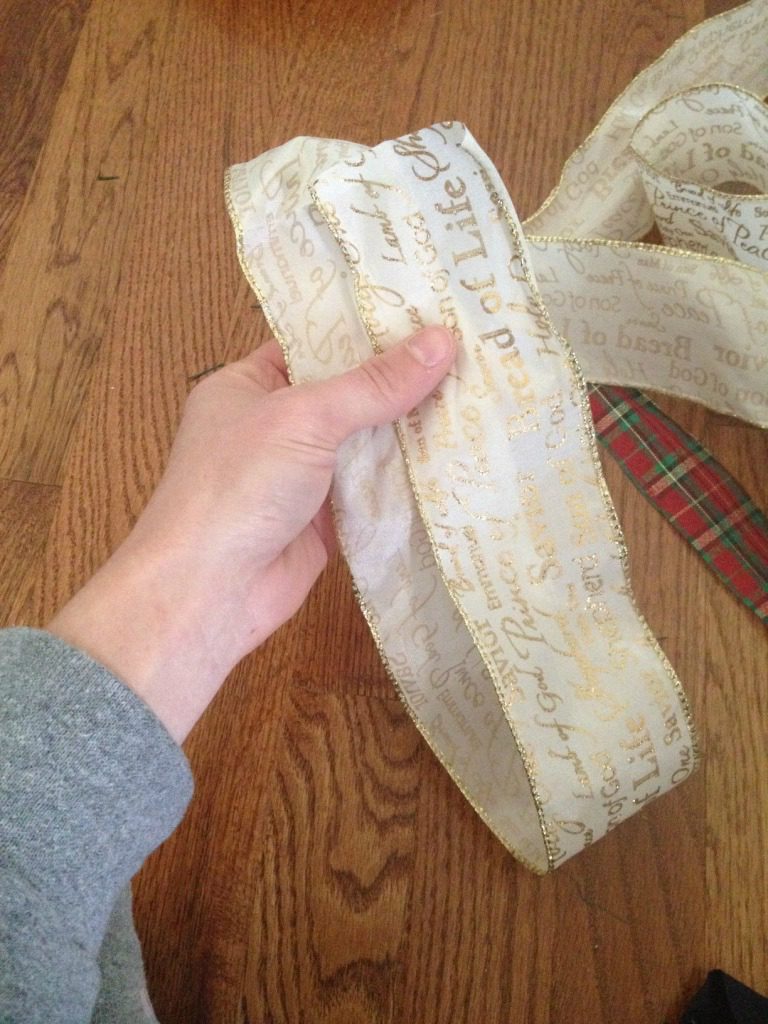
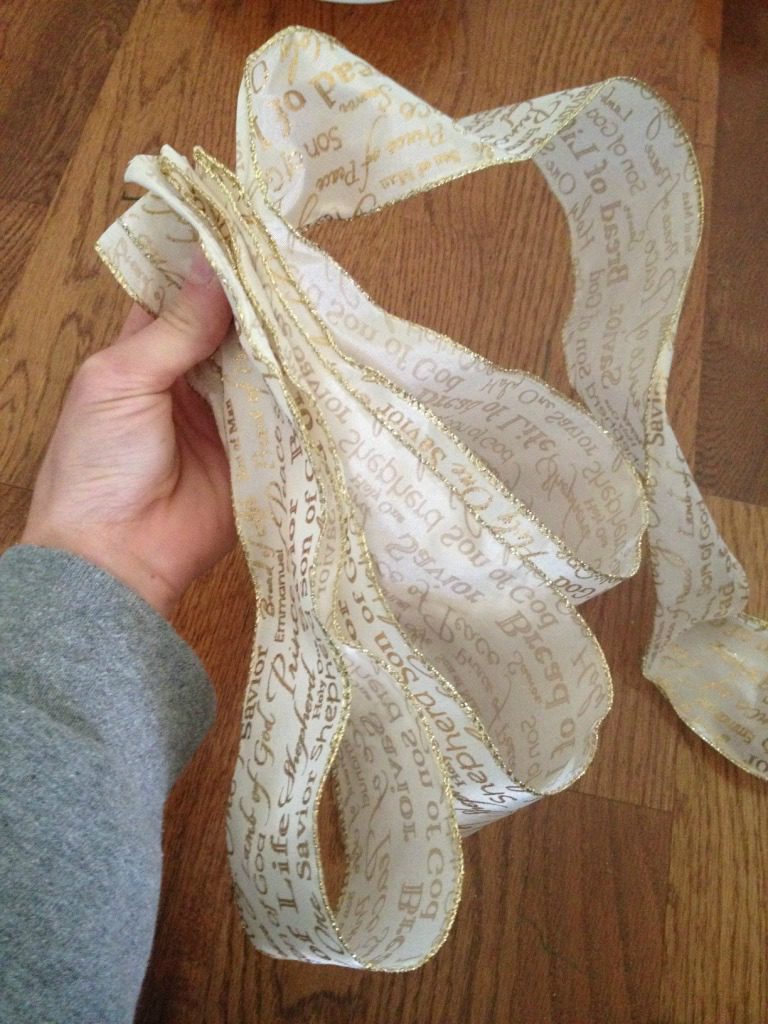
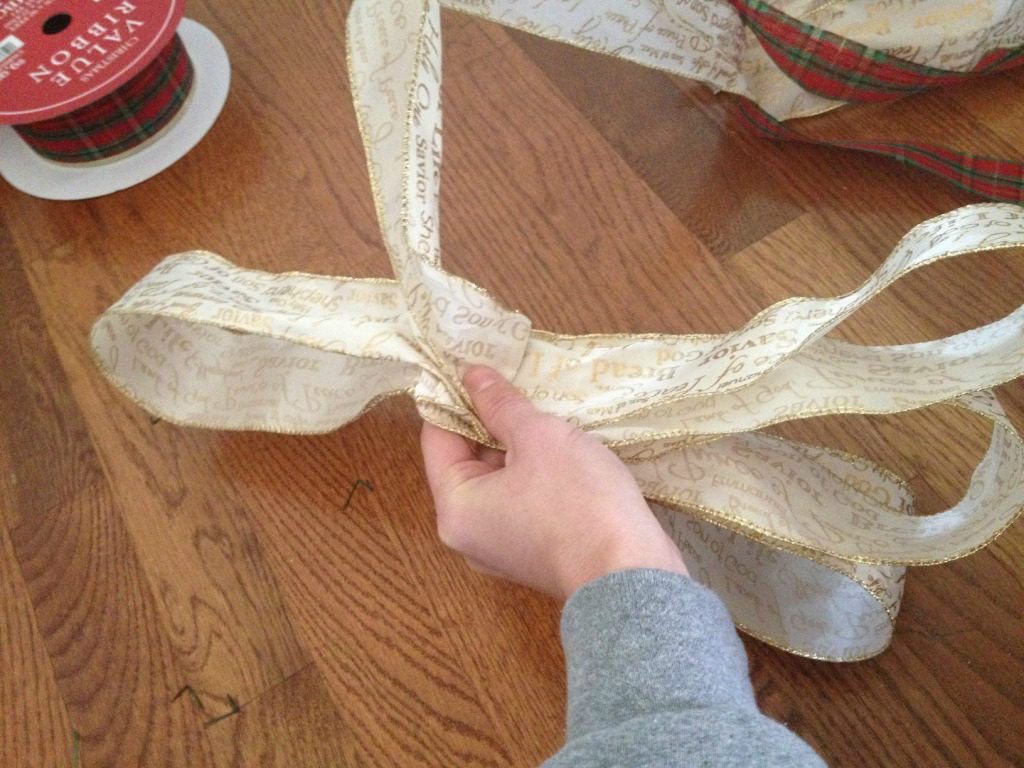
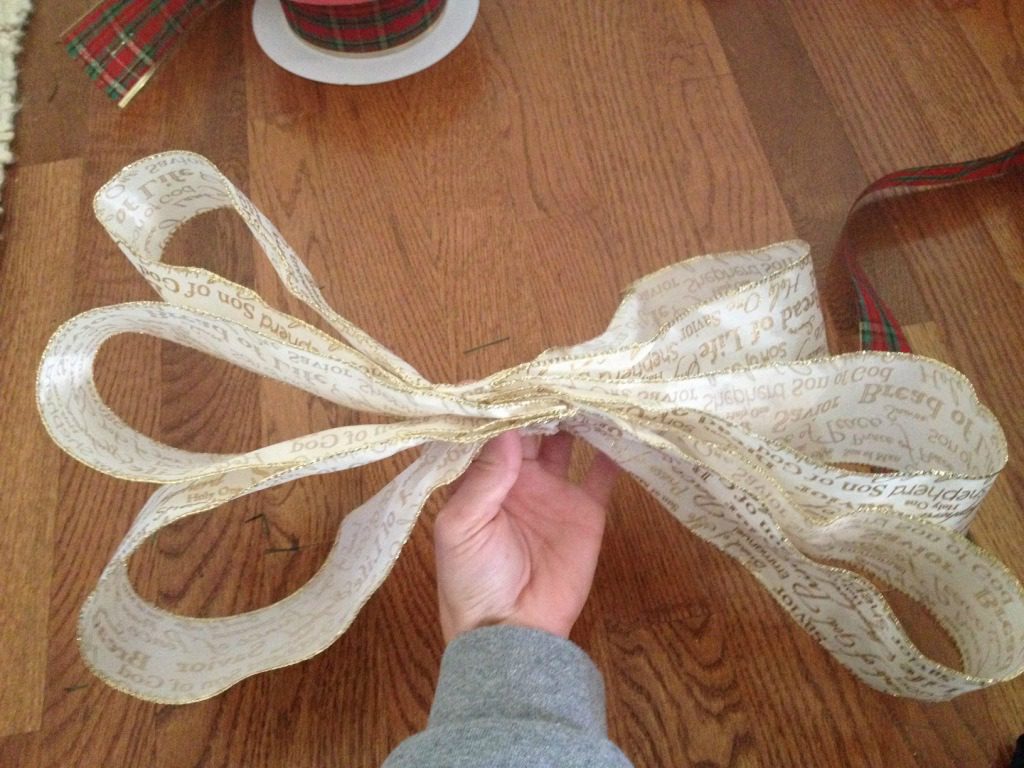
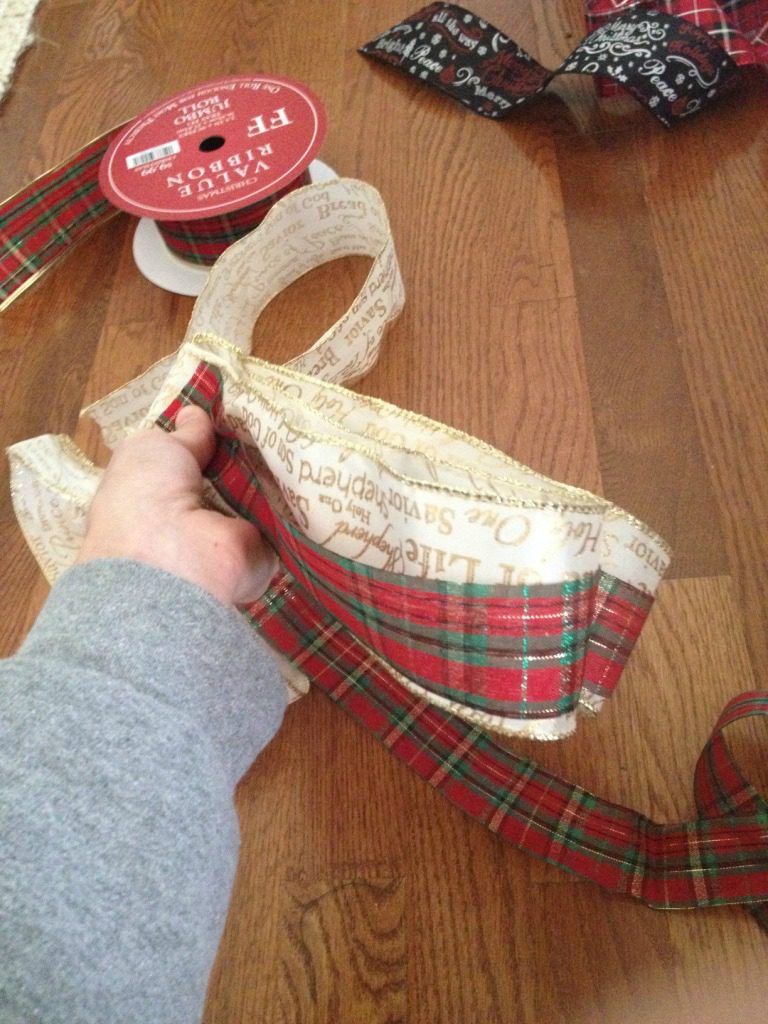
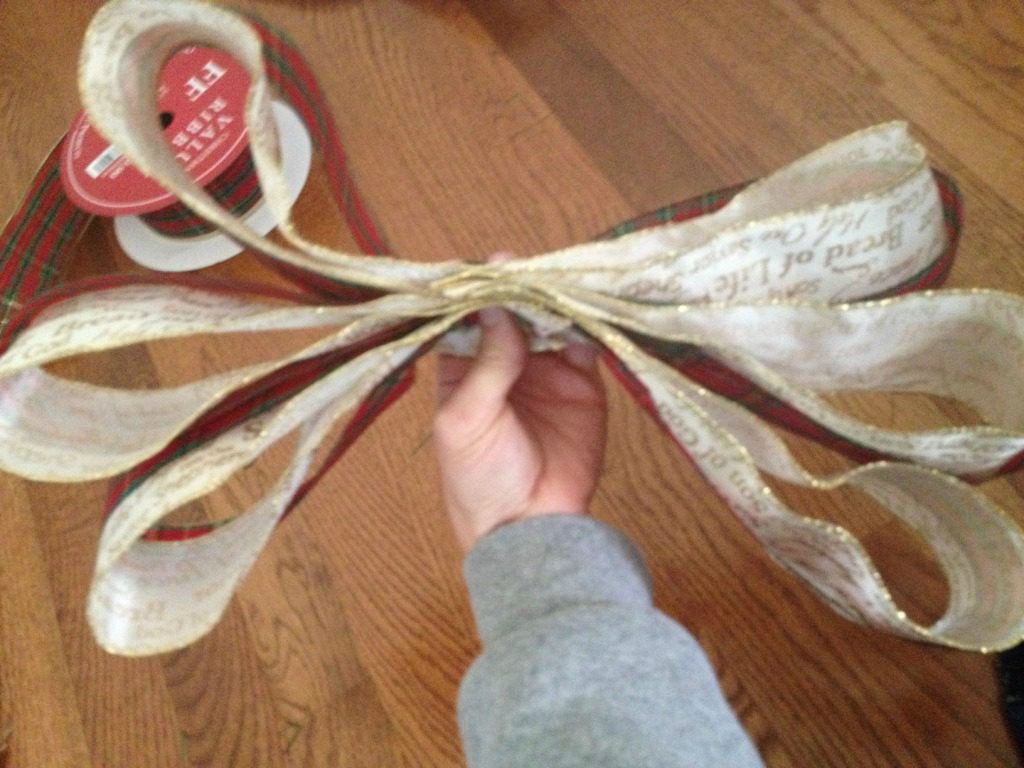
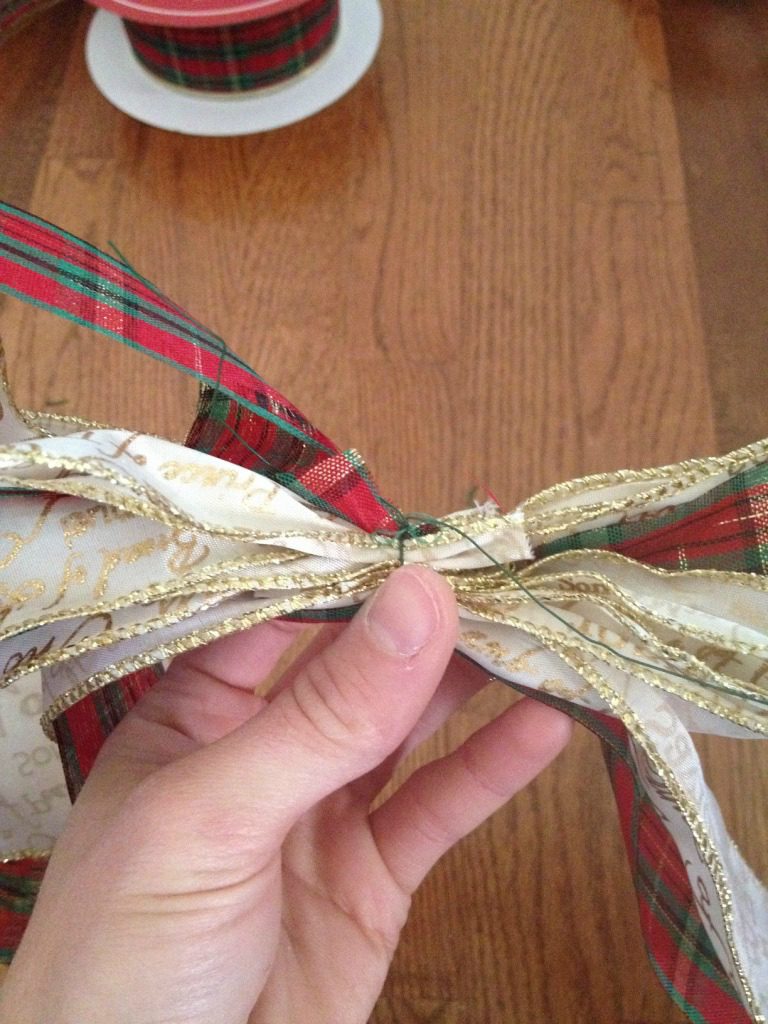
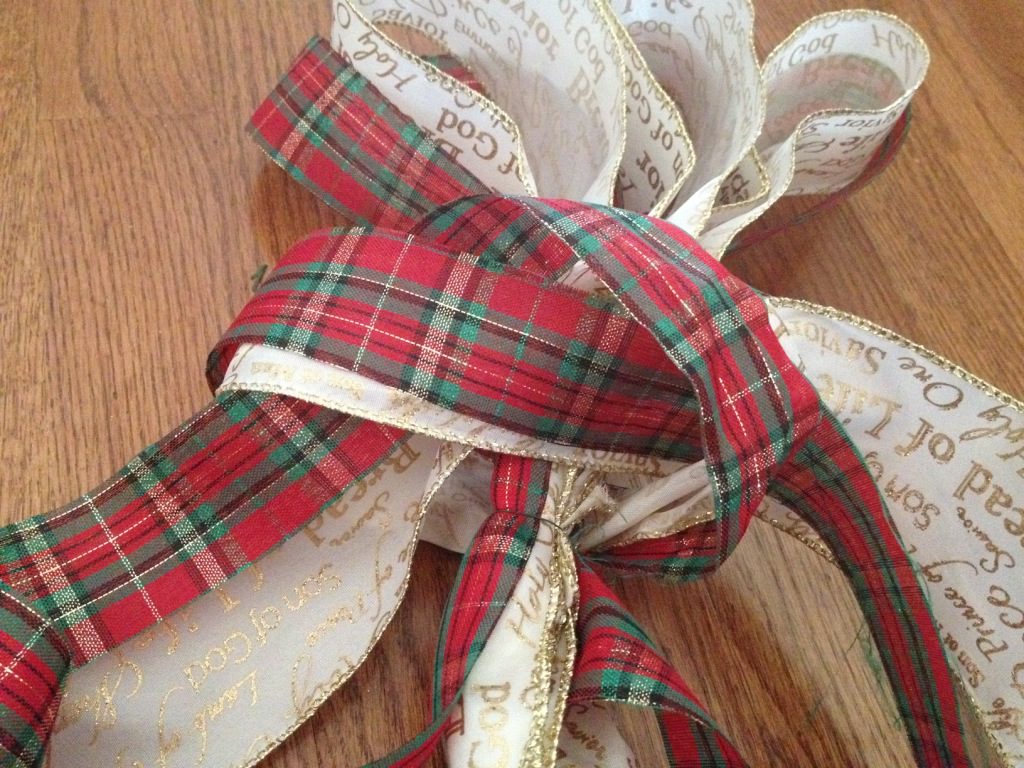
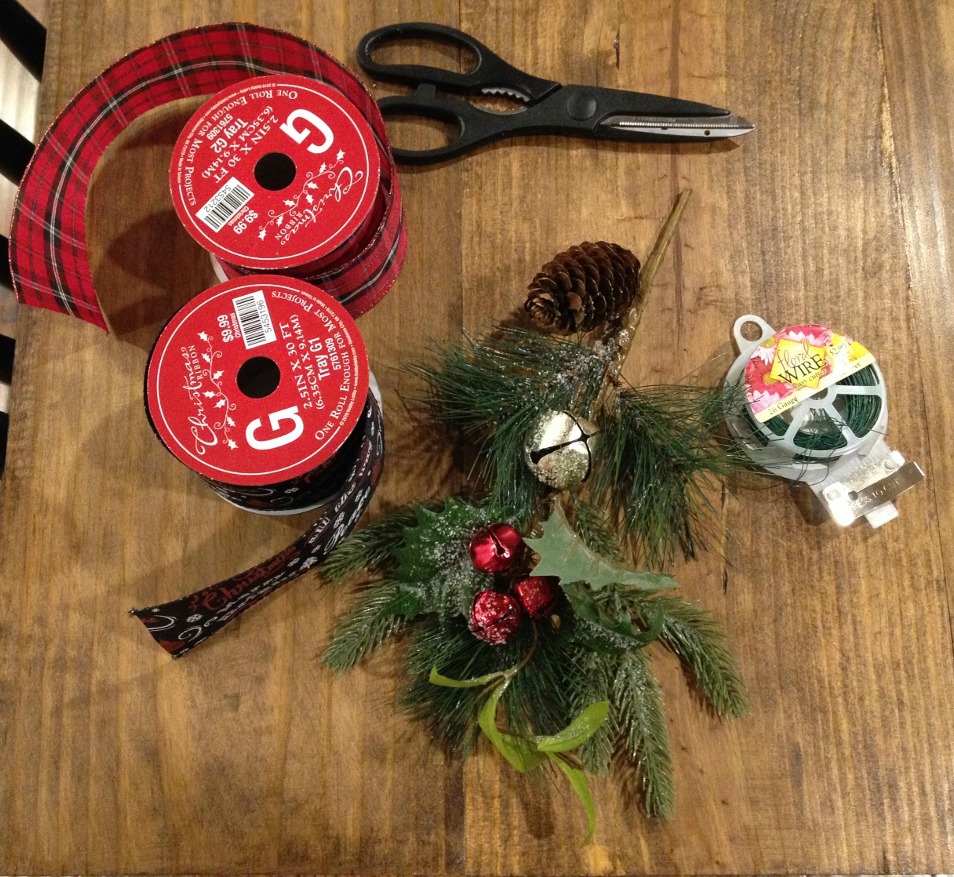
First, you take the ribbon you want to use as your bow and make a loop.

Super Easy 5 Minute Christmas Swags

Then, fold some back for a “tail.”

Super Easy 5 Minute Christmas Swags

Next, make another loop on the other side.

Super Easy 5 Minute Christmas Swags

And then fold it back over for another “tail.”

Super Easy 5 Minute Christmas Swags

Trim the ribbon so that the tails are about equal lengths.  Make sure the folds in the middle overlap some and take a long piece of floral wire and twist it tight around the middle of the bow.  Twist several times.

Super Easy 5 Minute Christmas Swags

Super Easy 5 Minute Christmas Swags

Then, twist the floral wire around the stem of the swag.  Twist it tight or the swag will fall out.

Super Easy 5 Minute Christmas Swags

Next, cut a loop (length will depend on how long you want it to hang) of the ribbon you want as your “hanger.”

Super Easy 5 Minute Christmas Swags

Fold it together at the ends and twist the floral wire around it.  Make sure it’s tight and twist several times.

Super Easy 5 Minute Christmas Swags

Super Easy 5 Minute Christmas Swags

If you are going to hang this around something, you will need to loop that ribbon around it before you twist it with the wire.  For example, on my chairs, I looped it around the back first, then twisted the floral wire.

Super Easy 5 Minute Christmas Swags

You actually don’t have to use this “hanger” ribbon at all.  For my lantern, instead of twisting around this loop of ribbon, I simply twisted the wire right onto the lantern handle.

Super Easy 5 Minute Christmas Swags

But, for my door swags, I taped them to the top so I didn’t need to loop around anything.  You could hang them from a nail or Command hooks or even just the door knobs if you choose, but I cheated and used clear tape.  (PS I’ll tell you all about these doors next week!! You don’t want to miss it!)

Give Your Doors Some Swag with This Five Minute Decoration!

And that’s it!  Once you get the hang of making bows, you’ll crank them out one a minute.  These took me less than 5 minutes each to make and I hung them up all over the house for a little extra Christmas festiveness.

Give Your Doors Some Swag with this Five Minute Decoration!

Give Your Doors Some Swag with This Five Minute Decoration!

Super Easy 5 Minute Christmas Swags

Super Easy 5 Minute Christmas Swags

Super Easy 5 Minute Christmas Swags

There are so many ways to use these and they are so versatile!  You can put some swag in every room in the house…and not break the bank…and you’ll have it done in no time!  Put them on the doors knobs or hang them from the door, hang them down a hallway, on a lantern, on a window, on the fridge, on the chairs, on the knobs of the dresser, on the bathroom mirror.  String them together and make a unique garland of swags.  Whatever you do, don’t skimp out on the swag this season 😉

.

Now get out there and get your decorations up!  And while you are decorating, don’t forget to take a moment to stop and remember the real reason for the season 🙂

.Super Easy 5 Minute Christmas Swags

Until next time, happy DIYing!


Stocking Stuffer Ideas for the DIYer–All Under $10!

November 27, 2016 by Shara, Woodshop Diaries

It’s the most stressful time of the year!!!  It’s Christmas!!!  And the stores are crowded and the traffic is awful and you have no idea what to get Aunt Sally or Uncle Bill.  Or your nieces and nephews.  Or anyone else on your list for that matter?  Or is that just me?

.

But, it’s cool, you guys, I’m here to help!  All year long, I’ve been making notes on little things that I would love to find in my stocking on Christmas Day because every year Mom and Dad ask what I want and I.  Never.  Know.  Until now.  And I’m going to share my list with you because these are really, really great stocking stuffer ideas for the DIYer/crafter/home improver in your life.  Big projects, small projects, whatever they like to do, all of these stocking stuffers will come in handy…and they are all under $10 each!  For those prices, snag a few for yourself while you are at it 😉

Stocking Stuffer Ideas for the DIYer--All Under $10!

.

All images are links, so if you are interested in an item, just click the picture 🙂

.

This post contains affiliate links for your convenience.  Although I may receive a small commission at no extra cost to you if you purchase from these links, I only link to products that I personally use and/or recommend.  This allows me to continue to provide readers with free content.  See disclosure policy for more details.

.

 Measuring Tape

I literally just broke my measuring tape last night and I am LOST without it.  I don’t think you can ever have too many of these.  A good measuring tape is not only handy for DIYers, but for anyone to have.  I keep a mini tape measure in my purse and I cannot tell you how many times it has come in handy if we are out shopping, and even when we were house hunting.

But, this is my favorite tape measure to use in the shop and around the house.


 Speed Square

This is one tiny tool that comes in handy ALL THE TIME.  I use it to check for square when I’m building and I use it to mark where to cut on a board.  I’ve even used it for laying out stencils to make hand painted signs and for making small wooden clocks.  It’s not just a woodworking tool…I’ve used mine for all sorts of crafts! Super handy tool to have.


 Wood Chisel Set

You guys, have you ever chiseled wood?  It’s addicting.  I’m NOT ANY GOOD AT IT AT ALL, but it’s the most relaxing and stress relieving thing I think I’ve ever done.  Even if you don’t have any projects to work on, GET YOURSELF A WOOD CHISEL SET and just play with it.  I just bought this exact set about a month ago and I’ve used in a couple projects already and have been looking for more projects to use it on.


 Clamps

There are lots of different types of clamps.  Pipe clamps are AWESOME, but they are more than $10, so to keep with the under $10 theme here, I recommend these smaller bar clamps.  These are my every day use clamps if I need to clamp something to a work surface, or clamp down a straight edge to make a cut.  I literally use these on a daily basis and I could never have enough of them laying around.  These are highly recommended.


 Nail Punch Set

I can’t speak for this exact set, because it’s actually on my own wish list this year, so I haven’t used them yet.  But, I have an old nail punch that my Dad gave me that I use all the time and I’m ready for some new ones.  These have good reviews and seem like a good price from a good brand.  You really can’t go wrong with a nail punch, though.  I use my old one often, especially when adding trim to a project and I need to punch the nails in a little further in.  It’s also handy if you work with pallets a lot and you need to drive those pesky nails back in their place…or out of their place.  It’s another one of those tools that you never really think about until you need it.  So it’s good to have on hand 🙂

 Plier Set/Side Cutters

These can be used for crafting of all sorts. Originally, I was only going to suggest buying side cutters, but I found this whole set for only a couple bucks more, and all three of these are super handy tools.  Side cutters and pliers are your best friend whether you are making a wreath, a wood sign, or a piece of furniture.  Side cutters will easily cut apart the wires on fake flowers for decorating and wreath making.  They will cut and bend your wire for hanging wall décor.  And they will cut your nail (or pull it out) when you miscalculated and shot your nail gun at the wrong angle and it went through the other side (oops!).  This is another handy tool that you can really never have enough of.


Hot Glue Gun

You can never go wrong with a glue gun.  They are a staple in every DIYer/crafters tool box.

 Paint Brush

Good paint brushes can’t be beat.  And I, personally, can never have too many.  I’m sure I’m not the only DIYer out there that is trying to paint several things at once and they are all different colors and that means you need a brush for every color.  And I never have enough.  For the price, you could afford to buy your DIYer (or yourself) several of these little guys just for that reason 🙂  By the way, this is my favorite brand of brush…highly recommended.

 Level

Any homeowner can benefit from a level.  How many times have you stared at that thing you just hung on the wall trying to figure out if it’s level?  Exactly.  Levels are great for everything from hanging that new painting on the wall, to making sure you are hang your cabinets straight.  This little one would be a great addition to any tool box, but if you’re willing to spend a couple bucks more, this one is twice as long, and this one is four times as long and both are highly recommended as I use them in my shop OFTEN.


These are just a few ideas for great and versatile stocking stuffers whether you’re buying for a professional DIYer, or a weekend crafter.  Personally (hint hint…Mom and Dad are you listening?), I would love to find all of these in my stocking this year, so I know they would be glad to see them too!

.

If you are looking to buy beyond just stocking stuffers, I have a great post here about the best tools to get started in woodworking.  Those range from $40-$200 and you can buy all five that I suggest for less than $500!  I know tools aren’t cheap, but you don’t have to have the most expensive tools to get the job done.  I promise…because I don’t have the most expensive tools!

.

Tools or no tools, whatever you give this year, make sure you give it from the heart and remember the true meaning of the season 🙂  With all the hustle and bustle that the holidays bring, don’t forget to stop and take a moment to be grateful for the Gift that was given us in Jesus on the very first Christmas Day 🙂

.

Until next time, happy DIYing, happy shopping, and Happy Christmas from Danny and I 🙂

Paper Sack Christmas Art and DIY Frame

November 22, 2016 by Shara, Woodshop Diaries

My grandma is hilarious.  Not in a “joke-telling” or “slap stick comedy” kind of way, but she’s just….funny.  I just love her.

.

The most exciting part of anyone’s birthday party or Christmas get together is seeing what random thing she put in everyone’s gift bag.  She always throws in a little something silly with the actual gift and you NEVER KNOW what it will be.  A couple Christmases ago, she threw in a random little cow figurine with my gift and a fat little owl statue with my birthday gift.  Danny got a solar powered turkey with his birthday gift this year and we leave it in the window sill and it flaps it’s wings like crazy!  In years past, I’ve thrown these things in a “junk drawer,” but lately, I try to find places to set them around to make me think of Granny and have a giggle or two.

.

So I said all that to say that last year, the best Christmas gift I got was a random paper grocery sack that Granny wrapped my gift in.  She sometimes wraps gifts in any kind of random container…I swear, she cracks me up.  She’s so frugal.

Paper Sack Christmas Art and DIY Frame

And I thought this sack was the coolest thing I had ever seen!  I kept it all year to use as decoration for this Christmas, but wasn’t sure what to do with it.  I thought about some sort of decoupage but I didn’t want to do anything permanent or damaging.  So I finally decided to just frame it.  But obviously, paper sacks don’t come in standard picture frame sizes, so I had to make a simple little frame from some 1x2s.  It’s a really quick project and easily customizable.  Exact measurements will depend on your desired size for whatever you are framing, so I’ll just give the instructions here and leave out the measurements.

.

I ripped a 1×4 in half to make my 1x2s, but you can buy 1x2s at the local Lowes or Home Depot if you don’t want to rip them.  I also used my miter saw (affiliate link), some glue (affiliate link), and my nail gun (affiliate link) to put it together.

.

I cut four pieces for the frame all at 45 degrees on both ends.  Again, measurements will depend on your specs.

Paper Sack Christmas Art and DIY Frame

I put a little glue on each end and stapled them from the back.

Paper Sack Christmas Art and DIY Frame

Paper Sack Christmas Art and DIY Frame

I did this all the way around until all four pieces were stapled.  Then when I picked it up, all the corners wanted to bend backwards.  I didn’t want to wait for the glue to actually dry to move on (HELLO! Mrs. Impatient here….), so I used my nail gun and shot a couple nails in each corner like the picture below shows.  I could have used a Kreg Jig (affiliate link) and done pocket holes for this, but I just wanted a simple, quick frame…it didn’t have to be super sturdy.

Paper Sack Christmas Art and DIY Frame

Once I got the frame pretty sturdy with the nails, I cut some more 1x2s to go around the outside. These pieces will have a beveled 45 degree angle on them.  (See pictures below.)  I nailed them onto the outside of the frame like the picture (I know it’s blurry…I’m sorry!).  I left ¼″ hanging over the back side and ½″ hanging over the front.  That way, you have room to place a piece of glass (if you choose) and a backer behind your picture (if you choose) on the back side.

Paper Sack Christmas Art and DIY Frame

Paper Sack Christmas Art and DIY Frame

I cut and attached the pieces all the way around then stained it.  I didn’t bother puttying the holes or anything.  I just wanted a super simple frame.  I had some leftover “experiment stain” where I had mixed a little Minwax Provincial and some Minwax Weathered Oak and it ended up being like the exact same color as the sack.  I’m still trying to decide if that’s good or bad…

Paper Sack Christmas Art and DIY Frame

Like I mentioned before, you could put a thin (⅛″) piece of glass in here and a thin cardboard backer with those little turny things (you know…those things on the back of the frames you buy at the store that twist) to hold it in place.  But I just used some clear tape and lightly taped it on the back to hold it in place.  I’m all kinds of cheating on this project, you guys.  All kinds of it.  Christmas is coming and ain’t nobody got time right now to follow the rules. I got wreaths to make and decorations to get up!

Paper Sack Christmas Art with DIY Frame

Paper Sack Christmas Art and DIY Frame

Paper Sack Christmas Art and DIY Frame

PS nothing says Christmas like an “Applied Mechanics” book, right?

Paper Sack Christmas Art and DIY Frame

How’s that for super simple Christmas art?  Who would have thought that silly paper sack from last year’s Christmas gift would be my favorite decoration this year?

.

Do you guys have anything like this…random paper sack, old record cover, newspaper, etc that you want to do something with, but don’t know what?  Making your own custom frame is a super fun and easy solution.  You know the best art is the kind you make yourself 🙂  And the kind that’s cheap….and the kind that no one else has…

.

So what are you waiting for?  Go FRAME ALL THE THINGS!!

Paper Sack Christmas Art and DIY Frame

Stay tuned…all through the next couple weeks I’ll be posting fun and easy Christmas projects as we head full force into the upcoming Christmas season!!

.

So until next time, happy DIYing!!

5 Minute Christmas Wreath That Anyone Can Make!

November 21, 2016 by Shara, Woodshop Diaries

We are taking it back to my roots today.  Did you guys know that long before I ever had a blog, or used a saw, or even knew Pinterest was a thing (when exactly did it become a “thing?”), I made my own wreaths?  Looking back, I guess this was my first dabble into the DIY world.  It all started with this Christmas wreath.  It was like a giant glitter ball.

IMG_0778

OOOOh shiny!  Of course things progressed and I made several styles of wreaths before I began repurposing all sorts of things, then started a blog, then eventually moved onto woodworking.  And now, here we are.  (I just summed up my entire last two and a half years into one sentence.)

.

But, I still like to go back to the beginning sometimes and make a new wreath.  And this year’s Christmas wreath is the easiest one I think I’ve ever made.  It literally took me 5 minutes to put it together.  And, to be honest, it looks better than most of the EXPENSIVE wreaths I’ve seen at the stores so far this season.

.

But, seriously, DIY wreaths almost ALWAYS look better than store bought…unless you want to pay $100 for the good ones.  In full disclosure, this one cost me about $30.  Mmmm hmmm.  So let me show you how it’s done so you can make your own this year, too 🙂

.

You will need:

An oval (or round, but I prefer oval) grapevine wreath form (any size you want…read below for more information)

(2) greenery stems (I used pine needles for the demonstration, but you can use any greenery)

(2) red berry stems

(2) rolls of contrasting color ribbon (to make your own bow) OR a premade bow if you don’t want to make your own

Floral wire

Jingle bells or chalkboard or other decorative item (optional)

5 minute Christmas wreath that anyone can make!

Now, before we get started, I have to apologize in advance for how terribly awful these pictures are.  I asked Danny (oh, Danny) to take some pictures while I made the wreath because I needed both hands to do it.  Poor Danny, he just doesn’t get what I’m going for and so these pictures are….well…not what I was going for.  But since this is super easy, hopefully they will still work and be helpful.  HOPEFULLY being the key word here.

.

Just for an FYI, I bought all my supplies at Hobby Lobby.  I already had the grapevine wreath on hand (I keep several), but they are like $8 at Hobby Lobby which is actually really, $4.80 because who goes to Hobby Lobby without a 40% off coupon?!  By the way, grapevine wreaths are AWESOOOOOOME because they are SOOOOO easy to decorate.  You literally just shove everything in it and you’re done.  No joke.  And when you are ready to change seasons, you just take it out and shove something new in it.  So let’s get to shoving.

.

So, first, I took a greenery stem and shoved it in the middle of one side of the grapevine form.

5 minute Christmas wreath anyone can make!

Then do the same on the bottom side.

5 minute Christmas wreath anyone can make!

5 Minute Christmas Wreath Anyone Can Make!

IF (capital IF) you need to (I prefer not to unless absolutely necessary), you can secure them a little more if they aren’t staying put by cutting off a piece of floral wire and “tying” them down on the back side.

5 Minute Christmas Wreath Anyone Can Make! 5 Minute Christmas Wreath Anyone Can Make!

I prefer not to do this so that it’s easier to take apart later and reuse the form.  That’s just me.  After it’s all in place, I shaped the greenery to curve around the wreath form a little.  Just play with it until it looks like you want it.  PS see Danny’s house shoe in the corner?  He makes me laugh.

.5 minute Christmas Wreath Anyone Can Make!

Next, do the same thing with the berries.  Shove them in on top of the greenery.

5 minute Christmas Wreath Anyone Can Make!

5 Minute Christmas Wreath Anyone Can Make!

Ta Da!!  Two minutes down and we are practically done already!

5 Minute Christmas Wreath Anyone Can Make!

Spread the berries out and shape them until you like how they look.

.

Next, attach a bow.  If you want to make your own, keep reading, I will show you in a second.  Just cut a piece of floral wire, slip it under a couple branches in the wreath form and twist it around the middle of the bow.  Twist several times to secure it, then fold back or trim the excess wire.

5 Minute Christmas Wreath Anyone Can Make!

5 Minute Christmas Wreath Anyone Can Make!

The next part is optional.  If you want and you have room in your wreath, you can add a decorative item like a chalkboard or jingle bells…or both!  Just use some floral wire to tie the item onto a couple branches.

5 minute Christmas Wreath Anyone Can Make!

5 Minute Christmas Wreath Anyone Can Make!

And it’s DONE!

5 Minute Christmas Wreath Anyone Can Make!

I made three of these one night.  Two were 18″ wreath forms and one was a 24″.  Here is the second small one I did.  For this one, I did the exact same thing, only I used a different type of “greenery” stem.  The beauty of these wreaths is you can mix and match whatever stems you like!  You can also cut up your berries in smaller sizes and shove them all in separately.  That’s what I did here.

5 Minute Christmas Wreath Anyone Can Make!

This is the 24″ one.  It was large enough to add a little chalkboard and jingle bells.

5 Minute Christmas Wreath Anyone Can Make!

I promised you I would also show you how to make a bow.  Now, there are probably a million tutorials out there for making a bow, but this is how I did it.  I used two types of ribbon.

.

First, I took my main ribbon and made a loop.

5 Minute Christmas Wreath Anyone Can Make!

Then, I folded back and made another two loops like this so that you have three loops the same size:

5 Minute Christmas Wreath Anyone Can Make!

Fold the ribbon over on the other side and make a loop.

5 Minute Christmas Wreath Anyone Can Make!

Then make two more loops on that side just like before.  Make sure all the “folds” are overlapping a little in the middle then cut:

5 Minute Christmas Wreath Anyone Can Make!

Now, stretch this bow back out and cut a piece of your “accent” ribbon the same length.  Now do the exact same thing (make the six loops) with your accent ribbon on the top.  Make sure you keep it tight.

5 Minute Christmas Wreath Anyone Can Make!

5 Minute Christmas Wreath Anyone Can Make!

Once you made your six loops again, tie it TIGHT around the middle with some floral wire.

5 Minute Christmas Wreath Anyone Can Make!

Then, cut two long pieces (as long as you want your ribbon tails) of each color ribbon.

5 Minute Christmas Wreath Anyone Can Make!

Tie them in a knot around the middle of your “six loop thingy.”

5 Minute Christmas Wreath Anyone Can Make!

Pull tight, and fluff out your loops.  Don’t pull them too much or they will come undone, but fluff and spread them out a little and that’s it!

5 Minute Christmas Wreath Anyone Can Make!

For real, 5 minutes work and you’ve already made your neighbors jealous.  Because, let’s face it…that’s the REAL goal here, right?  Don’t lie, we all do it.

.

Stay tuned all this week for a few fun, fast, and easy Christmas DIYs as we head full force into the season!

.

Until next time, happy wreath making! 🙂


DIY Wall Art You Can Make from Your Pet Photo

November 18, 2016 by Shara, Woodshop Diaries

DIY Wall Art Using a Picture of Your Pet

Wall art is the most difficult part of decorating in my opinion.  Then again, my opinion on all things decorating and $1.50 will get you a coke out of the machine and that’s about it.  PS side notes: #1:  do you call it soda, coke, pop, or something else? #2: can you believe they cost that much these days?!

.

Okay, so wall art…let’s get back on topic. When it’s time to decide on wall décor, I go into a state of “decision paralysis.”  Anyone else know what I’m talking about?  I literally spent WEEKS looking online and at TONS of stores for the perfect piece of wall art for our bathroom after we remodeled.  And I couldn’t pull the trigger on ANYTHING.  I wasn’t being picky, I just knew I wanted something different and something with a little bit of meaning.  And I wasn’t having any luck finding it.

.

So I got impatient and tired of looking and just DIYed it.  It was so easy and so cheap and I’m going to show you how you can do it too and all you need is a photo of your pet 🙂  Actually, you can use just about anything for this, but I chose to use one of our pets.  So we are sticking with that because it sounds better than “all you need is a photo of any random object you want to hang on your wall.”  See what I mean?  Just go with it.

.

I had seen a poster with this idea (aff link) previously, but it was too big for what I wanted and I didn’t want a picture of someone else’s pet hanging on my wall.  That’s just weird.  So I browsed through my iPhone pictures and found this picture of my first cat (long story…he’s no longer with us) and had an idea.  PS bonus points to you if you have more cat pictures on your phone than me.  I’m at about 500.  Don’t. Judge. Me.  We have several (outdoor) cats.  BUT, we are currently mouse free, so….there’s that.

DIY Wall Art Using A Picture of Your Pet

Now, I don’t have any fancy photo editing software but if you do, you can totally use that, but I used Microsoft Paint.  It’s stone age technology, but hey, it’ll do.  So I opened up this picture in paint.

DIY Wall Art Using a Picture of Your Pet

Then, I zoomed in on his face and used the eraser tool and CAREFULLY cut out around his face.

DIY Wall Art Using a Picture of Your Pet
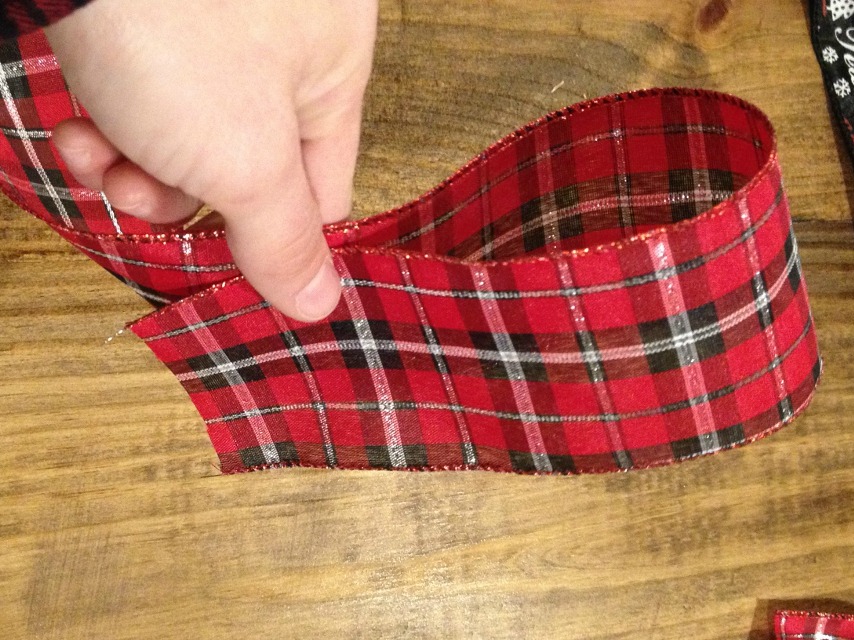
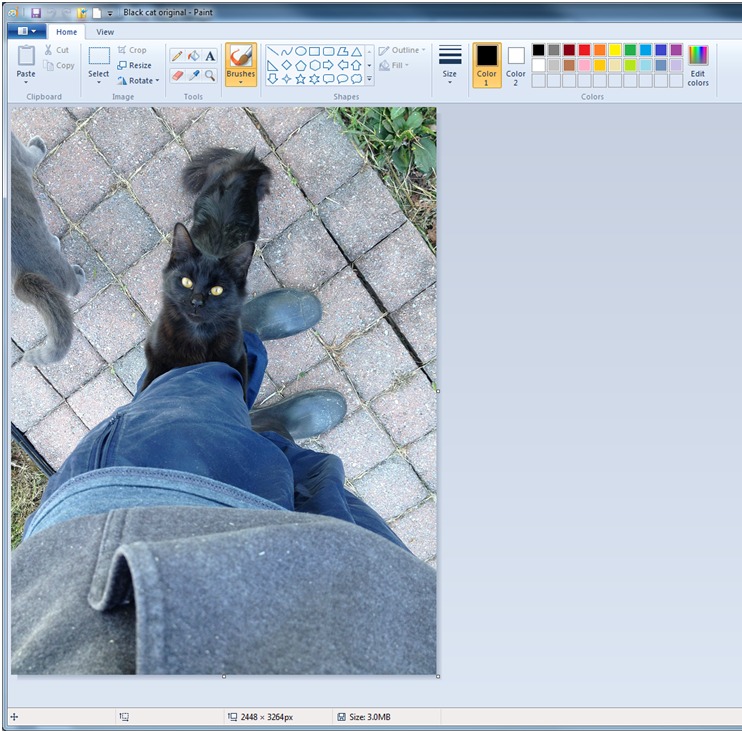
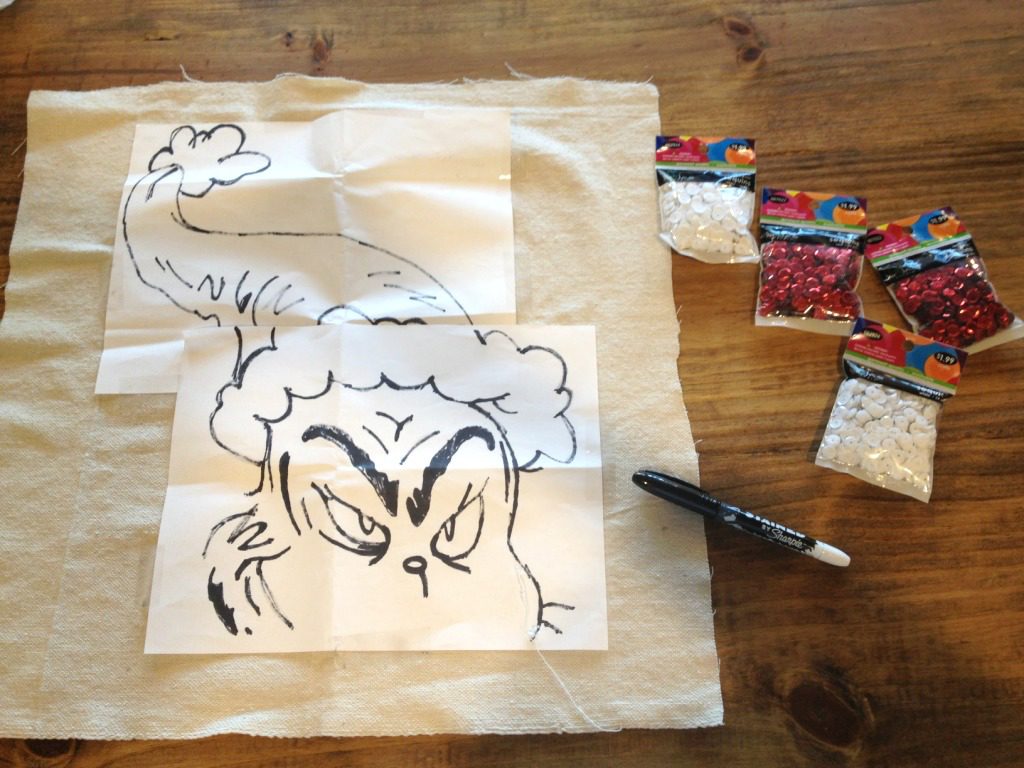
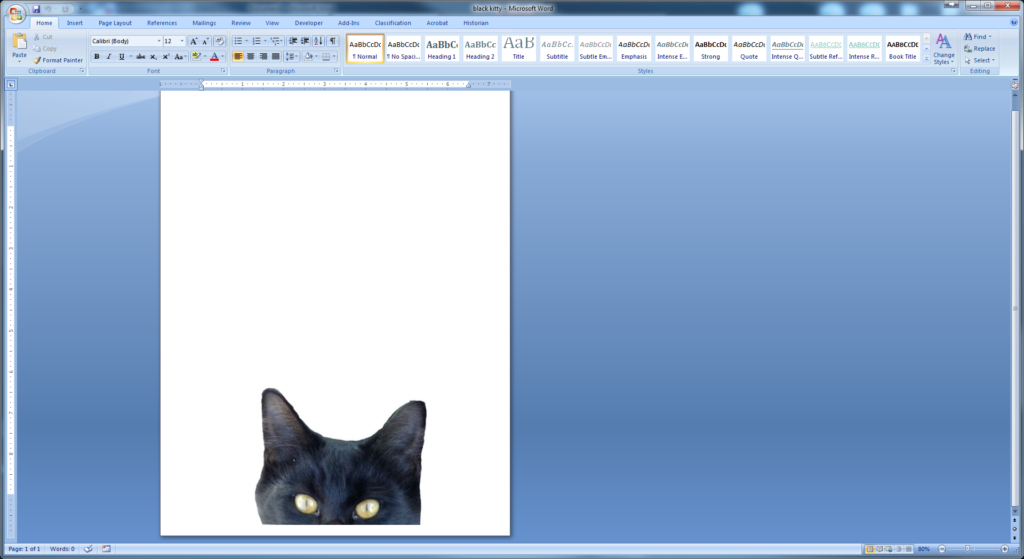
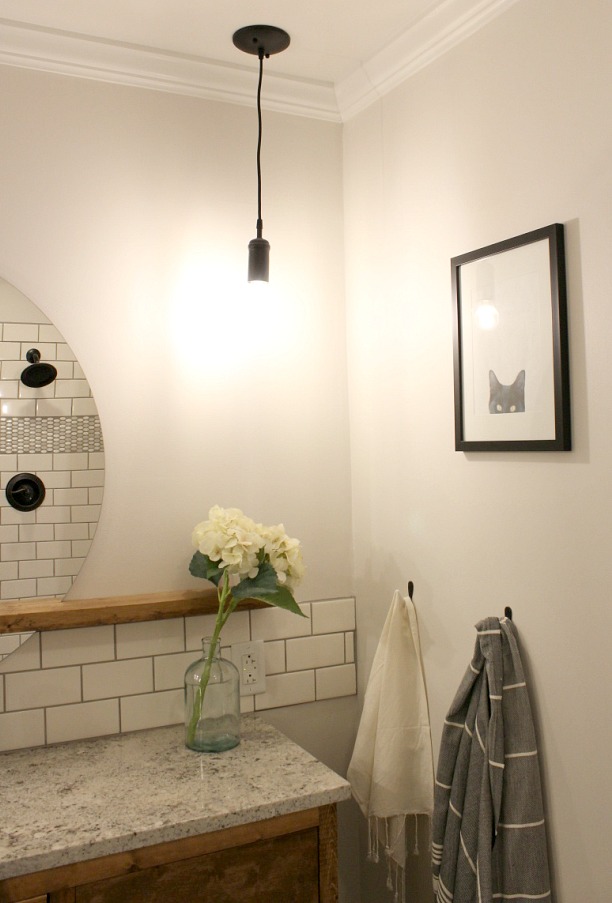
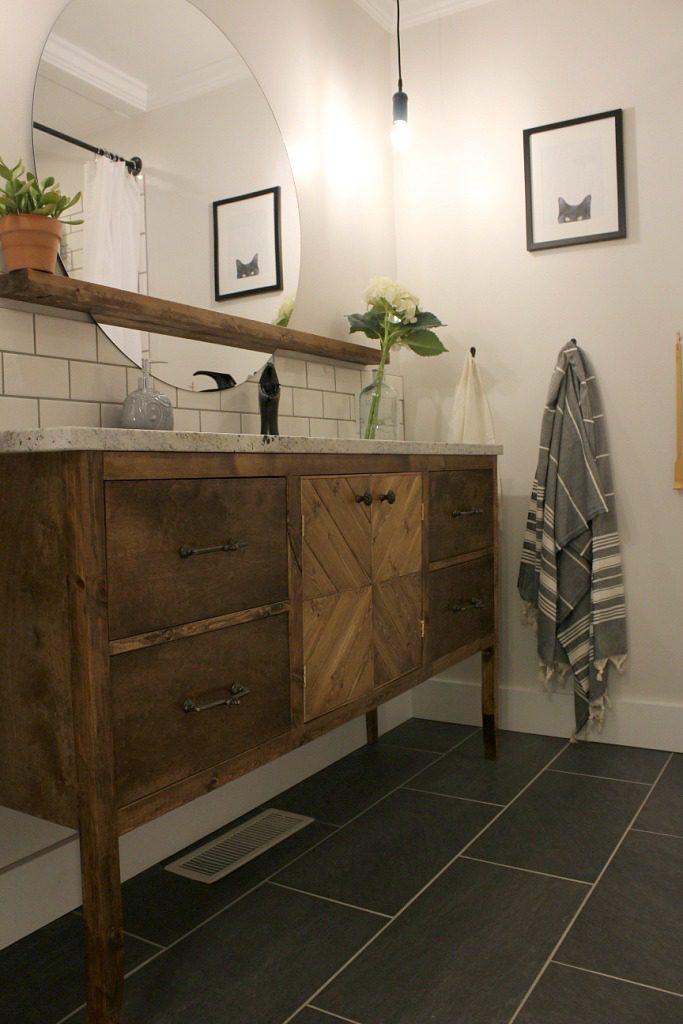
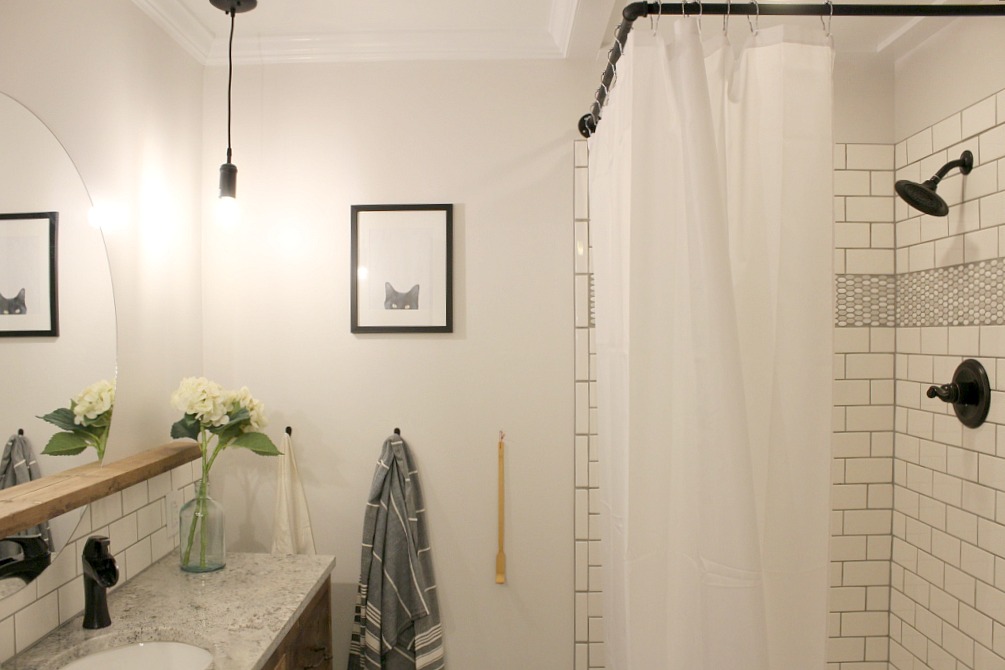
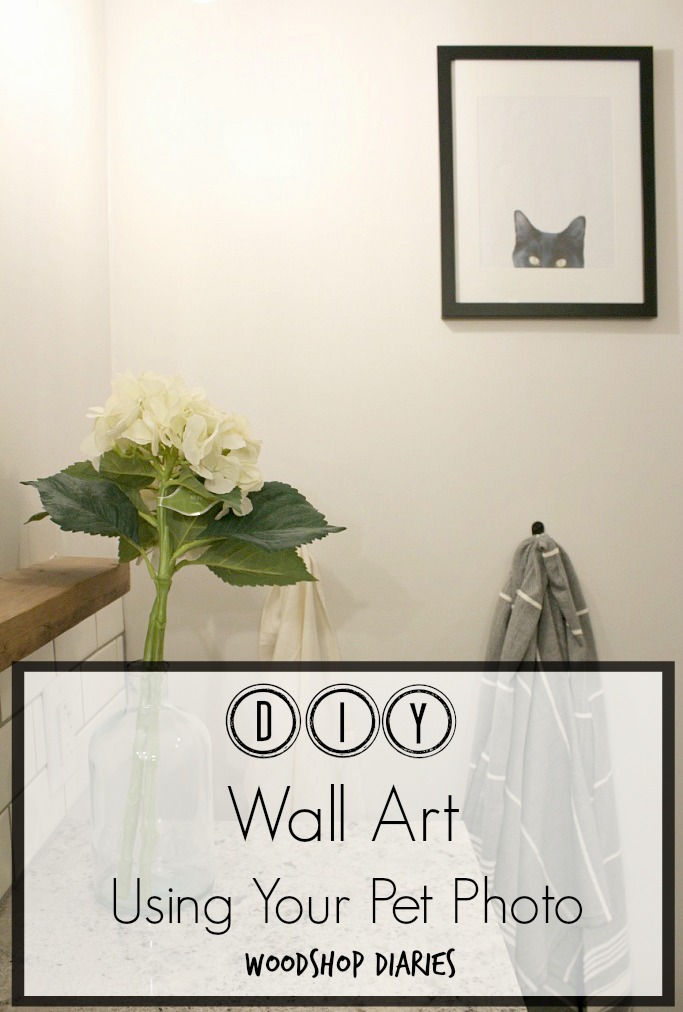
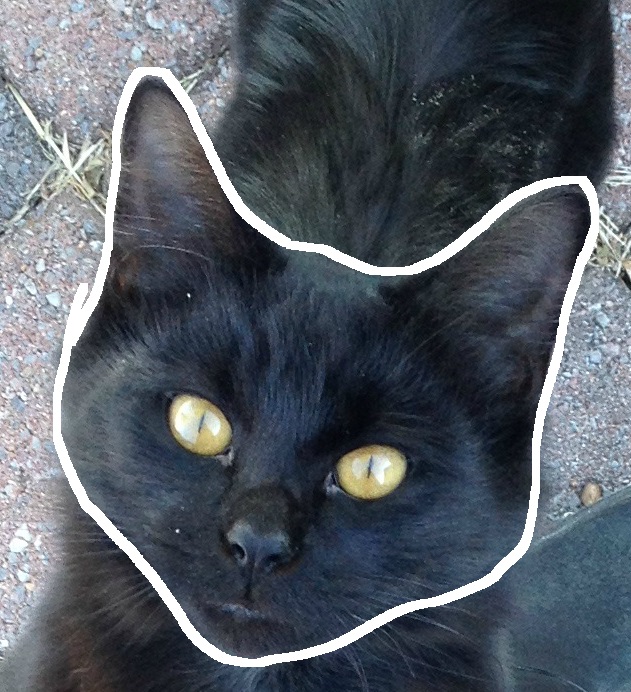
Then I erased everything in the background.

DIY Wall Art Using a Picture of Your Pet
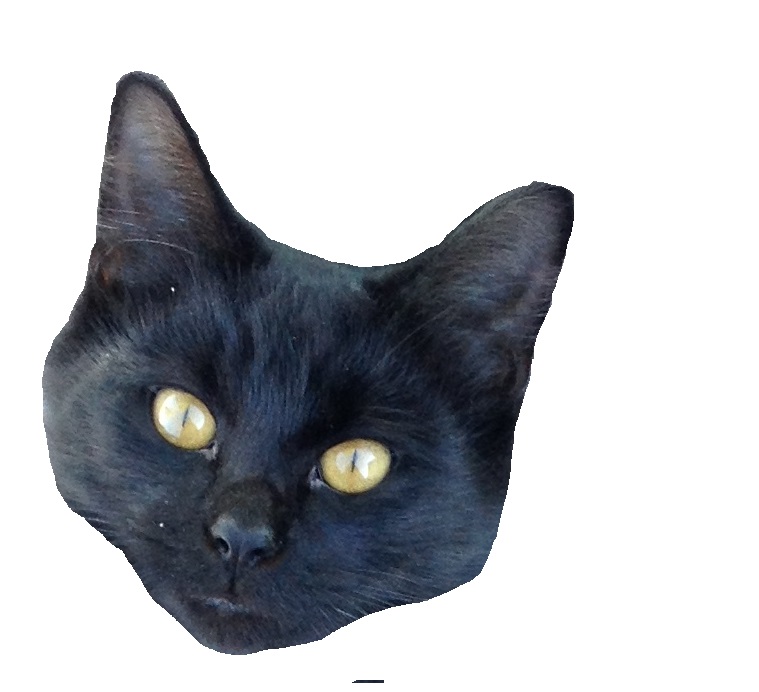
Then I rotated and cropped his face so I just saw his eyes and ears.
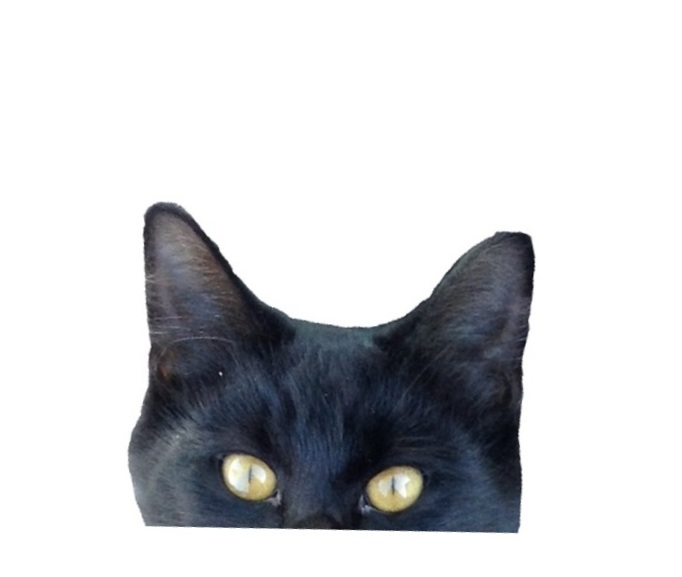
DIY Wall Art Using a Picture of Your Pet

Then I opened a Word document and placed this picture in the center at the bottom and printed it.

DIY Wall Art Using a Picture of Your Pet

I bought a cheap frame with a white mat from Michael’s (these are the best $5 frames ever!) and placed it inside.

img_0928

img_0914

img_1066

How’s that for cheap art?  AND, the best part is you get to see your little bud on the wall when you walk in the room 🙂

.

Cat, dog, horse, whatever, I think anything would work for this.  You could even do all your pets and hang them in a row in your hallway.  I say that because I almost did that, then Danny informed me it was weird to have all our (SIX!!) cats hanging on the wall.  So for now, I’m sticking with just the one in the bathroom.

.

So what do you think?  For real like the easiest and cheapest wall art idea ever?  Maybe, maybe not.  But it’s got to be one of them, right?

DIY Wall Art Using a Pet Photo

Until next time, happy DIYing!  I’ll be in the woodshop getting some things finished to show you next week so stay tuned!


Happy Home-iversary! Two Years After Move In Day

November 10, 2016 by Shara, Woodshop Diaries

I don’t like to forget things.  But, I do it ALL. THE. TIME.  I’ll be in the middle of something and remember something else I forgot to do and before I can grab a sticky note and pen to write it down (so I don’t forget), I’ve already forgotten what I grabbed a pen for.  WHAT THE HECK?!  I didn’t used to be like this…I’m afraid my age is starting to make me insane.  That or stress.  Or hormones.  Or all of the above…welcome to adulthood, Shara.  Where you spend 99% of your time wondering if you are legit crazy, or if this is all part of the ride…

.

Okay, so I told you all that to tell you that I take A LOT of pictures of my house.  Partially because, obviously, I like my home, but mostly because I don’t want to forget what it looked like.  If you’ve been around here very long, you know that I like to change things around A LOT.  Sometimes I don’t realize how much things have changed until I go back and look at the “before” pictures.  That’s why I like to celebrate our “home-iversary” and take a few moments to look back at where we used to be, what we’ve done in the past, and where we are now.

.

So, today, I want to show you a glimpse into the last two years since Danny and I moved into our house 🙂  I’ll walk you through the whole tour and tell you EVERYTHING.  Just kidding, I’ll try and be brief…we all know you’re only here for the before and after pictures, right?

.

You can read our whole “moving day” story at this post from last year.  I won’t relive that story for you again here, so let’s just dive right into the tour, shall we?

.

Our front porch (or the entire exterior for that matter) hasn’t changed much in the two years since we moved in.

IMG_1924

IMG_3963[1]

BUT, we plan to do a little work on the outside of the house some next year.  It’s low on the priority list…we’ve focused our attention on the inside, because, well….you’ll see. But in all actuality, we never planned to do a single thing to this house.  I’ve said this a million times before, but one thing lead to another and somehow the house has turned into an accidental “fixer upper” that we had never really planned on.  But, I’m so glad it has and we have had SOOO much fun redoing things.

.

The night we moved in, our foyer/hallway looked like this:

Before foyer

SO. MUCH. GREEEEEEEEN.

.

Over time, lots of things happened here.  First, was the closet redo.

IMG_2432

Then, when we remodeled the kitchen, we laid new flooring in here.

IMG_2617

Then, I redid the trim in here to match the kitchen trim after the remodel and painted some (look real close and you’ll see that the half round is missing on the trim…it’s in the later pictures).  Danny took this picture and was like, “you never sit on that bench…why are you taking a picture like that?”  Staging, Danny.  It’s called staging. Get with the program. HAHAHA like I know anything about staging….

IMG_2984

Are you tired of seeing this foyer yet?  It’s been transformed in SEVERAL phases.  We are almost done here then we will move on 🙂

.

So then I hung sliding doors.  Remember these?

Two Year Home-iversary Home Tour

This is the part where I decided I hated green.  So we did the whole grey thing. (PS see that unpainted half round?  Told ya.)

Two Year Home-iversary Home Tour

Yeah, okay, much better.  Then I changed up that closet a little (Danny was right, we never used the bench) and painted the front door.  SO MANY CHANGES.  But, here we are today….FINALLY.

Two Year Home-iversary Home Tour

Alright, so moving on to the kitchen.  It has really only had one big transformation, so here’s a few before, during, and afters.  I’ll give you one guess as to which one (before, during or after) this one is…

IMG_1898

In case anyone is wondering, the paint color in here is called “nacho cheese.”  Not kidding.

paint

YUM, right?  I found a leftover can in the basement.  Good thing I read the label on the side first, because I was about to go grab the chips and me and Danny were about to have a party!

IMG_1899

The kitchen was actually our first “real deal” remodel.  It’s a long story you can read about here, but we decided to redo it shortly after we moved in and it was so enlightening.  If you call vacuuming up your weight in mouse droppings and dust after demo “enlightening.”  Fun stuff, you guys! You should totally try it 🙂

IMG_2397

IMG_2413

IMG_2483

But, we for real did learn a TON with this remodel and it gave us (me) the courage to tackle a few more (against Danny’s will).  Once it was all said and done, we had this:

Two Year Home-iversary Home TourTwo Year Home-iversary Home Tour

And more recently, this (I need more updated pictures of it with better lighting…I know):

Two Year Home-iversary Home Tour

So that is our kitchen, now moving on to our most used room that has really never had a “huge transformation” but seems like it is always changing here and there, the living room.

.

This was the night we moved in:

IMG_1861

Beige….so…..BEIGE.  I feel like there are two kinds of people in the world…those who like beige and those who like gray.  I’m the latter.  And I felt bad because the previous owners just paid a lot of money to have this room painted, but…..we painted over it anyway…and traded the beige couch for the gray one too.

IMG_2242[1]

A few other changes have taken place in here like the fireplace mantle, wood shelves, and new coffee table plus we totally changed the whole layout but, now it looks like this:

Two Year Home-iversary Home Tour

Two Year Home-iversary Home Tour

Two Year Home-iversary Home Tour

Down the hallway, you’ll find my “office.”  Notice the “” here.  It’s basically just a room to house my laptop and craft supplies.  I just like to sound fancy and say I have a “home office.”  HAHA, please…

.

This was the original:

IMG_1872

After a remodel that included a new desk and shelves, we had this (and I have to say I LOVE how this room turned out). I still sometimes come stand in the doorway and stare…

Two Year Home-iversary Home Tour

Backtracking a little to the foyer, let’s visit the laundry room.  Danny LOVED the original (oh, Danny, WHY?!), so it was a struggle to get him to let me redo it, but he finally agreed and now he likes it better…I think.  Here is before:

IMG_1920[1]

He liked the large storage cabinets, but I hated how all the doors here hit all the other doors when you opened them.  You can check out the remodel here and here.  We removed the large cabinets, but I replaced them with custom built ones.

IMG_4296[1]

And we replaced the back door because it wasn’t closing right anymore.  And here it is now:

Two Year Home-iversary Home Tour

Two Year Home-iversary Home Tour

Two Year Home-iversary Home Tour

So, let’s see.  Where have we not been yet?  Oh yes, the BATHROOM.  Have you all heard me go on and on and on the last few months about bathroom remodel updates?  Well, good news!!! It’s finished!!! But, to get there, we first go through the bedroom.  Here is the original bedroom:

IMG_1876

One day, I will document the entire story of the bedroom…but for now, let’s skip to the current, because this tour is going on forever!  AMIRIGHT?!

.

It’s really amazing what a fresh coat of paint, new flooring, a little rearranging, a couple nightstands, a new dresser, and new light fixtures can do.  But, for real…after all that, if there wasn’t a change, then something is really wrong.

Two Year Home-iversary Home Tour

Oh, but right next to the bathroom, is the closet.  Which has gone through a couple transformations…the first was good, but the second was bad.  Here was the before:

IMG_1919

But then we redid it:

Two Year Home-iversary Home Tour

But then we had to tear it back out…

IMG_7966 (960x1280)

And now it’s waiting on it’s next redo…but for now, it’s functional…kind of.

IMG_7983 (960x1280)

And now, finally, the bathroom!  Here was the before:

bathroom before

And I know…it’s not that bad, but you can read my reasoning for the remodel here.  It involves rotten subfloor.  Which is so super fun to tear out….

IMG_7960 (960x1280)

We have spent more time hanging out in our crawl space during this whole remodel than we did sleeping…like you think I’m kidding.  But I’m kind of not…

.

But, when it was all done, it was totally worth it.

Two Year Home-iversary Home Tour

Two Year Home-iversary Home Tour

And, with that, I’ve taken you through our home and the last two years worth of work we’ve done on it.  Huh, when you condense two years worth of work to one little blog post, it kind of feels like we are slacking…I’m going to go ahead and blame that on Danny….and budgets…and full time jobs.  You know…all those pesky little things.

.

I hope you’ve enjoyed this short tour with me.  I left out a few rooms that we hope to tackle in the year(s) to come, but as we near our two year home-iversary, (which is actually Nov. 14), we are pretty proud of our home and what we have done to it so far.  It’s been quite the adventure and we’ve learned quite a bit along the way.  We started out as amateurs, and now we are just amateurs with experience.  I don’t feel like I’ll ever be an expert haha.

.

So, if you’ve been around with me for the whole journey already, I appreciate your patience and your continued support.  If you are just joining us, I hope you stick around.  Because after two years, there is still plenty more where this came from.

Two Year Home-iversary Home Tour

Until next time, happy DIYing 🙂


DIY Corner Desk

October 31, 2016 by Shara, Woodshop Diaries

Build Your Own Corner Desk {That Looks Like A Pro}

Need a new desk for working from home?  This DIY corner desk is easy to build yourself with this tutorial!

White painted DIY corner desk with trim molding and furniture feet--professional looking corner desk

I’m just going to throw this out there….I wouldn’t mind being sent to the corner if this was the corner I could go to 😉

.

I mean, do you blame me? This corner desk has the looks, the storage, and all the function you need to sit down and start on the task at hand. It’s perfect as a home school desk, a work from home desk, or just an ocassional use desk that still looks good in the corner of a living room 😉

.

RELATED: Looking for more desk ideas?? Here’s a few others to check out as well! Click on the images below to take you to the tutorial.

  • Resin Leg Desk
  • DIY Storage Desk with 9 Drawers
    DIY Storage Desk
  • How to Build Your Own Standing Desk--With planked sides and a shelf, this makes a great cashier kiosk or standing desk
    Standing Kiosk Desk
  • Simple Mobile Workbench Desk

This corner desk design makes the desk about 5’x5′ (not including the optional molding on the edge), about 31 ¾″ tall, and about 20″ deep (on the two “wings” not including the optional molding). 

Overall corner desk dimensions

Each “wing” extended out about 23″ on the front side.  This allowed for plenty of room in the front corner to slide in an average sized chair and still look good proportionally with the drawer size.

.

So, if you’re ready to get building, let’s go! I’ve got the link to the printable plans below and the tutorial following.

This post contains affiliate links.  See disclosure policy for more details.  I appreciate your support!

For This Corner Desk, You Will Need:

  • ¾″ plywood (2 full sheets)
  • ¼″ plywood (1 sheet)
  • (3) 1x3x8 boards
  • (2) 2x2x8 boards
  • (1) 2x4x8 board
  • Cove molding (optional)
  • 8 wood feet
  • 5 pair 16″ drawer slides
  • 1 ¼″ pocket hole screws
  • 2″ wood screws
  • 2 ½″ pocket hole screws
  • Wood glue
  • Circular Saw
  • Miter Saw
  • Jig Saw
  • Drill
  • Kreg Jig
  • Nail Gun
  • Square
  • Straight Edge (level)

GRAB PRINTABLE PLANS HERE!

.

1. Cut Out Corner Desk Top

First, I cut out the top to the size I wanted.  I’ve provided a plywood cut diagram in the printable plans. I drew it out on the plywood with a straight edge and a pen to get a feel for the size.

.

RELATED: Check out my post on The Easiest Way to Cut Down Plywood Sheets!

First, I was going to build a 4×4 desk, so I wouldn’t have to piece the plywood together, but it felt too small, so I went with 5×5.  I emphasized the lines I actually cut in the picture below.   Notice one “wing” is longer than the other.  Keep reading.

Corner desk top plywood layout for top piece

I cut across the board first with my circular saw (to make a 5×4 piece), then I cut the straight lines of the wings.  Once those were cut, I CAREFULLY cut along the straight line of the 45 degree line with my jig saw.

.

Because plywood sheets are 4ft wide, I had to attach a 12″ piece onto the end of one of the “wings” to give me 5ft.  I attached it with wood glue and pocket holes (using my Kreg Jig and screws). 

Adding extra "wing length" on one side of desk top plywood top
Attaching additional wing piece with pocket holes and screws

Then, I set the top aside while I built the rest of the pieces.

Overall desk top dimensions layout

2. Build the Drawer Cabinet Boxes

I built the cabinets so that their total height (after feet and face frames were added) would be 31 ¼″, depth 19″ and width 22″.   I cut four cabinet sides and two cabinet bottoms based on these dimensions.

Plywood pieces cut for side cabinets

I used my Kreg Jig to drill pocket holes in the bottom of the cabinet bottom pieces.

Side Cabinet bottom panel pocket holes for assembly

Then, I screwed the sides and bottoms together with ¾″ pocket holes and 1 ¼″ pocket hole screws.

Corner desk cabinet carcasses assembled upside down

While I had the cabinets upside down, I went ahead and attached the feet.  When I built this desk, the feet I used had a little bolt in the top and I used some attachment plates to install them.

Furniture feet attachment plate mounted on bottom of cabinet
Furniture feet attachment plate hardware example close up

However, since then, I’ve found it easier to glue and screw these in place and skip the plates. So I recommend gluing and screwing 4″ tall furniture feet into the corners of the cabinet boxes using wood glue and 2″ wood screws through the bottom panel into the feet.

,

Then, I flipped them over and attached two pieces of scrap plywood (could also use 1×3 board) at the top using pocket holes and screws making sure everything was square.

Graphic of cabinet carcass assembly with top supports

3. Add Face Frames to Corner Desk Cabinets

Now that the boxes were built, I added face frames to the front.  I made my frames from 1x3s and pocket hole screwed them together first, then attached them from the inside of the cabinet using pocket holes and screws again. 

.

You could also glue and brad nail these face frames in place as well. I built my frames to accommodate two identically sized drawers.

Corner desk side cabinets assembled with face frames attached on front

All details and dimensions are listed in the printable plans.

4. Add Drawers to Desk Cabinets

 Because the face frames don’t allow me to mount the drawer slides directly to the side of the cabinet, I had to install “spacers” to push the slides out to where they would clear the face frame when the drawer was open.

.

RELATED: Check out this detailed drawer building guide for more information.

I cut some scraps about 1 ¾″ wide and mounted them on the side of the cabinet where I wanted to install the drawer slides making sure they were level.  I actually used 2x2s first, and attached them with wood glue and 2″ wood screws. Then attached some ¼″ plywood on top of that to give me the 1 ¾″ total.

Side cabinets with drawer spacer blocks installed

Then, I attached the drawer slides to the spacers.

Drawer slides mounted into corner desk side cabinets

Once the slides were in place, I made four drawers of identical size.  and installed them into the cabinet boxes. You can check out my post here about how to make and install drawers. 

3D diagram of drawers installed into side cabinets

Once the drawers were in, I also added cove molding along the bottom of the cabinets using my nail gun and glue–that’s an optional step, but just adds some nice decorative detail.

5. Make Drawer Fronts

I made the drawer fronts like a shaker style cabinet door.  I made them about 2 inches taller and wider than the opening on the face frame of the cabinets.  This allows for 1″ overhang on all sides.

.

This tutorial shows you how to make shaker style doors.  I used the same method to make the drawer fronts.  Instead of pocket hole screwing them, I glued and clamped them instead.

Shaker style drawer front in clamps while glue dries

I actually recommend using solid panel (¾″ plywood) drawer fronts for this as they are much easier to install, (check out my drawer building guide for details) BUT if you do use this Shaker style drawer front, be aware you can’t screw them in from the inside of the drawer because the screw will poke through the ¼″ plywood center.

.

For this style drawer front, simply attach using wood glue between the drawer front frame and the drawer box. NOTE: It’s easiest to lay the cabinet on its back and allow gravity to hold the front where you want it until the glue dries.

6. Install Middle Drawer to Corner Desk Top

Now that the side cabinets were finished, I flipped the corner desk top upside down and drew where I wanted to install the slides for the middle drawer.  I cut some scrap 1×3 and attached drawer slides to them.  Then, I glued and screwed them into the top.

.

NOTE: You could also use pocket holes and screws to attach as well.

Middle corner desk drawer support blocks installed into bottom of desk top

I built a drawer to fit this space and installed it.  I used a scrap piece of plywood for the face front and cut it about ¼″ shorter than the distance between the cabinets so it would have clearance and not hit either when it slid out.

.

NOTE: In the image below you will notice the side cabinet drawers don’t have a front…this is because this is how I USED to build drawers years ago. I don’t build them like this anymore, so ignore the face the fronts here are missing.

unfinshed corner desk assembled in work shop

Then, I flipped it all back over and added cove molding along the edges of the top (that’s optional, but adds a nice detail).  I puttied the seam (see on the left) and along all the joints.  Then sanded, caulked a few places, and painted everything.

7. Assemble in Place

Once everything was finished, I brought it in inside and put it together.

Corner desk side cabinet painted white ready for assembly

Once all the pieces were in place, I screwed the top to the cabinets on those top supports mentioned in step 2 using 1 ¼″ wood screws.  For an extra support at the back corner, I cut a 2×2 to use as a post and used 2x4s in the back between the post and the cabinets.

Back corner support blocks on desk top

And at that point, it was time to slide it in place and set up shop….I mean set up OFFICE haha.

Finished DIY corner desk painted white in corner of office space with black chair
Close up view of left side of corner desk cabinets
Close up view of right side of corner desk cabinets

PS…Like my assortment of books here?  We’ve got 1984 and Brave New World for when you’re feeling really morbid about the government (both highly recommended by the way), Pride and Prejudice and Wuthering Heights for when you need a dark, twisted, semi-romantic read, and Math Reasoning and Fluid Power for when you literally have nothing else better to do.  Nice 😉

Close up view of middle drawer of desk open
Close up view of trim along desk top edges

Since I’ve never build a corner desk before, it was a bit of a challenge, but I thought it turned out great! And I’m really loving how much storage is packed into this desk as well. Plenty of storage and workspace without taking up a huge footprint.

.

If you loved this project as well, be sure to pin this for later!

Pinterest collage with overall dimension graphic at top and finished DIY corner desk image on bottom

Until next time, happy building! 🙂

  • « Previous Page
  • 1
  • …
  • 11
  • 12
  • 13
  • 14
  • 15
  • 16
  • Next Page »

Hi! I'm Shara, the designer, maker, and videographer behind Woodshop Diaries. Let's get building, friends :)

Learn more →

Woodworking Tips & Guides

  • How to make simple Shaker style cabinet doors!!
    DIY Simple Shaker Cabinet Doors
  • 5 Tools To Get Started Woodworking
  • DIY Kitchen Cabinets–From Only Plywood
  • How to Square Board Edges and Make Your Own 2x2s

Footer

↑ back to top

Tips to Take Your Projects to the Next Level

--5 Secrets to Professional Looking DIY Furniture

--How to Properly Paint Wood Furniture

--How to EASILY Cover Plywood Edges

--How to Sand Wood

--10 Must Have Tools for Furniture and Cabinet Building

Printable Building Plans

Check out our shop to browse printable PDF building plans!

Website Policies

This website is for entertainment purposes. Using any information provided is to be at your own risk.

This site uses cookies to provide you with a better experience.

All images and text on this site are property of Woodshop Diaries, LLC. Please be respectful and don't steal this content.

See Policies and Privacy page on this site for more information.

Want to get in touch? Contact Us Here

Copyright © 2026