Woodshop Diaries

  • Shop
  • About
    • Work With Me
    • Frequently Asked Questions
  • DIY Projects
    • DIY Furniture Plans
      • DIY Bed Plans
      • DIY Dresser Plans
      • DIY Nightstand Plans
      • DIY Desk Plans
      • DIY TV Stand Plans
      • Coffee and Side Table Plans
      • Tables
      • Shelves and Bookcase Plans
      • DIY Storage Trunk Plans
      • DIY Bench Plans
      • DIY Storage Cabinet Plans
      • DIY Bathroom Vanity Plans
      • Kids Projects and Furniture
    • DIY Scrap Wood Projects
    • DIY Workshop Projects
    • DIY Home Decor Projects
  • Getting Started
    • Cabinet Building
    • Woodworking Basics
    • Furniture Finishing Tips
    • Tool Guides & Reviews
  • Blog
menu icon
go to homepage
  • Shop
  • About
    • Work With Me
    • Frequently Asked Questions
  • DIY Projects
    • DIY Furniture Plans
      • DIY Bed Plans
      • DIY Dresser Plans
      • DIY Nightstand Plans
      • DIY Desk Plans
      • DIY TV Stand Plans
      • Coffee and Side Table Plans
      • Tables
      • Shelves and Bookcase Plans
      • DIY Storage Trunk Plans
      • DIY Bench Plans
      • DIY Storage Cabinet Plans
      • DIY Bathroom Vanity Plans
      • Kids Projects and Furniture
    • DIY Scrap Wood Projects
    • DIY Workshop Projects
    • DIY Home Decor Projects
  • Getting Started
    • Cabinet Building
    • Woodworking Basics
    • Furniture Finishing Tips
    • Tool Guides & Reviews
  • Blog
search icon
Homepage link
  • Shop
  • About
    • Work With Me
    • Frequently Asked Questions
  • DIY Projects
    • DIY Furniture Plans
      • DIY Bed Plans
      • DIY Dresser Plans
      • DIY Nightstand Plans
      • DIY Desk Plans
      • DIY TV Stand Plans
      • Coffee and Side Table Plans
      • Tables
      • Shelves and Bookcase Plans
      • DIY Storage Trunk Plans
      • DIY Bench Plans
      • DIY Storage Cabinet Plans
      • DIY Bathroom Vanity Plans
      • Kids Projects and Furniture
    • DIY Scrap Wood Projects
    • DIY Workshop Projects
    • DIY Home Decor Projects
  • Getting Started
    • Cabinet Building
    • Woodworking Basics
    • Furniture Finishing Tips
    • Tool Guides & Reviews
  • Blog
×
Home

How We Installed Real Wood Floor for Less than $1.50 Per Square Foot

October 26, 2016 by Shara, Woodshop Diaries

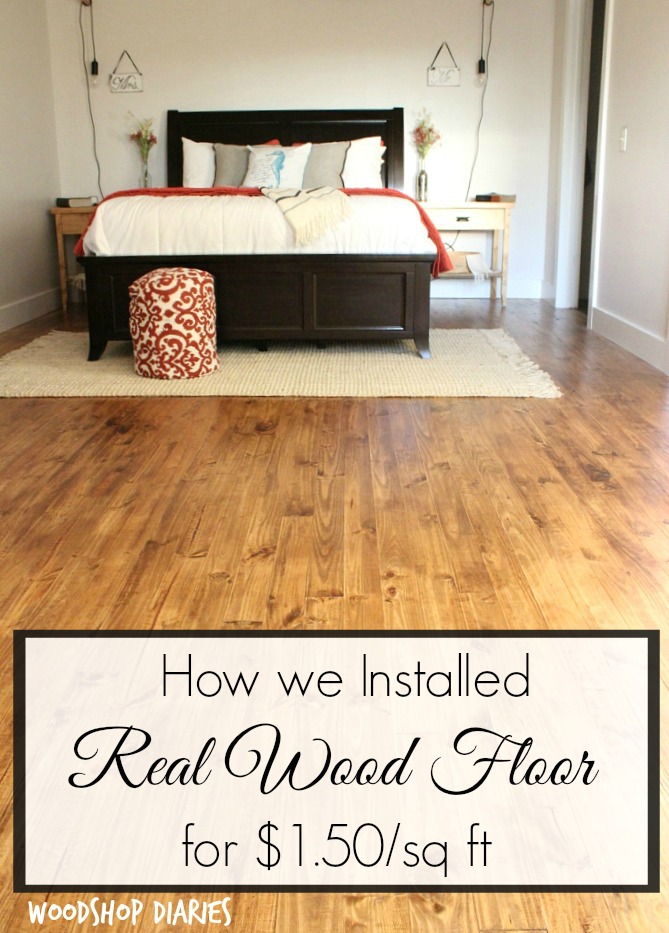
If you’ve followed along for very long, you know that I love a good remodel project.  And you probably know by now that I try to be pretty thrifty (AKA I’m cheap).  So when we decided to replace the bedroom carpet floor after the bathroom remodel, my budget was about $1.50/ sq ft.  And I wanted real wood flooring.  I know, I know…give me some of what she’s having because she is CRAZY, right?

.

Have you guys seen the prices of prefinished real wood floors?  They’re high…like real high.  Like higher than the Spice Girls’ platform boots high.  And we just finished a bathroom remodel.  So here we are, on a REALLY tight budget, but needed real wood floor for a pretty big sized bedroom (we are talking about 400 sq ft).  What to do?

Bedroom Flooring Chaos

I’ll tell you what we did….we installed our own solid wood pine floor for less than $1.50 a square foot.  And you thought I was crazy.  So let me tell you all about my “cheap” new wood floor.

.

Actually, to be honest, there isn’t a whole lot to tell.  It was pretty simple.  I know, you were thinking there was some big secret, right?  Nope.  We installed unfinished yellow pine flooring and finished it ourselves.  Easy as it gets.

.

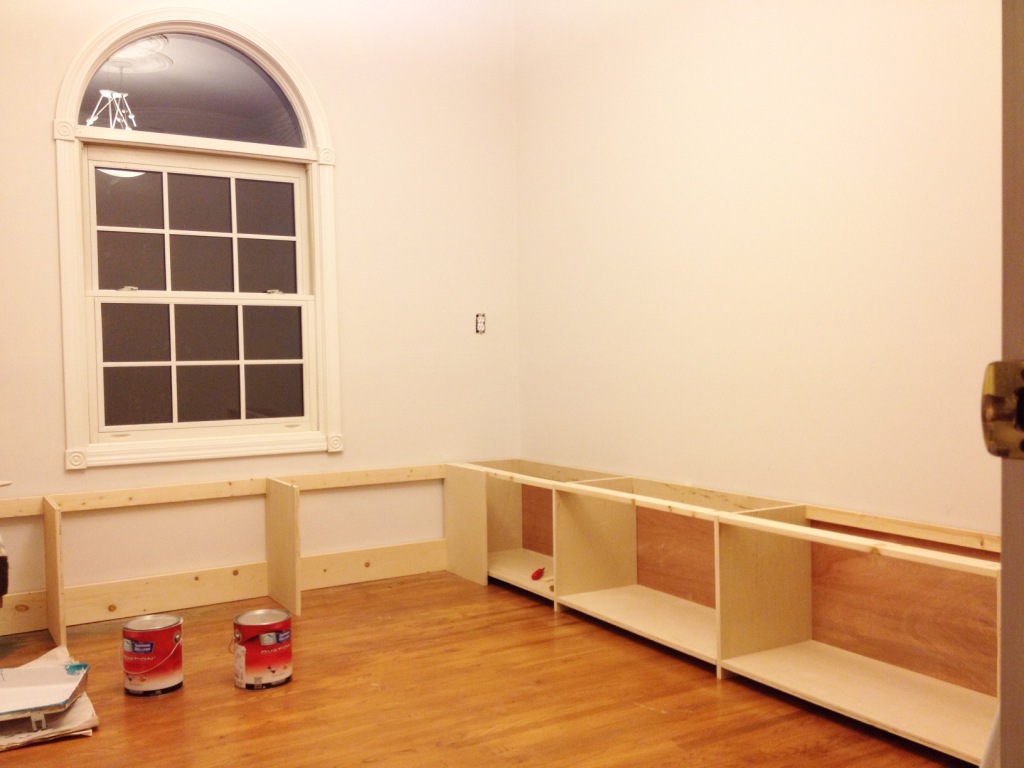
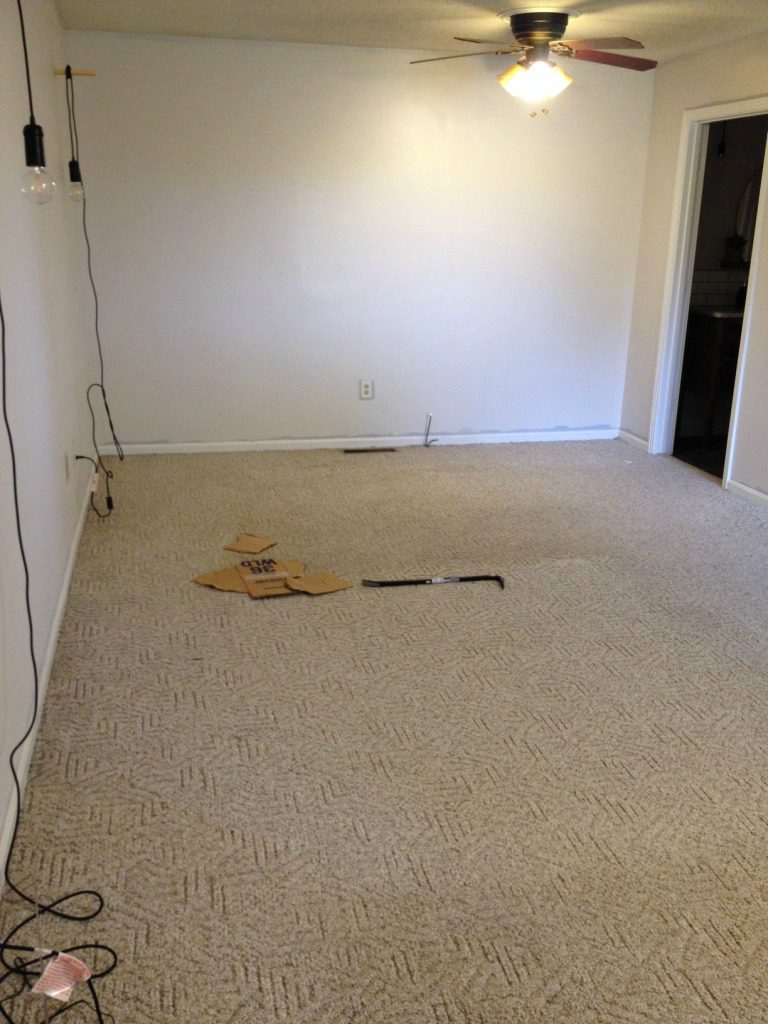
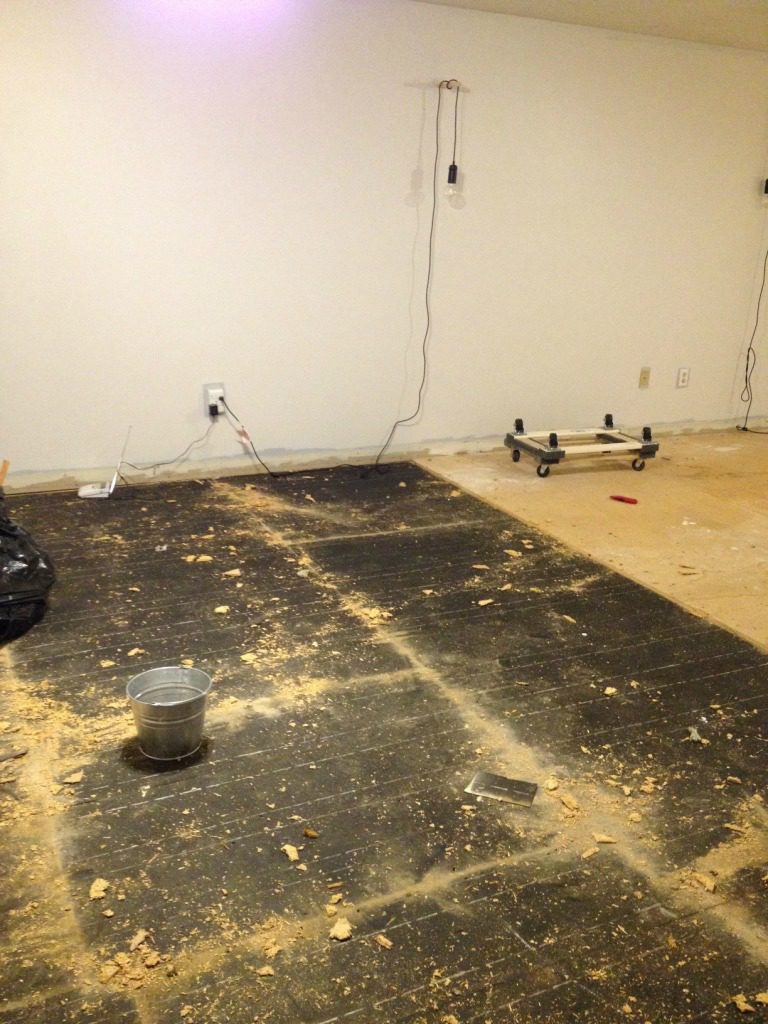
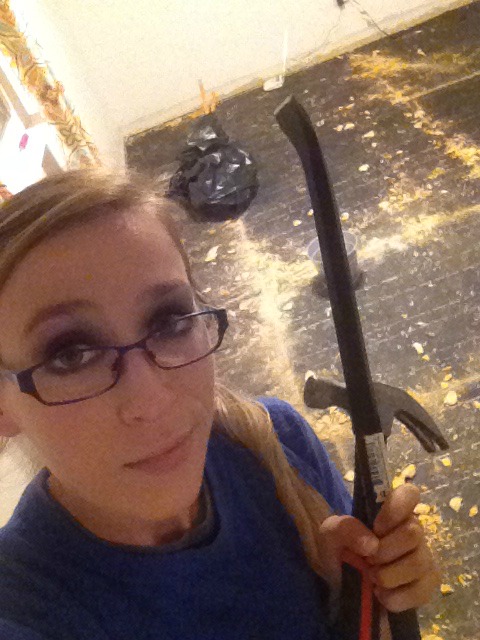
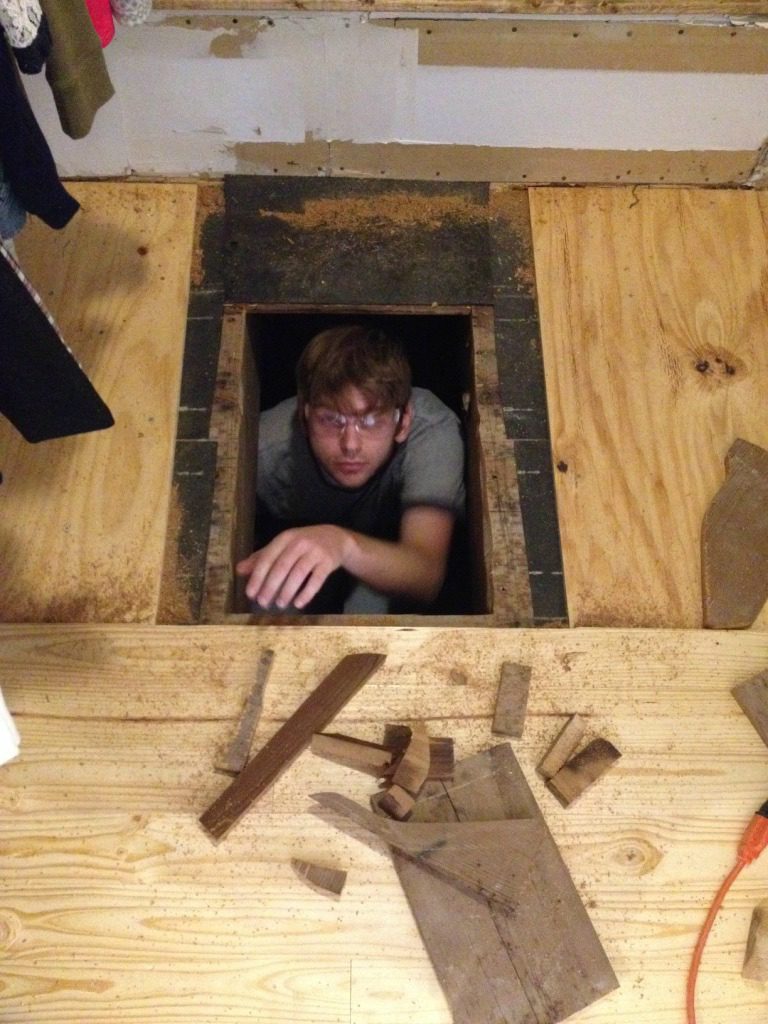
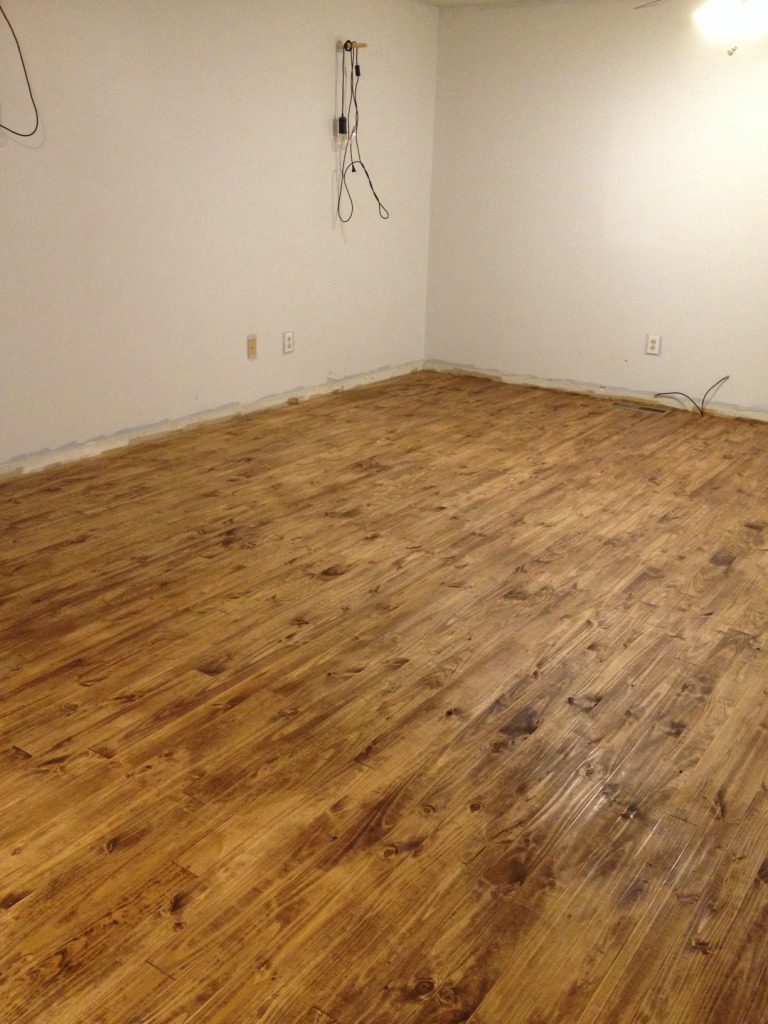
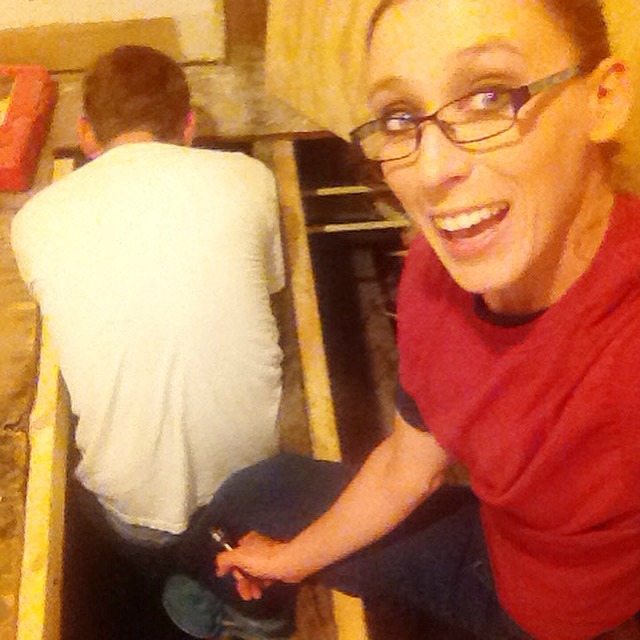
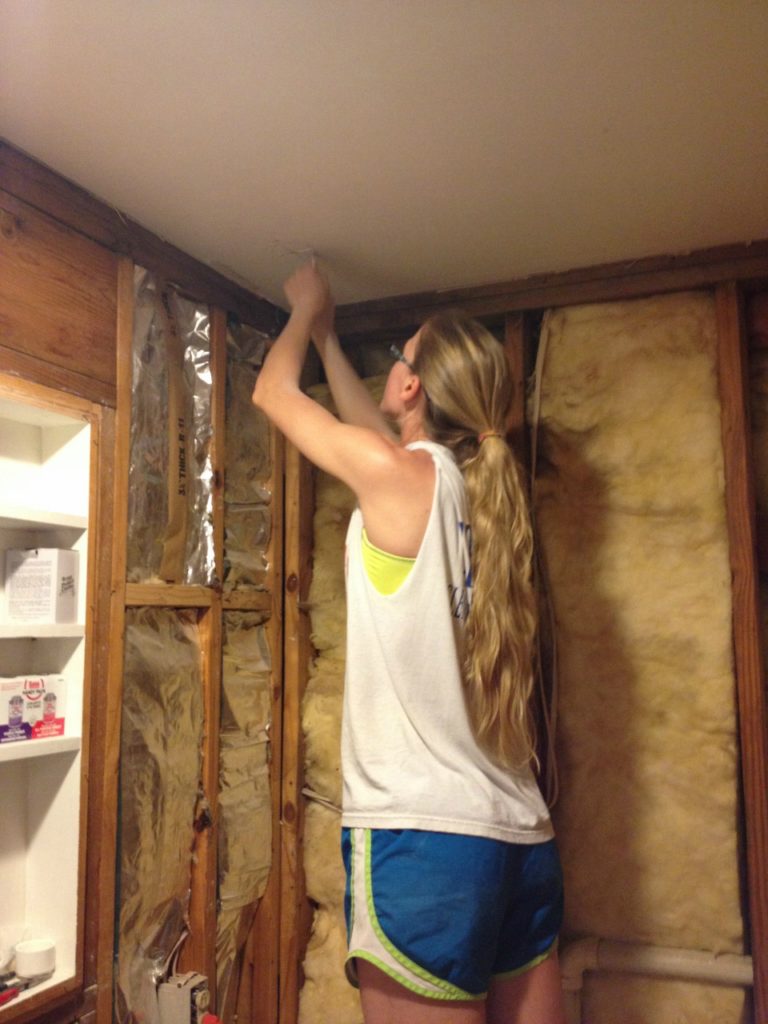
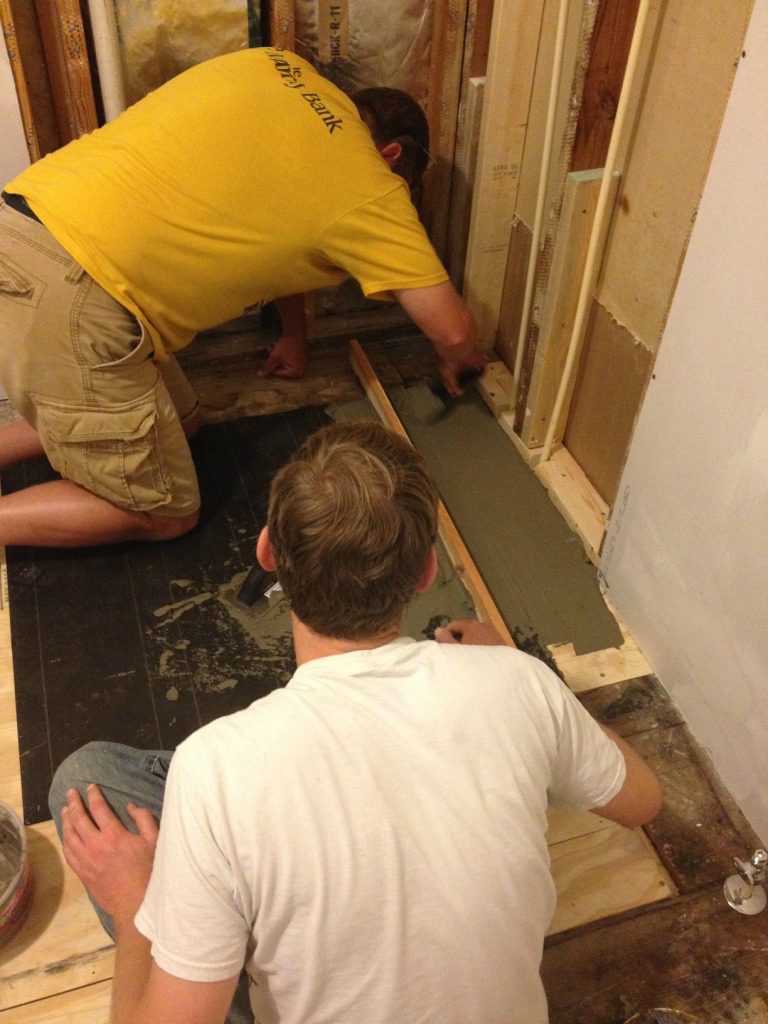
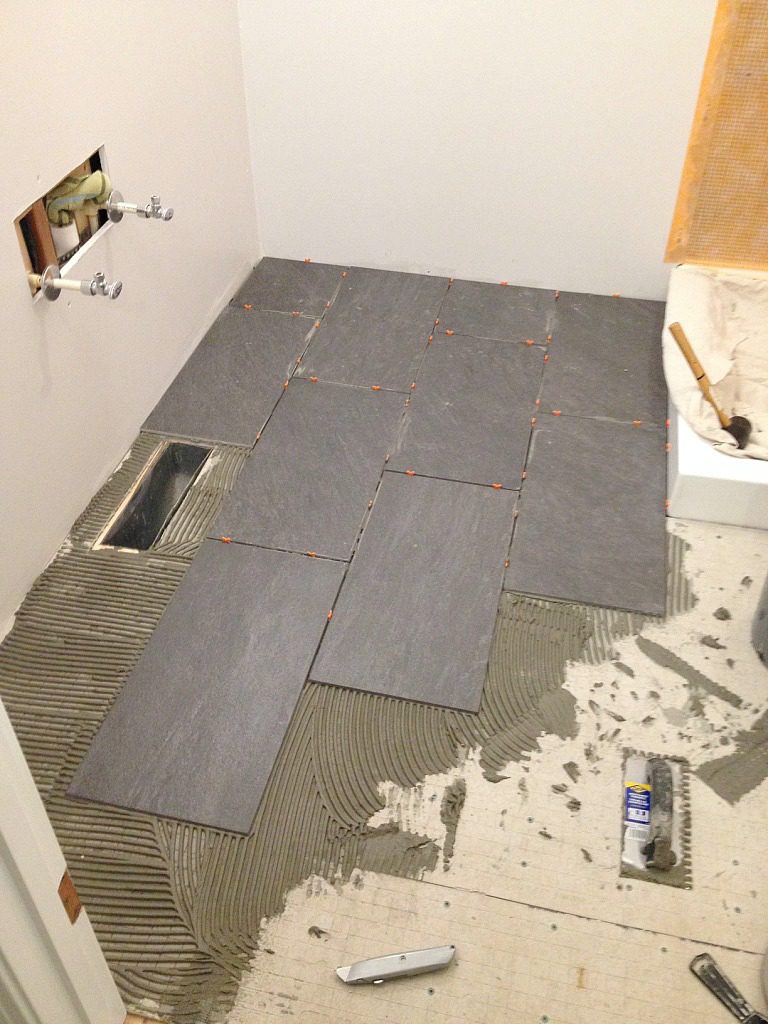
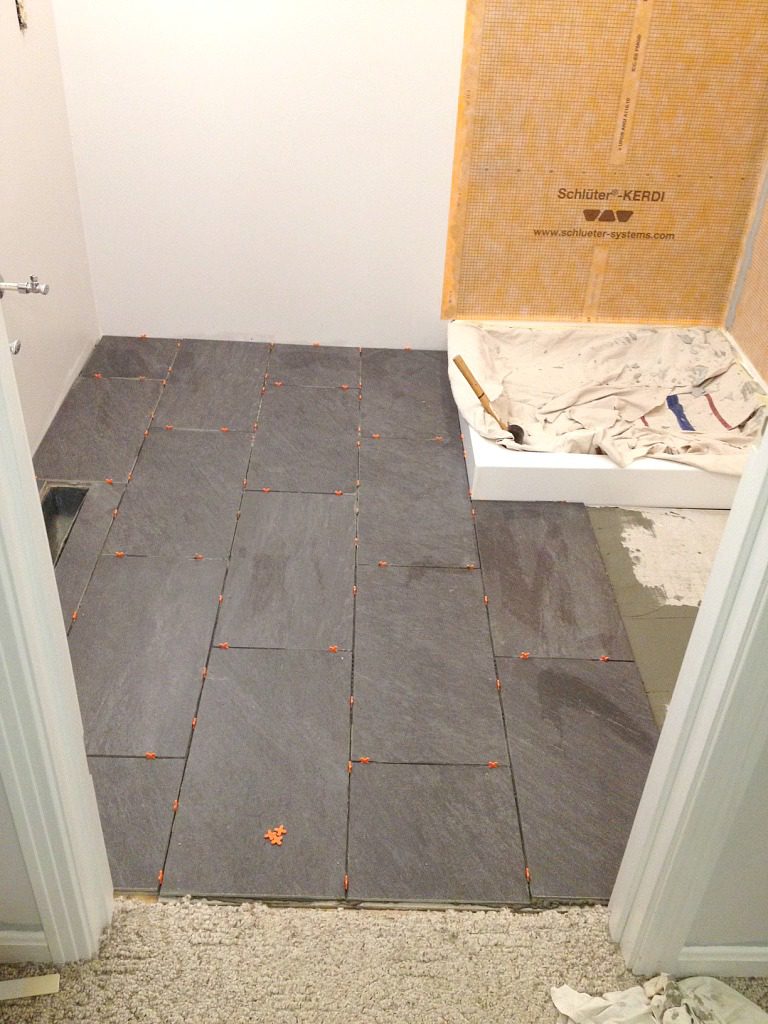
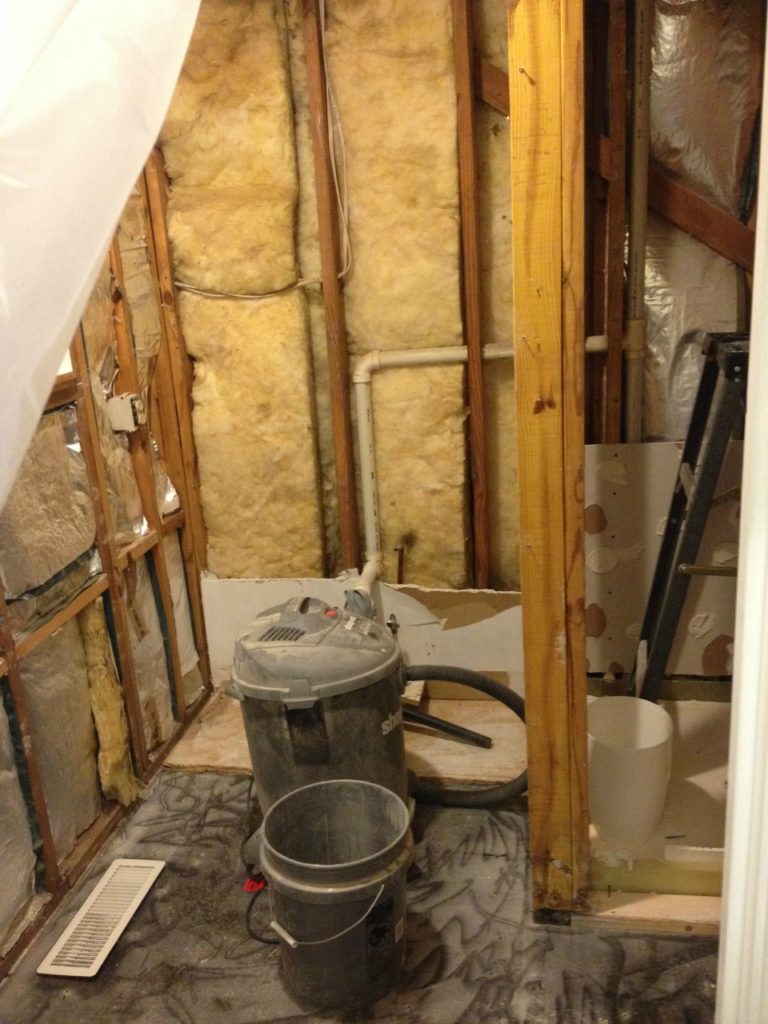
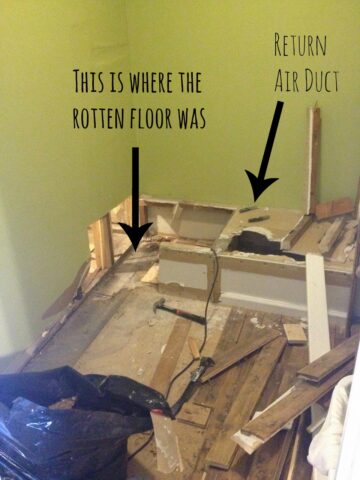
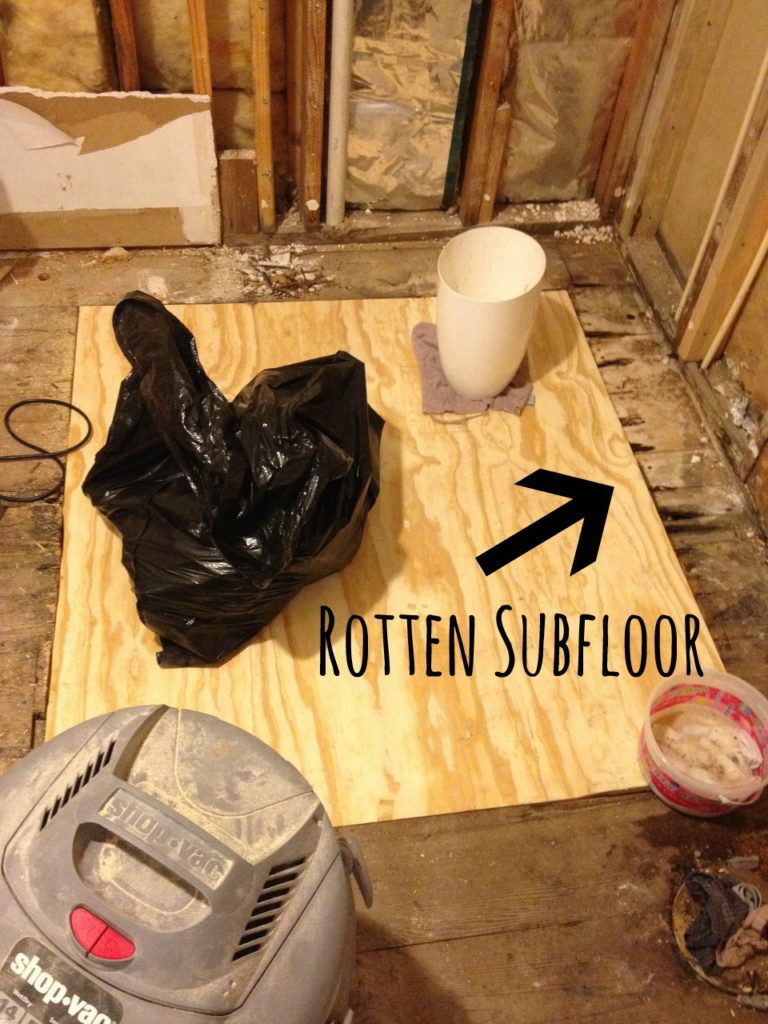
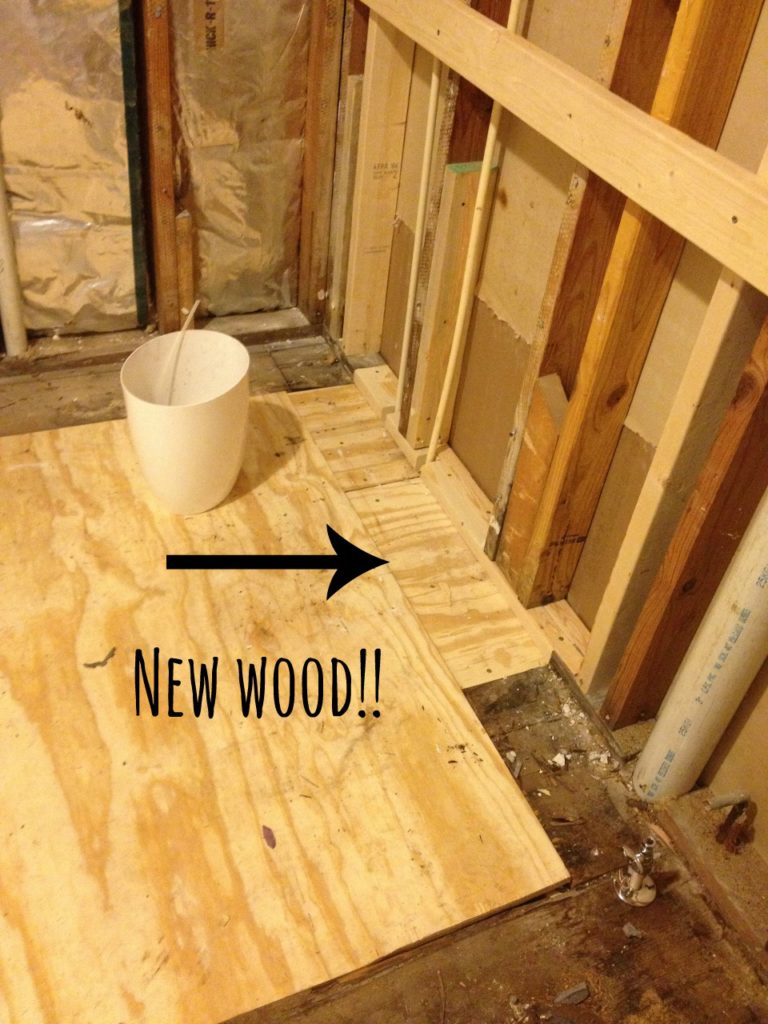
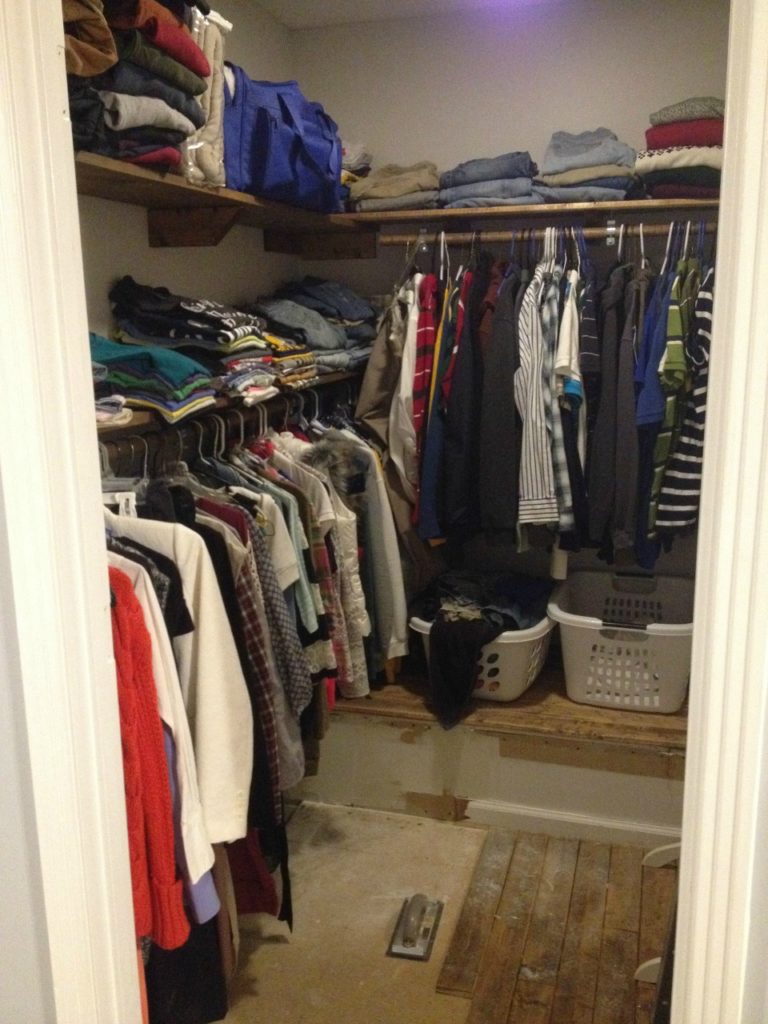
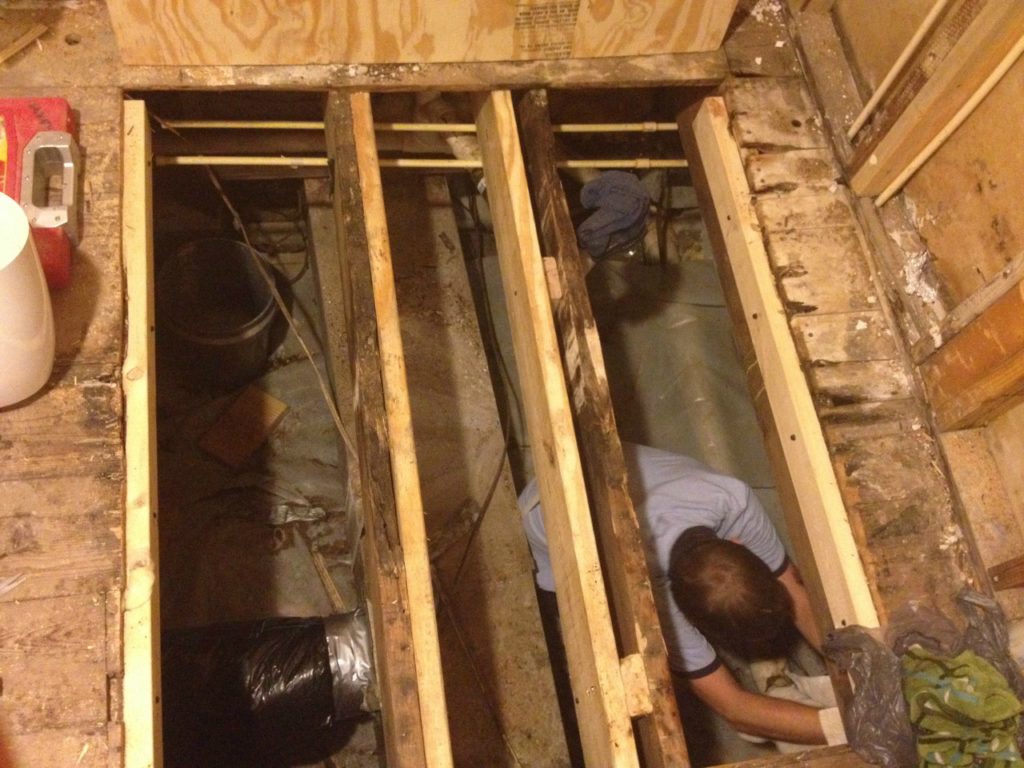
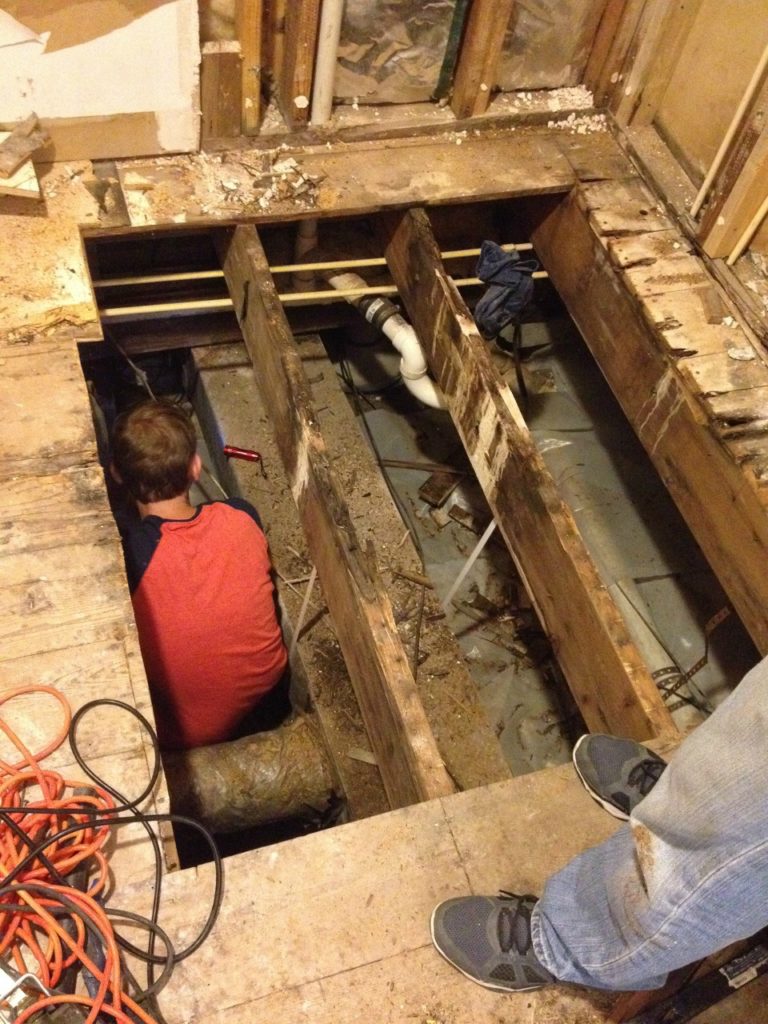
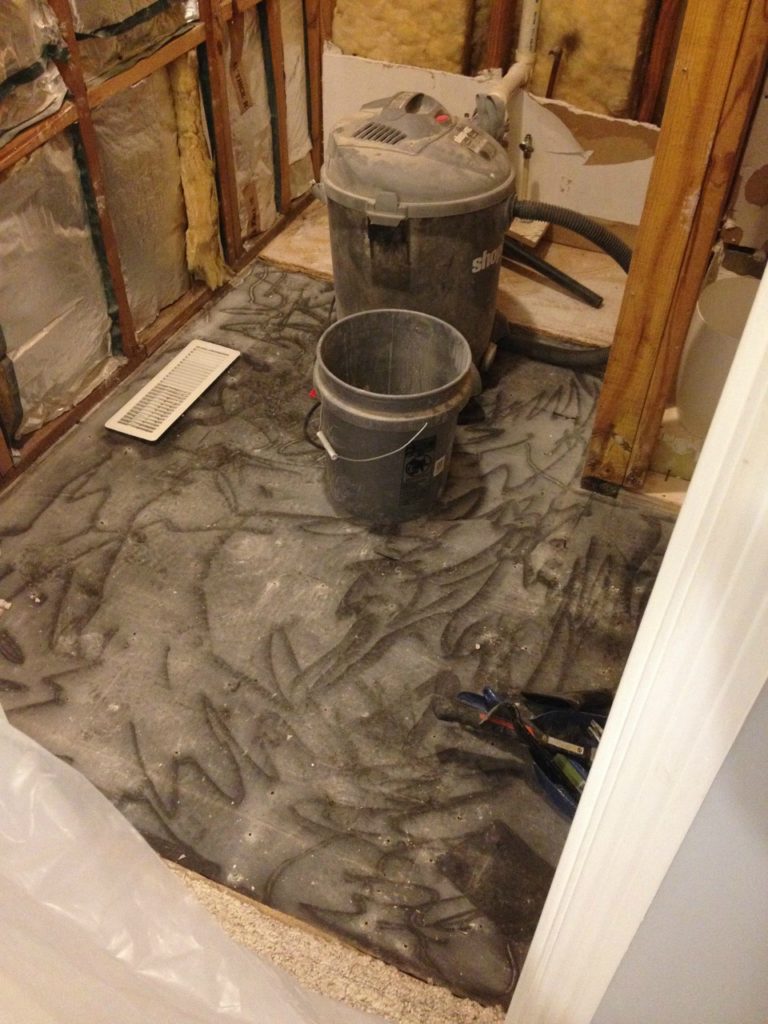
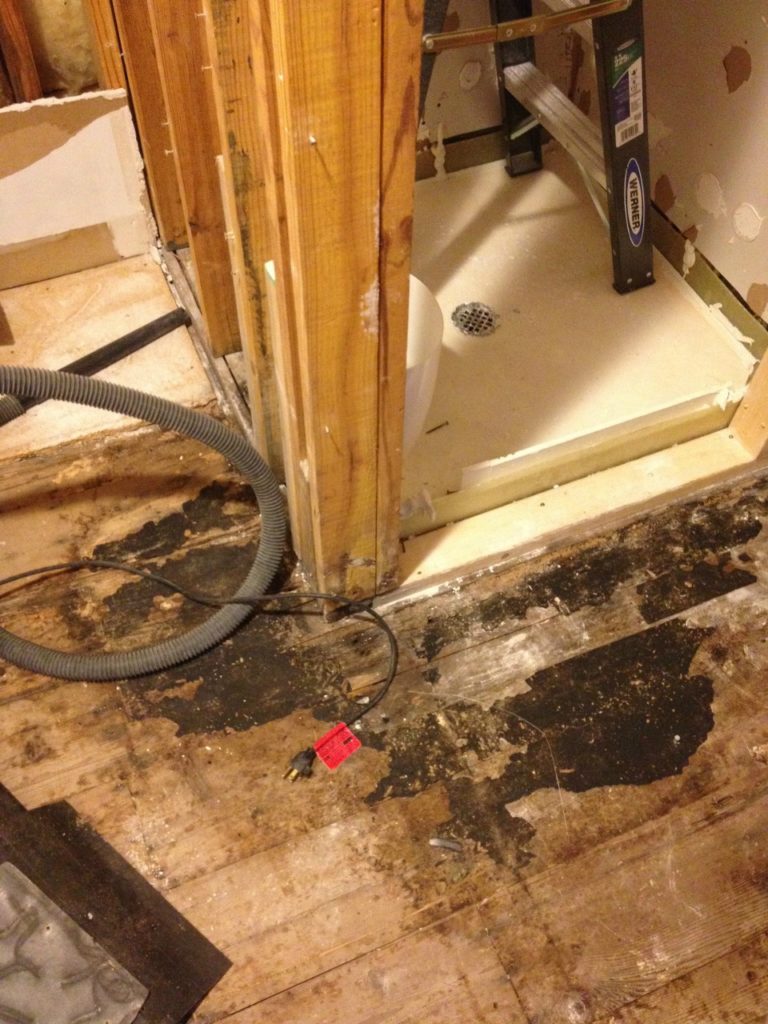
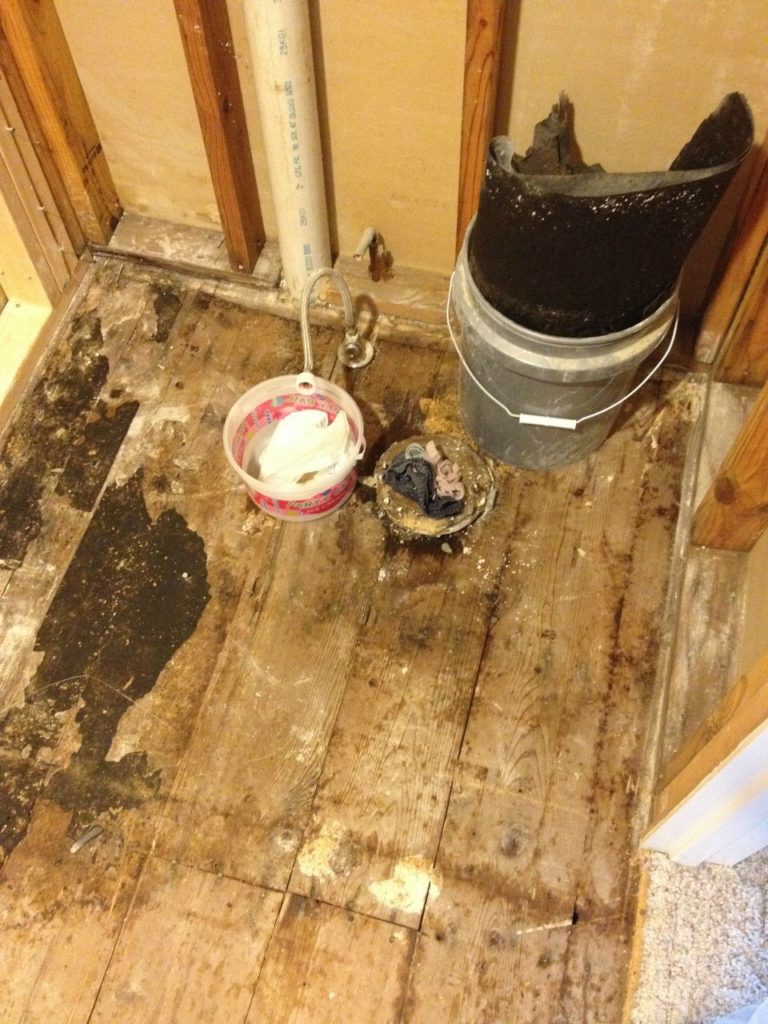
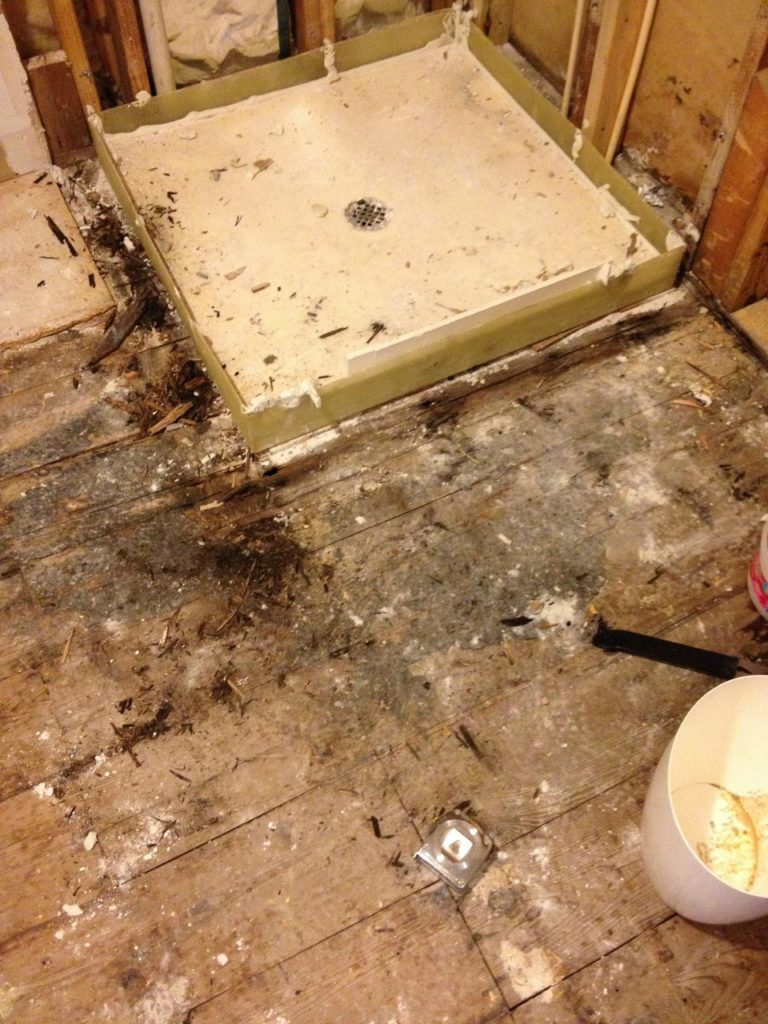
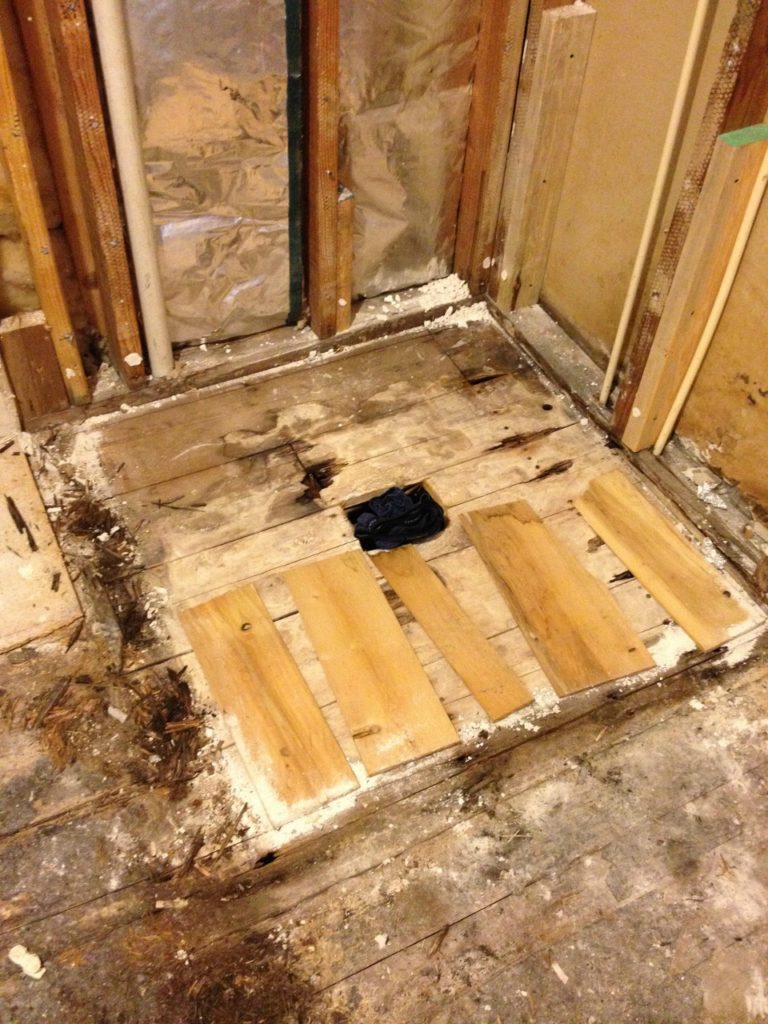
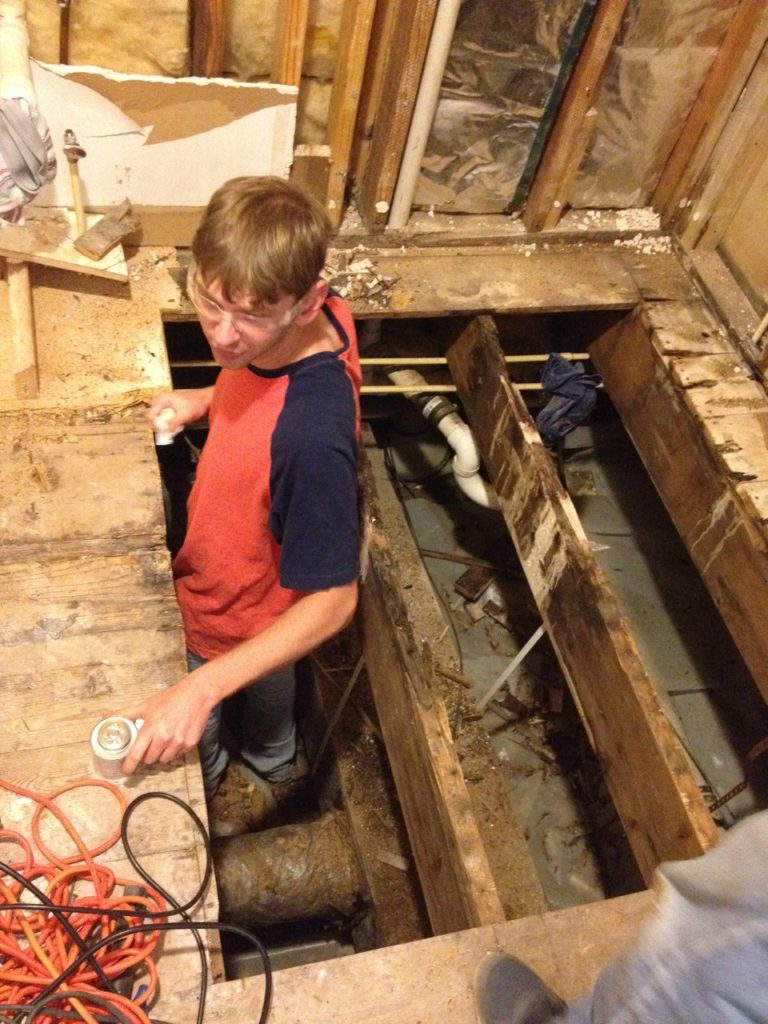
First, we removed all the baseboards and door trim (door trim was optional, but I was redoing it anyway), and pulled up all the carpet.  Our carpet was laid on top of particle board.  You’re not supposed to lay wood floor directly over particle board (so says the internet), so we removed it as well to get all the way down to the subfloor.  The black stuff here is tar paper…that’s a moisture barrier over the subfloor boards.  It looked to be in good shape, so we just left it instead of getting a new one.  We swept it really good before we put anything on top of it to prevent creaks.

img_8402

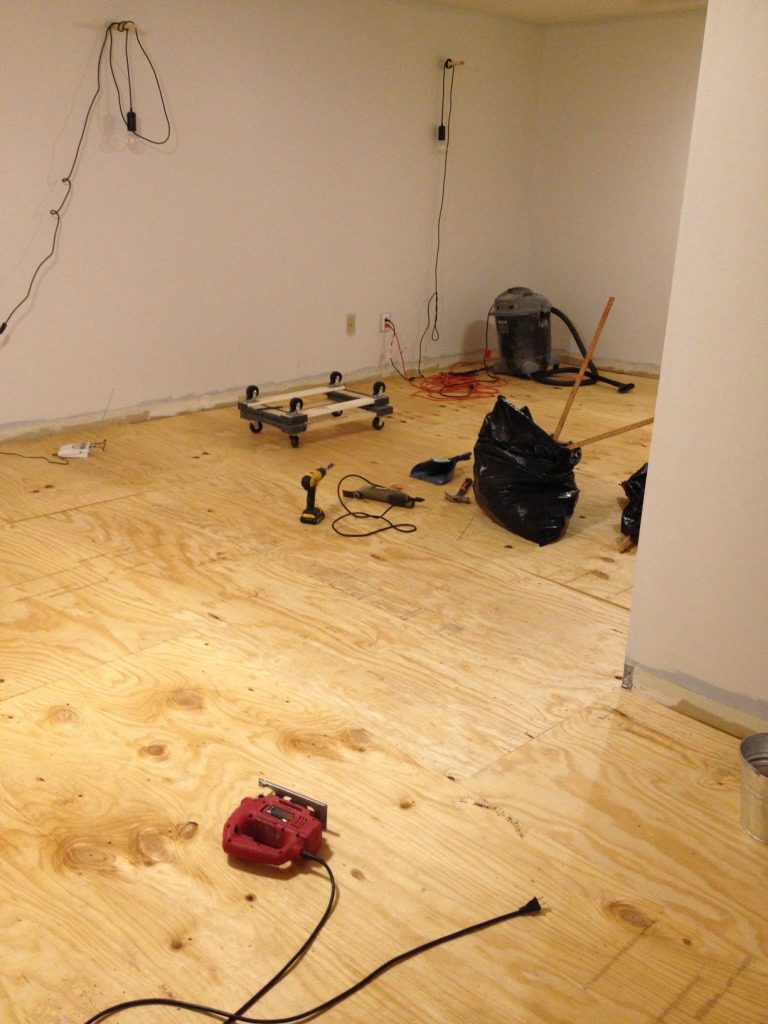
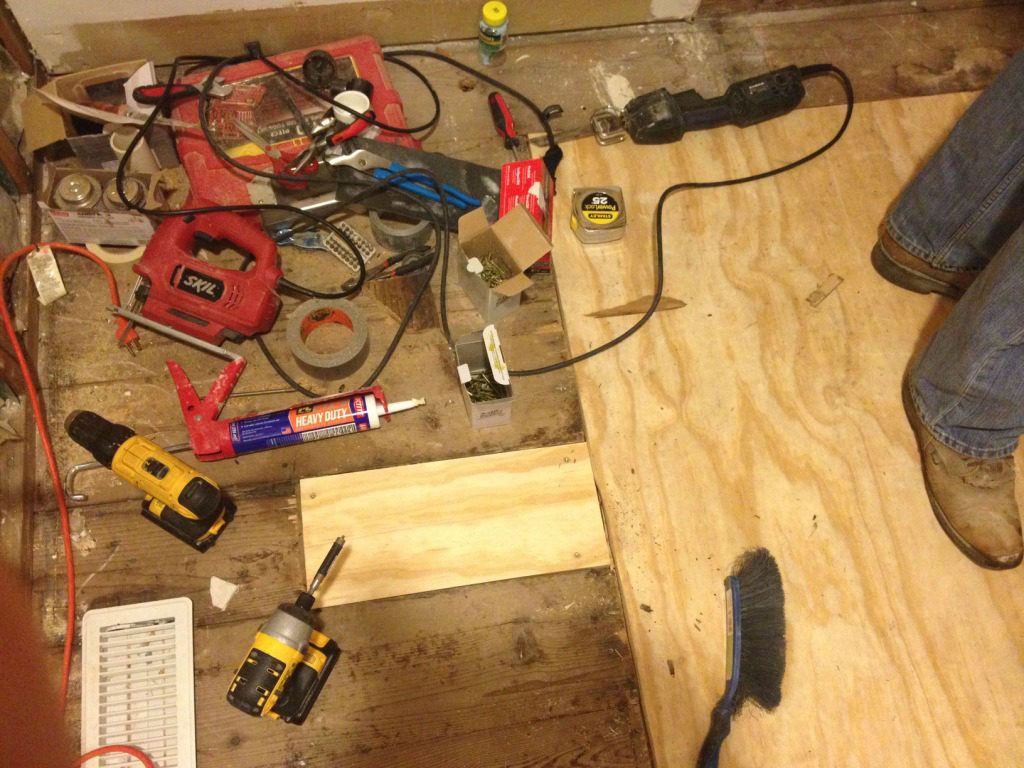
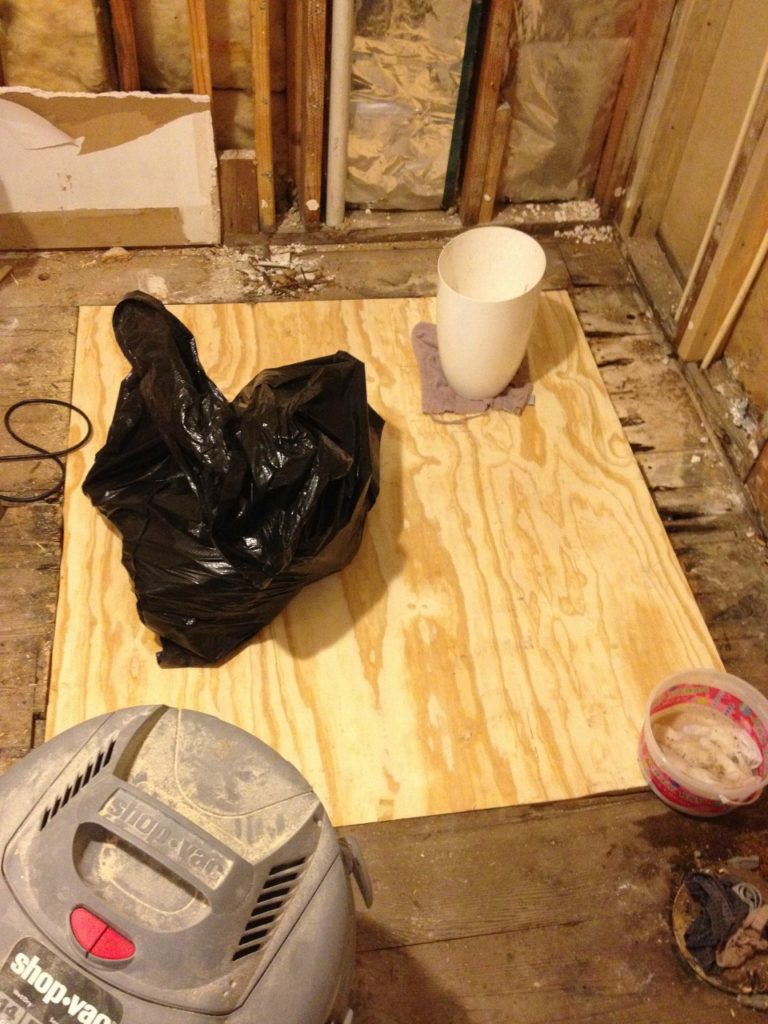
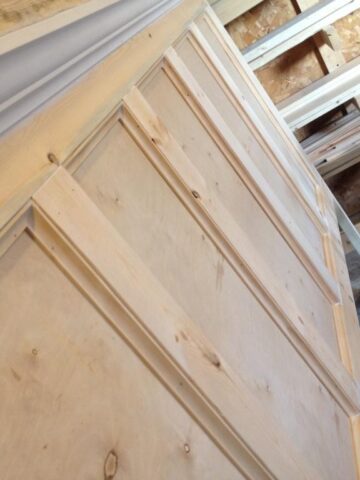
Once the particle board was gone and the tar paper swept clean, we laid plywood down as our underlayment.  Now, I’m not including the cost of the plywood in the $1.50, because you would need to do this no matter what type of wood floor you were laying down….just wanted to clarify.  It actually didn’t add much to the cost anyway, though.

img_8407

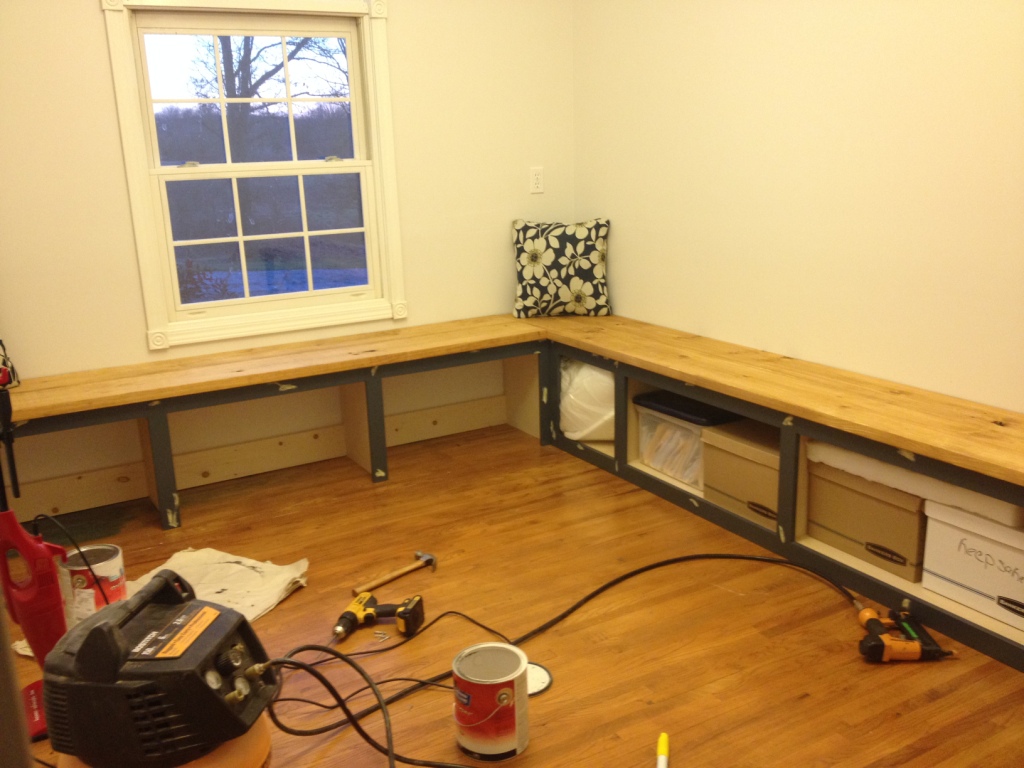
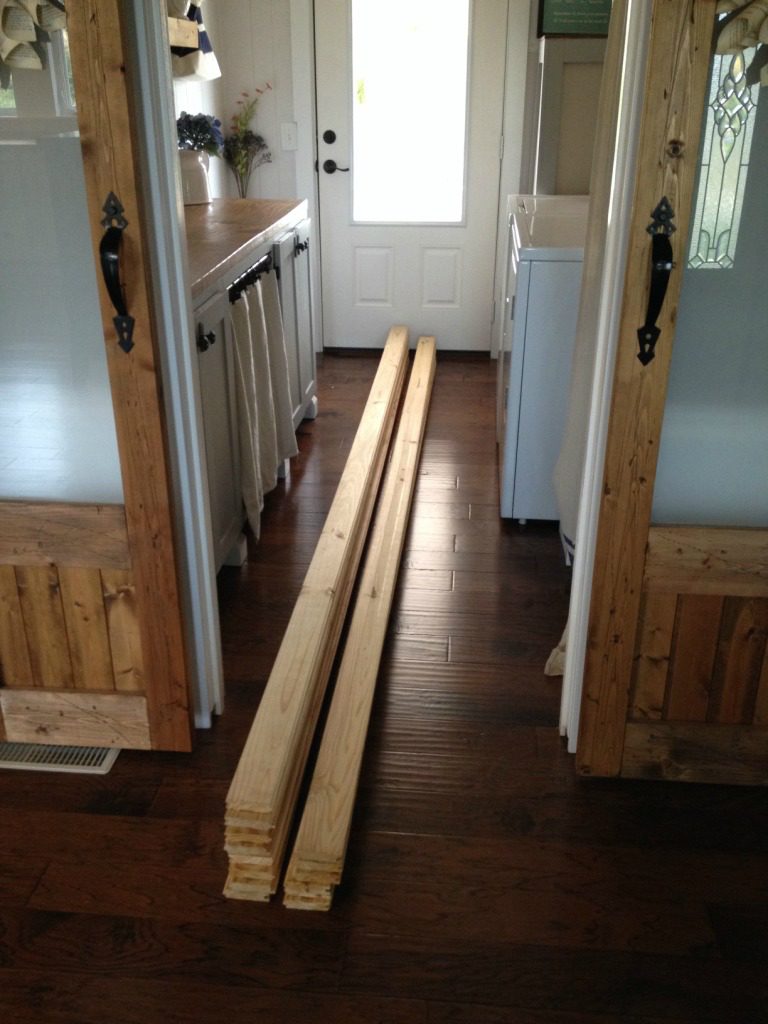
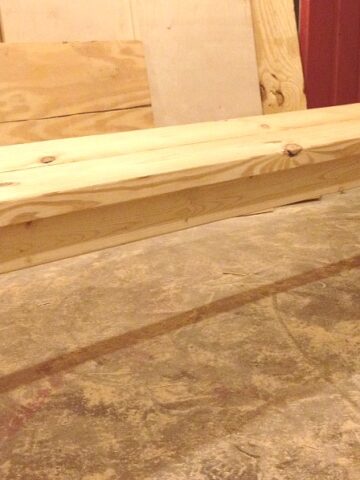
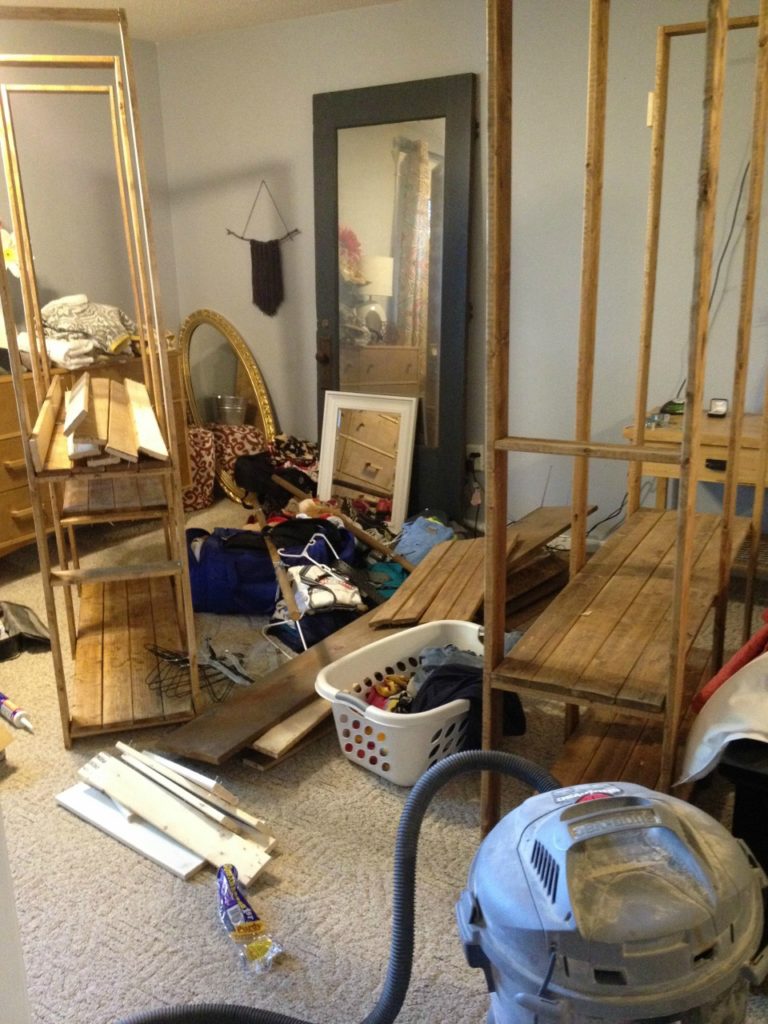
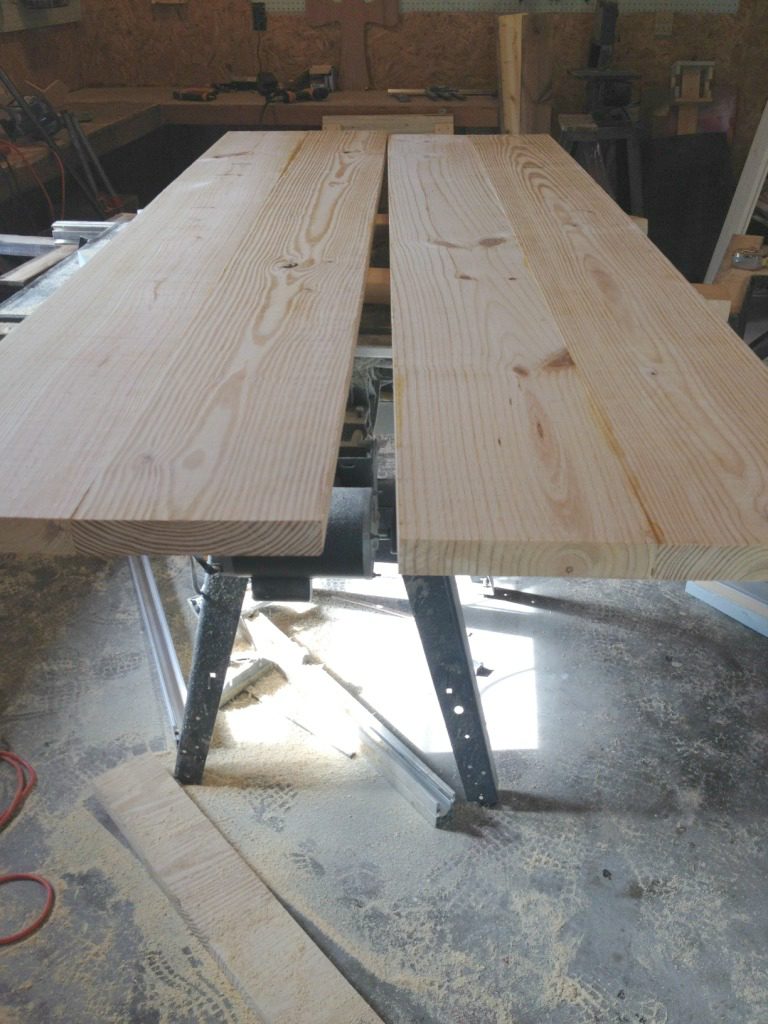
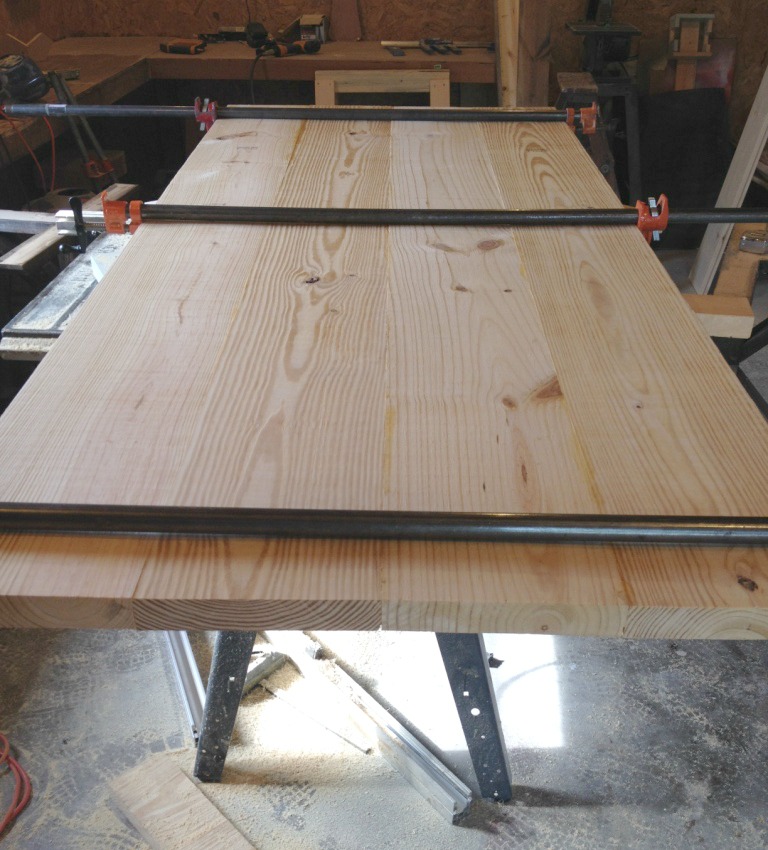
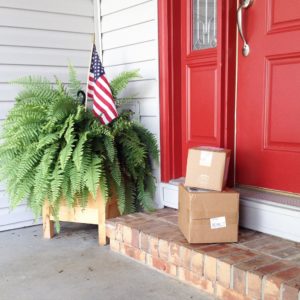
Once the plywood was screwed in place, it was time to lay the floor.  I had ordered (I will discuss where in a second) about 400 square feet of tongue and groove unfinished pine flooring and had it delivered about a week prior to this.

Bedroom Floor Chaos

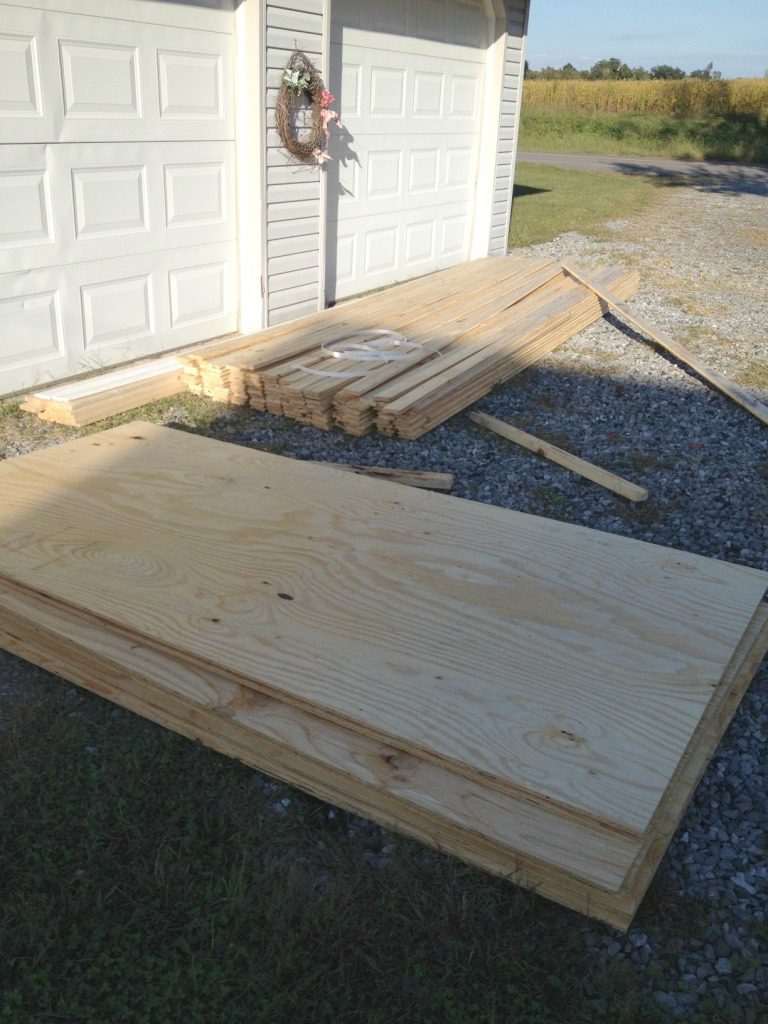
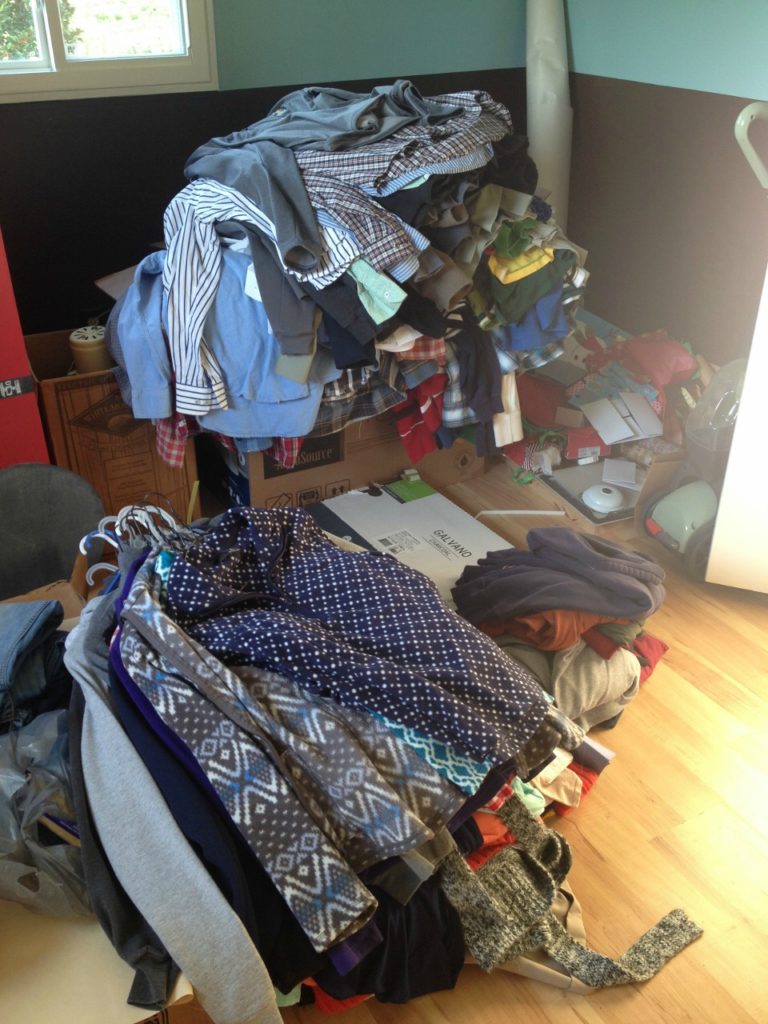
We moved it inside (where we could find room) to let it get acclimated to the inside humidity and temperature.

Bedroom Flooring ChaosBedroom Flooring Chaos

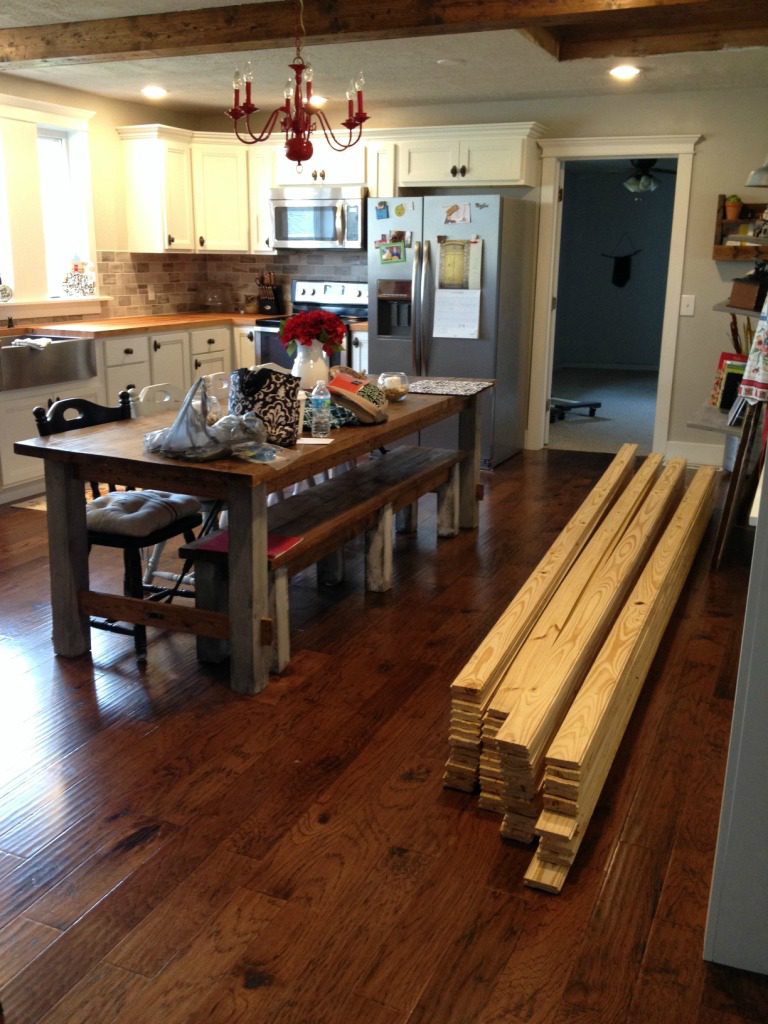
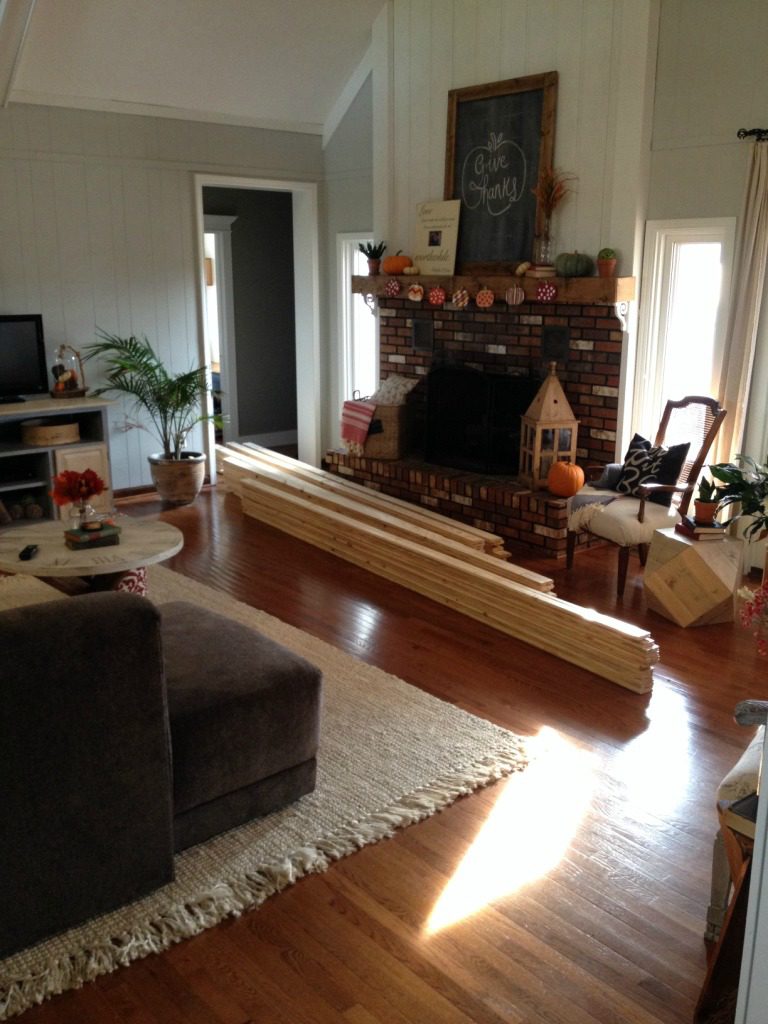
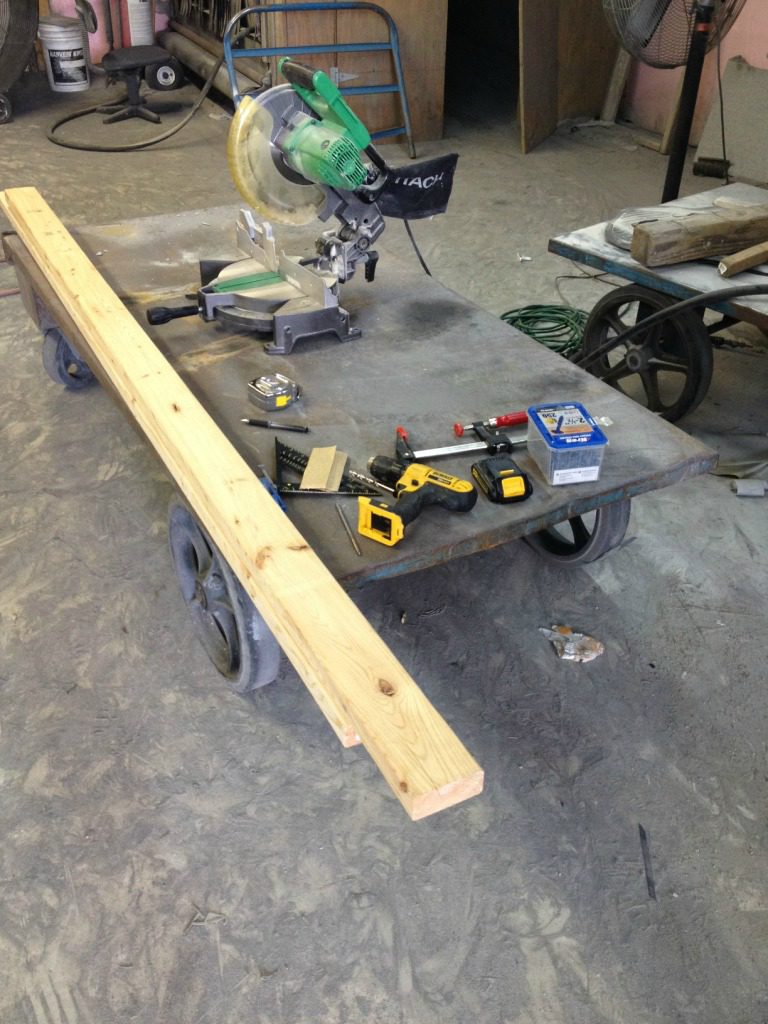
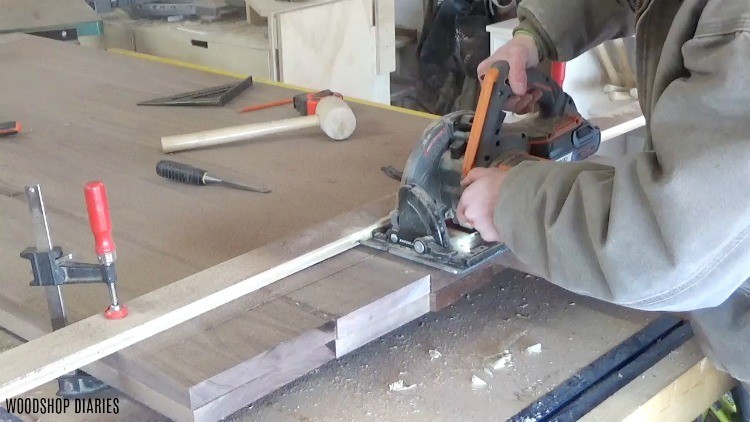
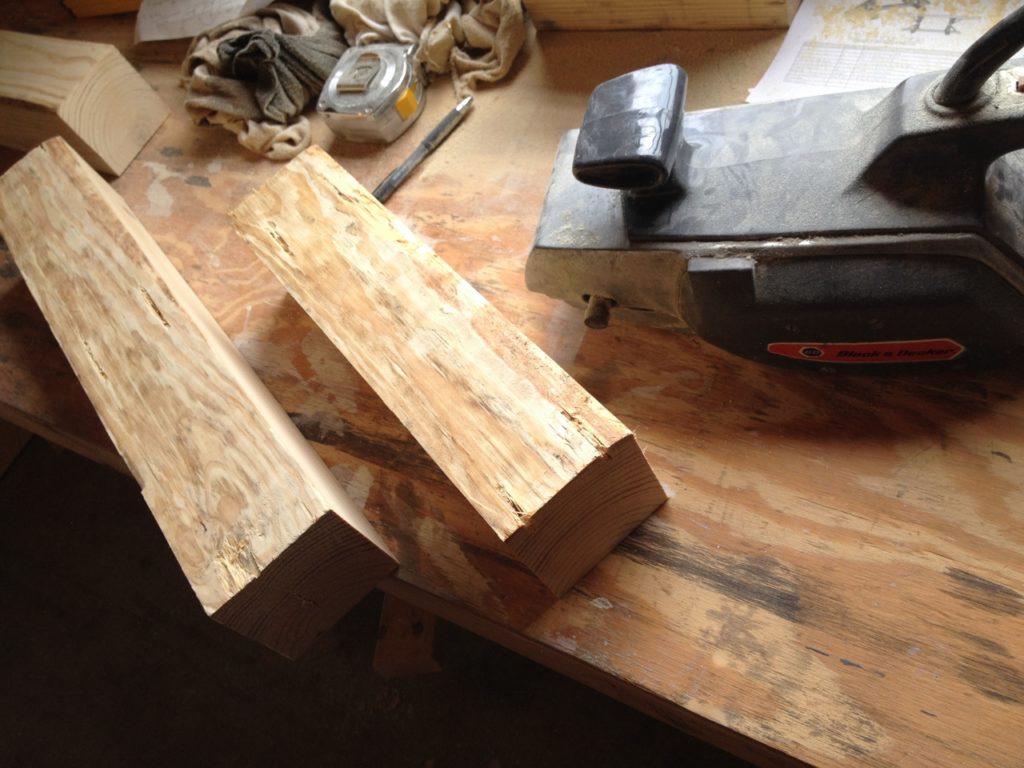
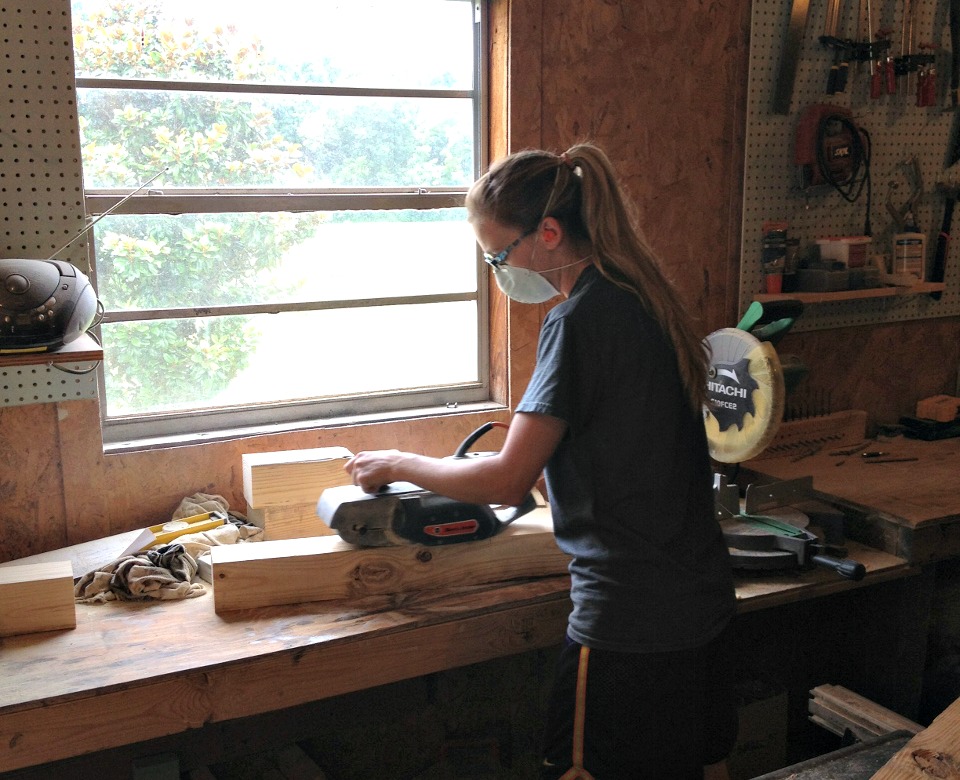
When we got ready to lay it, I brought my miter saw into the bedroom and cut pieces as we went.  The boards were 12 ft lengths, so laying it went fairly quickly.  We would cut at random lengths so none of the ends lined up next to each other.  We borrowed the floor nailer from a friend and stapled into the tongue of the board.  When we got close to the wall, we used my finish nailer since the large nailer wouldn’t fit.

How we installed real wood floor for $1.50 per square foot

How we installed real wood floor for $1.50 per square foot

How we installed real wood floor for $1.50 per square foot

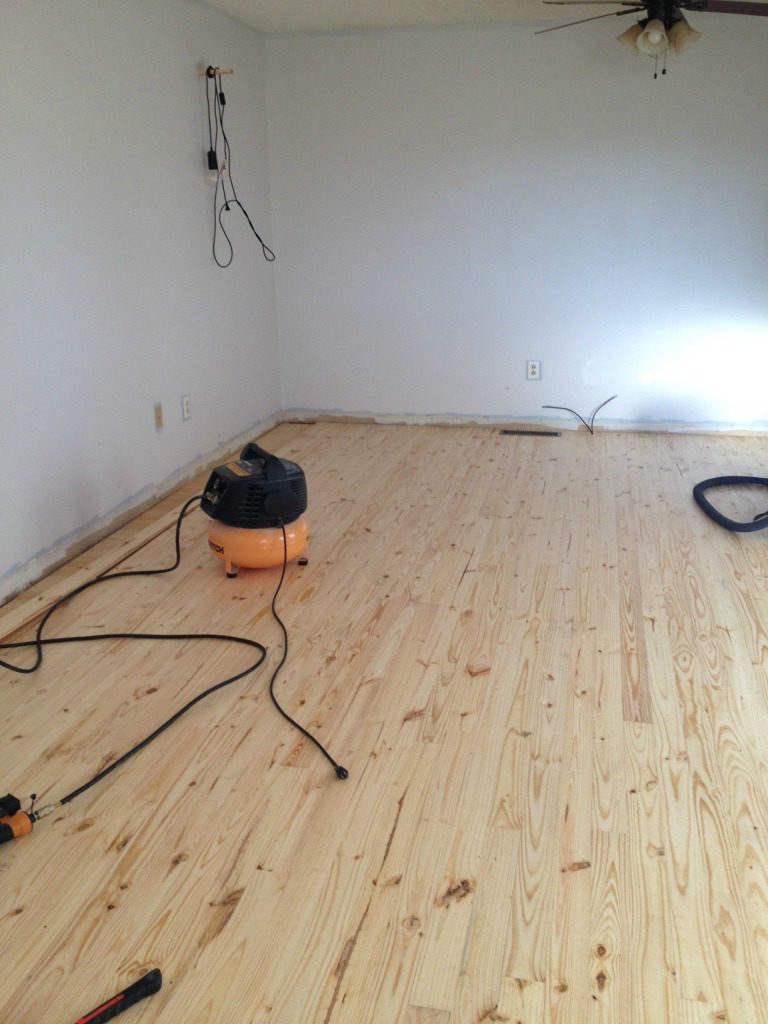
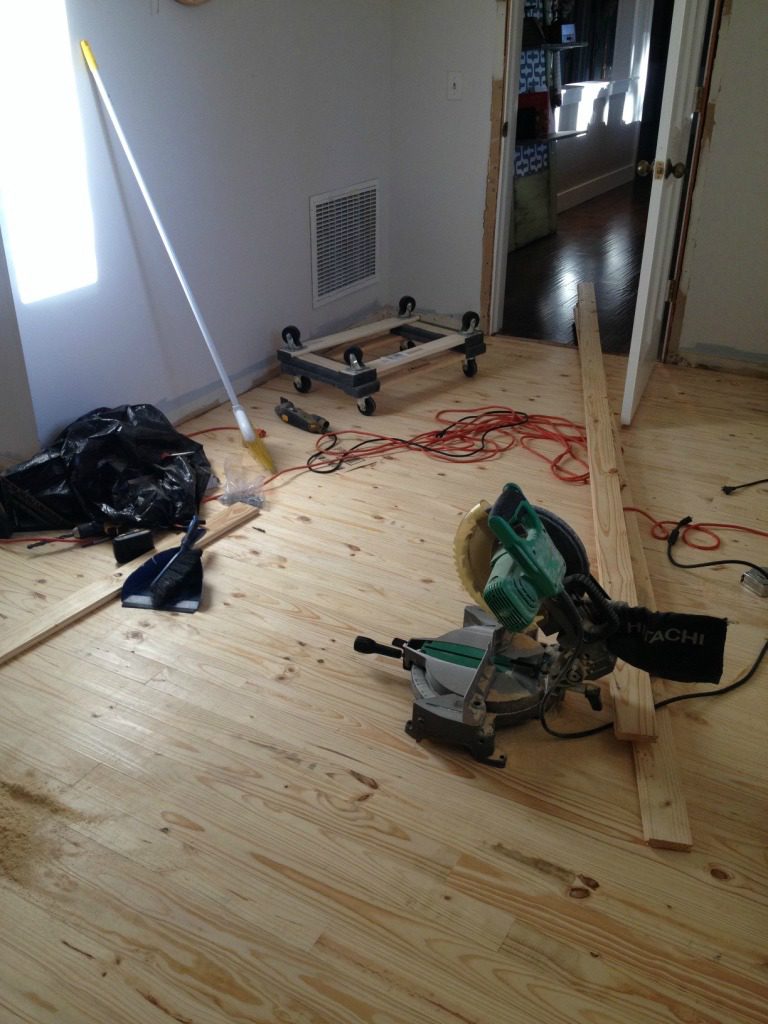
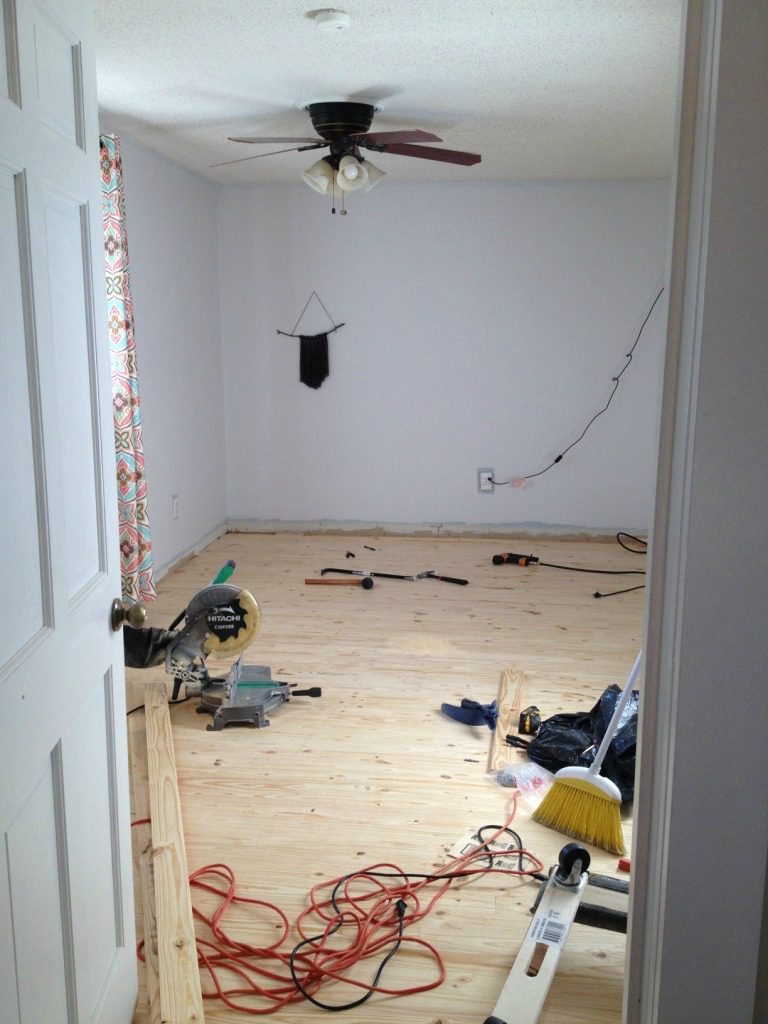
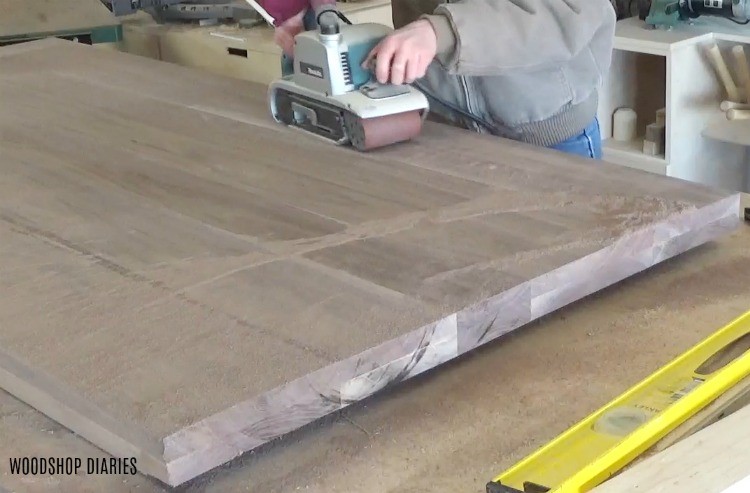
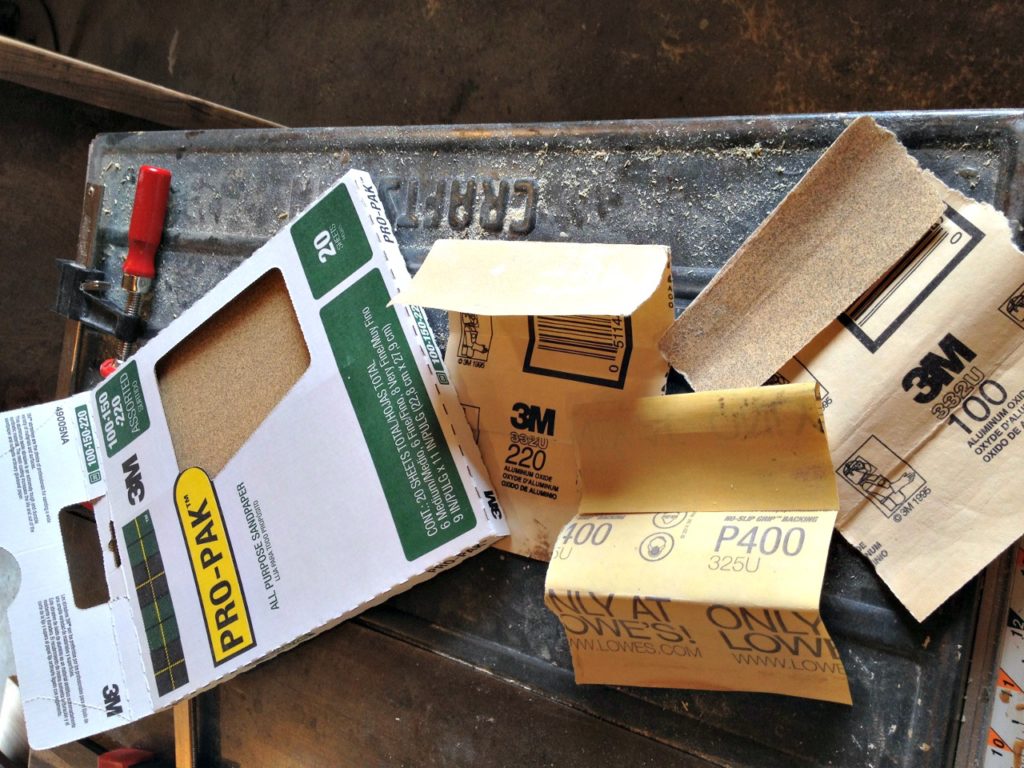
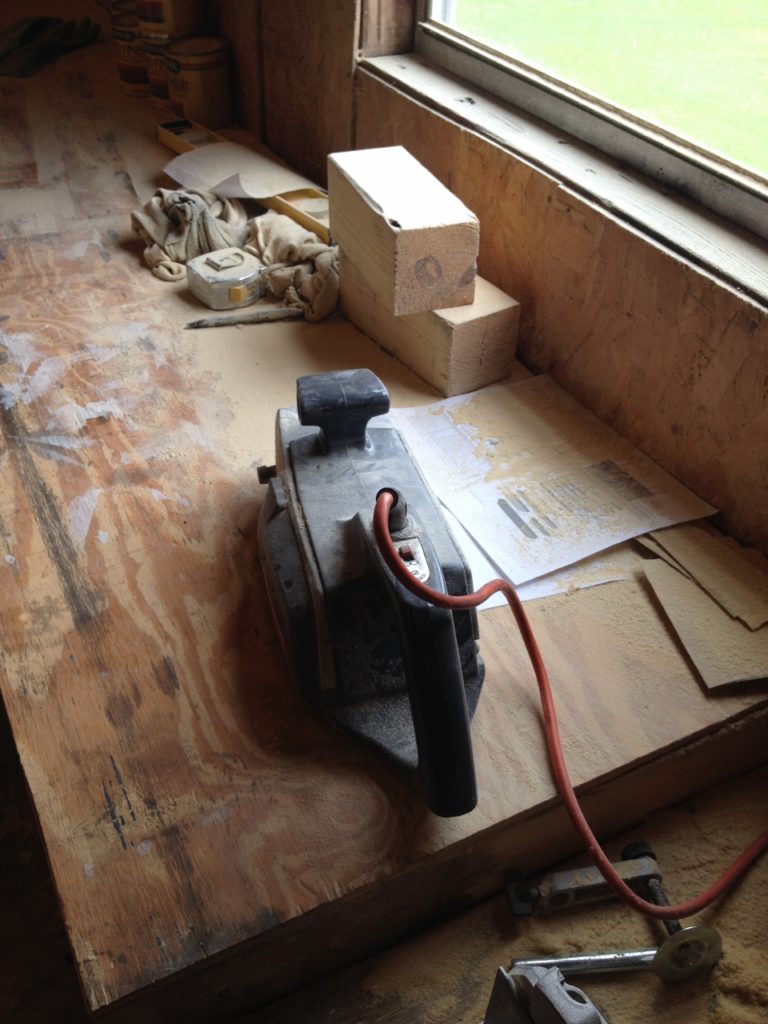
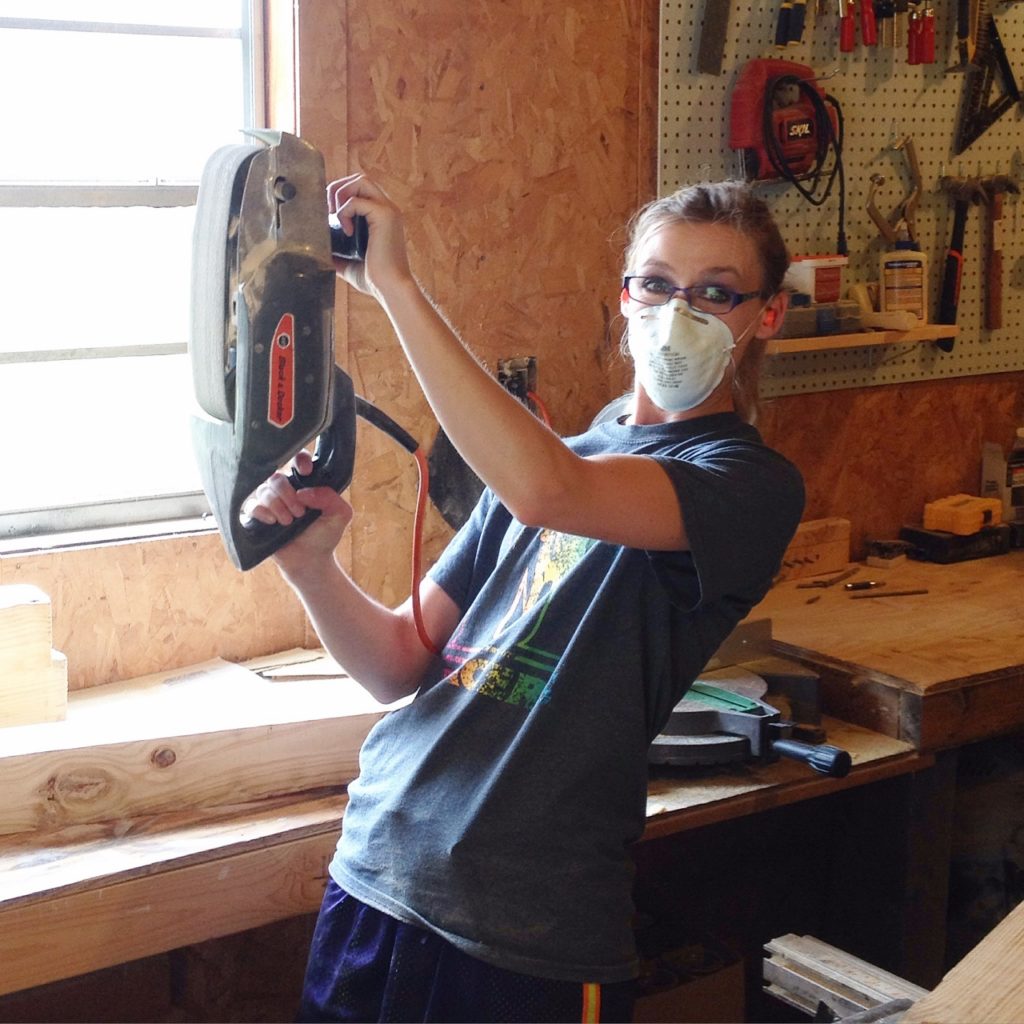
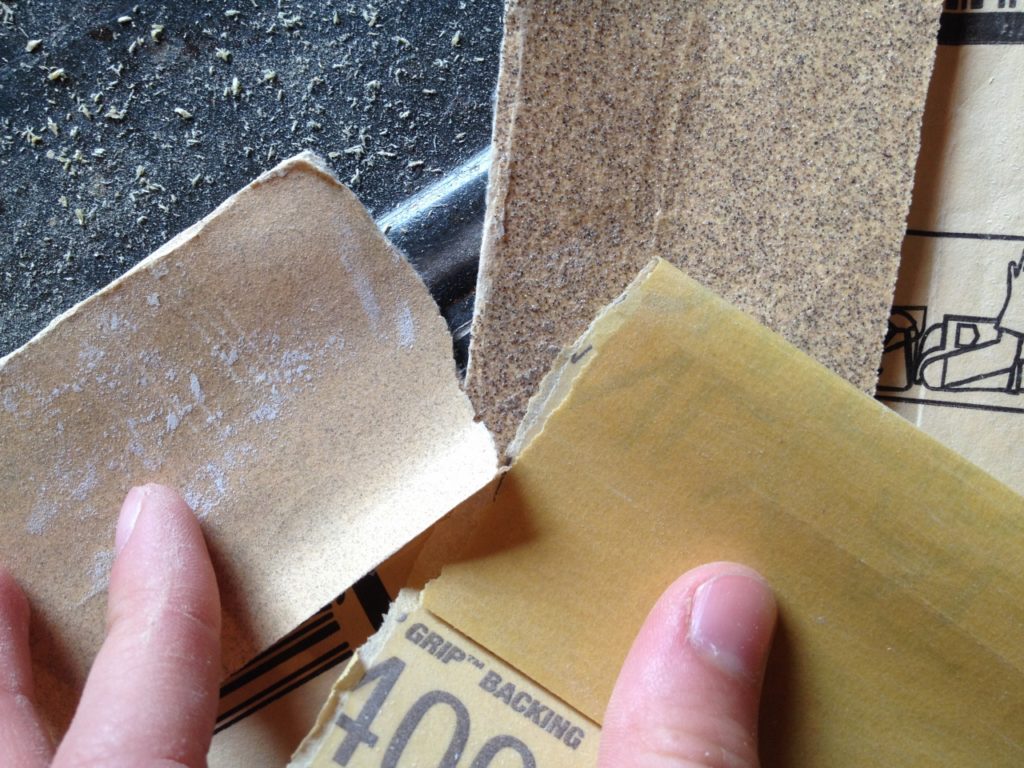
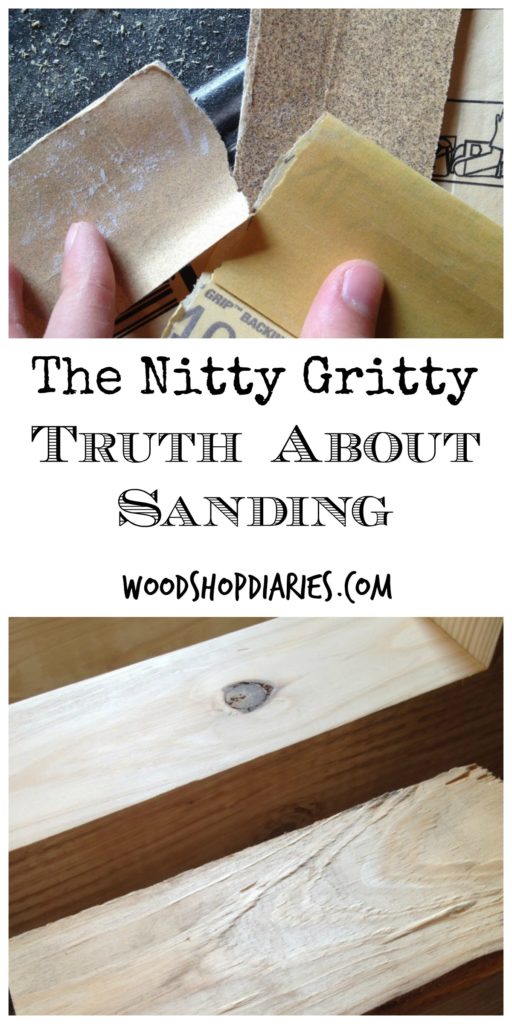
Once all the floor was down, it was time for cleanup.  We swept and vacuumed all the dust up and then sanded.  Here’s the deal with the sanding.  The internet (which we all know is always right) will tell you to rent a large floor sander and go to town.  However, I’m cheap, lazy, and never off work when the rental place would be open.  So I took my chances.  Our floor was already very level and I didn’t see any places where the boards didn’t match up, so I gave it a good sanding with my orbital sander and some 220 grit discs.  I really don’t think any more sanding was necessary.  And, yes, in case you were wondering, it took FOREVER and my knees felt like they were on fire by the time I got done.  Note to self…invest in knee pads.

.

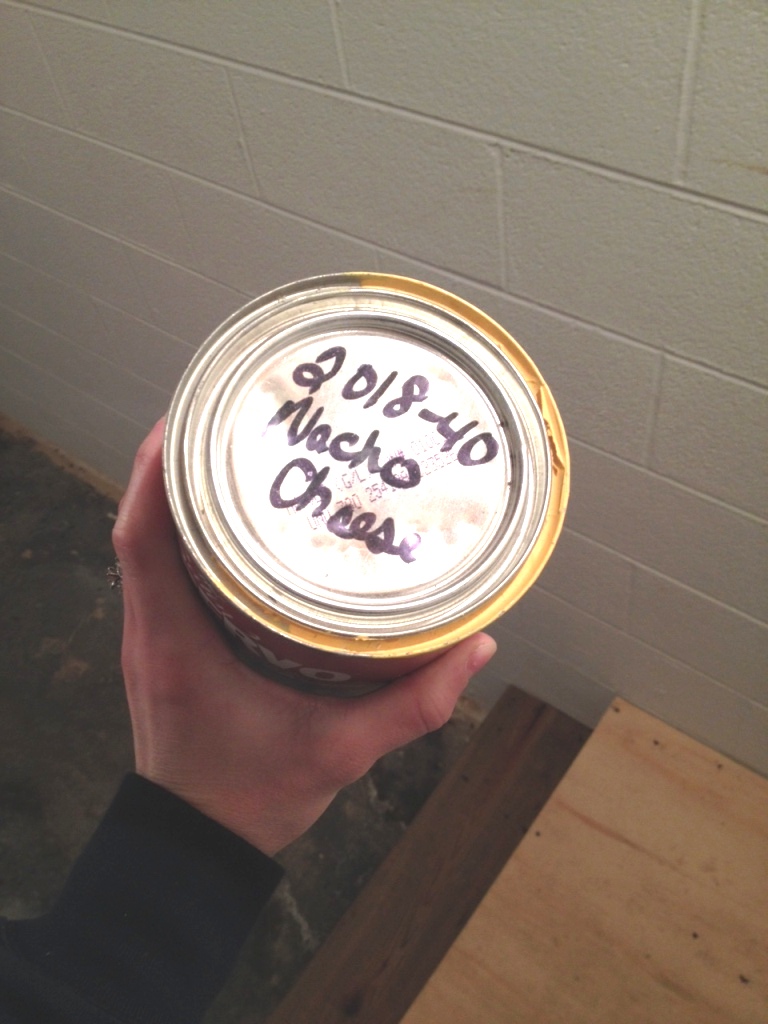
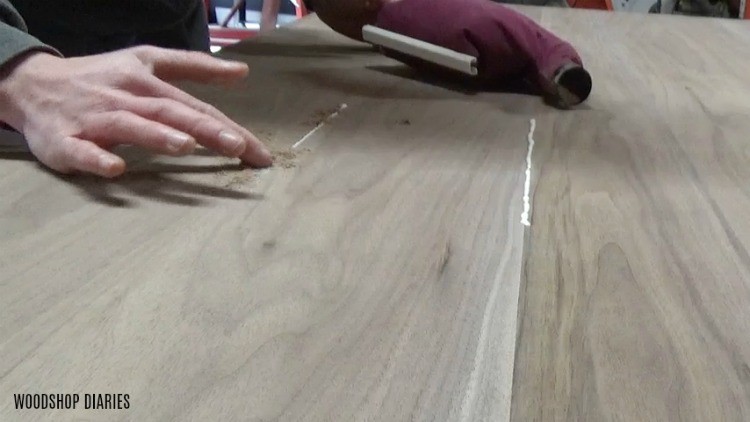
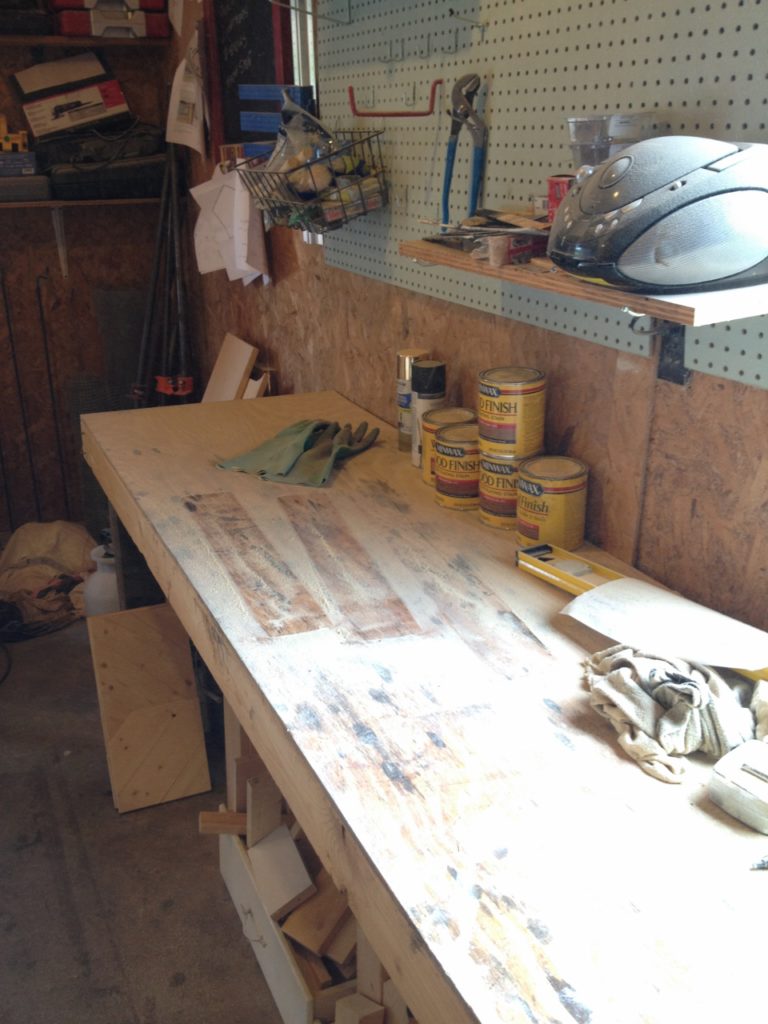
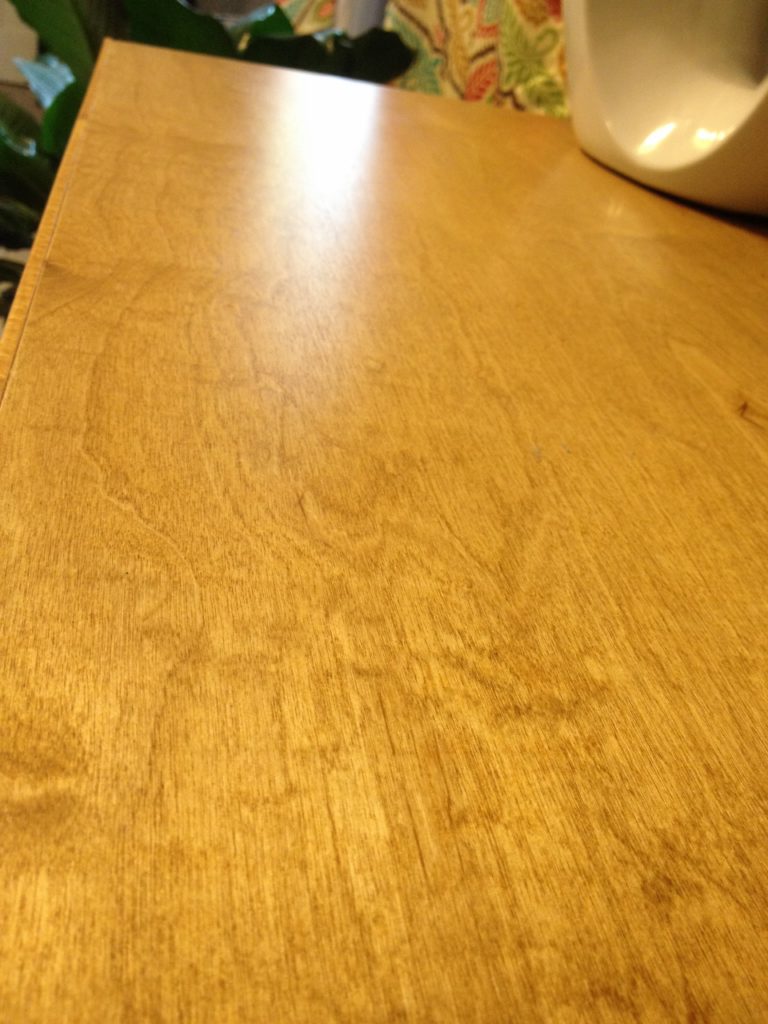
Once the sanding was finished, we cleaned….and cleaned….and cleaned some more to get all the dust off everything.  Then it was time for stain.  I used an old rag and got on my hands and knees AGAIN and stained the entire floor with Minwax Early American (aff link).  I bought the gallon, but I probably could have done it with a little over a quart.  A little stain goes a long way.

How we installed real wood floor for $1.50 per square foot

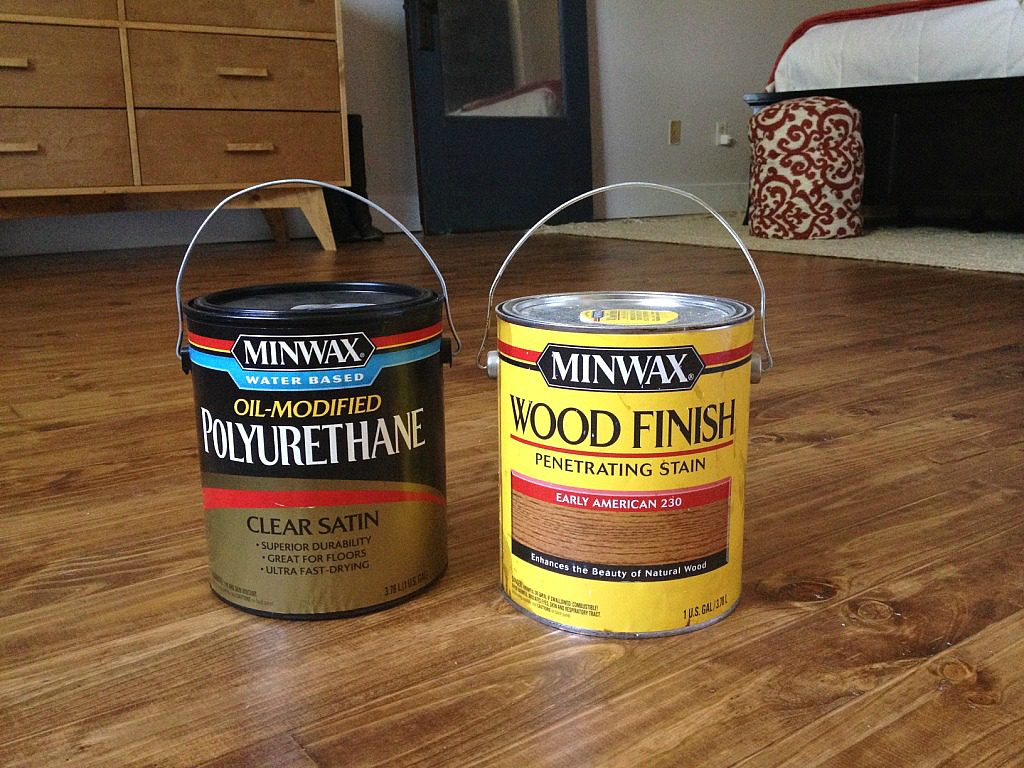
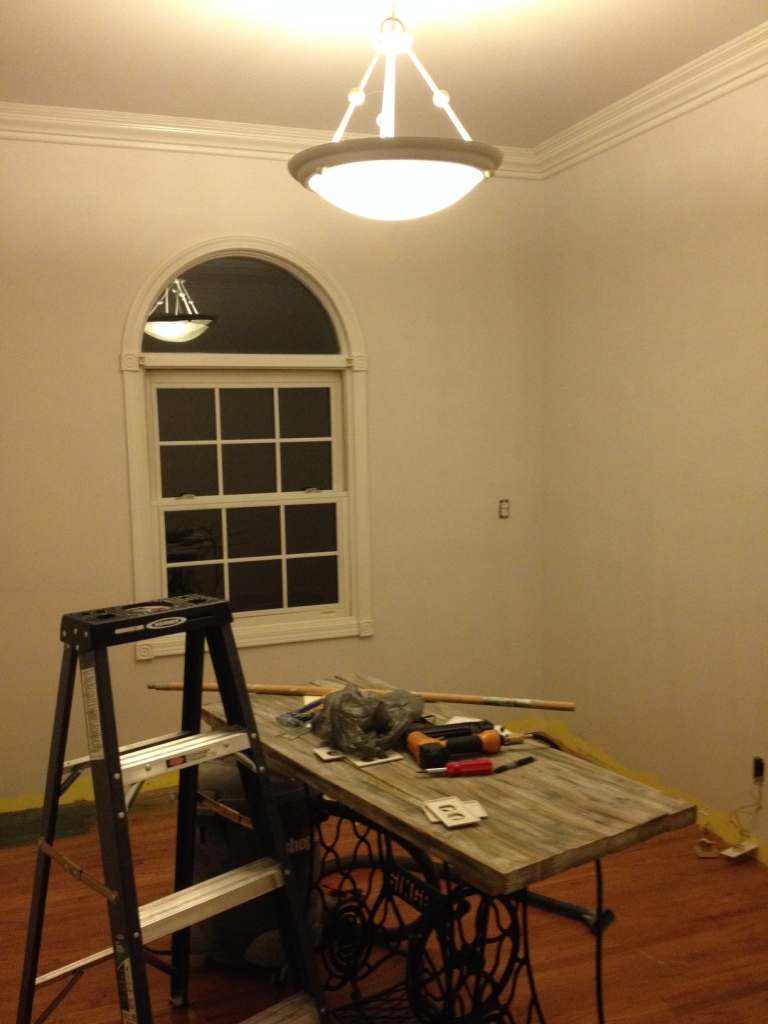
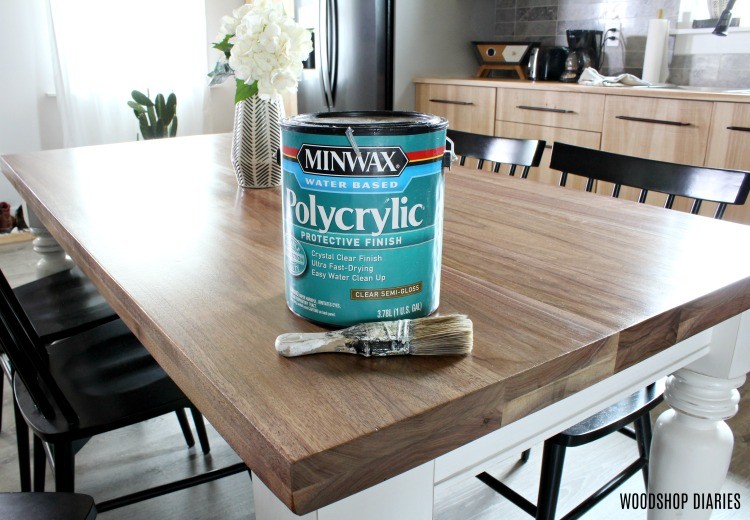
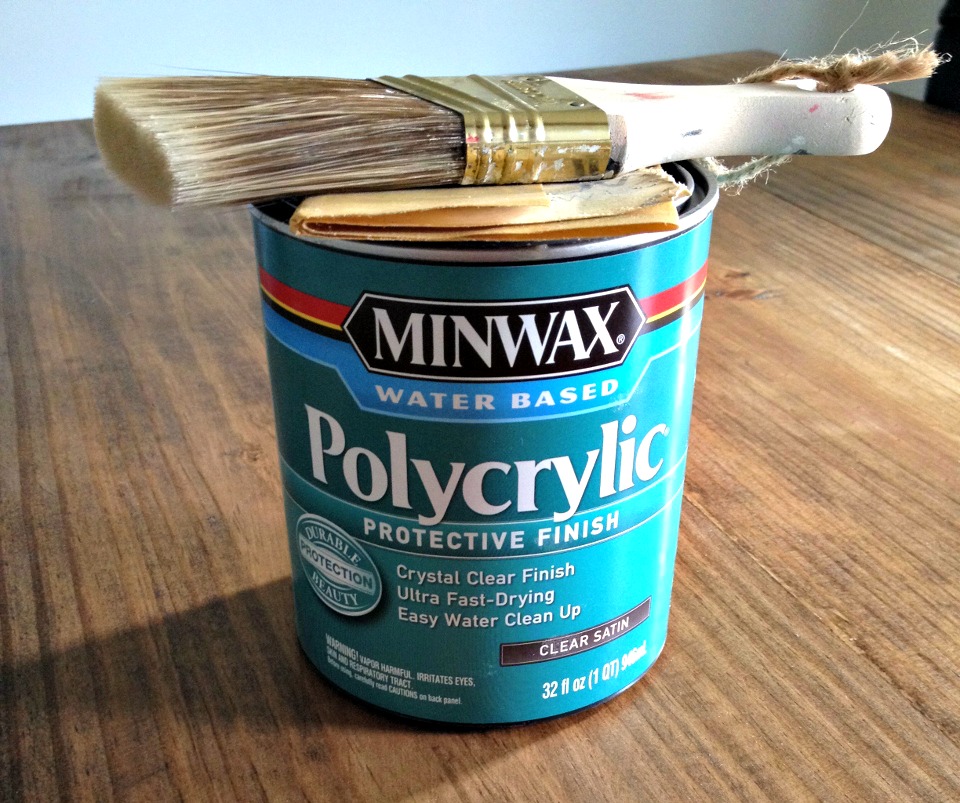
Once the room was stained, I let it dry overnight and then polyed it with Mixwax Oil Modified Poly (aff link).  We hand sanded with 400 grit paper between coats.  It was a lot of work, but totally worth it.  The poly was supposed to cure for a few days before replacing furniture, so I used this time to work on the baseboards and door trim.  Trim always takes longer than you expect it to….

.

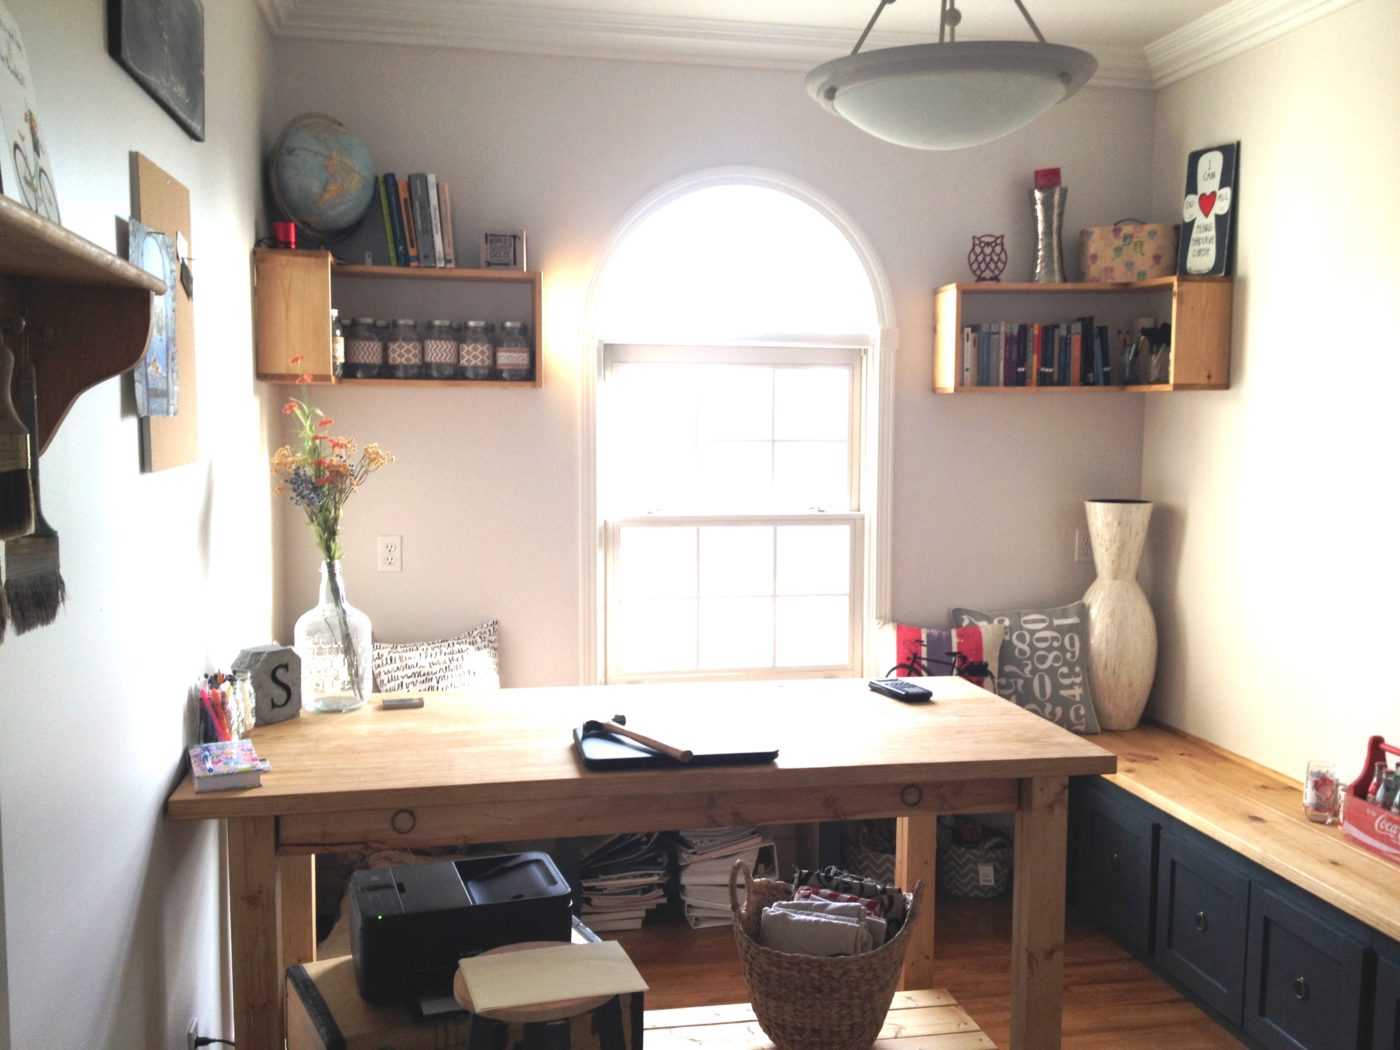
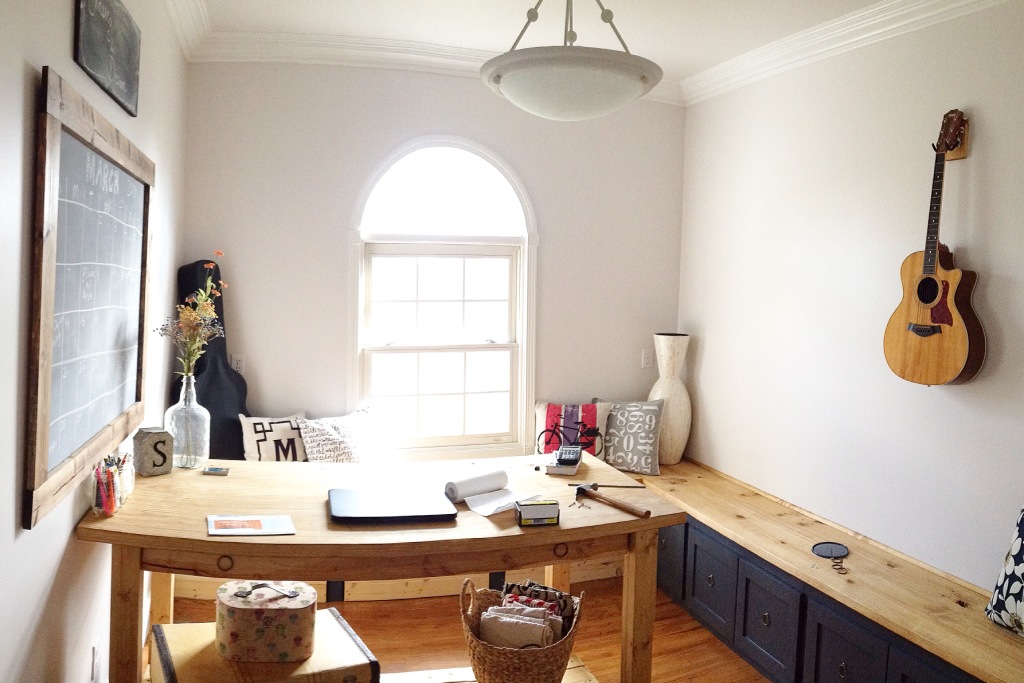
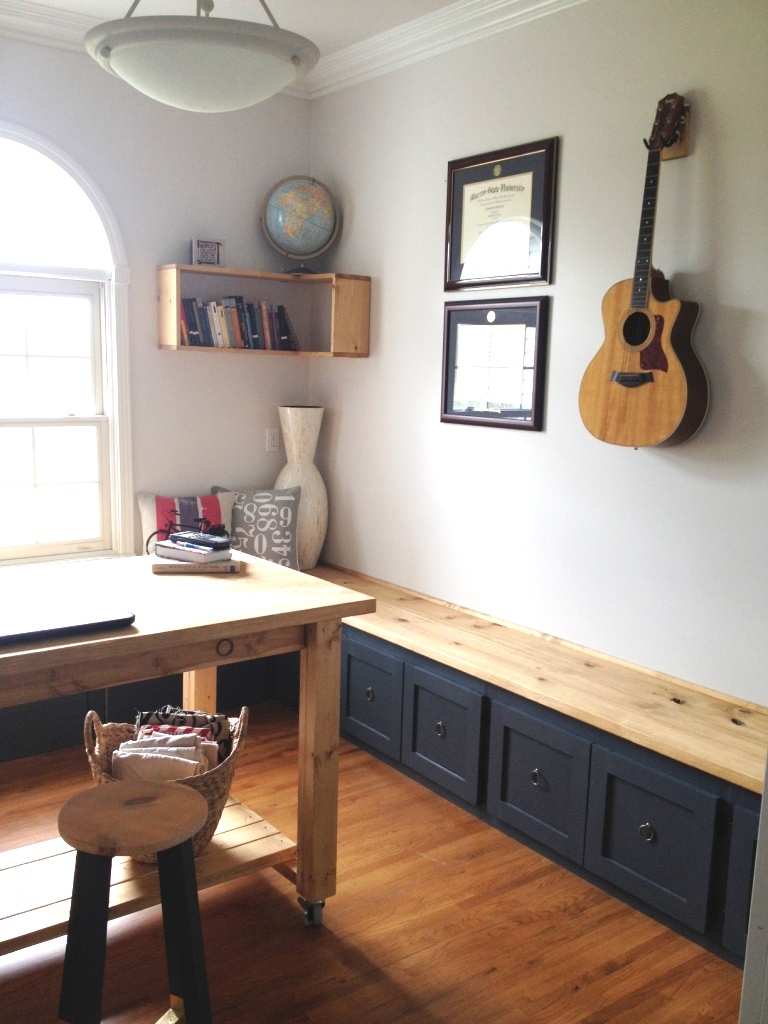
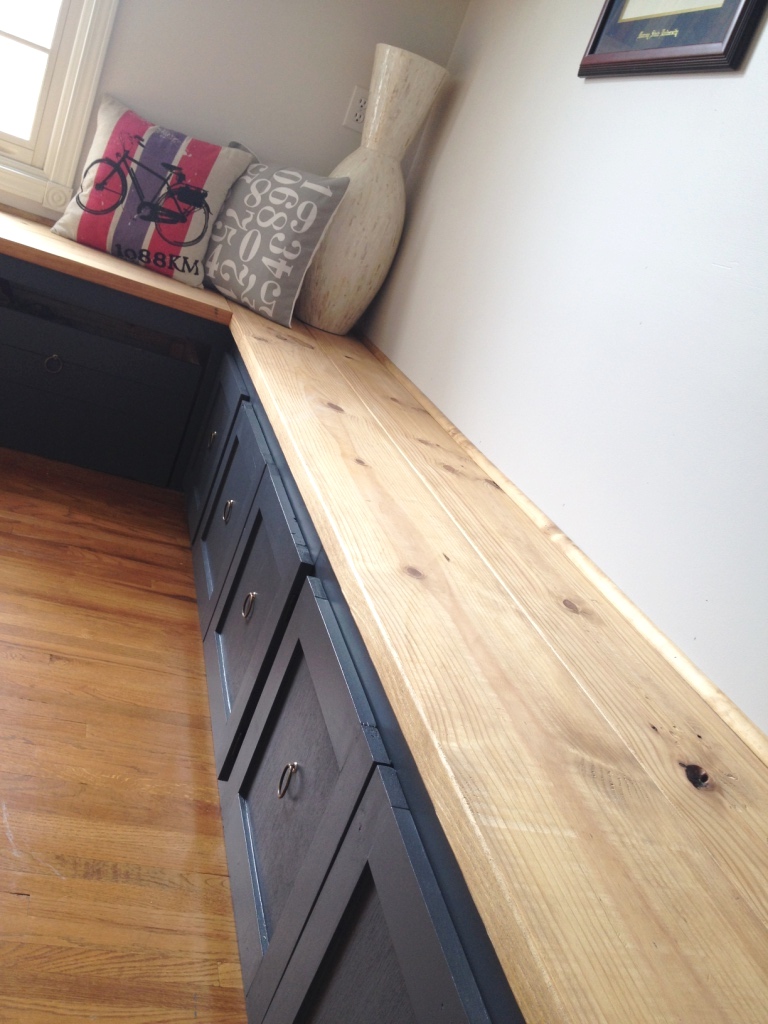
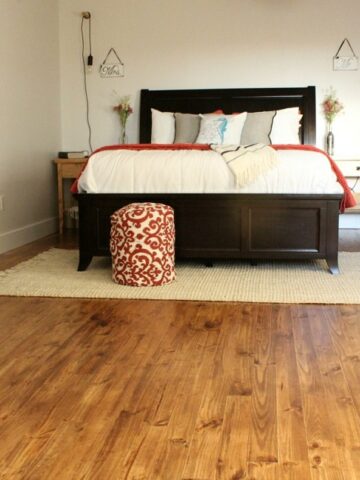
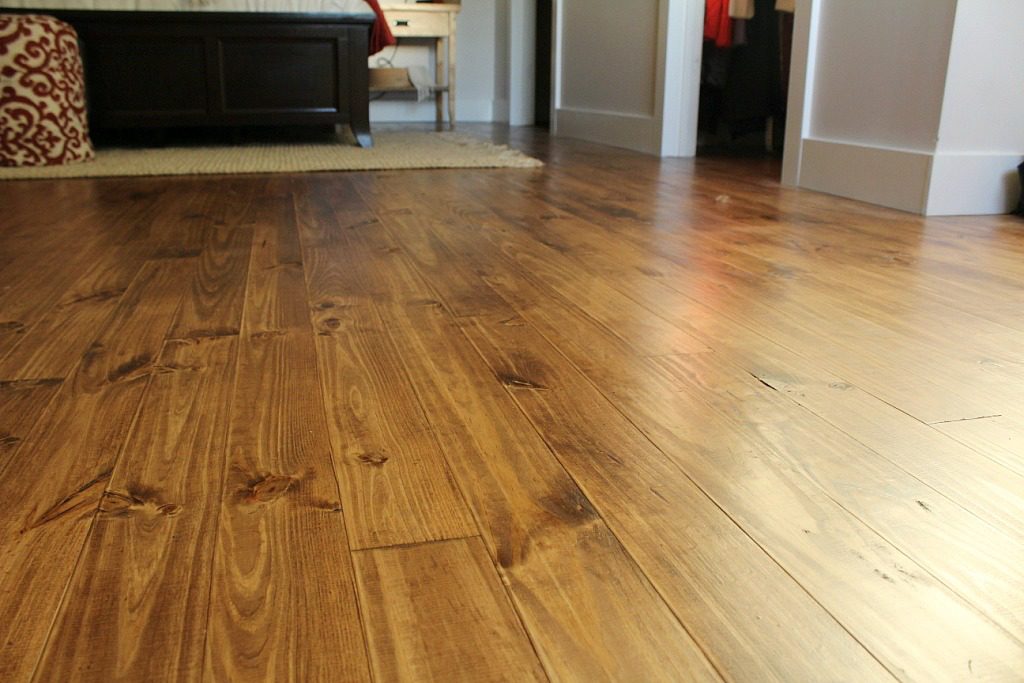
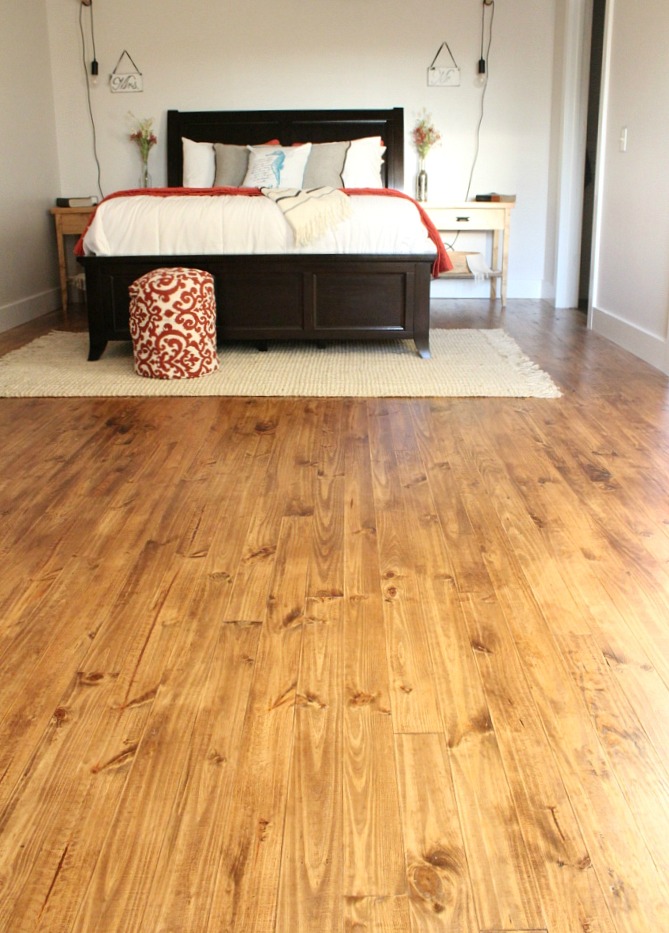
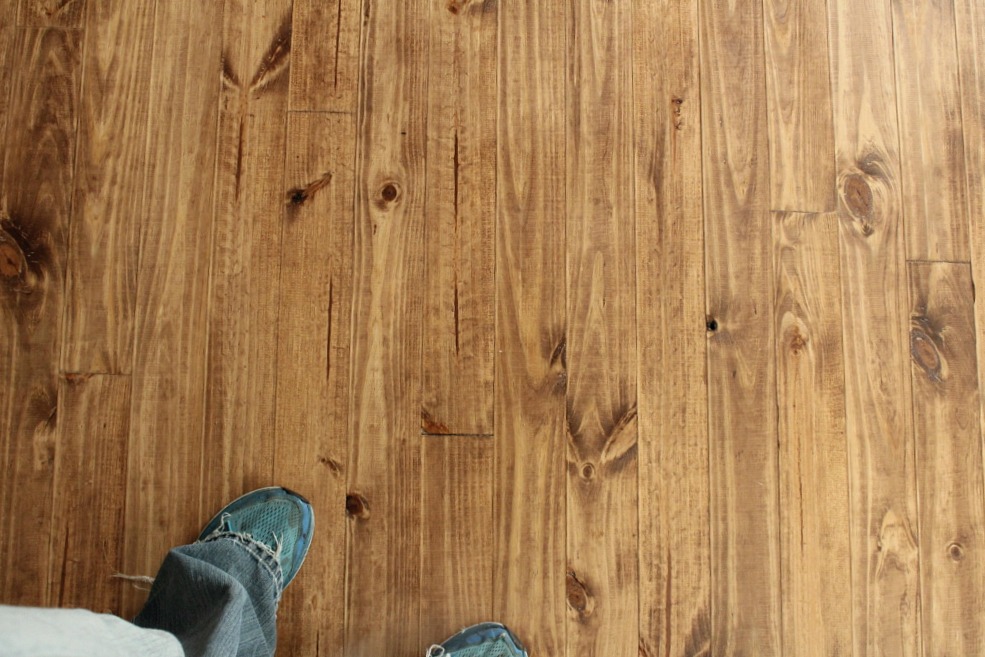
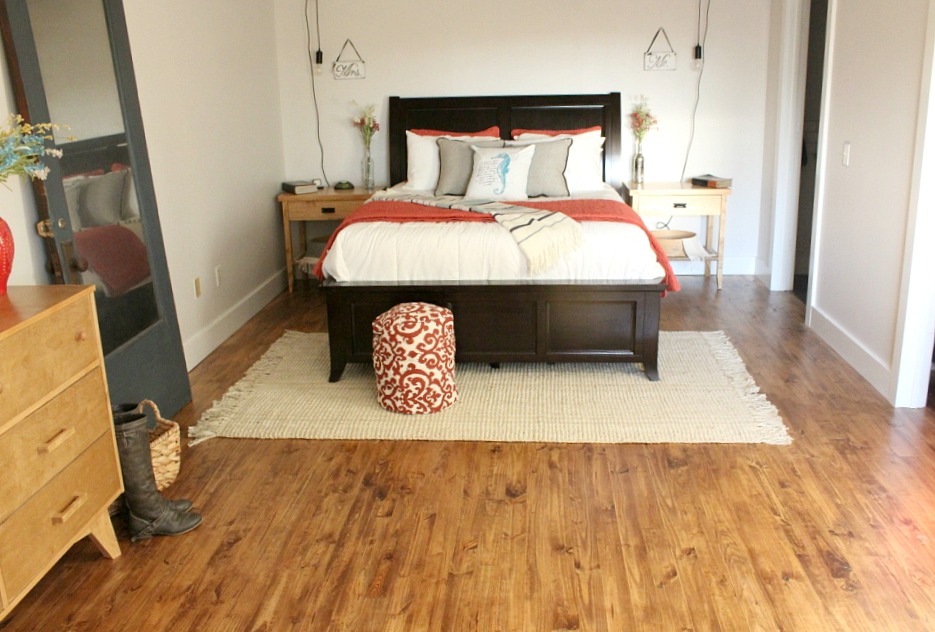
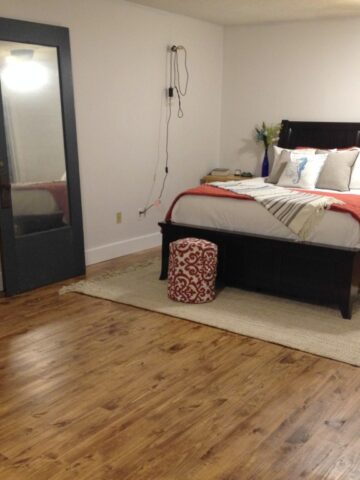
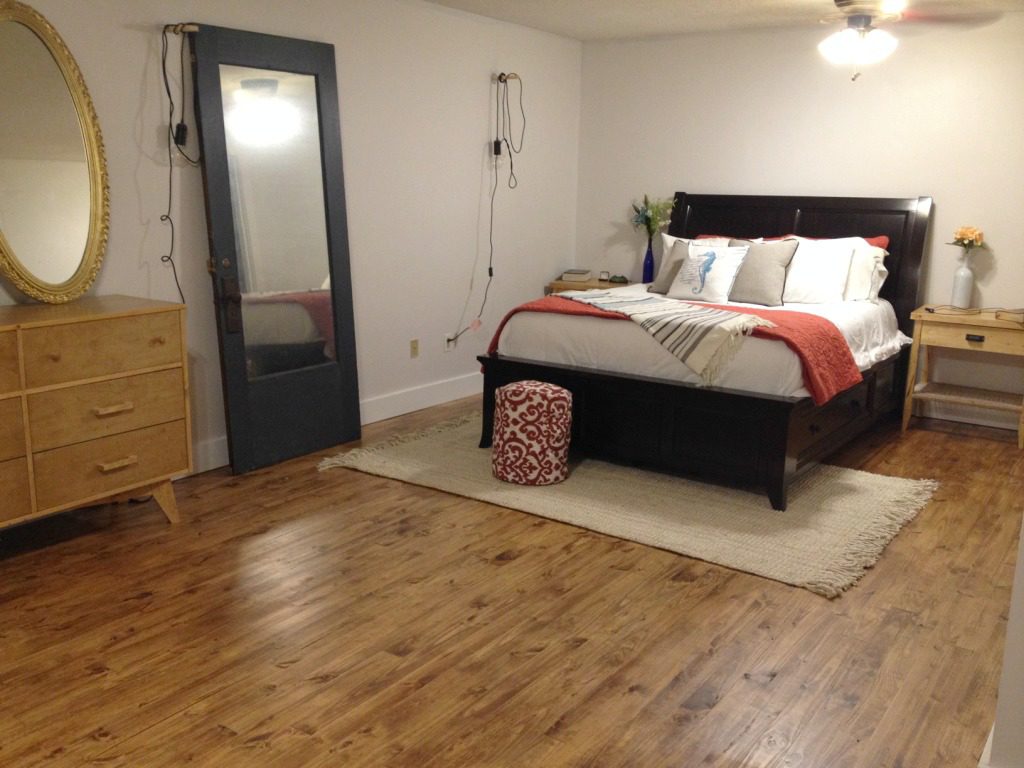
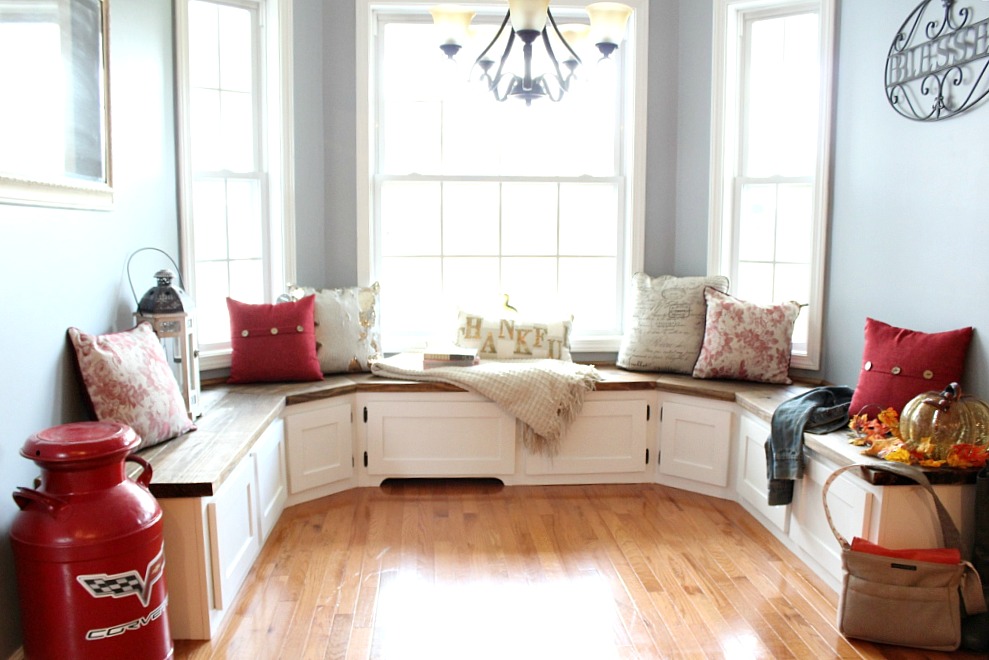
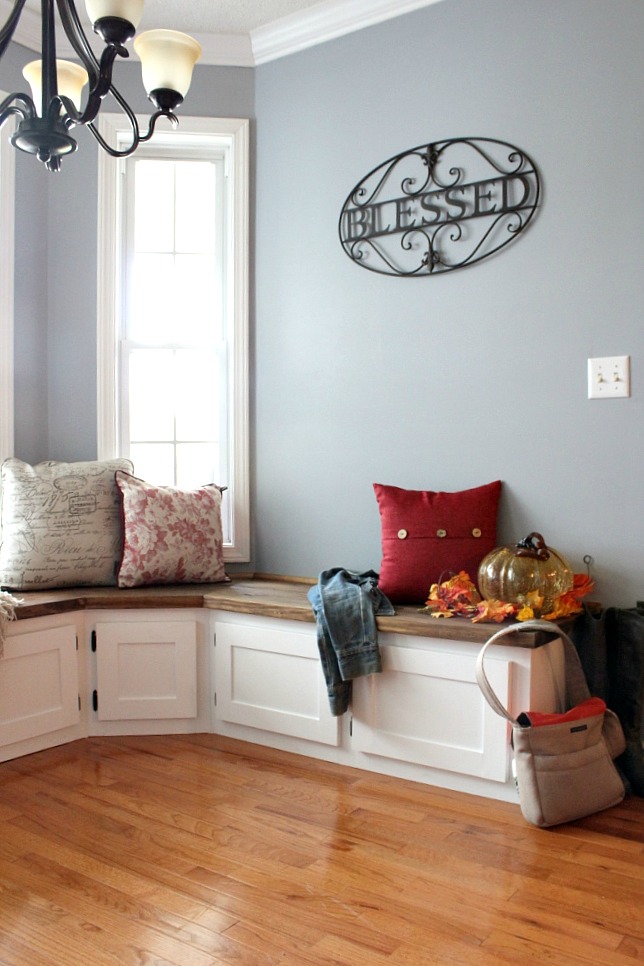
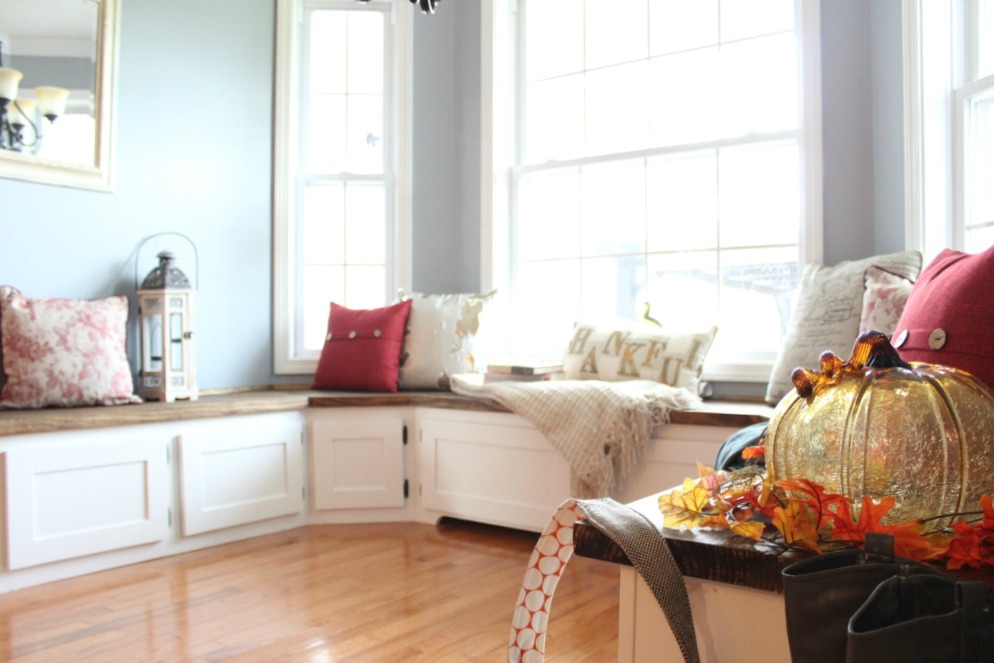
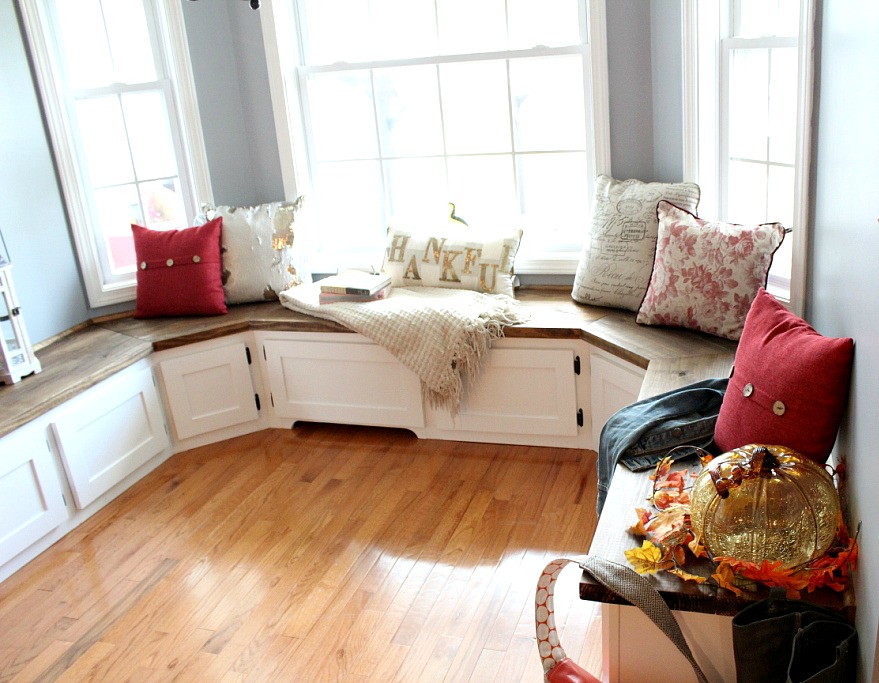
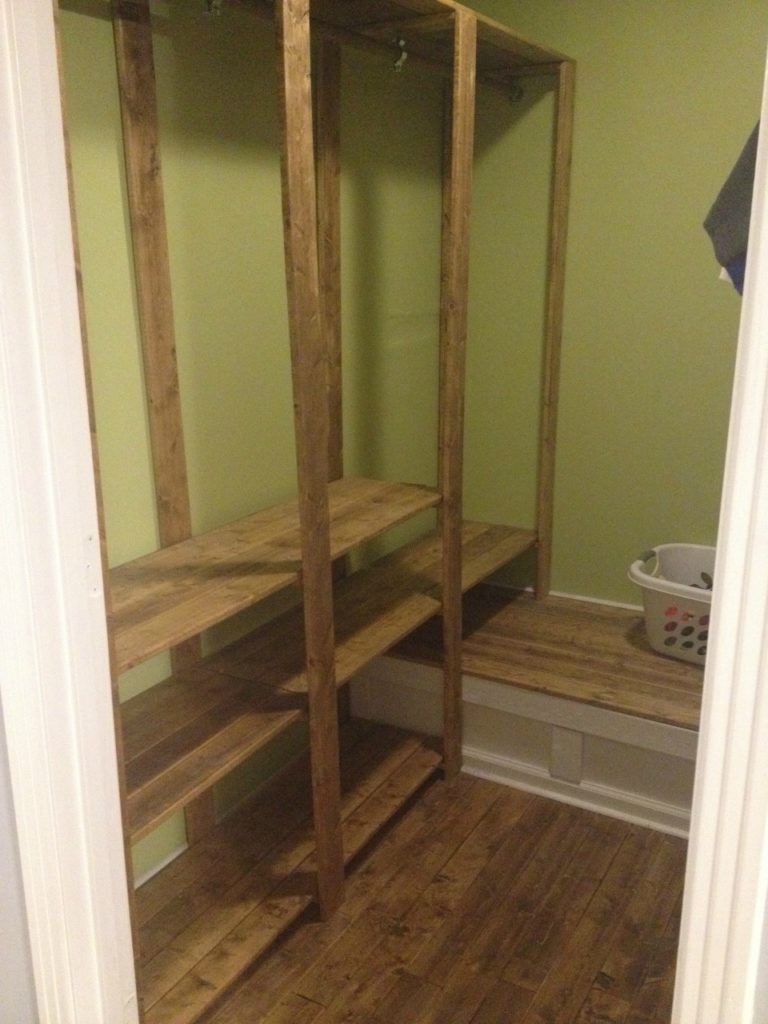
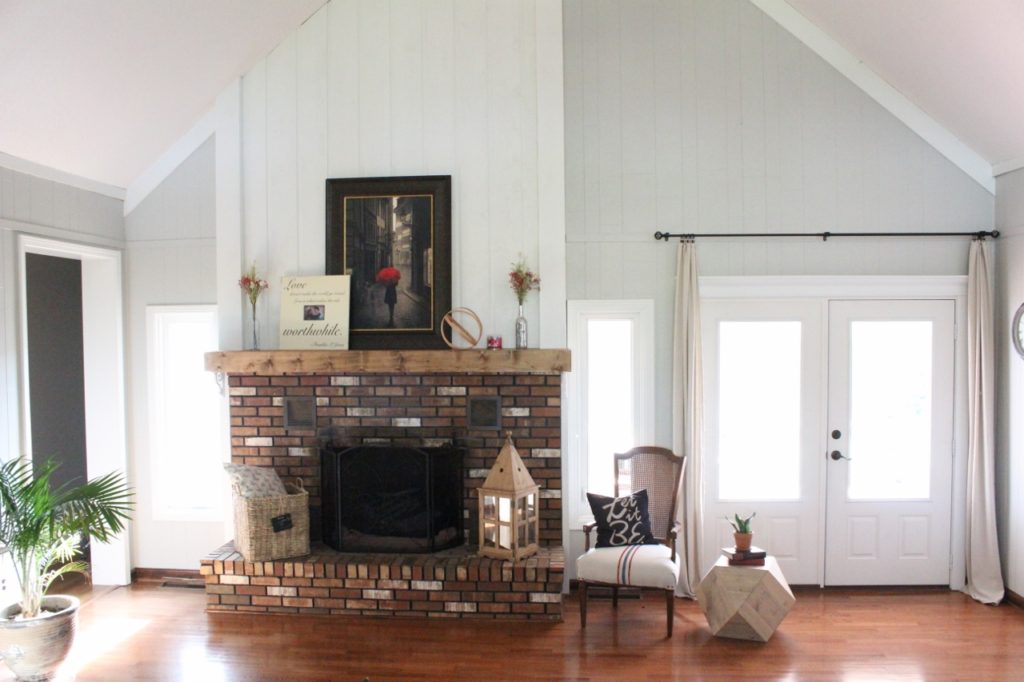
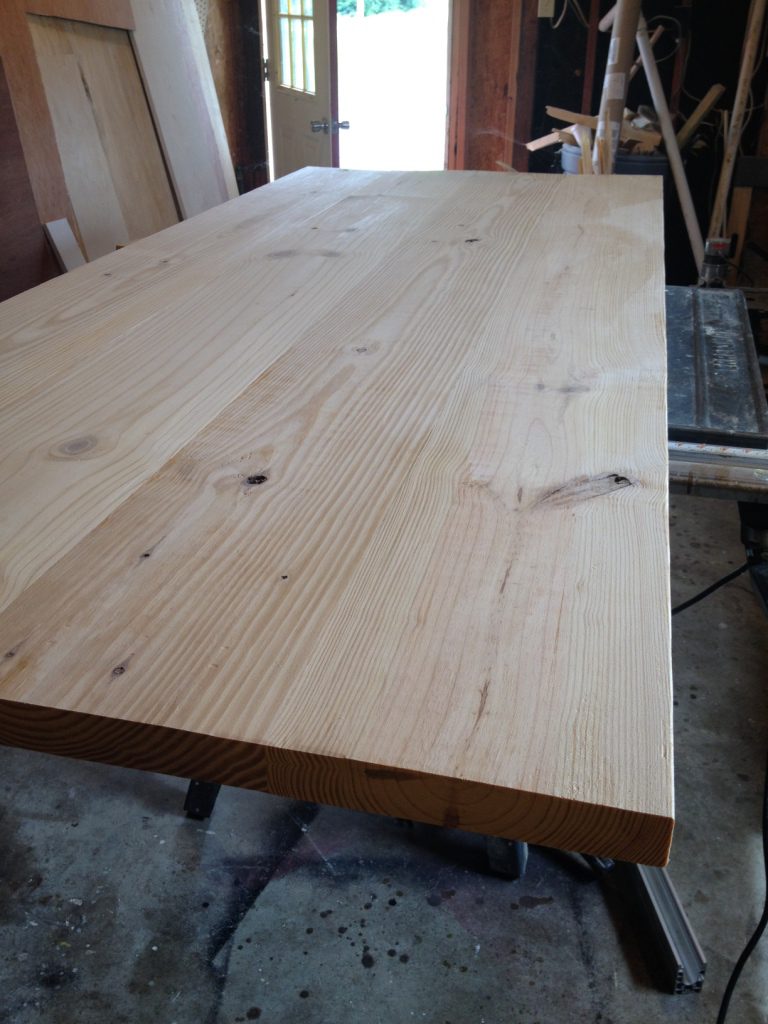
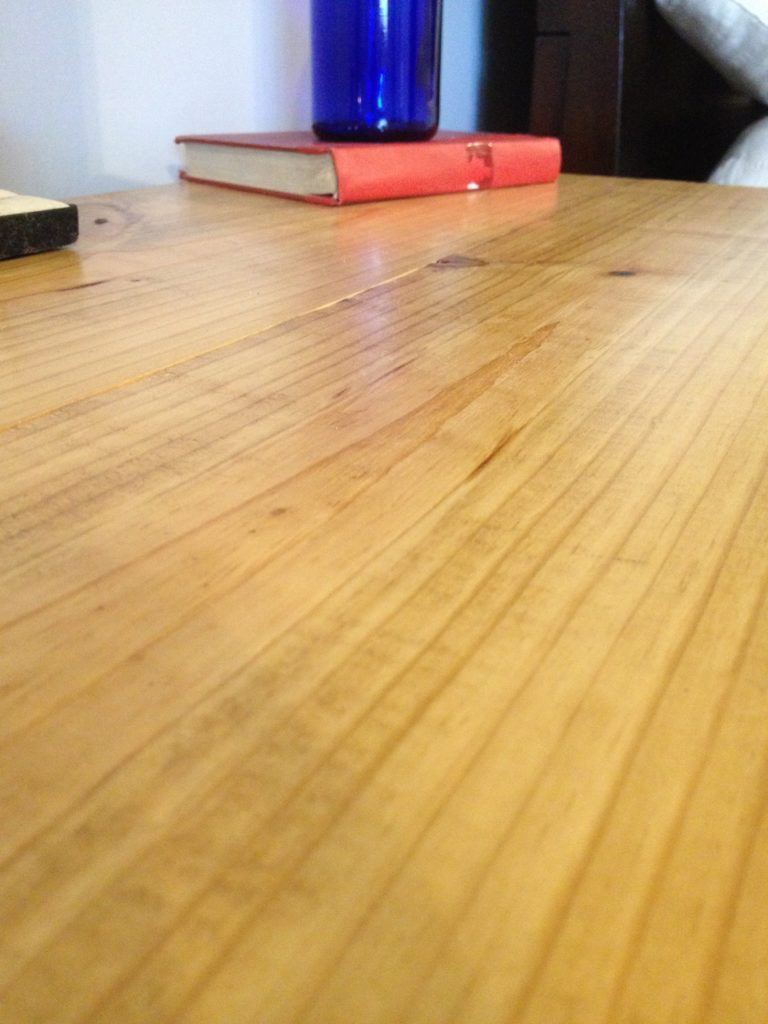
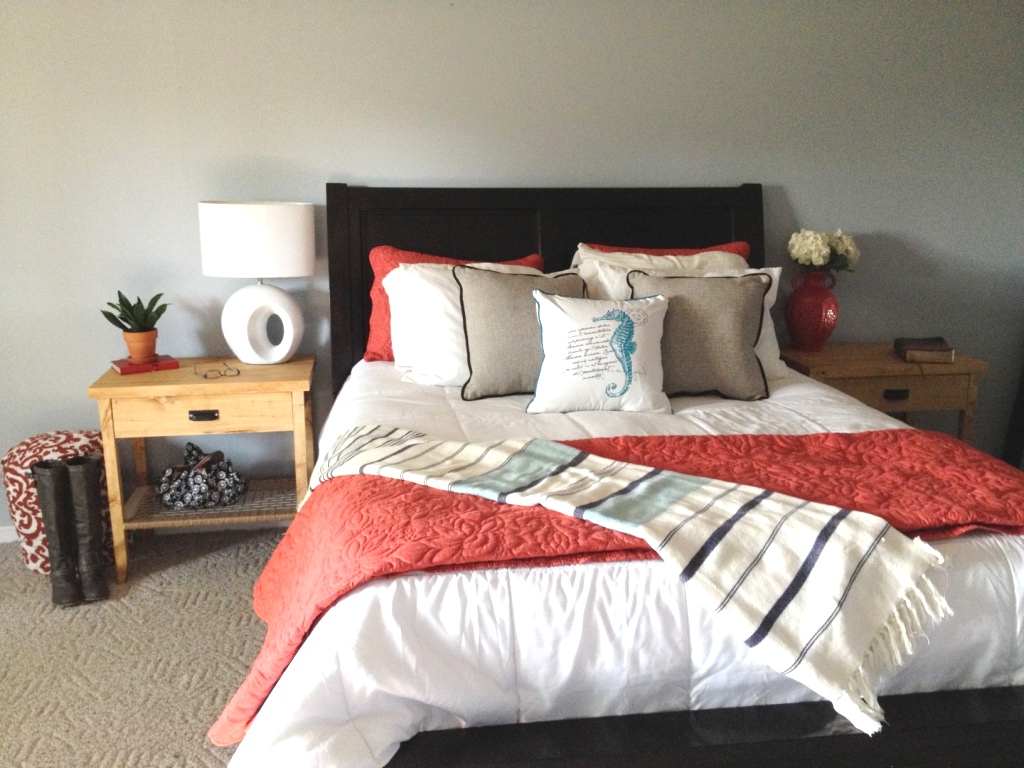
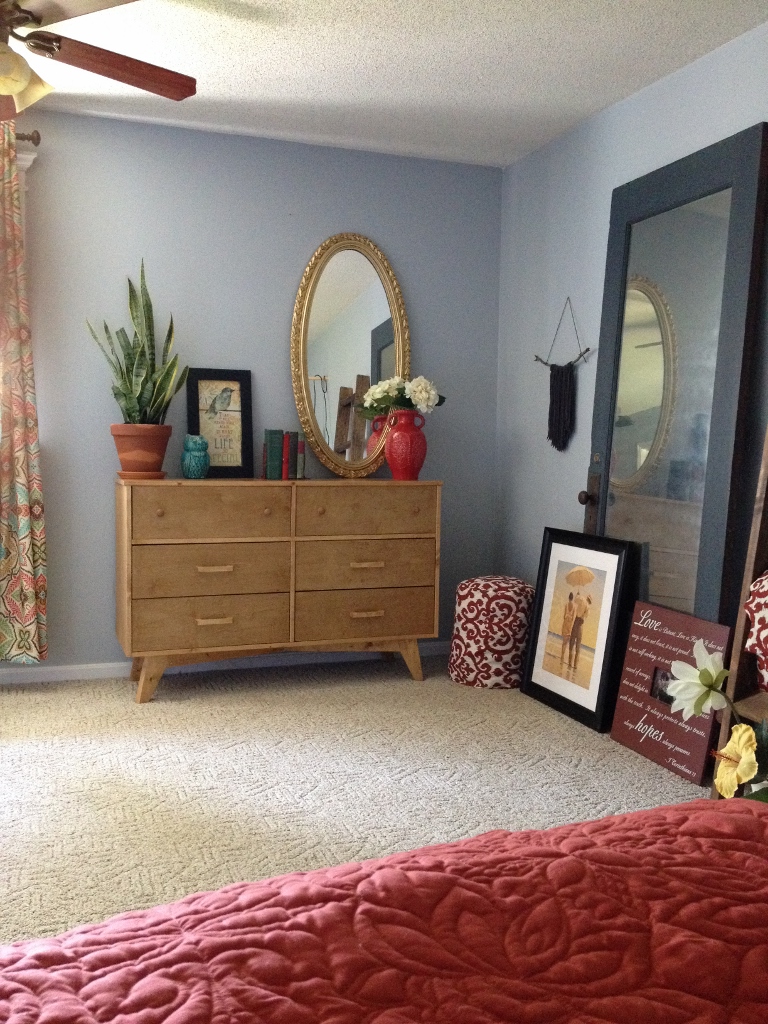
When all was done and the furniture was back in, I LOVED the new floor.  I’m going to be honest, when it was delivered, I was a little worried I made a bad decision, but I’m telling you, once it was installed and finished, I love this stuff and you really cannot tell it was a “budget” floor option.

How we installed real wood floor for $1.50 per square foot

How we installed real wood floor for $1.50 per sq ft!!

How we installed real wood floor for $1.50 per square foot

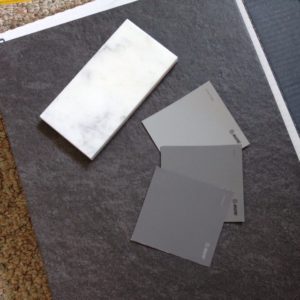
So now to the cost details….that part you all want to know about.  Our flooring itself was about $1.30 per square foot.  We bought it from the local lumber yard.  Who would have thought to check there??  You can purchase unfinished pine flooring from big stores like Lumber Liquidators and other online stores for reasonable prices, but then you’ll have to pay shipping and what if you get a bad batch?  Where do you go to return something like that?

.

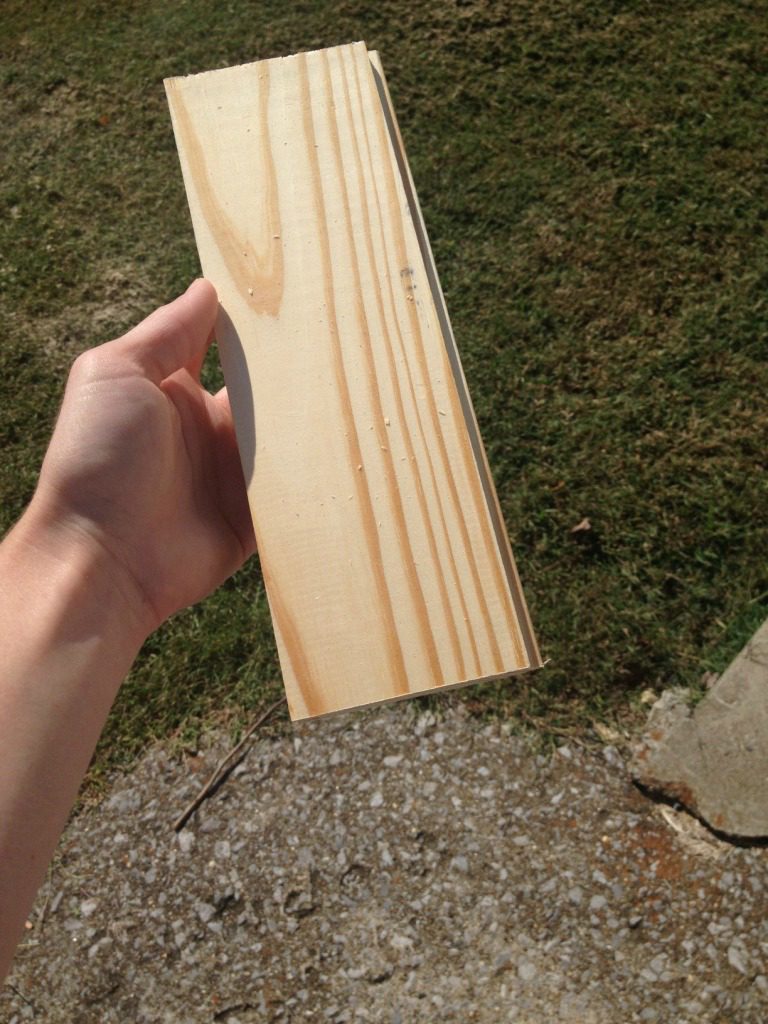
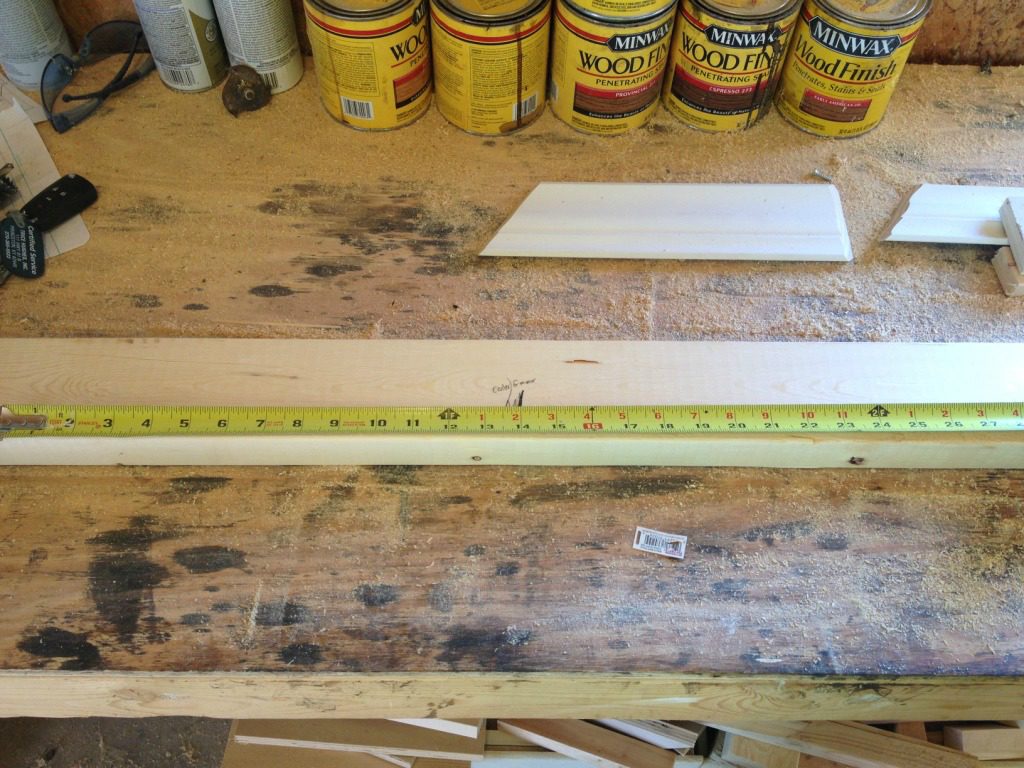
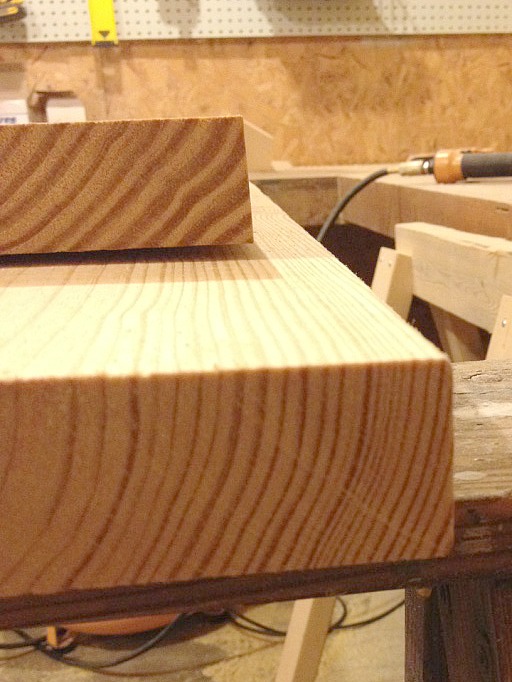
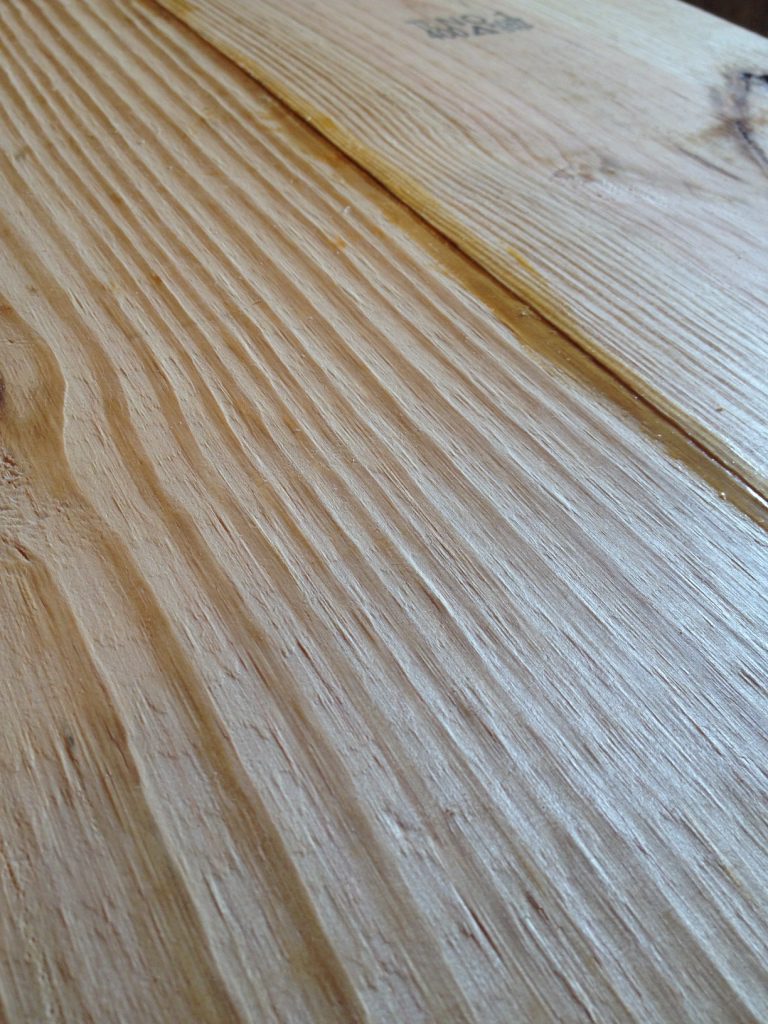
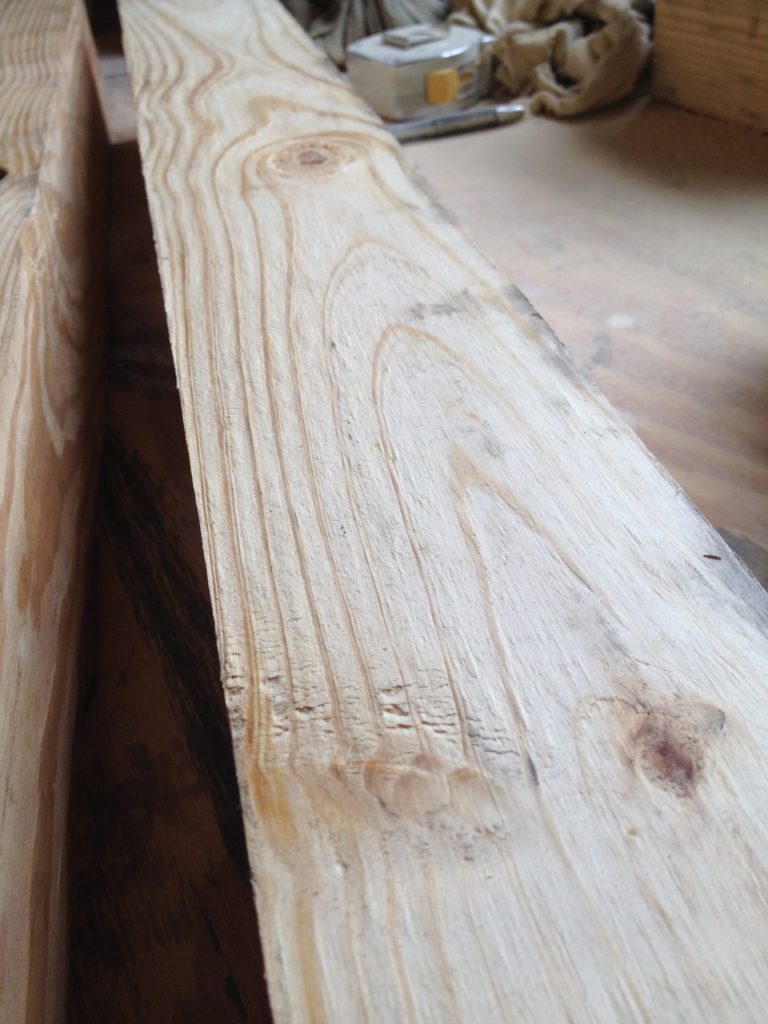
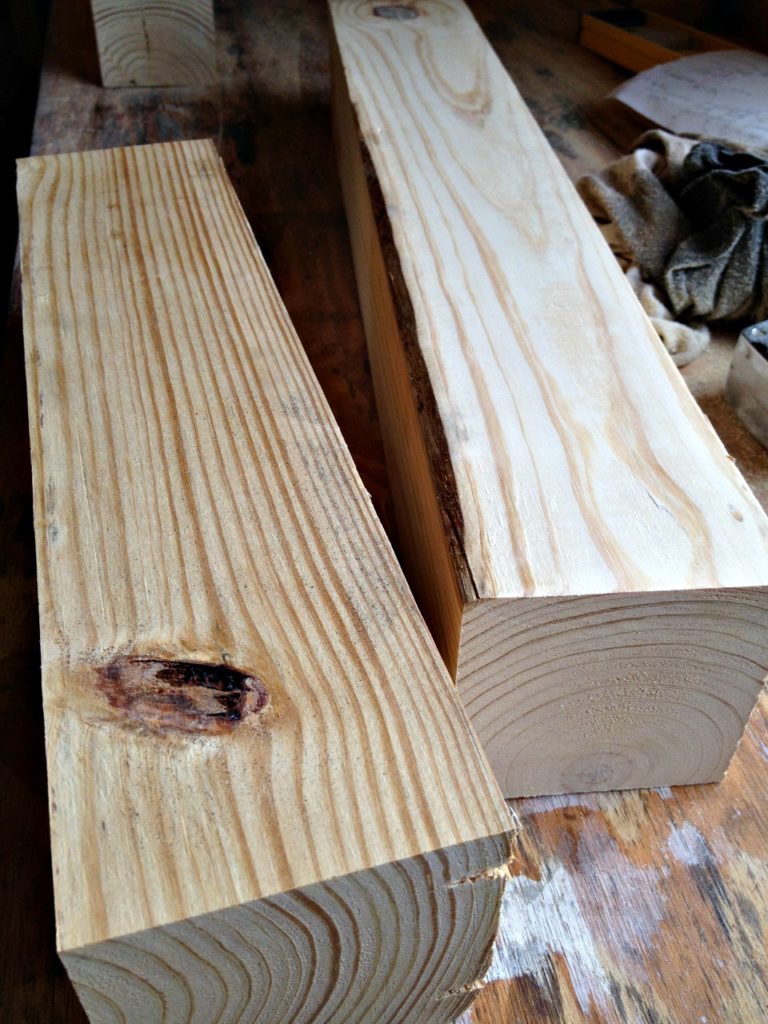
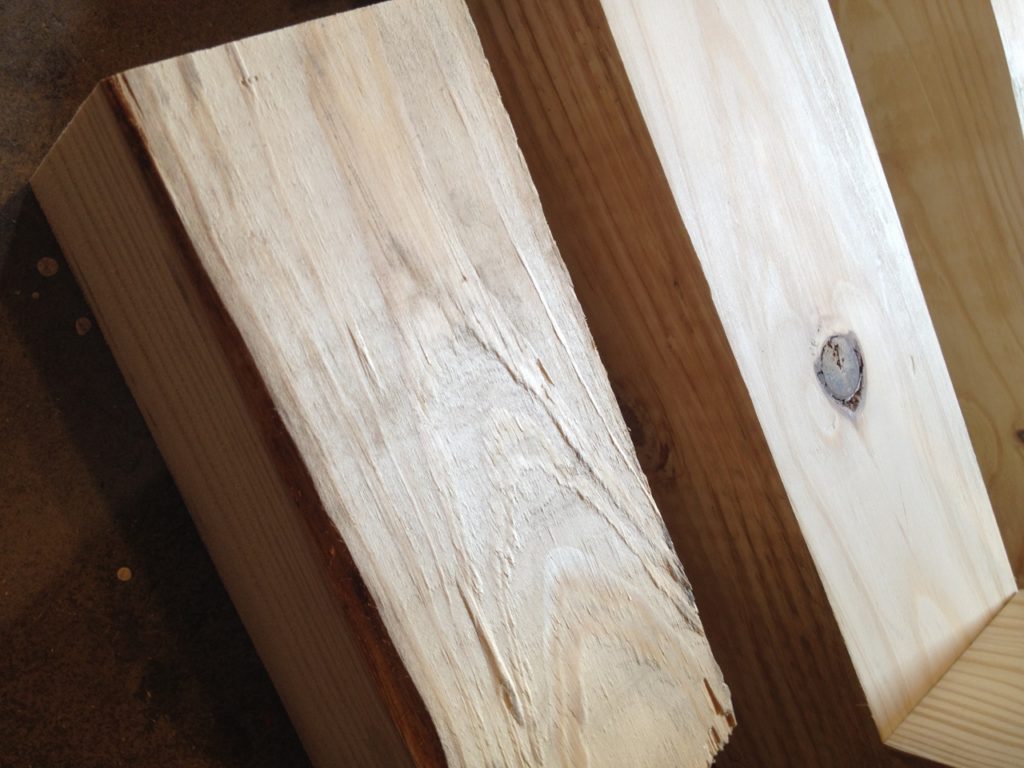
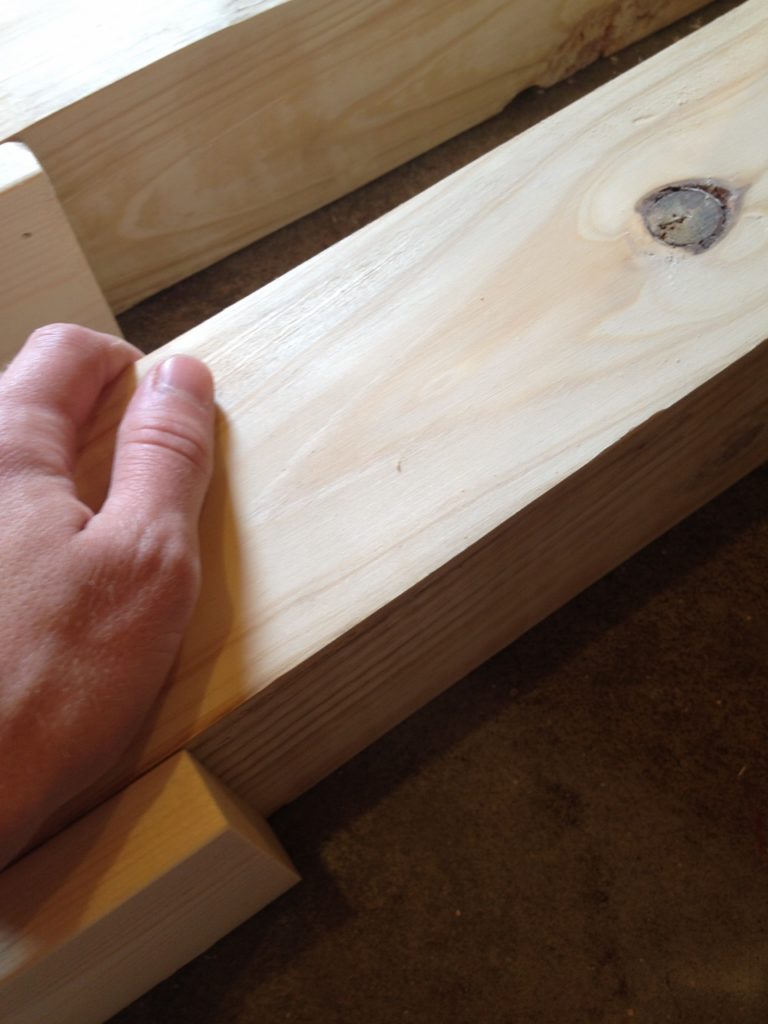
That’s why I chose to go local.  I trust the guys at the local lumber yard (by the way, if you are local to West Kentucky, I highly recommend Cole Lumber–good prices and good service–and I don’t get paid to say that), and they were very helpful when we were trying to decide what we wanted.  What we purchased was 1×4 tongue and groove yellow pine #2 in 12 ft lengths.  The tongue and groove is only on the long edges, not the ends.  This makes it a little more difficult to get a super tight fit, but it saves you a TON in waste.  You can butt any board up to any board and don’t have to worry about the direction of the tongue on each end.

How we installed real wood floor for $1.50 per square foot

How we installed real wood floor for $1.50 per square foot

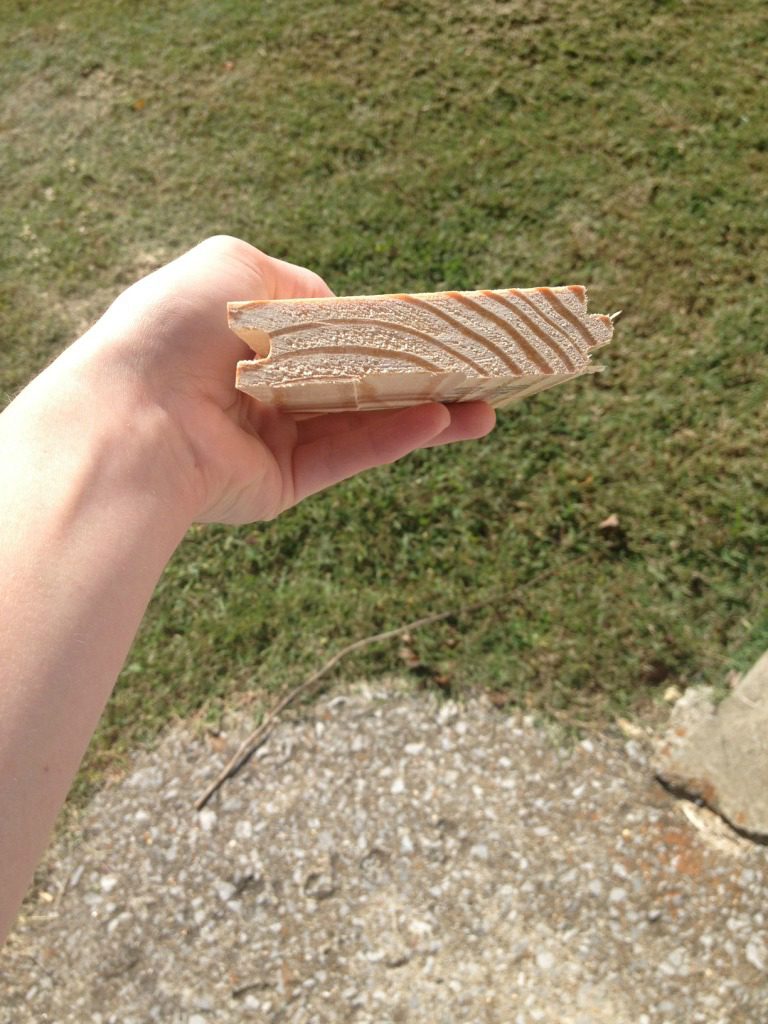
They price them to you in price per board, not in square feet.  You have to figure the sq ft per board to figure out what the price is per square foot and figure out how many boards you need.  With the tongue and groove, the board was about 3 ¼″ wide x 12ft long so 3.25″x12ft / 12″/ft= 3.25 sq ft per board.  Each board was about $4.22 (if I remember correctly), so $4.22/3.25 sq ft= 1.30/sq ft.

.

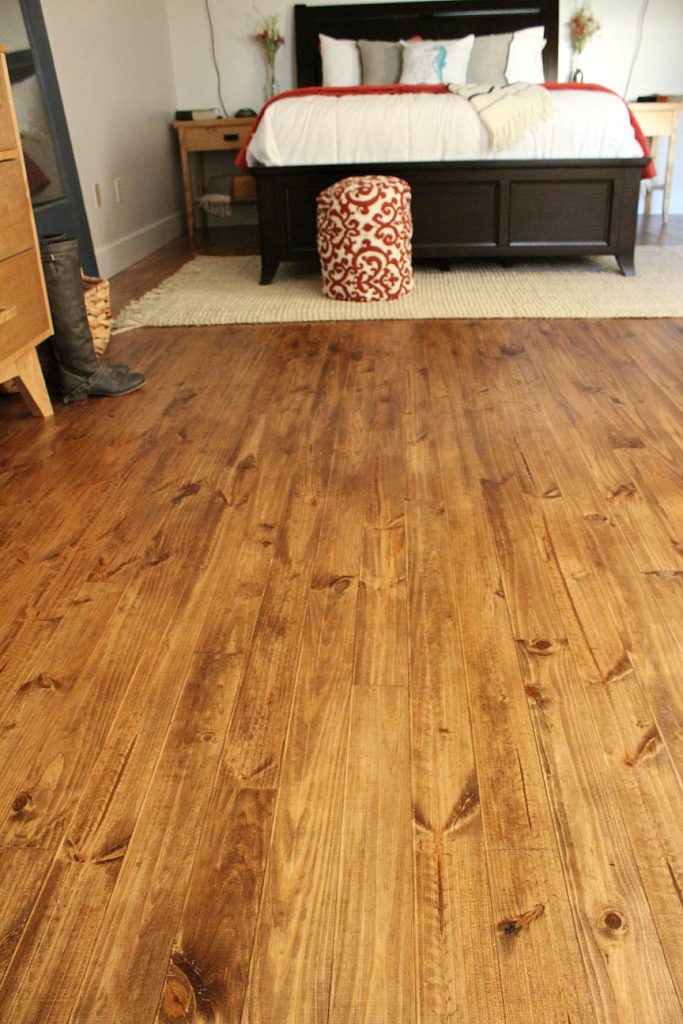
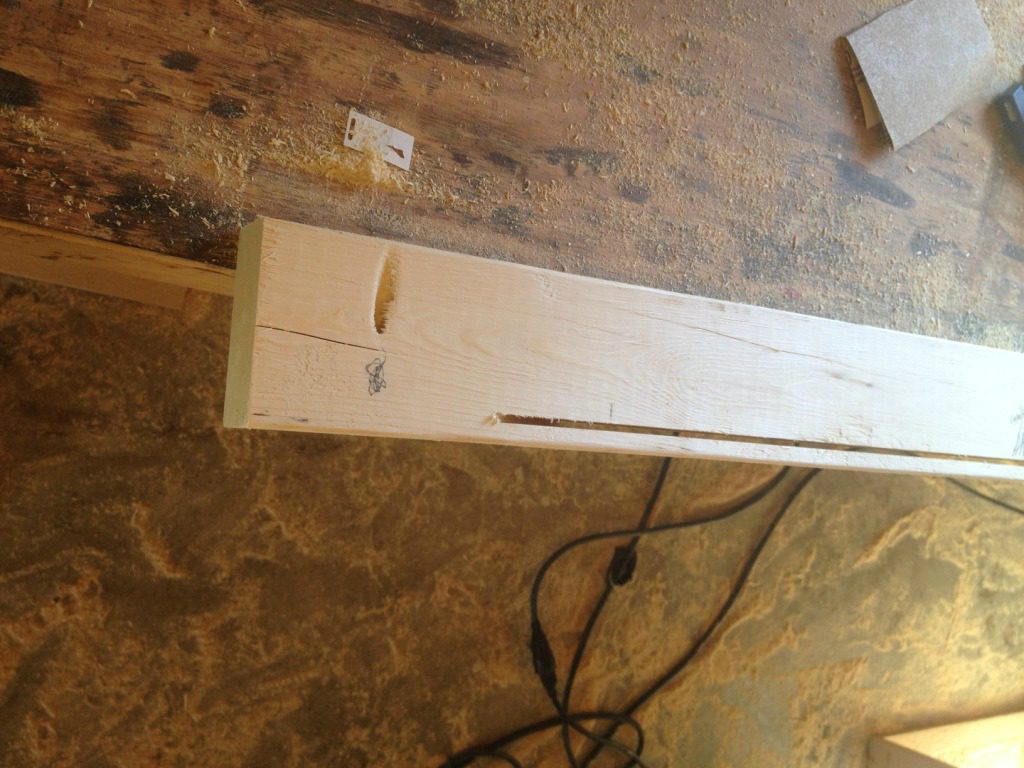
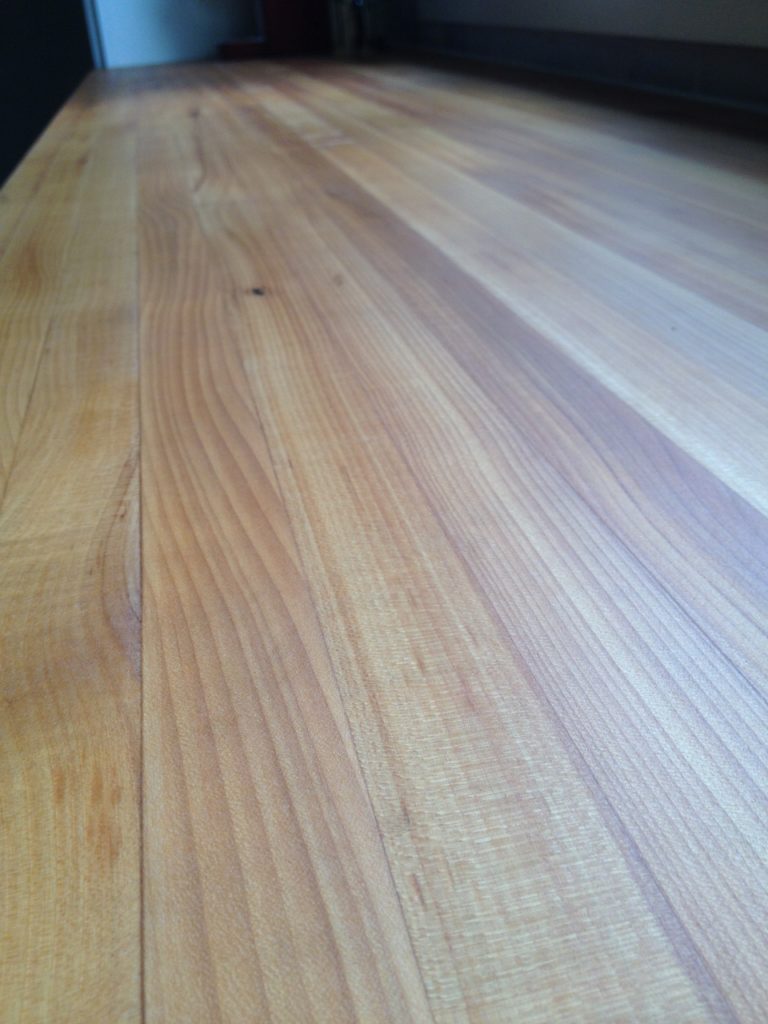
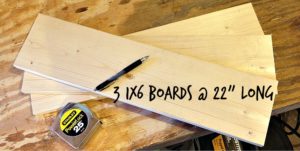
I wanted wider planks, but they were much more expensive and would have to be special ordered.  The 1×6 planks were three times as much and they came in what they call a “D” grade, which basically means there are like no knots.  To me, no knots=no character, so I wanted #2 grade, which will give you plenty of knots, but not a lot of deep knots.  So I went with the #2 1x4s instead and I’m glad I did.  The narrower the board, the less likely they are to cup too, so that’s another plus side.

How we installed real wood floor for $1.50 per square foot

The cost of the stain and poly and sanding discs divided over the almost 400 sq ft that we laid, added about $0.20 to the sq ft, so basically, the floor costs us about $1.50/sq ft and some sore hands and knees.  That’s a steal if you ask me.

How we installed real wood floor for $1.50 per square foot

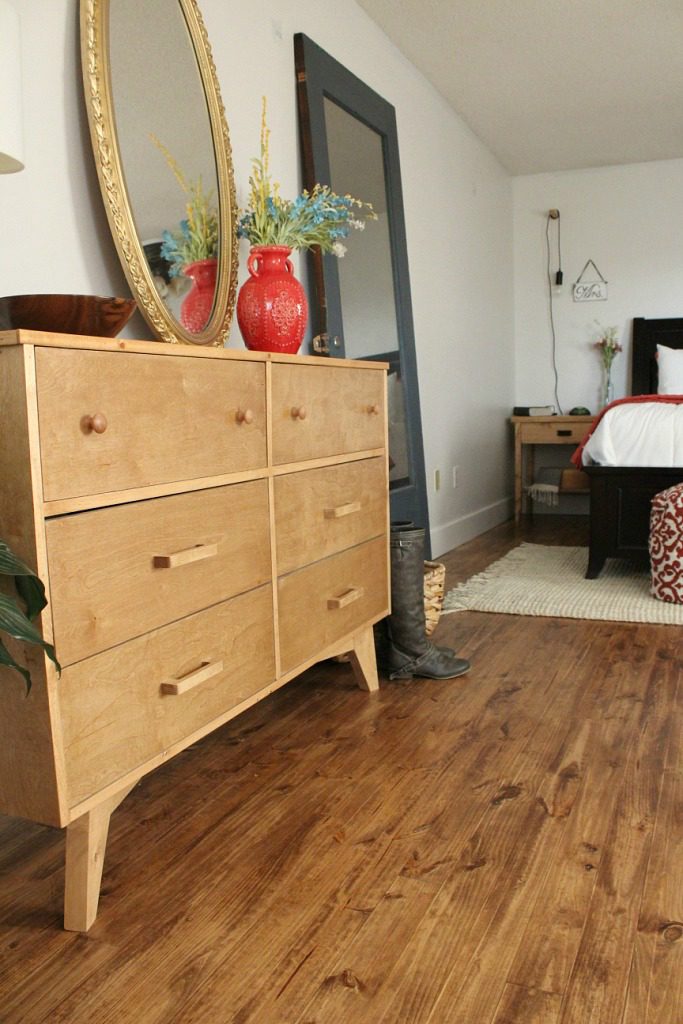
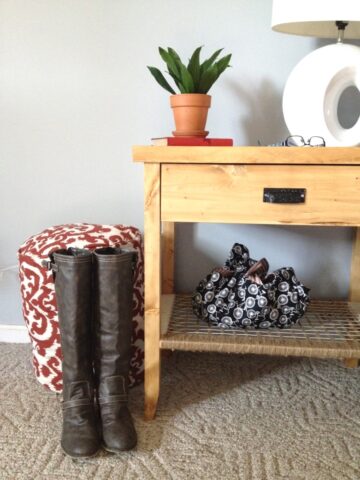
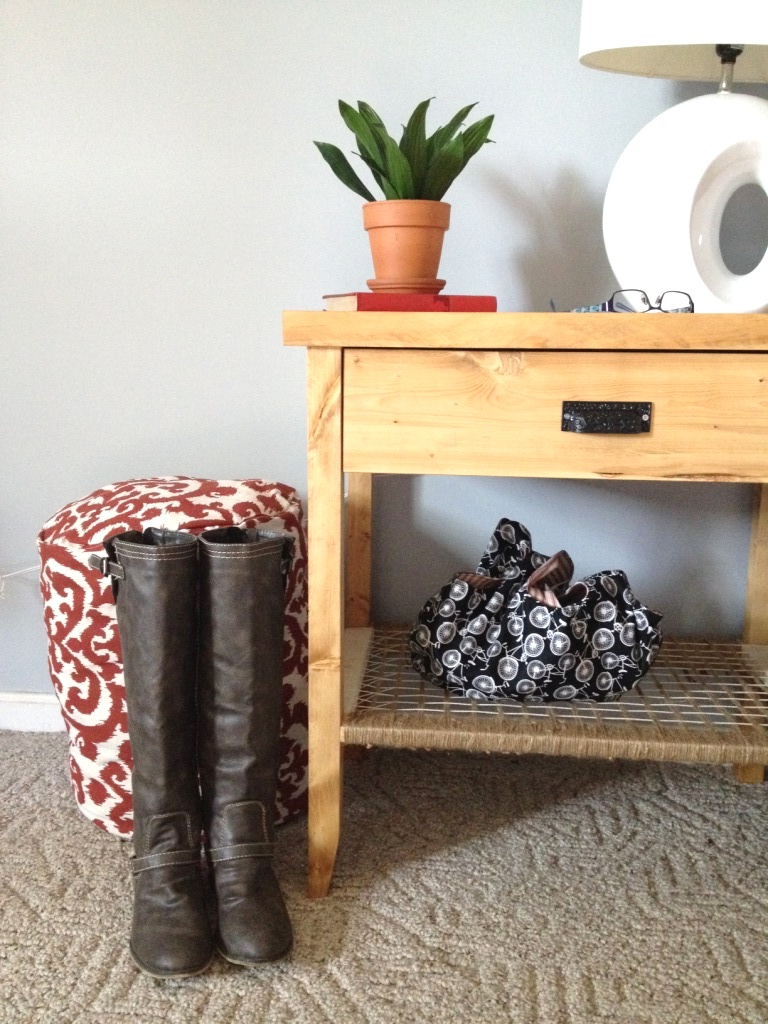
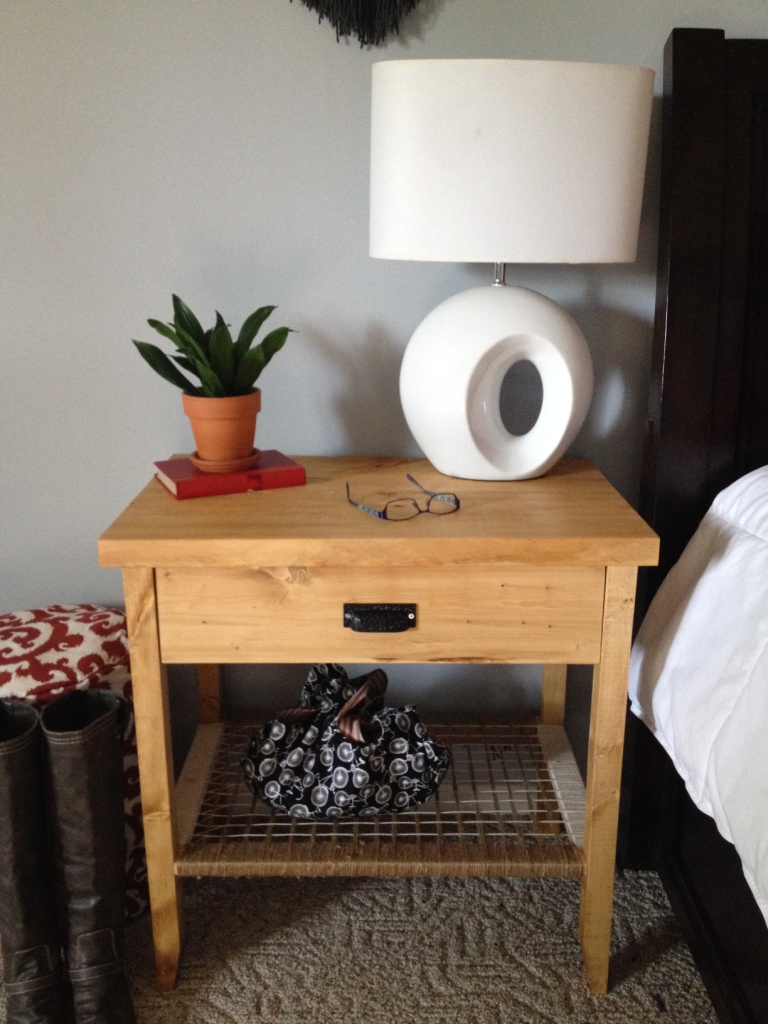
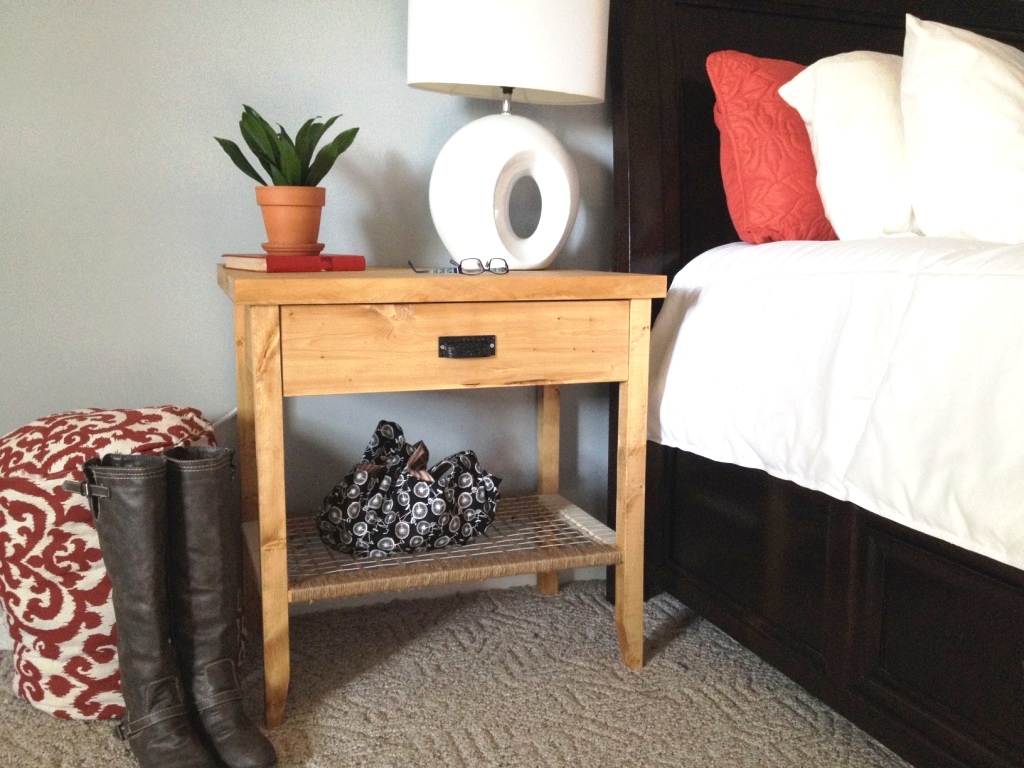
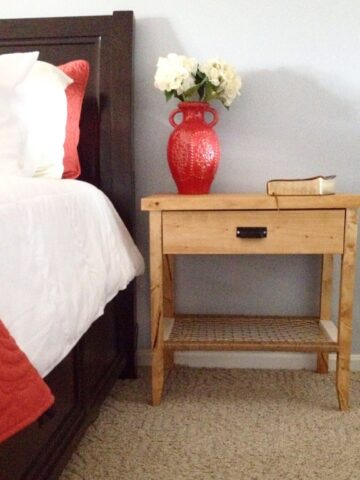
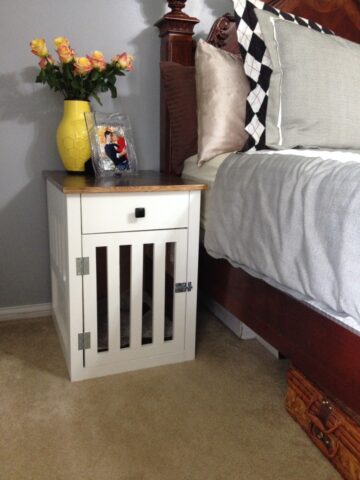
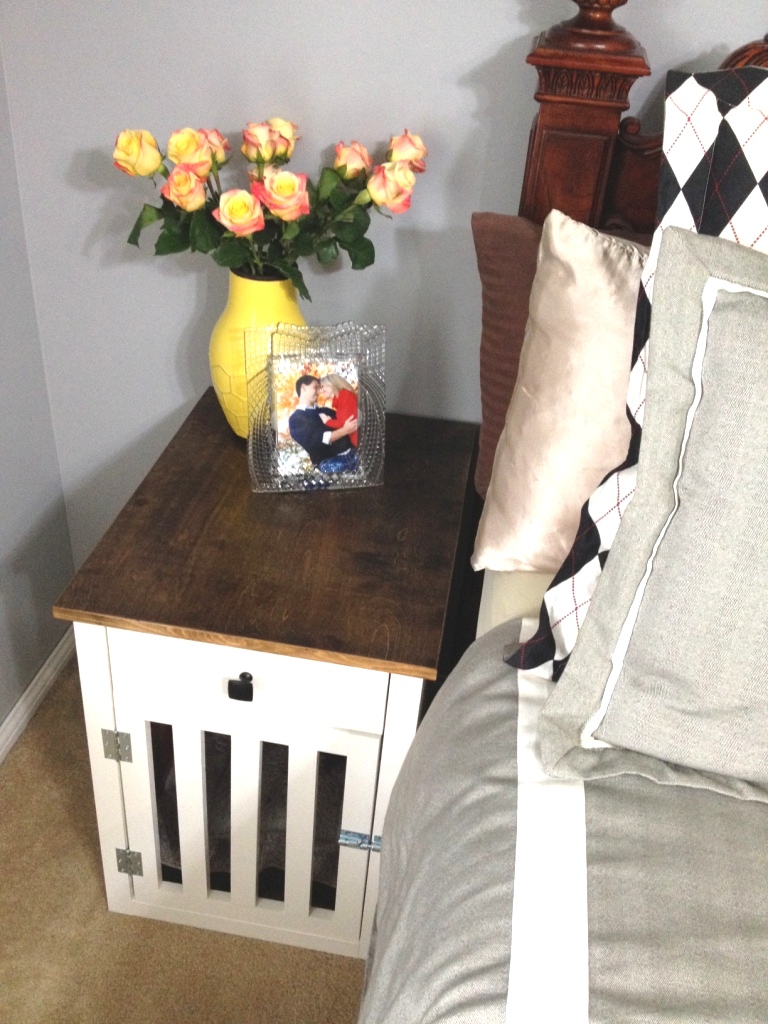
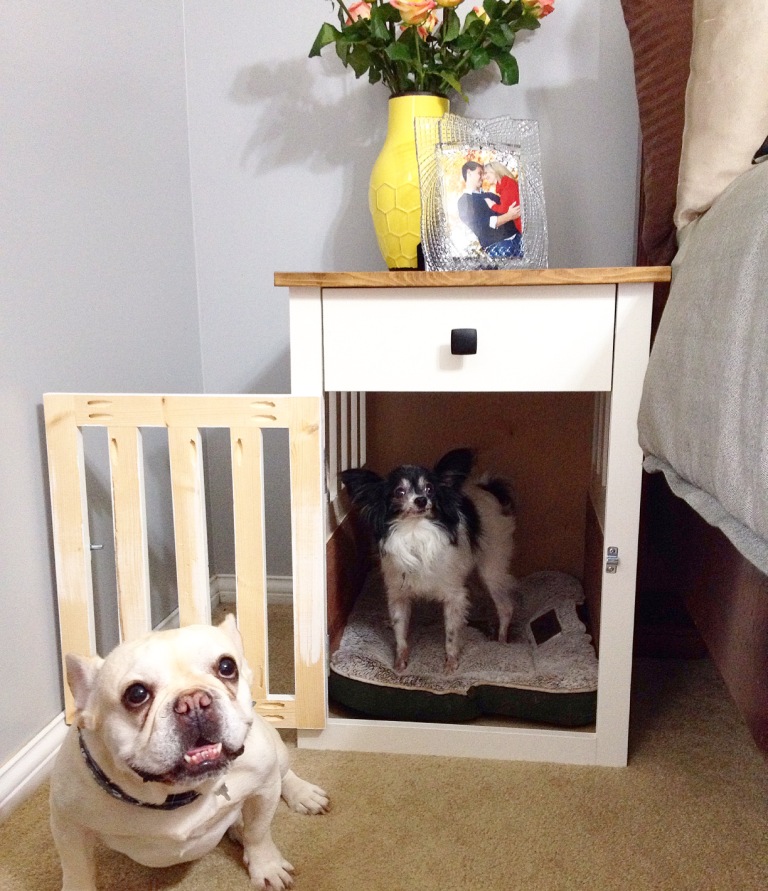
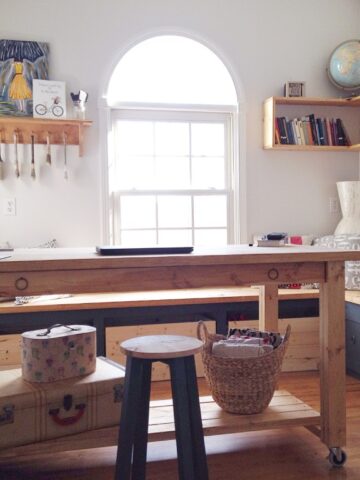
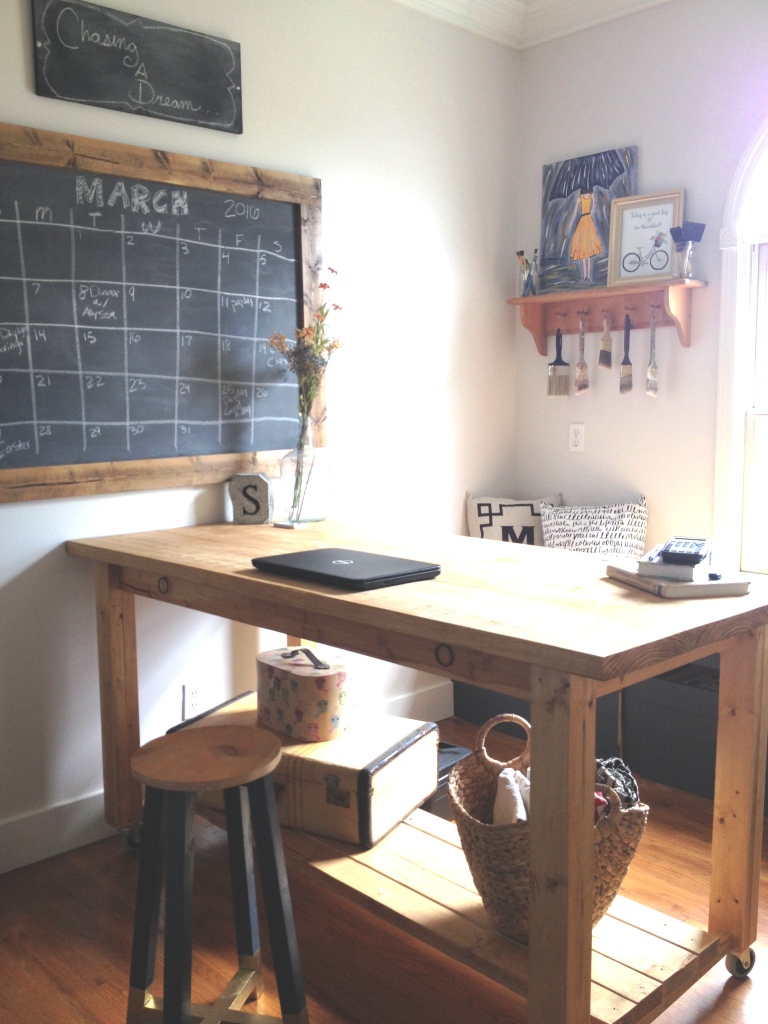
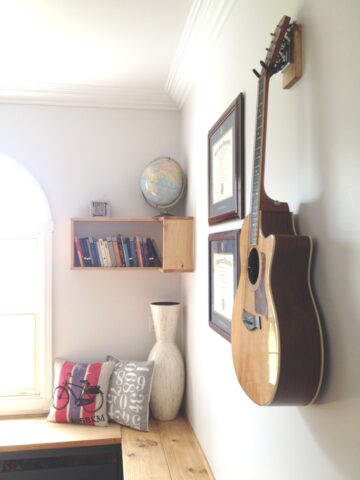
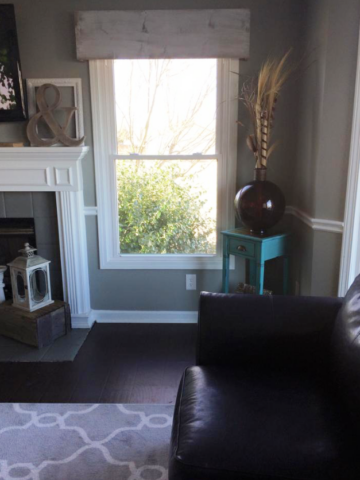
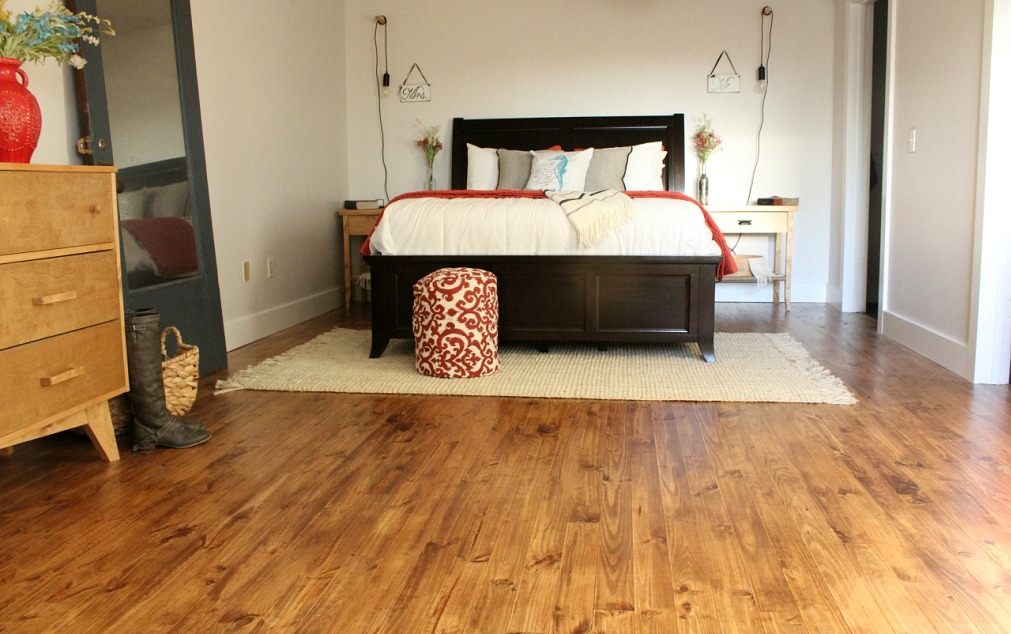
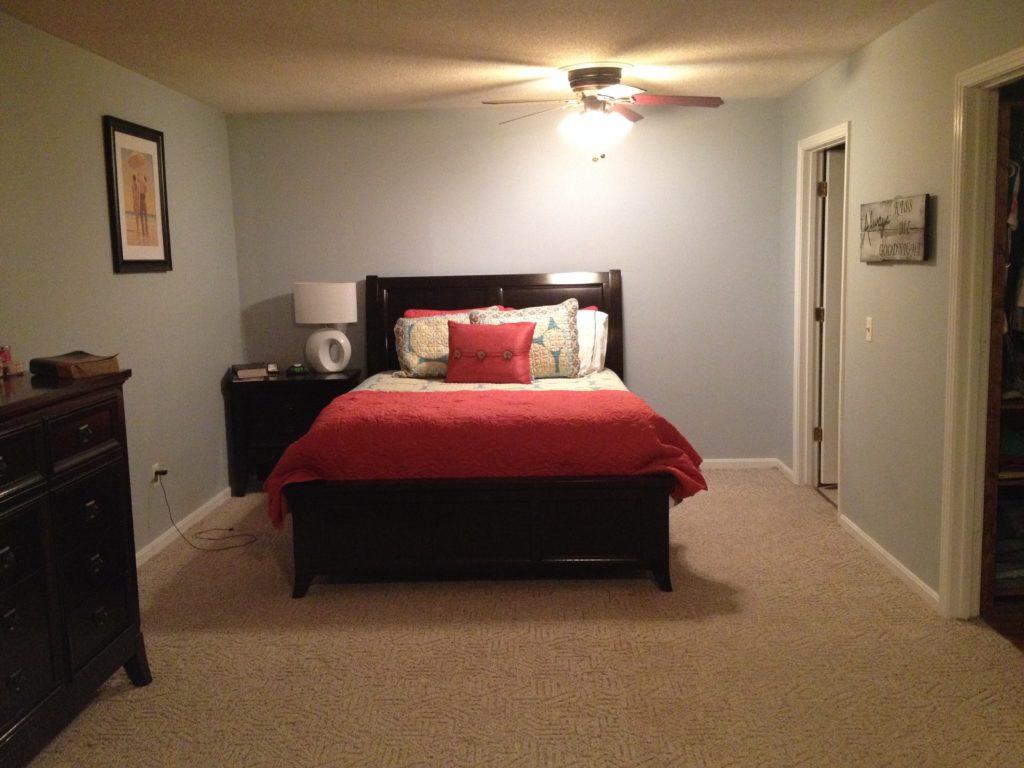
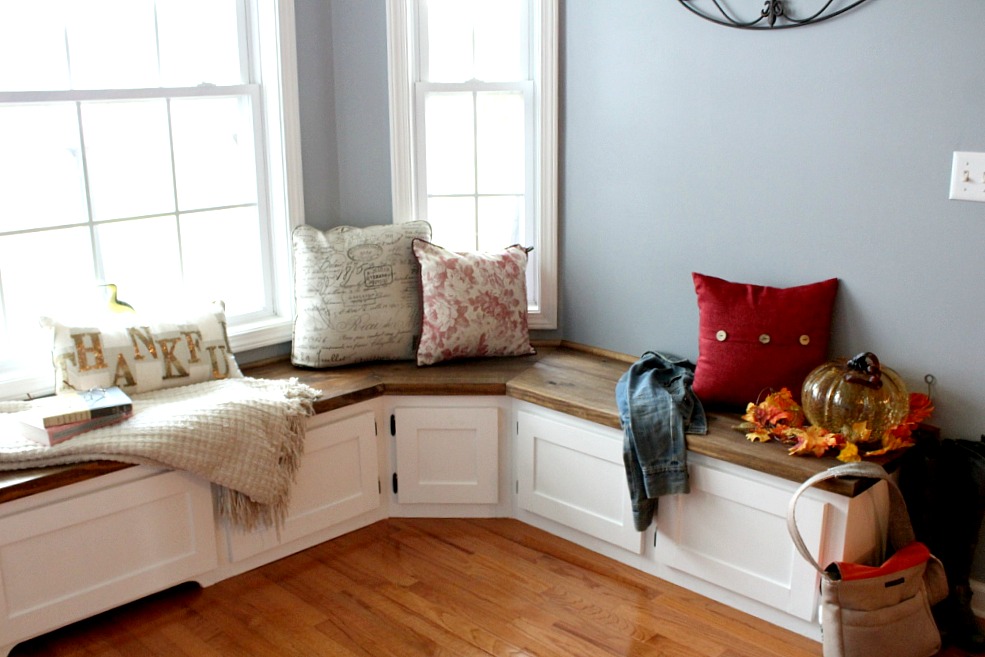
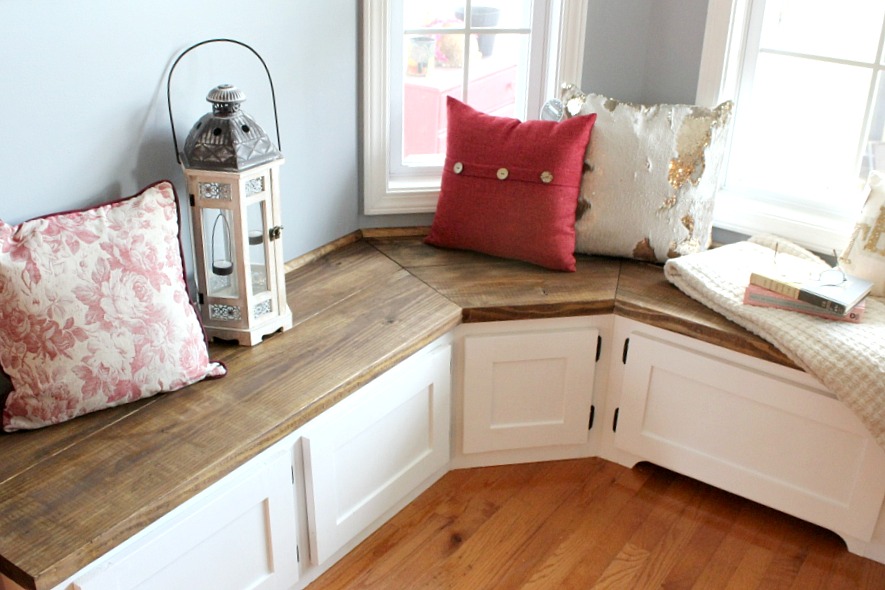
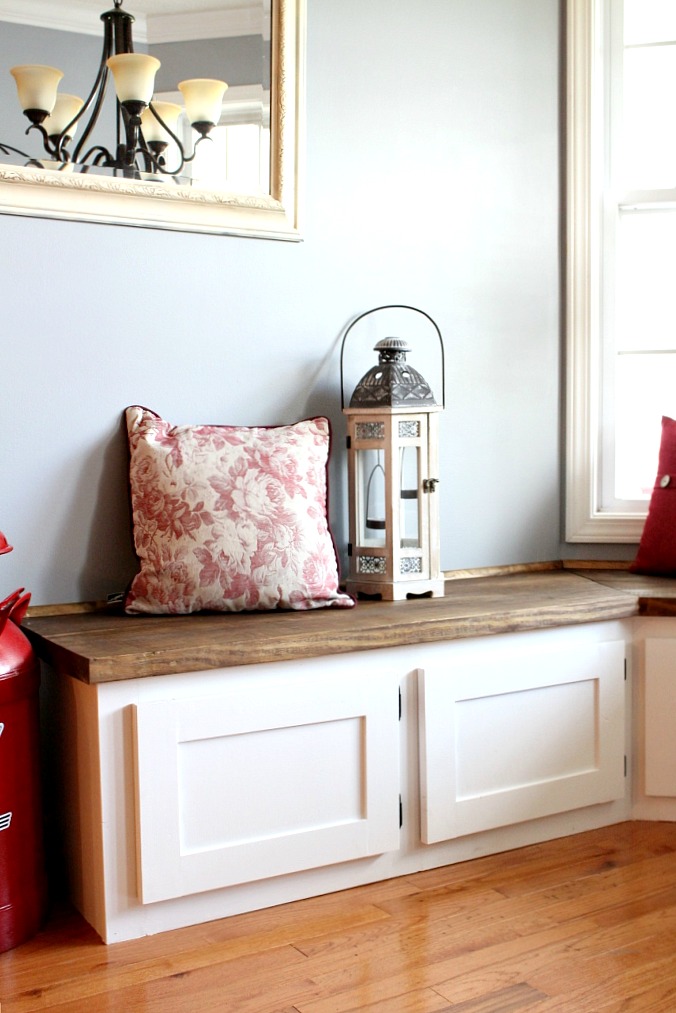
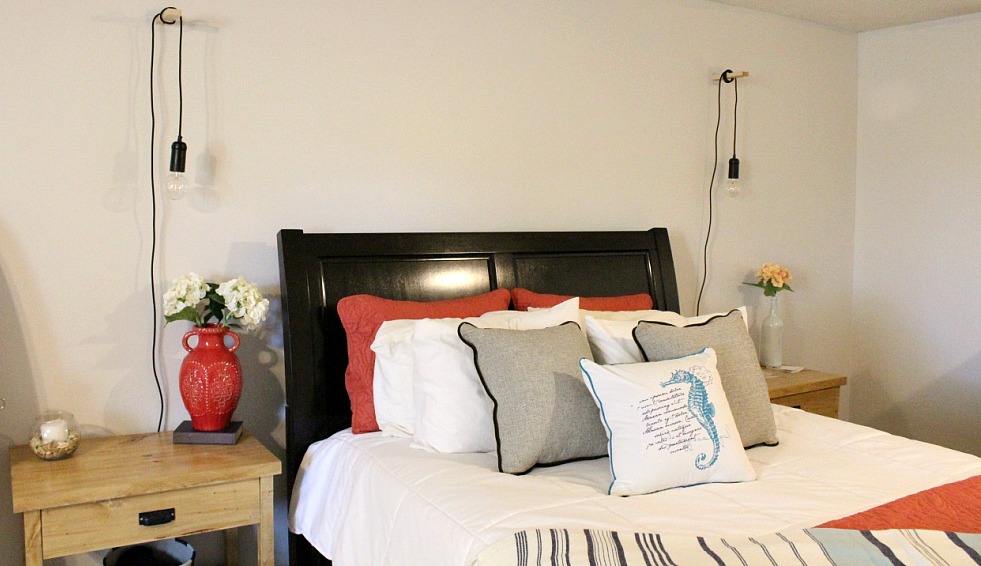
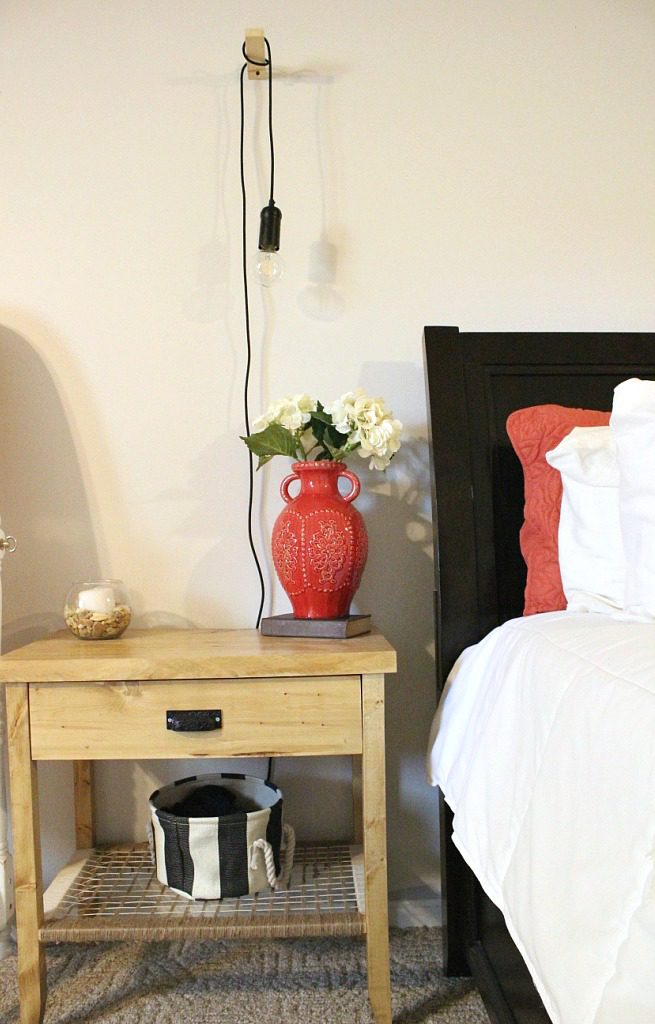
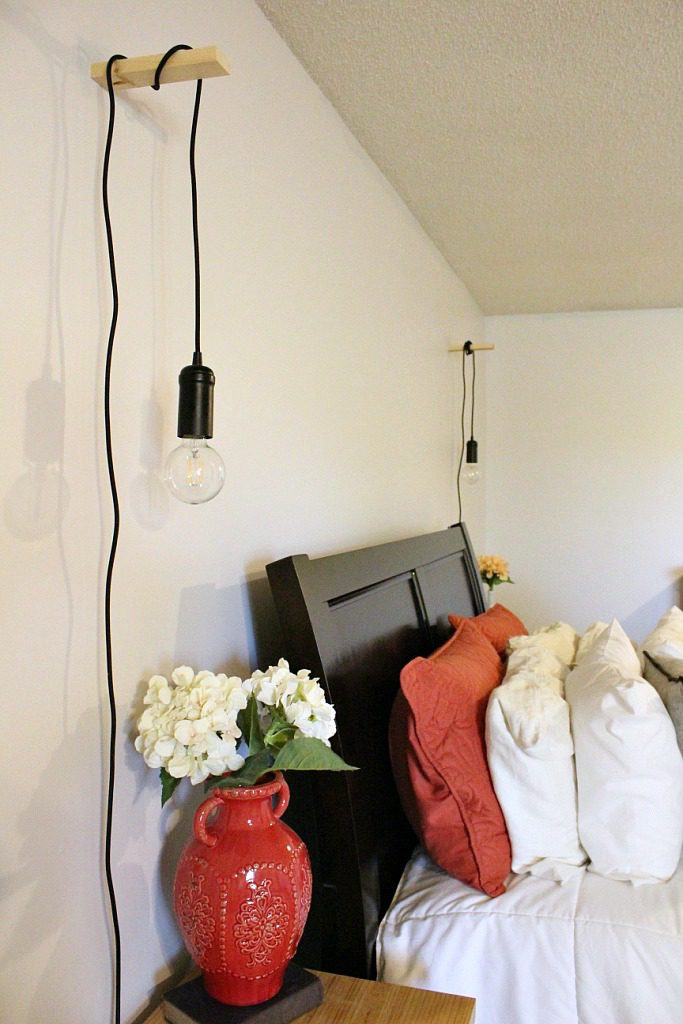
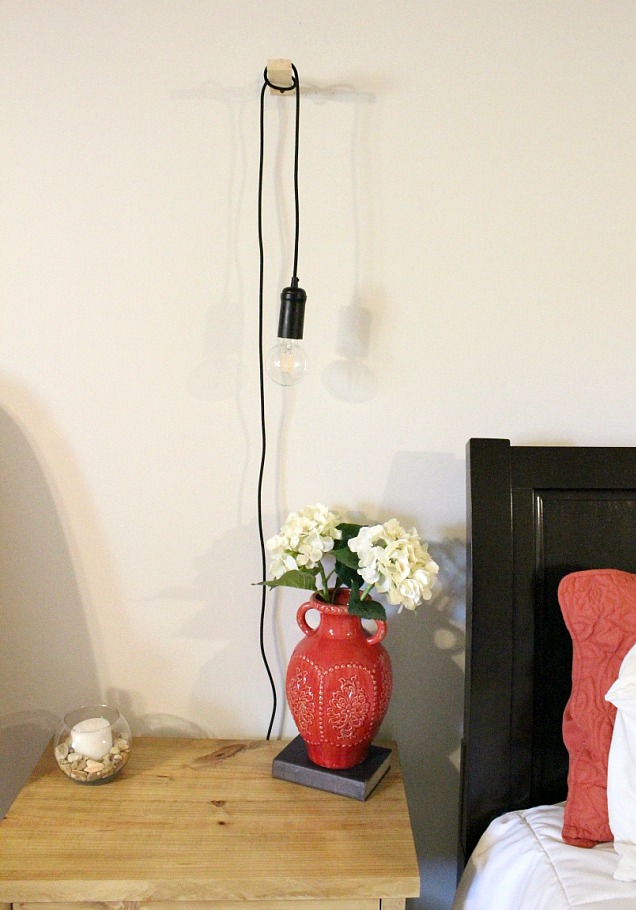
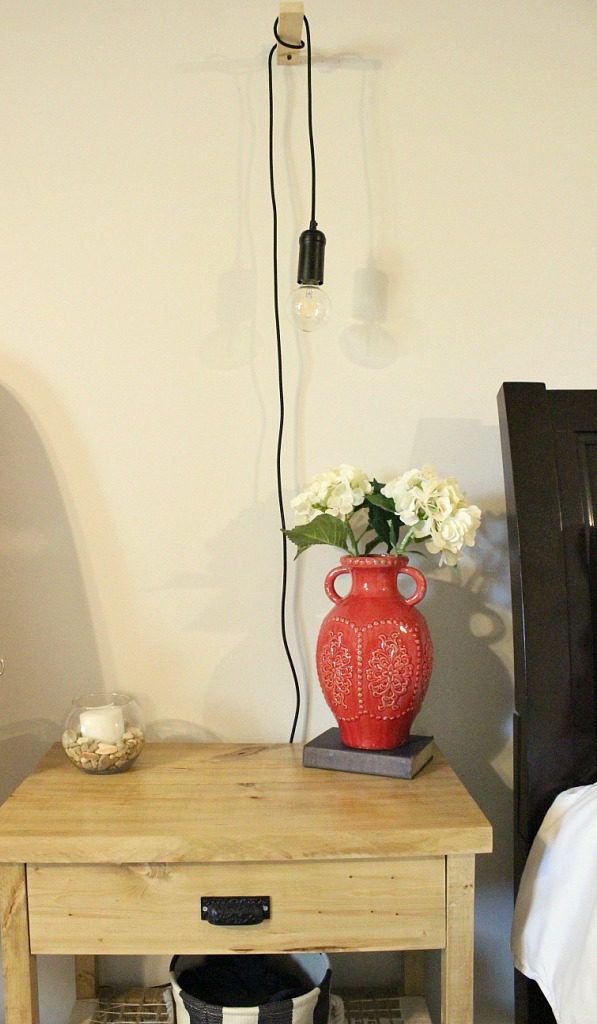
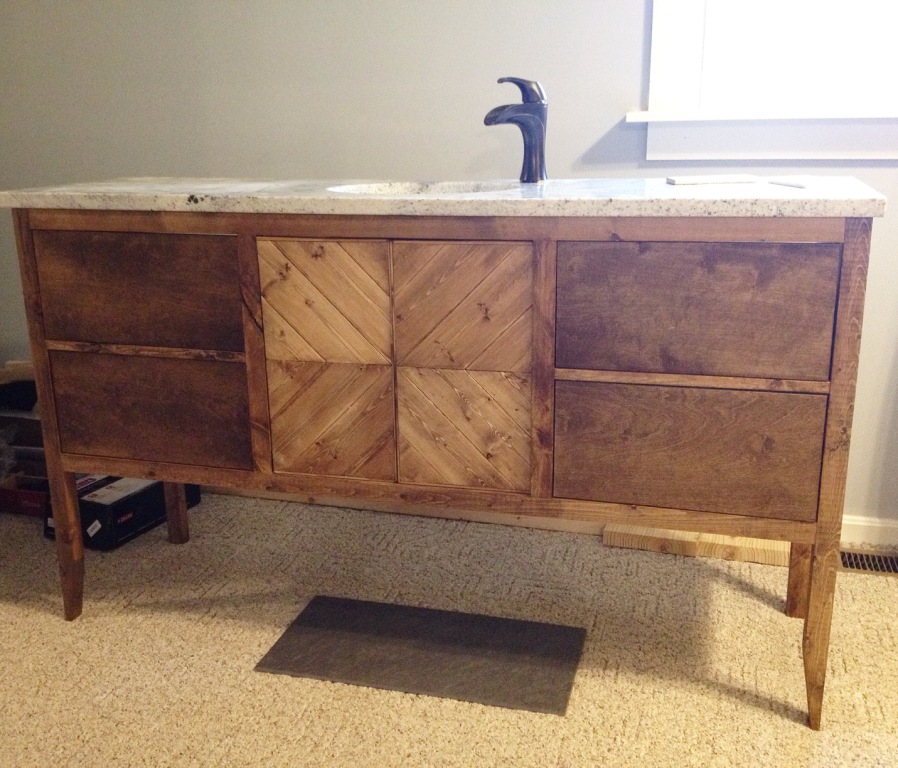
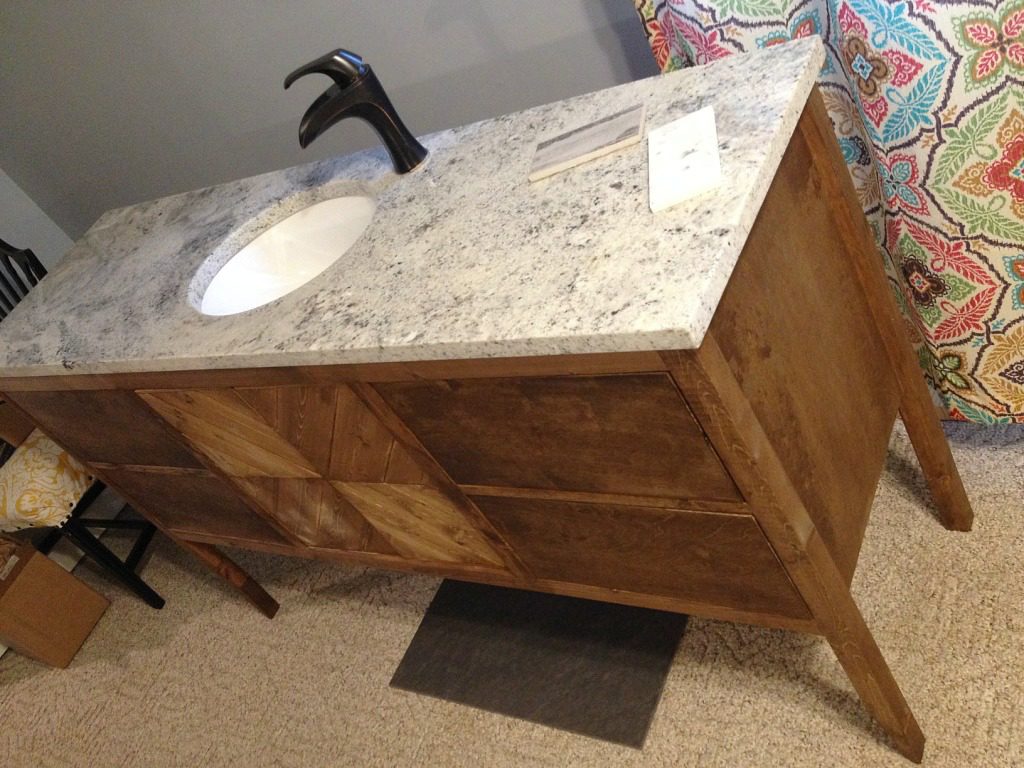
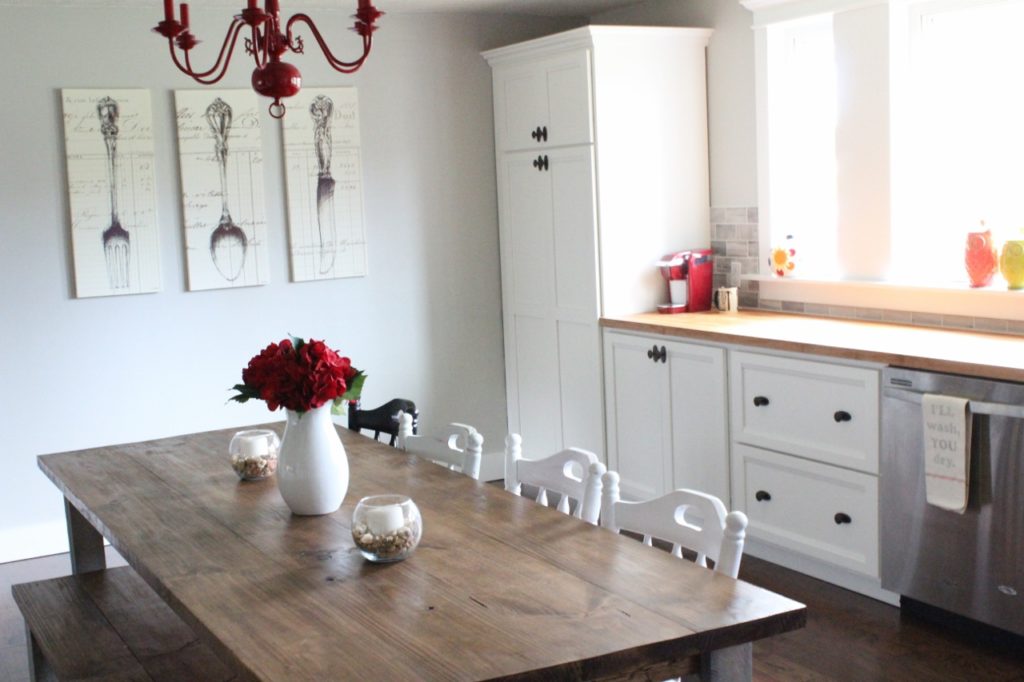
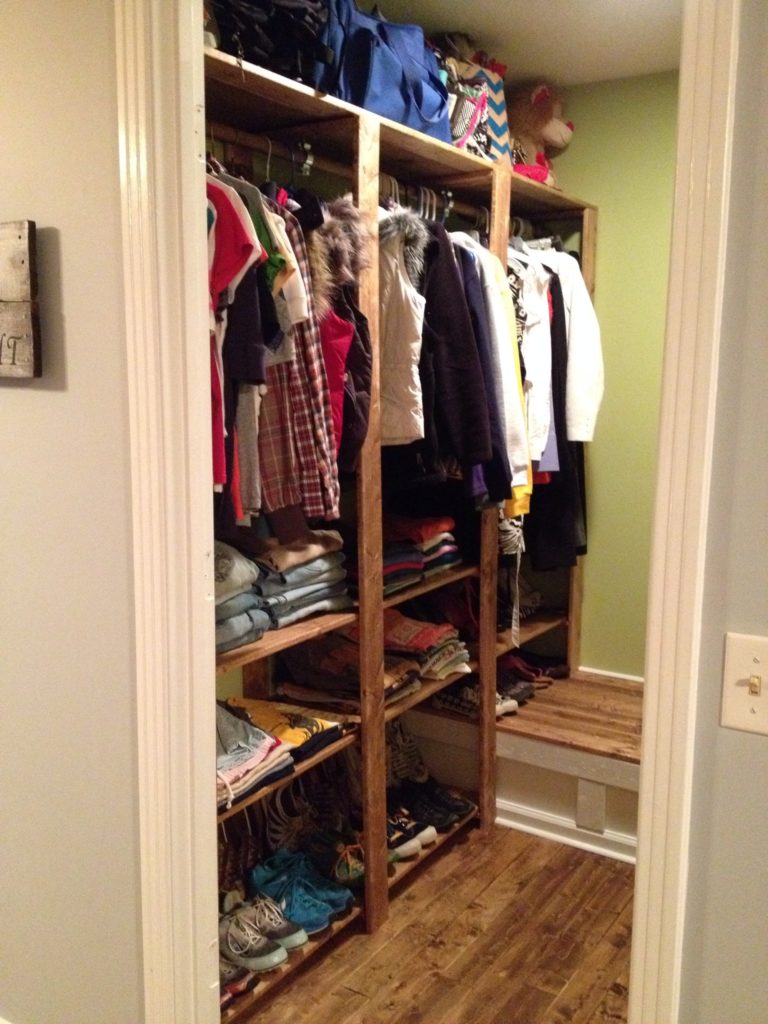
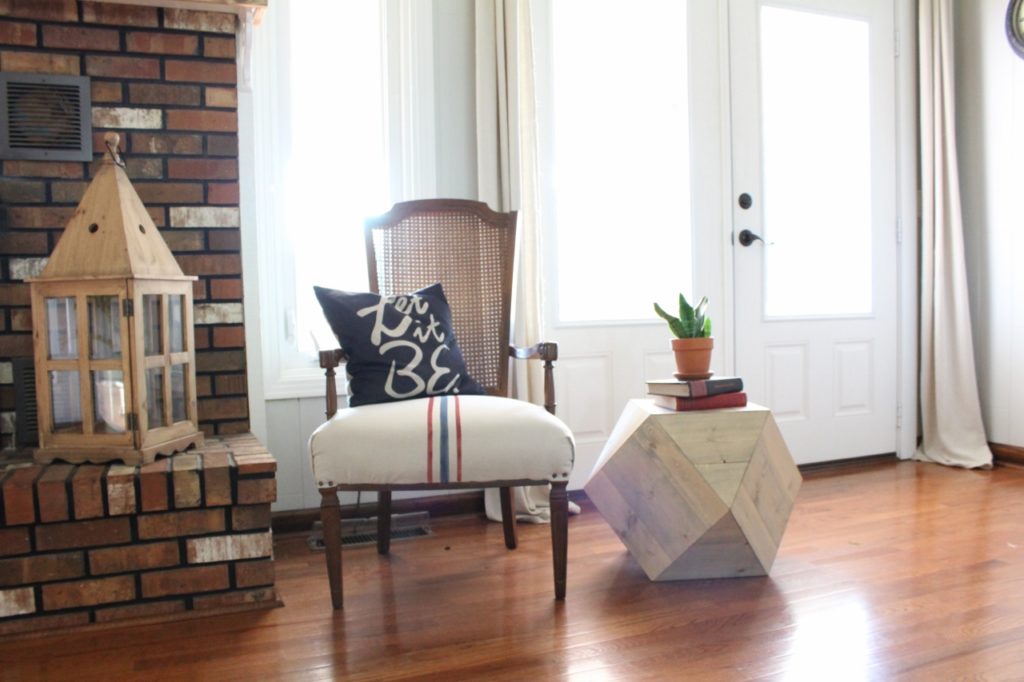
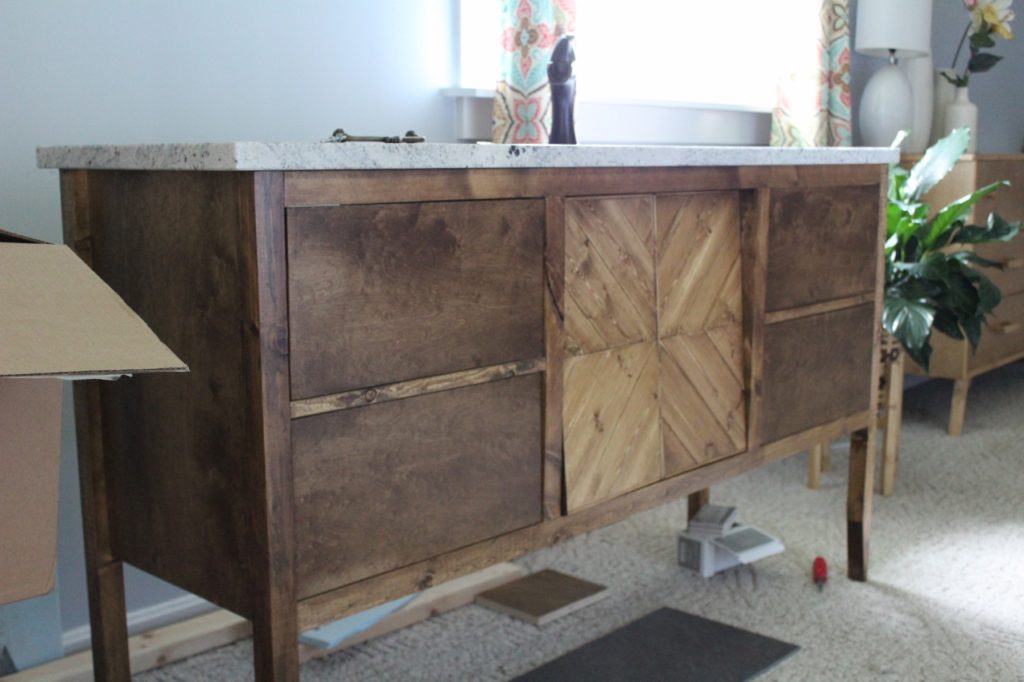
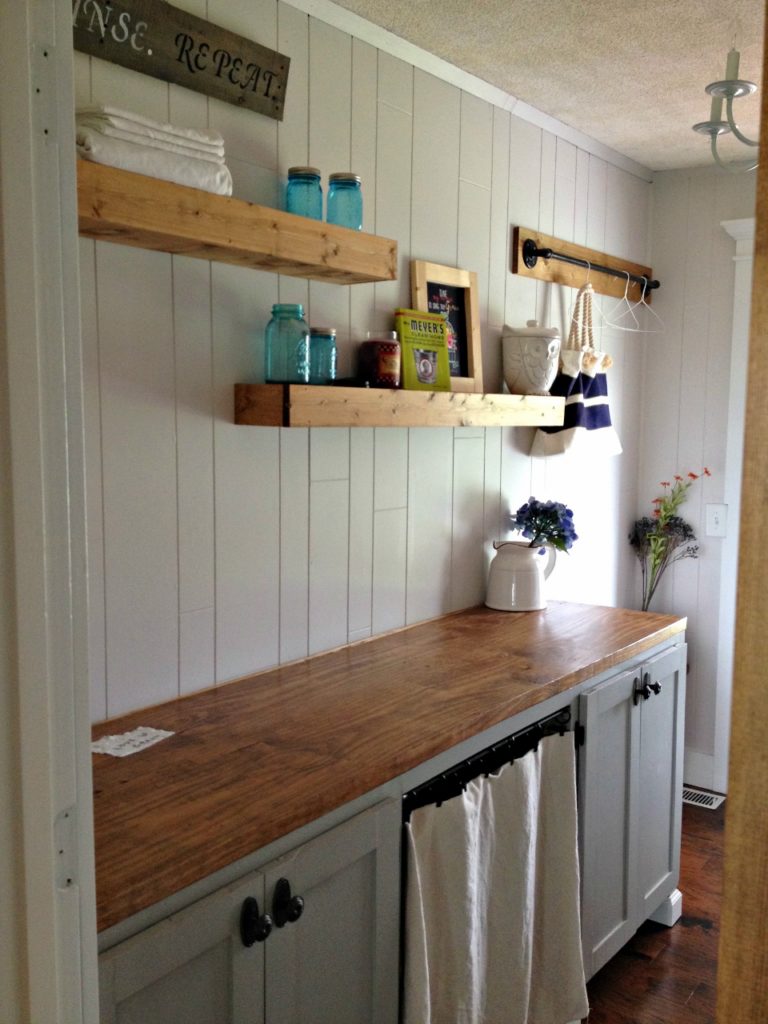
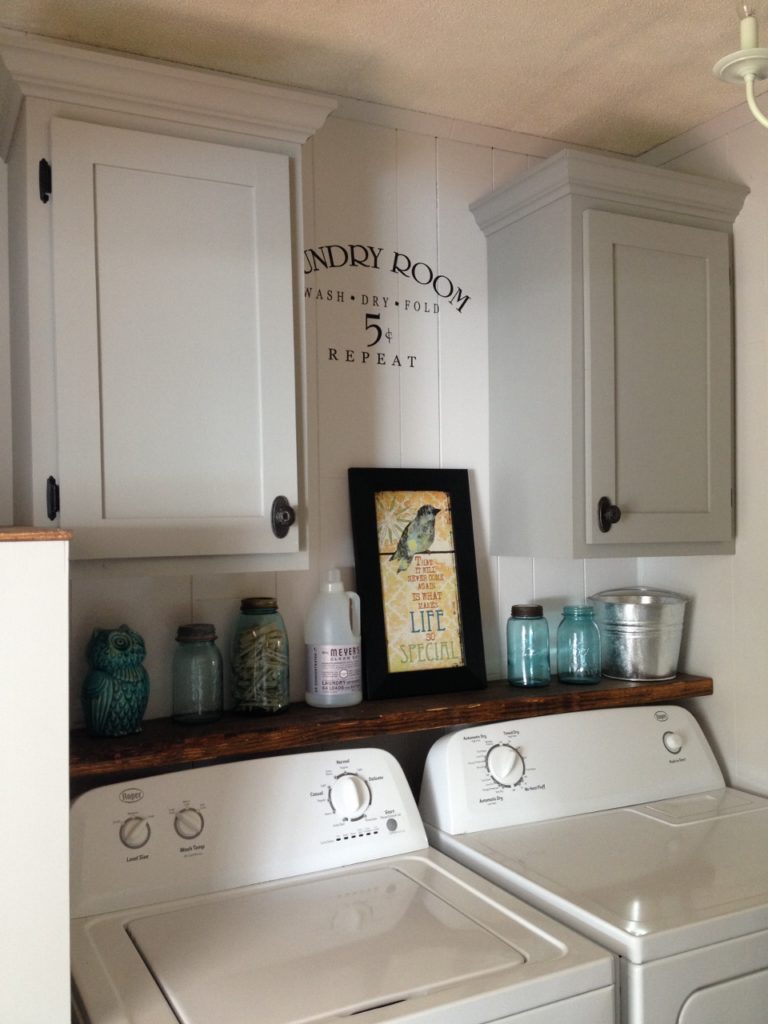
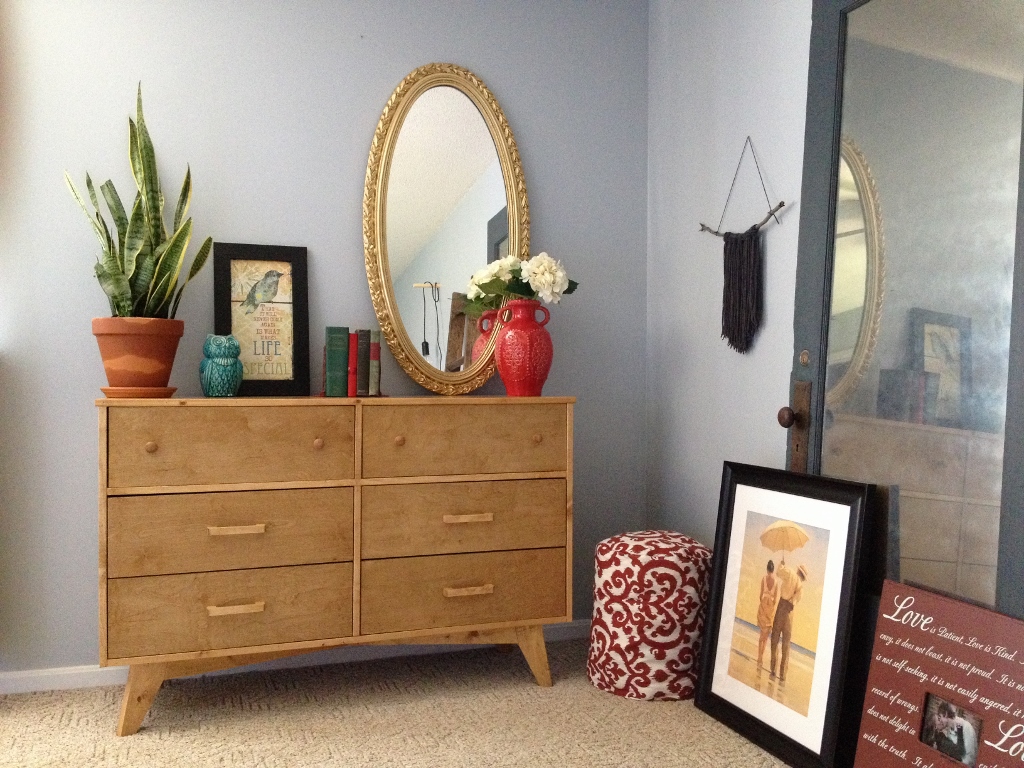
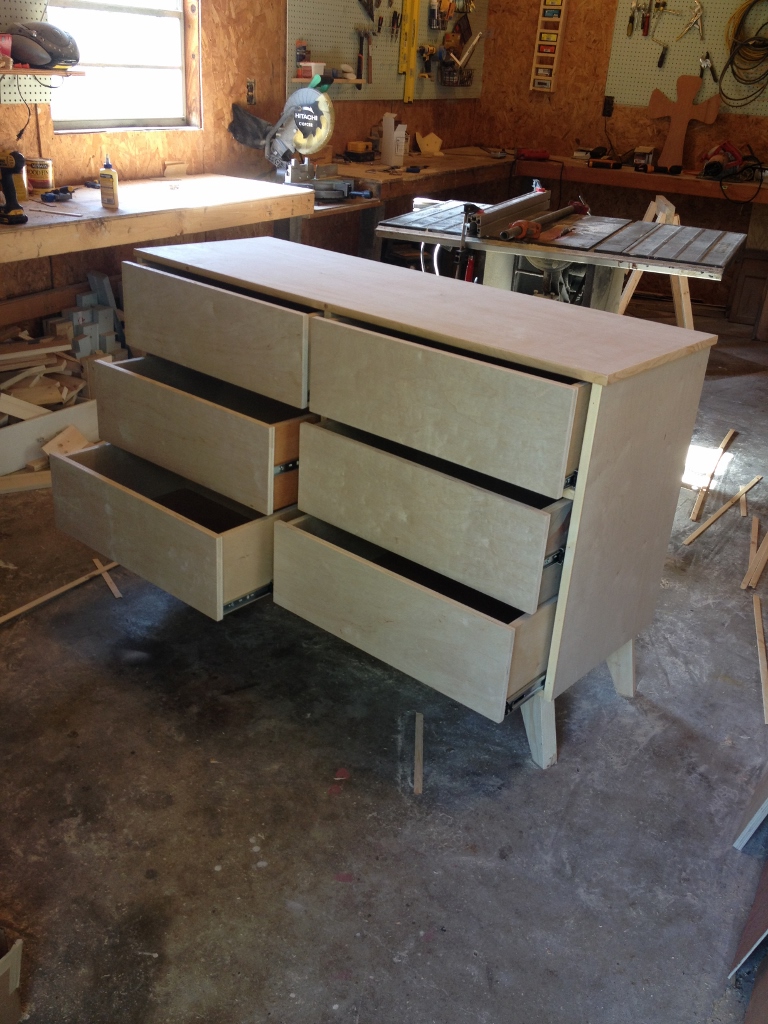
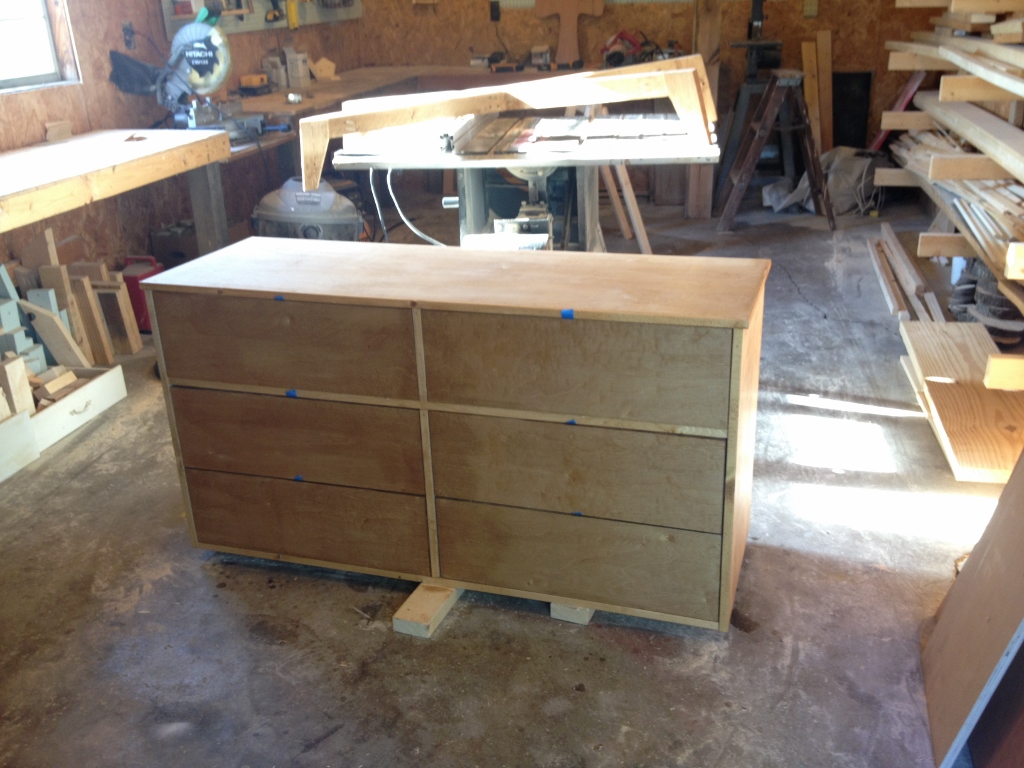
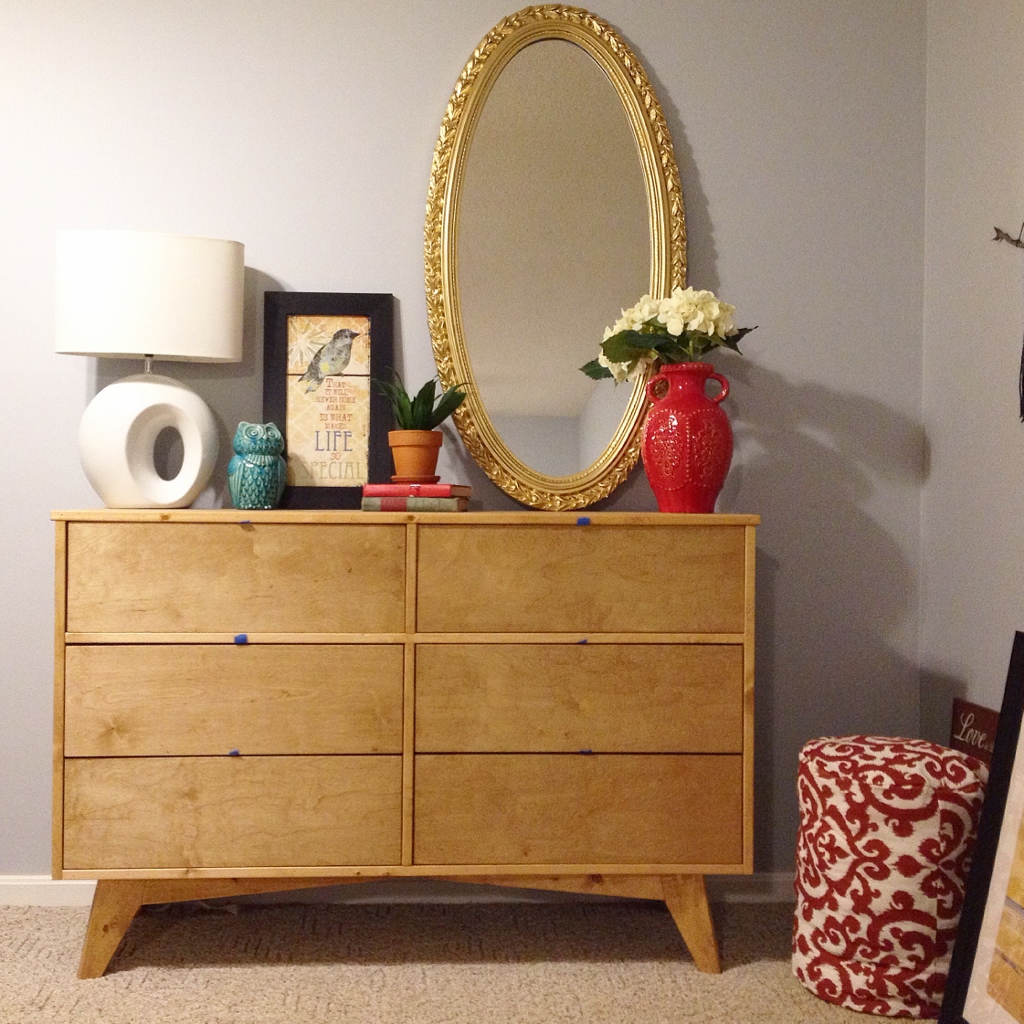
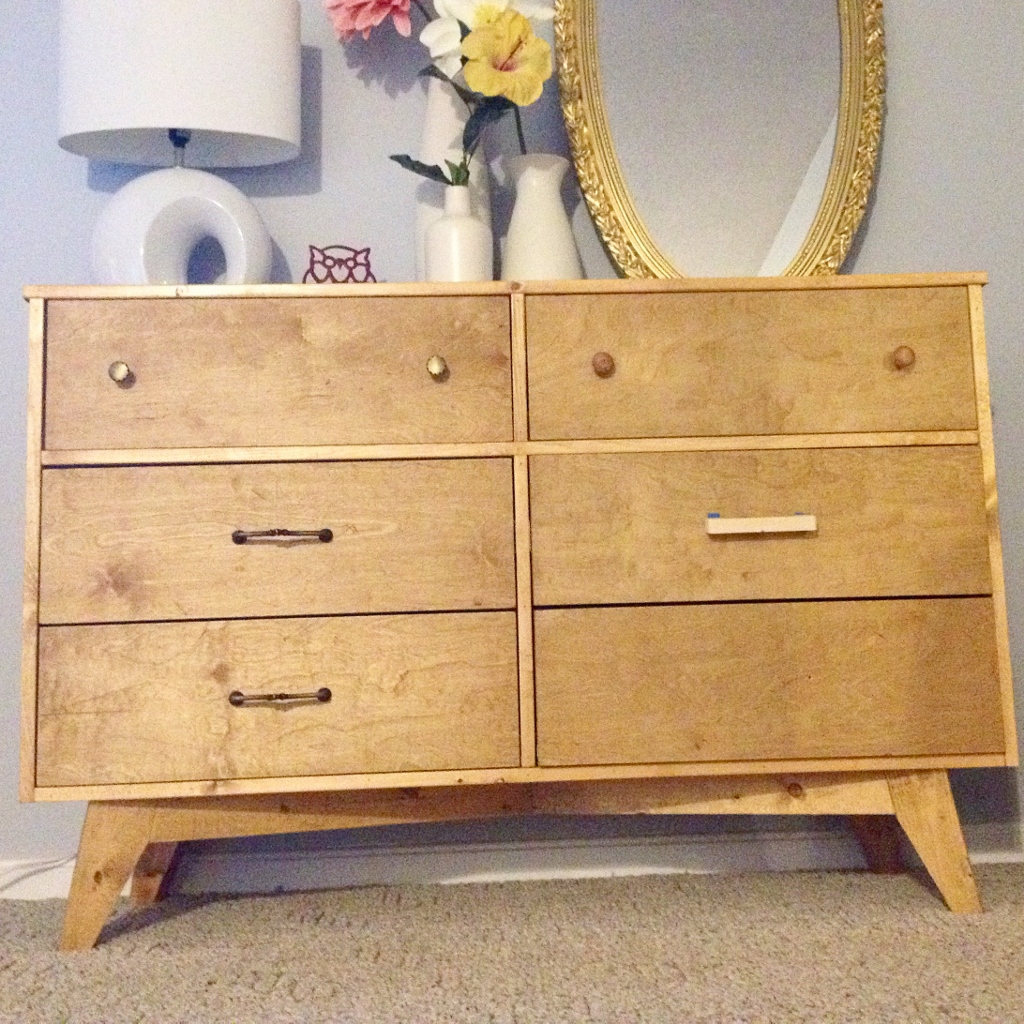
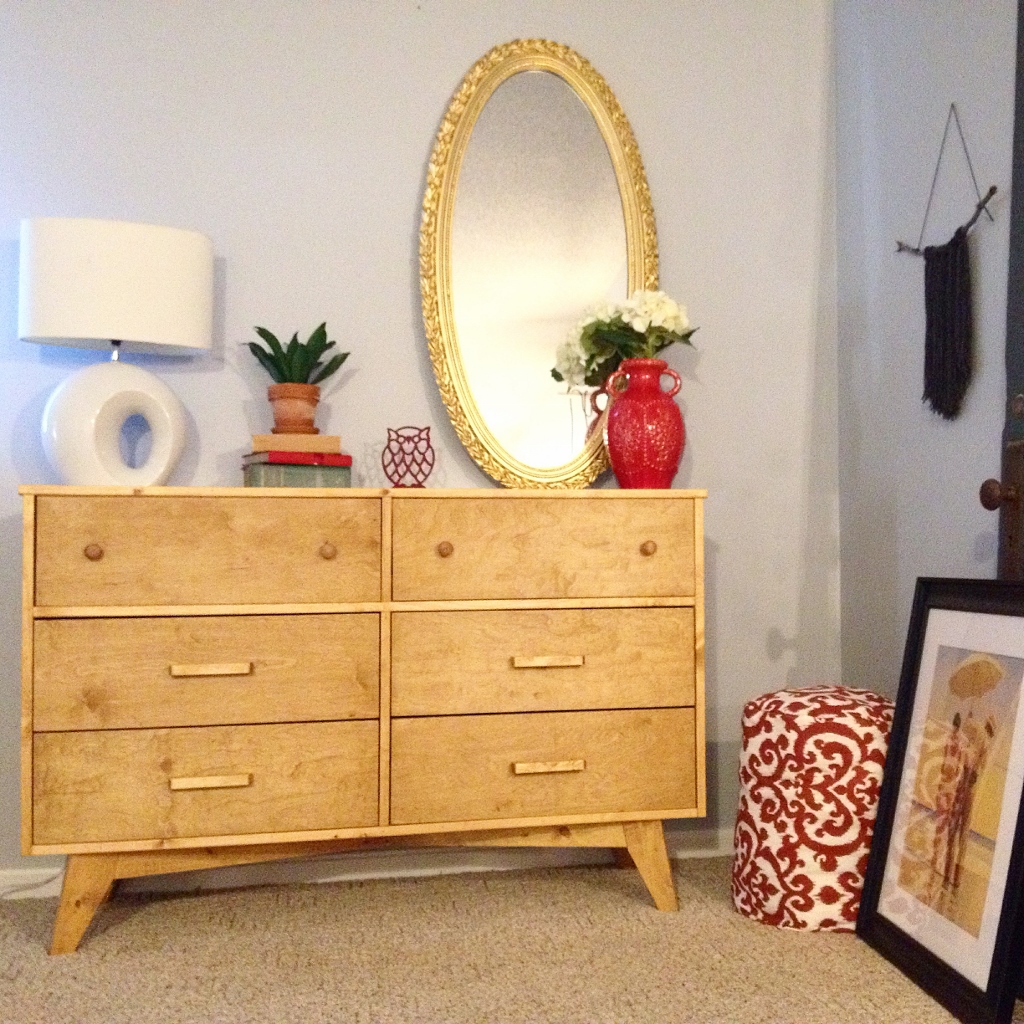
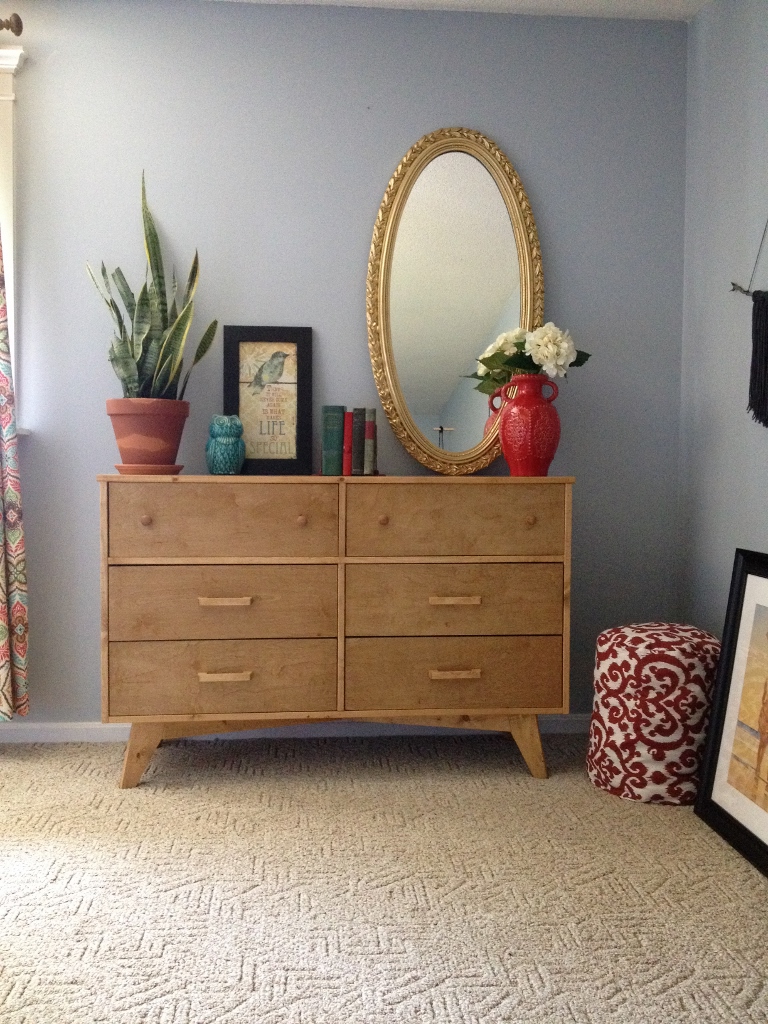
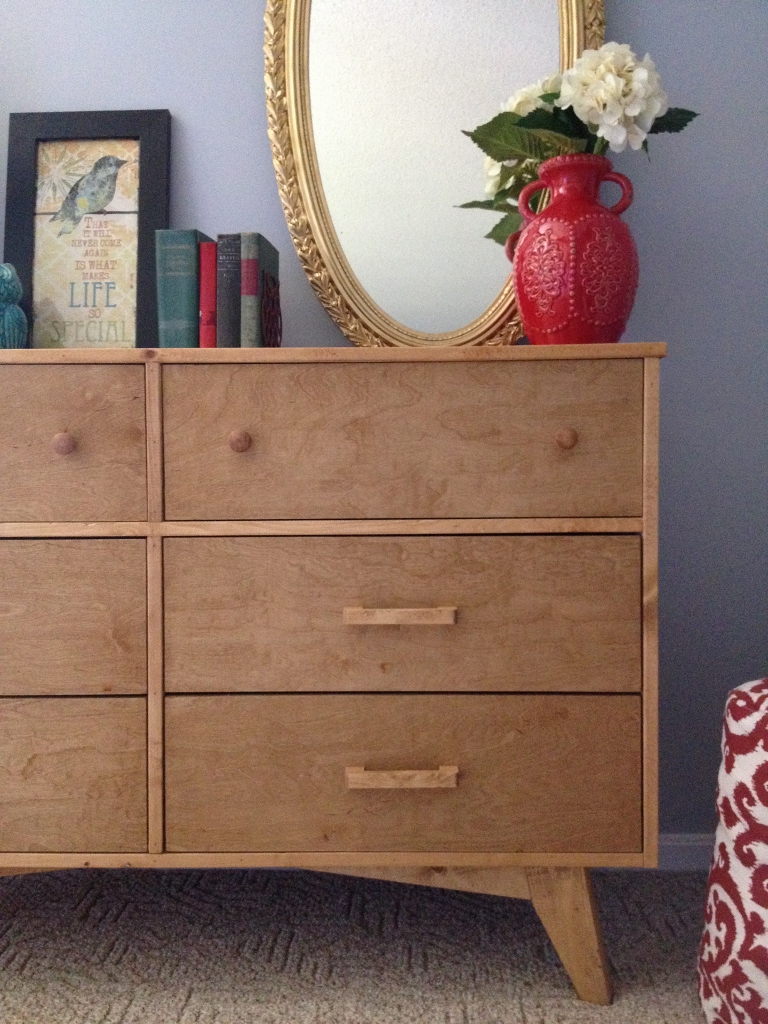
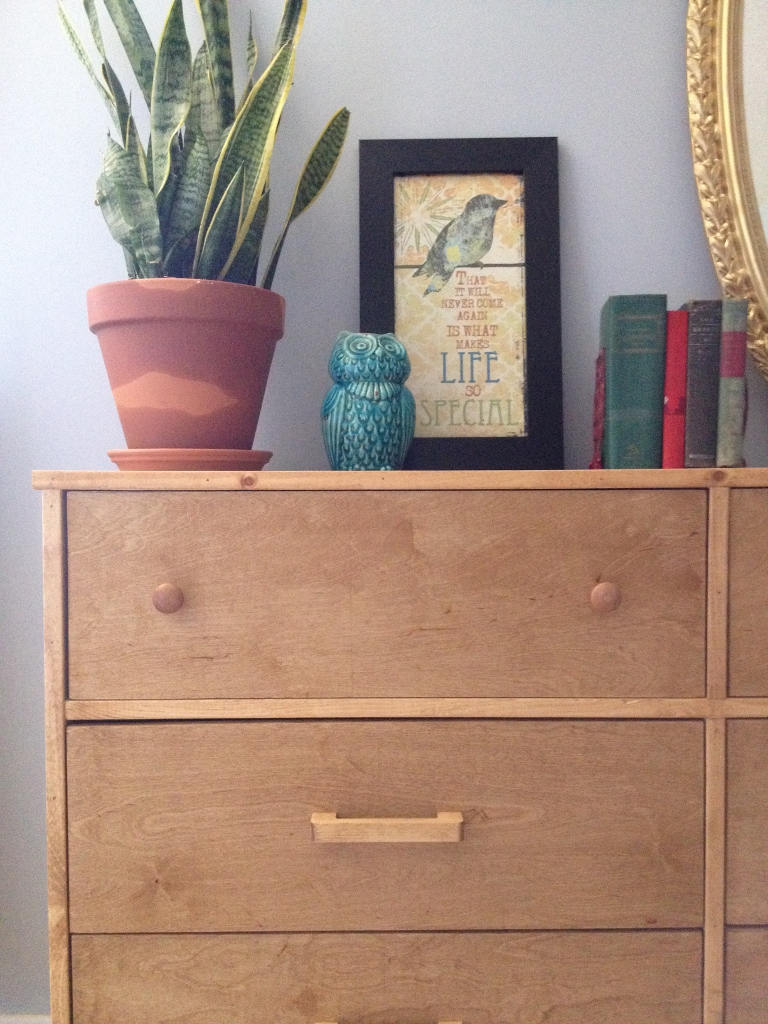
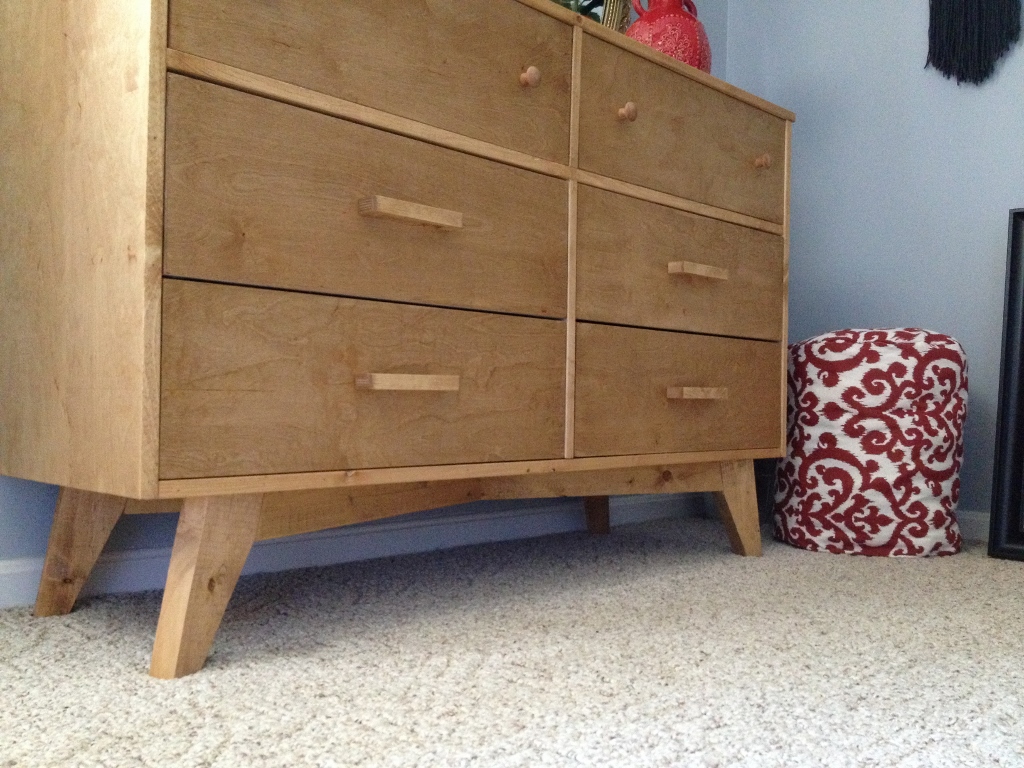
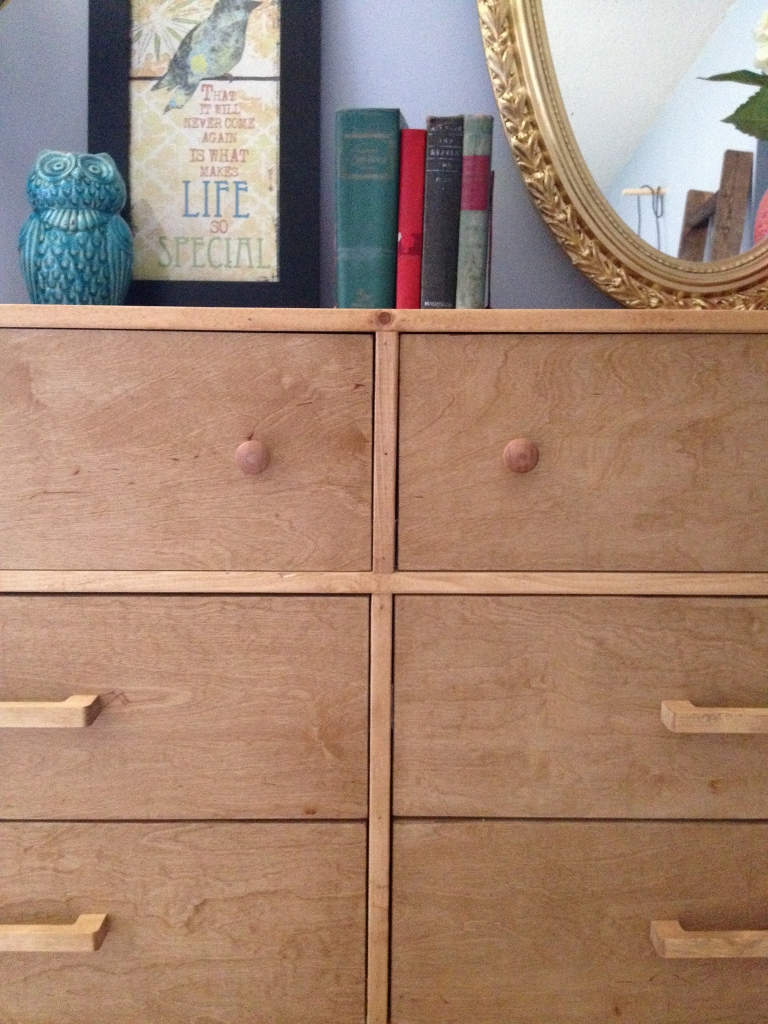
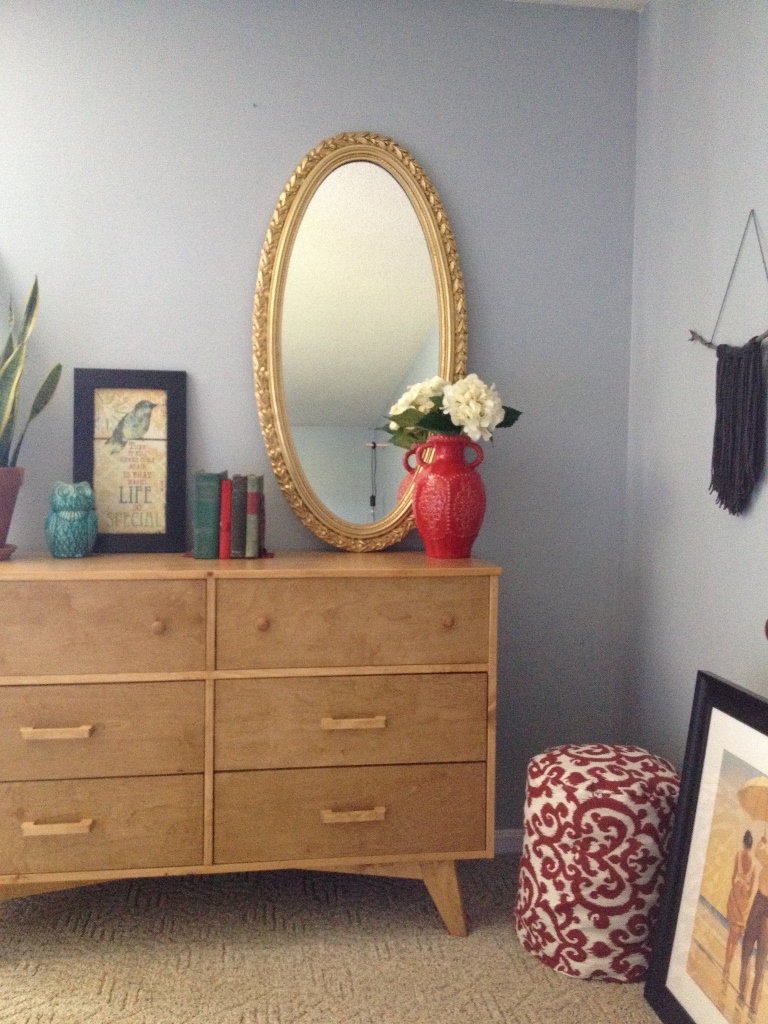
PS, remember my dresser and nightstands?  I love them so much more sitting on wood floor than the old carpet floor.

How we installed real wood floor for $1.50 per square foot

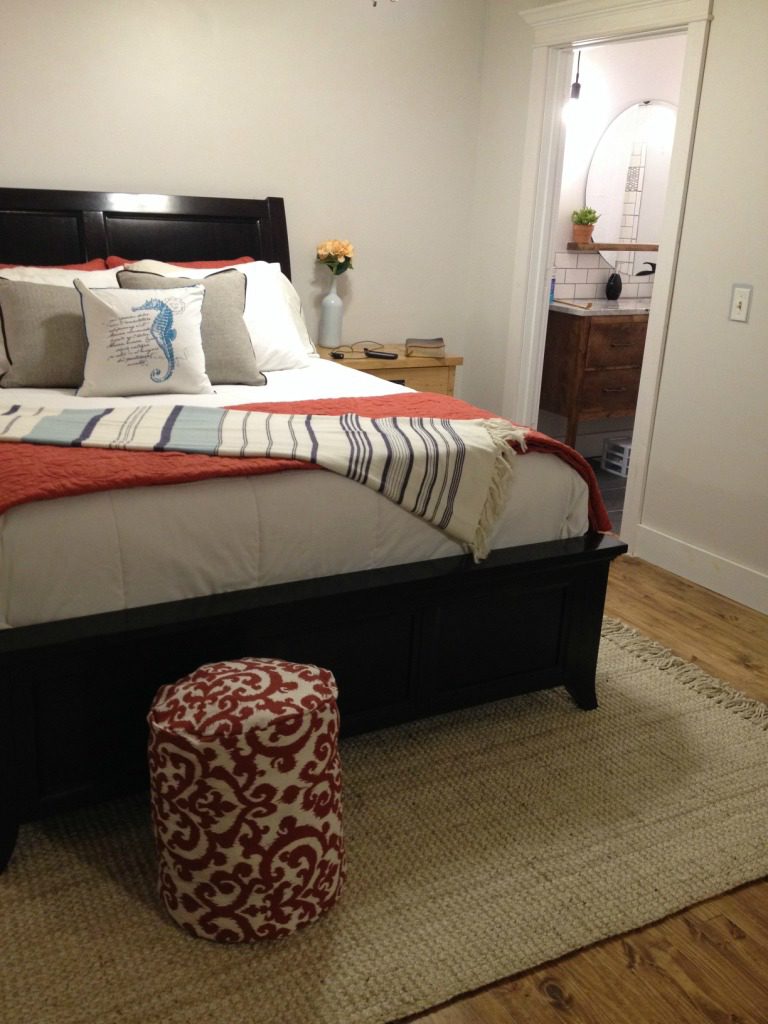
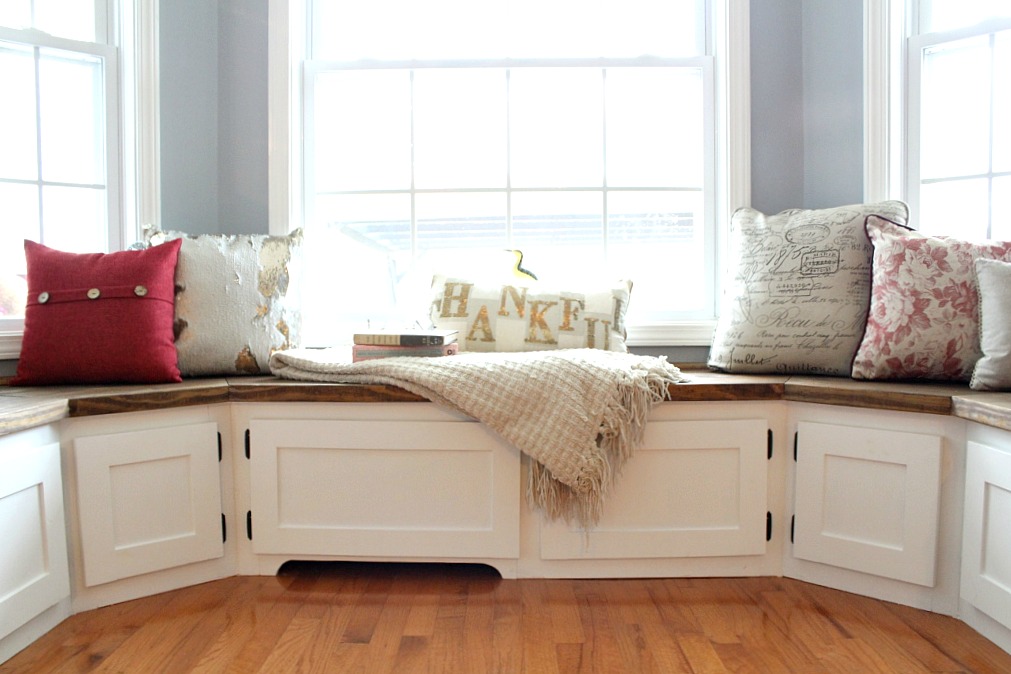
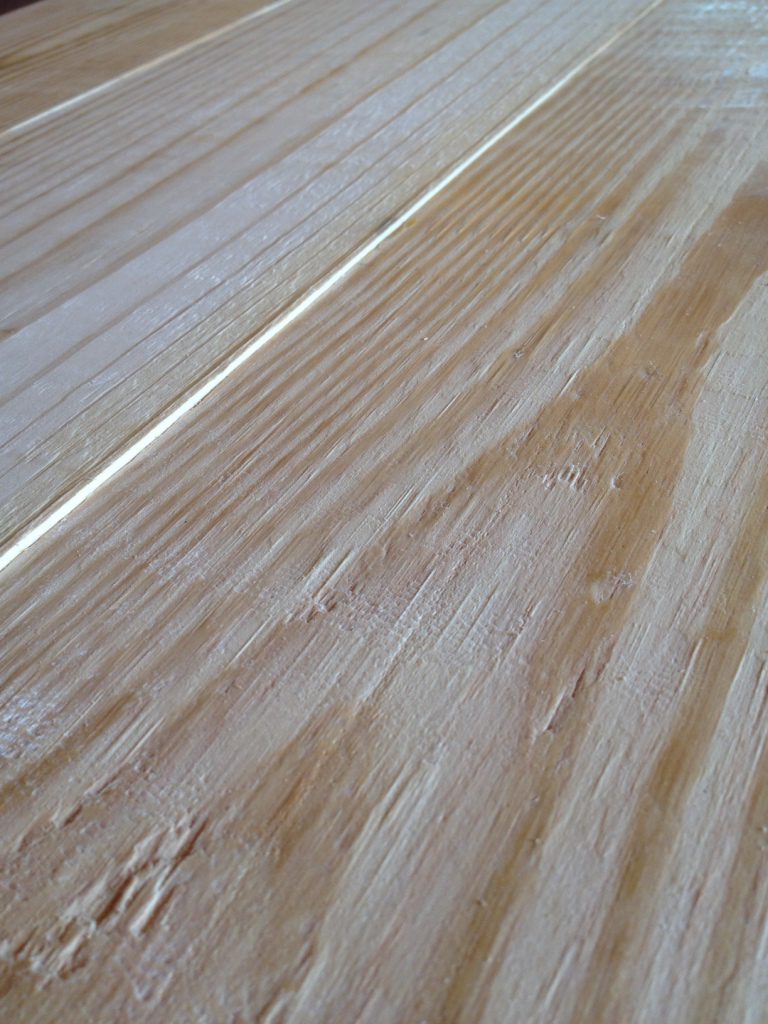
One thing to mention is that you do have to consider that pine is a soft wood.  Oak, hickory, birch, and other common floor types are hardwoods.  So pine won’t be as hard as hardwood flooring, but the thing about pine is that is wears really beautifully.  A dent or a scratch here or there will blend in with the knots and just add more character.  Plus, unless you plan to be dropping big heavy things on it all the time, I don’t see that dents would really be that big of a concern.  The plus side of finishing your own flooring is that if you do get a scratch, gouge or dent, you can just wipe a little stain and poly over it and no one will know.  That gives me so much peace of mind.

How we installed real wood floor for $1.50 per square footHow we installed real wood floor for $1.50 per square foot

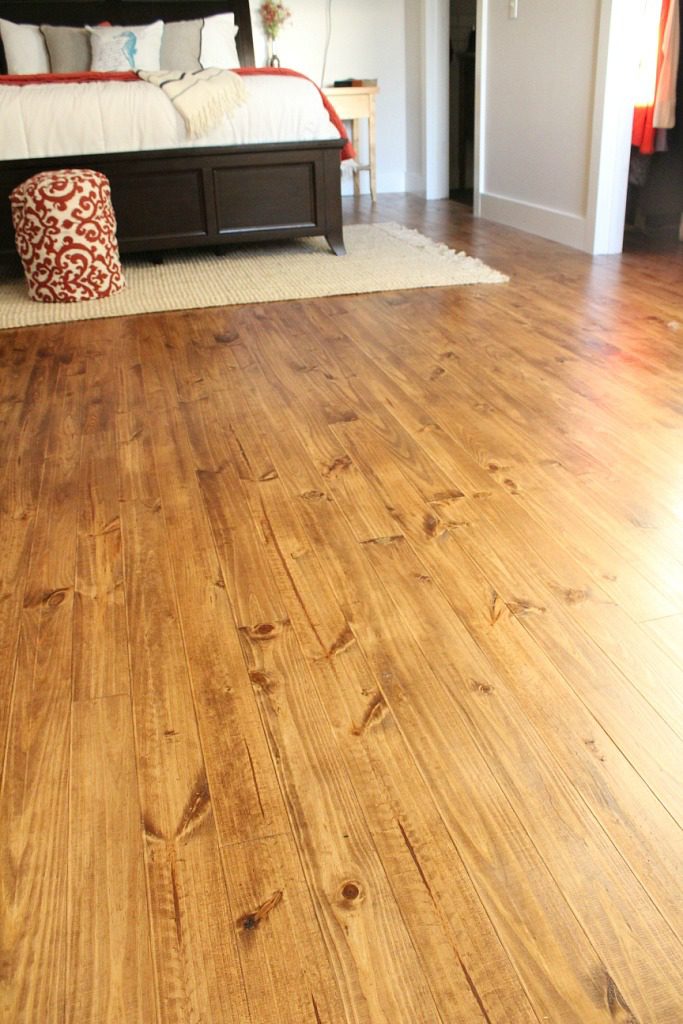
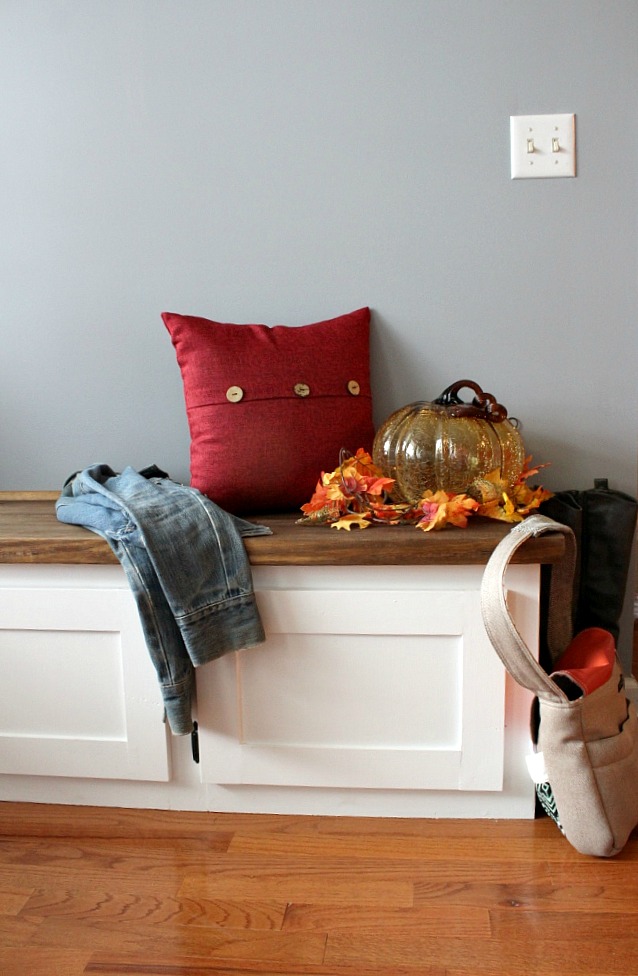
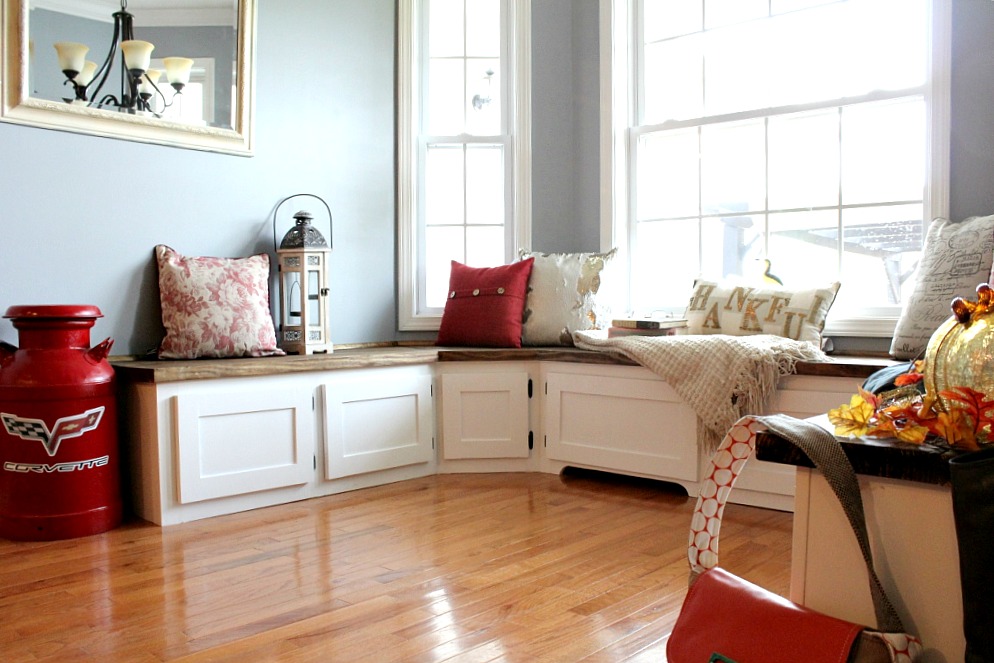
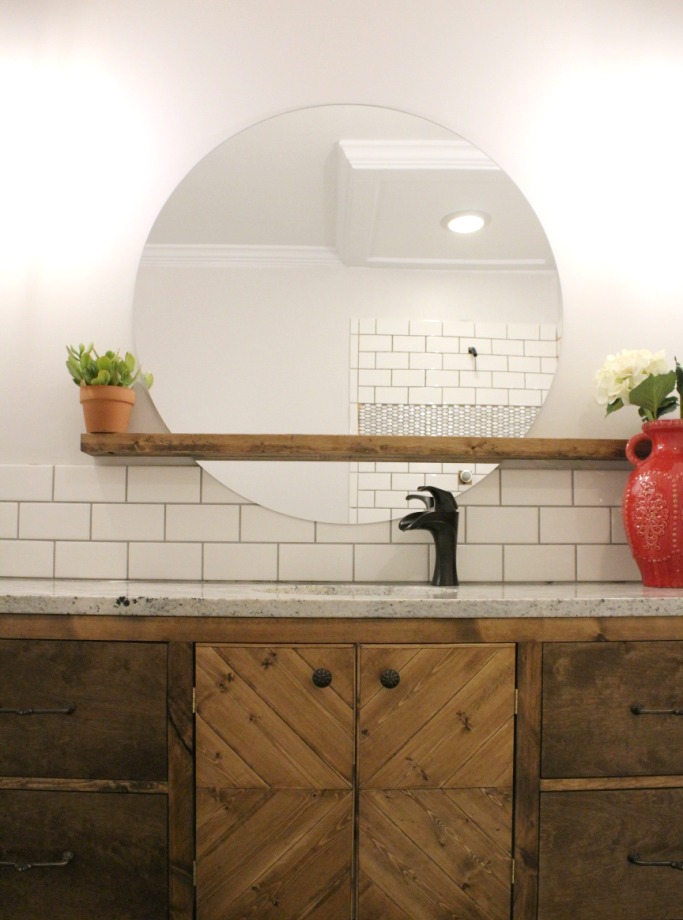
I seriously love this flooring and the wood adds so much warmth to our bedroom.  Can you believe we did it for $1.50/sq ft?!  What do you guys think?  Is this something you would try?

How we installed real wood floor for $1.50 per square foot

I would do this all over again (and I plan to for our other two bedrooms later) and I do not one bit regret putting this in.  It makes me smile every time I walk in here.  My wallet is smiling, too.  So, if you guys are looking for a budget flooring option, you can TOTALLY do this.  It’s a good project to DIY and it’ll obviously save you a TON of money.  Give it a try 🙂

.

Until next time, happy DIYing!

The Master Bathroom Remodel–Final Reveal

October 24, 2016 by Shara, Woodshop Diaries

DIY Wall Art Using a Pet Photo

Demo in the master bathroom started on August 3.  The plan was to have it finished in three weeks. HAHAHAHAHAHAHA.  I’m not an optimist….and of all the things I choose to be optimistic about, this was the most unrealistic outlook we could have possibly had.  Two and a half months later, I’m finally ready to show you the finished bathroom and tell you all the details.  That’s only three times as long as expected….oops.

.

In case you are new and haven’t seen the bathroom progress updates, here are links to all the updates:

.

My Bathroom is Cute, But I Hate It

.

The Point of No Return–Demo

.

The Best Plan is No Plan–Unexpected Bathroom Chaos

.

If You Don’t Laugh, You’ll Cry–Never Ending Remodel

.

This post contains affiliate links to products used during the remodel.  I only link to the products we used for your convenience.  I highly recommend each one.  Please see disclosure policy for more details.

.

Now, let’s take a trip down memory lane and look at the before:

Master Bathroom Remodel Reveal--The Before The Master Bathroom Remodel Reveal--The Before The Master Bathroom Remodel Reveal--The Before

I explained how it was cute, but I hated it here.  In a nutshell, the subfloor was rotten from a previous leak, so whether we liked it or not (and I did not), we were going to have to remodel.

.

We did all the work ourselves–with the help of Dad on occasion–and we budgeted about $3,000 for the entire remodel.  I lost track of the exact numbers after going to the store a MILLION times for more plumbing fittings, but I do know that we ended up slightly under budget.  Not bad for a complete bathroom gut job.

.

Now, here is the after:

Gorgeous Master Bathroom Remodel Reveal

Gorgeous Master Bathroom Remodel Reveal

Gorgeous Master Bathroom Remodel Reveal

We ripped everything out down to the subfloor, then replaced a large section of the subfloor in the bathroom and a small section that extended under the wall into the closet.  The shower and toilet plumbing stayed in the same location, but we moved the vanity plumbing to the other wall.  We removed the wall beside the shower and installed a corner shower pan instead so the space would feel more open.

Gorgeous Master Bathroom Remodel Reveal

Gorgeous Master Bathroom Remodel Reveal

Originally, we had planned to tile the shower with large 12×24 marble look like tiles.  We had already purchased the tiles and everything, but last minute, Danny made me worry we were going to regret using that tile.  I returned the tile and we chose to use white subway tile with these oval accents.  I’m so glad we changed our mind.  Although it took forever to install, I’m really happy with the result and I think they are the perfect fit for the room.  It seems like everyone is using subway tile, and I really wanted to be “different,” but the truth is, they are classic and that’s what I was going for.

.

By the way, the paint color in here is Eider White by Sherwin Williams, and the trim color is Extra White by Sherwin Williams.

Gorgeous Master Bathroom Remodel Reveal

It’s kind of hard to take good pictures in here because there is no natural light, but I’m telling you the difference in here with these new pendant lights vs our one measly 1980s recessed light that was in here before is AMAZING.  These pendant lights are not everyone’s style, I know, but I LOVE THEM.  They are simple, inexpensive, bright, and classic.  Oh and so easy to install.  I found them here and the bulbs are here.  LOVE LOVE LOVE them.

.

And this grey towel and these hand towels are AMAZING, as well.  I love the fringe and they are SUPER soft.

Gorgeous Master Bathroom Remodel Reveal

Gorgeous Master Bathroom Remodel Reveal

Gorgeous Master Bathroom Remodel Reveal

Gorgeous Master Bathroom Remodel Reveal

This cat picture is one of my favorite parts of this bathroom.  Before you call me a crazy cat lady, just hear me out.  A long time ago, I saw a poster on Pinterest of just the top of a black cat’s head coming from the bottom of the poster.  I don’t even like cats, but I thought it was cute.  Then later I saw it again at Hobby Lobby and I still liked it, but was too cheap to spend the money.  Now, at the time, we had two kittens around our house because we didn’t want mice.  Well, we sort of got attached to them (even though I thought I hated cats), and then my favorite, Black Cat, died on my birthday last year.  It was so super sad.

.

Well, after seeing that poster at Hobby Lobby AGAIN shortly after black cat died, I had an idea.  So I took a picture I had of him from my phone and carefully cut it out in Paint on my computer and printed it out.  I had it stuck on a shelf in my office for almost a year.  Then, when I was trying to decide on artwork for the wall in this bathroom, I thought it would look perfect.  Isn’t it cute?  I love things like that that have a little story and mean something more than just a piece of art on the wall.

Gorgeous Master Bathroom Remodel Reveal

Gorgeous Master Bathroom Remodel Reveal

I posted a tutorial on how I made the floating mirror shelf not long ago.  My original plan was to make a round frame for the mirror, but things didn’t go as planned and this actually worked out so much better.  This is a far cry from the tiny little mirror we used to have.

Gorgeous Master Bathroom Remodel Reveal

Gorgeous Master Bathroom Remodel Reveal

Gorgeous Master Bathroom Remodel Reveal

Danny and I work well together….this even goes for sharing a sink.  A lot of couples wouldn’t dare share a bathroom sink, but we try to make it fun…by fun I mean we race to brush our teeth so we can beat the other one to spit.  FUN STUFF.  But, really, when it came time to decide on one sink or two, we both wanted one.  It would be cheaper (we are both cheap), save space on the countertop and in the vanity (which we needed), and it would force us to share.  And let’s face it…sharing is caring, right?  We love each other…a small thing like sharing a sink should be one of those “inconveniences” that strangely brings you closer and makes you laugh.  Plus that’s one less sink to clean…win win.

Gorgeous Master Bathroom Remodel Reveal

Isn’t the little elephant soap dispenser like THE CUTEST THING YOU’VE EVER SEEN?!  I found it on clearance at Kirklands.

Gorgeous Master Bathroom Remodel Reveal

Gorgeous Master Bathroom Remodel Reveal

I bought our faucet MONTHS before we even started demo in here.  I KNEW this was the one I wanted.  LOVE it.  Because our vanity was so shallow, we had to mount the faucet off center.

.

Speaking of the vanity, here is the tutorial on how I built the vanity.  It had to be a custom size to fit the space, but despite it being shallow, it provides much more storage than we had before.

Gorgeous Master Bathroom Remodel Reveal

We installed a new toilet…nothing fancy.  But after it was installed, neither of us wanted to use it first because we had never had a toilet before that had never been used.  Once it was “christened” it couldn’t be “unchristened.” HAHA Gorgeous Master Bathroom Remodel Reveal

We recently started working on our master bedroom (it’s not close to being done yet), and the view from the bedroom into the bathroom now is my favorite.

Gorgeous Master Bathroom Remodel Reveal

My plan is to build French doors here soon….but my to do list is never ending so not sure when I will get around to it.  Right now, we just don’t have a door haha.

Gorgeous Master Bathroom Remodel Reveal

We decided to try a shower curtain first instead of getting a glass enclosure.  We are on a well for water and the water is really hard and we were afraid it would damage the glass if we didn’t clean it constantly.  So far, we like the curtain.  For a corner curtain rod, we used black pipe.  Because we had to mount it so high, we had to buy a 84″ shower curtain instead of a standard 72″ curtain.  Consequently, it’s VERY difficult to find an 84″ decorative curtain and I hadn’t had time to make one.  The curtain we are using is a “fabric curtain/liner” so it’s fine to use by itself I guess.  One day I may make a decorative curtain, but not today haha.

Gorgeous Master Bathroom Remodel Reveal

These curtain rings are seriously awesome and the cheapest ones that I could find.  Highly recommended.

Gorgeous Master Bathroom Remodel Reveal

The showerhead and faucet are beautiful.  We bought the Delta Windemere faucet.  This link is to the trim kit.

.

I’m trying to think if there is anything else in here to tell you about, but I think I’ve covered everything.  I am so glad this project is finished and I would love to hear your feedback in the comments below! And don’t forget to pin for later!

Gorgeous Master Bathroom Remodel Reveal

Until next time, happy DIYing!


If You Give Your Mom Some Built Ins, She’s Going To Want A Table Too–DIY X Base Dining Table

October 19, 2016 by Shara, Woodshop Diaries

DIY X Base Dining Table

We’ve all heard the story of “If you give a mouse a cookie,” right?  One thing leads to another and it’s never as simple as you give the cookie and go on about your business.  Then it needs milk, then you’ve got to read it a story and fluff its pillow and let it draw a picture.  (Side note…who would do any of this with a MOUSE?!  I would die.  I. CAN’T. EVEN.)  So things have played out similarly with my mom’s recent projects….

.

Do you guys remember the bench I made her?

finished bench

Then she wanted built ins.

Mom's built ins

Then she wanted her first bench upholstered.

Upholstered Bench

Well, here comes the latest project in the saga of “mom projects” and I’m thinking there is ANOTHER one coming after this, so that’s fun, right? 😐

.

After the built ins were installed, she wanted a new dining table for the space.  Her old one just didn’t fit that well and she wanted a new style.  I have to say it does hurt me just a little to cover up the view of those gorgeous built ins.

img_0615

But, what good is a house if it’s not functional?  And mom and dad needed a place to eat.  So I suggested a table style that would be a little more “minimal” and wouldn’t block so much of the view.  Basically it’s the same design as my clock table, but with a square top.

.

I used the same plans mentioned in the post here, but used 2x6s instead of 2x4s to make it a little more substantial.  I modified the plans to make the base 28 ½″ tall and about 36″ wide.  Mom needed her top to be 56″ long and 40″ wide.  Here’s the quick how-to : )

.

Note: This post contains affiliate links.  Please see disclosure policy for more details.  If you purchase through these links, I may receive a small commission that allows me to keep this site free for its readers, but I only link to products that I personally use or highly recommend.

.

Tools Used for this Project:

Kreg Jig

Miter Saw

Circular Saw

.

Products Used:

2 ½″ Pocket Hole Screws

Pocket Hole Plugs

Sand paper

Glue

.

Step 1: Glue up the table top

You can check out my post here about how to build a table top.  For this top, I used two 2x12s and two 2x10s to make the total width of the top about 40″.  I glued and clamped the boards while I worked on the base.

DIY X Base Dining Table

Step 2: Assemble the main X

If you check out the plans I mention in this post, you know that you have to make a “main X” first.  This is where I modify the plans.  Unless you want to do all the math, this is where you just trial and error.  As much as I love math, I still prefer the trial and error method.

.

This table couldn’t be wider than the table top and needed to be about 28 ½″ tall so the total table height with the top would be about 30″.  So I played with the angles and figured out that 45 degree angles worked great to get me the size I wanted.  So I cut one long piece of 2×6 with my miter saw at a 45 degree angle and determined how long the piece needed to be to make it stand 28 ½″ tall.  It’s easy to lay the piece out on a table top with the 45 angle against the wall.  Then measure down from the wall at 90 degrees and mark where that intersects the 2×6 at 28 ½″.

DIY X Base Dining Table

Then I cut two pieces like the picture shows with one regular 90 degree end and one 45 degree.  I could have taken the length of the long board, subtract 5 ½″, then divided by two to get the lengths these pieces should be.  But again, trial and error works, too.

.

Once I had my cuts made, I used my Kreg Jig and screws, to attach the two small pieces to the large piece.

DIY X Base Dining Table

DIY X Base Dining Table

Step 3: Assemble the Side Xs

Once the main X is assembled, I needed to make two identical “side Xs.”  In a nutshell, I need to make two pieces that when put together are the EXACT same size as the main X.  See this picture?

DIY X Base Dining Table

Those two pieces on the top are the “side Xs.”  When I lined them up on top of the main X, they are exactly the same.  To do this, I simply cut two pieces EXACTLY like the two small pieces from step 2.  Identical lengths and angles. I laid them on top of the main X small pieces so they matched up.  Then I cut a piece of 2×6 the same length as the long piece from the main X and cut it at a 45 degree angle IN THE CENTER.  (See picture above)  Once I got everything fitted together, I used my Kreg Jig and screws once again to attach the boards like the picture above.

Step 4:  Assemble the base.

Once all the pieces were made, I needed to attach them together.  I used my Kreg Jig and screws again to drill pocket holes in the sides of the “side Xs” and attached them to the main X like the picture.  I make sure to do this on a flat level surface so the table doesn’t wobble when it is assembled.

DIY X Base Dining Table img_8466

Step 5: Finish and attach top

Once I was done with the base, the table glue was dry.  I trimmed the top to size with my circular saw and sanded it really good.  Then I stained both the top and the base with Minwax Provincial.  I apologize, I don’t have good pictures here (but I do in this post), but I drilled pocket holes with my Kreg Jig in the top of each leg and attached them to the underside of the top with screws.

.

I used Kreg Plugs to plug the pocket holes…you can see them here:

DIY X Base Dining Table

I made the table so most of the pocket holes were on the back side of the table.  You really don’t notice them unless you are looking for them.  For a more disguised look, I recommend puttying around them and sanding. Since this was a “distressed” look, mom told me not to bother with the putty.

.

After the plugs were in, I wiped over them with the stain rag, then dry brushed the base with white paint.  Mom took it home and polyed the top with Minwax Polycrylic.

.

And here it is in its new home.

DIY X Base Dining Table

I recommended a different rug to mom, but she just loves this one…whatever makes her happy haha.  I love that the table doesn’t block the entire view of the built ins, but still fits well in the space.

DIY X Base Dining Table

DIY X Base Dining Table

DIY X Base Dining Table

Now, obviously, they have some chairs to go along with the table, but you know how this goes….I have to get the picture of the table only first 😉  Here’s what it looks like in its normal state.

DIY X Base Dining Table

DIY X Base Dining Table

DIY X Base Dining Table

DIY X Base Dining Table

Gorgeous, right?  I really love this X base style.  It’s unexpected and a great conversation starter.  I think it really fits this space well and allows room for people (*cough* me at these family dinners) to move around the table without knocking their knee on a table leg haha.

DIY X Base Dining Table

So what do you guys think about it?  Besides that fact she totally needs a new rug under this new table??  Maybe we could start a petition and convince her to switch it out? HAHA just kidding…to each his own and she likes it, so that’s all that matters.  BUT, Christmas is coming up and I think I see a rug under the tree this year with her name on it 😉

.

Let me know what you think (about the table, not the rug) in the comments below and be sure to pin for later!

DIY X Base Dining Table

Until next time, happy building!


Let’s Talk About Flooring–The Master Bedroom Chaos

October 13, 2016 by Shara, Woodshop Diaries

Have you noticed that I’ve been MIA the last several days?  (If you haven’t noticed, just humor me and say yes.)  Yeah, about that.  We decided to replace the carpet in our master bedroom with new pine flooring right after we finished our bathroom remodel and I’ve been a little preoccupied.  But, before I tell you about all that, first, this was our bedroom before:

The Story of our Bedroom Flooring Chaos

If you remember, we started remodeling our master bathroom about two and a half months ago.  Now, while the bathroom project seemed to drag on fooooooorevvvvvvveeeeeeeer (ps final reveal post coming soon), once we moved the bed out of the bedroom to replace the floor, it was a whirlwind to hurry and get it done.  Because, you know, sleeping on the couch every night gets old.

.

So anyway, why did we have to replace the carpet so quick after the bathroom remodel?  Well, we didn’t really HAVE to.  But we did because:

.

1. We wanted to replace it since we moved in two years ago.  (It appeared to be pretty old and had pet stains–if you know what I mean…)

2. We (I) got paint all over it when we repainted the bedroom several weeks ago.

3. We (Danny) got PVC crumbs all in it when we cut the pipes for the plumbing for the bathroom.

4. It was covered in drywall and concrete board dust from the bathroom remodel that I couldn’t get up with the vacuum.

5. It was just generally disgusting and needed to be replaced.

.

So just when our house was starting to get back to normal and the bathroom remodel was pretty much done, we had to move all our furniture out of the bedroom to prepare for the new floor.

The Story of our Bedroom Flooring Chaos

We put the furniture in every nook and cranny in the rest of the house that we could find because….

.

Then we got a load of lumber for the bedroom floor.

The Story of our Bedroom Flooring Chaos

And this flooring has to sit inside for several days to acclimate.  So in it goes.

The Story of our Bedroom Flooring Chaos

The Story of our Bedroom Flooring ChaosThe Story of our Bedroom Flooring Chaos

At this point, there isn’t a single room in the entire house that is in its “normal” state.  So I said all that to say, THAT is why I have been MIA the last few days because we have been going non stop to get our floor done and our house back in order.

.

So now to the fun stuff…We ripped up the carpet and started pulling up the particle board one night after work.

The Story of our Bedroom Flooring Chaos

The Story of our Bedroom Flooring Chaos

The next night, once the particle board was all up, we laid down ½″ plywood.

The Story of our Bedroom Flooring Chaos

It already looks better : )

.

Side note: at this point we are both already pooped.  You guys, I’m really slacking lately.

.

The next day, Dad brought over the floor stapler and we got to laying the floor.  I brought my saw in and cut pieces to fit.  There was dust EVERYWHERE. I don’t have a lot of pictures of the process because I swear it was non stop working to get this thing knocked out.  Luckily we got most of the floor down that night and Danny and I finished it the next day.

The Story of our Bedroom Flooring Chaos

The Story of our Bedroom Flooring Chaos

Because we are paranoid, we cut a trap door out of the closet floor (more on that in a separate post later) so we could easily check our plumbing in the new bathroom for leaks.  It’s a small door so Danny had to make sure he could fit through it.  Actually, he just got mad that I was making “his crawl space” dirty with my jig sawing so he had to get in there and clean it out.  HAHAHA silly Danny.

The Story of our Bedroom Flooring Chaos

Once the floor was laid, I sanded it smooth, then we spent a long time cleaning up all the sawdust.  It think I’d rather have ten splinters in my foot than to have to clean up sawdust again haha.  After all the dust was cleaned up, I stained the floor and polyed it.  I’m going to have a separate post on all the floor details shortly, including all the products that I used on them, so stay tuned.

The Story of our Bedroom Flooring Chaos

While the stain cured for a few days, I worked on the trim (which is still not finished by the way) and touched up some paint where we (Danny) scuffed the wall with the stapler.  Wednesday was the day we would finally be able to move the bed back in and we were counting down the days!  We had been alternating between sleeping in the guest bed (which no one ever uses, so it’s hard as a rock) and sleeping on the couch.  So basically I was running on coffee and no sleep for several days. And I was grumpy…

.

But when we moved the bed and other furniture in, it finally seemed worth all the hassle.

The Story of our Bedroom Flooring Chaos

A few of the baseboards still need paint touch ups and the door trim needs to be painted, but at least the floor is DONE.  And the room looks so much bigger!  And feels so much cleaner! What do you guys think?

.

I said all this to say 1. this is why I’ve been MIA for a week and a half and 2. stay tuned because I will have a post with all the floor details coming soon and you won’t believe how much money we saved doing things the way we did.  Eventually, I will tell you all about our bedroom remodel too, but not quite yet.

.

Stay tuned because I am so close to showing you the final bathroom reveal.  Here’s a peek.

The Story of our Bedroom Flooring Chaos

I plan on being back in action with some fun posts and projects next week after I get a few good nights sleep and have the weekend to catch up on all my building projects so stick around!

.

Thanks for bearing with me : ) Until next time, happy DIYing!


Super Easy Fall Pumpkin Banner

October 3, 2016 by Shara, Woodshop Diaries

I have a super easy fall craft for you guys today!  I know…it’s the first of October, and I should be cranking out Christmas stuff already to keep up with everyone else.  But I’m old school, so we are keeping with fall at LEAST until it’s time to start thawing out the Thanksgiving turkey.

.

So, fall.  The most wonderful time of the year.  When the air starts to smell like tobacco barns and the mornings are just the right amount of crisp coolness that your nose starts to run.  When you start seeing massive boxes full of overpriced pumpkins at the grocery store and you get the urge to bake everything imaginable.  It’s such an odd conglomeration of feelings that you get this time of the year, you know?

  .

But the worst feeling I get when I know fall is coming is the dread of decorating.  It’s not that I don’t love decorating for fall.  I really really want to, it’s that I have no idea HOW to decorate for fall.  The struggle is real.

.

That’s where this project came from. I’ve been struggling with fall decorating this year.  Like stressing out big time.  I mean, granted, my decorations are never really magazine worthy by any means, but my mantle just felt really boring this year and I felt like it was missing something.  I’ve been totally uninspired and I couldn’t seem to get my house to feel like fall and I just didn’t have time for a lot of fall décor projects to get it there.

.

So when I saw That’s My Letter’s Pumpkin Project, I was inspired to “copy” her pumpkin idea, but do something a little different for my mantle.   This was such a quick and easy project that helped add some life to my fireplace (and made me feel like my decorating might be finally finished!!!).  Here’s how I did it:

.

I found a clip art pumpkin from Google (what did we ever do without Google?), printed it, and cut it out.

Easy Fall Pumpkin Banner--Woodshop Diaries

Then, I took some scrap ¼″ plywood I had hanging out in the shop and traced the pumpkin onto it.  For some of these I used scrap luan (the pinkish brown stuff) and some I used birch plywood.  I was going to paint them, so I didn’t care if they were all the same, I just wanted to get rid of the scraps : )  After I traced them all out, I used my jig saw and carefully cut them out.  I used seven pumpkins for my banner.

Easy Fall Pumpkin Banner--Woodshop Diaries

Then, I clamped them all together and drilled two small holes in them so I could string them together.

Easy Fall Pumpkin Banner--Woodshop Diaries

After I gave them a good sanding, I laid them out and painted them.  First, I just painted them solid colors, but that still seemed too plain once I hung them up.

img_8326

So I took them down and painted them with some pattern.  I know the paint job looks bad…I was in a hurry and I wasn’t striving for perfection here.

Super Easy Fall Pumpkin Banner--Woodshop Diaries

Once I was finished painting, I strung them together with jute twine and tied a loop in each end of the twine.  I nailed a small nail into the mantle and put the loop around the nail.  And that was it!

Easy Fall Pumpkin Banner--Woodshop Diaries

Easy Fall Pumpkin Banner--Woodshop Diaries

Easy Fall Pumpkin Banner--Woodshop Diaries

Easy Fall Pumpkin Banner--Woodshop DiariesEasy Fall Pumpkin Banner--Woodshop Diaries

Easy Fall Pumpkin Banner--Woodshop Diaries

Easy Fall Pumpkin Banner--Woodshop Diaries

So there it is…the easiest craft of the season ; )  What do you think?  What other types of patterns would you have done?  Are you guys working on any fun fall crafts still, or have you already moved on to the next season?  I’m hoping I’m not the only one still enjoying the leaves changing and the tobacco barns.

.

If you are still with me enjoying the fall season and pumpkin spice lattes (I guess that part is optional), don’t forget to pin for later 🙂

Easy Fall Pumpkin Banner--Woodshop Diaries

Until next time, happy fall 🙂


Hurry Up and Fail–The Bathroom Cabinet Story

September 26, 2016 by Shara, Woodshop Diaries

I had an #epicfail the other day. And since you all chose to follow my blog, I assume you’re in it for better or for worse….the good the bad and the ugly, right?  So I can tell you about all the awesome things that turned out even better than I expected.  And I can also tell you about all the things that turned out so bad I just want to set them on fire.

.

  So, let me share with you the story of my bathroom cabinet idea that was a total flop.

.

As many of you know, we remodeled our master bathroom over the last month or so.  Truth is, functionally, it’s finished (HALLELUJAH).  But, I haven’t posted a “final reveal” yet because a few details are still out there to be decided on.  One of those details is what should go above the toilet.  (Another is a shower curtain, another is a bath rug, anther is hand towels, and a soap dispenser….you know…ALL THOSE LITTLE DETAILS.)

.

Let’s just focus on the above the toilet issue.  And, while EVERYONE has either a cabinet or floating shelves above their toilet, I wanted something “different.”  While scrolling through Pinterest the other day, I had an idea to use a mid century style sliding door cabinet above the toilet.  It would be perfect! It would house the towels, hide the toilet paper, and leave space above it for a cute print, picture, or plant.  It would be the most glorious thing I’ve ever built in my life!

..

So I plugged in the shop radio and got to work.  I sang and I danced and sawed my little heart out.  This was going to be awesome and fun and the coolest part of the whole bathroom!

.

So I brought it inside and hung it up and quickly set a few things on it to make it look like it’s been here this whole time.  And…I hated it.

The story of my failed bathroom cabinet--Woodshop Diaries

What happened?  I had this all planned out.  This was going to look awesome.  I was going to be able to check it off the list.  I had a mental deadline.  I needed to show everyone the finished room.  If this cabinet didn’t work out, I didn’t have a back up plan!

.

But, I couldn’t figure out what was wrong.  It looked strange above the toilet.  It should have been shorter.  Danny thought it should hang a little higher.  I needed to fill in the pocket holes so you didn’t see them.  Maybe the door should have been slightly wider.  But, I didn’t trash it just yet.  I still had hope!

.

Maybe a little paint and stain would fix it.

The story of my failed bathroom cabinet--Woodshop Diaries

Nope, still hated it.  AHH! I hate painting and I just spent my evening painting and staining this thing.  What a waste!  It looked out of place.  It looked kind of janky.  It looked like a rushed, not very well planned out DIY job.  (Which it kind of was…)  And I really wish I hadn’t painted it white.

.

I texted it to several friends and asked their opinion.  They assured me it wasn’t really that bad, but maybe I could tweak this or tweak that to make it better.  But, the more I looked at it, the more I hated it.

.

Now, truth be told, I hate just about everything I ever make before I love it.  I have learned, it truly is just part of the process.  But this hate was different.  Sometimes I hate something but I know it will grow on me and then it’ll be my favorite thing ever.  And sometimes I know the feeling won’t change.

The story of my failed bathroom cabinet--Woodshop Diaries

So I took down the awful cabinet and patched the drywall and touched up the paint.  And I took a step back and realized I’ve just got to wait.  I’ve got to wait to “reveal” this bathroom because it’s STILL not done.  I’ve got to wait to figure out the perfect thing to put here that gives me all the warm fuzzies.  I’ve got to let it go and quit thinking so hard about it because I will never find it if I’m stressing about it.  One thing I do not have is patience.  But one thing I hate the most is being rushed.  Nothing good ever comes from a rush job.  So for now, I’m chilling.  I may not post a bathroom reveal for another year.  But whatever I do, I didn’t spend this much time and money on this bathroom to not LOVE (I mean absolutely LOVE) every little thing I put in here.  Well, besides maybe a trash can….who loves a trash can?

.

So my cabinet idea was a fail.  It’s currently sitting in the floor in my bedroom while I decide whether to repaint and put somewhere else, salvage the wood, or just set the thing on fire.  I’m open to other suggestions, if you guys want to chime in 😉  (In reality, I really don’t hate the cabinet itself as much as I just hated it in this space.  Maybe it’ll find another home…if so, I’ll share it with you :))

.

Not all my projects turn out to be what I had planned.  And although, I don’t have plans for a super cool project for you to try in this post, I hope it is encouraging for you to know that we all fail sometimes.  My “design” ideas are usually not the best.  I am just winging it most of the time.  So don’t be scared to try something new.  Sometimes it’s a smashing success, and sometimes it’s a failure.  But it’s always better than not trying.

.

Said all that to say get out there and make something–even if it’s a failure, you can still have a bonfire 😉 It is fall, after all!  So if you guys need me, I’ll be drinking pumpkin spice lattes and waiting for inspiration to strike.  Maybe this time it’ll work out better.  Until next time, happy DIYing 🙂

How to Upholster a Bench

September 21, 2016 by Shara, Woodshop Diaries

I built this dining bench I posted a couple weeks ago…but that was just the start of the project.  Now I’m going to show you how to upholster a bench so we can finish this up 😉

Simple Dining Table Bench with turned legs unfinished pine

My mom needed a bench built ASAP because our family was having our annual “Thanksgiving in August” get together (don’t ask) and she didn’t have anywhere for people to sit.  So I built her this easy bench with turned legs, but didn’t have time to finish it before the meal.

.

When we have family dinners at Mom and Dad’s house, the men sit in the dining room and the women sit in the kitchen breakfast area (which has new built ins…have you seen them yet?!).  This bench was going in the dining room.  Personally, I think the men need to toughen up, but Mom thinks they should have a padded seat.

.

So as good as the bench would have looked with a pretty white base and a dark stained top, I upholstered the seat so the men can have a cushy seat haha.

.

It’s really easy to upholster a bench like this.  I’ll show you how.

.

Note: This post contains affiliate links for your convenience.  See disclosure policy for details.  

.

First, you will need:

1″ foam

Quilt Batting

Fabric

Hammer and upholstery tacks OR staple gun

Scissors

Materials needed to upholster a simple bench

1. Remove the Top of the Bench

First, I removed the top from the bench.  I had screwed the top on with pocket hole screws using my Kreg Jig on the underside, so I simply unscrewed them to remove the top.  When I made the bench, I didn’t attach the two top pieces together.  Before I upholstered it, I used pocket holes and screws to attach the two pieces together.  I could have also glued them, but didn’t want to wait for the glue to dry, so pocket hole screws worked fine.

.

2. Cut the foam to size

I unrolled the 1″ foam and laid it on the top of the wooden seat.  Using the scissors, I cut the foam with enough overhang on each side that it would wrap around the edge of the seat.  You want to wrap the foam around the edges for a softer, rounder look.

 Cut foam to size to fit over bench seat

I used the extra strip of foam for additional cushion.  I placed the thin “leftover” piece in the middle of the seat, then put the larger piece on top.  This gives the seat more cushion, but also gives it a better shape than if you only had one layer of foam. (PS Yes, I’m better with a saw than scissors…it looks like a 3 year old cut this.  Whatever, it still works.)

Foam cut to fit onto upholstered bench top

3. Add the batting to Upholster Bench

The batting helps to hold the foam in place and gives a little shape and cushion to the foam before you add the fabric.  I laid out the batting on the floor.  Because I had so much, I folded it in half, so it would give a double layer.  Then I placed the foam and the top upside down on the batting like shown.

Layer materials for upholstered bench seat

Then, I placed the wooden seat on top.

Materials layered showing how to upholster a bench

To attach the batting, I folded it over the sides and tacked it onto the bottom.  I started out using a hammer and upholstery tacks.  I’ve upholstered several chairs in the past and that’s how I did it…before I got a staple gun.  After several tacks, I realized things would go faster with my staple gun (DUH), so I used it a little later.  You can do either.

.

Start in the middle of one side and work your way around, pulling the batting tight and making sure the foam wraps around the side.  Don’t pull the batting TOO tight…it will rip.  If you have some lumps, it’s okay.

Tack batting over edge of upholstered bench seat

Batting tacked in place showing how to upholster a bench seat

Batting tacked over sides of upholstered bench seat

Once it was all tacked on, I trimmed off the excess.

Batting tacked around edges of DIY upholstered wooden bench seat

4. Add the fabric to Upholstered Bench

Now, it starts to look more like a bench top.  Mom wanted to use a drop cloth for her fabric because 1.) it’s cheap 2.) it matched almost exactly to the fabric on the seats of her new dining chairs.  I added the fabric exactly how I added the batting, just pulled it a lot tighter.  I laid it out on the floor and set the top on it upside down.

Lay out fabric to wrap around wooden bench seat

I apologize for the lack of pictures at this point, but it’s literally the same as the batting.  I pulled the fabric over the edges and tacked them onto the bottom.  I pulled the fabric very tight when I tacked it.  This helps remove the lumps from the foam and shapes the seat better.  You will use A LOT more tacks on the fabric than on the batting.  I used my staple gun at this point and pulled everything tight and stapled it until all the lumps were gone.  I used A LOT of staples.  When I was done, I trimmed the excess.

.

Helpful hint: there are lots of ways to handle the corners.  For mine, I just pulled tight and folded them over trying to have as few wrinkles as possible.  Just play with it until you get it the way you want it then staple the crap out of it.  Or google fancy ways to fold the corners.  Totally up to you.

5. Attach the top back onto bench

Once it was finished, I used pocket holes and pocket hole screws to reattach the top in several places just like I had done when I built it.  OR, you could use L brackets on the underside to attach the top to the base of the bench if you didn’t want to use pocket holes.  You could add some decorative tacks around the edges, but Mom’s dining chairs didn’t have any decorative tacks, so we didn’t add any to the bench.

Finished upholstered bench seat

Now, it was time to stage for pictures!  Because what’s more realistic than a random bench in the middle of my back yard? HA!

Simple Upholstered Bench painted white with turned legs

Close up of Upholstered dining bench with turned legs right corner

Close up of upholstered dining bench corners

Upholster a bench seat simple design with turned legs and white base

So what do you think?  Upholstering is really fun.  It’s probably my second favorite thing after woodworking.  If you haven’t given it a try yet, learning to upholster a bench is a really good project to start on.  So what are you waiting for?  Get to it! Oh and just in case anyone is wondering, the seat sits REALLY good…very cushy and soft.  I tried it out.  All the men in the family can thank me 😉

Get some cush(ion) under your tush in 5 easy steps! This DIY upholstered bench tutorial will show you how!

Until next time, happy upholstering!! 😉

Shara Woodshop Diaries Sign Off

When Momma Ain’t Happy…Just Make Her Some Built Ins

September 19, 2016 by Shara, Woodshop Diaries

I’ve learned a few things in my short time as an adult.  One of those things is that the saying “when Momma ain’t happy, ain’t nobody happy” is 135.74% true.  So when Momma wants built ins, you make her some built ins.

.

My Mom has been going through her house (against Dad’s will) and repainting and rearranging and buying new furniture and all that stuff.  It really looks a ton better.  Once she got her kitchen painted, she wanted me to make her some built ins in her breakfast nook.  Totally cool.  Except for I was about to start working on my bathroom remodel.  I figured out real quick that that wasn’t going to work out very well since Momma wanted her benches….like now.

.

So I took some time off the bathroom (it’s still not done by the way) and finished her built ins this weekend.  Now she’s happy (and so am I 😉 ).

.

I could not possibly give you a detailed plan on how to build built ins because it’s a totally custom project based on your measurements, but I will give you a overview.  And lots and lots of pretty pictures 🙂

.

This was her space before.

before the built ins

I made some detailed measurements and made the built ins in several sections.  First I started making the corners.  There are lots of ways to make the corner pieces, but I made them this way because it was easy to attach the side and back pieces.

.

I made two pieces like this based on the exact measurements of the corners.  One of her corners was ½″ longer than the other.  Always measure everything when doing stuff like this because no house is perfect and the measurements are NEVER exactly the same.  I used my (affiliate link) Kreg Jig to attach everything to make the cabinets.

IMG_7900IMG_7878

These two pieces fit perfect in each corner and allowed me to make the other cabinets straight without any weird angles.

.

I made the side cabinets and attached them to the corners.  I left the back cabinets detached until I could get them set in place at mom’s house and see how they fit.  Here’s a picture of my cat chilling out in one of the cabinets.  I’m sure you all totally wanted to see that, right?  He’s the best cat ever.  And I don’t even like cats that much.

img_7932

Sorry, I just had to throw the cat picture in there.  Moving on…I laid the cabinets out in my shop before we took them to my parent’s house.

img_7991

I added face frames to the corners and side cabinets before we took them to mom and dad’s, but I didn’t add the back face frames until I made sure everything was going to fit.  The corner face frames had to be beveled to fit the weird angle.

img_7993

img_7992

Once they were fitted in place in my parent’s kitchen, we shimmed everything up and I attached the back face frames.  The piece on the back left is where the air register was, so the bottom of the face frame is left open for air to come out.  I added a decorative piece later that you will see.

img_8214

Mom painted the cabinets and the doors while I got the bench tops ready at home.  You can find a detailed post about how to make the doors here.

.

I glued 2x10s together for the tops and stained them.  I cut the tops to size this weekend and added quarter round on the backs for trim.  Then I installed the doors.

img_8224

It was blazing hot outside and I was pooped, so I left them like this until I could come back the next day and fancy them up to take pictures.

installed

Now, you guys know that these final pictures are staged, right?  I came over and rummaged through all mom’s stuff and found some cute stuff to “fancy them up” with.  I always use the same stuff over and over to stage my stuff with.  It was weird having to look through mom’s stuff instead.  But, if I say so myself, I think they turned out really good!

.

What do you think?

You won't believe the difference these DIY Built Ins had on this breakfast kitchen nook!

You won't believe the difference these DIY Built Ins had on this breakfast kitchen nook!

You won't believe the difference these DIY Built Ins had on this breakfast kitchen nook!

You won't believe the difference these DIY Built Ins had on this breakfast kitchen nook!

You won't believe the difference these DIY Built Ins had on this breakfast kitchen nook!

You won't believe the difference these DIY Built Ins had on this breakfast kitchen nook!

You won't believe the difference these DIY Built Ins had on this breakfast kitchen nook!

This is Bubba James–the baby of the family.

You won't believe the difference these DIY Built Ins had on this breakfast kitchen nook!

You won't believe the difference these DIY Built Ins had on this breakfast kitchen nook!

You won't believe the difference these DIY Built Ins had on this breakfast kitchen nook!

You won't believe the difference these DIY Built Ins had on this breakfast kitchen nook!

You won't believe the difference these DIY Built Ins had on this breakfast kitchen nook!

You won't believe the difference these DIY Built Ins had on this breakfast kitchen nook!

You won't believe the difference these DIY Built Ins had on this breakfast kitchen nook!

You won't believe the difference these DIY Built Ins had on this breakfast kitchen nook!

Now, I know, I know.  Some of you will say, “Yeah, but what about the table? Where are they going to eat?!”   It’s cool, everything has been pre planned and thought out.  I’ll be making mom a new table for this space so it will still function as an eating area.  But for right now, we can pretend this whole space is designated to sitting and reading and snuggling with a blanket and a million pillows, okay?  Because that’s realistic, right?

.

So, seriously, what do you think?  It was kind of a rush job, so a few details could have been done a little better, but I think it really adds a lot of character to this space…plus storage and seating…and it turned out really good!  If you loved the transformation, too, be sure to pin for later!

You won't believe the difference these DIY built ins had on this breakfast kitchen nook!

Until next time, happy building!

Light it Up–Modern Bedside Pendant Lights

September 14, 2016 by Shara, Woodshop Diaries

When people ask me what’s my “style” I have no idea how to even respond.  I just know that I like something when I see it.  Is that a style type?  I’m more of a “I-just-like-what-I-like-when-I-like-it” kind of person.  But, I don’t see that going well during an interview with a design magazine.  Good thing I’ll never have to worry about that happening, right? HA…how depressing.

.

I’m sorry…back on topic.  So, as we are working on the South Wing Project (if you remember) to redo the south side of our home–which includes the master bedroom, bathroom, and now closet (due to the chaos that occurred during the bathroom remodel), I’m really trying to be myself and figure out my own “style.”  When it came time to choose bedside lighting after I built us new nightstands a few months ago, I knew I wanted something different.  Standard lamps were not doing it for me…unless I was willing to pay the big bucks…and I wasn’t.

IMG_6737.

I had seen people do pendant lights beside the bed, but I knew I wasn’t going to talk Danny into agreeing to hang two new lights from the ceiling.  Plus, we still haven’t decided where we want to permanently place the bed.  But, I was stuck on pendant lights.  I had to have them.  And they had to be easily moved if we decided to move the bed.

.

NOTE: This post contains affiliate links for your convenience.  Please see disclosure policy for details.  I only link to products that I personally use and highly recommend. 

.

Luckily, I found these pendant lights that plug into an outlet and you can hang them however you want. (WIN!)

.

There are a thousand good ideas on how to hang these on Pinterest, but I went super plain because I wanted the focus to be on the light, not what it was hanging on.

.

I used:

1×2 wood scraps

(2) 2 ½″ pocket hole screws

(2) Plug in pendant lights

(2) LED Edison light bulbs

Miter saw

Kreg Jig

Drill

.

I cut two 1×2 scraps about 7″ long and drilled pocket holes using my Kreg Jig into one end of each piece.  Then I found a stud in the wall and used a 2 ½″ pocket hole screw to screw the 1×2 into the stud.

img_8162

Then, I wrapped the cord of my pendant around the wood a couple times.

img_8163

Then, I screwed the LED Edison Bulbs in.  By the way, I LOVE these bulbs.  I looked all over for big clear LED Edison bulb and these were the cheapest I found for this particular size and style.  They are nice looking and really bright, too.

img_8164

And that’s it.  Easy peasy.  I think we may be moving the bed against another wall, and when we do, I may paint these wood pieces.  Or not.  Who knows.

img_0450

By the way, have you guys noticed that I use that same red vase in like all my pictures?  It’s my favorite 🙂 It doesn’t have a home…it just moves all over the house and stays a while then moves again.  I wish I had a hundred of them, but I got it at Kirkland’s and they don’t sell them anymore.  Sad day.

.

In other news, don’t you love the contrast and how the black lights stand out against the light wall?

img_0446

img_0443

img_0456

img_0449

img_0448

img_0445

I know this was a super simple little project, but I wanted to share.  Several people saw them on my home tour on Hometalk Live a few weeks ago and loved them.  Hopefully you do too.  Or you could be like my mom and think they are weird…it’s cool.  To each his own : )  If you did happen to love them, be sure to Pin for later!

picmonkey-image

Keep your eyes out for more projects to come.  I’ve got several in the pipeline and they’ll be coming at you soon!

.

Until then, happy building!

You’re So Vain…You Probably Think This Post is About You–My DIY Bathroom Vanity

September 12, 2016 by Shara, Woodshop Diaries

Last week I posted about my new bathroom mirror.  People seemed to love it…which was awesome!  (Thank you!)  But, the bathroom vanity seemed to steal the show.  Which is kind of rude, don’t you think?

This DIY floating shelf mirror is so easy to make, but makes a huge impact--Woodshop Diaries

The mirror is over here trying to get its 15 minutes of fame, and the vanity cuts it short by photo bombing all the pictures.  I guess it gets its name honest….vanity.  It’s so vain.  It thinks every bathroom post is about it.  So finally, here is an actual post about the vanity so maybe it will quit being so arrogant.

.

When I started trying to decide on a vanity design for our new bathroom, I spent MONTHS on Pinterest searching ideas. And you know how that goes.  Pin this and pin that and you never go back and look at what you actually pinned and you keep finding better ideas and sooner or later you’re overwhelmed with options and you don’t really like any of them.  Maybe that’s just me?

.

So, back in June (JUNE! That was 3 months ago!), I decided to quit obsessing over what kind of vanity to make (and quit spending hours a day on Pinterest looking at them) and just build one and be done with it.  When I got done, it sat in my bedroom for a couple months while stared at it every day and tried to convince myself that it was the most awesome thing I’d ever built in my life.  But, it wasn’t.  It would do I suppose, I just wasn’t really sure about it.

DIY Bathroom Vanity

But, last week when we got it installed in the new bathroom (FINALLY), I made a final decision. I decided that (drumroll please….) I think I like it 🙂  And many of you seem to like it too based on the compliments you sent when you saw it in my post about my new bathroom mirror last week!

.

So, without further blabbering, I will show you how I made it.

.

But first, I need to tell you a few things. The countertop is granite.  I bought it custom from a local granite shop.  They cut it to size and cut the hole for the sink and faucet and attached the sink for me before I got it.  Because of the small space in our bathroom, our vanity couldn’t be deeper than 18”.  So, I had the shop cut the top 18” deep.  I made my actual vanity 17 ½” deep to allow for a slight overhang. Due to the odd size of my vanity, I won’t give you exact dimensions that I used because likely you would want to make yours deeper if possible.  However, I will show you the steps I took to build it.

.

Note: This post contains affiliate links. Please see disclosure policy for more details.  I only link to products that I highly recommend and/or use myself.

.

For the build, I used:

.

Tools/Hardware:

Miter saw

Circular saw

Rip Cut

Kreg Jig

Drill

Measuring tape

Speed square

Drawer Slides

1 ¼” pocket hole screws

2 ½” pocket hole screws

2 ½’ wood screws

Glue

Large Clamps

Small clamps

Minwax Provincial Stain

Minwax Polycrylic

Sandpaper

.

Lumber:

2×2 pine

1×4 pine

1×6 pine

1×2 pine

Birch Plywood

.

1. Build front and back frames

For my legs, I cut 4 pieces of 2×2 at 35” long. I tapered two of them for the front legs.  I attached the 2 front legs together with a 1×2 on the top and a 2×2 on the bottom both pocket hole screwed using my Kreg Jig into each leg.

img_7133

Now, things would have gone smoother if I was able to use a 2×2 on both the top and bottom, but because of the sink size, I didn’t have the space and I had to use a 1×2 on top.

2. Add side panels

I used my Rip Cut to cut my plywood sheet down to pieces 15 ½” wide because I will need them all that size for the side panels and middle dividers. The Rip Cut makes cutting plywood SO much easier than a straight edge when you need several pieces the same width.  I cut two pieces of plywood for the side panels and drilled pocket holes using my Kreg Jig into each side.  I used 1 ¼” pocket hole screws to attach these pieces to the sides of the two frames like the pictures show.

img_7134

img_7135

img_7136

3. Add middle dividers

I used 2x2s for the bottom middle supports and attached them using pocket holes and screws in the bottom front and regular wood screws in the back. You could use pocket holes for both the front and back, but I was running short on 2 ½” pocket hole screws so I used wood screws where I could use them and you wouldn’t see them.  Helpful hint 🙂

img_7137

Then I attached 2x4s across the top as shown here. I used 2x4s here because I needed some surface area to silicone the top to the vanity.  2x4s gave me more surface area to glue than a 2×2 would.  I used ¾” pocket holes and 1 ¼” pocket hole screws to attach them (not 1 ½” pocket holes).  Then I added in the two front 2×2 dividers.  I pocket hole screwed them into the bottom support and used wood screws to screw through the 2x4s into the top of the 2×2 dividers.

img_7138

img_7140

img_7139

I know this would be so much less complicated if the top 1×2 was actually a 2×2. Bear with me.

.

Then I added plywood pieces using pocket holes and screws as the picture shows.

img_7152img_7151

After this, it is a good idea to add 2x2s on the back side like you did the front, but I did that step later because I wasn’t sure if I wanted to put backing on it.  I chose not to, so I later added the back 2x2s.  You can see in the picture where I screwed these 2x2s into the plywood dividers.

img_7403

4. Add drawer dividers

I added dividers between the drawers at this point using pocket holes and screws on the bottom side. This is totally optional, I just liked the extra divider.

img_7153

5. Add drawers

You can check out how to make drawers a few different ways in my post here. I used these ball bearing drawer slides and they are awesome!  Easy to install and the drawers slide smoothly.  These on Amazon are the cheapest that I have found if you are buying several at a time.  I used these when I made my dresser, too, and they work great!

img_7297

6. Add bottom piece

Okay, I’m going to digress for a minute.   I have really long hair.  (See?  This was 6 months ago…it’s actually even longer now.)

Me wood working tshirt

I know…like what the heck does that have to do with anything?  Well, if you have long hair, sometimes it gets in places…places that tend to clog.  Think drains…and p-traps. I know…totally gross.  But that’s real life.

So since I made the bottom of the cabinet so high off the ground, there isn’t a lot of room to work on the p-trap…which has to be cleaned out fairly often. In order to make this easier on everyone Danny, I cut my hair I made the bottom piece removable.

.

I screwed scrap pieces of 1×2 into the middle divider supports on the bottom and set a piece of plywood in. This way, when it’s time to clean the trap, we just remove the plywood, clean the trap, then put the plywood back in place.  Easy peasy.  If you don’t have this problem, you could simply screw the bottom piece in place and enjoy not having to deal with your nasty p-trap.

img_7389

7. Add doors

You can make doors lots of ways. I have a tutorial here on how to make simple shaker style doors. You could also just cut plain, flat pieces of plywood for your doors.  Or use plywood and attach some fancy molding.  Possibilities are endless.

.

I wanted something different, so I make these “geometric” doors. I have no idea what you would call them, but “geometric” seems okay haha.  Bascially, I made four squares of identical size out of 1x4s cut at 45 degree angles.  The length will obviously depend on the size you need your doors.

img_7367

First I cut all my pieces and dry fit them together to make sure the total height and depth was large enough for what I needed.

img_7392

Then I glued each individual square up separately.

img_7391

Once the glue was dry, I glued two squares together at a time.  These were my two separate doors.

img_7393

I trimmed the edges on the table saw (but you could use a large miter saw or circular saw) to make them straight and smooth. I added a thin trim piece around the edges for some extra detail.  Sorry, I forgot to take pictures of that until after I already stained them.

img_7402

img_7401

After everything was stained, I attached the doors using small brass hinges.

8. Finish with stain and poly

I stained the piece in Minwax Provincial and used Minwax Polycrylic for a clear coat. I really love Polycrylic…it’s easy to use, doesn’t stink, and it’s easy to clean up.

.

We sat the top on just to make sure it fit and the color looked okay together. And like I said before…left it sitting in the bedroom for 3 months haha.

IMG_7446

I added some brass hardware that I found at Hobby Lobby.  I originally bought the pulls for my dresser, but changed my mind.  You can read that post and get the whole story about my indecision on hardware.

IMG_7749

When it was time to install, we attached the top to the vanity using silicone on those 2x4s I mentioned earlier. Danny was afraid it would be a little wobbly since the legs and frame were so small and the granite so heavy, but it’s rock solid after screwing it into the wall during install.

This DIY floating shelf mirror is so easy to make, but makes a huge impact--Woodshop Diaries

I was afraid it wouldn’t look good in our new bathroom, but I’m really loving this design and style in here. I wanted our bathroom to have a modern/boho/eclectic/mid-century feel and this vanity along with this mirror are really doing a good job I think.

This DIY floating shelf mirror is so easy to make, but makes a huge impact--Woodshop Diaries

What do you guys think?

How to build a gorgeous bathroom vanity that will command the spotlight--Woodshop Diaries

How to build a gorgeous bathroom vanity that will command the spotlight--Woodshop Diaries

How to build a gorgeous bathroom vanity that will command the spotlight--Woodshop Diaries

How to build a gorgeous bathroom vanity that will command the spotlight--Woodshop Diaries

How to build a gorgeous bathroom vanity that will command the spotlight--Woodshop Diaries

How to build a gorgeous bathroom vanity that will command the spotlight--Woodshop DiariesHow to build a gorgeous bathroom vanity that will command the spotlight--Woodshop Diaries

How to build a gorgeous bathroom vanity that will command the spotlight--Woodshop Diaries

How to build a gorgeous bathroom vanity that will command the spotlight--Woodshop Diaries

How to build a gorgeous bathroom vanity that will command the spotlight--Woodshop Diaries

Love it?  Hate it?  It’s cool…you can tell me : )

.

But, for real, I love it.  I don’t blame it for stealing the show every now and then, but once the whole bathroom is done, it’s going to have to share the spotlight with a few other super fun projects I’ve got in here.  Can’t wait to show you what I decided to do above the toilet AND what I’ve decided to do for “wall art” in here.  I’ll go ahead and tell you that Danny says it is “creepy,” but I think it’s cute.  Stay tuned 😉

.

But, before you go, don’t forget to pin for later!  Until next time, happy building!

How to build a gorgeous bathroom vanity that will command the spotlight--Woodshop Diaries

DIY Sunrise Mirror–A Project Born from Laziness

September 6, 2016 by Shara, Woodshop Diaries

DIY Floating Mirror Shelf

This DIY Floating Mirror is brought to you by my own personal cheapness and laziness.

DIY Floating Mirror Shelf.

Yep, you read that correctly.  I am confessing to you right now that I am cheap and lazy. Need an explanation?  Read on : )

.

So, if you’ve been following along for a little bit, you know that we are remodeling our bathroom.  Well, this bathroom needed a big new mirror because the old one was TINY.  But…two things caused me some issues…Dilemma #1: It needs a frame…or not…but it needs SOMETHING…or not…  Dilemma #2: I’m obviously VERY indecisive.

.

Originally, the mirror was going to be framed.  I wanted a big round wood framed mirror.  So I made a frame from some 1x10s that I glued together and cut out with a router.

IMG_7834

The problem was that I cut it too thin.  I didn’t want a big bulky mirror frame (I was thinking minimalist style), but I made the frame only ¾″ thick.  It was WAY too flimsy.  PS I ended up using the center cut out to make a clock later.

.

So anyway, this thing sat (and is still sitting) in my shop for several weeks while I thought about what to do with it because I was too lazy to do the whole thing over and make it thicker.  Side note: I’m really not lazy…I just hate redoing things.  But I really am cheap because honestly, I just didn’t want to have to go buy more 1x10s.  #truth

.

SO, I did what all normal people do when they are trying to find inspiration.  I got on Pinterest.  And what did I find but this.  THIS. IS. IT.  Not only is it amazingly out of the ordinary (which is totally my style), but it’s the easiest thing to make that I’ve ever seen in my life!  And I won’t have to buy any lumber because I’ve already got a 2×4 in the shop for the shelf!  So let me show you how I made it 🙂

.

This post contains affiliate links.  If you purchase from these links, I may receive a small commission at no extra cost to you.  Thank you for supporting this site so I can continue to provide free content.  Please see disclosure policy for more details.

So here’s what I needed:

36″ diameter mirror (⅛″ thick)

2×4 board

Kreg Jig

2 ½″ pocket hole screws

Level

Drill

Table Saw (or router)

.

So, I called up my local glass shop and ordered a 36″ diameter mirror ⅛″ thick.  If you’re more of an online shopper, here is one on Amazon, but it’s ¼″ thick.  If you go with ¼″ thick instead of ⅛″, you’ll just have to make your slit a little wider.  No big deal.  More details on that in a minute.

.

When I got the mirror, I used a tape measure to eyeball the width across the mirror at about where I wanted the shelf to hit it.  The width of the mirror at the point I wanted it to hit was about 28″ wide.  That left a few inches hanging below the shelf.

.

In my bathroom, I marked the studs in the wall along where I wanted the shelf to sit.  Then I measured the length my shelf needed to be in order to hit at least three studs (remember you can’t count the studs right behind where the mirror will be).  I used a 2×4 for my shelf.  I cut it this length.  Mine ended up being around 54″ long.  I also offset my shelf so the mirror isn’t in the center.  This is just personal preference, not necessary.

.

Once I had the shelf (also known as a 2×4) cut to 54″, I held it against the wall where I wanted to attach it.  I made sure to line it up with the studs that I marked earlier.

IMG_8145

Then, I marked on the bottom of the board where the studs are and where the center of the mirror will be.

IMG_8146

Then I took the board down and used a tape measure to mark where the mirror will sit on the board.  Remember, my mirror was 28″ wide where I wanted it to sit on the shelf. So, I centered 14″ on my tape measure with the mark for the center of the mirror and drew a line at 0 and 28″.

IMG_8148

I flipped the board back over and marked the same lines on the top side. Then I cut the slit using the table saw.  (You could use a router for this if you don’t have/want to use a table saw.) I first set my rip fence about 3″ from the blade.

IMG_8150

SLOWLY AND CAREFULLY, I lowered the 2×4 board onto the blade (top side up) between the two lines that I just drew.  I ran the board through until the blade had cut all the way between the two lines.  Then I adjusted my rip fence 1/16″ closer to the blade and did the same thing again.  Then I had a slit in my 2×4 a little over ⅛″ thick all the way between the two lines.  If you use a thicker mirror, just keep adjusting the fence and cutting until your slit is wide enough to accommodate your mirror.

IMG_8151

Then I drilled 1 ½″ pocket holes using my Kreg Jig on the lines that I marked where the studs were. I made sure the holes were facing the BACK side of the board so I can screw into the wall.

IMG_8152IMG_8153

Here is where you should sand and stain/paint your board.  But, of course, I am too impatient and I hung it first and stained it later.  To hang the board, use 2 ½″ pocket hole screws and screw the board into the studs, making sure it is level.

IMG_8154

IMG_8155

I wiggled the shelf a little to make sure it wasn’t moving any.  If it is, you probably missed a stud (or two or three) and you’ll need to find them again and line your pocket holes with them.  Luckily mine hit the studs and was very secure to the wall.  I removed it later and stained it with Minwax Provincial, but then I simply lowered the mirror into the slot on the board (CAREFULLY).

IMG_8175

And that’s it!  If the mirror is leaning forward or backward, you may need to get a clip to hold it in place.  Too much pressure on the glass (if it is leaning) can cause it to break.  Mine set pretty good and was perfectly vertical, so I didn’t secure it any other way.  Because I’m so indecisive, I wanted to be able to remove it and do something different in the future if I chose, so I didn’t want to glue it to the wall or anything.  This floating shelf idea was genius!

.

Now, please enjoy the bazillion pictures I took of it because I love it so.  Also, here is your sneak peek at our newly remodeled bathroom.

DIY Floating Mirror Shelf

DIY Floating Mirror Shelf

IMG_0484

IMG_0487

Now, you can’t just take pictures of a mirror without having an obligatory mirror selfie in there somewhere, right?

IMG_0489

And you can’t ever just take ONE selfie…

IMG_0490

I may have gotten out of control…

IMG_0491

Okay, okay, back to pictures of the mirror…without me in them…

This DIY floating shelf mirror is so easy to make, but makes a huge impact--Woodshop Diaries

This DIY floating shelf mirror is so easy to make, but makes a huge impact--Woodshop Diaries

This DIY floating shelf mirror is so easy to make, but makes a huge impact--Woodshop Diaries

This DIY floating shelf mirror is so easy to make, but makes a huge impact--Woodshop Diaries

So, tell me what you think?  Totally better than trying to make another frame, right?  And totally easier…and cheaper.  SOOO, sometimes being cheap and lazy pays off : )

.

Oh, and if you were wondering, the vanity was totally DIYed and you can check out the whole how-to here.

.

If you like this project as much as I do, don’t forget to pin for later!

Stay tuned for several more projects coming up shortly!  Until then, happy building!

The LAST Bathroom Update–Because Sometimes If You Don’t Laugh, You’ll Cry

August 30, 2016 by Shara, Woodshop Diaries

I know, I know.  It was never supposed to take this long.  I was never supposed to write this many “update” posts before I finally show you the finished product.

.

And I was never supposed to be this burnt out.  I apologize for the lack of “fun project” posts lately.  I am dying from not being able to do fun fall projects and show you super cool builds I’ve been working on in the shop.  Like it’s literally eating me alive!  So please please please hang with me.  I’ll be back in the shop soon.  And seriously I’ll be ALL ABOUT these fall crafts soon too.  Fall is calling my name!

.

But first, we have to finish this bathroom.  And it’s really starting to wear me out.  I. Am. Pooped.

.

With every last minute trip to the store to get that one thing we forgot the last time we were there, I’m getting more and more discouraged and we are getting further and further behind.  So we just laugh.  For real.  We laugh when we sit down at 10:30 at night and eat supper when we are normally in bed by 10.  We laugh when we are still at Lowe’s when they close and lock the doors at night.  We laugh when we cut a tile too short because we are cutting them in the dark with a flashlight.  And we laugh when it’s a million degrees in our house and we are wearing dust masks and our safety goggles fog up every ten seconds so we have to stop and wipe them off.  Because if we don’t laugh at this point, we will just be crying.

IMG_8019

We really are having fun.  Remodels really are worth it.  But there comes a point when you are ready to be done, but the list still has a lot of stuff on it to be done.  Thankfully, we can see the light at the end of the tunnel and, you guys, I will be showing you the finished room SOON…like real soon.  And then I can get back to normal life : )

.

We last left off here.  No drywall, no lights, no floor, no shower pan…pretty much we were still at the studs.

IMG_8002 (960x1280)

We’ve come a long way.  First, we finished the plumbing under the house and we got the subfloor all back together.  If you remember, we had to replace a large part of the subfloor.  (FYI, the large piece of plywood was turned the other way before it was screwed.  The grain of the subfloor should go perpendicular to the joists, so that is what we did.)

IMG_8020

Then we took the little shelf in the wall out and put up the drywall, mudded it, and painted it.

IMG_8029

IMG_8035

IMG_8037

Based on the instructions with the shower pan, we were supposed to simply set it in place and it should be fine.  HAHAHAHA yeah right.  We couldn’t get the floor to be perfectly level, so we tried using mortar to level out the floor.

IMG_8042

That basically just made a big mess.  So we got some ½″ plywood and laid it down over the whole plank subfloor (which apparently we would have had to do anyway before we laid the Hardiboard but that’s another story) to level it out.  We messed around with shimming the stupid thing for a few days and finally decided it was good enough and moved on.

.

I talked Danny into hanging the lights for me and I’m telling you…it’s a miracle!  One of the main reasons (besides the fact the floor was going to cave in at any time) we I wanted to redo the bathroom was because of the lighting.  These simple pendant lights and the recessed shower stall light are sooooooooo pretty.  The light is soft, but it is PERFECT for in here.  Sometimes I just go turn them on just to look at them.

IMG_8047

I know…it’s hard to tell because I took a picture directly of them.  Maybe this will help some.

IMG_8057

My mom hates these lights.  I’m loving them.  They are so simple.  What do you think?

IMG_8055

I’m also loving this paint color in here so far.  It’s Sherwin Williams Eider White.  I have it in my office and my laundry room, and now my bedroom too (since this weekend).  By the way, the bedroom is next on the “redo” list after the bathroom.  It just got painted, and will be getting new flooring shortly.

IMG_8064

So after we laid the ½″ plywood on the floor over the subfloor planks, we started on the cement board (we used Hardiboard).  Just a warning…½″ cement board is the devil.  We bought ½″ for the shower walls and the floor and after we did the shower, we made a trip to Lowes to exchange it for ¼″ to use on the floor.  You’re supposed to be able to score and snap it…we scored the ½″ for about 20 minutes and it never snapped.  You have got to be kidding me.  It took us a whole night to get the shower walls up.  I had hoped to have the floor AND walls up in one night.

IMG_8098

When we got the ¼″ board for the floor, things were A LOT easier.  We got the cement board floor laid the next night.  I Someone forgot to charge the drill batteries, so mine died and Danny and I had to take turns screwing in all the screws. I took pictures while he worked.

IMG_8101

Can we just talk about the lighting in here again?  I don’t even mind that I don’t have a window in here.

.

We used this stuff called Kerdi for the shower walls.  Danny read up on it and wanted to use it.  It’s a thin membrane that you put on under your tile.  It’s supposed to make it totally waterproof.  It took all day to get it on the shower walls.  Again, I had planned to have that on the walls and the floor tiled in one day.  See how we keep getting so far behind?  Haha.  That’s me laughing so I don’t cry about it.

.

So, Danny decided to take the rest of the weekend off.  While he played with our barn cats, I decided to work on the crown molding.  Don’t look too close at the joints.  Do your best and caulk the rest, right?

IMG_8103

This was actually an interesting solution to a problem we had during demo.  Long story short, we couldn’t tear out the shower ceiling flush with the rest of the ceiling when we demoed.  I didn’t want this random square protruding from the ceiling and I REALLY didn’t want to have to finish those drywall corners and make them look decent.  So instead, I added some 1×4 wood to frame out the part that hung lower than the rest and attached crown molding to hide the drywall edges.  I still have to paint the 1x4s and putty the molding, but I was pretty impressed with how good it turned out.  I was afraid it would look weird and out of place, but surprisingly, it doesn’t look bad!

.

So finally, we were ready to start tiling the floor.  Which, like everything else, seemed to take a lot longer than I expected it to.

IMG_8104

This was about the point I realized it wasn’t going to get done in one night haha.

.

We got to this point and quit for the night.

IMG_8105

Four tiles left.  FOUR.  Wish us luck.

.

We’ve really come a lot way since my last update and we should hopefully be done pretty soon.  There are lots of little things to finish up, but it’s really starting to look like a bathroom now.  I’m working my hardest to be able to install the vanity this week and I CANNOT WAIT to take some pretty pictures of it and tell you all about it.  I built it months ago and have been eagerly waiting for it to actually be in the bathroom instead of sitting randomly in my bedroom.  Maybe this week will be the week!

.

This is the LAST update before the final reveal, so keep your eyes peeled because it’s ALMOST DONE!

.

Until next time, happy remodeling!


Super Simple DIY Dining Bench with Turned Legs

August 24, 2016 by Shara, Woodshop Diaries

I’m so glad to finally have a fun, new project to show you guys besides the bathroom remodel.  I know you are probably all super tired of hearing about it and it’s taking WAY longer than we expected.  To be honest, I’m tired of working on it.  But, it has been consuming all my time after work and I am bummed I haven’t been able to make anything fun and show you guys…until NOW. (ps forgive the terrible picture…after I made the bench, Mom took it home to paint it and when I asked for a picture, this is what I got.  You get the idea, right?)

IMG_8093

.

Quick backstory: My family has started this tradition the last few years where we have “Thanksgiving dinner” in the summer.  Everyone gets together at mom and dad’s house and we have turkey and dressing and pumpkin pie just for the heck of it.  I have no idea why this happened…I’m just told to be there and bring the pie.

.

Well, our summer Thanksgiving dinner is this weekend and mom has been redoing parts of her house.  In her dining room, she re-painted her old table and got new chairs to match.  She wanted a bench instead of chairs for one side of the table and asked me to make it for her.  I was originally told I didn’t have a deadline and with all the remodel stuff going on in my house, I figured I would get to it when we were done.  But then I was informed that she needed it by this weekend’s family dinner.

.

Mom always gets what she wants.  You know the saying…when momma ain’t happy…

.

So I took an afternoon and put this bench together for her.  It’s super easy and I really should have done it sooner.  It only took about 20 minutes.

.

Note: The following contains affiliate links for your convenience.  Although I may receive a small commission if you purchase from these links, I only link to products that I highly recommend and/or personally use myself.  Please see disclosure policy for details. 

.

So here is what you need:

.

(2) 2x4x8

(1) 2x8x12

(4) short turned legs–they should be about 15″ tall and should have flat sides on the top

Miter Saw

Drill

Kreg Jig

2 ½″ pocket screws

2 ½″ regular wood screws

Measuring Tape

Basically all this stuff right here: (this bench started in my dad’s shop but then I took it back to my shop later that night…long story.  I had dinner plans and gave blood after work and anyway…so that’s why the pictures from “not my normal workspace”)

IMG_8069

Step 1: Cut the boards

.

Mom’s bench needed to be 67″ long.  This was the perfect length to be able to slide the bench under the table and out of the way if needed.  So I cut the 2x8x12 into two 67″ long pieces for the bench top.  Set these aside for now because you won’t need them again until the last step.

.

Now, for the frame.  I allowed for a 1″ overhang on each edge, and the legs were 2 ¼″ square, so my long 2x4s (for the front and back side) were 67″-2″ overhang-4 ½″ for the legs=60 ½″ long.  So, I cut two 60 ½″ long pieces from the 2x4s.  The short pieces on each end were 8″ long (doing the same math…14 ⅕″ deep bench-2″ overhang-4 ½″ legs=8″). So, I cut two pieces of 2×4 at 8″.  Now, you will also need two pieces at about 8 ¼″ long as well for the braces in the middle of the seat.

.

To sum it all up, you need two 60 ½″, two 8″, and two 8 ¼″ 2×4 pieces.  Don’t get lost in the math.  By the way…I attempted a video of me making the bench and it just wasn’t working…but here are a few shots from it.  You know…for entertainment value…

IMG_8087

Step 2: Drill the pocket holes


Using the Kreg Jig set to 1 ½″ stock, drill pocket holes in each end of the long 2x4s and also in the 8″ pieces.  Don’t drill them in the 8 ¼″ pieces.  I did this at first, then later realized it wasn’t going to work.

IMG_8090

Step 3: Assemble the frame


Screw the short pieces into the top of the legs with 2 ½″ long pocket hole screws.

IMG_8074

I screwed mine about ⅛″ out from the inside corner.

IMG_8075

Once you have both short sides done, screw the long boards in the same way, leaving about ⅛″ from the corner.

IMG_8076

Screw each end of both pieces into the legs.

IMG_8077

Now, add your 8 ¼″ blocks, screwing them in from the outside.  I tried using pocket holes, but I couldn’t get the drill in such a tight spot, so I screwed from the outside and puttied the holes later before painting.

IMG_8078

Step 4: Attach the top

Now, I have to tell you that this bench will eventually be upholstered.  Mom hasn’t picked out her fabric yet, so the top is being attached temporarily since it will be removed later to upholster.  To attach the top more permanently, I would either glue or pocket hole and screw the two top pieces together then attach to the frame.  To attach it to the frame, drill pocket holes along the insides of the frame and braces and attach from the bottom with 2 ½″ screws.   In our case, since this is temporary, we simple screwed the two boards in on the short sides of the frame.

IMG_8080

Like I said, to attach it permanently, drill holes just like this on the braces, and the long side support, too.  That is what I will do once I get it upholstered–which will be soon, so keep an eye out for that project : )

.

And that’s it.  I told you it was super simple.

finished bench

Mom took it home to paint it, so I don’t have a lot of good “finished product” pictures, but when I upholster it later, I will get some.  She’s supposed to pick out fabric this weekend, so hopefully I can show you how to upholster it soon : )

.

So what do you think?  Easy peasy, right?

.

So what are you waiting for?  Get building : ) right after you pin for later.

How to build a super simple DIY dining bench with just a few boards and a few minutes--Woodshop Diaries

Until next time, happy building!


The Real Real Life House Tour–Live Video

August 18, 2016 by Shara, Woodshop Diaries

Have any of you used Facebook’s live video feature before?  I’m a total newbie.  Like I literally gave it a practice run last night and had no idea what I was doing.  I’m just not into this new cool kid technology.

IMG_0244 (1280x853)

So Friday should be interesting.  What’s Friday you ask?

.

This Friday, August 19th, I will be doing my first Facebook live video.  Why is that a big deal?  Because it’s on Hometalk’s page!

.Woodshop Diaries

Hometalk has started posting live video home tours of some of their favorite Hometalkers and I’m up!  If you haven’t already seen any of the tours yet, you have got to check them out!  I’m giving a shout out to Deb from Seeking Lavender Lane…LOVED her tour.

.

I am so super nervous, but also super excited.  It’s such a fun opportunity to be able to open my home and show you guys.  So be sure to tune in to Hometalks Facebook Page at 1PM Eastern to watch it live.  Or you can watch it later by going to Hometalk’s Facebook page and searching their videos.  I will also share it on my own Facebook page too, once it’s over, so be sure you’re following Woodshop Diaries on Facebook!

.

We will be having a t-shirt giveaway, and I’ll be asking for your input on an upcoming project, too.  Don’t miss it!

.

Check out the promo video and be sure to tune in! Can’t wait to see you there!

https://woodshop.imarkdev.com/wp-content/uploads/2016/08/Promo-Video.mp4

.

Oh and PS, just a little history before the tour.  My husband, Danny, and I bought this house about two years ago.  We fell in love with it and never planned to remodel.  But, once we moved in, a few things bothered us about the house here and there and long story short, we ended up gutting the kitchen mainly because we needed new appliances.  It wasn’t ONLY because of the appliances, but that was a big part of it.  You can read the whole story here.

IMG_0189 (1280x853)

Once the kitchen was complete (although it’s been over a year and some of the last little details haven’t been finished, so it’s not technically complete), we thought we were done remodeling.  But, I was kind of starting to get irritated about our laundry room.  That’s when I hung the sliding doors.

IMG_0113 (1280x853)

But after the doors, I wanted to repaint the hallway.  Then I wanted to redo the trim around the doors to match what we did in the kitchen.  Then I wanted to make the laundry room look nice since we had these super cool sliding doors.  So I redid the laundry room.

finished

Then we were done.  BUT, the office had started to become a catch all room and I really wanted it to be nice since you can see into it from the living room.  So we redid the office.

IMG_5970

After that, Danny said he was done.  But then I built a bathroom vanity and now we are redoing a bathroom and a bedroom and a closet (eventually).

IMG_7451

IMG_7950 (960x1280)

So somehow, our house has become an accidental fixer upper.  But we are loving it.  Even if it is always in a mess.  To see it all, be sure to check out the tour Friday : )

.

Until next time, happy house touring!

Bathroom Remodel Update–The Best Plan is No Plan

August 14, 2016 by Shara, Woodshop Diaries

At this point, I was hoping to come to you with all kinds of fun pictures of major progress on this bathroom remodel.  I had made plans and schedules and figured out in what order we needed to get everything done so we would be back to normal as soon as possible. By this week, I was expecting to tell you about how we tiled the shower.

.

But, instead, I get to tell you about how productive (yet unproductive at the same time) our week has been due to this one little detail we (I) didn’t plan for.

.

If you remember from my my previous bathroom posts here and here, I told you about how the subfloor and a couple joists in the bathroom had some water damage that needed to be fixed.  Well, good news is that we fixed the majority of it fairly easily.  And we were just going to leave it like this and move on.  I didn’t expect the damage to extend past the bathroom wall.

IMG_7962 (960x1280)

We tried to ignore the large section of subfloor that was in really bad shape that went under the wall and just pretend like we didn’t see it.  I hadn’t planned for this.

IMG_7962 (960x1280)

Mainly because if we decided to replace it, it would require us to rip out our closet that is on the other side of the wall.  The same closet we had already redone last year.  Not only that, but if  you’ve read my post about how we redid the closet, you would know that the return air duct was in the closet.  Guess where this rotten floor went to?  Right under the return air duct.  Nothing can be easy…

IMG_7966 (960x1280)

So we gritted our teeth and decided that we would fix it even though we (I) REALLY REALLY didn’t want to deal with a torn up bathroom and a torn up closet and a torn up bedroom all at one time.  This happened to be my side of the closet, so I moved all my clothes to the bedroom…where they were piled in the floor.

IMG_7965 (960x1280)

This was a Monday night after we both got home from work.  I apologize for the lack of pictures of the process, but we were both trying to hurry because everything had to be closed up and put back together before we could go to bed (because we couldn’t turn the air conditioner back on until we had the return duct back together), and were both pretty irritable haha.

.

As you can see from the picture above, we tore out part of the return duct (after we turned the air off), pulled up the floor in the closet (wood and particle board…yuck). and cut out the drywall.  We cut out the rotten 2x4s and subfloor planks and replaced them with ¾″ plywood and fresh new 2x4s.  We are lucky this was not a load bearing wall.  It was fairly simple…just really time consuming.  Here is the new wood from the bathroom side.

IMG_7974 (960x1280)

Then we rebuilt the return duct, covered it back with drywall, and I mudded it to seal it.  This literally took us an entire evening. But we do both feel better that it’s fixed.

.

So after that fiasco, I expected things to go smoothly and make some good progress.  But, then I got news that I’ll be doing a Facebook live video on Hometalk with a house tour this Friday at 1PM Eastern (you should totally tune in!!).  Which is awesome and exciting and also super nerve racking because at this point, my house looked like this.

IMG_7970 (960x1280)

IMG_7973 (960x1280)

IMG_7972 (960x1280)

So my first priority was to at least get the clothes back in the closet and get my house cleaned up and ready for a tour.

.

Once the bathroom is done, our plan was to rip the carpet up in our bedroom and lay wood floor.  We had planned to leave the floor in the closet as is, but now that we had to rip it out anyway, we figured we would just lay the same floor in the closet that we use for our bedroom.  Which means, if I simply put everything back in the closet like it was, I would have to rip it back out when we redid the floor because our shelves were sitting on the floor like this.

IMG_2069

So I did a rush job and just stuck some shelves up on the wall to make it easy on us when we do the floor later.

.

I painted the walls, one night, then hung the shelves the next night.

IMG_7980 (960x1280)

IMG_7983 (960x1280)

It’s not pretty, but it’s functional.  There will be another closet remodel sometime in the near future, but for now, I’m just trying to survive.  This bathroom is turning into a bigger job than I had planned for.  I’m starting to think I should quit planning…

.

At this point it’s Thursday and it looks like there has been no progress made.  Which is kind of true haha.

.

Danny and I spent Thursday, Friday, and all day Saturday working on plumbing and electrical.  Neither of us expected either of those things to take as long as they did, but then again, no one ever does, do they?

IMG_7964 (1280x960)

Funny story time…my Dad is hilarious.  He’s a HUGE help when we ask him for help with these types of projects.  BUT, he’s well known for always breaking something before he’s done.  His help outweighs the broken stuff, so it’s always still worth it to ask him for help. .

.

So, anyway…last week, after we cut all the rotten subfloor out and cut a piece of plywood to cover the hole, we set it in to see if it fit and it was a little off on one corner.  I was going to trim it, but instead, Dad decides to step on it to force it in and it falls through the hole and knocks off our air duct (on the bottom left in the picture).  Thankfully Dad was okay since he almost fell in the hole with the wood.  But, then we had to go buy some flexible duct and put it back together.  Remodels are so funny….frustrating….but still funny.

.

As far as electrical goes, I was SO excited to cut the holes for the new lights.  I cannot wait to be able to actually SEE in my bathroom for once.  All that’s left to do is wire everything to the main panel and hang the lights.  I. CANNOT. WAIT.

IMG_8001 (960x1280)

A new pendant light will go here:

IMG_8002 (960x1280)

All that’s left to do with the plumbing is hook it up to the main supply lines and test it.  It’s slow going, but once the plumbing is done, we will start with drywall and things should start being more exciting.  Of course, nothing ever goes as planned, so who actually knows what’s going to happen this week with this remodel.  You’ll have to stay tuned to find out!

.

I’ve been pretty busy with all this this week and haven’t posted about any cool projects I’m working on.  Don’t worry…I have plenty of fun projects coming up soon that you won’t want to miss.

.

In the mean time, be sure to tune in on Hometalk’s Facebook page this Friday at 1 PM Eastern for my house tour!  It’s going to be fun 🙂

.

Until next time, happy DIYing!

Bathroom Remodel Update–The Point of No Return

August 7, 2016 by Shara, Woodshop Diaries

It happened when we redid the kitchen.  It happened when I redid the laundry room.  It happened when we painted the living room.  And it happened when I redid the office.

.

We have once again reached the point of no return.  This time, it’s with our bathroom.  As excited as I was to rip into this bathroom and do another remodel, I still started to question why I was doing this once I got to the point of no turning back.  We were about to this point when it really hit me.  Maybe I should have just left it alone.

IMG_7940 (960x1280)

Of course, I would never admit this to Danny, but every time I’ve redone a part of the house, I get so far into it and question my decision.  Is this really going to be better than it was?  Am I really improving the house?  Is this really what I want to do with this space?

.

I think this must just be part of the process.  Either way, there is no turning back now.  Our bathroom used to look like this:

bathroom before

Not so bad, just not what I had in mind.  However, I had several legit (and a few not so legit) reasons as to why we needed to remodel.

.

Guess what it looks like now?

IMG_7960 (960x1280)

I know, right?  WHAT. HAPPENED. HERE?!

.

Well, it all started when I took off the baseboards.

IMG_7911 (960x1280)

Okay, so then I knocked off a few wall tiles…just for fun.  And in the process, we uncovered this AWESOME wallpaper that used to be here.  ALL. FOUR. LAYERS.

IMG_7918 (1280x960)

There was the top layer…the greyish stuff.  Not so bad.  But there there was the white and navy striped stuff.  Okay a little more “out there.”  There there was this:

IMG_7922 (960x1280)

I really have no words.  Wolf. Wallpaper.  Did you catch that? WOLVES. ON THE WALL.  In the BATHROOM.  Who does this?  Who even makes wolf wallpaper?  Was this a Twilight fad or something?  I just…I don’t even know what to say about this.

.

Under all of this was this pink stuff.  I’m guessing this was the original wallpaper.  The things you learn about your house when you remodel are so funny sometimes.

IMG_7920 (960x1280)

So after that comedic relief, Danny joined me and we continued with demo.  We removed the vanity.

IMG_7921 (960x1280)

Of course, Danny is always the cool one in the pictures using the tools because I’m the one who has to take all the pictures.  Don’t let him fool you…I helped him cut this out.

IMG_7923 (960x1280)

At this point, I thought, “we could just put in a new vanity and call it quits.  It was already getting dusty and hot in here.

.

But then we realized how easy and satisfying it was to rip large chunks of the wall off with the tiles still attached.

IMG_7936 (1280x960)

IMG_7925 (960x1280)

So one thing led to another and we started removing the trim off the shower.

IMG_7935 (960x1280)

And that was even more fun because the large chunks of cultured marble came out in even bigger and cleaner chunks than the drywall did.  So the next thing we know, half the shower is gone.

IMG_7940 (960x1280)

And funny story…we were trying to figure out how to get the shower head and faucet handle off and I accidentally turned it on on Danny. HAHAHA.  Shh…I told him it was an accident, but I did it on purpose.  Hey, it was a good opportunity for another moment of comic relief.

IMG_7938 (960x1280)

I took over with the prybar while Danny took a break after I soaked him.

IMG_7942 (960x1280)

All the other drywall had been nailed, but in the shower it was screwed.  That was a HUGE relief, so I started removing all the screws.  The next thing we knew, most of the drywall was down.  By the way, this wall on the left is not an exterior wall now (an addition was added to the house in the late 90s), but it used to be (hence the insulation).  This shelf actually used to be a window.  The new bathroom mirror will go here when we get done.  Just a side note…one more thing we learned about the house during the reno.

IMG_7948 (960x1280)

IMG_7945 (960x1280)

IMG_7947 (960x1280)

This is kind of the point where we started to get tired and realized this was kind of hard work.

IMG_7946 (960x1280)

But, one thing led to another and we realized the floor tiles came up fairly easy, so the next thing we know, the floor is now gone.

IMG_7949 (960x1280)

IMG_7950 (960x1280)

If you read my post about why we are remodeling this bathroom, you will know that the main reason was because of the condition of the subfloor.  So this was the moment of truth.

.

I pulled up the tar paper and we examined the floor.

IMG_7951 (960x1280)

IMG_7952 (960x1280)

I’ve seen subfloors in pictures, but when you pull it up and realize this is YOUR OWN subfloor, well it kind of makes you cringe a little.  Some spots were worse than we had hoped for.  We removed the rest of the shower so we could get a better look.

IMG_7953 (960x1280)

IMG_7954 (960x1280)

IMG_7955 (960x1280)

By the way, we both had fiberglass all over our arms for the rest of the day after removing this shower pan.  Word of advice, wear gloves, and sleeves…and PANTS…when messing around with fiberglass.  It’s not pleasant when you get it all over you.  Especially on your legs.

.

So we decided to remove a large part of the subfloor where the shower had been.  Luckily the damage appeared to have been from the past and wasn’t at all wet when we got down to it.  So we don’t appear to have any leaks that are still ongoing.  However, whatever leaked in the past was able to do some significant damage in here.

.

We pulled up part of the subfloor and sistered two new joists to the old ones that had a little damage.  Danny really liked being able to get into the crawl space through the floor instead of the crawl space access all the way on the other side of the house.

IMG_7956 (960x1280)

I told him we should keep a trap door in the floor for easier access.  He wasn’t on board with the idea…

IMG_7959 (960x1280)

IMG_7960 (960x1280)

So, here we are.  We started with a normal bathroom and now we are here….with a giant hole in the floor, no drywall, all the plumbing cut off, and Danny’s old underwear stuck in all the drainage holes so we don’t smell sewer gases. AND there isn’t really an end in sight.  We will still have to continue on some subfloor repairs this week that we weren’t planning on having to do.  It will require us to tear apart some of our closet on the other side of the wall that we just redid about a year and a half ago.  That’s kind of depressing, but it gives me an opportunity to redo my closet AGAIN…which will be fun : )  Don’t tell Danny.

IMG_7962 (960x1280)

I’ve asked myself several times in the process if I was sure this was a good idea.  In the middle of all the mess and stress and frustration, it is so easy to wonder if this was a good idea or not.  But, I KNOW that once it’s done, not only will the house be in better shape from the repairs, but the new bathroom is going to look AWESOME.  I keep telling myself that anyway haha.

.

Stay tuned, hopefully there will be a lot of progress to be made in the next several days!  By the way, I’m also working on some super cute built in benches for my mom and dad’s kitchen nook and you will NOT want to miss them.  I will show you all soon!

.

Until next time, happy DIYing!

My Bathroom is Cute But I Hate It–Let Me Explain

August 1, 2016 by Shara, Woodshop Diaries

The bathroom.  The home of the toilet.  Where the hairs left from the man of the house’s last shave still reside in the sink.  And where you continuously find toothpaste splatters on the mirror and faucet (and WALLS?! How does that even happen?!  Husbands…that’s how.)

.

It’s where the p-trap gets clogged with disgusting things I’d rather not name, and where the shower drain collects the wads of hair that I swear couldn’t have all come from my head.  Sorry for the visual…just being real here.  The bathroom is where real life happens.  REAL real life…the kind of things where “everyone does it” but no one wants to talk about it.  You know…

.

Despite all the “real life” events that occur in a bathroom, surprisingly it is really easy to find beautiful bathrooms all over Pinterest and in magazines of all sorts.  Bathrooms CAN be beautiful–even though what happens in them rarely is…

.

Unfortunately, this post is not about a beautiful bathroom.  It’s about MY bathroom.  Dun dun dun….

    IMG_7867

I’ve had several people tell me they thought my bathroom was cute when I showed them a picture or two.  So, I kind of feel bad about saying that I don’t like it.  Maybe I’m the crazy one??  That’s cool.  You can tell me.  I can take it.

.

Hate is kind of a strong word.  I don’t really HATE the bathroom.  But I see a lot of potential and the current design just isn’t doing it for me.

.

IMG_7870

Either way, it’s about to be gutted.  AND I. CAN’T. WAIT.  I’m sure I won’t be saying that in a couple weeks (stay tuned, you’ll find out soon enough because I will be documenting everything. EVERYTHING.  If I remember…) when I’m knee deep in drywall dust, grout, and trying to figure out how to install a new toilet.  We’ve been through a kitchen remodel, and I’m somewhat prepared for what’s to come with another gut job, but I’m also aware that my expectations are clouded by the idea of how beautiful my bathroom will be after we are done.  I HOPE.  Oh, please let me be right about this…

.

But, because I’ve had several tell me they liked my bathroom as is, I feel the need to justify why we are remodeling.  So here’s the list of the main reasons we are about to tackle another gut job against my husband’s will.

IMG_7869

#1 We kind of have to.


When we redid our kitchen, Danny had to crawl under the house to move the plumbing for the sink and to run the wires for a few new electrical circuits we put in.  While he was under there, he noticed a pretty bad spot (rotten wood from a leak in the past) in the floor of our bathroom.  We had the house inspected when we bought it about two years ago and the inspector told us about the spot, but we were confused and thought it was under the OTHER bathroom.  When we looked at the floor under the other bathroom, everything seemed fine, so we didn’t think anything else about it.  But after Danny saw it and showed me pictures, we agreed it needed to be fixed.  I’d rather not  fall through the floor during a shower one day.

IMG_7868

BUT, in order to fix it, we need to get down to the subfloor.  Which would mean removing the shower.  Which would mean removing the flooring, which would mean having to redo a lot of the tile work on the walls.  I mean if you’re going to fix the floor, you’re pretty much going to be redoing the entire bathroom.  So that’s reason #1.

#2  It’s REALLY dark

This bathroom has a single light fixture.

IMG_7871

And that little dude is pretty stingy with the light, too.  We’ve tried all types of bulbs, but it’s just not cutting it.  Plus its location compared to the shower entrance means that VERY LITTLE light gets into the shower.  Like you pretty much shower in the dark.  And it’s really hard to clean a shower you can’t see into, too.  Just saying…

.

Actually, when we first moved in, I didn’t take a shower in this bathroom for the first week or so because it freaked me out how dark it was.  Not even kidding…

.

Oh, and I can’t even put makeup on in the bathroom because the lighting is behind my head.  So I can’t see my face in the mirror.  I sit in the floor in the bedroom to apply makeup.  Which is fine…just another reason to add to my list. (Can you tell that I’m kind of wanting to redo this bathroom whether it’s justifiable or not??)

IMG_1917

.

Adding lighting would be an option, but why make anything easy?  Remodeling would be so much better : )  Plus, it would have been hard to add a light above the shower since it’s cultured marble on the top (which is something else that is weird to me).

#3 The vanity

I’ve had so many compliments about this vanity, so I feel kind of bad complaining about it.  But, I really don’t like it.  I know, that makes me a terrible person.  Please forgive me.

.

But I made a new one already for the remodel and I really think it’s much better.  Maybe this will make up for not liking the old vanity?

IMG_7451

See, the old vanity has no shelves, and no drawers, and it’s really just a front.  It doesn’t have a back or any sides and the bottom of it is kind of in rough shape.  I wanted to replace it a long time ago…but again with the tile work and stuff on the wall.  The fact that the tile is all over the bathroom walls just wasn’t making anything easy to redo without a big undertaking.

#4 The door

Okay, so this one isn’t really a good reason, but I added it anyway.  This bathroom is small.  Like 7×7 small.  And a quarter of it is taken up by a door that swings into the room.  Our laundry room was like that, too.  Just doesn’t make sense.  It would be much easier to switch the door to open into the bedroom instead of into the bathroom.  But if we did that, then I would want to rearrange the room.  Which would require a remodel.  SOOOOO, here we are : )

bathroom before

.

#5 I just really want to redo it

Truth: I just really like remodels.  It doesn’t take much for me to justify doing one.  I’m sure you can tell that by now.

.

I have plans and ideas and sometimes what I picture in my head doesn’t look the same as when it’s done, but I’m really crossing my fingers on this one.

.

Here’s the plan: we will be gutting it to fix the floor.  Then we are moving the plumbing for the vanity so it will be on the left wall.  Side note: We wanted a double vanity, but the depth had to be custom in order to fit in the space, and we would be losing a lot of countertop to have two sinks.  So we chose having more countertop space over having two sinks.  Most people would have chosen two sinks, but we don’t mind sharing : )  It makes life a little more comical sometimes…you just have to have a good sense of humor.

IMG_7446

Then we will put lights over the vanity (HALLELUJAH WE WILL HAVE LIGHTS!!), and one over the shower.  We will be putting in a corner shower in place of the old one and replacing the toilet.  We will redo the drywall, retile the floor, add a backsplash, tile the shower walls (more on that in a later post) and add some shelving and storage.

IMG_7089

Stay tuned and be sure to follow along on Instagram!  I will update there often on the progress and will post on here with updates as we complete different phases of the remodel.  Demo starts Wednesday!!!

Until then, happy DIYing: )


Getting Things In Focus–I Bought a Camera!

July 27, 2016 by Shara, Woodshop Diaries

I’m a saver.  Why?  Sometimes I ask myself the same question.  I mean, if you’re going to buy it a year from now, why not just buy it now and enjoy it?  Don’t answer that.  I am well aware of the reasons why we shouldn’t buy everything we want right now.  But, I’m also well aware of how not fun it is to wait.  #adulting #responsibilities #itsucks

.

So, I’ve been eyeing a DSLR camera for over a year. But I couldn’t justify buying it.  And I just really didn’t need to spend the money.  Instead, I improved my iPhone pictures and told myself to keep waiting.  And saving.  And waiting.  And saving.

.

And then…I did it.  I bit the bullet and bought a camera.  Like a for real deal camera.  AND know what else?  I have NO IDEA how to use it…(maybe should have thought about that before pressing the “buy now” button)

I bought a new camera!

Obviously, because I’m taking “selfies” with it in a mirror in my bedroom in poor lighting and it’s not even in focus.  Let’s just pretend it’s picture perfect, okay? Maybe one day it will be…we can all dream, right?

.

I clearly have a lot to learn.  Who even knew cameras were so complicated?

.

I have some helpful (*cough* sarcasm) tips for what to do when you open the box and find your first ever DSLR camera.  At least these are the steps I followed…so I can only assume they are correct.  Please enjoy the randomness that follows 🙂

Don’t read the manual.


Why do they even include these?

Light and bright foyer--grey walls, white trim, navy door, sliding doors

You just  put the thing together and start shooting and suddenly you have professional pictures.  That’s how this works, right?  I don’t need INSTRUCTIONS.  (I sound like my dad…)

Kitchen inspiration

Just kidding…I may just take a quick look…

Light and bright farmhouse kitchen

Hours later–INFORMATION OVERLOAD.  I quit.  I can’t even.  It’s just too much.

.

Five minutes after quitting, pick it back up and….

Take random pictures of everything.


Like bathroom fixtures…

IMG_0069 (1280x853)

And baby baby kittens… (have I told you about how we currently have 13 cats at our house?  THIRTEEN.  If anyone needs a kitten, we have PLENTY to share)

IMG_0257 (1280x853)

Yes, there are eight.  EIGHT.  What cat has EIGHT kittens?  Ours.  It’s insanity.

IMG_0326 (1280x853)

IMG_0332 (1280x853)

And semi-grown kittens…

IMG_0251 (1280x853)

IMG_0302 (1280x853)

IMG_0253 (1280x853)

And my favorite full grown kitty…

IMG_0290 (1280x853)

IMG_0288 (1280x853)

IMG_0075 (1280x853)

Play with a million settings for hours.

Then go back to auto because you can’t figure out this whole manual thing yet…

IMG_0207 (1280x853)

Side note: I used to collect the Coca Cola Christmas bottles with the Santas on them.

IMG_0241 (1280x853)

Another side note:  I’m not sure my living room ever looked so good in a picture.  See next step…

IMG_0113 (1280x853)

Retake the same pictures over and over again.

Then compare them to your iPhone pictures to see if they look any better.


IMG_0107 (1280x853)

Good news! They do.  I’d hope so for that price tag.  Although an iPhone is actually more expensive than the camera…which is kind of why I still have a 4S.  #imcheap

IMG_0056 (1280x853)

IMG_0230 (1280x853)

And that, my friends, is how to get started using your new camera. .

I think.

.

 Just in case that isn’t all there is to it, feel free to send me any advice you have (besides removing my purse and lunch box from the table before taking pictures of it…I knew better), because I could obviously use it 🙂

.

Until next time, happy photo taking 🙂 Look out for all the “new camera” photos in my upcoming posts!


Super Simple DIY Shutters

July 24, 2016 by Shara, Woodshop Diaries

DIY Wood Shutters--Great Beginner Project

Looking to spruce up your home’s exterior without spending a ton of money?

Front of beautiful white she shed with natural wooden shutters and yellow front door

Making your own DIY shutters is an excellent way to add some curb appeal!

I made these from simple 1x4s and it’s crazy how such a simple project can make such a huge impact!

Before Shutters
These super simple DIY shutters can be made in no time, but will add so much character to your windows! You have got to check these out!
After Shutters

A friend of mine recently bought a “she shed” for her new home office.

So she asked me to make her some shutters for it to give it a little–something extra.

So, I’m sharing a simple formula for making your own simple DIY shutters.  

I promise, you will be done in no time 🙂  And all you need are some 1x4s, screws, glue, and an outdoor finish.  

Easy peasy…let’s get started.

To Build These DIY Shutters, You Will Need:

This post contains affiliate links. See policies for details.

  • Treated OR Cedar 1x4s (see step 1 for how many)
  • 1 ¼″ exterior screws
  • Wood Glue
  • Outdoor finish
  • Nail heads
  • Hammer
  • Drill
  • Miter Saw

.

NOTE: In the photos below, you will see I used regular untreated 1x4s for this project.

That will work fine…for a while. Regular spruce or pine 1x4s will last a good while if they are regularly recoated in a good outdoor finish.

However, they will eventually rot.

So, I recommend using cedar boards for this as they are naturally rot resistant OR using treated lumber for outdoor use.

1. Cut Shutter Boards to Size

Cut three 1x4s the height you want your shutters and two pieces of 1×4 at 10 ½″ long FOR EACH SHUTTER.  

She had three windows, so needed 6 shutters total.  So I cut all the pieces at one time.

wood for shutters cut to size

For shutter length, I don’t know that there is a definite RULE for what they should be.

But I’d recommend adding a few inches to the height of your actual window and making your shutters this tall.

Determine this height and multiply by 3, then add (2 x 10 ½″) = 21″.

That gives you how many feet of 1×4 you need PER shutter. Typically, you have two shutters per window.

This will help you determine how many feet of 1×4 you will need per window.

2. Finish the Shutters Before Assembling

This isn’t absolutely necessary, but I think it makes things easier and allows you to cover all wood surfaces for better protection.  

I stained these with an outdoor deck stain (Olympic Canyon Brown Wood Toner).  

We have used this on all our outdoor furniture and I love the color.  

Since these shutters will be outside, I suggest you use a good outdoor sealant or good outdoor paint.

I stained before assembling so the stain and sealant would get on all the surfaces and between the boards as well..

3. Assemble the DIY Shutters

I used glue and 1 ¼″ exterior grade screws to assemble these shutters.  I laid out the three long boards and clamped them together.

Long boards for shutters ready for assembly

I measured 6 inches in from each side and drew a mark with my speed square.

This is where I want to line up the short boards.  

I put glue on the short boards and tacked them in place with my nail gun.  You could use hammer and nail here.  

Basically, you just want to hold this board in place so you can flip it over.  

Clamps would work as well.

Glue on stretcher
Tack front stretchers in place on front side of shutters

Then, I flipped it over so that it is face down on the work surface.  

Used 1 ¼″ EXTERIOR deck screws and screwed three screws into each short piece to connect the three long boards to them.  

I forgot to stain the backs of these boards prior to assembly *face palm*.  

But, I DID go back and stain them before I hung them up.

Screws on back side of shutters showing how to attach front stretchers

Now these shutters are ready to go.

shutters assembled and stacked against wall ready to hang

4. Add Nailheads to Front of Shutters

For a little extra detail, I added these super cute nailheads to the front of the shutters.  

They are actually upholstery tacks.  Who knew, right?  

I got mine at Hobby Lobby in the fabric/sewing department.  They have several styles.

Upholstry tacks in package

I simply tacked the nails onto the front of the boards with a hammer.

Hammer nailing decorative nail heads onto wood boards

They add so much detail.  Totally worth the extra couple bucks.

You could also use some decorative outdoor and decking hardware to spruce these up a little.

shutters stained with nailheads on front
Close up of nailhead hammered into front of shutter

Now, before you hang them, be sure to stain the back if you haven’t already (looking at myself on that one…).

Step 5: Hang DIY Shutters

To hang them, I used 2 ½″ outdoor deck screws and screwed them into the siding.  

I used 4 screws per shutter.

The exterior of this shed was wood, so it was easy to hang.

However, depending on the exterior of your own home, you may need to hang differently.

If going into brick, you may need to use special screws for brick. Same for vinyl.

Here is her adorable office before the shutters.  It’s cute even without them.

She shed without shutters on front window

But, then look how much cuteness they add once they are up on the windows?

Shutters hung on each side of she shed front window
Close up of right side window shutter made from wooden 1x4 boards
Shutters on front porch of she shed building--wooden shutters hung on each side of front window

See how cute?!  I know, right?  These simple projects can have such a big impact.

If you’re looking for more ways to spruce up your home’s exterior, check out some of my favorite outdoor projects:

DIY Concrete Landscape Curb
How to Make a DIY Concrete Planter for Your Front Porch!
Concrete Planter Pot
Simple Planter Box
How to build your own modern plant stands for front porch or even inside the house
Modern Planter Box
DIY Front Porch Wagon
How to make your own DIY concrete planter pot with wooden base
Modern Outdoor Chair

If you enjoyed this simple DIY shutter project, don’t forget to Pin for later!

These super simple DIY shutters are such a quick and easy project, but will add so much character to your windows!  You've got to check these out!

Until next time, happy building 🙂

How to Hide Your Ugly Water Heater

July 20, 2016 by Shara, Woodshop Diaries

Disclaimer:  The water heater in this post is electric.  I’ve been told this could pose a fire hazard with gas water heaters.  I am not familiar with gas water heaters and the safety precautions to take with them.  So, before doing this project, please consult a professional to find out if this is safe for your own application.

.

Compliments are always so nice, right? They can totally change everything.  I mean you’re going along having the worst day ever and someone tells you that they think you are having a good hair day and suddenly the world is right again.  “Who, me?  My hair? *flips it around shoulders* Why…thank you! It is great hair, isn’t it?”


So, let me ask you something. Has anyone ever complimented your hot water heater?


No? Really?  I wonder why?  Is it possibly because it’s maybe just a little bit slightly kind of possibly…um….UGLY?


yikes before--ugly water heater


Don’t be offended, you really can’t help it. It’s just the nature of the beast…water heaters are just not pretty appliances.  I don’t have a pretty one, you don’t have a pretty one.  No one has a “pretty” water heater.  It’s just not a thing.  (Although, the tankless ones are much more attractive than the large ones with tanks…they just cost a lot more.  And, hello, my middle name is cheap.  Well, not really.  It’s Beth.  But it might as well be cheap.)


Despite their atrocious appearance, we do have to take a minute to appreciate what a water heater does. I mean…it heats our water.  That’s kind of a big deal.


before--ugly water heater


Several years ago when I was in college, a large part of West Kentucky (where I call home) went through an ice storm. Pretty much everyone was without power and everything was covered in ice.  We had no hot water (because no electricity) for days.  After three days, I had had enough and I had to take a shower whether there was hot water or not.  Have you ever taken a shower so cold that you could see your breath.  That’ll make you appreciate your water heater….


Said all that to say: our water heaters serve an important purpose. We can’t just toss them because they are ugly.  But we CAN cover them up.  And guess what?  IT’S AN EASY FIX!

How to hide your ugly hot water heater--An eadsy DIY solution--Woodshop Diaries


Here is how you make a water heater cover. AND guess what else?  It’s easily removable for quick access in case of any leaks that you need to get to.  Danny had to make sure that was a requirement 🙂


I can’t tell you exact measurements on this, because it will all be based on your own personal application. You will have to take in to consideration the space you have around your heater, and the size of your heater.


My water heater is tall and skinny. I didn’t take pictures of me making it last year when we remodeled our laundry room, but I made one for a friend of mine recently and hers was a short, fat water heater.  The pictures below are from when I made that one.  The process is the same, just the measurements will be different.


First, I cut four 1x4s for the “legs.” These will need to be slightly longer than the height of your water heater. Then, I cut 4 short pieces of 1×4.  The length of these short 1x4s will be based on how wide and deep you want your cover to be.  You will need to drill pocket holes in them (using your Kreg Jig–affiliate link) like the picture below.


frame pieces

Then you will attach the short 1x4s (with pocket screws–affiliate link) to the longer “legs” to make two frames like the picture below.

frames


Then, I took some luan—which is like cheap ¼” plywood—and cut two pieces to size to fit in the frames. I cut them about an inch wider and an inch longer than the opening.  You have to have some overlap so you can staple or nail them on.  I stapled it on the back of each frame.


panels


If you would rather, you can use fabric instead of luan. I used fabric for mine (it was drop cloth actually), but my friend wanted wood.  Either works fine for hiding the heater 🙂


front view finished


Then I drilled pocket holes in one leg of one panel like the picture below. I screwed the two panels together using pocket screws.  Make sure you screw them in the right orientation for your application.


attaching 2 panels


At this point, you have two options. Because I wasn’t going to be putting a lot of weight on mine and I didn’t have the space to add the extra leg for support, I just attached my top at this point.


However, if you have the space for the extra leg, I would put the extra leg in for support. If you don’t have the space, skip this step and go to the next one.


To add the extra leg, I cut another 1×4 the same length as the other legs, and a shorter 1×4 like I used for the frames.


Using pocket holes and screws, I attached it like the picture below.

attaching last leg


before adding top

Now, you can add the top. If you weren’t able to use the extra support leg, I suggest using ½″ or ¾″ plywood for the top.  If you were able to add the extra leg, you can use plywood or planks.  I did planks here.


side view


I nailed them on for the top. If you don’t have the extra leg, I would use screws to hold it in place better.


top view


Now it’s ready for paint, or stain, or just leave it unfinished. Anything will look better than that water heater!

top attached

Just set it in place, and that’s it!  Easy peasy!  By just sitting it in place, it makes for easy removal in case you need access to your heater.

laundry-room-washer-side-doors

laundry-room-from-foyer-doors

finished

That’s much better than looking in and seeing ugly pipes and warning labels all over a big metal tank, right?

PS if you like what you see here, be sure to check out my whole laundry room remodel 🙂  It’s seriously one of my favorite rooms in the house now!

So what are you waiting for?! Get to building–you have a water heater to hide!

Don’t forget to pin for later!

How to hide your ugly water heater--An Easy DIY--Woodshop Diaries


How to Build the Easiest Desk Ever

July 16, 2016 by Shara, Woodshop Diaries

Need a super easy desk idea?  Look no further.  Not only is its style “on point” (kids these days…where do they come up with this strange lingo?), but it is a crazy simple build and sure to be a conversation starter.

How to Build the Easiest Desk Ever

Simple, industrial, rustic.  What more do you want?

.

Plus, this could be a console table, dining table, foyer table…the possibilities are endless.  And you can have it done in no time.  No kidding.

Of course, if industrial isn’t your thing, I have a few other suggestions on desk ideas I might suggest ; ).  This one is nice, too.

.

So anyway, let me tell you how to build this desk.  It’s literally 5 steps (YOU CAN TOTALLY DO THAT)…and the last one doesn’t even count.

.

This post contains affiliate links for your convenience.  See disclosure policy for more information.  

Tools needed:

Drill

Wrench or channel locks (handy, but not required)

Pipe Clamps

.

Materials needed:

(4) ½″ black flanges

(6) 2′ long ½″ black pipe

(4) 4″ long ½″ black pipe

(4) ½″ end caps

(4) ½″ tees

Wood for top (size of boards will be determined by size desk desired)

Black Spray paint

Wood Glue

1 ¼″ Screws (I used Kreg Screws)

Stain & Poly

.

I will give one word of caution: precut and threaded black pipe isn’t cheap.  If you are able to cut and thread your own pipe, you can buy larger pieces and cut and thread them yourself to save some money.  You may be able to do this at a local hardware store, but be aware they may charge for this.

.

Okay, so Step # 1:  Assemble the pipe

.

Screw the 2′ pipe into the flange first.  Then add the tee onto the other end of the 2′ pipe.  Screw the 4″ piece into the other end of the tee and screw the cap on the other end of the 4″ pipe.  It’s easier to see in a picture.  So from bottom to top we have: flange, 2′ pipe, tee, 4″ pipe, cap.  Screw them as tight as possible–use a wrench or channellocks if you have them.

How to Build the easiest desk ever

how to build the easiest desk ever

These are your legs.  You will do this four times.

How to Build the easiest desk ever

Now screw two legs together with the remaining 2′ long pipes.  You will have two “sets” of two legs attached with the pipe.

How to Build the Easiest Desk Ever

So, moving on to Step #2:  Clean and paint the legs

.

The legs will be dirty.  You can clean them with a rag and alcohol or Simple Green if you have any.  Any type of degreaser–even dish soap–will get them pretty clean.  They don’t have to be PERFECT…you just don’t want dirty hands just by touching it.  Once you have the dirt and grease off, give them a couple good coats of spray paint.

How to Build the easiest desk ever

See?  So far it’s easy peasy.  We are already to Step #3:  Assemble the top

.

You can check out my post here on how to build a table top.  Basically, you glue and clamp the boards.  You can square off the edges if you have a table or circular saw, but it isn’t required.  My table was 48″ wide, so I glued three 2×12 boards 48″ long together.  You can have them cut the boards for you at the lumber yard or the home improvement store if you do not have your own saw.

How to Build the easiest desk ever

Once the glue was dry, I trimmed it to the exact size I wanted and gave it a good sanding.

.

Now, for Step #4: Attach the legs

.

Turn the table top upside down (side you want to be the top should be down).  Mark where you want to attach your legs.  I centered mine from front to back and set the center of the flanges to be 4″ from each edge.  I marked it out and screwed the flanges in place.

How to Build the easiest desk ever

I used 1 ¼″ Kreg pocket screws because that is what I keep on hand.  They fit in the flange screw holes perfectly.

How to Build the Easiest Desk Ever

Attach both leg assemblies, then you are ready for the next step! Almost done!

How to Build the easiest Desk Ever

Now, this is Step #5–the step I told you really doesn’t even count: Stain and finish

.

Flip the table over and stain.  I used Minwax Provincial stain.  Once the stain was dry, I gave it a few coats of poly and it was good to go.

How to build the easiest desk ever

.

Of course, there is the optional Step #6: Bother your husband to help you get it inside so you can take pictures with your BRAND NEW CAMERA!!!

.

I can’t wait to tell you about it!  I’ve never had a real camera before. I know, I can still use a lot of practice with it.

How to Build the easiest desk ever

desk top

desk flowers

Pipe Desk Corner Close up

pipe desk vertical

pipe desk whole thing

pipe sk from above

pipe desk

So, tell me what you think…about the desk, or my poor photography skills.  Either is fine ; ) HA

.

Is industrial style your thing?  Or do you prefer the solid wood type stuff?  Whether you like it or not, you can’t deny that it is for real the easiest to build desk ever, right?

.

So what are you waiting for?  Get to building!

.

Oh, but before you go, don’t forget to pin for later!

How to Build the Easiest Desk Ever in Just 5 Simple Steps--Woodshop Diaries

Until next time, Happy Building 🙂

How to Build a Table Top

July 12, 2016 by Shara, Woodshop Diaries

Making table tops shouldn’t be intimidating.  I’ll show you how easy it is to build a table top for your DIY furniture projects in this post.

How to build your own DIY Farmhouse dining table--minwax early american top and white distressed base with chunky turned legs

So first I have to get this off my chest.  I’m far from an expert table top maker, but I typically avoid table tops made from 1xs, except when I built my own dining table…but that was part of the design element.  Otherwise, they just seem flimsy, weak, and insufficient.  Maybe it’s just me.

Note: This post contains affiliate links.  Please see disclosure policy for more details.  

And as much as I LOVE my Kreg Jig, I prefer gluing tops together vs screwing with with pocket holes.  That’s just my personal preference.  And 2xs are MUCH easier to glue than 1xs. (Just another reason not to make table tops with 1xs.)

However, I recently built a dining table and used 4/4 (basically rough 1xs) walnut boards to make a 2x top.  To do this, I planed all the boards smooth, then laminated (just glued) them together to make thicker boards like this.

Then, I ran them through the table saw to get the sides even and smooth (which is step 1 below). You can see the process in this DIY dining table video. So, if you want to make a thicker top, you can just glue 1xs together like this to make it thicker.

I’ve made SEVERAL tops like what I’m about to show you and it is simple and by far my favorite way to make a table top.  All you need are some pipe clamps and glue.  A table saw is handy, and if you need to trim it, a circular saw is useful as well.

So, let’s get building.  Here’s a dining table build video that shows the process with these walnut boards if you’re interested.  And the step by step is below.

Step 1: Pick Out Table Top Boards

Hardwoods are fairly expensive depending on where you live and what’s readily available. 

I showed walnut in the pictures above, but usually, to save quite a bit of money, I will use 2x8s, 2×10, or 2×12 construction lumber for my tops and just stain them my desired color. You can use any wood type you’d like and can afford for the top. 

In this tutorial, I’m showing using 2x10s.  But in the video above, I show this with walnut.  The process is the same no matter what wood I use.

I’ve had a lot of questions about how to get a flat table top.  There are a lot of fancy methods you can use to flatten out a board or a table top. 

However, the best advice I can give, especially if you don’t have a shop full of huge, fancy tools and a WHOLE LOT OF PATIENCE, is to start with flat boards.

RELATED: How to shop for lumber

I know that seems kind of obvious, but when selecting the boards you will use for a table top whether it’s a fancy hardwood (like the walnut I showed above) or a standard 2×10 at Home Depot, eyeball down the edge of the board.  If it’s bowed, put it back.  If it’s twisted, DEFINITELY put it back.

A flat board will make a flat table top.  A bowed board will make a bowed table top.  And a twisted board will make a twisted table top.

Also, if I’m making a large table top, I prefer to use wider boards (so 2×8, 2×10, 2x12s)…that means less glue joints.  But again, that’s my own personal preference.

Step 2: Square Edges of Table Top Boards

Once I’ve selected my table top boards, I like to clean up the edges.  When I buy 2xs at the lumber yard or hardware store, the edges are not perfectly square.  They have rounded corners.  See the bottom board below?  That’s a rounded corner board.  The top is one where I squared off the edges.

wood edges

You could skip this step, but I always like to square my edges before gluing.  It just makes the table top smooth across the top. 

If you glue two rounded edge boards together, you have a little dip at all the joints and that’s just another place to get food, crumbs, or dust stuck.

To square off an edge, I use my table saw and I set the rip fence about an ¼″ narrower than the width of the board and run it through. 

Then, I set it another ¼″ narrower and run the other side through.  Here, I’m doing this with some walnut boards.

Check out this post to learn how and why to square board edges

You can use a jointer if you have one, but I do not, so I use the table saw.  However, if the board isn’t straight, this can cause some issues. 

If it’s crooked, the table saw will cut it crooked.  You need straight joints for a clean glue up.  Again, that’s why it’s so important to pick straight boards.

Step 3: Glue Up Table Top

Once my boards are squared off, I’m ready to glue.  I’ve learned the hard way, that if you are gluing multiple boards together for a top, it takes longer, but it’s so much easier to glue two at a time vs all of them at the same time.

So in this case, when I was gluing up 4 boards for this dining table top, I laid them out on some scrap 2x4s and wiped any sawdust off the edges. 

I want the edges smooth and clean.  I flipped one up on its side and applied the glue.  I usually run a squiggly line down and line back.

two boards to glue together
glue on edge

Then I flip the board over and press it against the other board.

I like to use pipe clamps to tighten the boards together.  If you notice your boards buckling, you can alternate and put one clamp across the bottom and the other across the top. 

Mine was pretty flat, so I just left them on top.  I try to adjust the boards as I tighten so the tops are flush.

Tighten each clamp a little then go back and tighten them a little more.  You don’t want them so tight all the glue squeezes out, but you don’t want to see any gaps. 

Adjust a little as needed.  Then I let it set overnight or at least several hours to dry good.

two boards clamped2

Then, I repeat with the other two boards.  So, I have two large pieces to glue together for the final top.

two pieces to make one

I did the same thing with this–flipped it over, applied glue, then clamped.

whole top clamped

Don’t worry if a little glue gets on it…you can sand that off.

glue on table 2

Mine were a little uneven, too. One board was slightly higher than the other in the middle.

table uneven before sanding2

Step 4: Trim Top to Size

After glue up, sometimes the ends of the table top aren’t perfectly even.  So I use my circular saw and rip cut or just a straight edge to trim along the edges so that they are nice and even. 

Sometimes, I may need to trim a few inches off to get it to its final length as well.

Step 5: Sand Table Top Smooth and Flat

Once the glue is dry, it’s time to sand.  You can sand by hand (not recommended as it would take forever, but it’s doable), or you can power sand. 

I use a belt sander to gave it a good sanding and especially in those uneven areas and to help get it nice and flat–so I sand any high spots and ridges.

Make sure if you are staining, that you get all the glue off before you stain.  It’ll sand off pretty easy.

RELATED: How to sand wood

table top after sanding

Step 6: Fill Cracks

Once the top is sanded flat with a belt sander, I like to look it over closely for any cracks in the joints. 

Theoretically, there shouldn’t be any.  But, no one’s perfect, and sometimes glue ups leave some small cracks.

If I plan to stain the top, I will use a stainable wood putty to fill any small gaps or cracks. 

But, if I’m planning to just use only a clear coat, and I need a matching color putty, I will use some wood glue and matching color saw dust to make my own putty to fill the cracks.

Once the cracks are filled, I sand the top again with my orbital sander to remove any excess glue and putty.  I usually use 80 grit sand paper on my belt sander, so with my orbital sander, I use 120, then 180, 220, and finally 400. 

The higher grit you go, the smoother the top will be when you start applying finish.

Step 7: Apply Finish

Now the top is ready for finish.  Depending on what I’m making and what type of wood I’m using, I use different products when finishing my tops. 

If I’m making a dining table top or something that is getting a lot of heavy use, I will finish with Minwax Polycrylic or Minwax Helmsman.  These are clear coat polys that I just brush on and hand sand with 400 grit between coats.

RELATED: How to apply clear coat finish

If I’m using pine, I may stain the wood before applying the poly. 

RELATED: How to stain wood

But if I’m using a hardwood, I typically like to keep the natural color and skip the stain.  What’s shown above here is walnut–simply finished with four coats of Polycrylic.

You could also opt for a wax or oil sealer if you wanted.  But they may need to be applied periodically as they wear.

Now all you have to do is put it on a base 🙂  Here are a few of my favorite table options.  Click the images for tutorials to build your own base.

Check out this beautiful distressing on this easy to build DIY Farmhouse Dining Table--get the free building plans here

So that’s how simple it is to build a table top…basically glue, clamp, trim, sand, finish.  It doesn’t have to be complicated.  You can use biscuits, dowels, pocket holes, etc.  But I’ve had good luck simply gluing.

FAQ About Building Table Tops

I’ve had many questions over the years about table tops so here are some of my most frequently asked questions.  I’m not an expert, but I’m sharing what I’ve learned from my own personal experience.

What about wood movement?

I’m not a wood movement expert.  From what I can tell, wood movement is mostly unpredictable.  Things that I’ve made that theoretically should have failed, have been doing great for 5+ years…outside…in the elements. 

Things I’ve made that should have been fine have split…inside…in air conditioning.  So, I can’t tell you what will and will not last. 

That said, wood expands and contracts most ACROSS the grain.  So boards get WIDER, not longer.  So most issues occur when boards are placed perpendicular to each other–like with this table I built a while back.

How to Build a Modern Farmhouse Dining Table

As the wood shrank and narrowed across the main body, the end board didn’t get shorter, so the boards ended up splitting along one of the glue joints.  If this end board wasn’t there, that wouldn’t have happened.  So, these days, I avoid putting a frame or an end board onto a table top like this so the wood can move more freely.

And that brings me to breadboards…

What about breadboards?

I don’t use breadboards on my table tops because of wood movement.  Many people like them to help keep ends of the table flat and for added visual interest.  However, you have to attach them in a way that allows the wood to move and I don’t like taking chances, so I just avoid them so it’s one less headache to deal with.  Nothing right or wrong with adding one…I just avoid it to save extra trouble.

How do you get your table top flat?

There are lots of ways to use a planer or a router sled to flatten a bowed or twisted table top.  However, if you’re like me and don’t have the equipment, patience, or desire to do all that extra work, your best bet is to START WITH FLAT BOARDS.

When picking out boards to use for your table top, eyeball the edges of the board.  If it’s bowed or twisted, PUT IT BACK.  Find the straightest, flattest boards you can.  Flat boards will make flat tops.  Twisted boards will make twisted tops, bowed boards will make bowed tops.

Also, gluing in small sections helps.  I try to work out my glue ups so that I’m only worrying with one (two at the most) glue joint at a time while I’m clamping.

Once it’s glued, you can use a belt sander to sand down any ridges or high spots to help flatten it as well.

How do I install it to the base?

There are a lot of theories on this.  In the past, I’ve used pocket holes and screws to attach the base.  Many of my tables have been fine doing this, but theoretically, it doesn’t allow for wood movement, so there’s the possibility for splitting.

I recently learned about figure 8 metal tabs and used them in my latest table build.  They pivot so they allow the wood to move across the base, but still stay securely attached.  Here is an excellent tutorial for how to install them.

I hope this post has been helpful and answered your questions.  Building table tops can be as simple or as complicated as you want it to be.  I prefer keeping things simple 🙂  So if you’ve enjoyed this post, be sure to pin this for later!

Building a table top is the easy part, deciding on a base is what's difficult!  Find out how to build a table top that will last forever and doesn't require fancy tools--Woodshop Diaries

Until next time, happy building 🙂

The Doctor is In–How to Fix a Broken Leg

July 10, 2016 by Shara, Woodshop Diaries

Facebook for sale pages…they are a gamble.  Sometimes you get an awesome deal on something you wanted.  And sometimes you get a….well, a dud.

A friend of mine recently got the latter.  She bought a coffee table and she asked me if I could do something with it because it was a little wobbly.  I’ve never repaired furniture before, but I’ve built it so it can’t be that hard, right?

Turns out, it’s not.  I’ll show you how 🙂  But first, let me tell you a little more about this particular table.

When I got it in the shop, I gave it a good look.  While all the legs were a LITTLE wobbly, one was really bad.  It appeared someone had tried to fix it previously with…get this…expandable foam.  What?  Can’t even make this stuff up.

Anyway, so I looked around and unscrewed the loose table leg.

IMG_7288 (960x1280)

(Now, before I tell you how to fix one like this, let’s be clear.  There are a million types of table legs and there are LOTS of ways they are attached.  This is just one, but it is pretty common.  If you have a different type of table leg that needs repair, feel free to contact me and I can try and give you some suggestions.)

You can see the leg was supposed to screw tightly into the screw coming out of the corner piece.  What happened is that the hole in the top of the leg had gotten stripped out so it would screw in, but it wouldn’t ever screw tight.

So first, I tried filling the hole with glue and sawdust.  I mixed together a little paste of it and stuffed the hole.

IMG_7292 (1280x960)

I gave it a couple days to cure then I drilled a pilot hole and tried to screw it on and see if it pulled tight.

IMG_7307 (960x1280)

IMG_7309 (960x1280)

Nope.  Didn’t work.  So that was a waste of two days….

So then I remembered I had a dowel rod laying around leftover from an attempt at making my own drawer pulls for my dresser.  They didn’t work out, but I had already painted them gold.  Ignore that….

The dowel rod was ½″ which was bigger than the screw on the table, so I thought if I could glue the dowel rod into the stripped out hole, then screwed that in, that should work.

IMG_7375 (960x1280)

So I used a ½″ drill bit and tried to drill at straight as possible into the leg.

IMG_7377 (960x1280)

Then I cut a piece of dowel rod so it would sit in the hole and be flush to the top of the leg.  I put some glue in the hole and covered the dowel with glue and slid it into the hole.

IMG_7381 (960x1280)

IMG_7382 (960x1280)

I wiped off all the excess glue that squeezed out and let it dry for a day.  I was so excited, I just KNEW this was going to work and I couldn’t wait to tell you all about it because this felt like the legit way that things like this were supposed to be fixed.  I was LEGIT.

So I drilled my pilot hole and screwed it in and guess what?  STILL DIDN’T WORK.  I think what happened was that I didn’t drill a perfect 90 degree angle and my hole ended up slightly bigger than my dowel and when I screwed it in, the dowel busted.  Guess I should invest in a drill press or something…

IMG_7388 (960x1280)

Okay, so, at this point I threw all the “legit” out the window.  And this is what actually worked.  (I’m sorry to all those “proper” woodworkers who would have a much more advanced solution to this, but I just needed a solution that would work and not require me to invest in tools I don’t already have.  The budget is slim ha!)

I used epoxy.  For real.  Why didn’t I just do this to begin with?

You can buy all different types of epoxy at the hardware store for a few bucks.  Most types would have worked fine, I’m sure.  But, Dad buys Domo 10 (not an affiliate link) in bulk qualities because he uses it a lot when he makes tombstones (that’s what he does for a living), so I just borrowed his.  I’m a mooch.

I drilled out the dowel rod I had put in and filled the hole with epoxy. (Sorry for the blurry picture…)

IMG_7397 (960x1280)

Then I stuck it on the screw,

IMG_7398 (960x1280)

I twisted it down good and wiped off what squeezed out and let it set for a day.

And when I checked on it, what do you know, it didn’t wiggle AT ALL.  WIN!

By the way, (helpful hint) if you have a table like this (dining, coffee, any table), or chairs like this (most dining chairs these days are) that have Allen screws on the insides of the corners, you should re-tighten them occasionally.  We used to re-tighten our dining table and chairs every month or so because they got a lot of use.

I brought it inside and had Danny pose with it to show how sturdy it is now.

IMG_7566 (1280x960)

IMG_7567 (1280x960)

He was obviously THRILLED to be my model.  He’s really the best, but sometimes he can be the worst.  He was mad I made him take his shoes off to put his feet up.  He’s so silly.  But, you get the point.  It’s now strong enough for even Danny with his chicken legs big, strong legs to prop his feet up on.

IMG_7569 (1280x1280)

IMG_7560 (1280x960)

So, that was a really long way to say, you can easily fix a broken coffee table leg with epoxy as long as you don’t want to be super fancy and proper. : )

Sometimes you just got to get ‘er done, right?

I’m all for proper technique and fancy tools (neither of which I would know anything about), but then there is real life.  When all else fails, and the budget is tight, epoxy.

Until next time, happy fixing broken table legs!

Don’t forget to pin for later!

A super easy solution to a broken table leg--no fancy tools required--Woodshop Diaries

What’s Up Wednesday–The Nitty Gritty Truth About Sanding

July 6, 2016 by Shara, Woodshop Diaries

It’s What’s Up Wednesday again, you guys! Only two more days until the weekend!! If you don’t count today, that is.  I never count today when I’m waiting for the weekend 🙂

So, let’s just get right to it.  Let’s talk about sanding. Everybody grunt in unison, now.  UGH.  It’s the worst, I know.  I could make this a real short and sweet post and just tell you that “sanding sucks.”  The end.  That would be the truth, right?  But, that’s not the WHOLE truth.

There is A LOT to know about sanding. I don’t even know enough to scratch the surface…<—did you see what I did there?  So I am not going to claim to be a sanding expert.  (For real, who would want to be a “sanding expert”?  That’s like being the safety guy/girl at work.  Everyone already knows you SHOULD do it, but no one likes the one who enforces it.)

But, has anyone ever told you that sanding is totally WORTH IT? Really, you ask, is it REALLY worth it?  Is it worth the sawdust in my hair and wearing a dust mask in 100 degree weather?  YEEEEEES, I promise.  I will show you.

Sandpaper different grits

Now, I get it. I ignored sanding for a long time.  I thought it was mostly a waste of time.  It’s a dirty, time consuming, and sometimes difficult job.  I assumed it wasn’t worth the hassle.  I mean, I buy 2xs and 1xs at the lumber yard.  They’re already PRETTY smooth to begin with.  The difference would be minimal, but the effort would be great.  I thought, it was surely a “non value adding task.”  So, I know the struggle.

But the truth is (and I hate to be the bearer of bad news), sanding really does make all the difference.  Dang, I know right?  Not what you wanted to hear.  But now that you know the truth, it’s time to live by it.  These are the general “rules” I have adopted based on my own experience lately (or sometimes lack thereof).

NOTE: This post contains affiliate links.  Please see disclosure policy for details. 

1. Sand raw wood prior to assembly.

No, I don’t ALWAYS do this.  Should I?  Probably.  I especially always try to sand my 2x material because it’s typically made for building houses and things, so they don’t take great care to get them smooth before you buy them at the lumber yard.  Not sanding them could get you a nice pretty splinter like I have in my hand right now. Plus if you are making furniture, you want it to be nice and smooth and not look like building lumber.

Sometimes I use the belt sander with an 80 grit belt, and sometimes I sand by hand–depends on how rough the lumber is.  I typically buy an assorted package of sandpaper to keep on hand for hand sanding.

1x material is USUALLY pretty smooth to begin with, but a good sanding never hurt.

But, do you want to know what was life changing?  What made me really understand why this is important?  Buying untreated 4x4s at the lumber yard.  UGH.

I bought a couple untreated 4x4s from the lumber yard for a project for a friend. They looked HORRENDOUS.  Like for real, I almost cried in the parking lot of the lumber yard when I paid top dollar for a couple and they loaded them in the truck and they looked awful.  So when I got them home and in the shop, I cut them to size and grabbed my belt sander.  I figured before I cut my losses and just burn them, I might as well try a thing or two.

IMG_7411 (960x1280)

IMG_7407 (960x1280)

And I’m glad I did because, just look at them now. (Left-unsanded, right-sanded)

IMG_7408 (960x1280)

Now, you can see the mess, too.  Sanding is definitely messy.

IMG_7422 (960x1280)

But it was TOTALLY WORTH IT!

This is me sanding….

IMG_7423 (1280x1280)

IMG_7416 (960x1280)

See? They were “rub my face on it” smooth!

IMG_7413 (960x1280)

IMG_7414 (960x1280)

What’s sad, though, is that it took me this long to take sanding seriously.   So SAND YOUR RAW WOOD (especially 2x and 4x material) before finishing.  Before assembly is even easier : )  I PROMISE you this makes such a big difference!

2. Sand after Poly

When I was making the countertops for my laundry room redo, I was putting Polycrylic on them in the shop.

laundry cabinet side from foyer

By the way, have you guys tried Polycrylic? IT. IS. AWESOME.  Like it’s for real the best stuff ever.  It’s a water based sealant that you can apply over stain (or paint if you want) and it’s super easy to clean up, no stinky smell, and doesn’t yellow over time.

IMG_7493 (960x1280)

There used to be a time when I thought poly was another one of those “non value added tasks,” but then I started editing pictures.  I know what you’re thinking, where are you going with this? Sanding, poly, editing pictures?  Are you on something?  No, just hear me out.  Have you ever edited a picture and adjusted the sharpness of the image?  (I’m talking to you, Instagrammers)  Polying after staining is like sharpening the look of your piece.  It makes the wood grain look less “fuzzy,” and makes the stain color really stand out.  It also makes it much easier to dust, but that’s another story.  All that being said, you should totally NOT skip applying poly after staining.

Anyway, so I was polying my countertops and once I had my obligatory (at the time this was my mindset) two coats on and it was kind of dry, I asked Danny to help me carry them inside. I don’t remember what he was doing, but he was busy and said he would help me when he was finished.  My can of poly was almost empty and I figured while I waited, why don’t I just finish out this can and give it a third coat?  And since I’m already killing time, why don’t I sand before this last coat like the can says (and I had never actually done before) and just see what happens?  You want to know what happened?  It changed my life forever!  And by that I mean that ever since then, I’ve sanded between poly coats.  That’s life changing, right?  Look how smooth…I wish you could touch it!

It was soooooooo smooth. Like “I wanted to rub my face all over it” smooth.  So that whole sanding between poly coats thing was for real all this time and I thought they were just kidding!!  Again, with the truth : )

And one time, when I ran out of 220 grit (which is what the can said to use) while finishing my nightstands, I grabbed some 400 grit that I kept for my butcher block (more on that in a second) and used it between coats. I’m telling you, you haven’t felt smooth until you’ve used 400 grit sandpaper between poly coats.  Now that is all I use when finishing pieces.  See the differences in the grits?  this is 100, 220, and 400 grit.  The larger the grit, the smoother it will be after sanding.

IMG_7432 (1280x960)

And my nightstands are so smooth.

IMG_7425 (960x1280)

IMG_7426 (960x1280)

3. Sand frequently used surfaces occasionally

I’m going to confess something. I’ve had butcherblock countertops for over a year and I never sanded them all down.  I’ve kept sand paper on hand for them and used it in little spots, but never sanded them all the way down.  I simply oiled them and wiped them clean.  Once I used 400 grit paper on my nightstands, it occurred to me I should try using it on my butcher block. OMG the difference!  I wish I could grab your hand and pull it into this picture to feel this!

IMG_7428 (960x1280)

Frequently used surfaces can get scratched, dirty, and worn.  An occasional sanding and maybe a fresh coat of poly (or oil) makes a world of difference.

4. Sand primer prior to painting

The whole sanding between coats of primer and paint is another thing I thought was “non value adding.” Nope, it does make a NOTICEABLE difference.  I use Kilz latex primer and it tends to raise the grain of the wood (just like any water based finish).  When I made my laundry cabinets, I made sure to sand everything down before painting and it’s amazing how smooth they feel compared to my door trim that I didn’t sand down before painting. Sometimes it’s the little things that can really make a piece stand out.  Sanding is definitely one of those “little things” that are so easy to skip.

I know this was a super long post about a somewhat boring and kind of hated subject, but within the last few months I have really really been convinced of the huge difference a little sanding makes.  I’ve known all along that I SHOULD be spending more time sanding and getting a good finish, but it wasn’t until these few experiences I’ve shared with you that it really sunk in.  I have a hard head I guess haha.

Many of you probably already knew all of this, but if there is anyone out there like “6 month ago me,”  let me encourage you to get out that sander or sanding block and get to it.  You’ll be amazed at the difference!

The truth hurts, but splinters hurt worse : )

Don’t forget to pin for later!

The Nitty Gritty Truth about Sanding--And how it can make or break your project--Woodshop Diaries

Until next time, happy building sanding!!


A Simple Modern Outdoor Table

July 3, 2016 by Shara, Woodshop Diaries

I have a thing about legs.  I’m kind of picky.  I don’t really care if they are skinny, or a little bit chunky, but they have to be straight and smooth.  What?  Did you think I was talking about “people legs?”  You crazy.

Furniture legs, guys.  Let’s all get on the same page.  Wow, that could have been bad….

Ever since I built my office stool, I’ve wanted to do the same design on a bigger scale.  I mean, it’s super simple…nothing fancy.  But I think that’s what I’m drawn to lately.

IMG_6042

So when I sold last year’s “rush decision” outdoor picnic table I made, but never really loved….

IMG_3040

I replaced it with this modern round dining table and used my stool design as inspiration.  It’s super simple and really a quick build that could be used both outdoors or indoors.  But, obviously mine is outdoor since it’s replacing my old picnic table.  What do you think?

NOTE: This post contains affiliate links.  Please see disclosure policy for more information.

Here’s how the build went down…

I used:

about (4) 2x4x8 boards for the base

(2) 2x10x8 boards (for the top)

Wood glue

2 ½″ pocket hole screws

2 ½″ regular wood screws (or could use pocket hole screws instead)

Couple of 1 ¼″ wood screws

(WAIT!! Let me do the math real quick…beep beep boop…that’s only $30 in lumber!!! No joke!)

Instead of buying 4x4s (those things are hard to find untreated), I glued 2x4s together to make the legs.  I glued 4 legs together and made them about 30″ long.

Once the glue was dried, I ran them through the table saw to square off the ends.  I shaved about ¼″ off both sides where the joints were and made the leg 3″ wide.  So the legs are actually 3″x3″ instead of a true 4×4 which is 3 ½″ x 3 ½″.  No one will notice : )

I sanded them down with the belt sander to make sure all sides of each leg was super smooth.  Then I cut all the ends at a 7 degree angle parallel to each other on my miter saw, making sure all the legs were the same length.

Table legs 7 degree angle cut

I wanted my top to be about 36″ diameter, so I made the top of the table base a little smaller than that at 28″ wide at the top.  So the top x needed to be about 22″ wide.  (28′-(2×3″ legs)=22″)

I used the table saw to rip a piece of 2×4 22″ long in half to make two 2×2 pieces.  (I ripped them at 1 ½″ wide.) I cut the ends off at 7 degrees not parallel to each other.  I wanted to notch each one out in the center to the two would fit snugly together.  So I found the center of each piece and marked ¾″ to each side of the center and marked halfway down the piece (see picture below).  I used a jig saw to cut two lines then used a chisel to knock the block out.

Table Braces notched out

If they fit together the first time, awesome.  If not, trim a little off with the chisel or jig saw until they fit good.

Table x brace

Then I put a couple screws through the bottom to hold them together.

I drilled pocket holes using my Kreg Jig (set for 1 ½″ thick material) in each end on the bottom side of the X (you could do top or bottom).  I screwed them into the top of each leg using 2 ½″ pocket hole screws.

Then, I did the same thing for the bottom X except I used 2x4s instead of 2x2s.  I made these 28″ long and also cut 7 degrees off each end as before.  I notched them out and drilled pocket holes in the bottom and also screwed that into the legs.  I screwed them in about 3″ from the bottom of each leg.  Your height may vary a little based on your exact measurements.  Just make sure your table sits square when you attach the bottom X.

For the top, I cut 4 pieces of 2×10 a little over 3′ long (about 37″ or so–doesn’t have to be exact).  I squared them off on the table saw to get a good flat edge then glued and clamped them together.  I used a router and a jig to cut the circle out of the top just like I did with my coffee table.  This picture is from that project:

IMG_3547[1]

I gave everything a good sanding, then stained it with outdoor deck stain and sealant (I used Olympic Deck Stain Toner in Canyon Brown).  Once the stain was dry, I flipped the table top upside down and set the base on top of it upside down.  I used 2 ½″ screws and attached the top by screwing through the 2x2s into the top.  I put several screws in to make sure it would hold.  Then I flipped it back over and brought it out back.

Build this simple modern dining table for $30 in lumber--Woodshop Diaries

I made my mom and sister pose for a picture by it haha.

mom and sissy outside laughing

By the way, these Adirondack chairs are AMAZING.  I love them.  You can find Ana White’s plans for them here.  I built these two last year and they are super easy and super sturdy and cheap to build.

Build this simple modern dining table for $30 in lumber-Woodshop Diaries

How to build this simple modern dining table for $30 in lumber--Woodshop Diaries

I mean, for real, check out those LEGS.  It’s probably just me, but I am loving this simple style.  Super easy to make and just a simple, modern design.    One day, maybe I’ll throw an umbrella in the mix, but for now, it’s fine by itself in the shade.

Build this simple modern dining table for about $30 in lumber--Woodshop Diaries

PS Funny story…this is what the cats do when I’m trying to take pictures on “their” back porch…

IMG_7477 (1280x960)

Cute right?  Within five seconds after this picture she was digging her little kitten claws in my back trying to play with my hair…

IMG_7489 (640x480)

Then this….

IMG_7480 (1280x960)

I give up…

I waited until they were napping and tried again haha

So what do you think? Adorbs, right?  It’s seriously super cheap to build.  So what are you waiting for?!  Get building!!

But first, don’t forget to pin it : )

Build this simple modern dining table for $30 in lumber--Woodshop Diaries

Happy Building!!! Oh, and Happy Independence Day!!  Hope you have a safe and fun holiday!!

What’s Up Wednesday–Paint’s Up Wednesday

June 29, 2016 by Shara, Woodshop Diaries

Hello everyone!!! It’s What’s Up Wednesday again!

So what’s up? PAINT is up!!  On the walls, of course.  I’ll get to that in a second.

bathroom full room

What else is up? Bathrooms.  Let’s talk about them.  They’re expensive—I mean plumbing, tubs, showers, sinks, COUNTERTOPS, vanities, toilets, faucets—none of that stuff is cheap.  And what do you do in bathrooms?

IMG_5460

Exactly.

You spend all that money on a bathroom just to….you know….in there. Is it worth it?  I dunno.  Maybe?

IMG_5462

(You guys, I know I keep using these pictures from the Mrs. Meyer’s video…they’re the next best thing I have right now to emoticons…so you get the idea, right?  Note to self: find some sort of way to insert emoticons in blog posts…)

So, either way, I’ve got three bathrooms (let’s rephrase: the house we bought came with three bathrooms). This was our guest bathroom when we moved in.  We’ve done nothing to it until about a week ago.

IMG_1870

Now, I realize I couldn’t have taken a worse “before” picture even if I tried, so let’s give the bathroom a little credit here.  It’s not THAT bad.  Here’s a more friendly before picture.

IMG_3297[1]

What’s bad is I’ve had paint in my cabinets leftover from a failed attempt at painting our living room well over a year ago. And, It never occurred to me to USE THAT PAINT for something….ANYTHING.  JUST USE THE PAINT!

I had half a gallon left of Sherwin Williams Rainwashed and we were having family over in a week. So I figured what better time to paint this bathroom than right before we have guests who will be using it?  PLUS, we are about to be using this as our main bathroom soon while we remodel our master bath, so this might possibly make the room more bearable for us, too.

Painting is such a satisfying process.  It’s one of those things with almost immediate results.  Like three hours after popping open the can, the room looked like this.

bathroom full room

shower

vanity

Don’t lie.  You’re totally jealous of my swirly chocolate cultured marble countertops, right?  I cannot even explain it, but they are actually growing on me since the paint job.  Maybe something about the blue with the brown vs the green with the brown?  Doesn’t that have something to do with the color wheel?  No idea, but it’s honestly not that bad anymore…please someone tell me if I am losing my mind…

countertop

I’m NOT a photographer by any means (clearly because I’m still using an iPhone for these pictures…poor girl can’t afford a for real camera yet…donations gladly accepted, though), but I’m trying to take some “more interesting” pictures lately.  Like this one…I have no idea if this is a “good” picture, but it cracks me up because….

IMG_7335

Did you see me?

me in mirror

The paint fumes must have gotten to me that day…

But, for real, the miracle of paint is so often overlooked. As much as I want to rip this bathroom out and put in a brand new one (and I will one day…when I have a few grand laying around and nothing to do with it AND after I’ve splurged on a camera), for now, half a gallon of paint and a $3 roller has bought me another year or so of procrastinating an expensive remodel (guesstimating about $4,000).  And for that, I owe it a “what’s up Wednesday” post.  So this is what’s up this Wednesday…my “new” bathroom.

I’m totally not getting paid to say this, but I do always highly recommend Sherwin Williams paint and this Rainwashed color is soooooooo pretty.  It feels like I’m at the beach while I’m….you know…in the bathroom.

I’ve said all this to say, you guys, if you can’t afford a remodel, paint is a MIRACLE WORKER.  Try it.

How a Little Paint Saved Me a Lot of Money--Simple Bathroom Update--Woodshop Diaries

You may just fall in love with your ugly bathroom again…and even start to appreciate your chocolate swirly countertops, too.

So, that’s it for now.  Get out there and paint something…unless it’s wood…in that case, stain it 🙂

Happy DIYing!!


What’s Up Wednesday…And a SUPER Simple DIY Wood Tray

June 22, 2016 by Shara, Woodshop Diaries

How to make a super easy DIY wood tray

Good morning! And welcome to our second installment of What’s Up Wednesday!  I know, right?  I woke up this morning like “UGH it’s only Tuesday…”

Then when I went to pick out a shirt to wear to work, I was like “I’ve already worn the red shirt and the blue shirt this week, so today is the grey shirt day…which means it’s WEDNESDAY!!!”  I don’t want to wish my life away or anything, but for real, aren’t we all counting down to the weekend??  Wednesday is TOTALLY better than Tuesday 🙂  And, yes, I do wear the same shirts to work in the same order by color…

So anyway, a few random things for this What’s Up Wednesday…

Thing #1:  The bathroom remodel I’ve been talking about for weeks is still on schedule to start end of July to August.  I’ve been buying stuff for it and picking out colors.  AND YOU GUYS….I AM SOOOOOO EXCITED.  I got the pendant lights in the mail this week and I picked out tile and grout colors last week!  PS I’m still figuring this out…but I know the pictures below are a little blurry 🙁 sad day


IMG_7219 (1024x1024)


IMG_7089


Thing #2: Our favorite orange kitty has been sick all weekend and we put him back outside (his natural habitat) on Monday after work and he was loving it.  I got this ADORABLE picture that Danny is going to kill me for putting on here, but I have to show you 🙂  AREN’T THEY THE CUTEST!!??


IMG_7242 (640x640)

Thing #3:  I migrated all my followers last night to the new site.  You all should be receiving emails of new posts now.  If you notice any glitches in the site or are not getting the emails, please let me know.

Okay, enough of the randomness, I have a SUPER simple DIY for you guys that you are going to LOVE…at least I hope so.  This was seriously one of my first ever projects and people seem to love them.

It’s a serving tray!

This is super easy to customize, but I’ll show you how I did mine.


You will need:

Saw of some sort (miter saw is good, but when I made my first one, I used a little cheapo jigsaw)

Hammer and 1 ⅜″ or longer nails (or nail gun if you have one)

6′ 1×6 board (or could use 1×4 for a narrower tray)

3′ 2×4 board (or could use 1×4)

IMG_7245 (1024x768)

That’s it!

So, first, you want to cut your “stretcher” boards.  These will be the 1x6s (or 1x4s if you chose to use those instead).  Cut three (or more if you choose) the length you want your tray to be.  Mine was 22″.

IMG_7243 (1024x768)

Then you want to lay the boards out side by side and measure the distance across them.  If you use 3 1×6 boards like I did, it will be 16 ½″ wide.  Cut two 2×4 boards (or 1×4 if you choose) this length.

IMG_7244 (1024x768)

Lay them out on the work surface like the picture below with the 2x4s and the 1x6s facing DOWN.

IMG_7247 (1024x768)

Make sure everything lines up and is square, then nail (using EITHER hammer and nails, or a nail gun) at least two nails in each 1×6 board from the bottom into the 2x4s.  Be sure to nail from the bottom so you don’t see the nails when you flip it over.

IMG_7248 (1024x768)

And that’s it!  Sand, stain/paint, and add handles if you want and it’s good to go 🙂

If you liked the project, please pin the image below for future reference 🙂

IMG_7256 (768x1024)

I stained mine in Minwax Weathered Oak, but didn’t like how light the color was, so then I mixed some Minwax Provincial in with the Weathered Oak and stained it again, but it was still too light, so then I just went over it again with plain Provincial and I liked the final result.

IMG_7261 (1024x768)

If you like the coffee table, you can check it out here.

Brooke has some pretty pictures of a tray I made in her post here as well.  If you aren’t following Brooke, you should be.  She is super talented!  I made Brooke’s tray out of an old pallet, so the wood is a little more beat up than mine.

pinterest tray

I literally made this one last night specifically to post for this.  It took me maybe ten minutes–minus all the time I took trying to decide if I liked the stain colors haha.

So what are you waiting for?  Go make one or two…or seven.  It’s whatev.

Until next time, happy building!! 🙂


I Have an Announcement to Make

June 21, 2016 by Shara, Woodshop Diaries

It’s official.  It’s exciting.  It’s scary.  It’s kind of a big leap of faith.

You guys….we….are…..MOVING!!!!

IMG_3347[1]

Keep Reading

What’s Up Wednesday, Week 1-Father’s Day

June 15, 2016 by Shara, Woodshop Diaries

It’s time for my first ever installment of “What’s Up Wednesday!” So…… what’s up?


When I ask my dad that, he always says his weight. HA! Speaking of Dad, in honor of Father’s Day on Sunday, for this What’s Up Wednesday I want to share a few funny stories about my dad.   My dad is the funniest guy I know.

IMG_3042

Keep Reading

The South Wing Project Part 3–DIY Mid Century Dresser

June 13, 2016 by Shara, Woodshop Diaries

The best compliment I have gotten on my new DIY dresser was “that looks like it came straight out of the 70s.”  Why, thank you, sir, that was the point.  Guess I made it well 🙂 haha

IMG_7096 (1024x768)

If you follow me on Instagram (and you totally should…I’m @woodshopdiaries), you will have seen like a billion pictures of this project already, but I am just now getting around to finally posting about it.  It’s been rough, to be honest.  I’ll get to that in a minute.

.

First, let me refresh your memory on what the “South Wing Project” is.  You can check out part 1 and part 2 for a few more details.  Basically, the south side of our house is where our master bedroom, master bathroom, and closet are on.  I’m “redefining” my personal style as we redo this area in the next few months.  We redid our closet a while back, but our bathroom is our next big project.  While we are preparing to redo it, I’ve also started to work on our bedroom a little.

IMG_6736

Actually, the truth is, I’m having a hard time making decisions about the bathroom, so I’m making other things in the mean time 🙂

.

So after I made new nightstands, I wanted a retro/mid century style dresser like this one I saw at West Elm.  But the price tag was $999.  Umm, no.  So I figured out a way to make a similar one myself for about $100.  And that is (one of the many reasons) why I DIY.

.

NOTE: This post contains affiliate links for your convenience.  See disclosure policy for more information.  As always, I only link to products that I personally use and/or highly recommend.

.

For this project, I used:

Materials:

Birch plywood (2 sheets)

A couple 2x4s (some 2x4s were cut down to 2x3s on the table saw)

¼″ plywood for drawer bottoms and backing

Edge banding or thin strips of ¾″ wood

Pocket hole screws (1 ¼″ and 2 ½″)

2 ½″ wood screws (just a few)

1 ¼″ wood screws (just a few)

6 (pair) ball bearing drawer slides (I bought the 10 pack because it was cheaper)

Knobs and pulls

Tools:

Miter Saw

Jig Saw

Kreg Jig

Circular Saw (this is the link to the one I have, but apparently, there is a newer model now)

Drill

Tape measure

Pen/pencil

Hammer & Small finish nails (or nail gun is even better)

Making the Base

First, I made the legs/bottom frame.  I used my miter saw to cut four 2x4s 8″ long with a 7 degree miter on each end parallel to each other.  Then I marked on each block 2 ½″ down from the top and 1 ½″ from the outside at the bottom.  See picture below.  I drew a line between the two marks and used a jig saw to cut along the line.  These will be the legs.

IMG_6705 (768x1024)

IMG_6706 (768x1024)

I cut one 2×3 (2x3s are 1 ½″ thick and 2 ½″ wide) about 43″ long with  each end mitered at 7 degrees not parallel to each other. I screwed each end into a leg using pocket holes and screws.  (By the way, if you don’t already have a Kreg Jig for pocket holes, you NEED to get one.  I use mine ALL THE TIME.  Check out all my favorite tools here.)

IMG_6707 (768x1024)IMG_6708 (768x1024)

The next part was tricky.  I needed my dresser to be about 18″ deep.  So the angles between the other 2×3 and this 2×3 across the bottom were pretty big.  Too big for my miter saw to cut normally.  I can’t even tell you what angle I cut (I think it was around 60 something), but I ended up having to do some maneuvering on my saw to cut the angle.

.

Your angle would depend on how deep your dresser would be.  As long as the distance between the two legs (front to back) is smaller than the depth of your dresser, it’s fine.  No specific angle is required.

.

I ended up with two pieces to screw into this first 2×3.  The picture below shows better what I’m talking about.  I attached these two 2×3 pieces with pocket holes and screws to the other two leg pieces.  Then I screwed them into the long 2×3 in the middle with 2 ½″ screws.  Instead of screwing 2 smaller pieces into the one long piece like I did, you could mark and notch out the two 2x3s to fit together.  I was afraid it might lose some of its strength if I did that and it might have ended up with a sag in the middle.  In hindsight, it probably would have been fine.

IMG_6813 (768x1024)

Making the Main Dresser

Once the bottom was together, I started on the top part.  I used birch plywood (because it’s cheaper than oak and because for some reason, I think the grain is pretty).  I basically make a big box. I ripped my plywood into two 18″ pieces with my circular saw.  Then, I cut a piece 18″ wide x 52″ long with for the bottom and screwed two 18″x28″ pieces to it using pocket holes and screws.  Seriously, I don’t know what I’d do without my Kreg pocket hole jig.

IMG_6738 (768x1024)IMG_6739 (768x1024)IMG_6740 (768x1024)

Then I attached a 1×4 between the sides about 8 ½″ down from the top (again using pocket holes and screws).

IMG_6741 (768x1024)IMG_6743 (768x1024)

Then I added another 1×4 the same way in the back side.  I attached a “divider”  piece of plywood in the middle and on top of the 1x4s using pocket holes and screws on the bottom and using 1 ¼″ screws from the top.  Make sure it is exactly in the middle and square.  NOTE: in the first picture, I set the top piece on just to see what it looked like…at this point I had not attached it yet.

IMG_6745 (1024x768)IMG_6755 (768x1024)IMG_6756 (1024x768)

I then attached a backing–I used cheap ¼″ plywood backing–with small finish nails.

IMG_6783 (1024x768)

Adding the Drawer Slides and Drawers

It was easier to attach the drawer slides to the dresser before putting the top on.  So, I attached the two bottom and the two top first.  This was my first time using ball bearing drawer slides.  They are expensive, but they are really nice.  I highly recommend them. And these from Amazon are seriously the cheapest I have found anywhere.

.

I’ve got another post to detail how I made the drawers (here it is!! :)), so I will skip that part for now.  Once I attached the drawer slides, I then attached the top (which I made slightly longer than the bottom piece so it would have a little “lip” on each side) using pocket holes that I drilled into the sides (sorry I forgot a picture), then attached the drawers to the slides.

IMG_6810 (768x1024)IMG_6812 (768x1024)

Finishing

I covered the plywood edges with some thin strips of wood I had on hand. I tacked them on with a few finish nails. You could use edge banding, but I have a lot of thin strips in the scrap pile to get rid of, so I used that.

.

I stained both the bottom legs/frame and the top piece separately (I used Minwax Puritan Pine) then attached them together.  To attach them, I turned the top piece on its side and screwed the bottom frame into the top “box” from the bottom (so you couldn’t see the screws).  Then I finished it with Polycrylic clear coat.  I LOVE that stuff.

IMG_6814 (1024x768)

Adding Hardware

It really wasn’t too difficult of a project.  Seriously the hardest part was deciding on hardware.  I got Danny to help me bring it inside and I left this painters tape on them (so I could open the drawers) for about 2 or 3 weeks trying to decide.

IMG_6838 (1024x1024)

The original one that I wanted had brass hardware and had two knobs on each top drawer and long handles on the four bottom drawers.  But have you looked at prices for long drawer pulls?  I would literally have spent more on the hardware than I did the entire dresser!!  I’m cheap.  Totally not doing that.

.

I bought wood knobs for the top with the intention of spray painting them to look like brass and making my own wood handles.  Long story short, I accidentally stained the wood knobs and kind of liked it.  But my wood drawer pulls didn’t work out.

.

So then I bought some cute brass pulls at Hobby Lobby, but I just wasn’t feeling them.  I didn’t think they fit the dresser style.  So Danny’s friend at work has a CNC machine and he cut me a few wood ones.  At first, I hated them.  I seriously hated everything I tried to put on this dresser.  I was having a breakdown every time I tried something haha…it was bad.

.

So I stared at my options for a while.  And for some reason, I was still liking those stained wood knobs.

IMG_7033 (1024x1024)

So, I finally stained the wood pulls and attached them just to see what I thought.  I was pleasantly surprised that I really really liked them.

IMG_7053 (1024x1024)

It only took me a month, but I FINALLY LOVED my dresser…and dresser pulls 🙂  The struggle has been real.

.

I am quite possibly, the only one who likes this dresser, but I’m seriously so excited about it.  Like it’s one of my favorite projects I’ve ever done.

IMG_7109 (768x1024)

IMG_7122 (768x1024)

IMG_7119 (768x1024)

IMG_7111 (1024x768)

IMG_7117 (768x1024)

IMG_7108 (768x1024)

IMG_7123 (768x1024)

IMG_7106 (768x1024)

IMG_7097 (768x1024)

What do you think?  Does it make you feel like throwing on your bell bottoms and getting out the disco music? HAHA.

.

I will post a how to on the drawers later this week.  Sorry for such a long post, this dresser just makes me so happy 🙂

.

Don’t forget to pin for later!

Mid Century DIY Dresser Pin

It’s Me Again…

June 9, 2016 by Shara, Woodshop Diaries

I am just not getting the hang of this blog thing. I mean for real, how hard is it to post more than like ONCE A STINKIN’ MONTH?!  You guys….sometimes it’s actually really hard.  And I have no idea why.

I wrote A LOT in school. I was on the high school newspaper staff, and I loved to write short stories.  In college, I wrote A TON of lab reports.  Like hundreds probably, no kidding.  And at work now, I frequently write summary reports on monthly scrap and other data findings.  I know how to write.  But, I’m just not sure how to BLOG.

IMG_7058[1]

Keep Reading

The South Wing Project Part 2–DIY Nightstand Woven Shelf

May 12, 2016 by Shara, Woodshop Diaries

Welcome back to the “South Wing Project” saga!!  As I discussed in part 1, we will be slowly (over the next few months) updating our master bedroom and master bathroom and I will be documenting as we go.  The first project was new nightstands.  We last left off here:

IMG_6643IMG_6644

I showed you how I built the nightstands in the last post.  Then I showed you the finished product and promised to come back to explain how I wove my shelves.

IMG_6737

So here we are…part 2. The excitement continues!!! Because, for real, what’s more exciting than spending HOURS weaving a shelf?

.

I will warn you…this took me forever.  I mean like a couple hours PER SHELF.  I think it is a super cool feature and was worth it, but I was not prepared beforehand for it to take me this long.

.

The good news is that it is easy to do, the materials are not expensive, and it requires minimal tools–basically scissors and a staple gun.

.

This post contains affiliate links.  If you purchase from these links, I may receive small commission at no extra cost to you.  Thank you for supporting this blog so I can continue to provide free content.  See disclosure policy for more information.

You will need:

Staple gun (You could also use a pneumatic staple gun)

cotton string

jute twine

Scissors

.

So, I have to preface this…I swear every time I write a blog post, I realize I am terrible at all of this.  In my previous post, I mentioned that I made the shelf supports from 1x2s and ran them where the widest part of the 1×2 was going vertical.  Then I changed my mind and twisted them around to be horizontal.  I did all of that before I started the following process.

.

HOWEVER, I ran out of 1×2 and for one of my supports I used a 2×2 (in the back so no one would notice) because I didn’t want to cut any more 1x2s on the table saw.  Of course, this is the one I chose to take pictures with.  So the pictures will be a 2×2 as the back support and a 1×2 as the other supports.  Just go with it.  If you have a 1×2, the instructions are still the same. Please forgive me for all the confusion.

.

Okay, so here we go.

.

The first thing I did was wrap the entire front and back shelf support in twine.  And I wrapped the two side supports with the cotton string.  I was careful not to over lap any and to push the “wraps” close together.  I stapled the end of the twine/cotton to the bottom of the support and just started wrapping.

IMG_6692

I wrapped all the way across then stapled the end and cut it off.  If your roll doesn’t make it to the end, just tie it off to the start of your next roll, or staple each end and start the new one where the last one left off.

IMG_6693

Once you have all four supports wrapped in jute and cotton, take your jute and cut a piece that is long enough to wrap around the front and back supports and add another inch or two for safe measure–you don’t want to cut it too short.

IMG_6712

Match your ends together and staple the end of the “loop” on the underside of one of your jute wrapped supports.  See picture below.  (Ignore all my extra staples…I used a bunch of short leftover pieces to wrap my supports and had to staple all the ends.)

IMG_6710

Pull the two ends tight and wrap them around the opposite jute covered support and staple to the underside.

IMG_6711

Repeat this, spacing your jute “runners” equally across the supports.

IMG_6713

Once you make it all the way across with your jute, you can start with your cotton.  Take the end of the cotton string and weave over and under your jute runners from one side to the other.  Wrap the string AROUND the support and continue weaving all the way back following the same weave pattern.

IMG_6714

Pull the string tight and adjust its location as needed.  Trim the string making sure that it will still reach to the bottom of the support, pull tight and staple in place–similar to how you stapled the jute string.

IMG_6716

IMG_6717

Repeat these steps alternating your weave pattern–one run goes under then over then under, etc. and the one next to it goes opposite.  See picture above.  Space your runs evenly and make sure to pull tight.

.

Once you have finished weaving, trim long or loose ends.  That’s it!

.

Side note:  pulling too tight could cause the supports to twist or break.  You need to pull tight, but not TOO tight.  Make sure the supports are screwed in each end with TWO screws to prevent twisting.

.

And there you have it.  You’ve woven a shelf!  I’m sure there are a thousand ways to weave a shelf, but this is a simple way I tried it and it’s working fine for me so far 🙂

The easy way to weave a shelf--Woodshop Diaries

The easy way to weave a shelf--Woodshop Diaries

The easy way to weave a shelf--Woodshop Diaries

This would be super cool to do for several types of projects…not just a nightstand shelf.  I think it adds that extra storage area without feeling too heavy.  I guess that’s because it’s see-through haha.

.

So what do you think?  Will you try it?  Do you like it or would you rather have a wooden shelf?  You do have to consider this, though–you don’t have to dust a woven shelf 🙂  WIN!

.

I hope you have enjoyed the making of my nightstands.  Don’t forget to pin for later!

The easy way to weave a shelf--Woodshop Diaries

These are just a drop in the bucket of the overall project to update our bedroom and bathroom, but while we are waiting on a few things before we start the bigger projects, these were fun to make.  I hope you stick around to see the rest of the projects.

.

Up next–and I seriously CANNOT wait to show you guys–is my DIY dresser.  I’m in the process of making it right now and I’m so excited about it.  I might be the only one that thinks it’s cool, but I think it is SUPER cool!

Stay tuned and get building!! 🙂

The South Wing Project Part 1–DIY Nightstands

May 10, 2016 by Shara, Woodshop Diaries

How to Build a Modern Nightstand

Before I get started, I have to tell you that I have never before referred to any part of my house as a “wing.”  That makes it sound like a castle or something…which it most certainly is NOT.

But while I sat here trying to come up with some semi appropriate, but funny “nightstand” title, I was having little luck.  By the way, do not Google “funny nightstand puns.”  Just don’t.  So I looked at the bigger picture.  These nightstands are just a tiny part of a much larger project.

Keep Reading

Making My Own Vintage and Finding my Style–DIY Telephone Bench

May 2, 2016 by Shara, Woodshop Diaries

I think I might be a “hippie.”  In all honesty, I’m not sure what the exact definition of a hippie is.  But, my sister has always said I was one.  I have worn flare jeans for as long as I can remember. I like tie dye things.  I have had long hair for pretty much my whole life (except for that one time in college when I cut it off and then I had a Ron Burgundy moment and I “immediately regretted my decision”). I play the guitar.  I used to want a Volkswagen bug car.  I like peace signs and boho type clothes…and colorful patchwork purses.  My favorite pair of shoes are Rocket Dog sneakers with peace signs and smiley faces on the side and they have rainbow tie dye shoe strings…I mean, is that not normal?

So I’ve been trying to fit myself into this “farmhouse” thing that everyone is doing now since Chip and Joanna (you know…from Fixer Upper on HGTV) have taken over the internet and television.  I’m a huge fan–I think they are AWESOME.  I kept forcing myself to make my home fit the farmhouse style because farmhouse is totally in.  However, farmhouse just isn’t my personal style.  I was trying too hard to make it work.  It wasn’t until recently I figured this out and have accepted it.  But, I’ve been attempting to go this direction for a while.  And I’ve finally decided I’m done.  I think my office redo was kind of the start of going a different direction.

IMG_5970

Keep Reading

Going to the Dogs–DIY Dog Crate Nightstands

March 29, 2016 by Shara, Woodshop Diaries

My sister is one of my most favorite people.  I mean, we kind of grew up together.  Of course, she had six MISERABLE years on this earth before I came along, but she’s known me for most of her life, and I’ve known her for all of mine.

IMG_6242

We vacationed together.  We watched Disney movies together.  We rode the bus together.  And when she was old enough to drive, we would roll the windows down, listen to Kid Rock and see how fast we could top the hills on the hilliest road in the county.  Seriously, DO NOT TELL MOM WE DID THAT.  (FYI–mom on the left, sister and I on the right.)


IMG_6246


Oh and on Christmas Eve, I always got to sleep in her bed because when I was little, I thought I would wake up in the middle of the night and scare away Santa, so she would make sure to keep me there until it was “safe” to leave the room.  It became a tradition and we did that until she moved out.  She will tell you she hated it, but she lies :).


IMG_6243


So, all of that has nothing to do with nightstands.  I said all of that to say I know my sister better than she thinks I do and sometimes it’s really funny.


IMG_6244


She asked me to come over and help her with some storage ideas in her bedroom and closet.  The first thing I noticed when I walked in the bedroom was that she didn’t have any nightstands.  I asked if she would like some nightstands and pointed out that it would provide some extra storage.

.

She is very minimalist and doesn’t like a lot of furniture, so I knew she would say no.  The dogs sleep beside the bed and she didn’t want nightstands in the way.  I didn’t push it, but a couple weeks later she texts me asking if I would make some nightstands.  Totally knew that was coming.  Sometimes I just have to plant the seed and wait 🙂

.

She wanted a dog crate nightstand like this one from Ana White.  But just like with the fireplace I made her, she wanted it customized.  She gave me the dimensions she wanted and I modified the plans and added the drawer.  You can pretty much follow Ana’s general plan for the crate (adjust measurements as needed for your particular size).

.

But, to add a drawer, I just made the top piece on both sides a 1×6, added wood drawer slides, and made a simple drawer to fit the space.

IMG_5989


I also used a solid piece of plywood for the bottom and the back.  Ana’s version had “bars” in the back to match the sides.

Be sure to attach the top before the drawer slides.  I used pocket holes and screws to attach the top.


IMG_5995


I attached drawer slides to each side of the crate at the bottom of the 1×6 piece using pocket holes and screws.


IMG_6014


I made a simple drawer to fit in this space and I made the sides and back just deep enough to where they wouldn’t rub on the top when you slid it in and out. I stapled ¼″ plywood on the bottom, so don’t forget to add this in the drawer height as well.  I used a 1×6 piece for the front.  Below are the two “drawers” before attaching the front 1×6 piece and the ¼″ plywood bottom.


IMG_6026

I also made a door to fit the opening once the drawer was installed.  I painted the bottoms white and stained the top.  I didn’t paint any of the inside because I didn’t want the dogs chewing on anything and eating any paint.

IMG_6028


Add a simple knob, two hinges, and a latch to the front and it’s done!


Do double duty with these DIY dog crate nightstands--Woodshop Diaries


IMG_6203


IMG_6208


Do double duty with these DIY dog crate nightstands--Woodshop Diaries


And now, I present Sissy’s two dogs, Rufus and Wally!


Do double duty with these DIY dog crate nightstands--Woodshop Diaries

Rufus is more photogenic than Wally.  Is this not the cutest thing?

IMG_6223


IMG_6191


I think Rufus is a little more excited about the new crates than Wally.  But my sister and her husband seem to like them, too.  Which is more my concern than if the dogs like them haha.

.

Although this doesn’t provide my sister A TON of storage, it does give her two more drawers she didn’t have before, another surface to set things on, and a cuter place to house the dog beds.  It’s a win!

.

Looks like my storage ideas are “going to the dogs” these days. Get it?  I guess I should give my sister credit for the idea.  She has these ideas and I just interpret them and bring them to reality.  We make a good team I guess 🙂

.

Here’s to many more project collaborations with my sister!  Maybe for the next one, I can talk her into painting haha!

.

Don’t forget to pin for later!

Do double duty with these DIY dog crate nightstands--Woodshop Diaries

Until the next project, happy DIYing!

Yellow to Mellow–My Home Office Makeover

March 22, 2016 by Shara, Woodshop Diaries

Have you ever heard the saying, “if it’s yellow, let it mellow and if it’s brown flush it down?”  I have a chalkboard above the toilet in our guest bathroom and Danny wanted me to write that on it when we first moved into our house.  However, I am not a supporter of the practice of “letting it mellow,” so I preferred that all bathroom users flush when they are finished.  Instead, I opted to write, “Wash. Rinse. Repeat.” on the board.

.

I felt this was more beneficial to all involved…

.

Not that I have anything against the yellow…I mean yellow has been my favorite color for as long as I can remember.  But some yellow things ought not be yellow.  One of those things are walls.  Unless that’s your thing.  I mean, who am I to tell you what color to paint your walls?  In fact, in my old house, we painted our hallway BLINDINGLY bright yellow.  I really liked it…for a while.  So, yes, I have been there.

.

Sometimes you just need a little yellow in your life and I’m not going to stop you.  But, if you’re anything like me, you get tired of it quick and need a change.

.

For kicks and giggles, let’s take a second to look at the two rooms that were painted yellow when we moved into our house.

.

Exhibit 1: The Kitchen

IMG_2164

Exhibit 2: The “office”

IMG_1872

Side note:  The kitchen was painted “nacho cheese” before the remodel.  You think I’m kidding don’t you?  Jokes on you, cuz that’s for real.  We found a can of leftover paint in the basement. That was literally the color name…

paint

See, I don’t lie…

.

I have no idea what color the office was painted, but I honestly did like the yellow….for a couple months.  Then I was OVER IT.

.

I was also over the cheapo MDF cabinets and was kind of over the desk I made last year.  But, don’t worry.  I’ll find something else to do with that singer sewing machine base.

IMG_2160

So there I was hating everything, so I ripped it all out.

IMG_5359

It also appears someone spilled a bunch of green paint in the corner.  NICE….

.

So I painted the yellow.

Then I built a window seat and some short storage cabinets.


I realize that I could have/should have made the cabinets taller, but I really didn’t have that much to store in here AND I had INTENDED to build built in shelves above the cabinet.  You can read a little about my struggle with this office design here and here .

.

So then I built a desk.  Then I built shelves.  Then I got all excited and started “decorating.”  As you can see, I had some issues.  We went from this:

IMG_5778

To this:

IMG_5905

To this:

IMG_5912

Then this:

IMG_5942

And now I am finally DONE moving things and patching holes in the wall.  Here is the finished room:

IMG_5970

I kept feeling like it was missing something and I just wasn’t feeling it.  Then I added this door and I kind of think it totally clashes with the colors, but then again, I kind of like it.  And I think this was the last thing in the room that made me finally feel like it was finished.  So if you hate the door and think it clashes, just don’t tell me.  Then again, I don’t want to look like a fool, so maybe you should tell me…yay or nay?

IMG_6052

IMG_6043

I went back and forth about shelves on each side of the window and finally decided on one corner shelf on one side and this paint brush shelf on the other side.

IMG_6050

IMG_6069

IMG_6068

My grandpa originally made me that shelf many, many years ago to hang my cross country medals from high school on.  I graduated high school and interests change….so now it has paint brushes haha.

IMG_6072

The rock on my desk was a gift from my dad.  When I was a freshman in high school, my dad got laid off from the factory he had worked at for 30 something years.  He trained with a local monument company a few towns away to prepare to start his own in our hometown.  He brought me this rock with my initial on it one day that he had made for his first “practice” stone.  At the time I didn’t think a lot about it, but over the years it has become more special to me.

IMG_6055IMG_6077

I added my guitar to the wall for a little interest–and to tempt me to play it every now and then since I’ve kind of stopped…

IMG_6070

IMG_6044

IMG_6065

Take a look at this?  Get it???

IMG_6066

I wanted this room to be a little eclectic.  I wanted to be inspired when I spent some time in here.  I only put things that I really loved in here and didn’t fill it with stuff just to fill it with stuff.  Know what I mean?

IMG_6075

IMG_6059

IMG_6056

IMG_6046

IMG_6053

I am not the perfect decorator or even close to a professional designer.  I spent hours stressing over this room.  It may not be magazine worthy, but I finally have embraced it and, hey, it can’t be worse than the before, right?  Let’s compare:

IMG_5800IMG_5970

Yep,  I think I like it.

.

And at the risk of thinking maybe I don’t, I am already making myself busy with the next project 🙂 That’s how I roll.  Distraction is the only way I survive the day.  Just kidding… totally not kidding…does that make me crazy?

.

That’s normal, right?

.

So what do you think about the office?  Would you like to work in here?  Me too haha.  This is my inspiration to maybe one day spend some more time working in here vs working…anywhere else.  Here’s to chasing that dream 🙂

.

So to bring this whole thing full circle, let me say this:  I took the yellow and made it mellow.  I guess in some instances “letting it mellow” is acceptable, huh? 🙂

.

Don’t forget to pin for later!

office redo pinterest

DIY Floating Corner Shelves

March 9, 2016 by Shara, Woodshop Diaries

In this post, I’ll share how to build these unique DIY floating corner shelves with just one board!

Home office with craft desk and built ins with DIY corner floating shelves on the wall

This office space used to be “nacho cheese yellow.” Not even kidding–that’s the name written on the paint can we found in the basement after we bought the house.

.

I wasn’t a huge fan of the color, or the boringness of the empty space, so I decided to give it some much needed style and function.

.

First, I remodeled the room, then I built a new desk, and finally, I added these floating shelves to display some of my favorite items and books.

.

These aren’t your typical floating shelves, but what’s really cool about this boxy style is that you can install them on an inside corner or around an outside corner as well!

.

So if you want to build your own, grab a board and let’s get building 🙂

.

This post contains affiliate links.  Please see disclosure policy for more details.

To Build These DIY Floating Corner Shelves, You Will Need:

  • 1x8x8
  • Miter saw (or chop saw)
  • Drill
  • Kreg Jig for Pocket Holes
  • 1 ¼″ pocket hole screws
  • L-brackets for hanging
  • 1 ¼″ wood screws
  • 2 ½″ or longer screws for hanging

Step 1: Cut Corner Shelf Pieces

I cut my 1×8 board into pieces:

  • (2) 28″ long
  • (4) 10″ long

Now, a typical 1×8 is 7 ¼″ wide, so these shelves are 7 ¼″ deep. If you want deeper shelves, you can use a wider board like a 1×10 or 1×12.

1x8 board cut into pieces to assemble floating shelves--two 28" boards and four 10" boards on workbench

A 1×8 is 7 ¼″ wide, so these shelves were 7 ¼″ deep. However, if you want a deeper shelf, feel free to use a wider board–like a 1×10 or 1×12.

Step 2: Assemble Long Shelf Side

I screwed the 28″ pieces onto the ends of one of the 10″ pieces with 1 ¼″ wood screws like shown in the image below.  Feel free to use wood glue as well if you want.

.

I could have used pocket holes and screws here, but it would be hard to get the drill in that small space after the first 28″ piece was on.

Two 28" boards screwed into 10" board to make long side of floating corner shelf

HELPFUL TIP: Don’t forget to predrill here! Those screws in these thin boards will split easily if you don’t!

Step 3: Add Short Corner Shelf Side

I used a pocket hole jig to drill ¾″ pocket holes into the ends of two of the 10″ boards. Then, I used 1 ¼″ pocket hole screws to attach them to the other end of the 28″ pieces like shown below.   

RELATED: Learn how to use a pocket hole jig in this post!

Two 10" boards screwed to long corner shelf side using pocket holes and screws

HELPFUL TIP: Think about how you want to hang your shelves and have the pocket holes face up.  This way, you can set something on the shelf to cover the hole on the bottom pieces and you wont see the top of the top piece if you hang it eye level or higher.

.

Or, if you’d rather plug these pocket holes so they’re hidden, check out this post for 4 different ways you can plug your pocket holes.

.

Then, I screwed the last 10″ piece between these two short boards using 1 ¼″ wood screws.

Final pieces of corner shelf screwed into short side

Now, you can stain it or paint it as you wish before you hang it. 

Step 4: Hang DIY Floating Corner Shelf

To hang these corner shelves, I screwed L brackets into the studs where I wanted my shelf to hang (make sure you use at least 2 ½″ long screws to secure it into the studs!)

.

If you don’t have a stud where you want your L bracket, use a drywall anchor. Then, I placed the shelf on the brackets and screwed them in.  You can see the brackets underneath the top shelf in the picture below.

L brackets screwed into wall to used to hang corner floating shelves

You will need to use two L brackets on both the top and bottom shelves here–so at least 4 brackets total.

.

I found it easiest to hang the top brackets on the wall first, rest the top shelf on them, then screw in the bottom shelf brackets in order to get the spacing between the shelves right.

.

Now, I wouldn’t weigh these down with tons of heavy stuff, but this was plenty to hold a few books and decor items like you see in the pictures.

.

If you didn’t want to use L brackets, you could also use pocket holes and screws drilled into the shelves where the studs will be. You can see an example of how I used this method to install floating shelves under a bathroom mirror.

.

Now that the shelf is hung, use it to display your favorite books and decor.

DIY Corner floating shelves hanging on wall in office with books inside

These would work great in a home office, a kids room, or in an entryway to toss keys and mail onto if you don’t have floor space for a table!

Home office with large craft desk and built ins with DIY corner floating shelves installed on one wall corner

If you’ve enjoyed this DIY floating corner shelves project and want to see more shelving ideas, check out these DIY shelves for more ideas and build plans!

.

And if you want to save this for later, don’t forget to pin it!

DIY floating corner shelves pin image

Until next time, happy building 🙂

The DIY Desk Born from Indecision

March 1, 2016 by Shara, Woodshop Diaries

There should be a support group for people who have trouble making decisions.  Maybe there is one already out there.  If so, I probably would have trouble deciding if I really wanted to go or not.  It’s probably best I assume the support group doesn’t exist.  Or maybe it would really be helpful.  But then what if they ask everyone to bring a snack to the meetings?  What would I bring?!

.

So when I decided to remodel the room I call “the office,” I had a room in mind that had a million shelves.  I wanted it FULL of books and a rolling ladder so I could reach the top of every shelf.  It would be dark and elegant and make you feel smarter just by gazing into it.

.

I would have a fancy desk with a fancy chair and it would be like walking into a Harvard library (not that I’ve ever been inside a Harvard library–but I’ve watched Legally Blonde, so that’s close enough, right?).  I mean I was super sure that was exactly what I wanted!

.

Want to know what I ended up with?

None of the above.

.

But, I’m okay with that.

.

Once I installed the window bench and the cabinets on the right wall, I started doubting that I wanted to make built in shelves on top of them.  And I kind of appreciated the simplicity of the bare white walls.  UGH, that meant I had to change my plan that I had already taken months to decide to execute.

.

So I put off doing anything else to the walls until I made the desk.  Oh, but what kind of desk do I want now?  I had originally wanted a desk…like a fancy office desk.  But now that I wasn’t doing a fancy “Harvard library thing” in here, I didn’t know what to do.  So I started thinking of this more as a craft room/studio.  Seriously….a “studio?”  I crack myself up. I don’t even know the definition of a studio!

.

I finally settled on a large craft table that I can spread out on and that would move–because I couldn’t decide exactly where in the room I wanted the desk to go.  See?  I seriously have a problem!!!

.

So here is how I made my new desk/craft table/whatever this thing is 🙂

.

Note: This post contains affiliate links.  If you purchase from one of these links, I may receive a small commission at no extra cost to you.  This helps keep the website and it’s content free.  Thank you for supporting this site.  Please see disclosure policy for details.

Materials Needed:

(3) 2x12x8s for the top (could use one 8ft and one 10 foot instead)

(2) 4x4x8 (or could glue 2x4s together and get 4 more 2x4s)

(2) 1x4x8

Drawer slides (18″)

(4) 2x4x8

(1) 2x2x8

¼″ plywood

1 ¼″ pocket hole screws

2 ½″ pocket hole screws

(4) 3 ” casters

Tools Needed:

Kreg Pocket Hole Jig

Miter or Chop Saw

Drill

Step 1: Build the sides

It is difficult to find untreated 4x4s in this area, so I glued 2x4s together for the legs.  Whether you use this method or actual 4x4s, either works fine.  I cut these 4×4 legs at 31 ½″.

.

I cut two pieces each of 1×4 and 2×2 at 22″ and pocket hole screwed them to the legs like the picture shows.  I used ¾″ pocket holes and 1 ¼″ screws for the 1×4 and 1 ½″ pocket holes and 2 ½″ screws for the 2×2.  You could replace the 2×2 with another 2×4, but I liked the smaller profile of the 2×2.

.

Notice that I also drilled pocket holes in the 1×4 towards the top.  This is to attach the top later.

IMG_5688

Step 2: Attach the sides

I attached a 1×4 as the back support using pocket holes and screws.  I drilled pocket holes onto the back support like I did the side supports in the picture above.  This piece is 40″ long.  If you wanted your desk even wider or more narrow, this is easily customizable and you could make this support whatever length you wanted.  My desk was about 54″ long.  I drilled pocket holes going toward the top along this back piece just like from step 1 on the 1x4s.

IMG_5703

Step 3: Attach the top

You can read about how I make table tops in this post, but basically, I squared off the edges on my table saw and glued the boards together.  Squaring the edges makes the top smoother, but it’s not absolutely necessary.  So if you don’t have a table saw, no biggie.

.

It was cold outside and I didn’t want to wait for the glue to dry completely before moving on, so I secured the boards while the glue dried using pocket holes and screws.  You can see the pocket holes in the picture below.  I cut it to size (it was about 32″x54″) then flipped the table base over.

.

I centered the base I made from steps 1 and 2 on the top and made sure everything was square.  Then, I screwed it onto the top using the pocket holes I drilled earlier and 1 ¼″ pocket hole screws.

IMG_5704

Step 4: Add drawer

Next I made the drawer slides.  I used wooden drawer slides.  This was before I ever worked with REAL drawer slides.  I totally recommend using real ball bearing drawer slides for this, but I’ll show you how I did wood ones just in case you are curious.  I cut two 1x2s and screwed them into the side supports using pocket holes and screws.


To make the drawer, I cut two pieces of 1×4 to be the drawer sides.  I made them an inch or so shorter than the side support.  I placed a shim down on the bottom of the table top and placed the 1×4 on the shim (I wanted to hold the 1×4 about ⅛″ off the table top).  I clamped a 1×2 onto the drawer slide to hold it in place and I shot a couple nails through the 1×4 into the 1×2 that is clamped.  These will be the drawer slides on the side of the drawer.

IMG_5707

After these are nailed, I put a couple screws in to make sure they held.  I marked the front and the bottom side of the 1×4 so I wouldn’t get them mixed up on which direction they went.

IMG_5708

Then I cut a piece of 1×4 to go across the back side of the drawer and used pocket holes and screws to attach it.  I slid these pieces in the desk to make sure everything fit good before I attached the front.

IMG_5709

I cut the front piece about ¼″ shorter than the total distance between the two front legs and attached it using pocket holes and screws from the inside.

IMG_5710

Once I made sure the drawer fit well and was square, I used a router to cut a ¼″ groove on all the sides of the drawer about ¼″ from the bottom.  I cut a piece of ¼″ plywood to slide into these grooves.  I could have nailed the plywood to the bottom of the drawers, but this was cleaner.

IMG_5780IMG_5781

Now, if you would rather, simply attach a set of drawer slides onto the side supports and make any drawer style from this post and it will actually be easier in the long run. (I’ve learned a few things since I originally wrote this post 🙂 )

Step 5: Add shelf and casters

I cut pieces of 2×4 (and one piece of 2×6 because I didn’t buy enough 2x4s for the project…so don’t be like me) for the bottom shelf.  I just laid the boards on the 2x2s and marked where to cut.  But they should be somewhere around 43″ if my math is right 🙂

.

Helpful hint: This desk is big.  I advise you not to screw the shelf in until you get it inside.  In order to get it in a doorway, you’ll have to go at an angle and you can’t if the shelf is there.  Trust me…don’t ask how I know this.

.

I stained everything with Minwax Puritan Pine and screwed the casters into the legs.  (Another helpful hint….see helpful hint above.  You might want to think about putting the casters on once inside as well 🙂  Again, don’t ask how I know)

IMG_5718

Once I got it inside and put it back together, I screwed the 2x4s and 2×6 into the 2×2 support for the shelf.

IMG_5782

I polyed it with Minwax Polycrylic and attached these super awesome DIY drawer pulls to the drawer, and I’ve finally decided that I made a good decision on the desk style.  I think…

IMG_5771

And I have decided that it fits well in the room.  And if I change my mind, I can roll it to a new location 🙂  Perfect.

IMG_5790

IMG_5778

IMG_5783

IMG_5791

IMG_5788

IMG_5785

IMG_5784

Okay, so do you love the desk or what?  It’s very simple, and very functional.  I am thankful that sometimes my indecision points me in a better direction 🙂

.

To see the whole office remodel, and all the DIY projects included, click here.

.How to Build a DIY Craft Desk

So until the next project, happy building!  Get out there and embrace the indecision 🙂

Getting a Handle on it–DIY Drawer Pulls

February 29, 2016 by Shara, Woodshop Diaries

I hate hardware.  It’s one of those necessary evils.  I avoid drawers and doors in almost every project possible just so I don’t have to buy hinges, pulls, knobs, and hardware. I have to admit, it does make everything look and function much better.  But I always forget to factor the hardware into the build budget, then $100 later, I’m like “HOW DID I MISS THAT?!”  So, basically, it all boils down to the $$$.  Hardware is expensive.


And of course, it is never a coincidence that when you know exactly the kind of hardware that you want, you 1.) can never find it or 2.) will pay a fortune for it.  Until now…dun dun dun!  DIY drawer/door pulls!!  FOR CHEAP! Like, WHAT?!


IMG_5784

Adorable, super cheap DIY door/drawer pulls for less than $1 each!--WoodshopDiaries

Yup…AND they cost less than $1 each!!  Which leaves more money to spend on cool things like new cans of stain you don’t really need, another pair of wool socks, cat food, Cadbury eggs.  You know…whatever floats your boat…or whatever ends up on your grocery list…

Keep Reading

DIY Cornice Boards-The Window Treatment I Didn’t Know Existed

February 9, 2016 by Shara, Woodshop Diaries

Please tell me I’m not the only one who had no idea what cornice board was…


I mean, I was completely clueless!  My sweet and talented friend, Brooke, texted me one night and asked if I wanted to make her some cornice boards.  I was like “um, what the heck is a cornice board?”  Then she sent me a picture and I was like “ohhhhh…well that’s different.” HAHA.  Like where have I been?  Obviously not on Pinterest…


So I asked her to send me some measurements and I got started.  I have to admit, I was kind of hesitant that these were going to look good in her living room, but OMG for real.  They look super cute and I kind of want my own 🙂  And the best part? They’re super easy to make, and install….AND they’re cheap!

Keep Reading

  • « Previous Page
  • 1
  • …
  • 12
  • 13
  • 14
  • 15
  • 16
  • Next Page »

Hi! I'm Shara, the designer, maker, and videographer behind Woodshop Diaries. Let's get building, friends :)

Learn more →

Woodworking Tips & Guides

  • How to make simple Shaker style cabinet doors!!
    DIY Simple Shaker Cabinet Doors
  • 5 Tools To Get Started Woodworking
  • DIY Kitchen Cabinets–From Only Plywood
  • How to Square Board Edges and Make Your Own 2x2s

Footer

↑ back to top

Tips to Take Your Projects to the Next Level

--5 Secrets to Professional Looking DIY Furniture

--How to Properly Paint Wood Furniture

--How to EASILY Cover Plywood Edges

--How to Sand Wood

--10 Must Have Tools for Furniture and Cabinet Building

Printable Building Plans

Check out our shop to browse printable PDF building plans!

Website Policies

This website is for entertainment purposes. Using any information provided is to be at your own risk.

This site uses cookies to provide you with a better experience.

All images and text on this site are property of Woodshop Diaries, LLC. Please be respectful and don't steal this content.

See Policies and Privacy page on this site for more information.

Want to get in touch? Contact Us Here

Copyright © 2026