Woodshop Diaries

  • Shop
  • About
    • Work With Me
    • Frequently Asked Questions
  • DIY Projects
    • DIY Furniture Plans
      • DIY Bed Plans
      • DIY Dresser Plans
      • DIY Nightstand Plans
      • DIY Desk Plans
      • DIY TV Stand Plans
      • Coffee and Side Table Plans
      • Tables
      • Shelves and Bookcase Plans
      • DIY Storage Trunk Plans
      • DIY Bench Plans
      • DIY Storage Cabinet Plans
      • DIY Bathroom Vanity Plans
      • Kids Projects and Furniture
    • DIY Scrap Wood Projects
    • DIY Workshop Projects
    • DIY Home Decor Projects
  • Getting Started
    • Cabinet Building
    • Woodworking Basics
    • Furniture Finishing Tips
    • Tool Guides & Reviews
  • Blog
menu icon
go to homepage
  • Shop
  • About
    • Work With Me
    • Frequently Asked Questions
  • DIY Projects
    • DIY Furniture Plans
      • DIY Bed Plans
      • DIY Dresser Plans
      • DIY Nightstand Plans
      • DIY Desk Plans
      • DIY TV Stand Plans
      • Coffee and Side Table Plans
      • Tables
      • Shelves and Bookcase Plans
      • DIY Storage Trunk Plans
      • DIY Bench Plans
      • DIY Storage Cabinet Plans
      • DIY Bathroom Vanity Plans
      • Kids Projects and Furniture
    • DIY Scrap Wood Projects
    • DIY Workshop Projects
    • DIY Home Decor Projects
  • Getting Started
    • Cabinet Building
    • Woodworking Basics
    • Furniture Finishing Tips
    • Tool Guides & Reviews
  • Blog
search icon
Homepage link
  • Shop
  • About
    • Work With Me
    • Frequently Asked Questions
  • DIY Projects
    • DIY Furniture Plans
      • DIY Bed Plans
      • DIY Dresser Plans
      • DIY Nightstand Plans
      • DIY Desk Plans
      • DIY TV Stand Plans
      • Coffee and Side Table Plans
      • Tables
      • Shelves and Bookcase Plans
      • DIY Storage Trunk Plans
      • DIY Bench Plans
      • DIY Storage Cabinet Plans
      • DIY Bathroom Vanity Plans
      • Kids Projects and Furniture
    • DIY Scrap Wood Projects
    • DIY Workshop Projects
    • DIY Home Decor Projects
  • Getting Started
    • Cabinet Building
    • Woodworking Basics
    • Furniture Finishing Tips
    • Tool Guides & Reviews
  • Blog
×
Home

Modern Industrial DIY Wood + Metal Wall Clock

July 1, 2019 by Shara, Woodshop Diaries

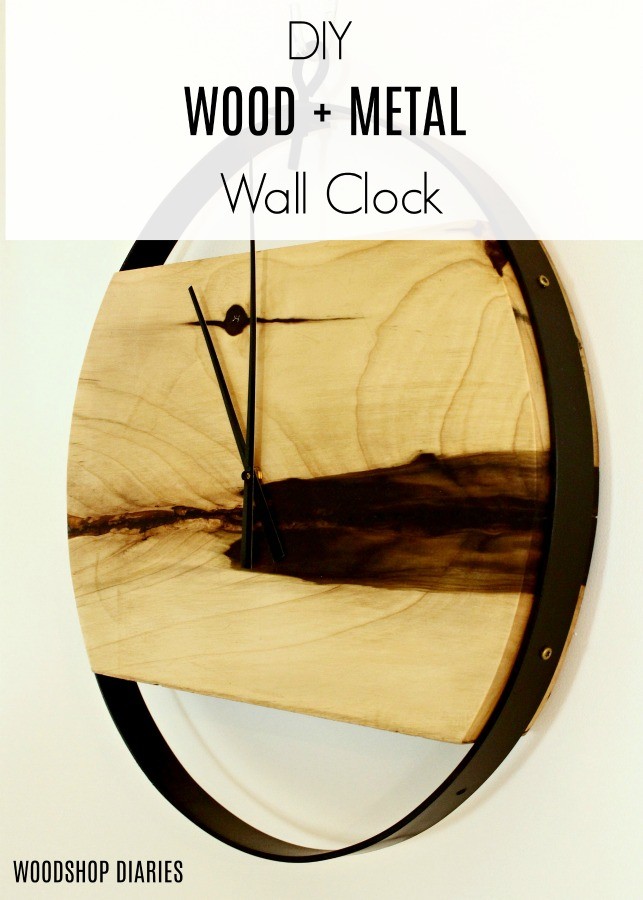
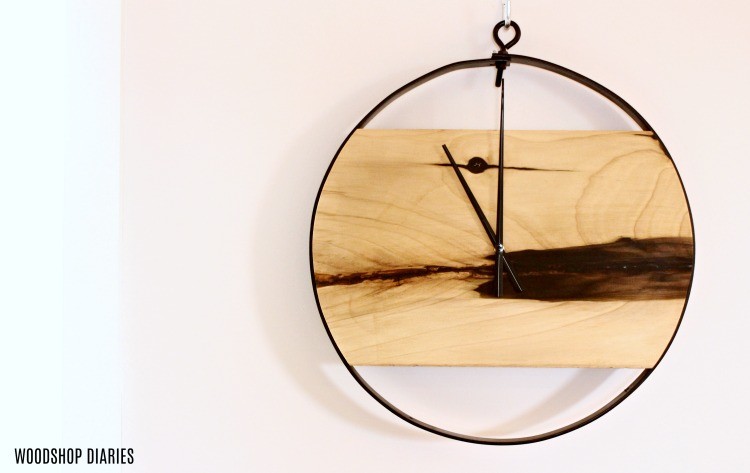
Ready to make a cool DIY Wood + Metal Wall Clock?  This post is sponsored by The Home Depot and contains affiliate links. It is part of the #THDProSpective Tool Review Program. See policies page.  All opinions are my own.

How to Make a Modern Industrial DIY Wood and Metal Wall Clock

This industrial DIY Wall Clock was a project that got me a little out of my comfort zone.  Not only was I working with metal on this project (which I don’t typically do), but it was also my first time using a torch.  (AKA literally playing with fire #smoresanyone )

Don’t worry…all went well and nothing caught on fire haha.  But Danny was there as the fire watch because he was paranoid (watch the video below to see his safety warning haha).  I can’t blame him…I’m kind of a hot mess anyway, so hand me a torch and things could go south quick.

.

And as a result of playing with fire…and a few other things…I was able to make the coolest clock, like, EVER.  Who says playing with fire never results in something good? HA.

So, if you’re ready to see how I made it (and how you can make one, too!), let’s get to it.  I’ve got a video for your below as well as a step by step tutorial 🙂

For this project, you’ll need:

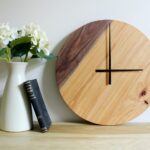
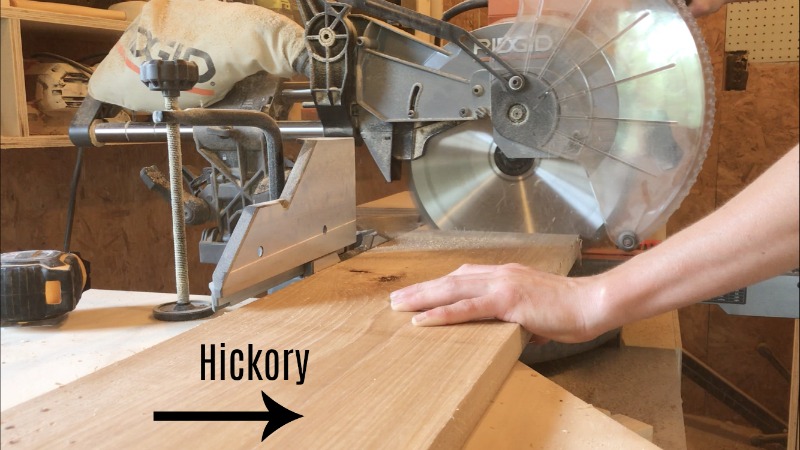
A cool chunk of wood for the middle of the clock

3/16” Thick x 2” wide steel flat bar (slightly longer than circumference you want your circle)

Eye bolt and 2 nuts

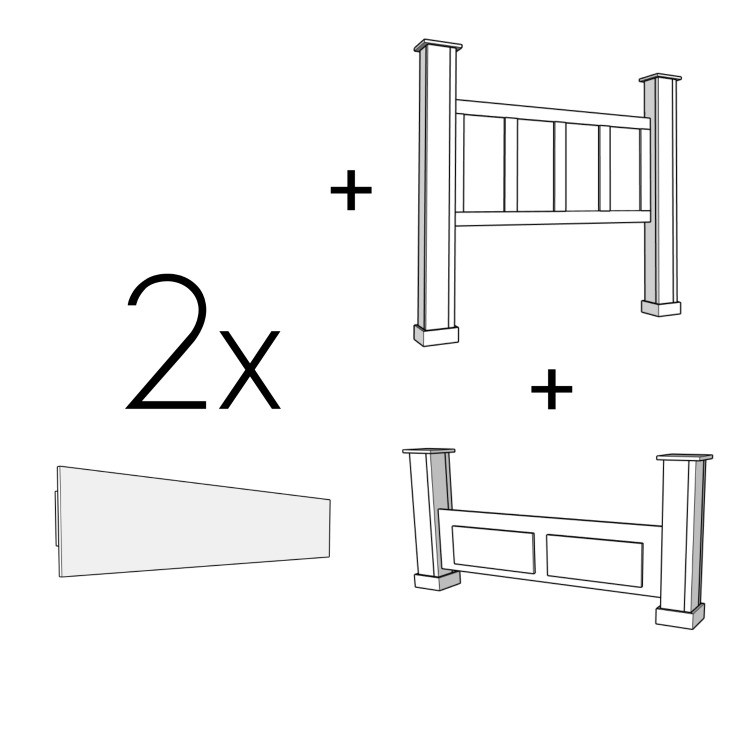
Scrap 2x lumber to make the jig to bend the steel (For this, I raided my scrap wood cart for a few boards)

Wood Glue

2 ½″ wood screws

Spray Paint

Clock Kit

You’ll also need:

Bernzomatic TS8000 Torch

Drill and Driver Kit

MultiTool

Stud Finder

Band or Jig Saw

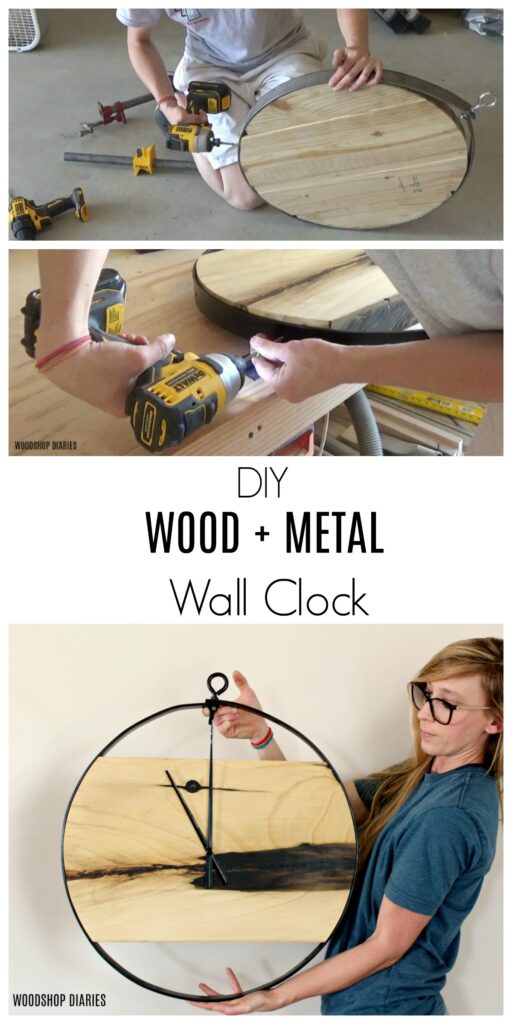
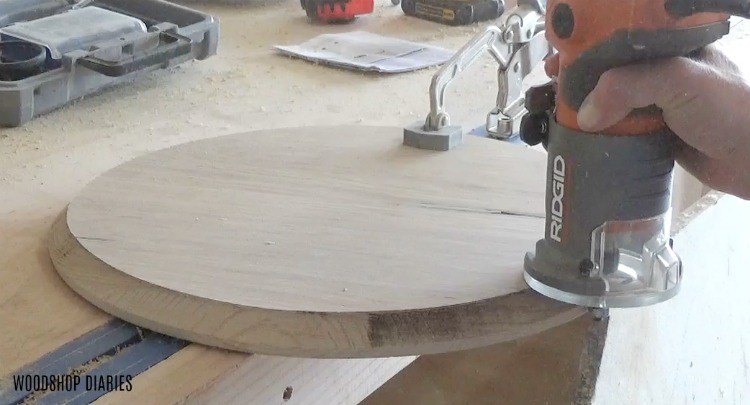
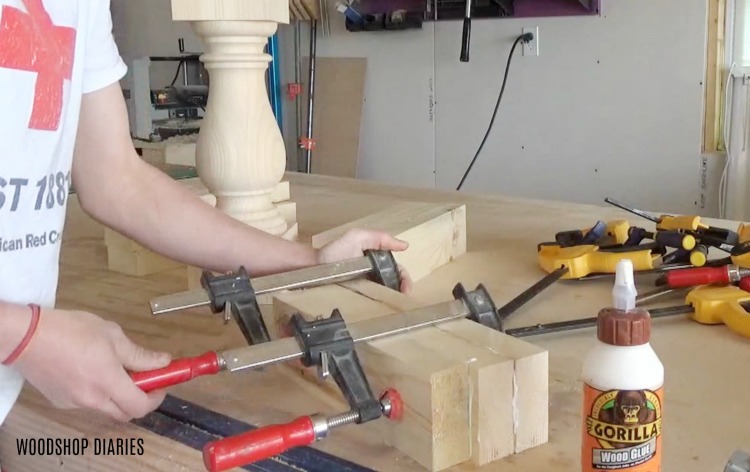
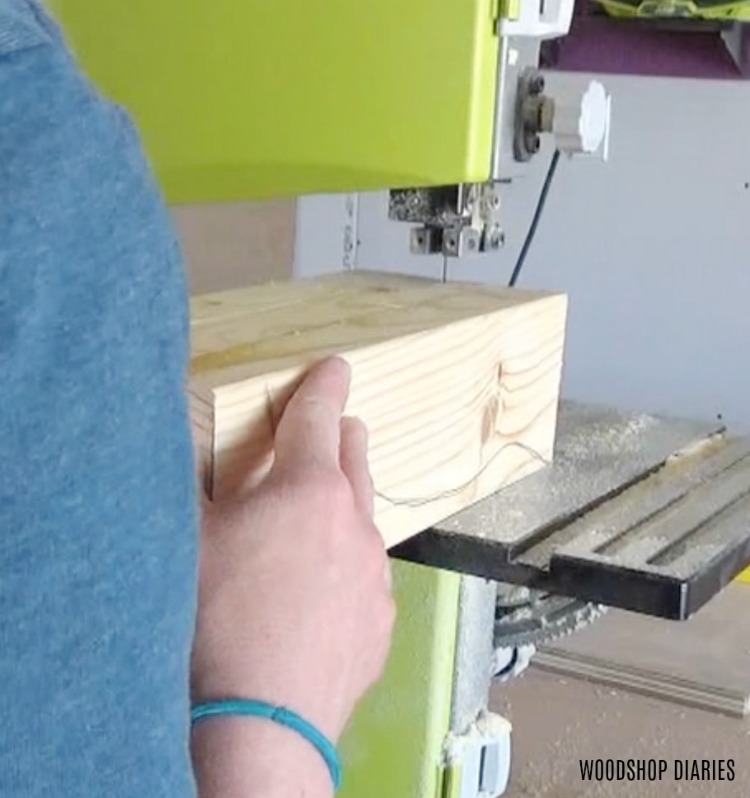
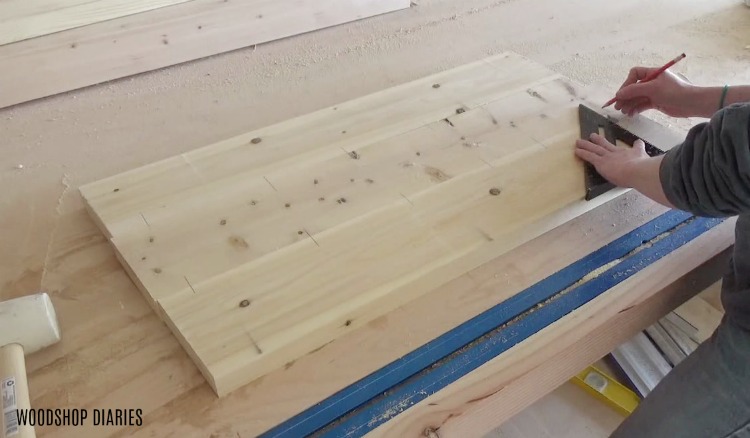
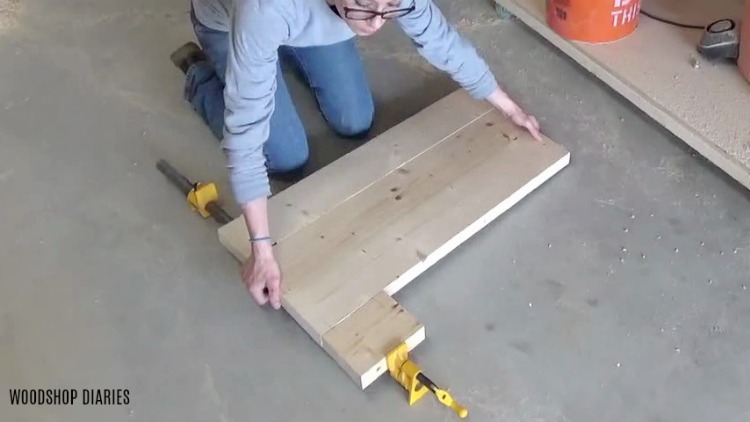
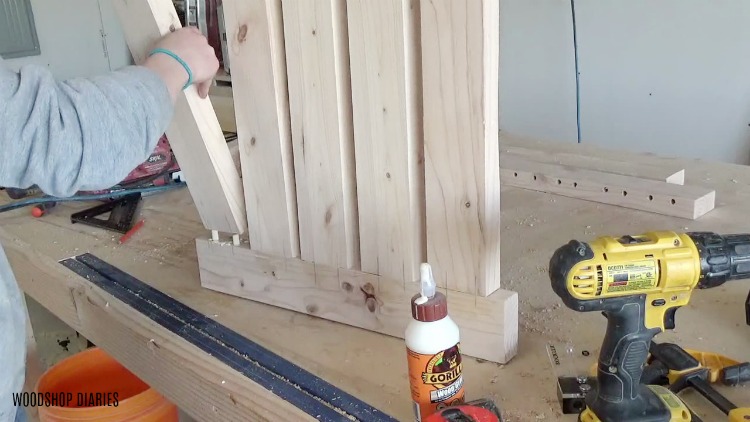
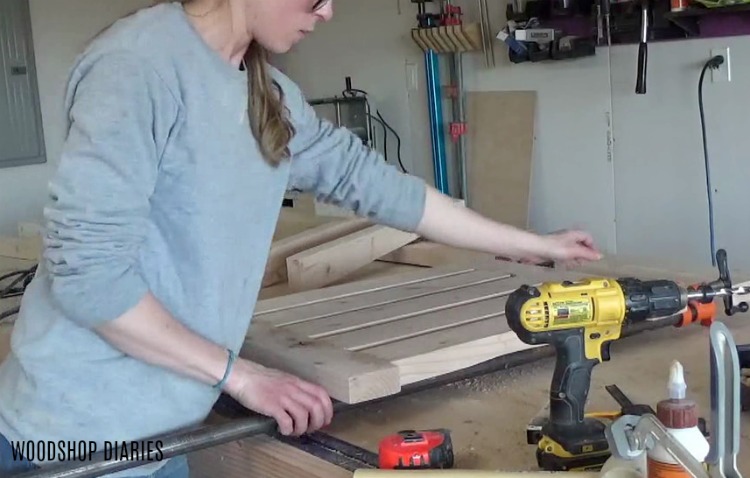
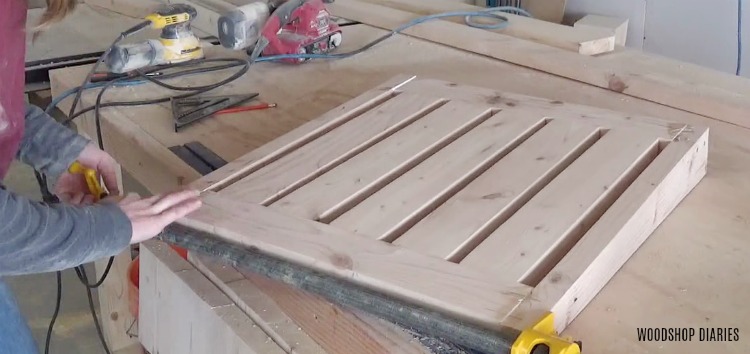
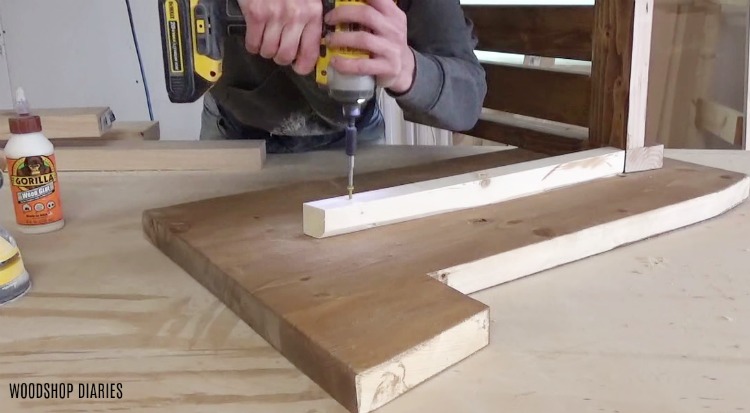
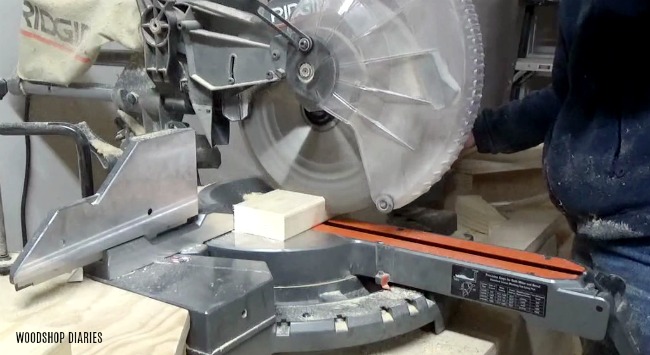
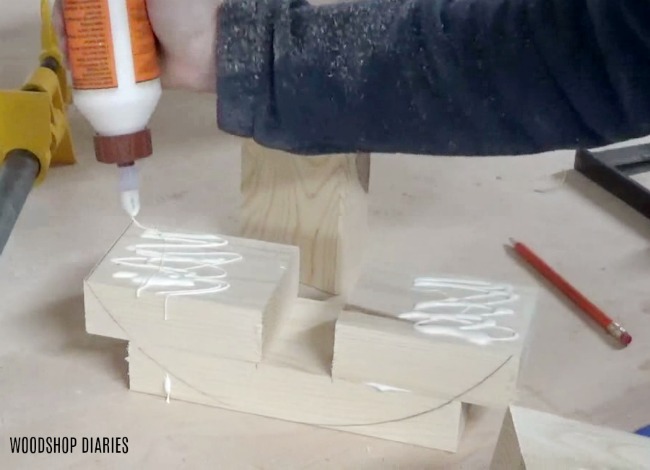
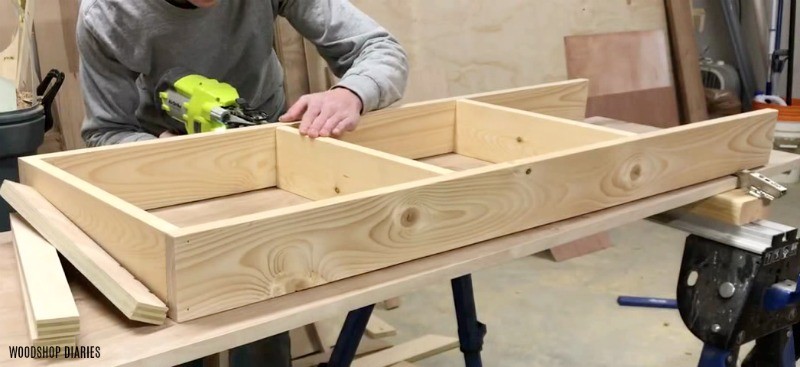
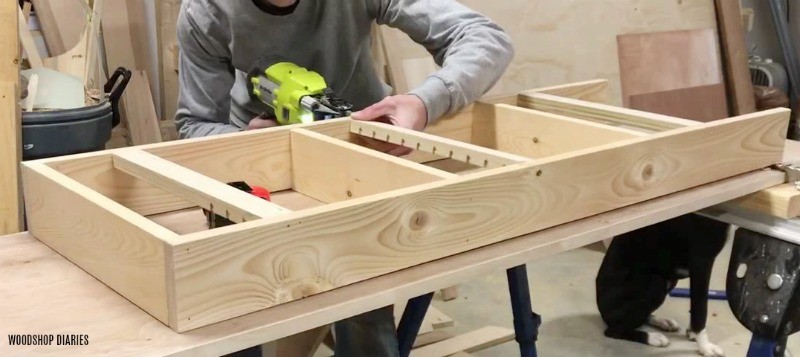
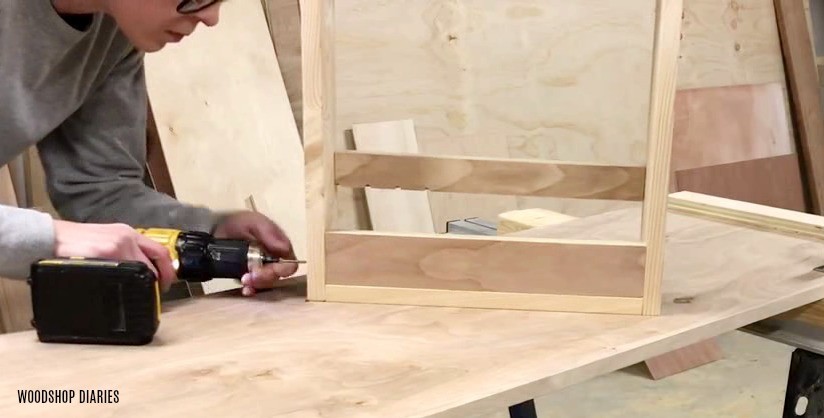
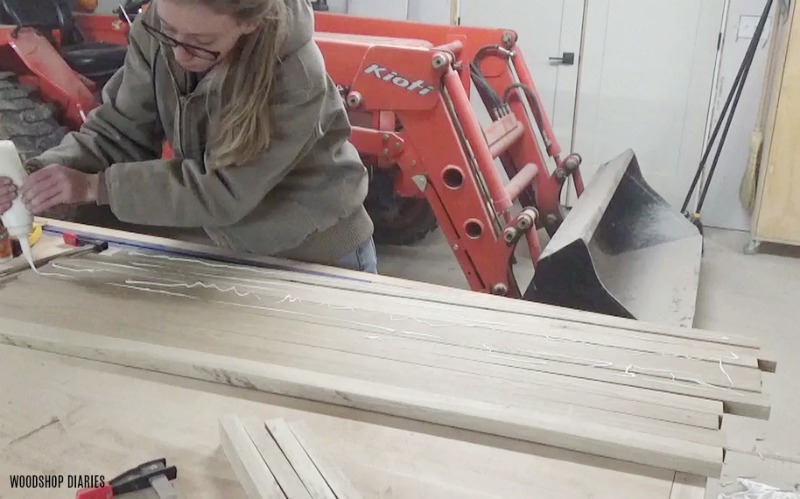
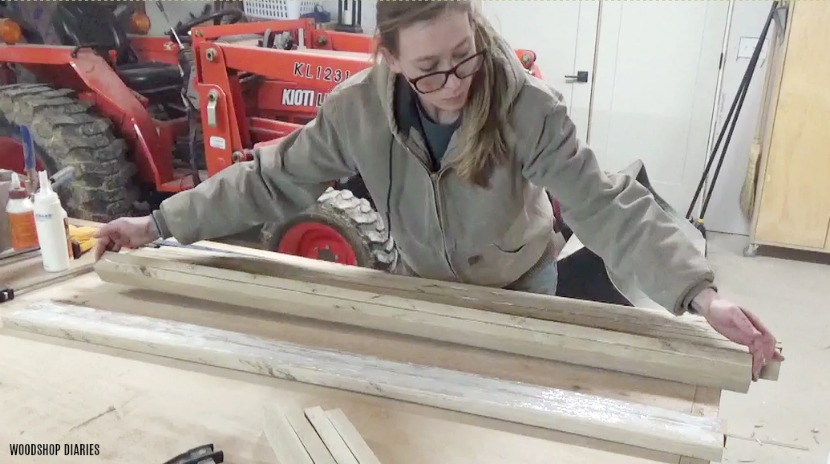
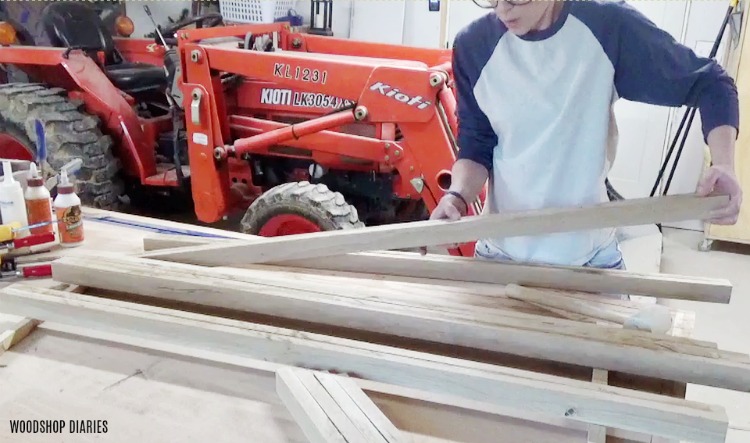
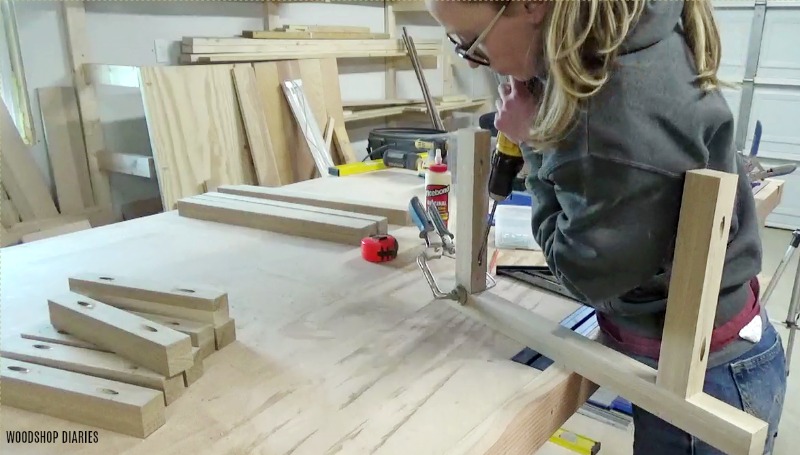
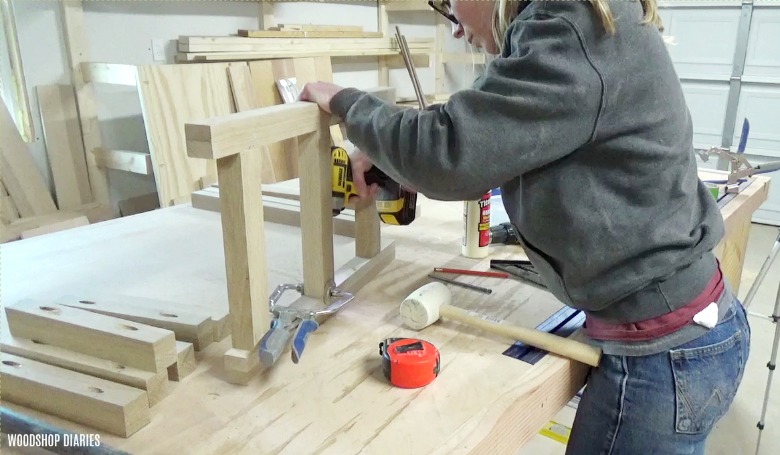
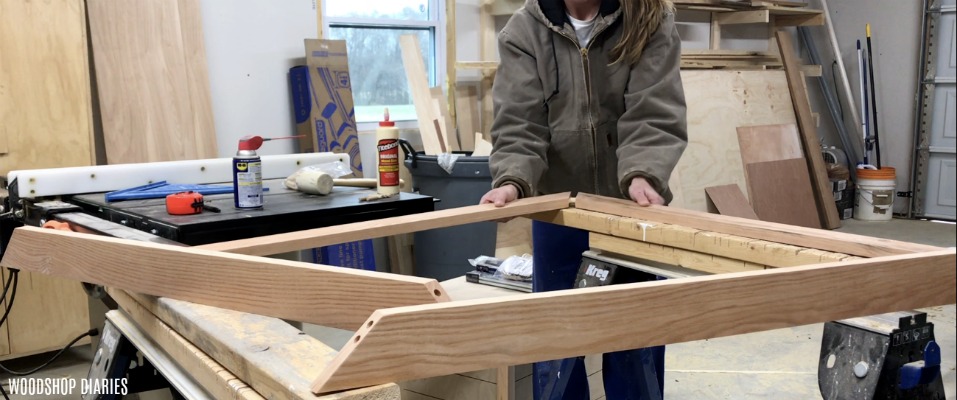
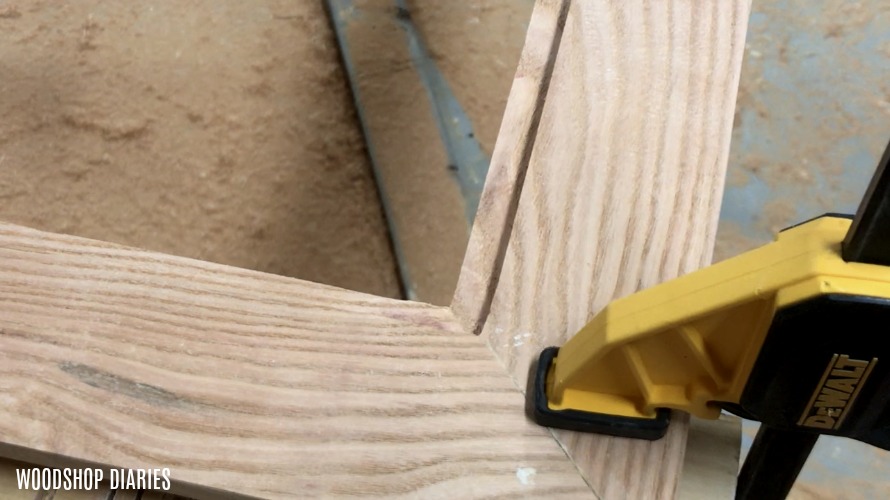
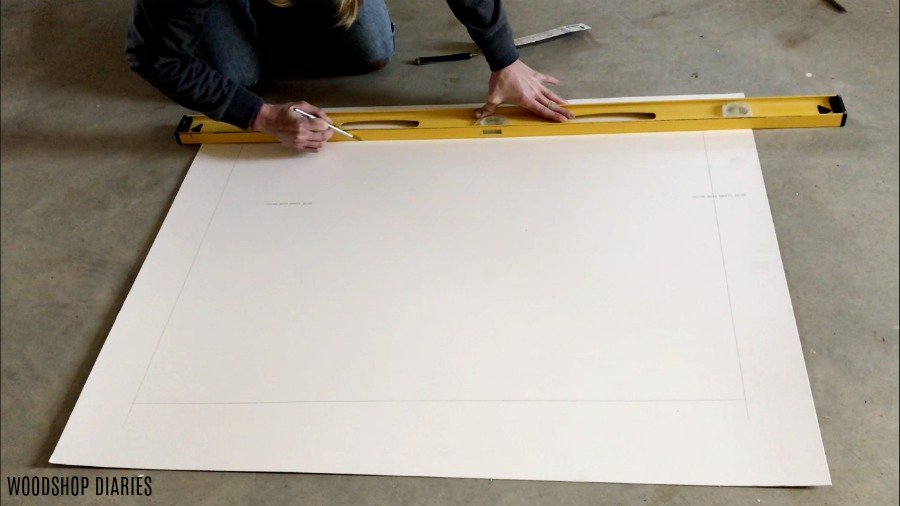
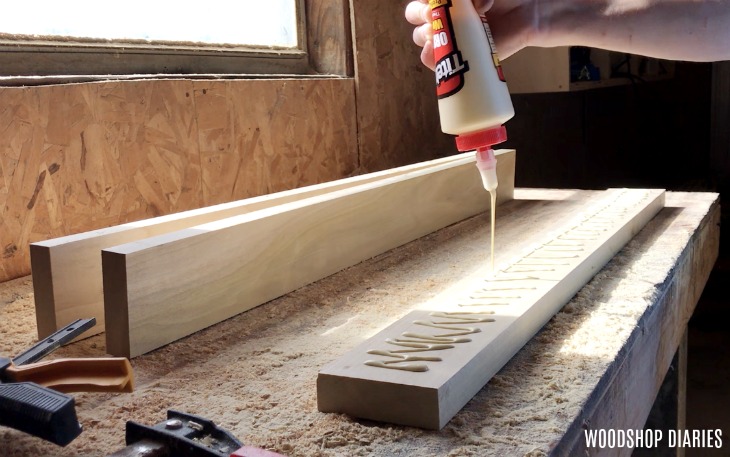
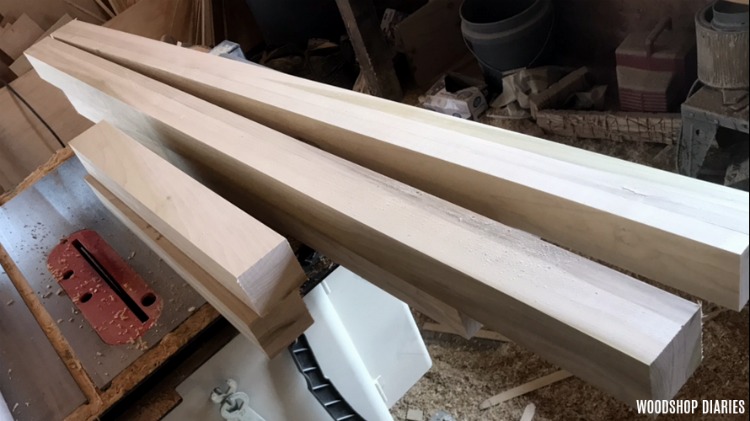
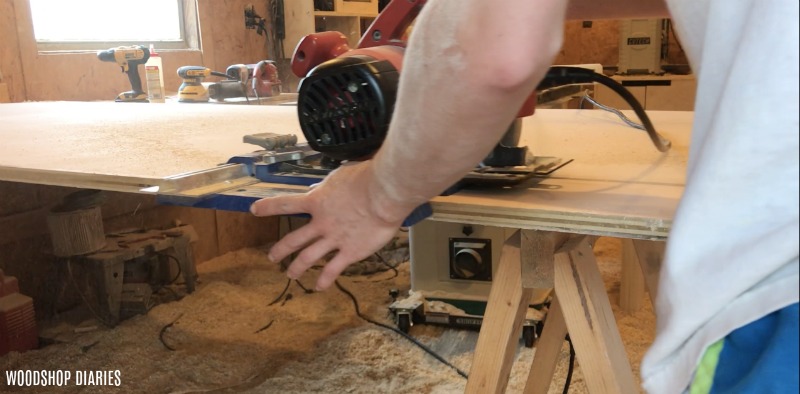
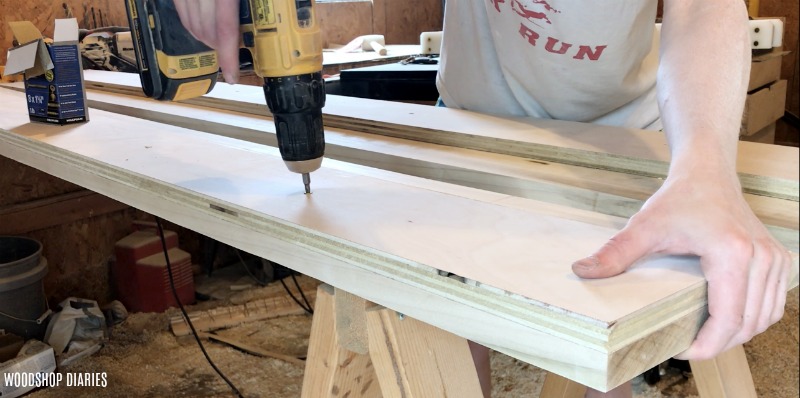
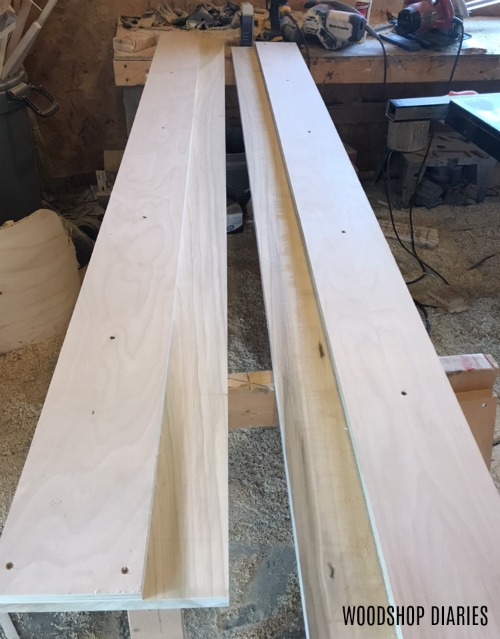
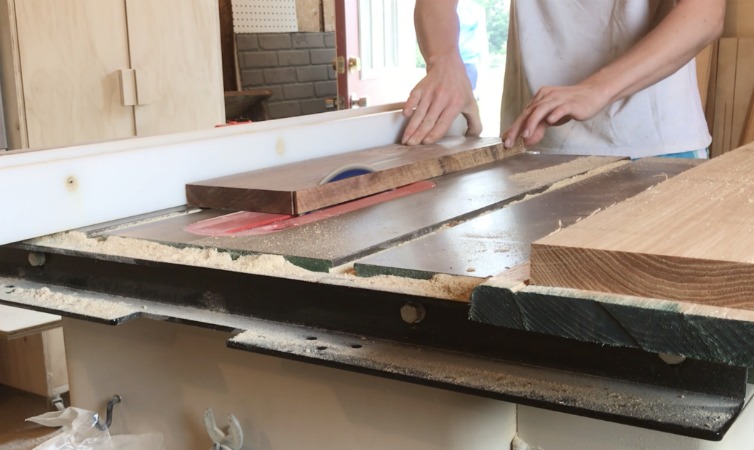
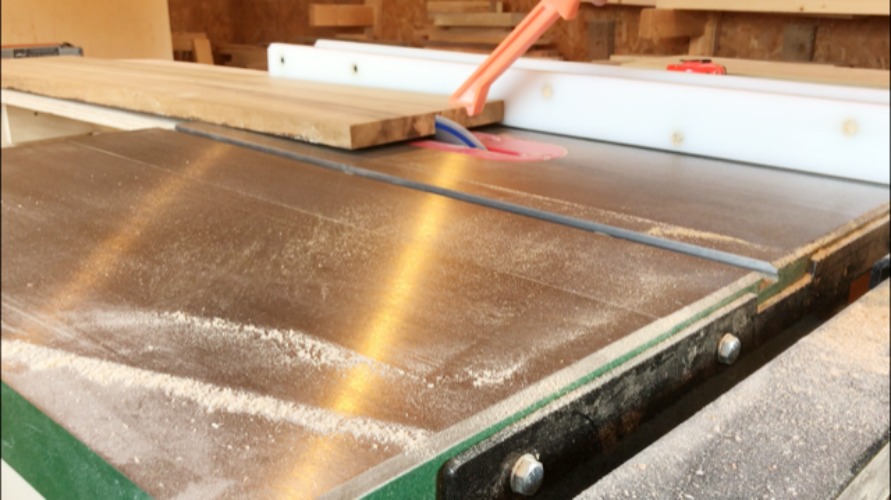
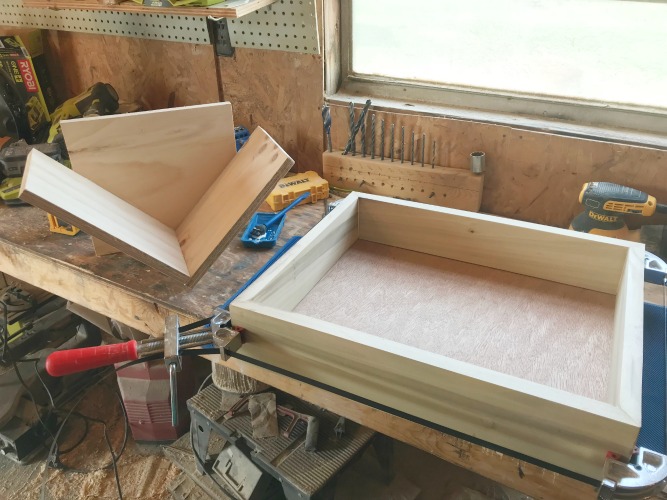
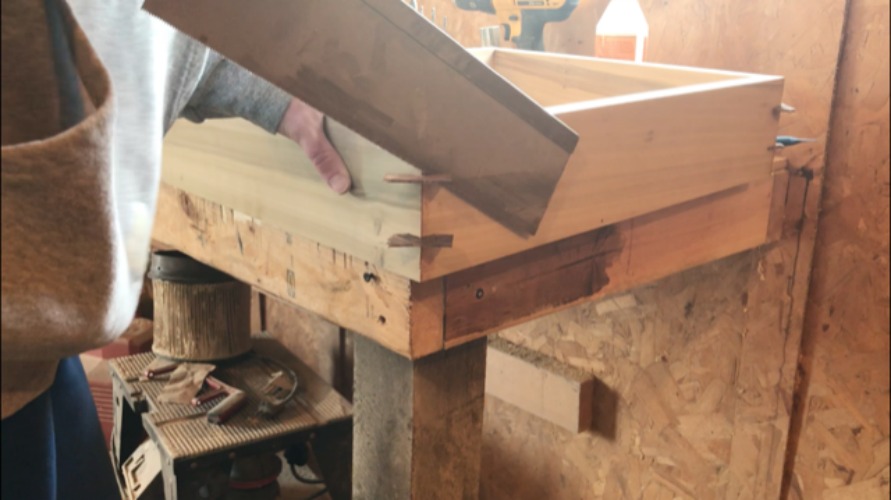
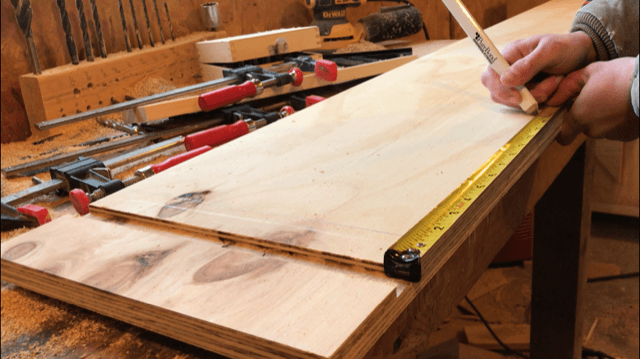
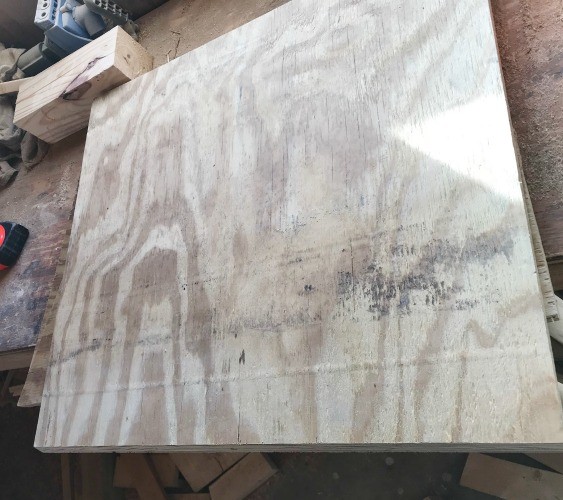
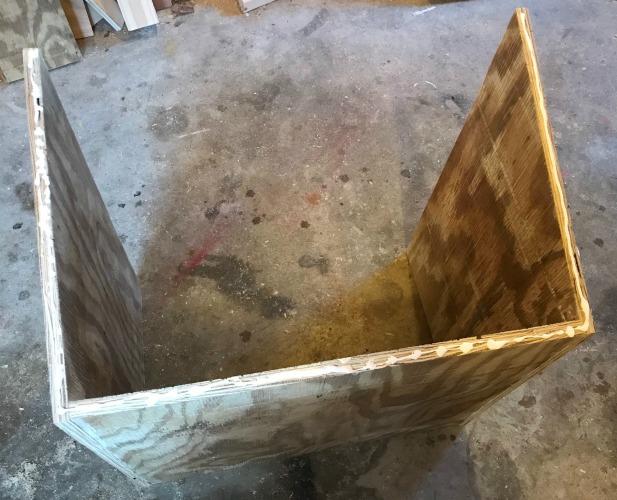
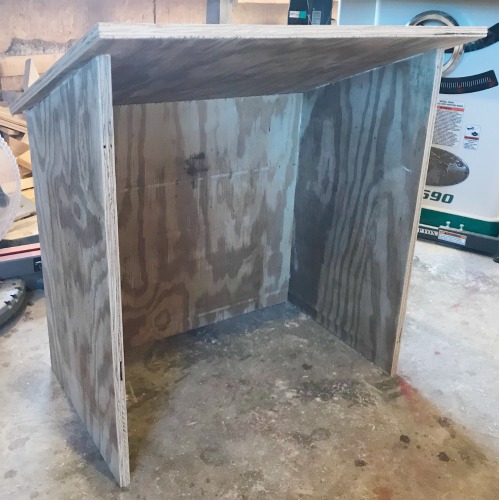
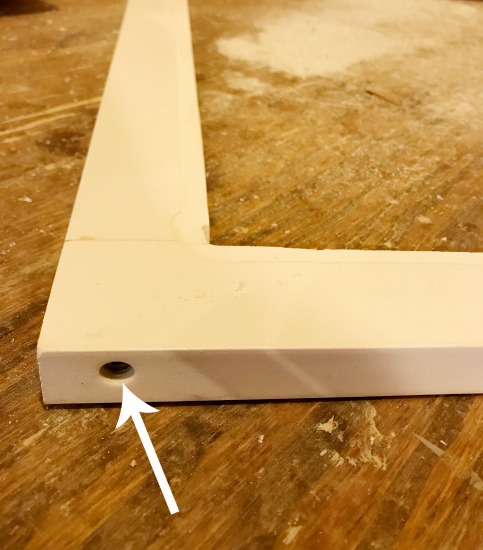
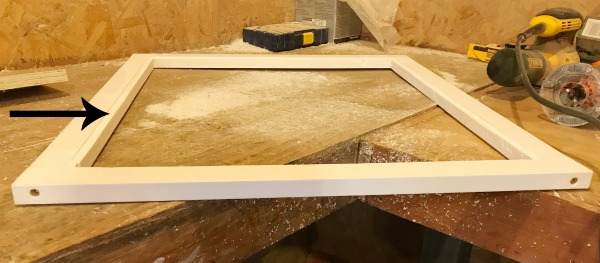
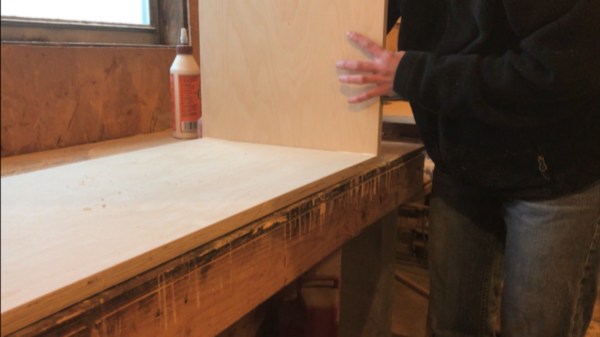
Step 1: Glue Up Circle Jig

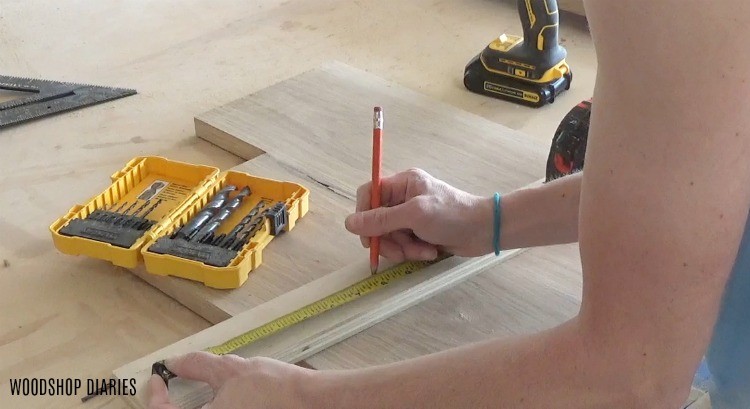
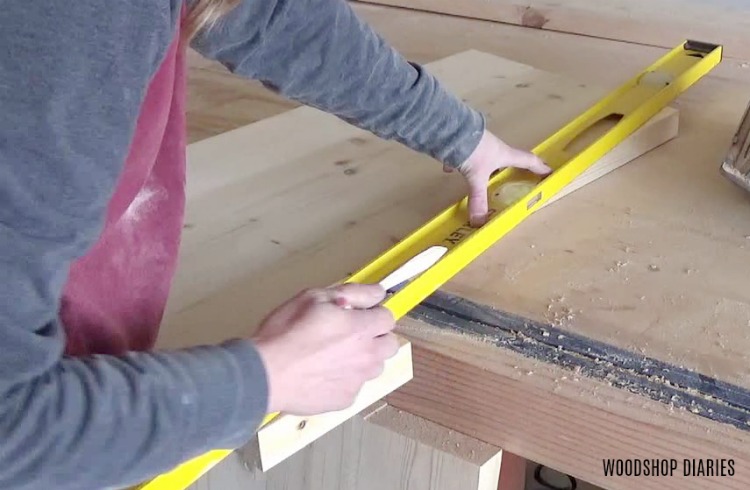
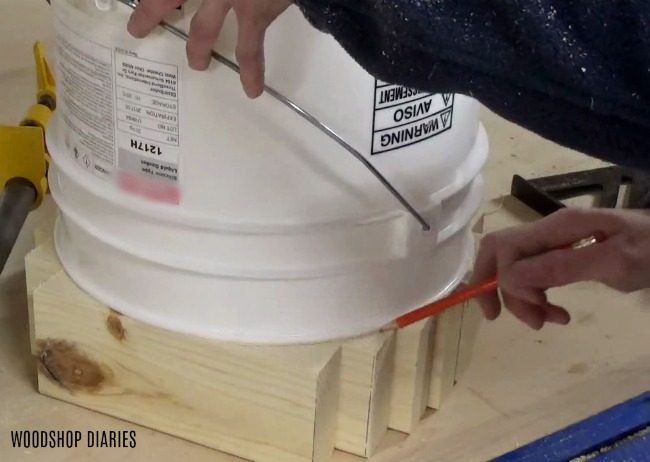
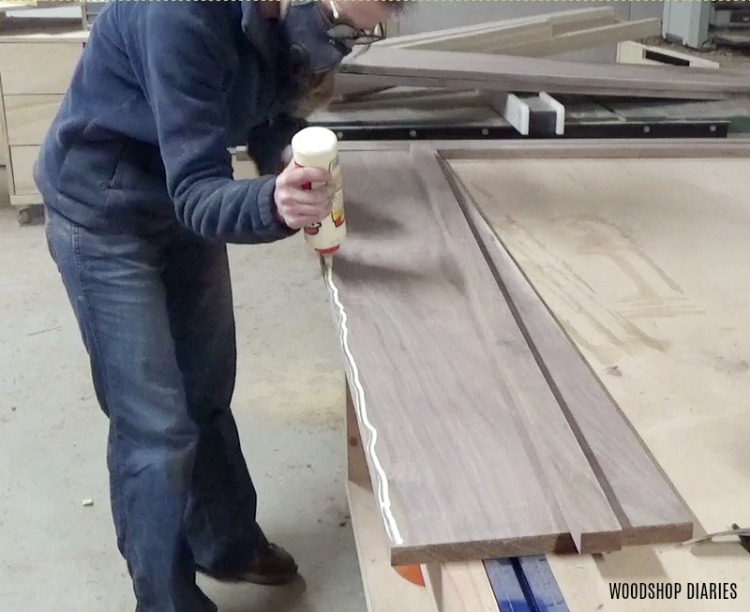
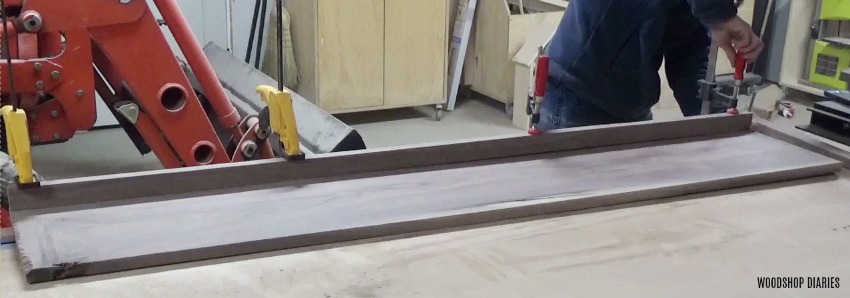
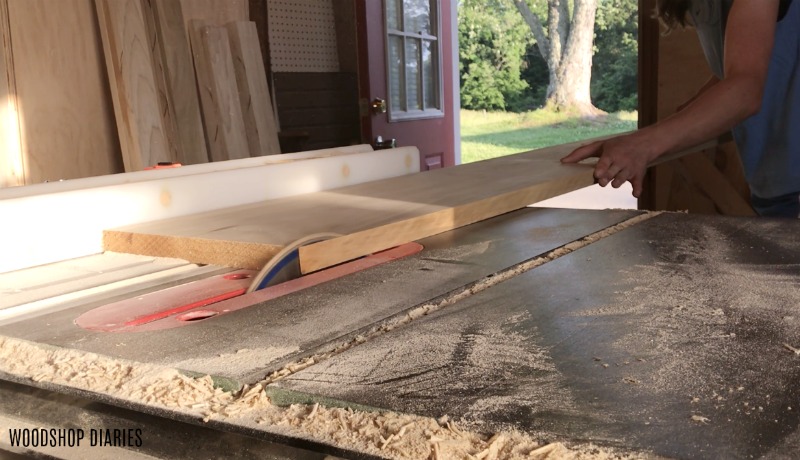
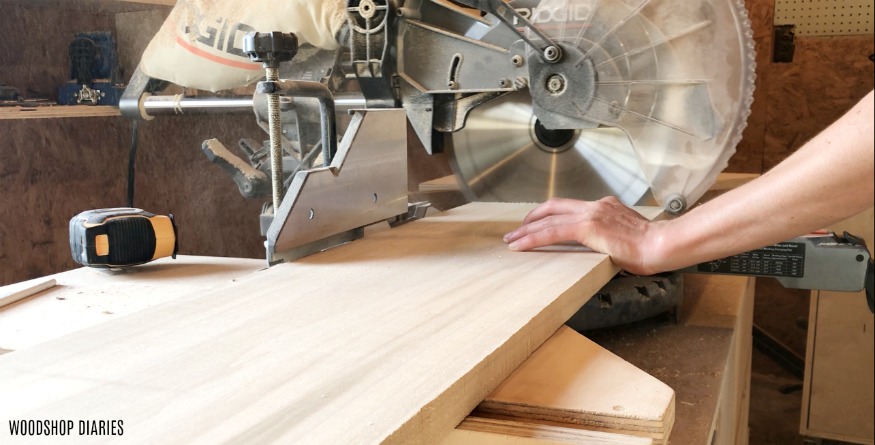
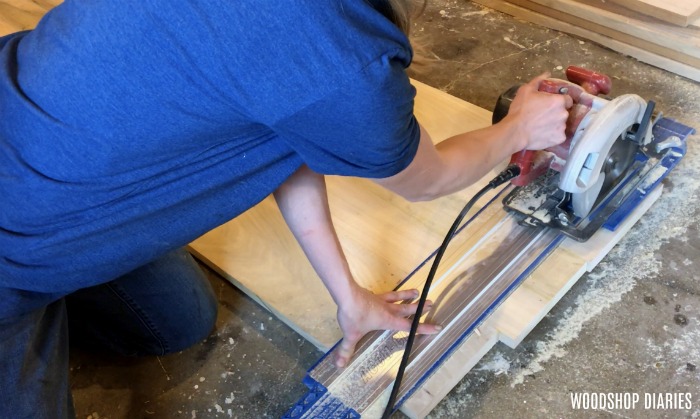
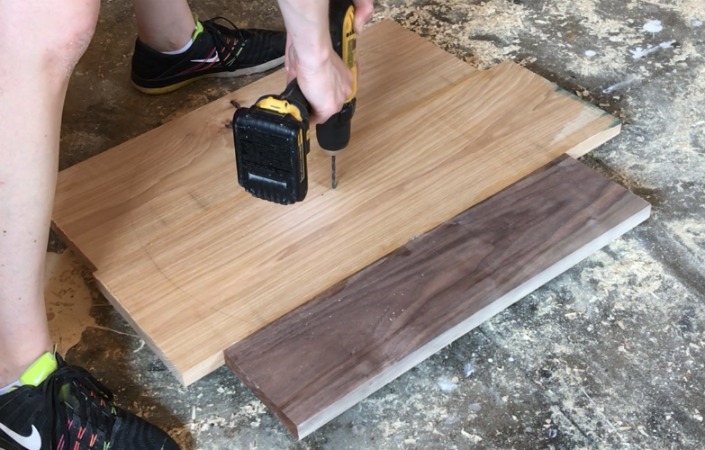
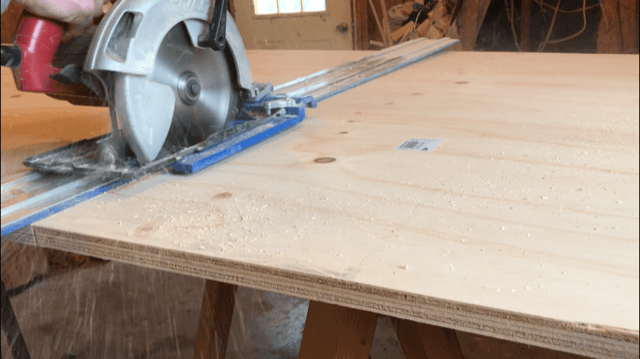
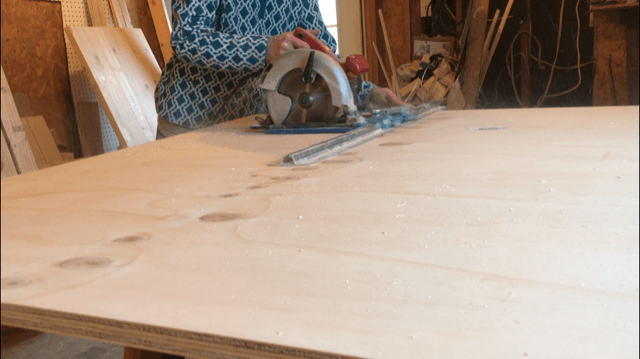
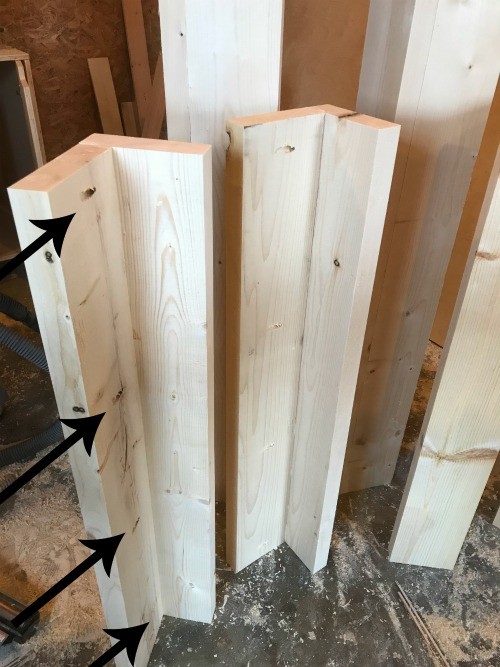
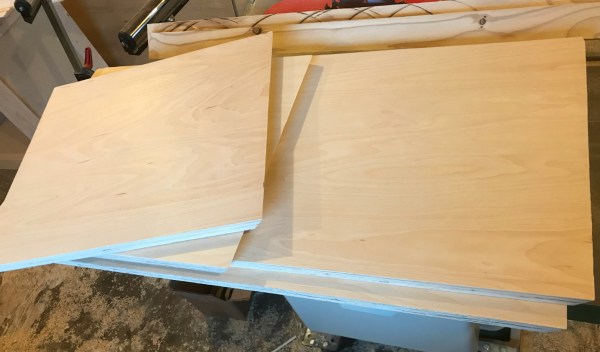
First, I made a circle jig to bend my metal bar around to make a circle.  For this, I took some 2x wood scraps and after cutting them down to size, I laid them out on my workbench.  I used an old clock I made last year to draw out my circle because I wanted to make this clock the same size.  You can use any round object to draw out the size you’d like for your clock.

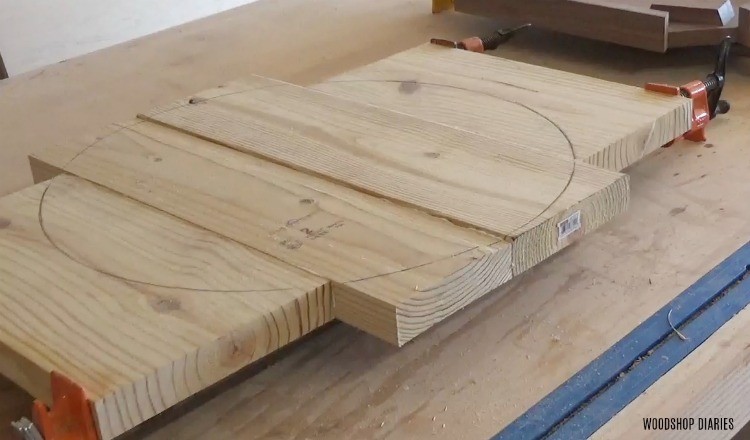
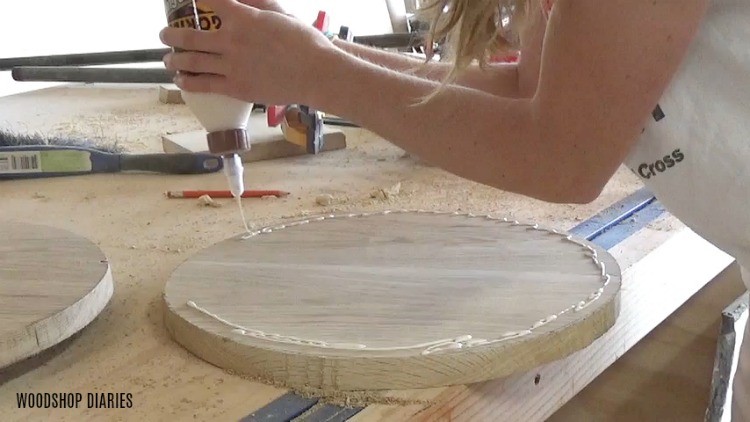
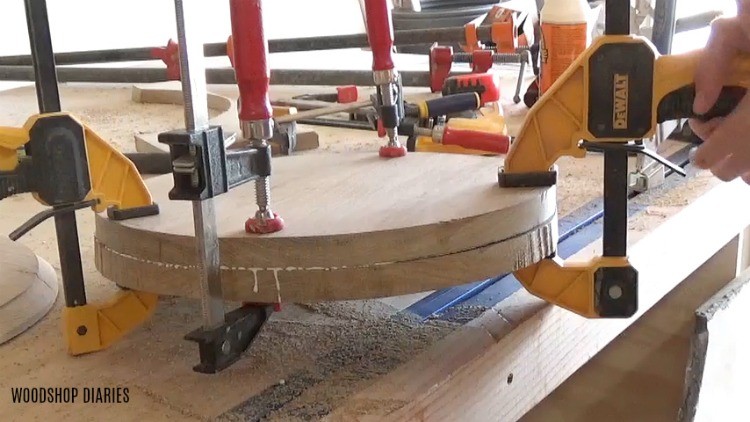
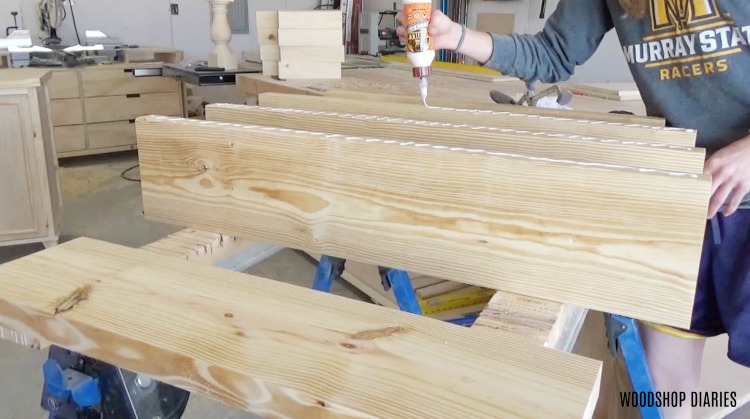
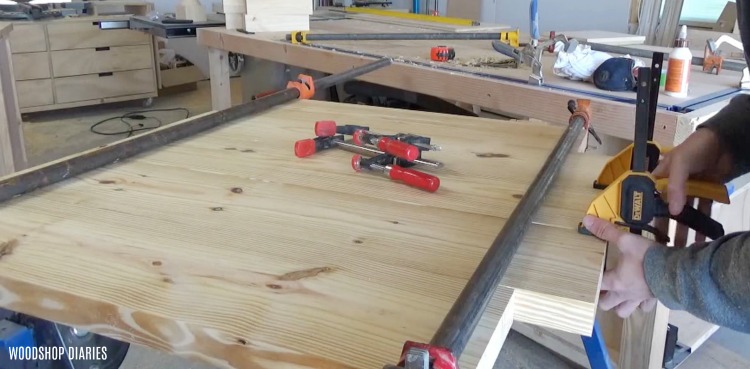
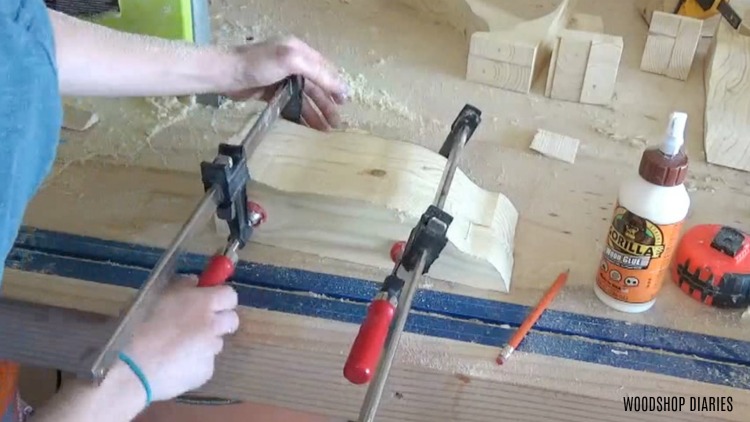
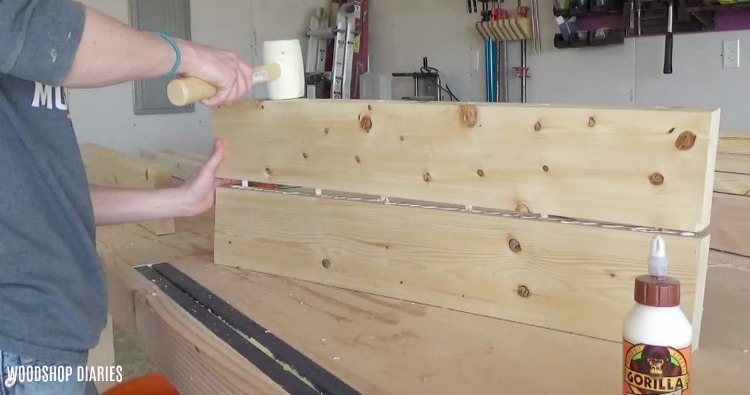
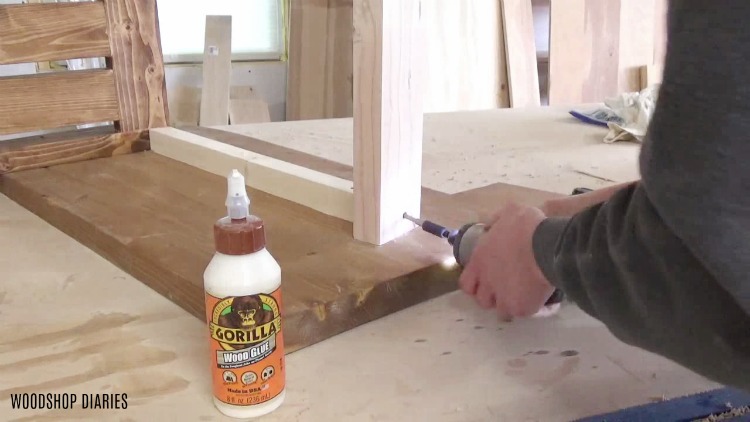
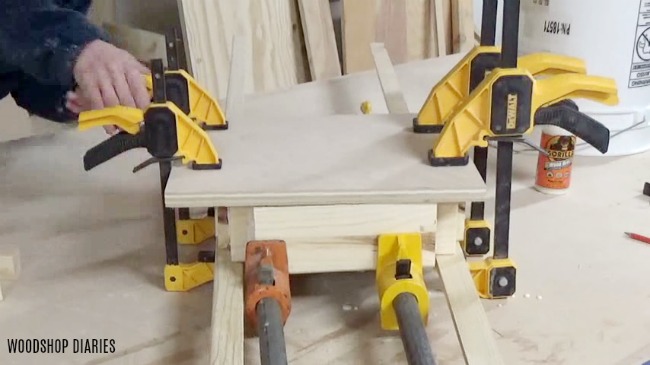
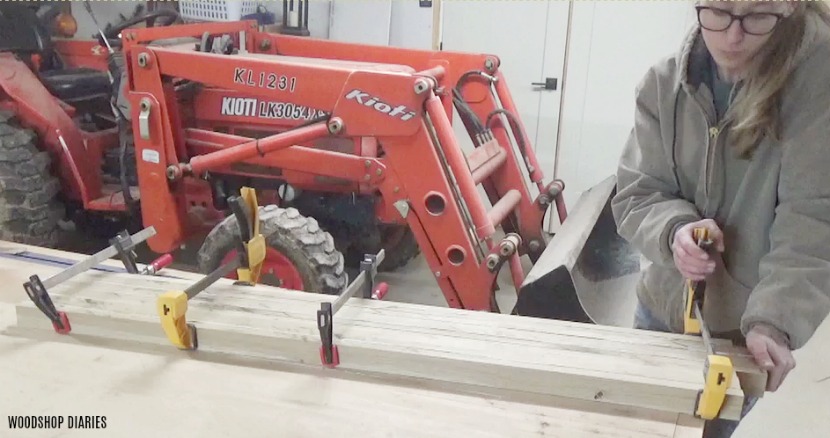
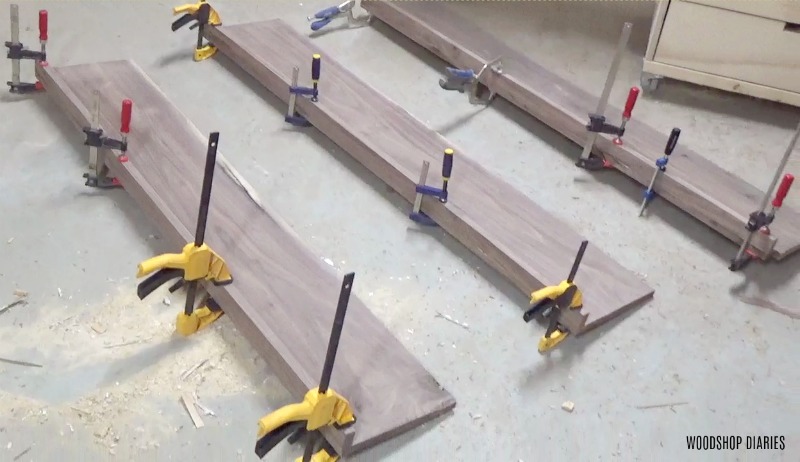
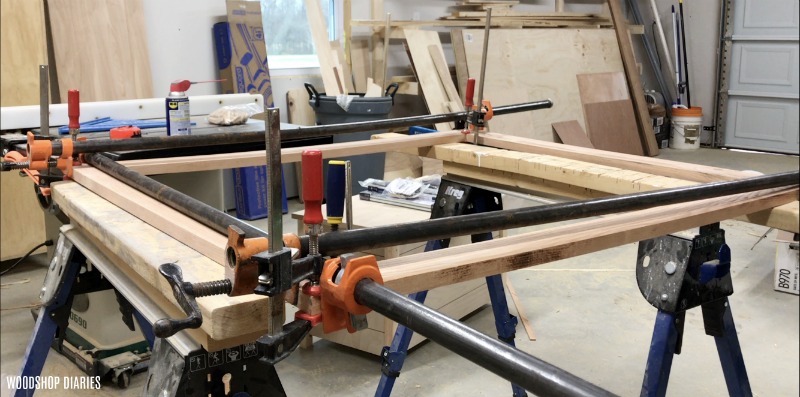
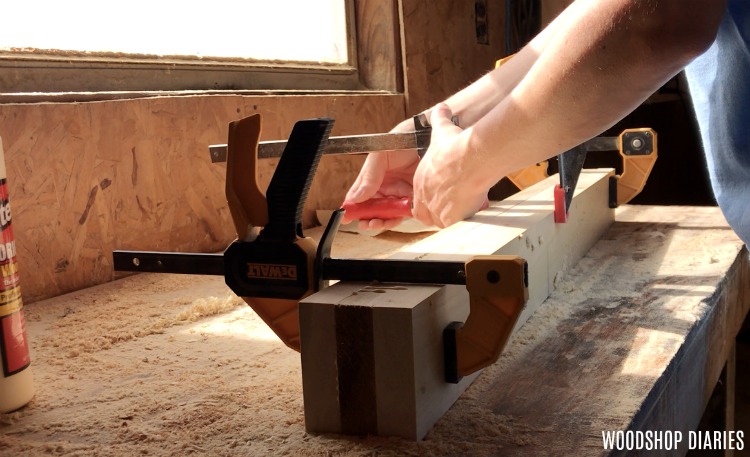
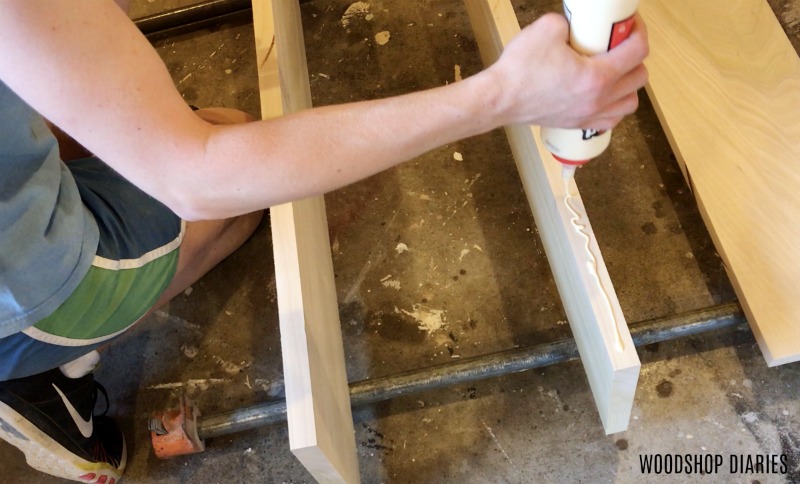
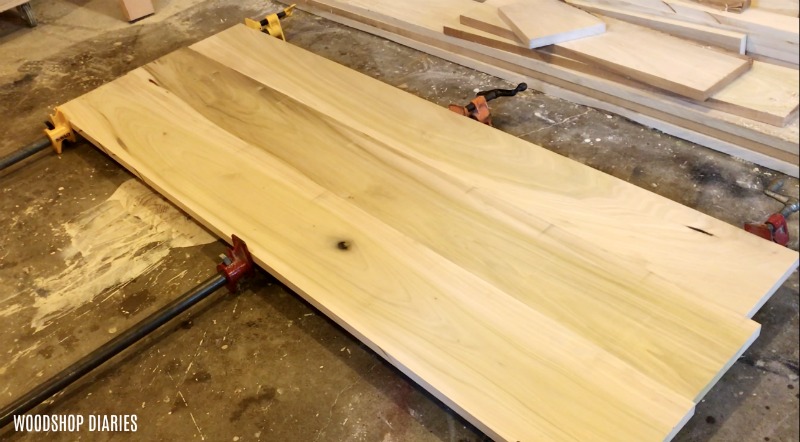
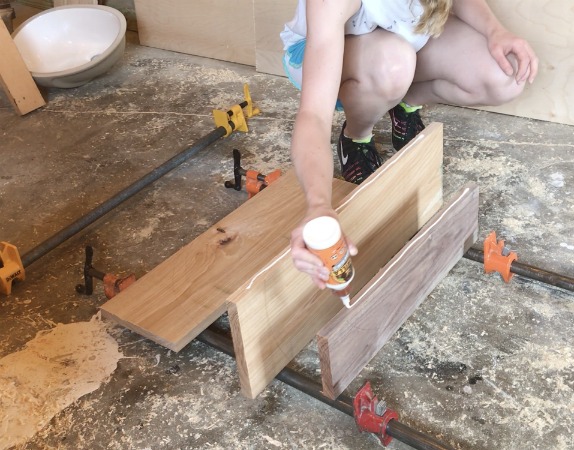
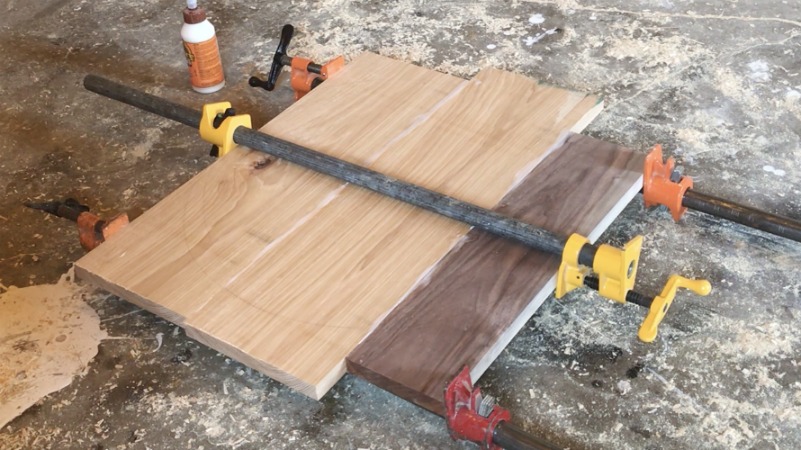
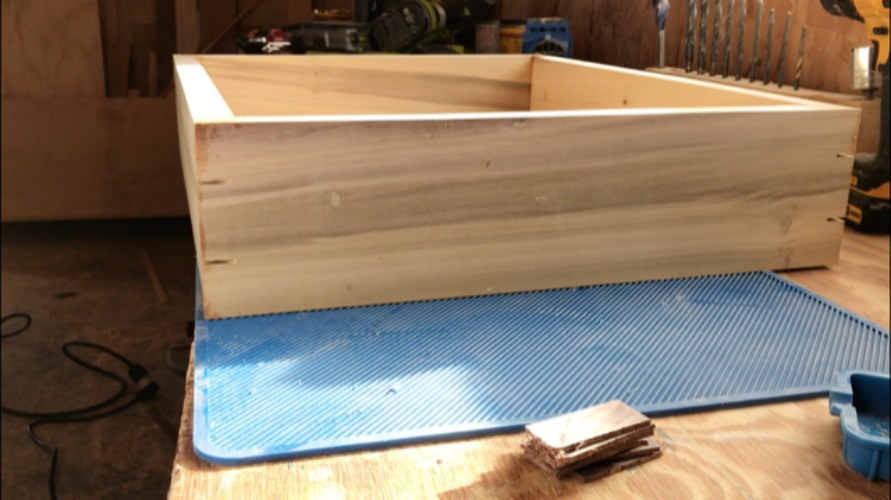
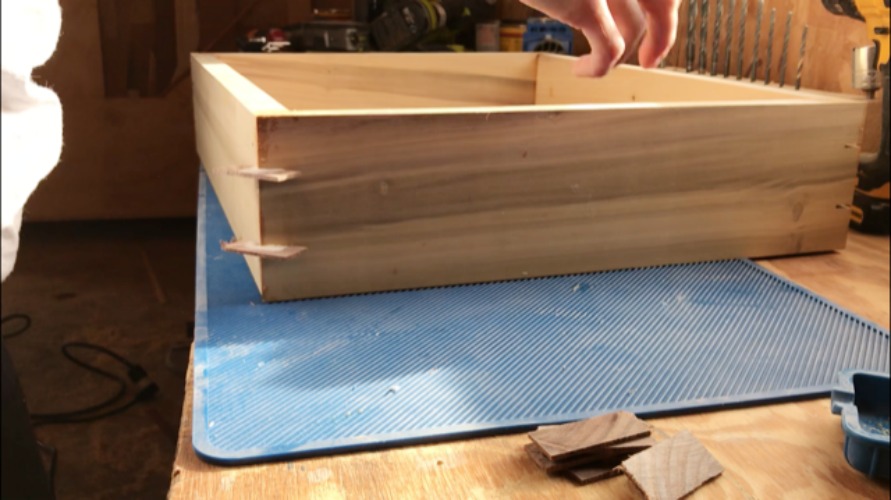
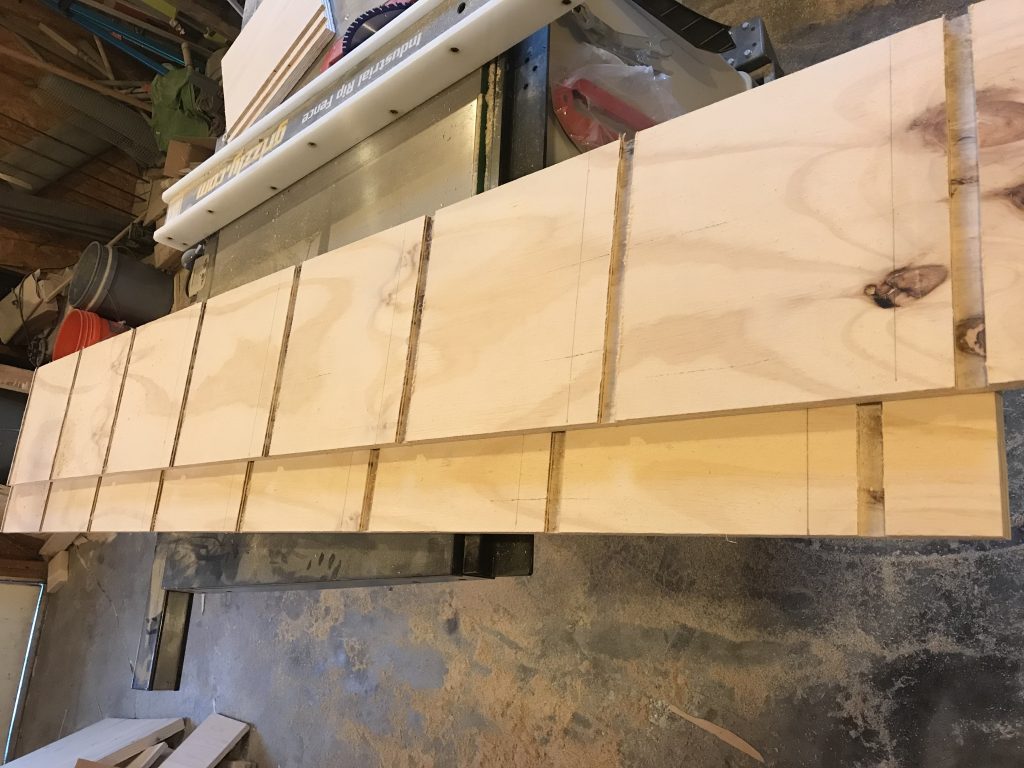
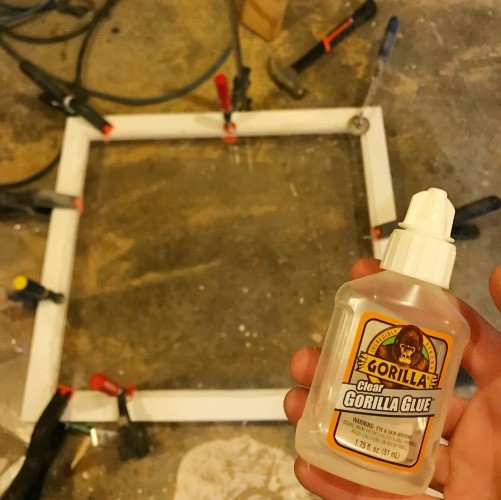
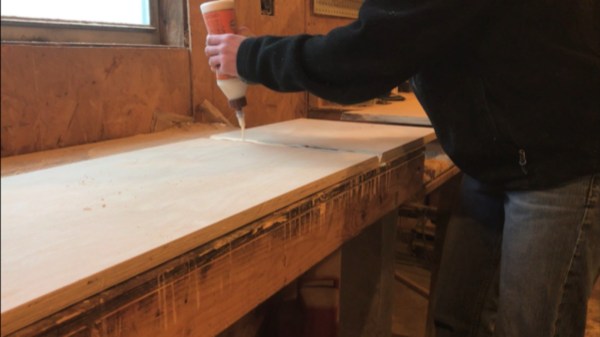
Then I glued these boards up and let them dry.

.

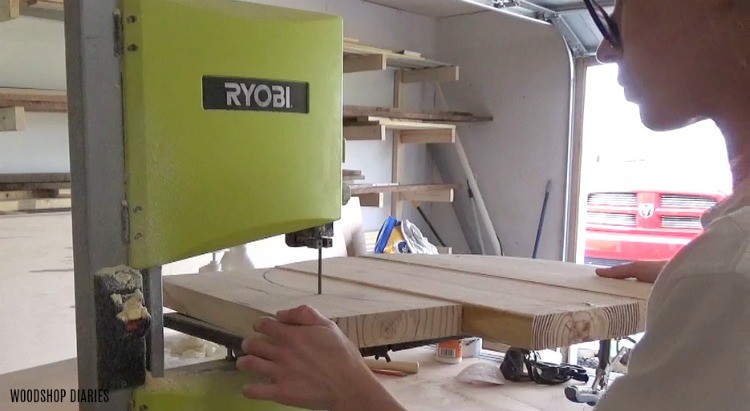
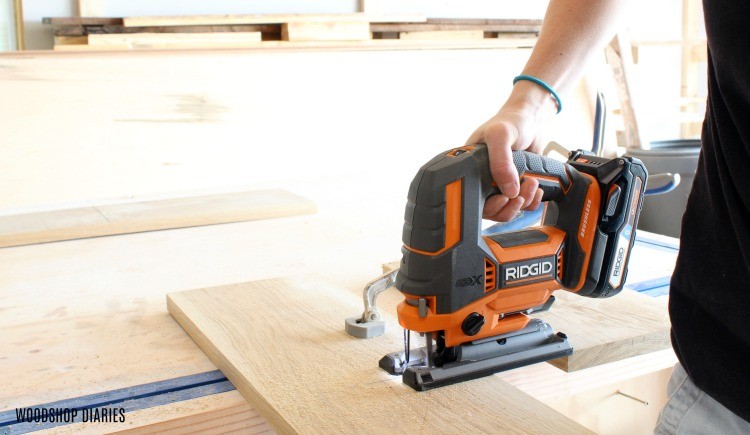
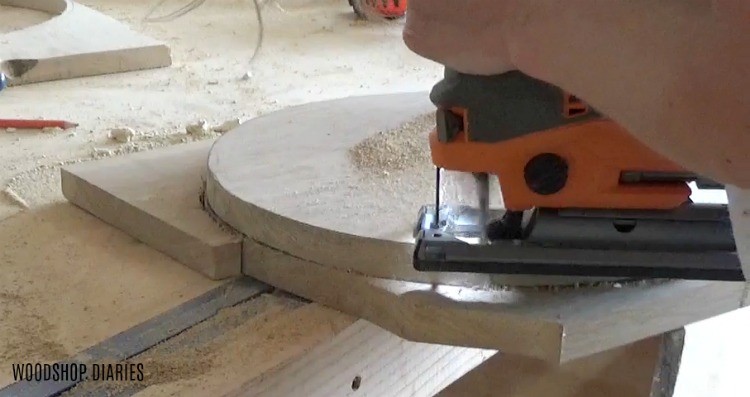
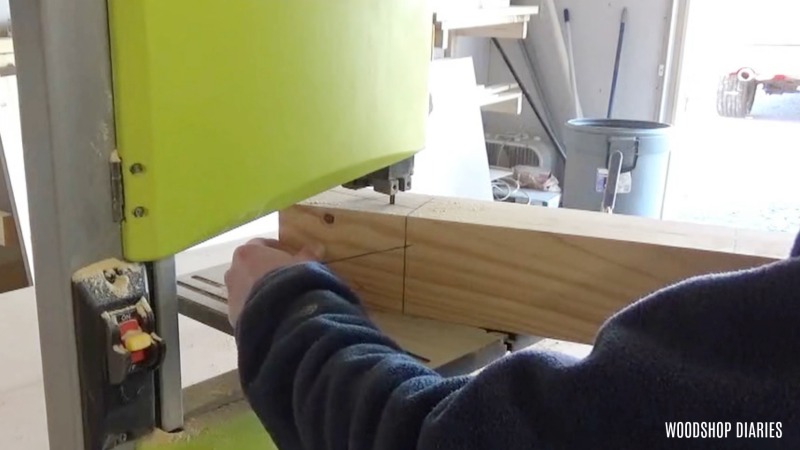
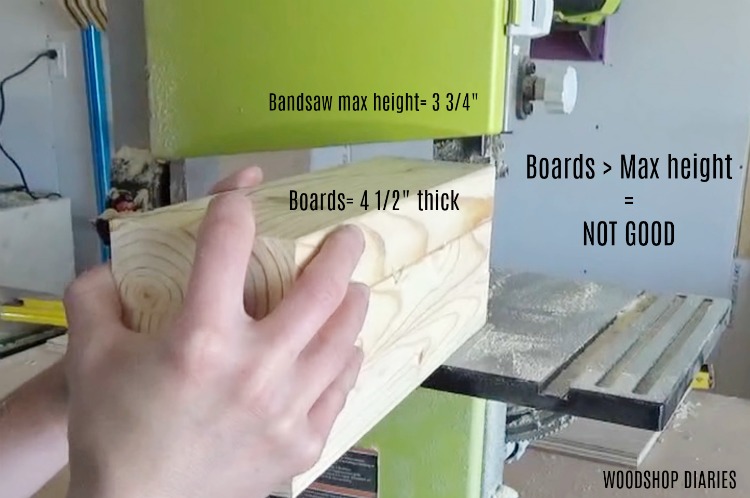
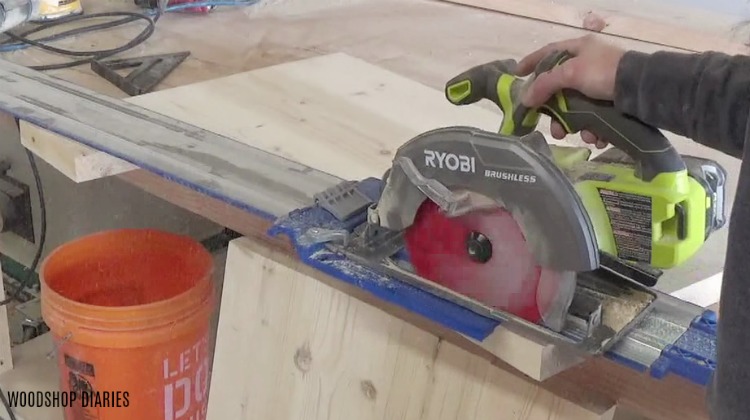
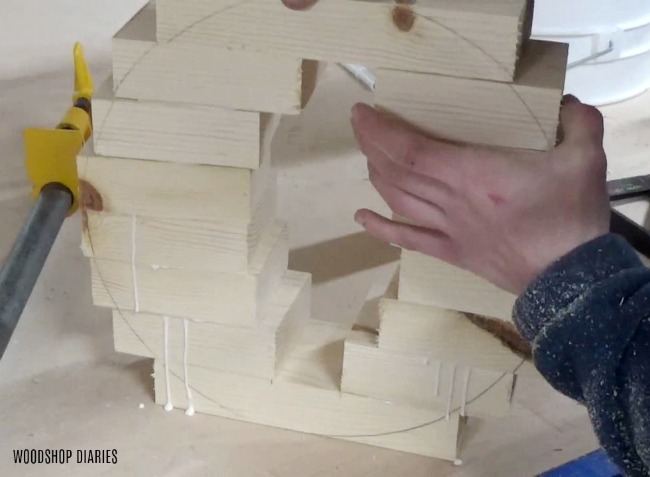
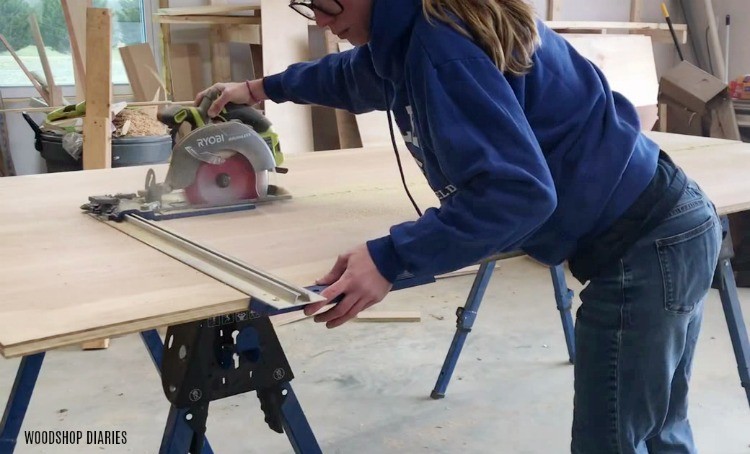
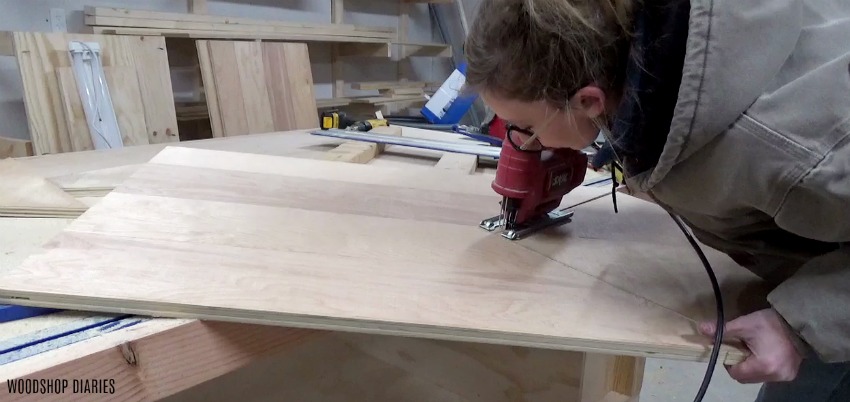
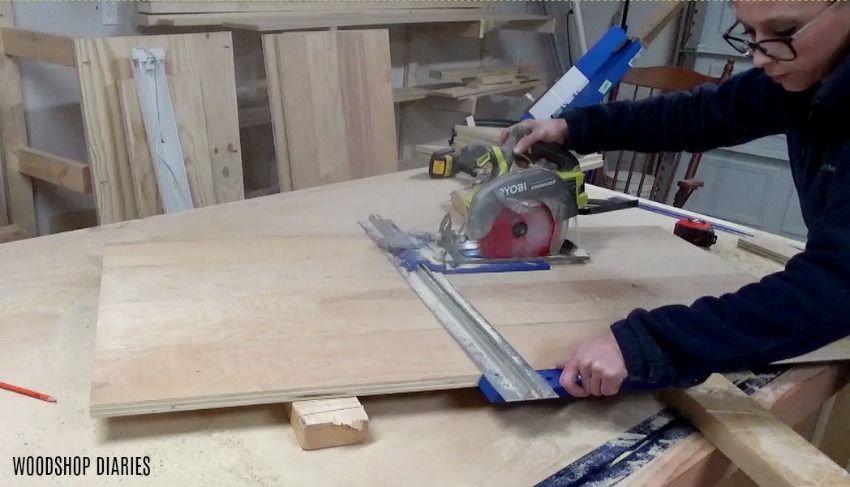
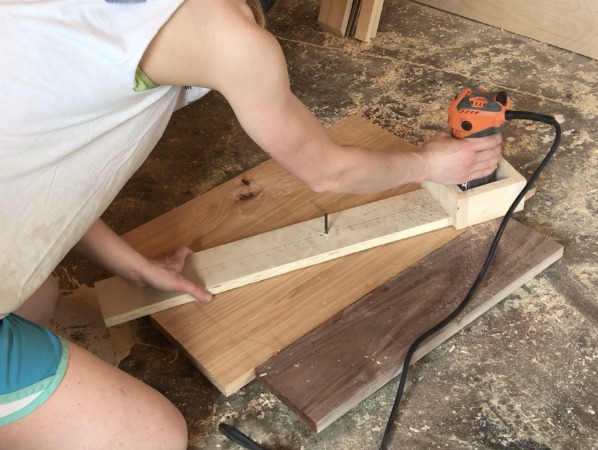
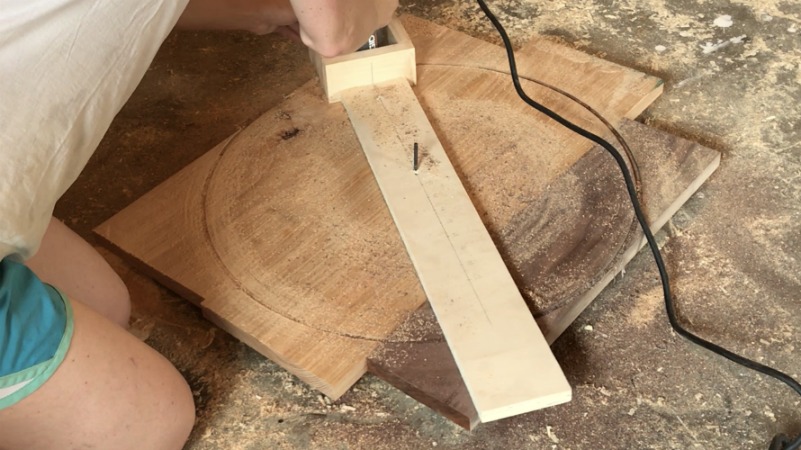
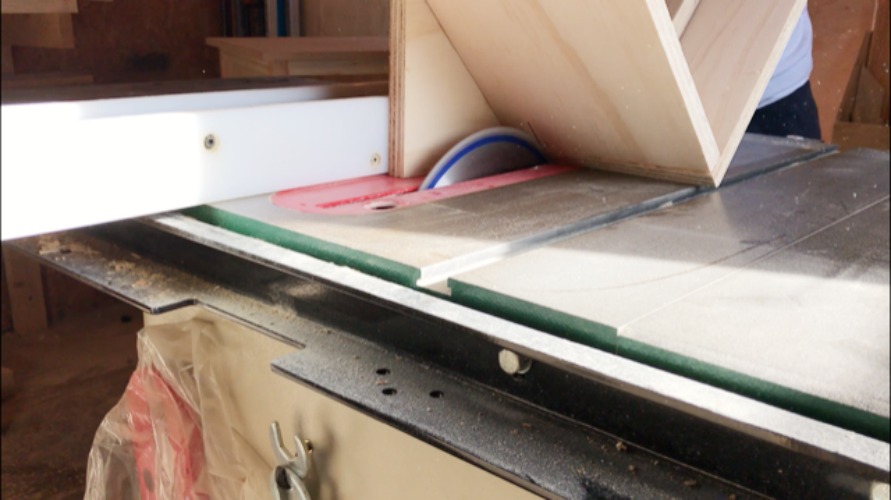
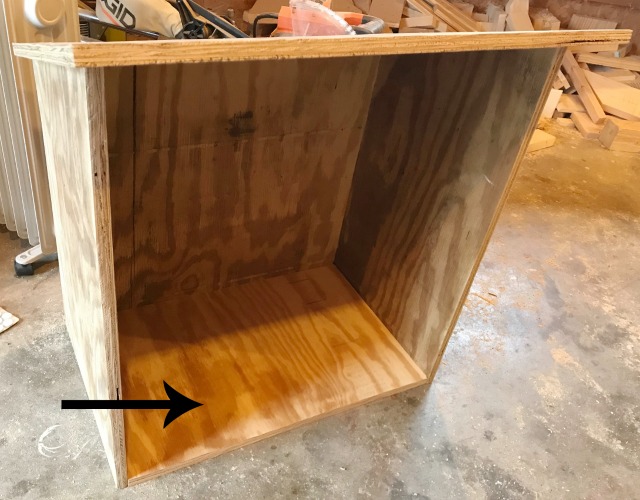
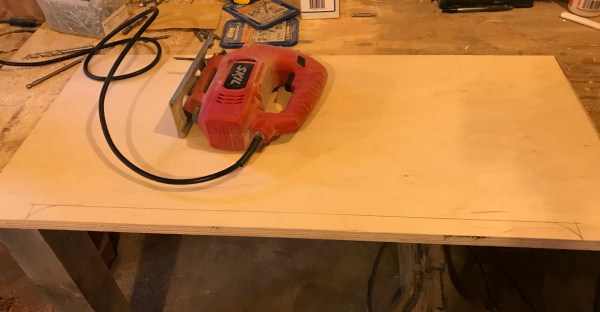
Once the glue was dry, I used my band saw, I cut this circle out.  You could also use a jig saw to cut this as well.  It doesn’t have to be PERFECTLY round or perfectly full.  Basically, we are just going to be bending the flat stock around the circle.

Step 2: Bend the Metal Circle

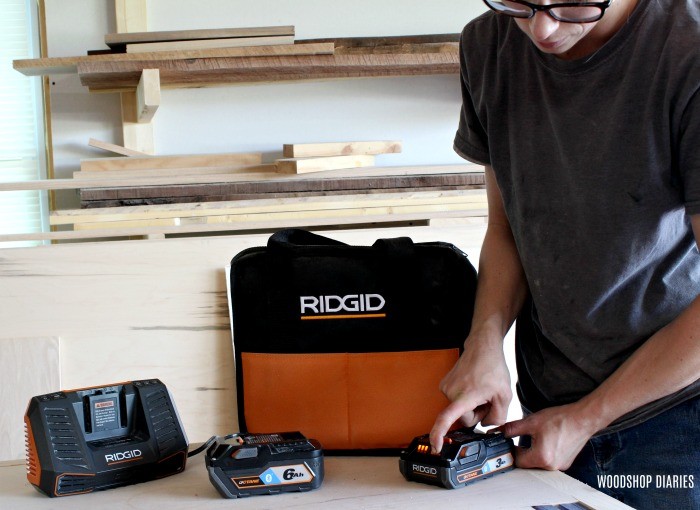
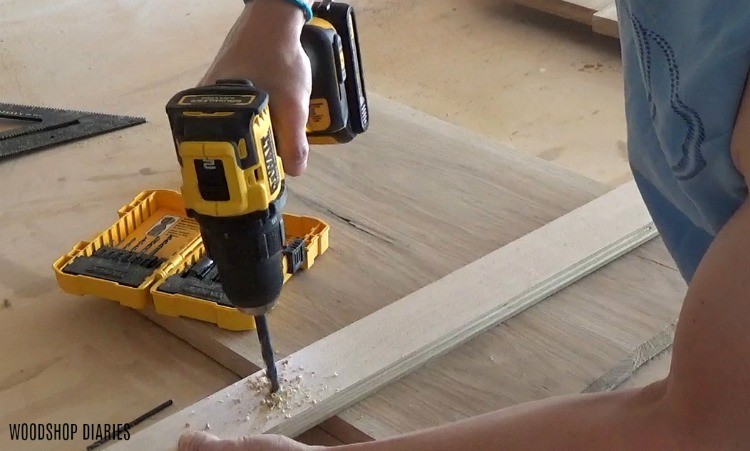
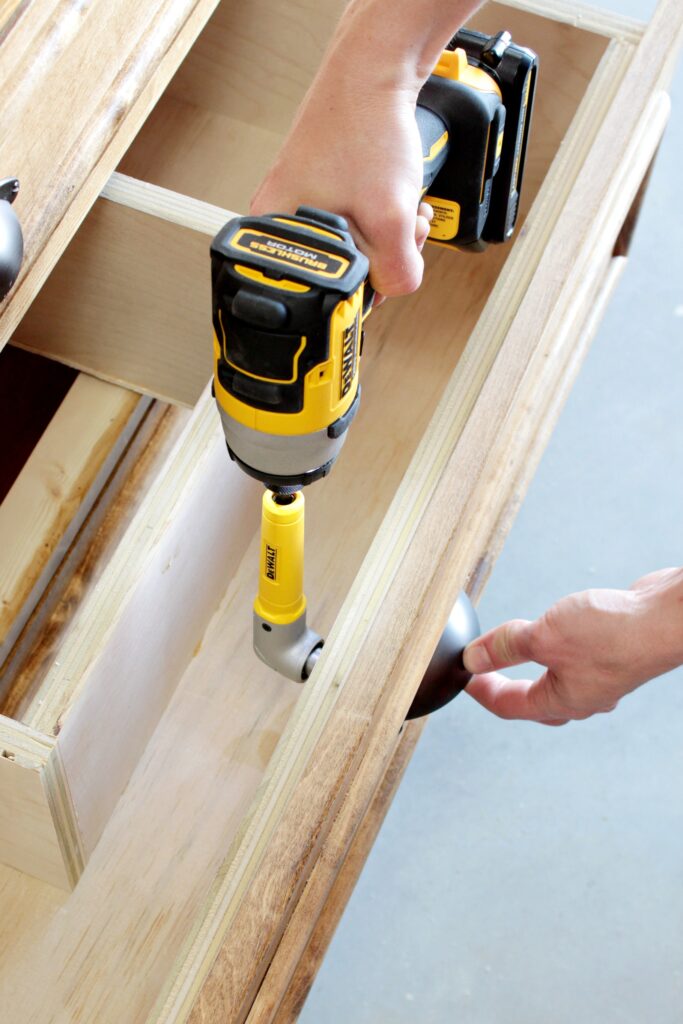
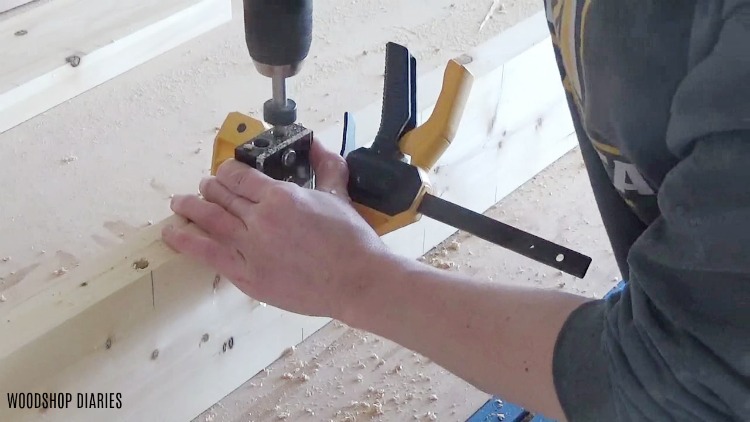
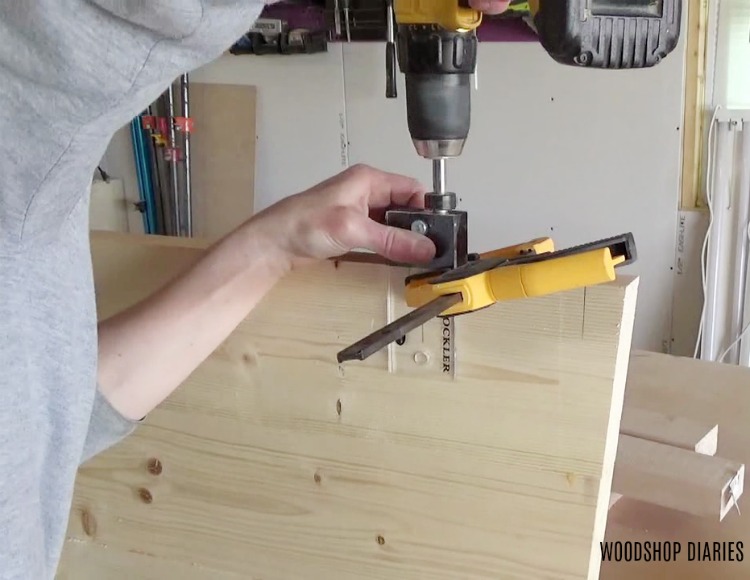
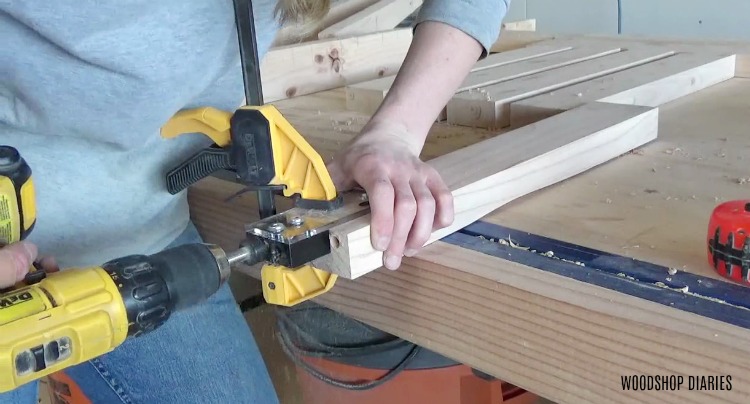
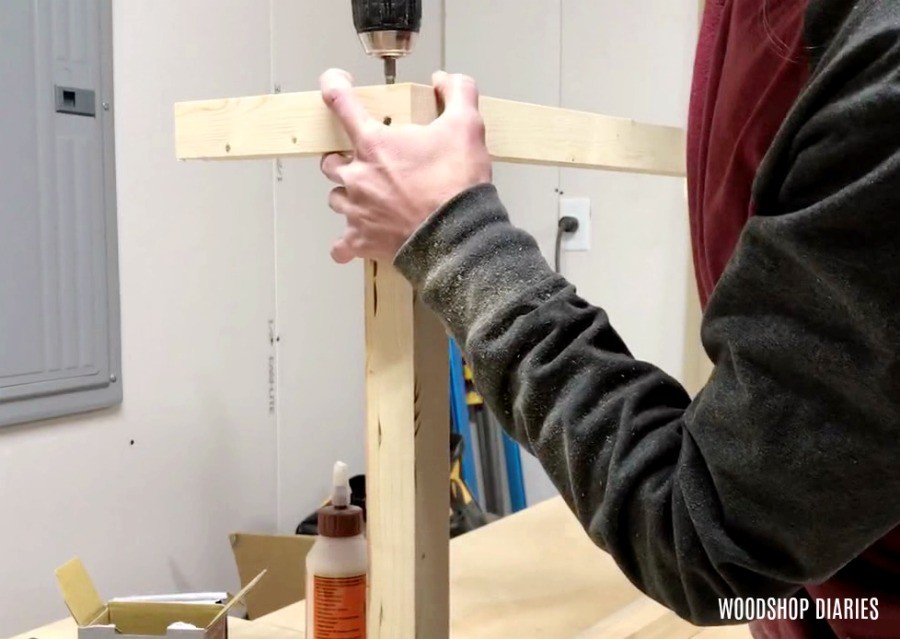
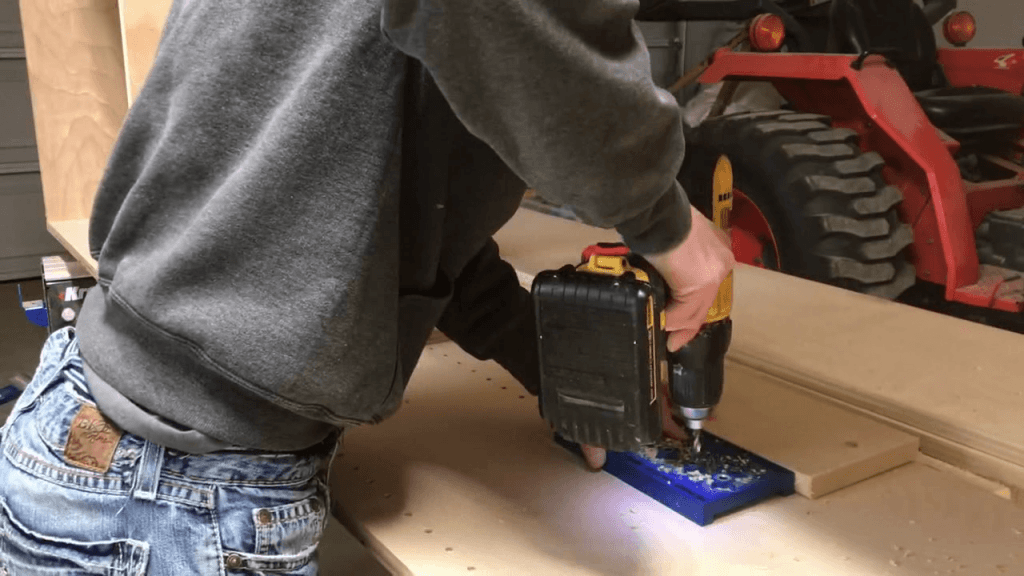
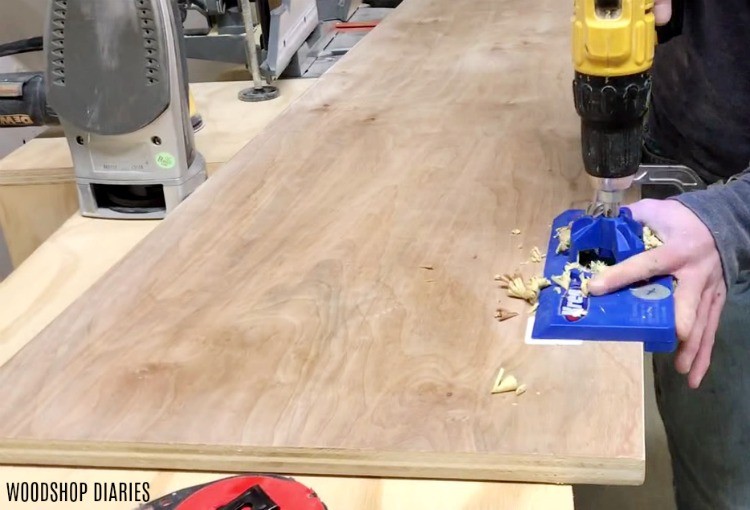
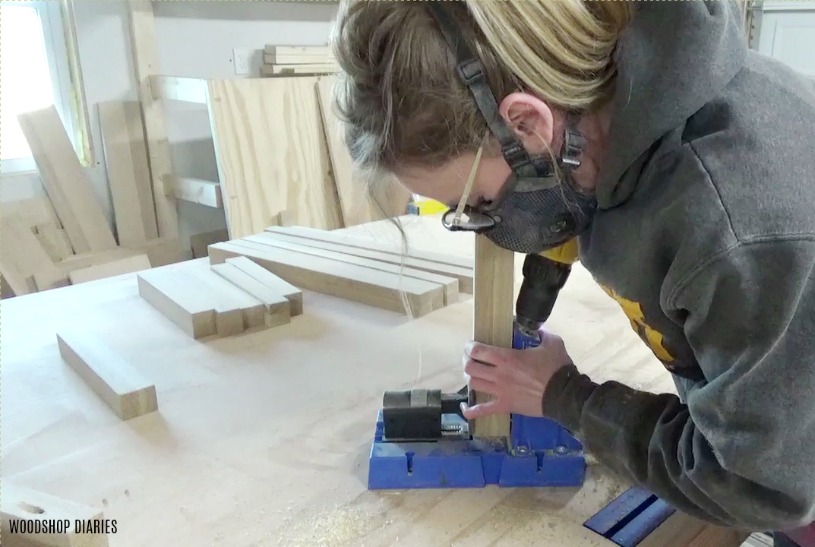
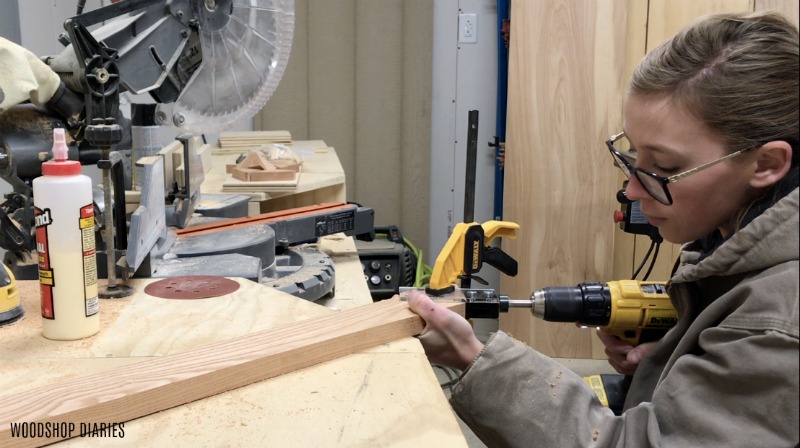
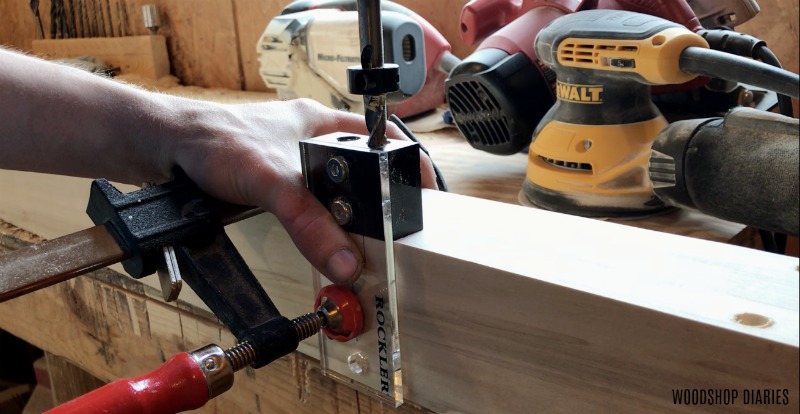
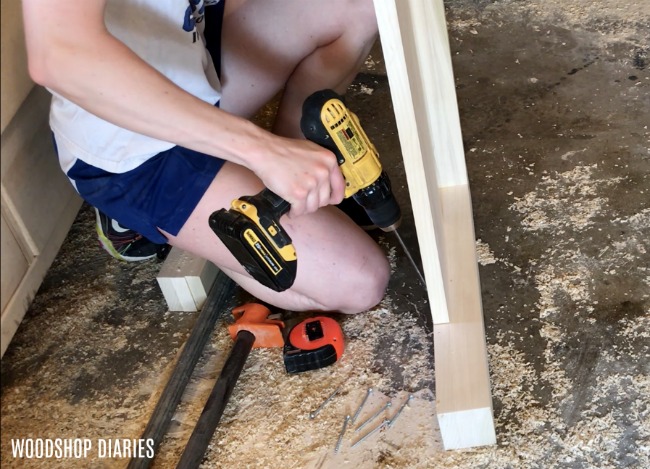
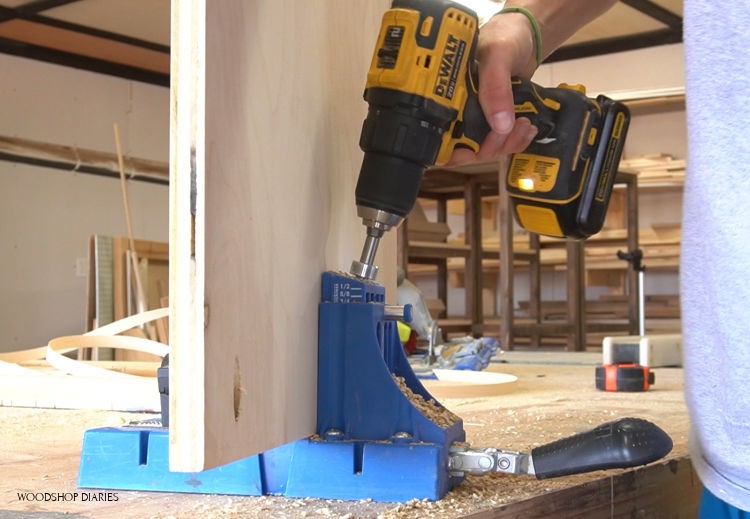
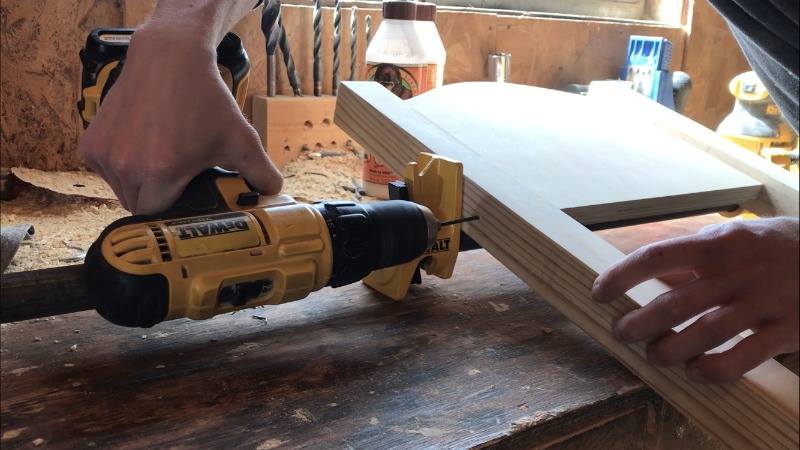
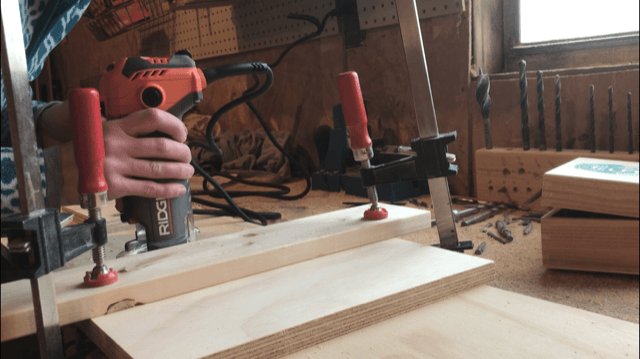
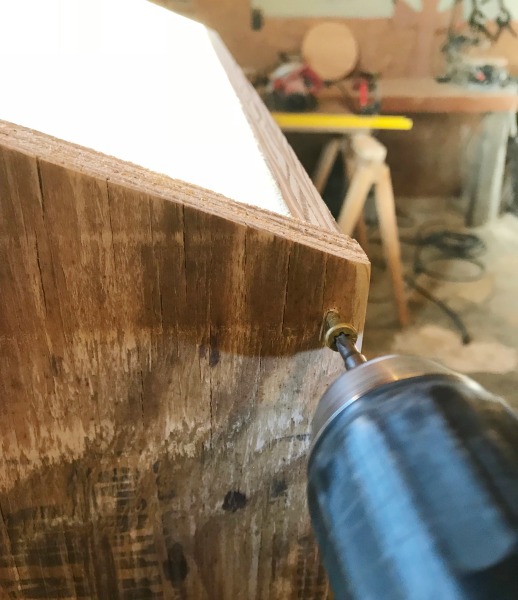
Now that the circle was cut out, I moved on to bending the flat stock.  At this point in the project, it was really helpful to have a drill and a driver handy as I started to bend this metal.  I used the DeWalt Atmoic 20V MAX Compact Drill/Driver set for this particular project.

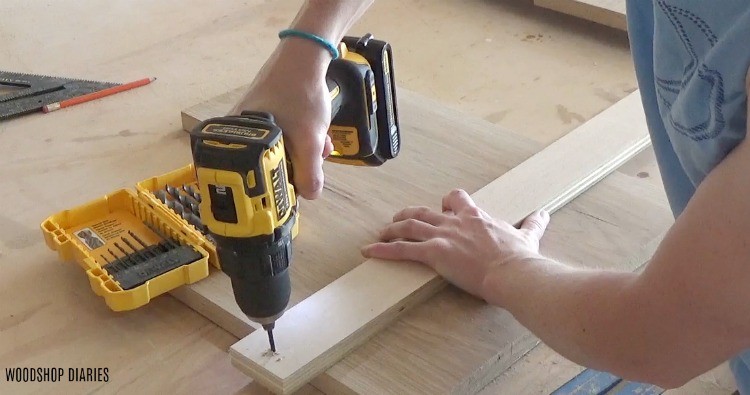
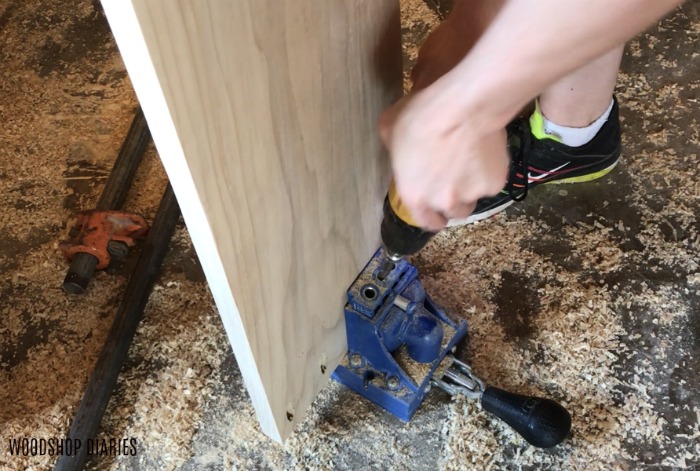
So, I used my Drill to drill a starter hole so that I can screw the steel to the jig.  I made sure to drill the hole large enough that the screw would fit through, but it would stop at the head.

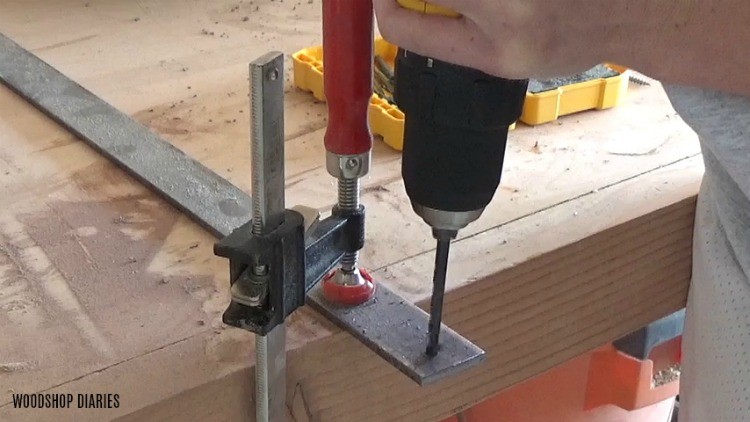
Once I made sure my screw would fit through the hole, I used the Driver to drive the screw into the wood circle.

And now, before moving on, a quick safety warning.  Torches are hot.  Torches produce fire.  Be careful when using a torch and be sure to read all instructions and safety warnings that come with the torch.  For extra precaution, keep a fire extinguisher handy when using a torch.  Got it?  Basically, don’t set anything on fire, okay?

.

I used a Bernzomatic TS 8000 torch kit to help in bending this steel.  By the way, it’s really helpful to have an extra set of hands for this step—one to roll the circle and one to heat the metal.

.

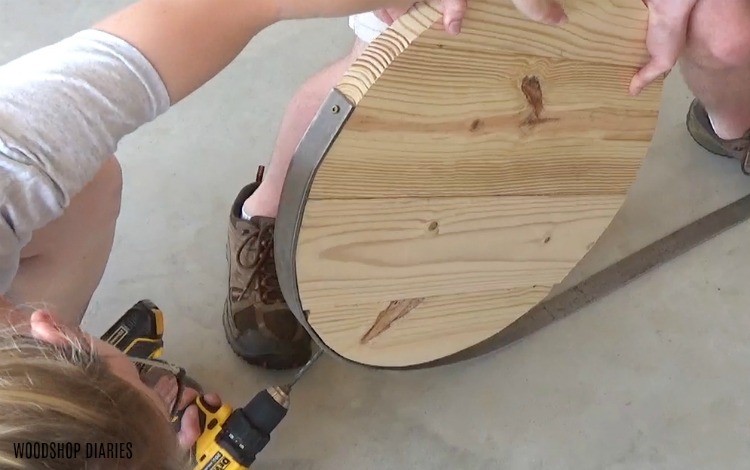
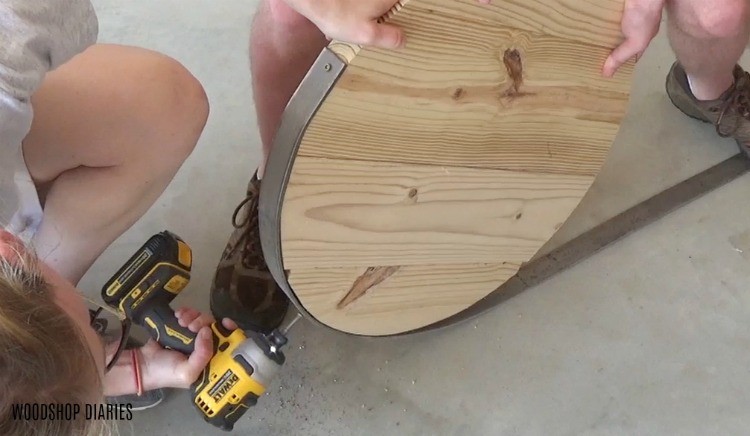
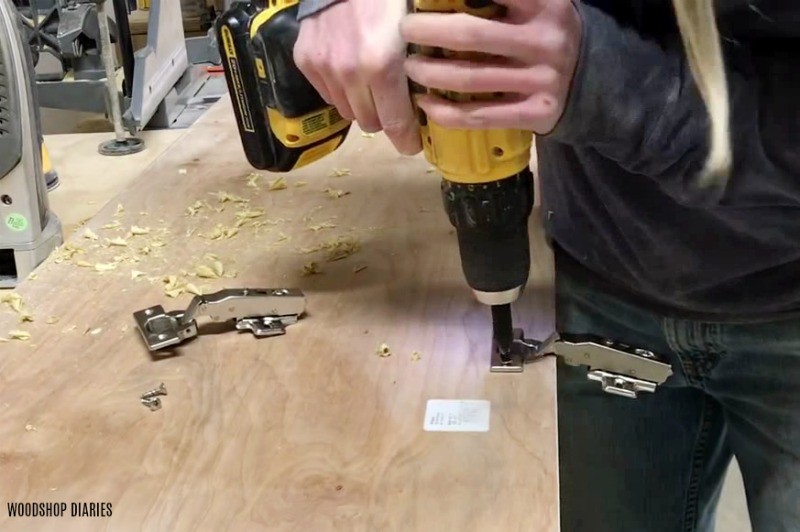
Basically, I used the torch to heat a small section of metal at a time, then while it was hot, Danny rolled the metal around the wood circle.  To keep the metal tight to the jig, I drilled holes in the bar and drove screws through like shown as we rolled it.

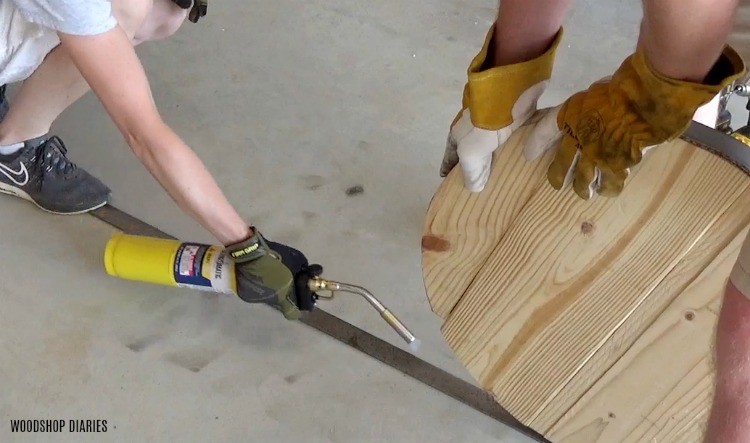
It’s super handy that this torch has a trigger so that I could quickly pull the trigger to heat a small section of metal at a time, then easily just release the trigger to stop the flame and move over to drilling and driving screws to keep the flat stock close to the circle jig as it was bent.  We worked our way around the circle heating, bending, and attaching the metal to the jig as we went.

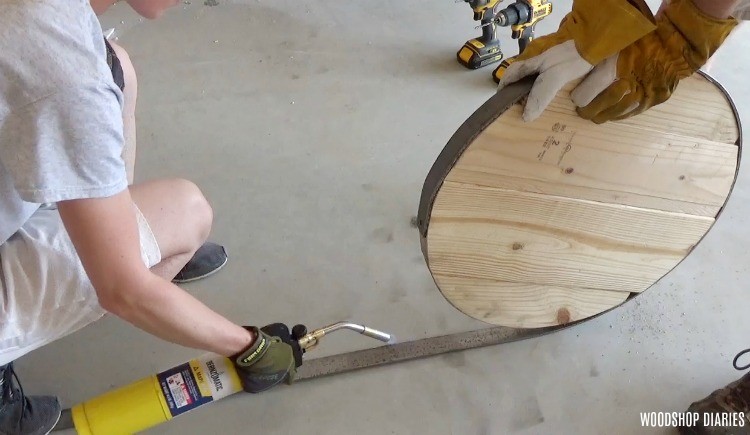
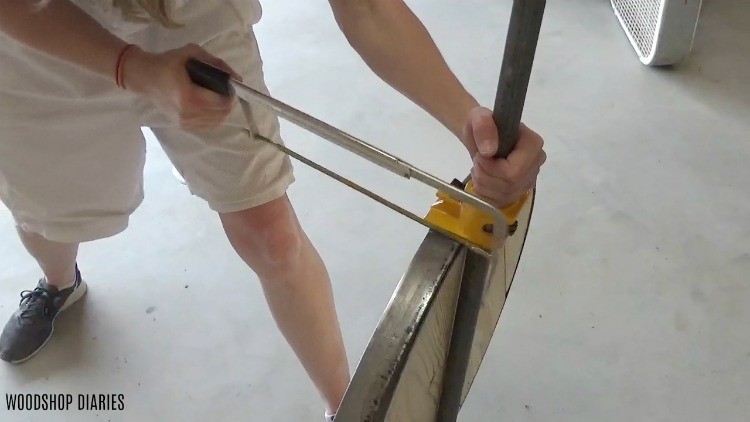
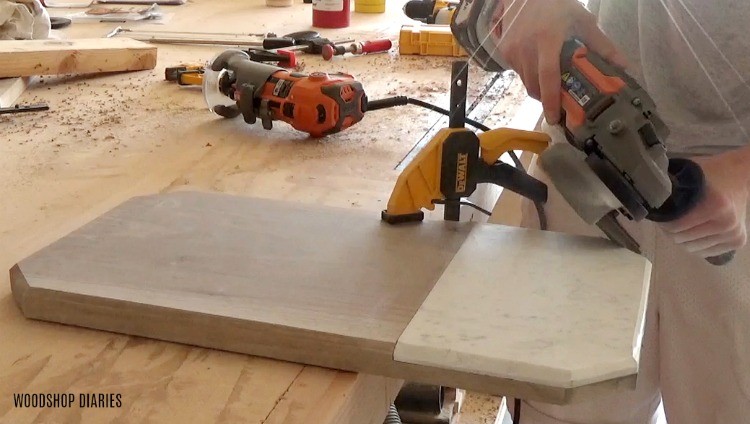
Step 3: Trim and Connect Ends of Metal Ring

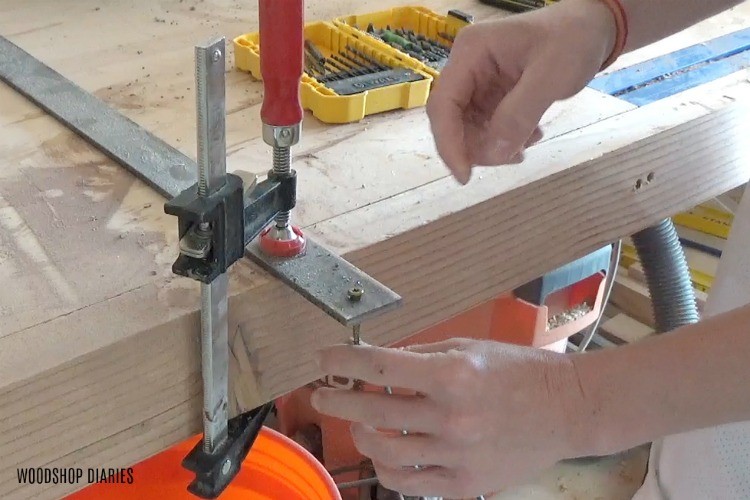
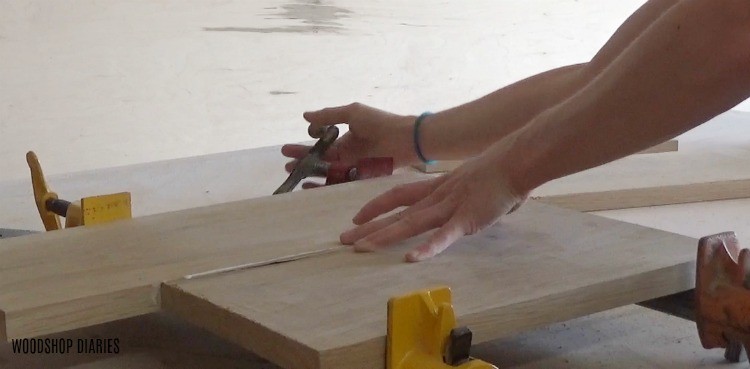
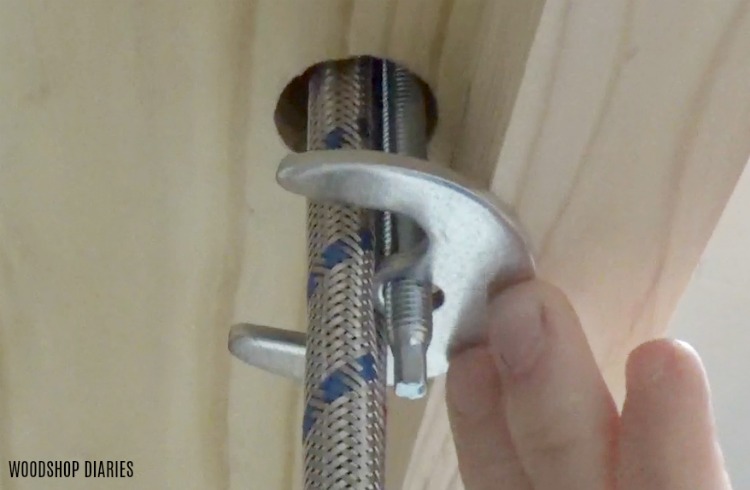
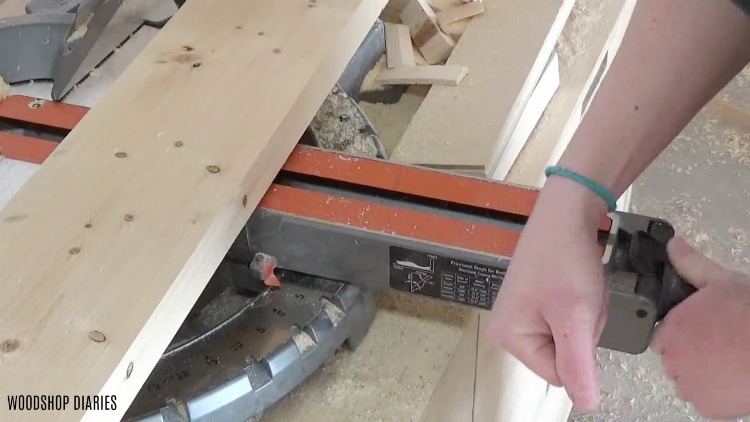
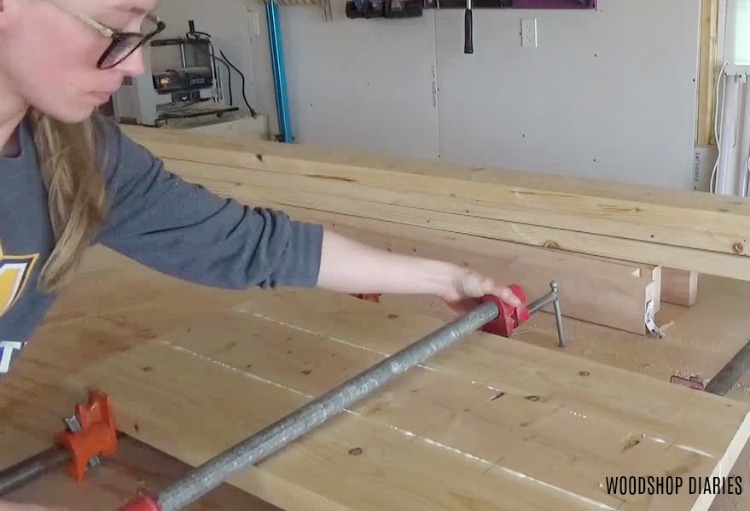
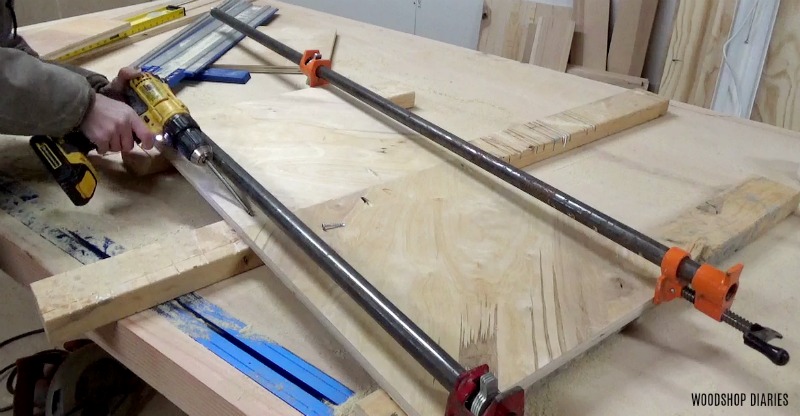
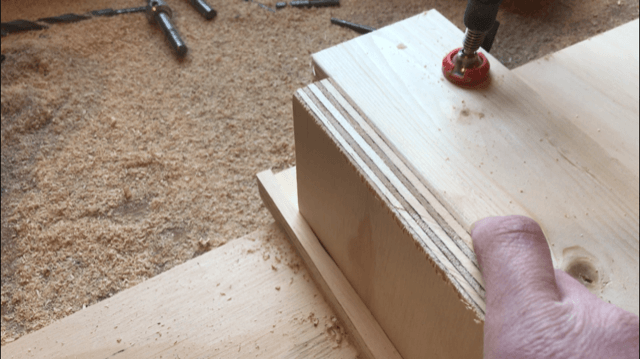
Once we got to the end of the circle, I clamped the metal in place and used a hacksaw to cut off the extra making sure to leave a slight overlap to attach the ends together with an eye bolt.

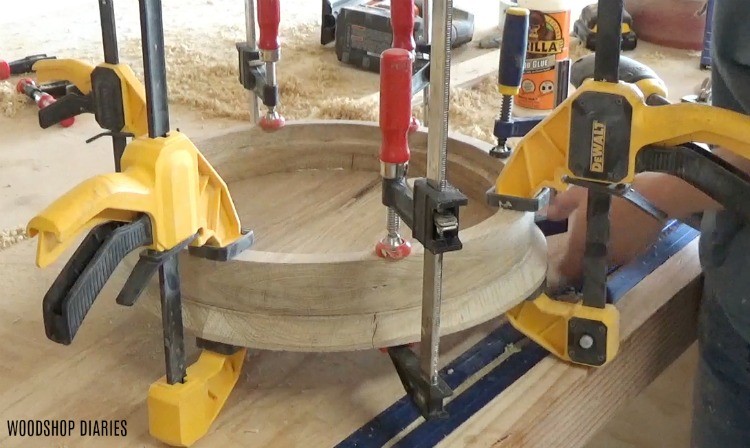
Then I used my Drill to drill two holes into the ends to insert the eye bolt.  I loosely placed the eye bolt through these holes with one nut at the top and one at the bottom.  I used clamps to help hold the metal ends close enough together to get the nuts on the eye bolt started.

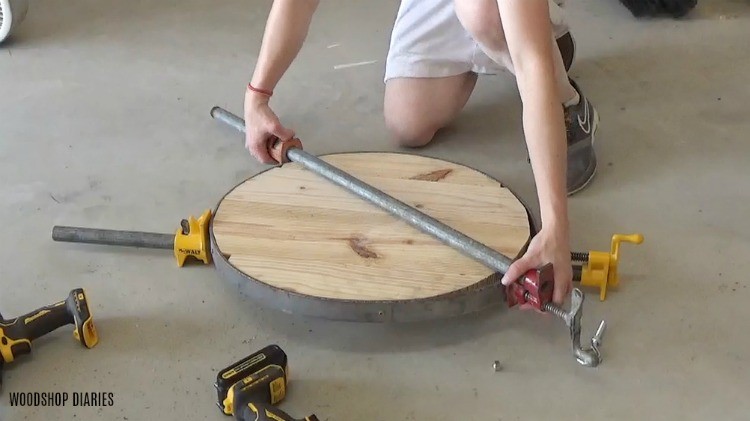
Then I removed the screws around the ring and took out the wood circle jig.  My camera battery died around this point, but once I removed the circle, I used a couple of wrenches to tighten the nuts on the eye bolt to bring the ends together nice and tight.

Then, I gave it a few coats of black spray paint.

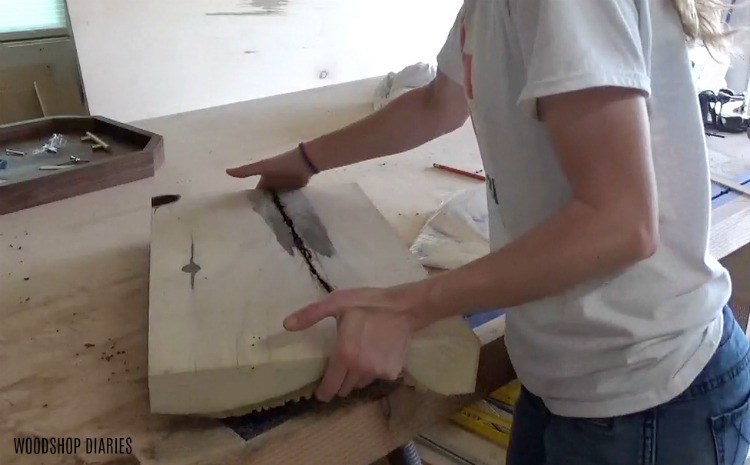
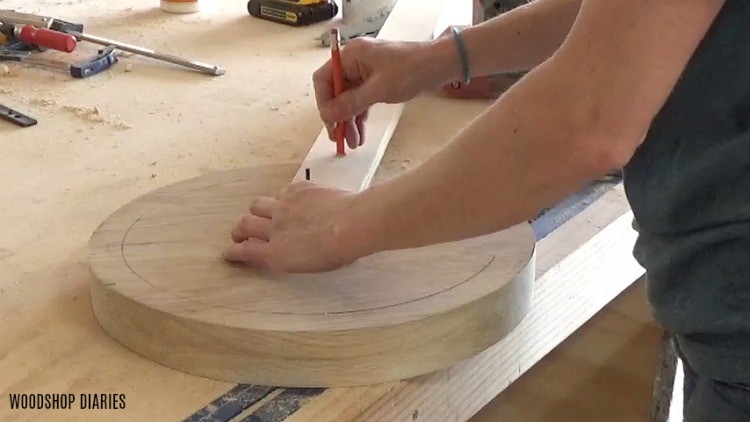
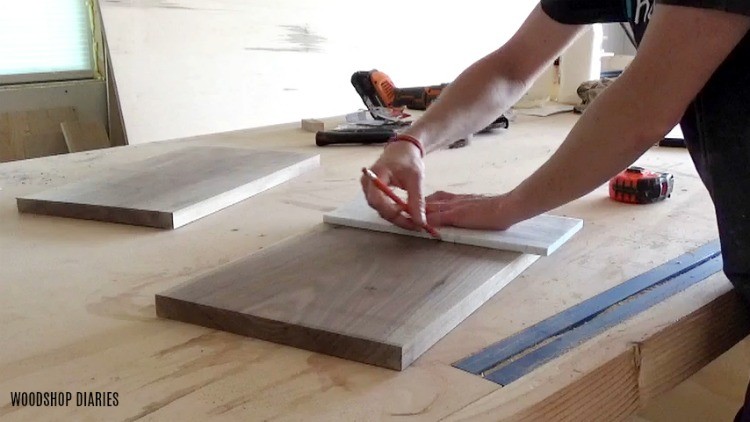
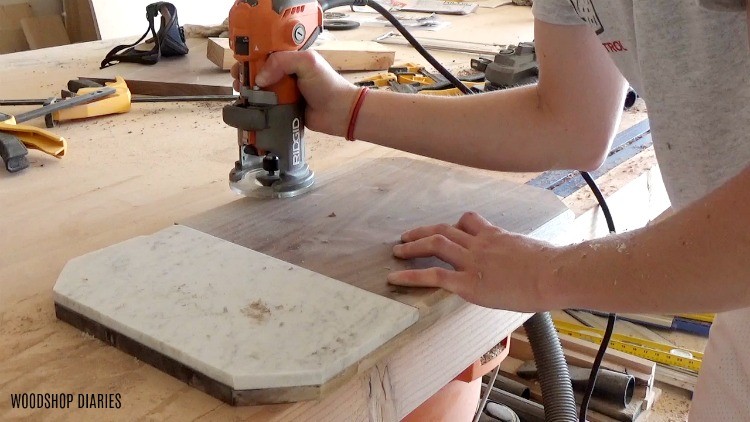
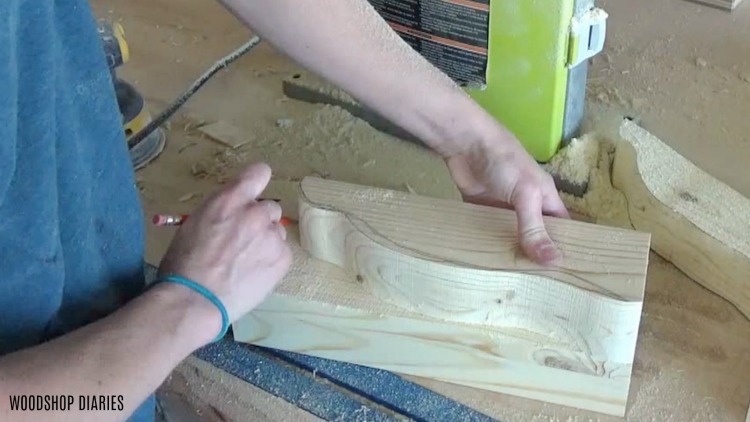
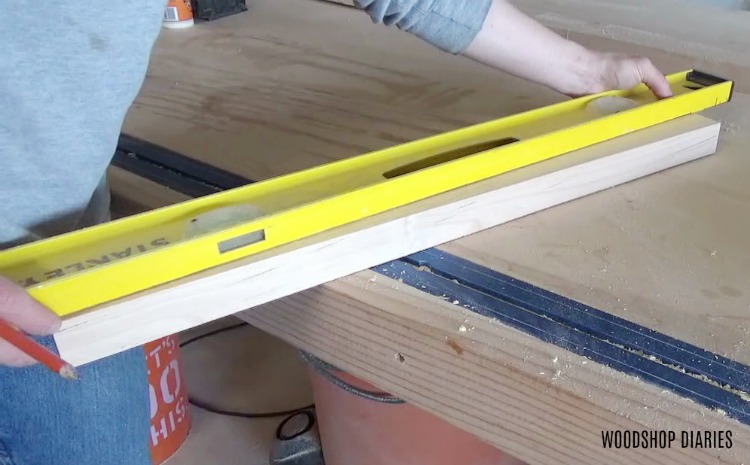
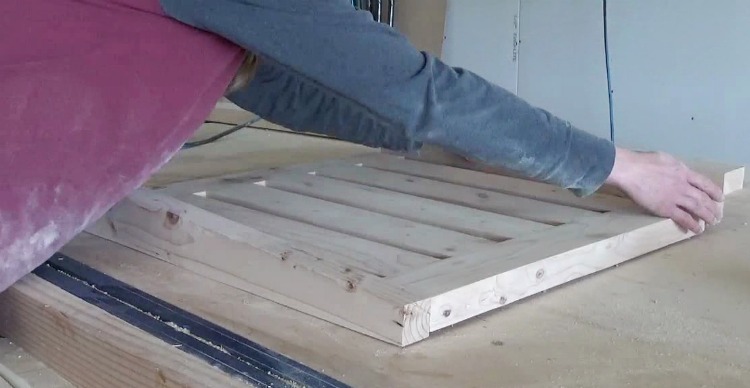
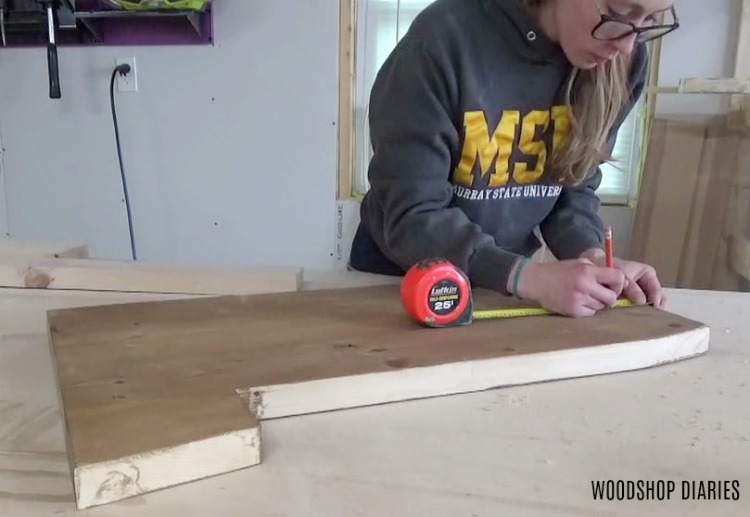
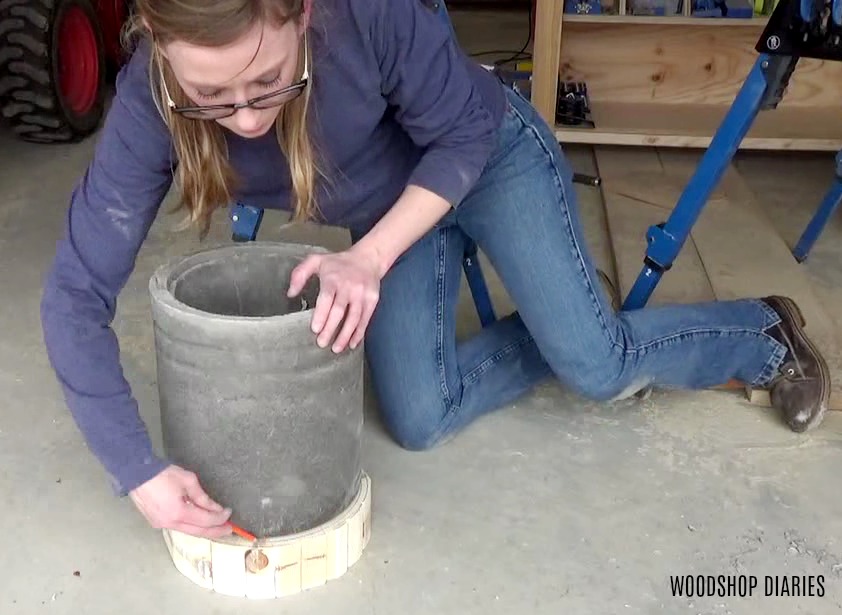
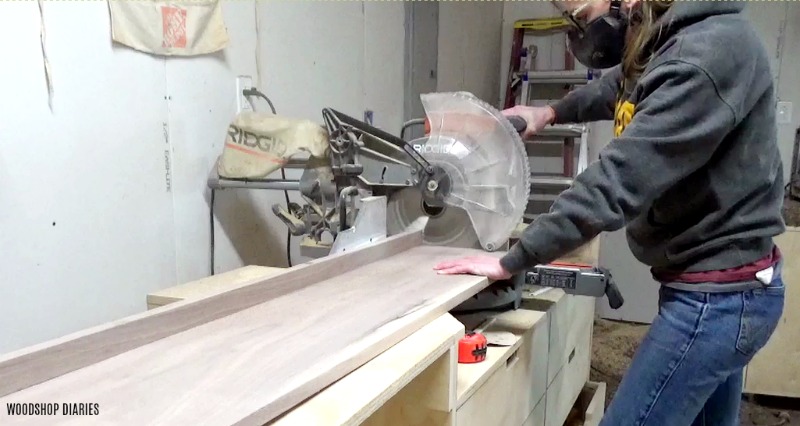
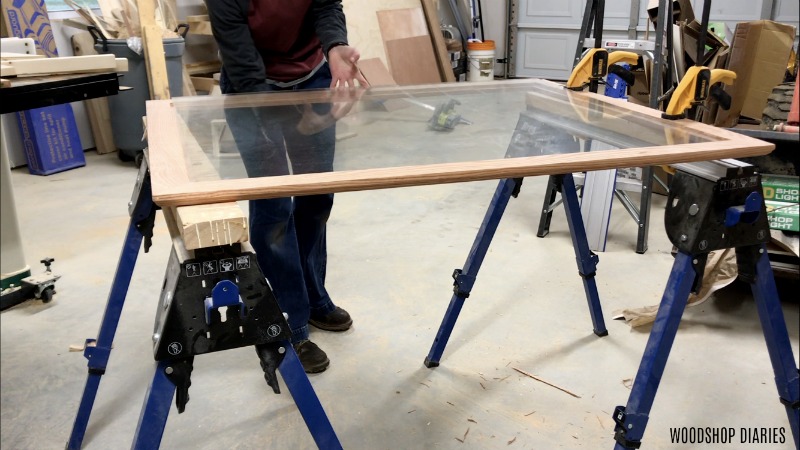
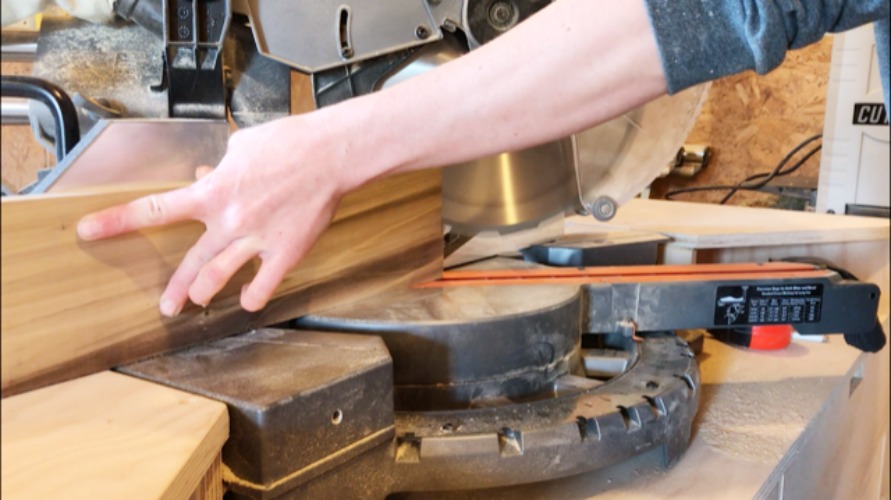
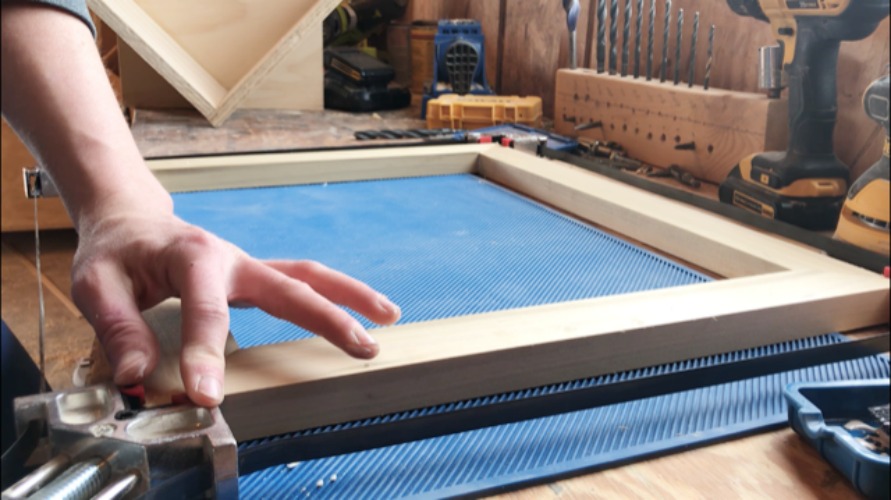
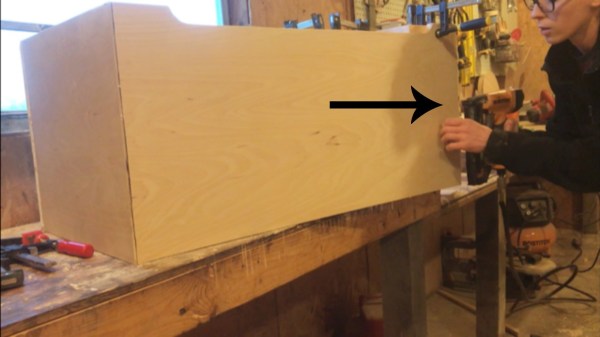
Step 4: Cut Out Wood Center

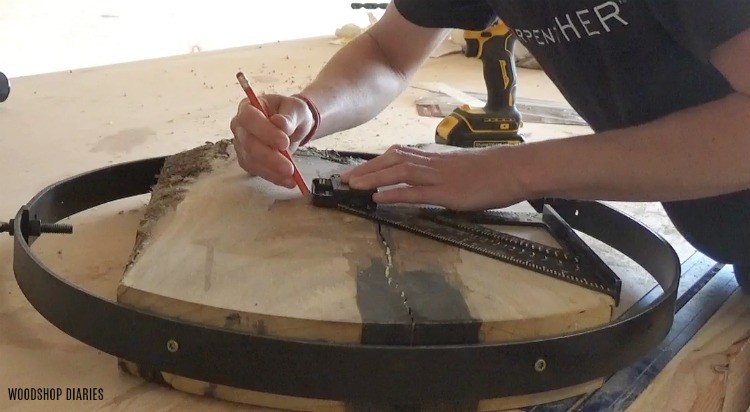
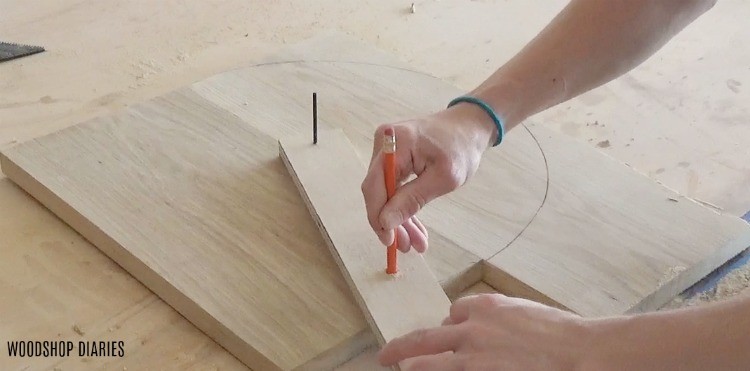
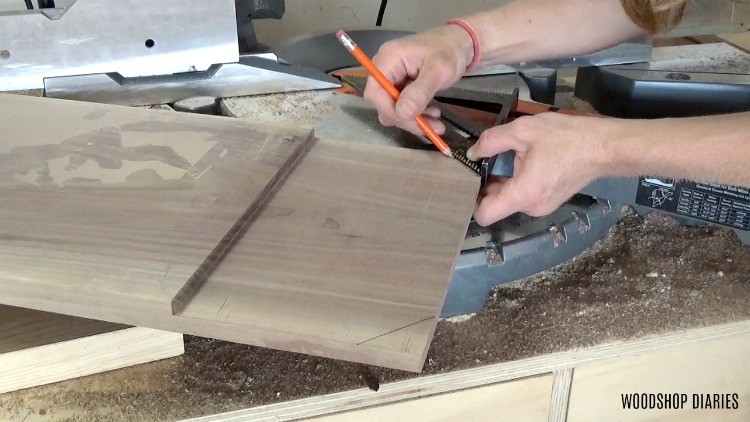
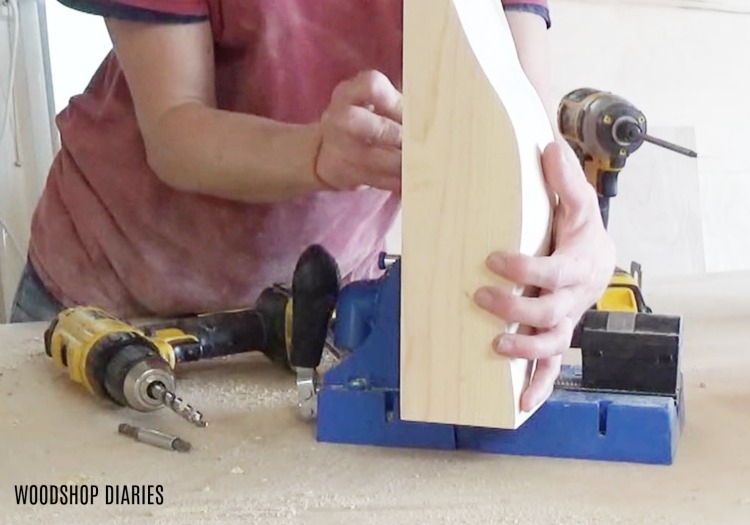
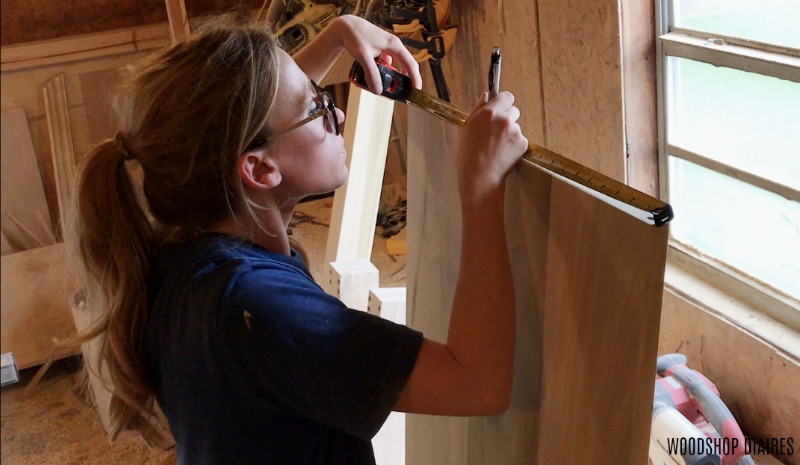
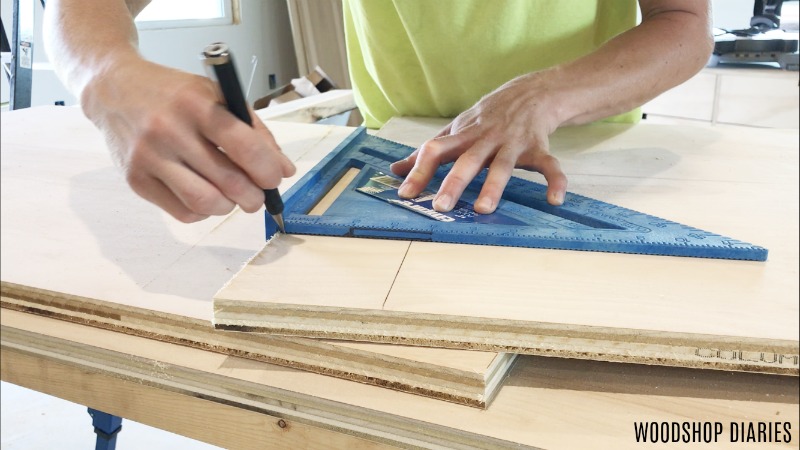
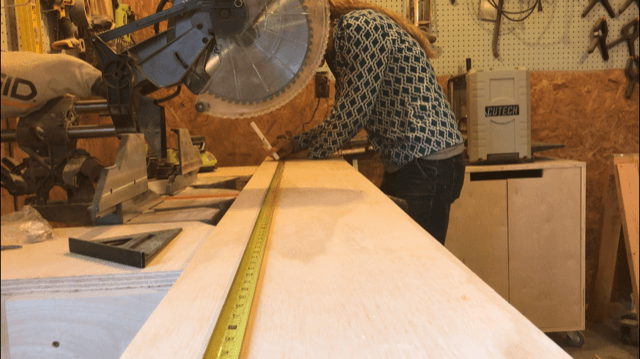
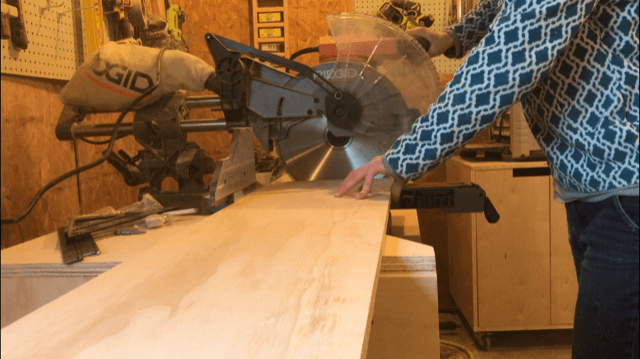
I placed the ring on top of my chunk of wood for the middle of the clock and traced where to cut it to fit inside.

.

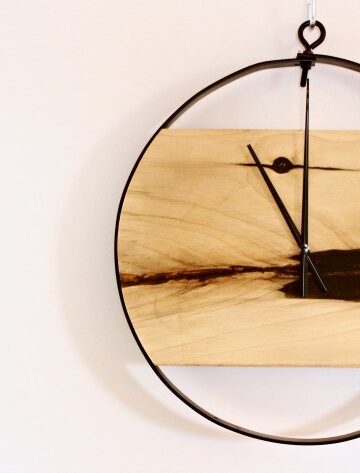
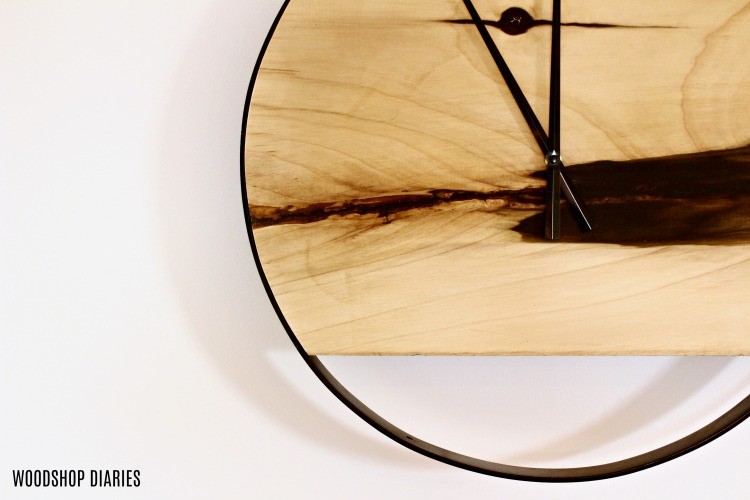
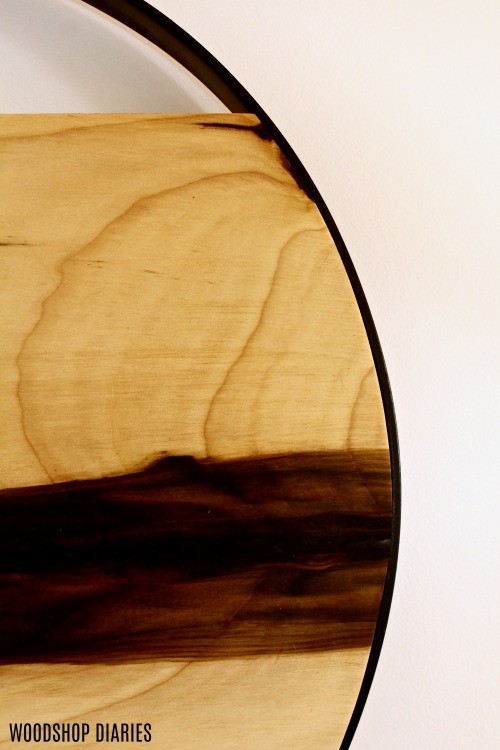
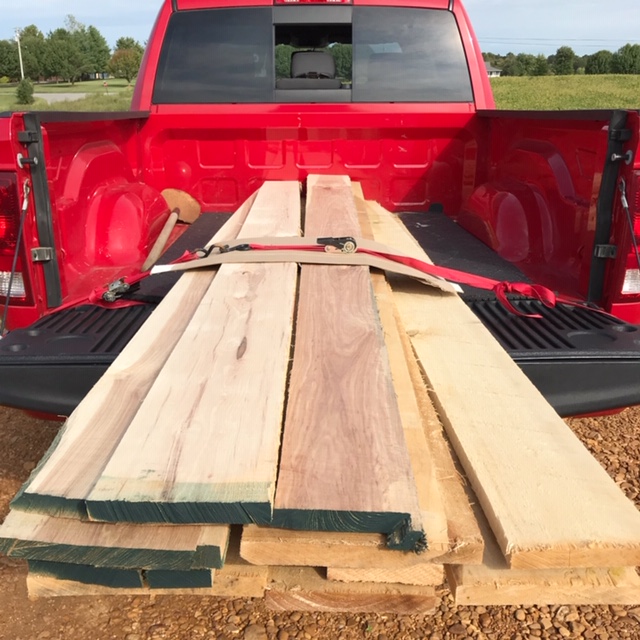
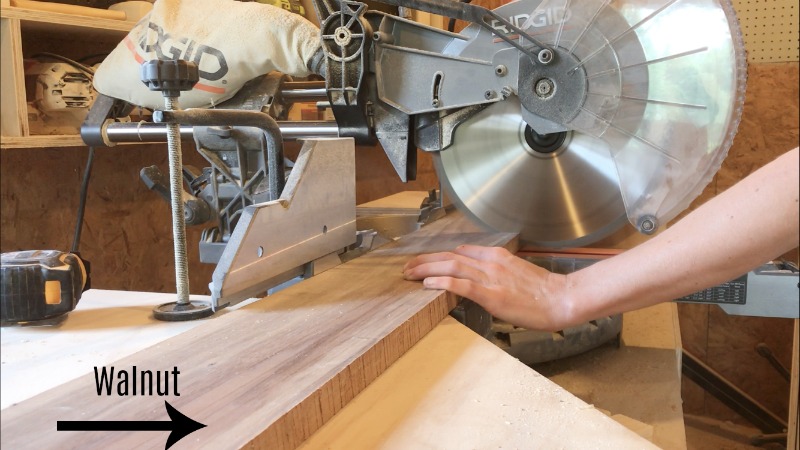
Side note: I know I will get questions about this, so I will go ahead and answer.  To find my center chunk of wood, I went to my local hardwood mill and asked if they had any off cuts or “barky” looking pieces in their scrap bin that I could buy.  They had this chunk of poplar that looked pretty cool and was large enough for the clock, so I lucked out.

If you’re wanting a piece, check out your local lumber mills and ask to see their scrap bin.  One man’s trash is another man’s treasure.

.

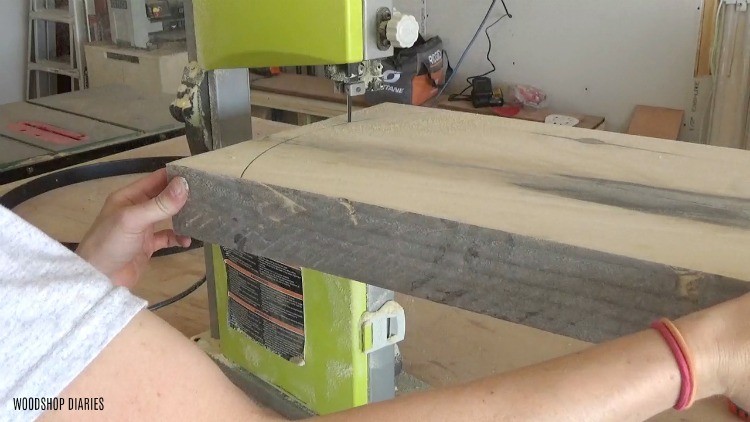
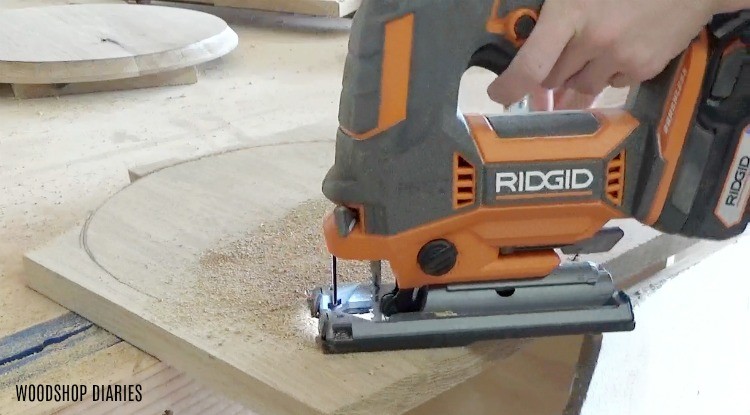
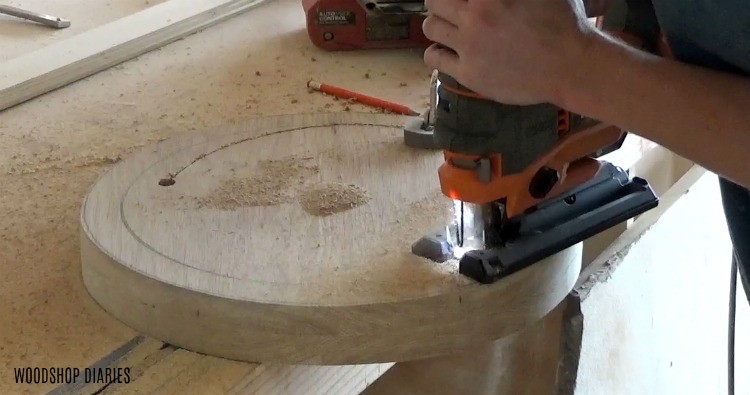
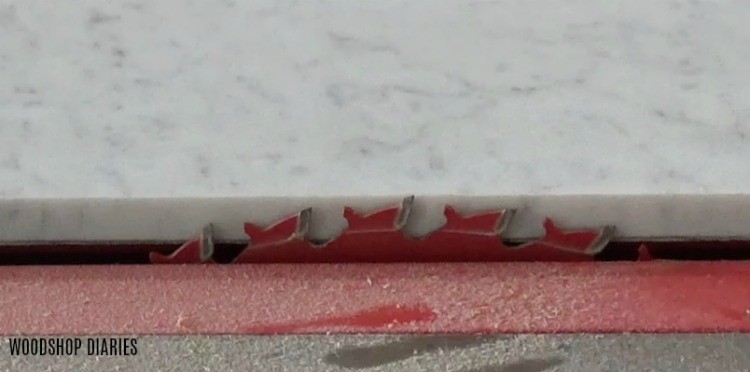
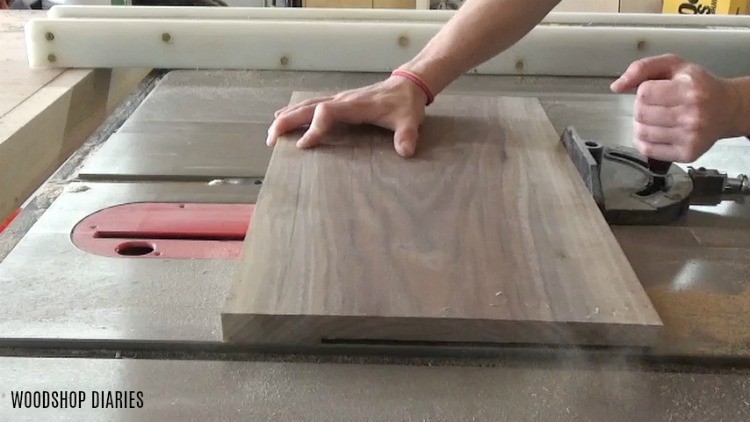
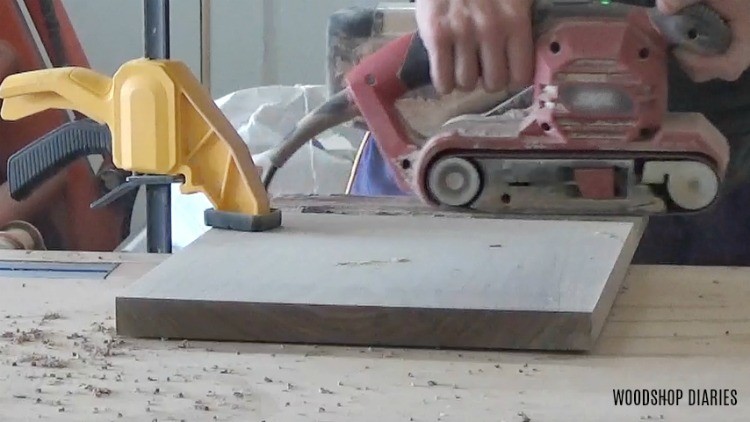
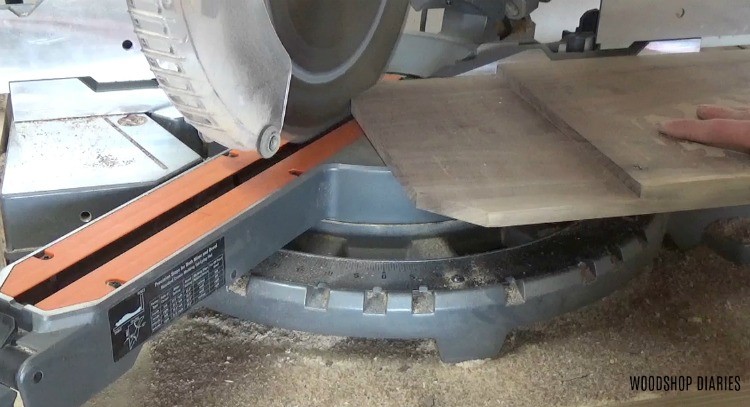
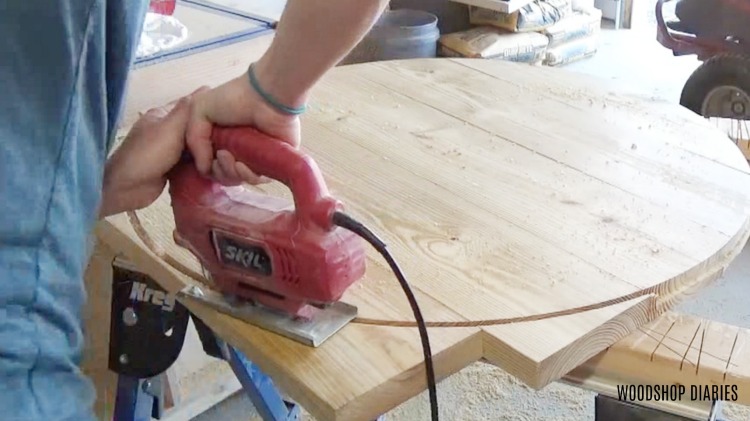
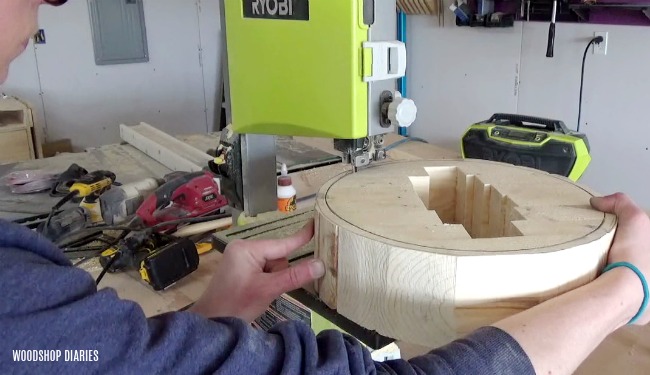
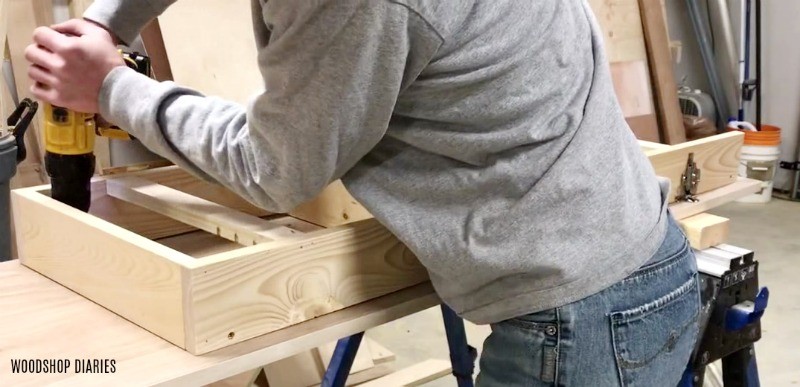
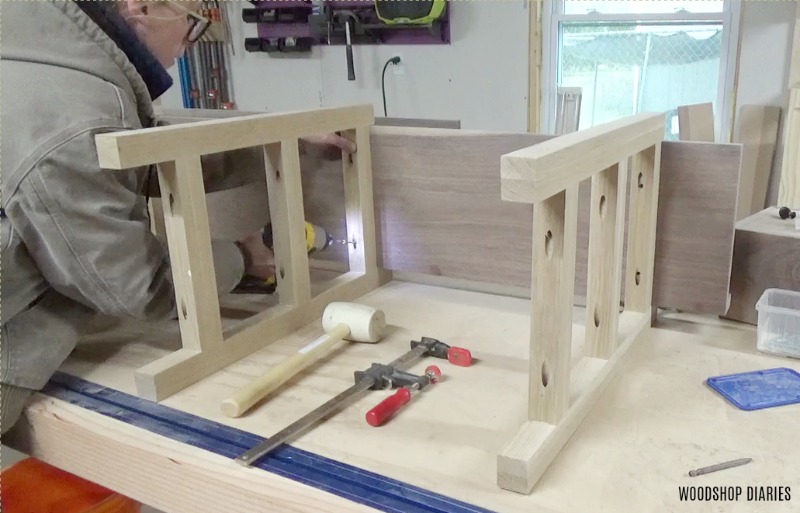
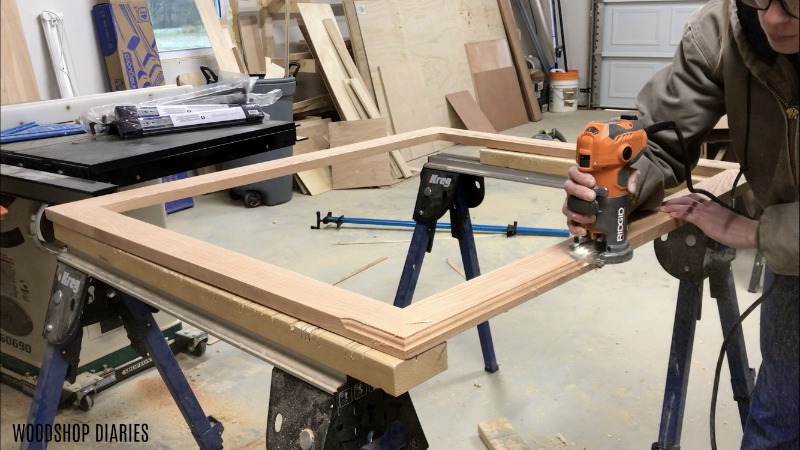
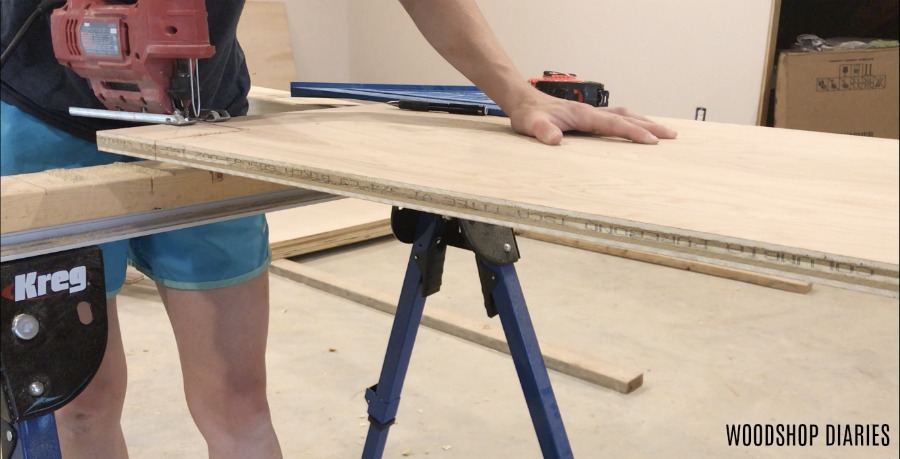
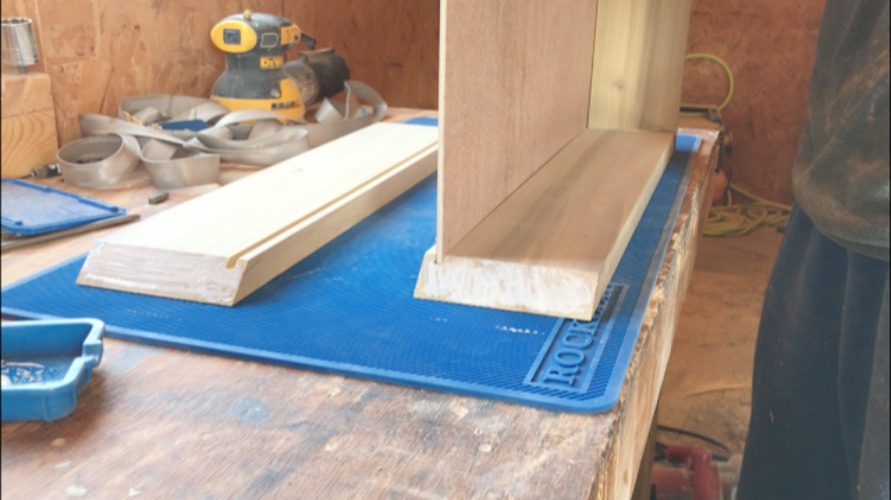
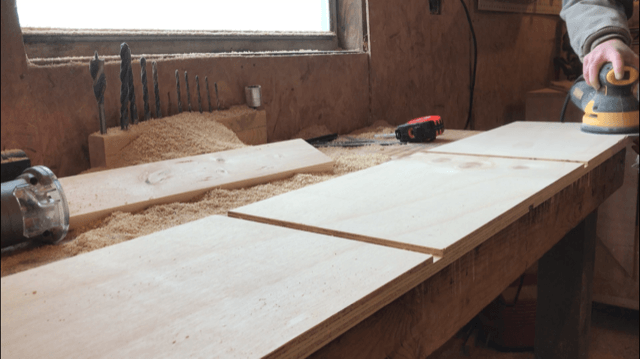
I used my band saw again to cut along these lines (you could also use a jig saw), then gave it a good sanding and test fit it inside the ring.

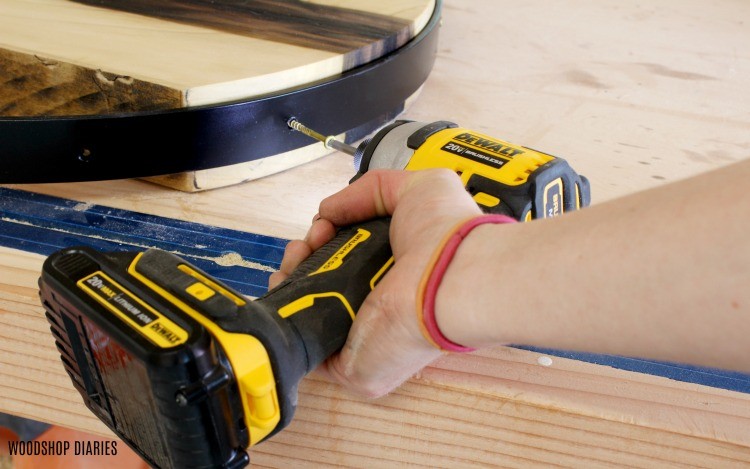
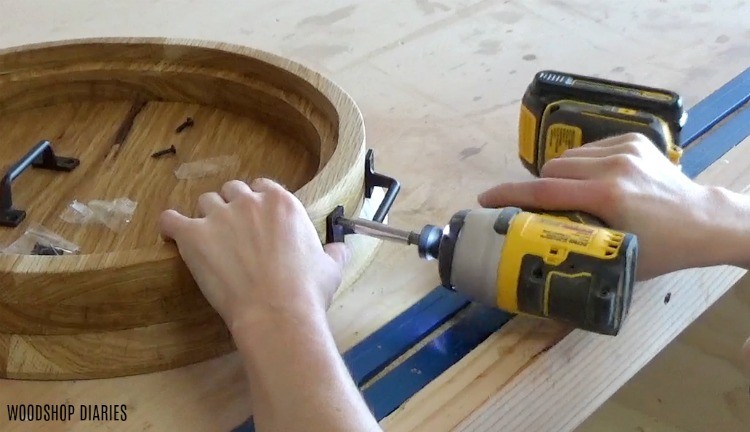
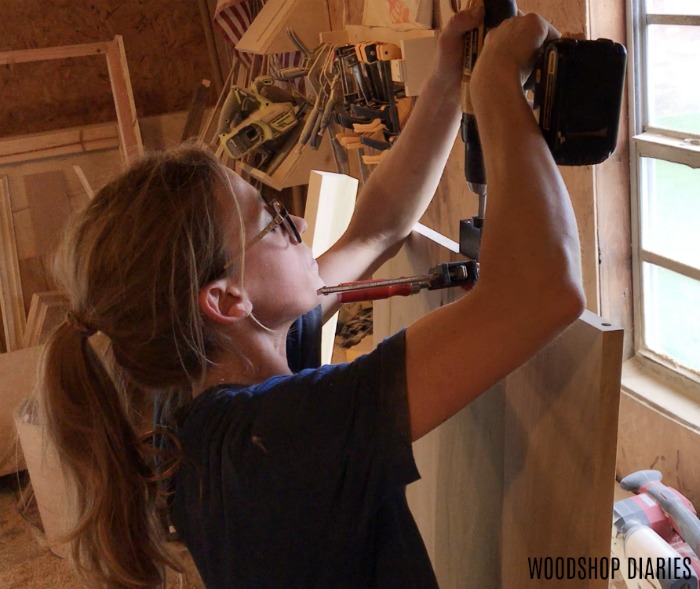
At this point, I noticed that the holes I had drilled during the bending process didn’t line up with where the wood was going (Hint: prior planning prevents poor performance so don’t be like me and maybe think that through beforehand haha), so I marked new holes and drilled them out so that I could attach the wood to the ring with screws.

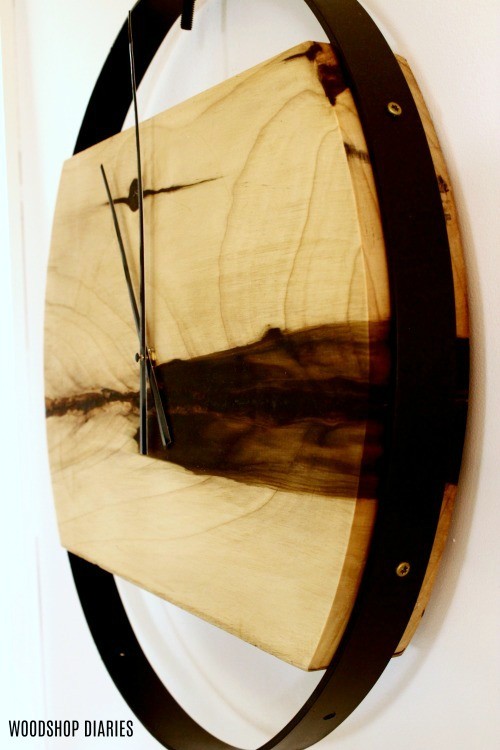
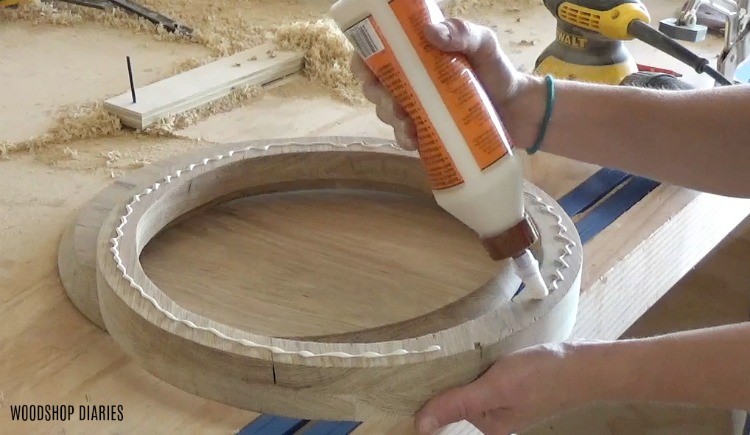
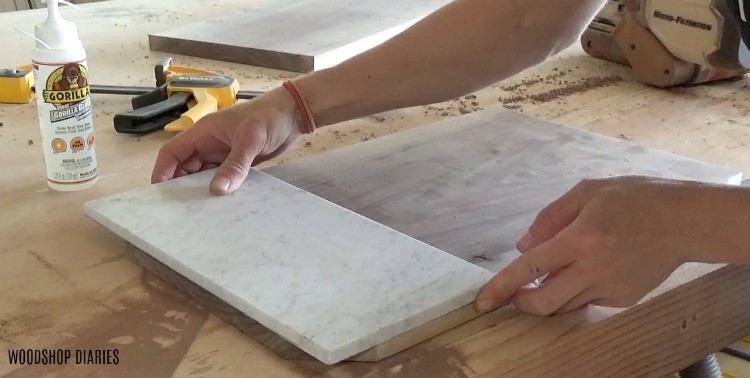
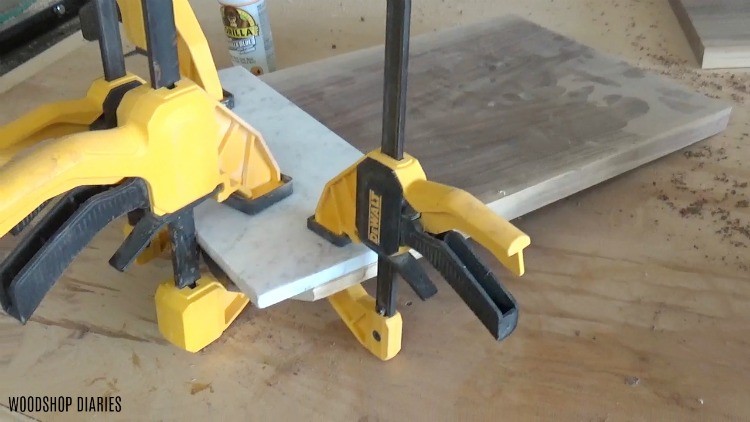
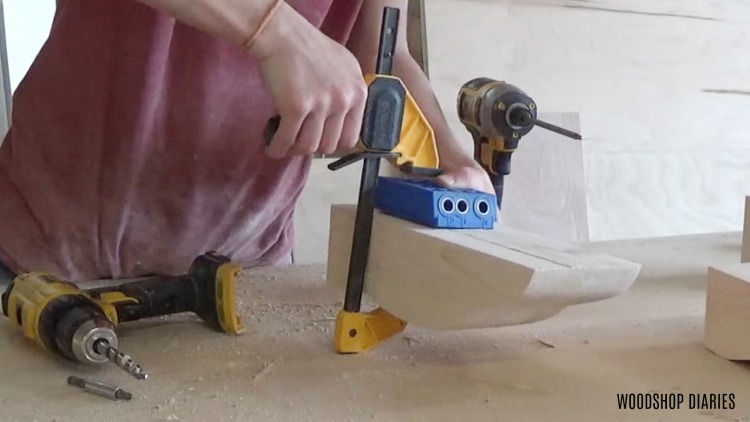
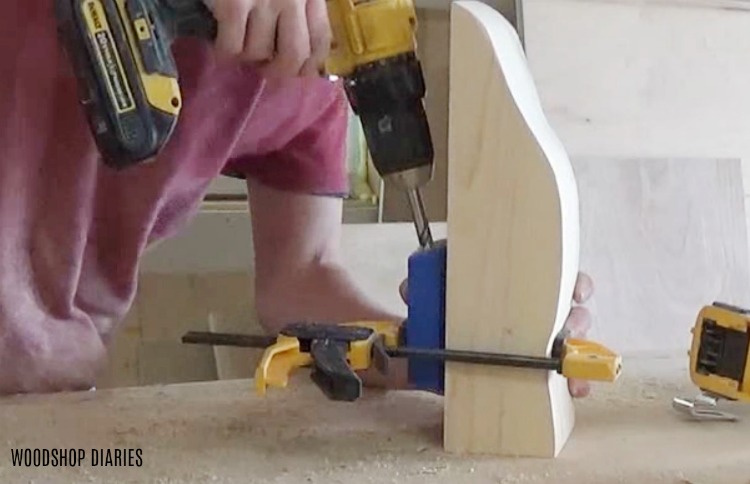
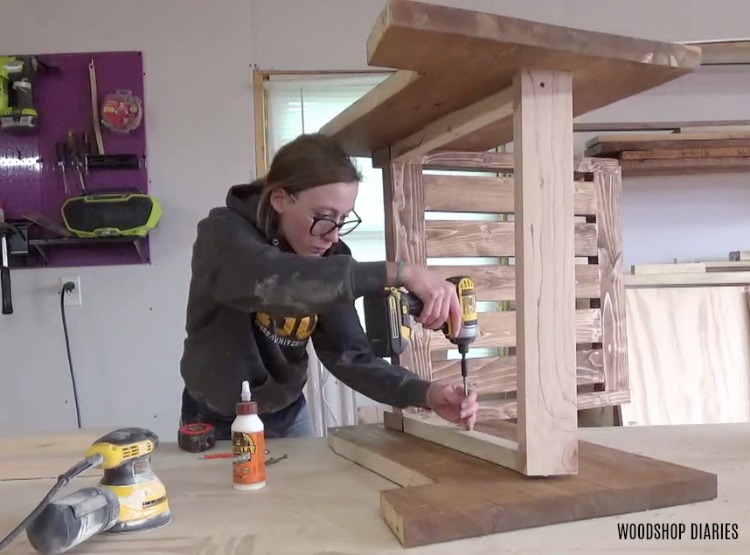
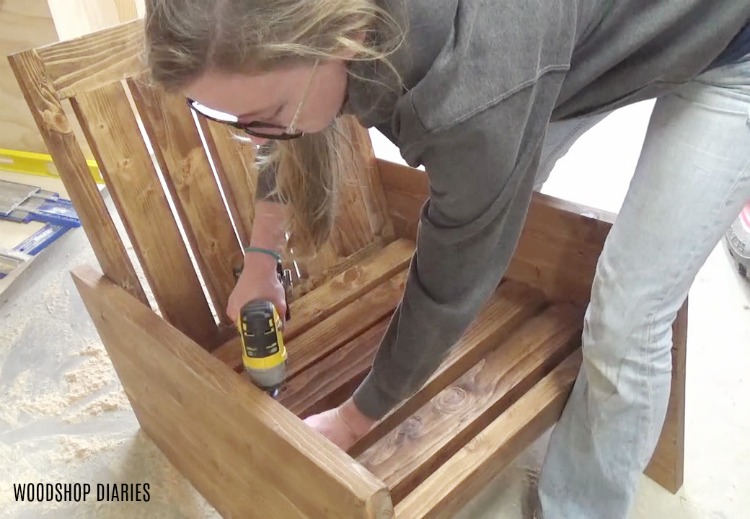
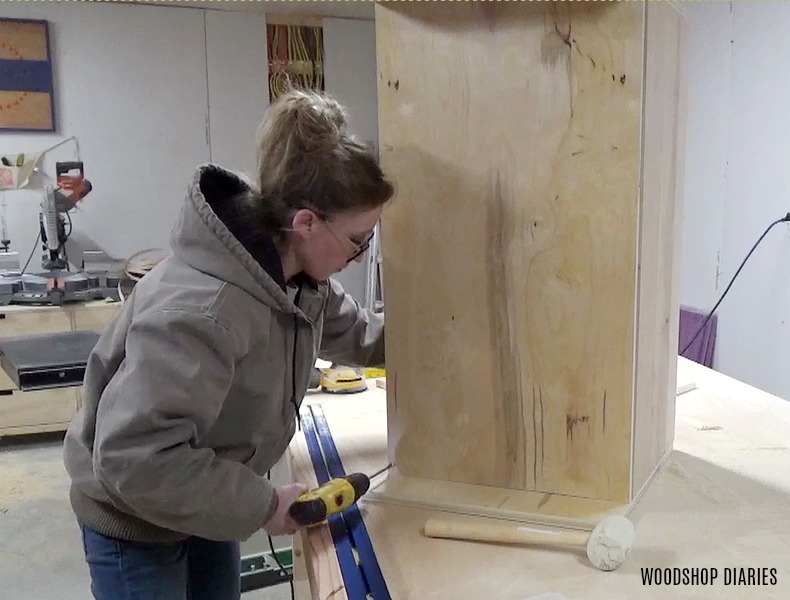
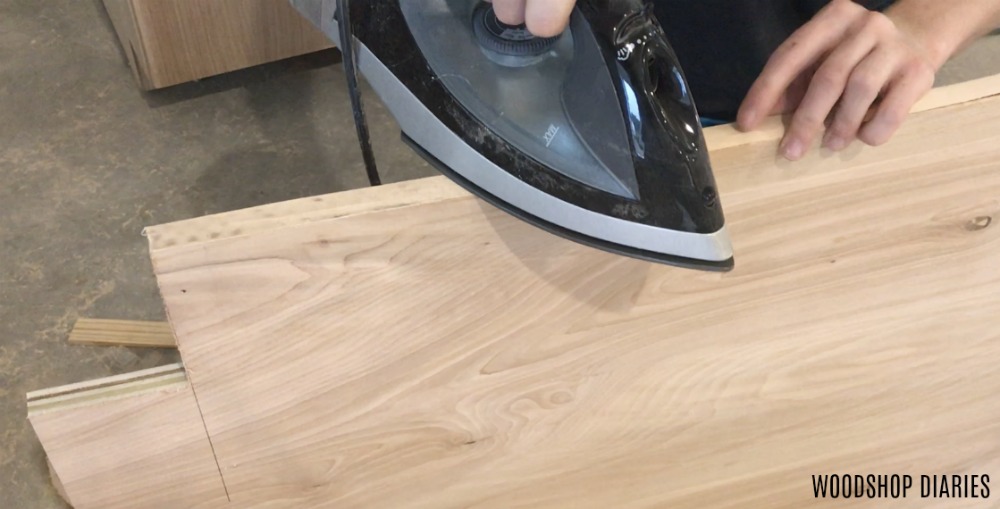
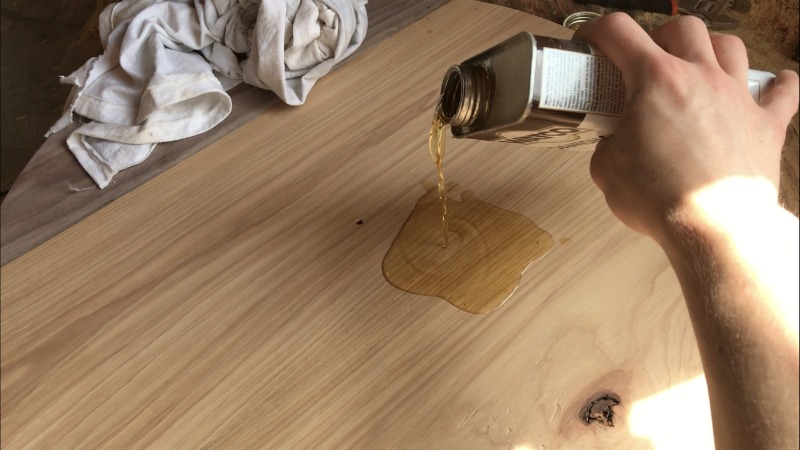
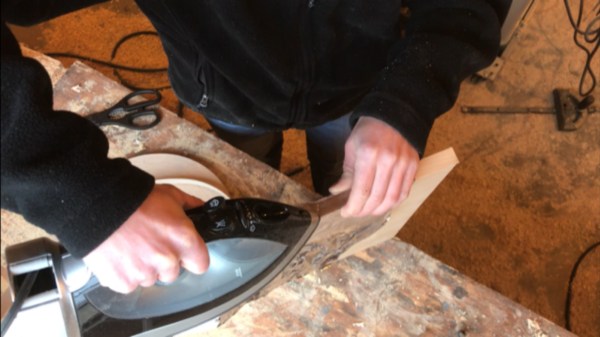
Before attaching it all together, I gave the poplar a beeswax finish.  Then I placed it in the ring and attached along the sides with 2 ½” woods screws using my Driver.

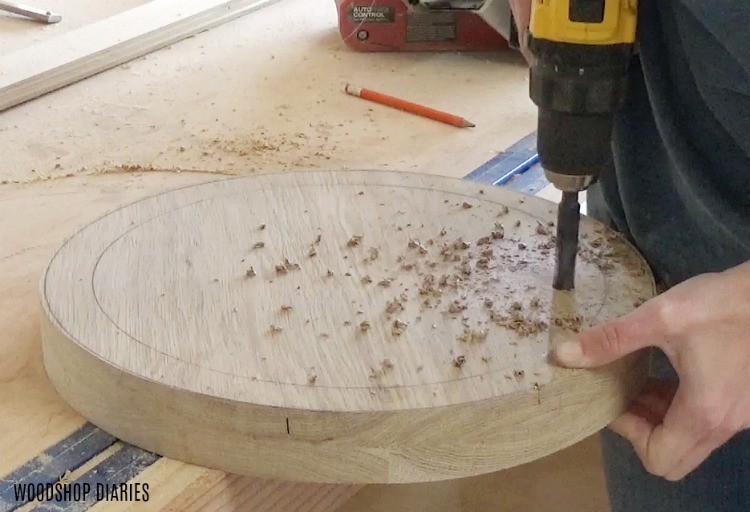
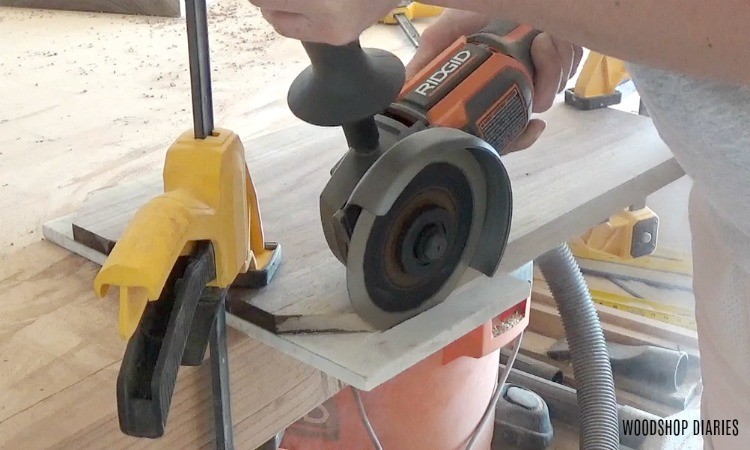
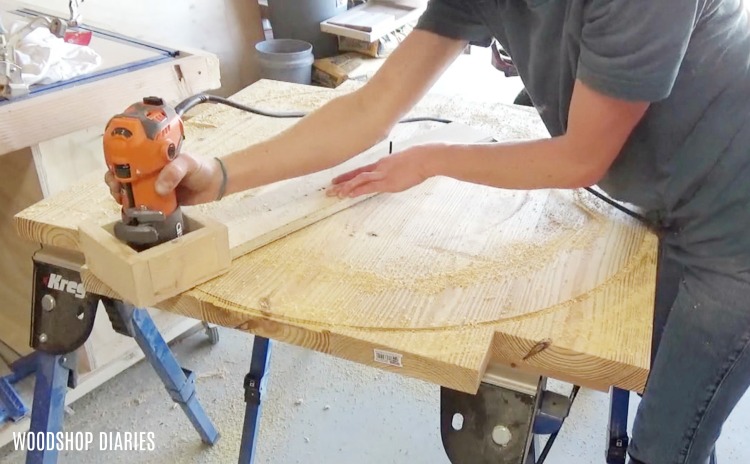
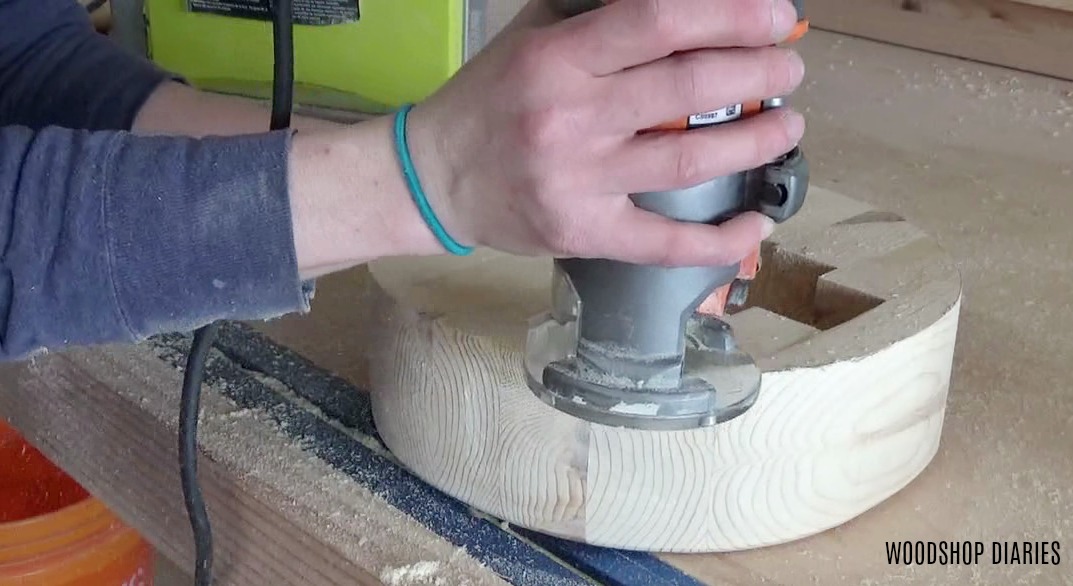
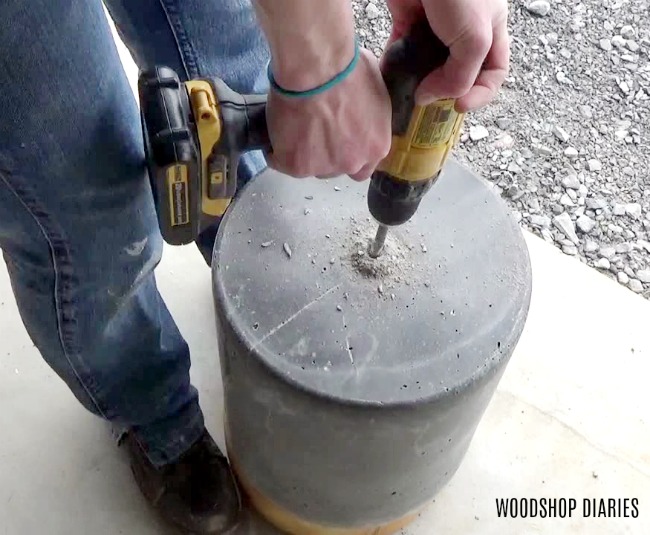
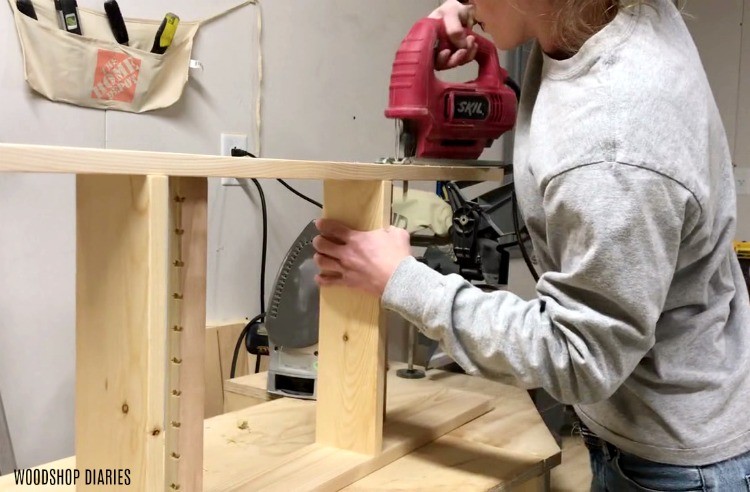
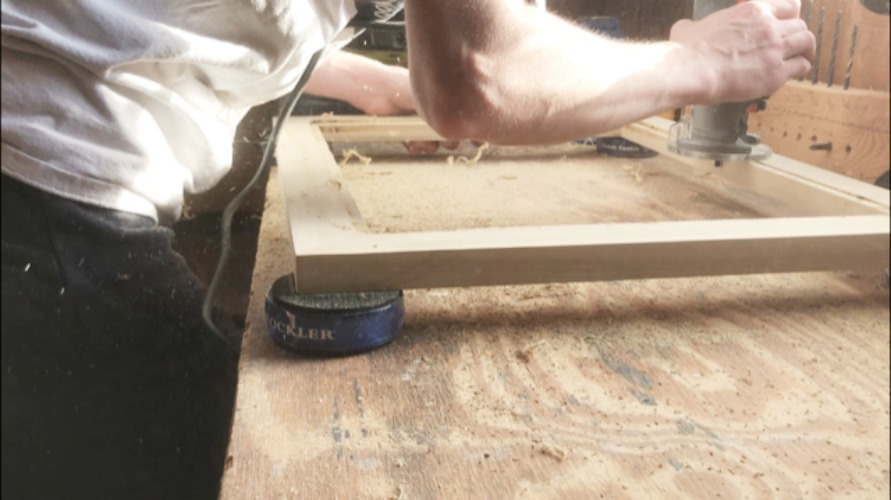
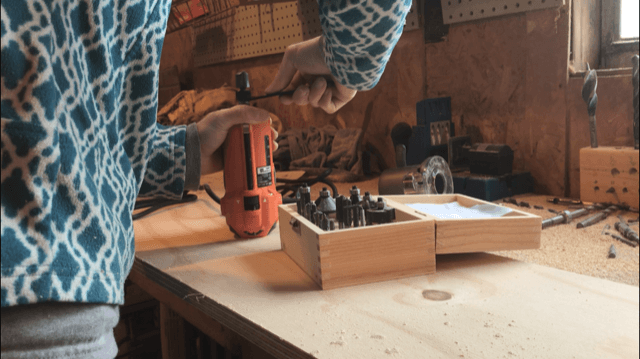
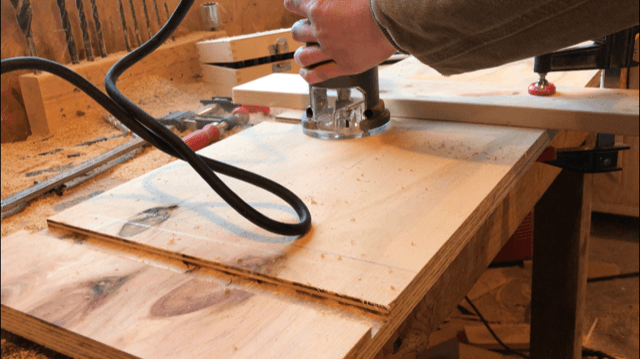
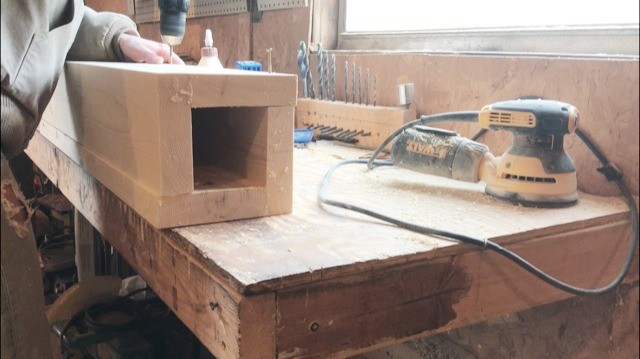
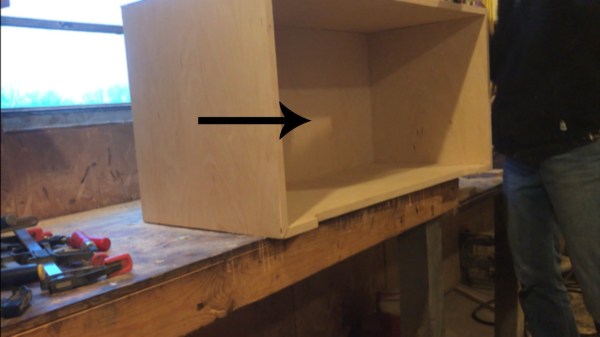
Step 5: Cut Out for Clock Mechanism on Back Side

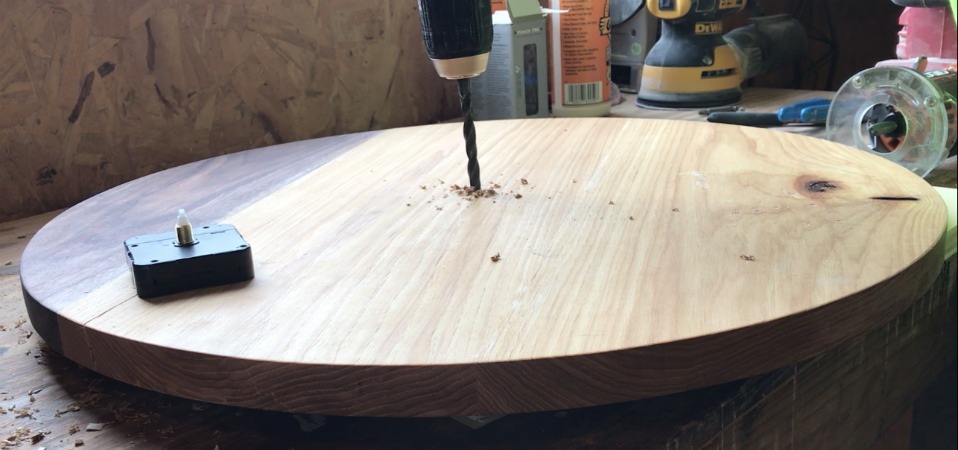
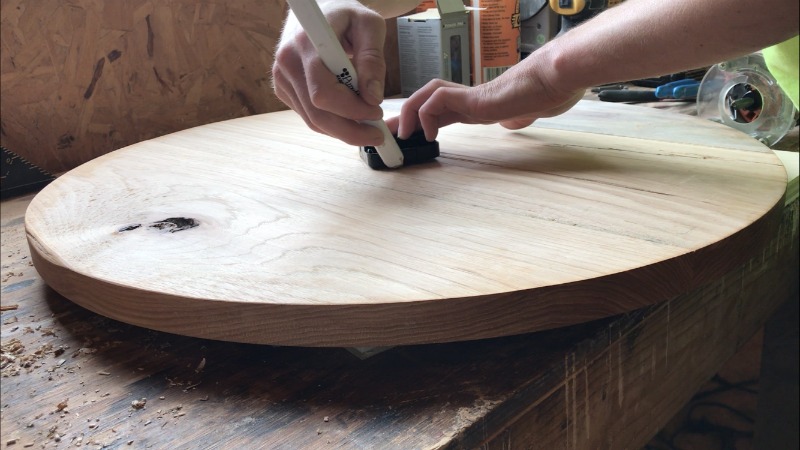
Now, all that’s left is the clock mechanism.  I found the center of the clock and drilled a hole large enough for the shaft of the clock control to fit through, then marked where I needed to cut out for it to fit inside.

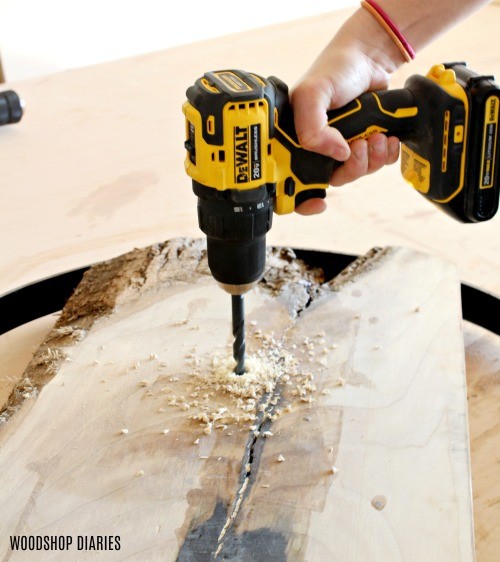
The clock shaft was only about ⅞” long, but the wood was about 2 ½” thick.  So I needed to cut out quite a bit of material for it to fit down into so that the shaft reached the front of the clock face.

.

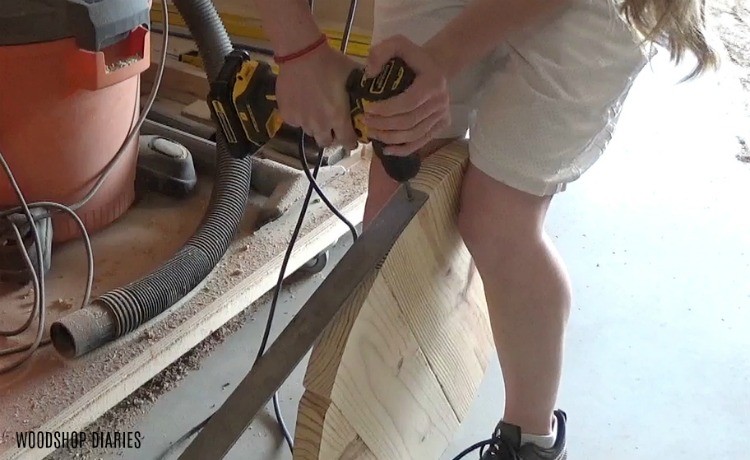
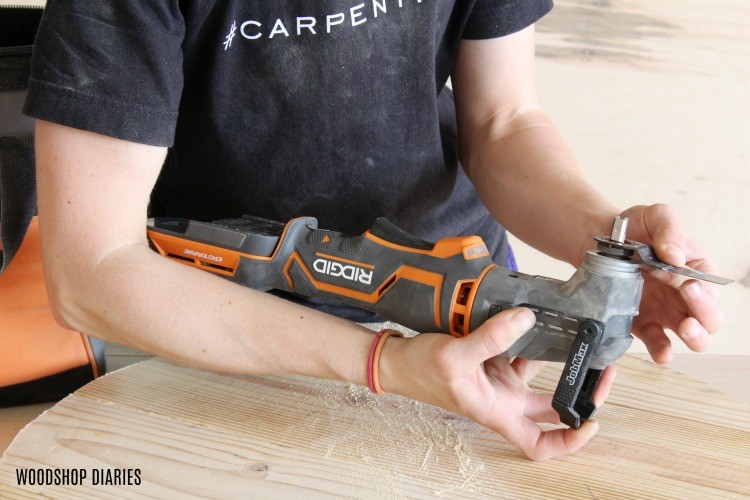
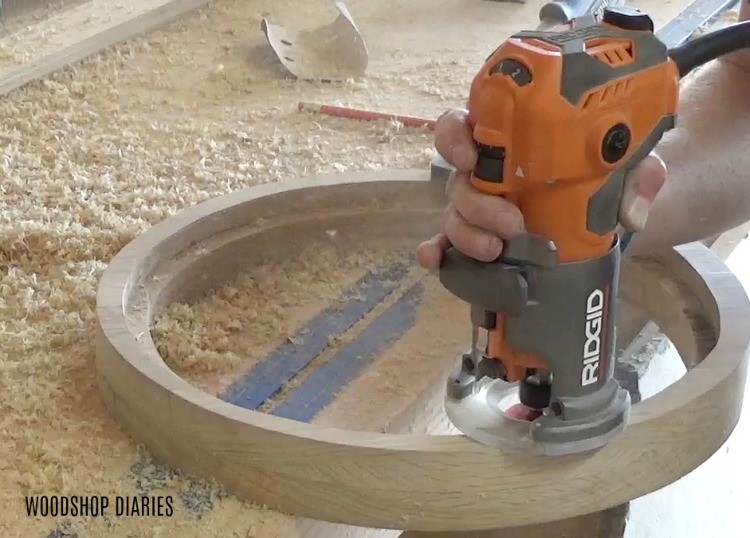
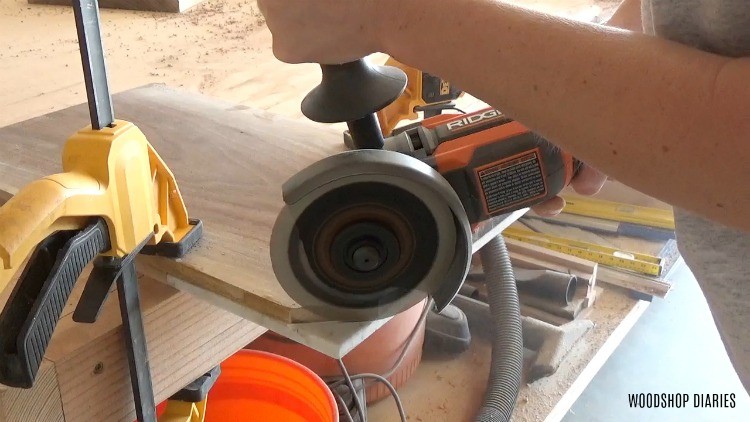
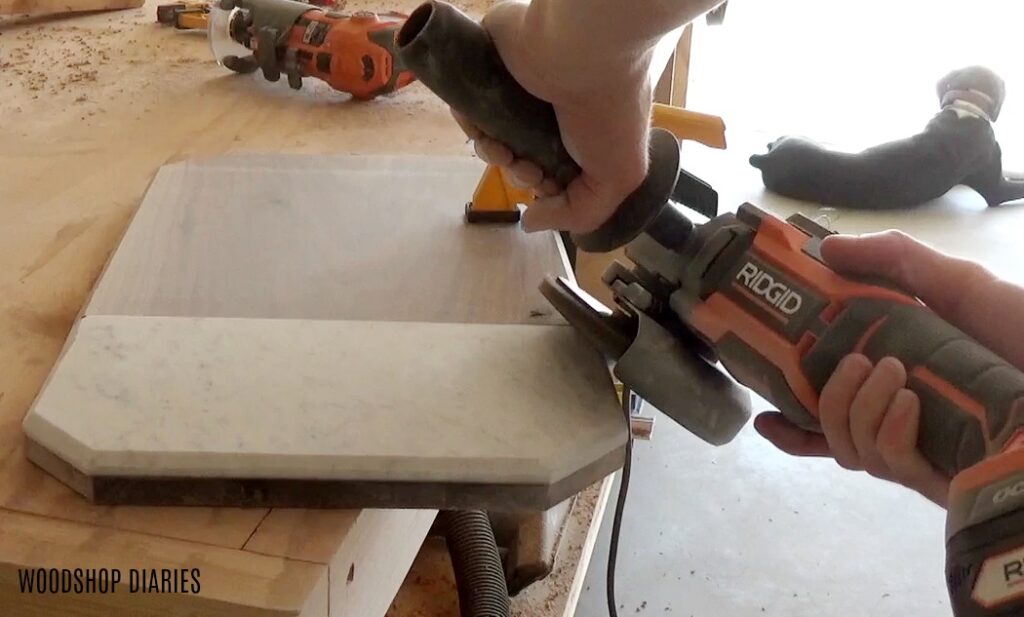
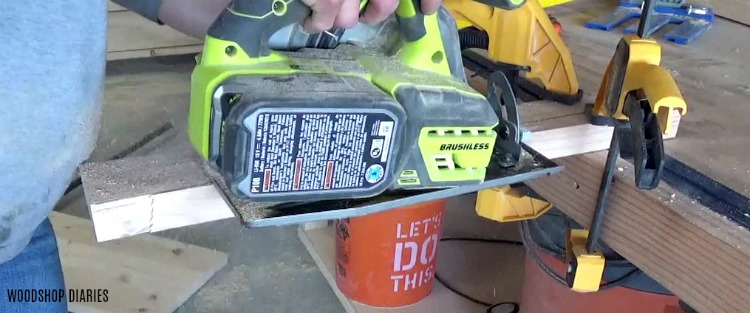
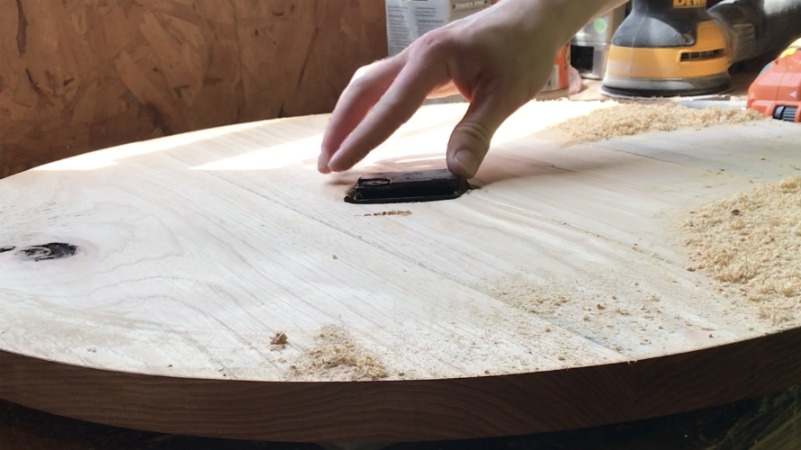
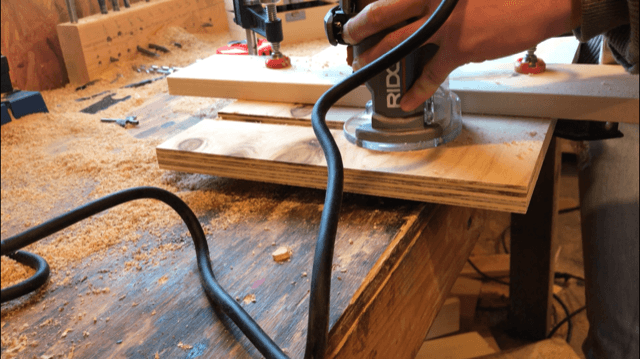
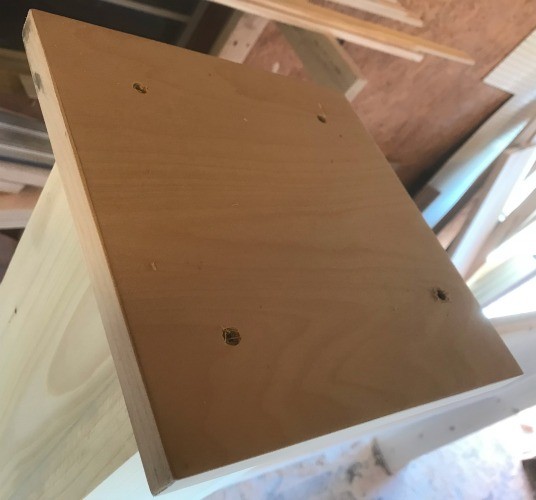
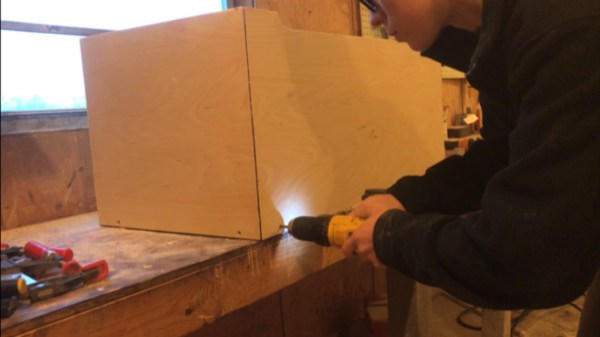
To make quick work of this task, I used this JobMax Multitool with the wood cutting attachment.  It worked almost like a power chisel.  SO. MUCH. FUN.

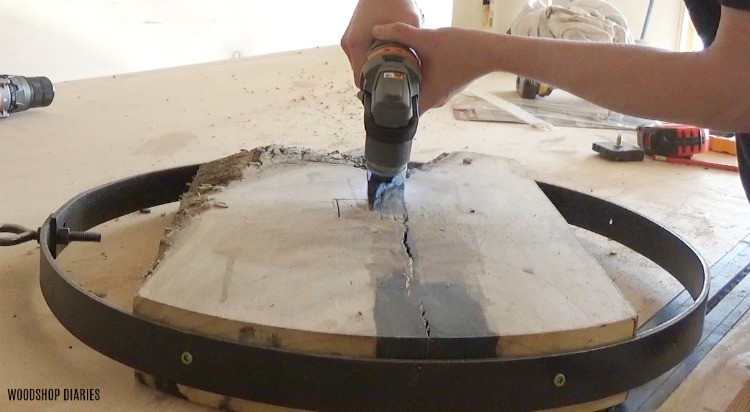
I just cut out large chunks at a time and kept test fitting the clock mechanism until it was deep enough to attach the nut and the hands on the front side.

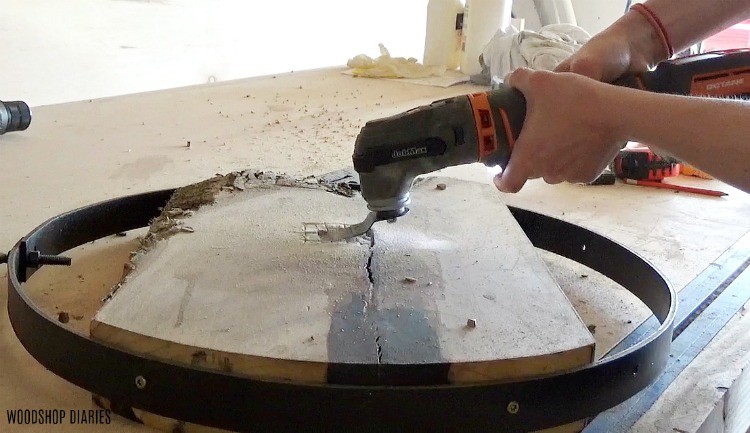
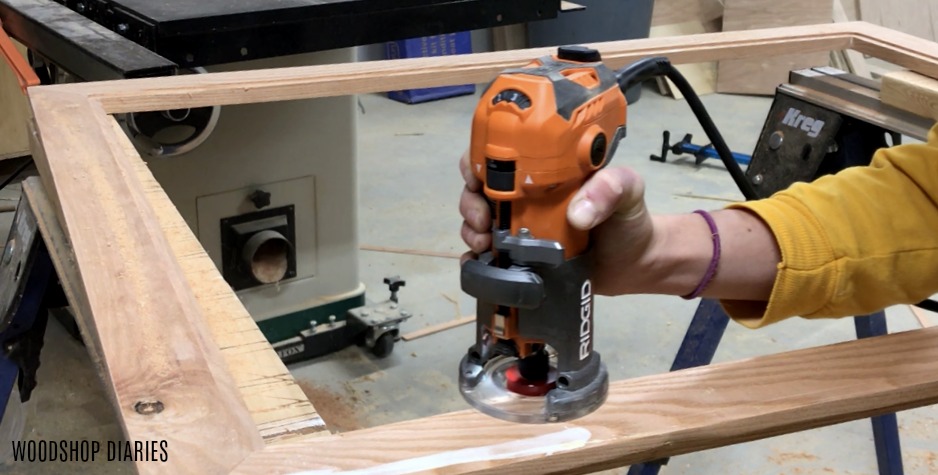
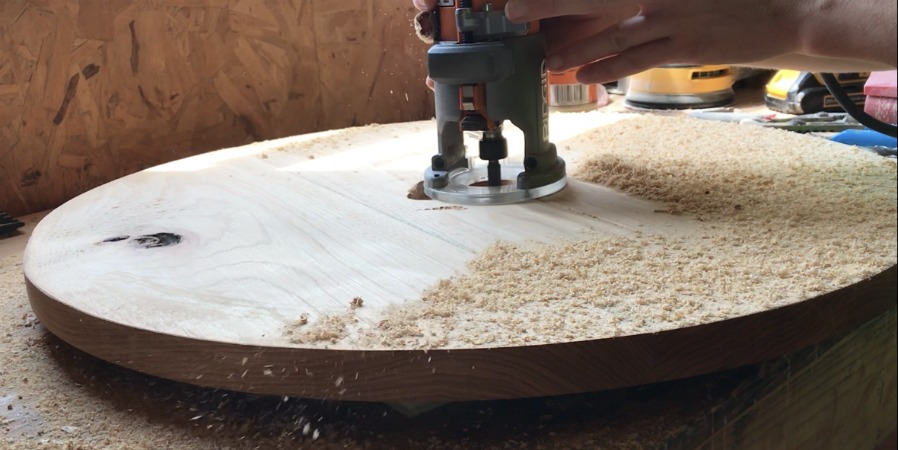
I’ve cut this out before with a router on other clocks I’ve made, but using this Ridgid MultiTool was WAY faster, WAY cleaner, WAY easier, and way more fun especially for something this thick.

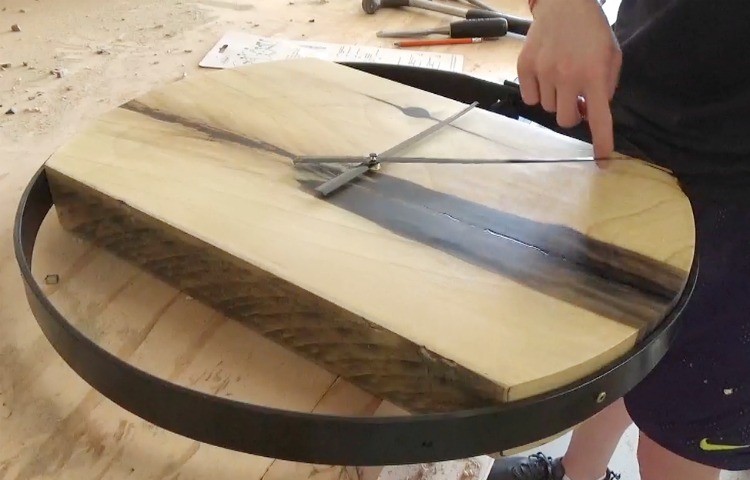
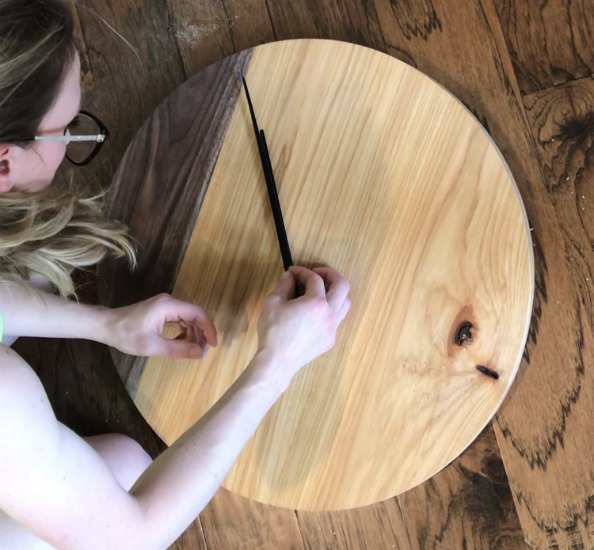
Once I had cut deep enough to get the clock mechanism to the face of the clock, I attached the rest of the kit with the hands on the front side and made sure everything worked well and the hands didn’t touch when they rotated around the clock.

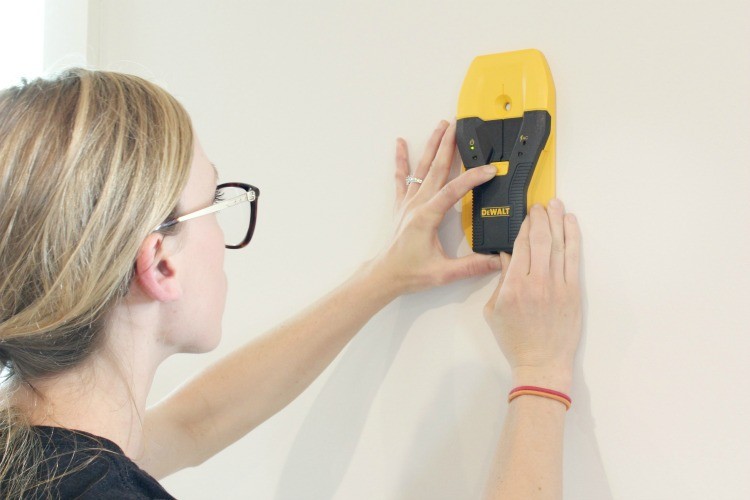
Step 6: Hang the Clock

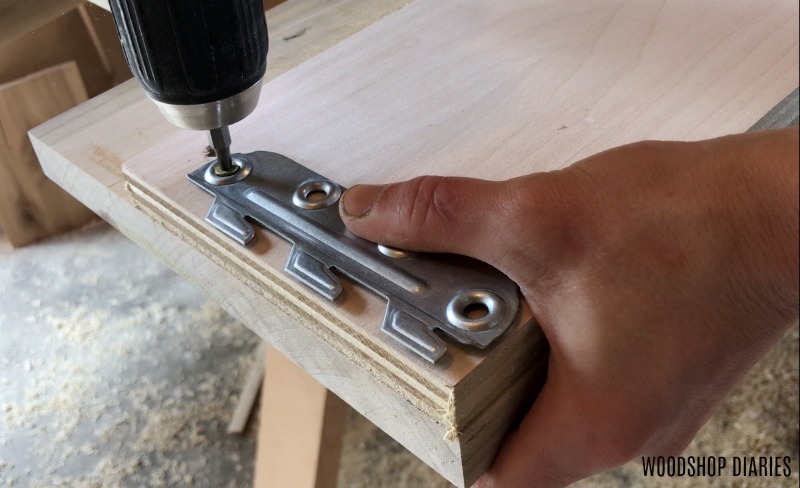
Then, I moved inside to get ready to hang it.  I used this DeWalt 1 ½” Stud Finder find studs, so I could be sure to hang this heavy clock on a stud and not just in the drywall.

.

I used it to find a stud in the wall to screw a metal hook into to hang my new clock on.  It’s pretty heavy so I wanted to make SURE I was hanging it on a stud.

.

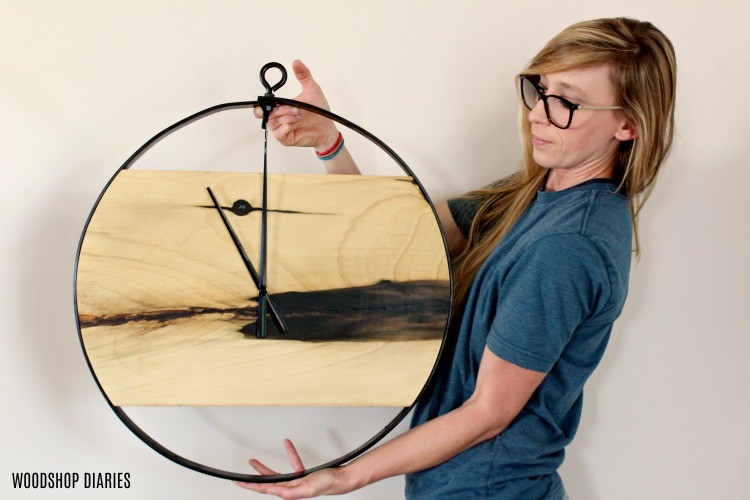
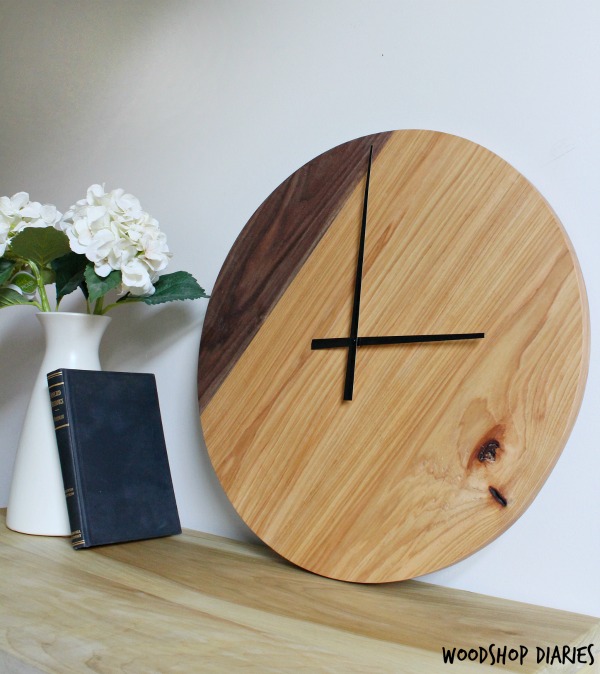
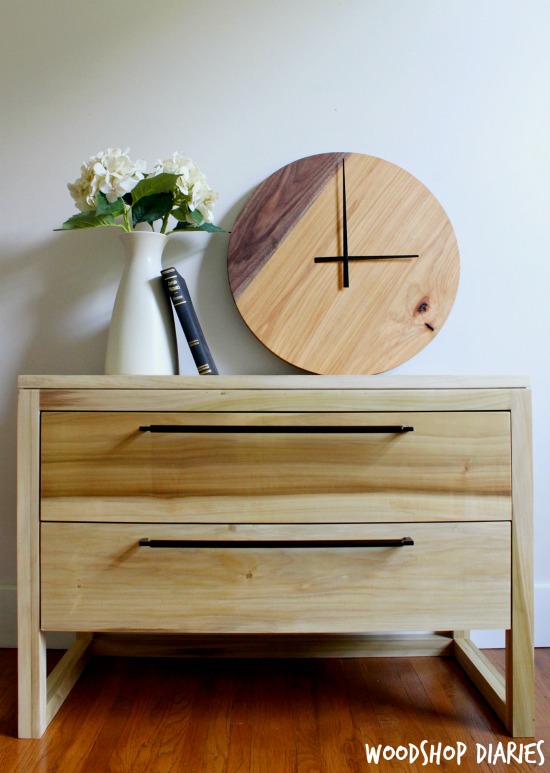
And at this point, I was able to hang my cool industrial looking wall clock and take pride in the fact that I finally used a torch in the shop and didn’t catch anything on fire.  I feel like being the hot mess that I am, that’s a pretty good accomplishment.

I was really nervous about this project because I don’t do a lot with metal or heat, but now that I’ve jumped that hurdle, I feel like maybe this is just the beginning of incorporating metal into my projects.

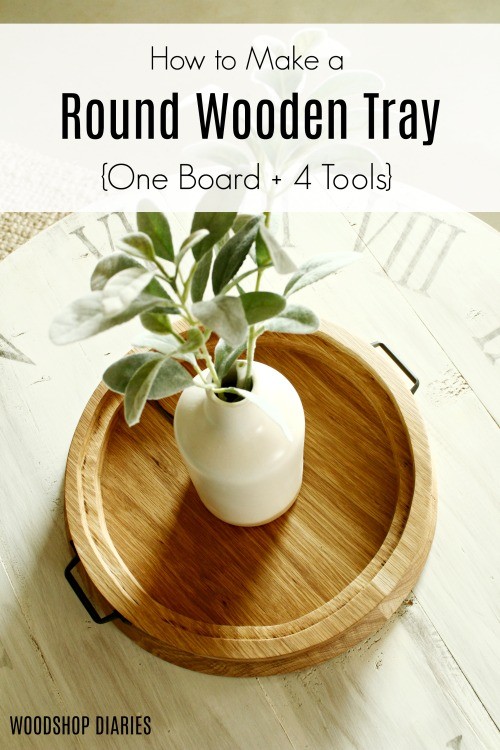
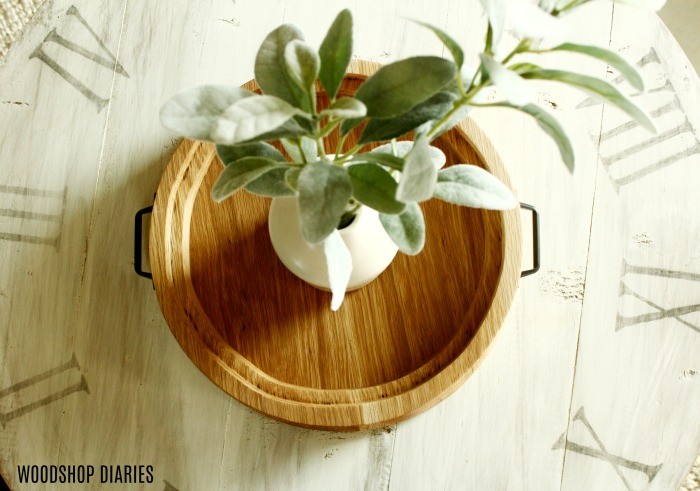
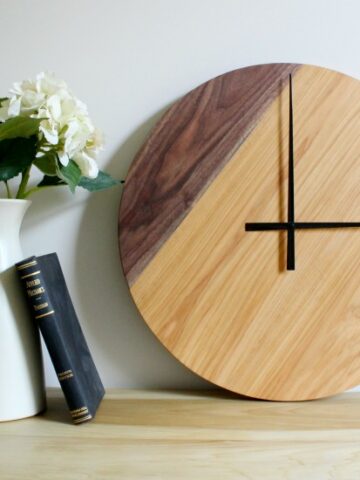
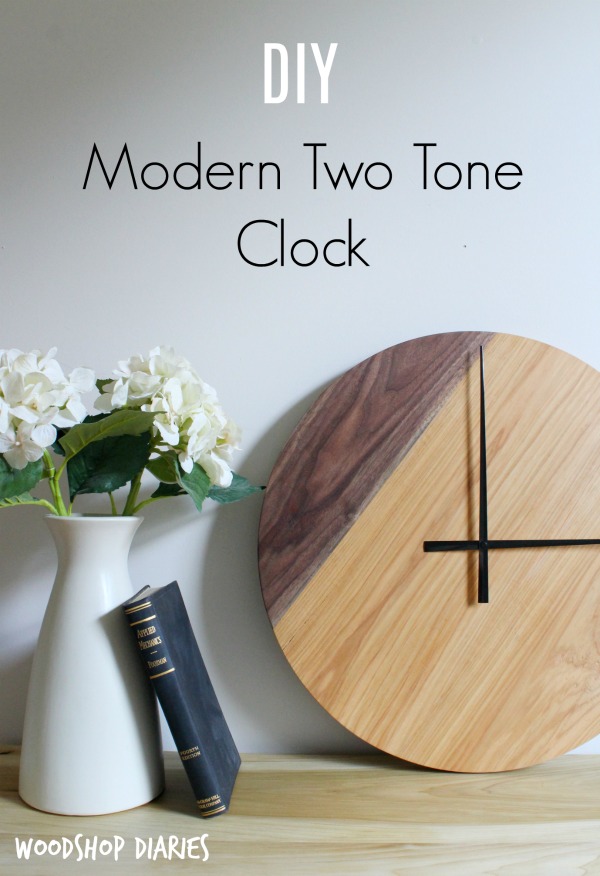
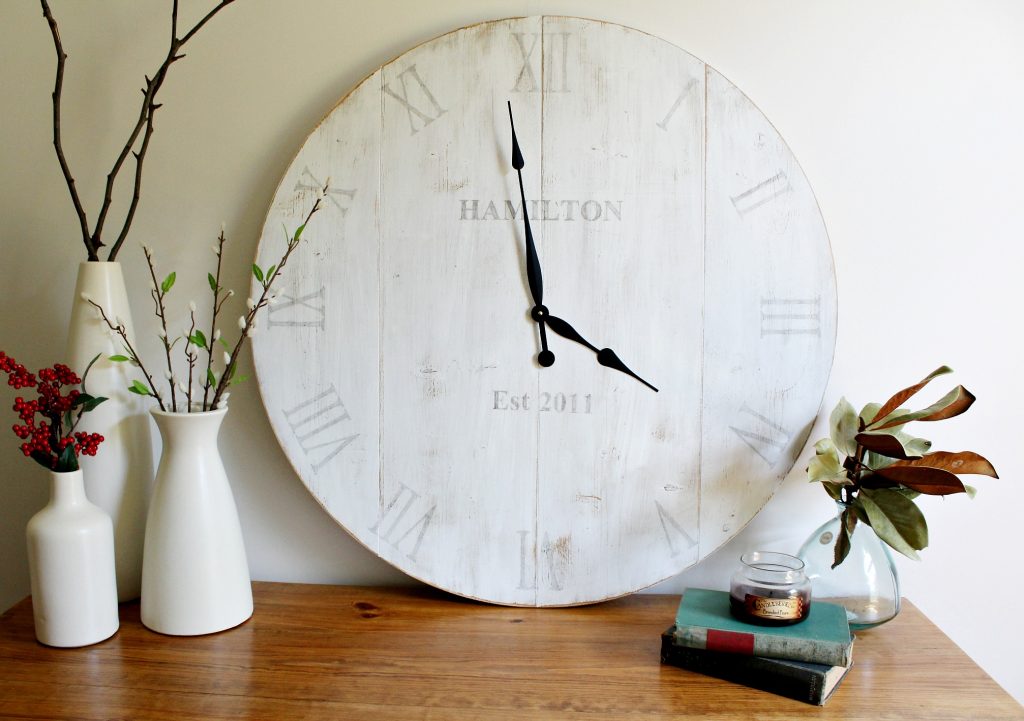
Stay tuned to find out 😉  But for now, be sure to check out the awesome tools used to make this clock and if you are interested in other cool clock ideas, here’s a couple I’m pretty fond of 🙂

.  How to build your own personalized DIY wooden wall clock with this free tutorial

If you liked this project, I’d love if you’d pin for later AND if you aren’t already, I’d love if you’d head over and subscribe to my YouTube channel.

Until next time, happy building ????

DIY Round Serving Tray {One Board+Four Tools)

June 24, 2019 by Shara, Woodshop Diaries

Ready to wow your guests with a DIY Round Serving Tray that you made from a single board??  You’re in the right place!  Keep reading to find out how.

This post is sponsored by The Home Depot and contains affiliate links.  See policies page.  All opinions are my own.

I have this weirdly intense love for all things round lately.  Is that weird?  Like, I just love circles.

.

AND wood circles are even better.  AND wood circles that I can use on my coffee table to corral all my husband’s remotes….EVEN BETTER. (HOW CAN THERE BE SO MANY REMOTES?! We only have one TV!)  PS remotes not shown in pictures so that they actually look cute haha 😉

So I decided to take one board, four tools, and a few hours of shop time and make this round wooden tray 🙂  I wasn’t sure how well it would turn out, but I was pleasantly surprised that an upgrade in jig saws would make a world of difference with my cutting accuracy.  But, more on that later.

.

So if you’ve got a spare board, a jig saw, router, sander, drill and you don’t mind getting a little dusty, then you’re ready to make your own DIY round wooden serving tray 🙂

Looking for more DIY serving tray inspiration?  Try one of these fun projects:

  How to make a simple DIY wooden serving tray   How to make a Personalized DIY Lazy Susan

I’ve got the video tutorial right here, then I’ve also got the step by step tutorial and links to all the products used in this project below 🙂

For this project, you will need:

1x8x8 board

Sander

Router with chamfer and rabbeting bits (optional, but adds some cool details)

Drill

Ridgid 18V Octane Cordless Jig Saw (don’t forget the Octane Battery Kit—currently, if you purchase this battery kit, you can get the jig saw, or another Octane tool, for free!)

Wood Glue

Clamps

2 handles

Step 1: Cut board down

Since it was a one board project, I used what I had on hand, which was white oak.  I had actually already cut this board down to use on another project, but changed my mind, so I’m using it for this.

.

The first thing I did was trim down my board to six 16” pieces.  For this, I used my Ridgid Octane 18V Cordless Jig Saw and Bluetooth Batteries.  Side note: Ridgid is running a deal until August where if you purchase an Octane Battery Kit, you get an Octane tool for free.

Just being 100% honest here…all of the Octane tools I’ve used so far pack a TON of power with these new Octane 18V batteries.  Not only are they super powerful, but they’re also smart.  With the Bluetooth technology, you can get various push notifications, and pretty cool security features, too.  And you may think I’m crazy, but one of my favorite features is this little button on the front that you can press to get a quick visual of how much charge your battery has left.  Which is great for people like me who never know which of my batteries are charged and which aren’t haha.

Anyway, back to the project.  I cut my boards down using my new Ridgid Octane Jig Saw 🙂

Now, my board pieces put together were actually a little more than 8 ft, but you only need 8 ft to complete the project.  But you’ll notice a few of my boards here are longer than 16” because I didn’t want to cut off a couple inches I didn’t need.

Step 2: Glue up three panels

Once the boards were cut down, I glued up three panels of two boards like shown.  This tray is made in layers, so each of these glue ups is one layer of the tray.

Step 3: Draw and cut first circle

Once the glue was dry, I used a piece of scrap wood and a drill to make a simple circle jig and traced out a circle about 14” in diameter onto one of my panels.  This will be the bottom of the tray.

.

To make the jig, I drilled a small hole in the end of the board, then measured the radius of the circle I wanted, then drilled a hole large enough for a pencil to fit into.

Then I drilled the small hole bit into the middle of the piece (if you don’t drill all the way through, you can use the bottom side as the top and not have to putty over the hole in your finished tray) and traced my circle.

Then I grabbed my jig saw and cut this circle out.

I sanded this circle to get the edges pretty smooth, then used my router and a chamfer bit to route a nice chamfer around the edge.  I took a little off at a time, lowering the bit after each pass until I got the chamfer as deep as I wanted on this edge.

This step is totally optional, but I really liked the “flare” look at the bottom of the tray.  You could make it straight all the way down as well if you wanted.

Step 4: Draw and cut out other circles

I gave that a good sanding, then placed it upside down onto another of my glued up panels and traced around the top.

I reached again for my jig saw and cut out this circle.

Once I saw that it fit on top of my bottom piece okay, I proceeded to cut out the last layer to match this one using my jig saw.

Step 5: Cut out middle circle

Once both top layers were cut out, I glued them together using wood glue only around the outside of the circles.  Because we will cut out the middle, they really only need to be attached on the edges.

After the glue dried, I found the center of the circles and used my little circle marking jig to draw a circle 2” in diameter smaller than the outside diameter.  This will allow me to create a 1” wide ring.

I used a drill to drill a pilot hole for my jig saw blade and cut this out using my jig saw.  Maybe it’s because I’ve always had a cheap electric jig saw, but I’m just super impressed with how these Ridgid 18V Octane batteries are powering this jig saw through this thick, hard oak.  I’ve literally never been able to cut through hardwood 1 ½″ thick with my jig saw.  That’s legit insane.

Now that the ring was cut out, I checked that it fit, then gave it a good sanding.

.

Just like the chamfer was an optional step, this is also an optional step, but it adds a detail that I liked.  I used a rabbeting bit on my router and routed out the inside of this ring.  I took a little out at a time and just went as far as I felt like, then got tired of making circles and stopped haha.

Step 6: Glue top ring to bottom base

Then another quick sanding before gluing this top ring to the bottom piece.

Once the glue was dry, I gave it one more final sanding to blend in any uneven lines where the top and bottom meet.

.

Then I finished it off by buffing it with some Mineral Fusion Beeswax and added a couple of handles on the sides.

Most handles aren’t going to come ready to fit on a rounded surface, so you can try to slightly bend your handles, before installing, or pick shorter handles so it won’t be as noticeable.

.

Once it was done, it was ready to bring inside and decorate.  It would make a great serving platter for snack foods, a tray to corral remotes on the coffee table, or a place to toss keys and loose items in an entryway.  It’s a versatile project you can use however you wish.  You already know how I’ll be using mine 😉

How to make a DIY round wooden serving tray

So what do you think?  Pretty fun for one board and four tools.  Also, I didn’t think about it until after the fact, but the Ridgid Octane Cordless jig saw’s blade bevels, so if you wanted to skip the router altogether, you could chamfer the bottom edge just by beveling the jig saw blade and cutting out your circle.  That would make this project only need three tools instead of four.  Even better!

So if you’re ready to get dusty and make something awesome, grab your jig saw and get building 🙂 Don’t forget to check out this Ridgid Octane battery kit at the link here.  And if you aren’t already subscribed to my YouTube channel, be sure to head over and hit that subscribe button to stay up to date on all the latest projects and videos 🙂  And one last thing…if you liked this project, I’d love if you’d pin it for later!

But, enough for now ????  Until next time, happy building ????

Wood and Marble DIY Cheese Board

June 17, 2019 by Shara, Woodshop Diaries

Looking for a really cool wood and marble DIY cheese board to wow guests at your next get together?  I’ve got you covered in this post 🙂

This post is sponsored by The Home Depot.  All opinions are my own.  This post contains affiliate links.  See policies page.

Did you see the DIY modern walnut serving tray I posted a couple weeks ago?  Well, if you did, you will remember that I said two things: 1. I just got a load of free walnut from a friend at work I’m trying to put to good use and 2. I’ve been wanting to tackle a few smaller projects this summer to avoid burnout from all the big projects on the to do list.

.

I’ve been wanting to try a project combining wood and marble for a while and I finally got around to making something!

.

Truth be told, I’ve had this on my to do list for about a year, but just now found some “free time” to try it out.  I remember buying the tile for this project when we started buying stuff for our garage apartment house.  I either have way too many irons in the fire, or I’m TERRIBLE at time management HA!

How to make a DIY wood and marble cheese board

Either way, the timing is perfect because now I have plenty of walnut to use with it and I finally got an angle grinder and it was a life saver with this project.  But more on that later.

If you’re ready to make your own, let’s get to it.  I’ve got the video for you here and the step by step tutorial below 🙂

For this project, you will need:

Hardwood board (I went with walnut since that’s what I had) between 11-12″ wide, preferably (only need 18″ long)

6×12 Marble Tile

Ridgid 18V Octane Cordless Angle Grinder

4 ½″ Diamond Cutting Wheel

4 ½″ 80 grit sanding wheel

Clear Gorilla Glue

Miter Saw

Speed Square

Measuring Tape

Router and Chamfer Bit

Miter saw, router, OR table saw (see step 2)

Step 1: Prepare Wood for DIY Cheese Board

I started out by picking out my board.  I had a wide walnut board that would work perfect for this. It was about 11″ wide.  You need a board 11-12″ wide OR you can glue up some narrower boards to make your own wide board.  I took it over to my miter saw to trim it down to the length I wanted.  I ended up making it about 18” long.

Then, I laid out my marble tile on the walnut piece and marked where I needed to cut out to place the tile.  I needed to cut out a section from this line to the end of the board the total thickness of the tile.  There are multiple ways to do this.

Step 2: Cut Out Tile Section of Hardwood Board

I started out trying to do this with my router and a straight bit.  I would have to cut out a little thickness at a time.  It’s possible to do, but once I got started, I realized it would be a little difficult to get it nice and clean once I got down to the edge.

So I switched to the table saw.  I set my blade height to the exact thickness of the tile and started cutting out this section one blade width at a time.  It took forever.  I really need a dado blade for stuff like this.

If I had a bandsaw big enough, that would have been ideal.  You can also use a miter saw to do this if it has a stop adjustment on the cutting depth.

.

Once I finally had the section cut out, it was a little rough, so I used my belt sander to fine tune the depth and clean it up a little.  I dry fit the tile in place to see if it was flush to the wood and sanded as needed to get it to fit perfectly.

Step 3: Trim Corners of Board

For some reason, I’m on a sharp corner hating kick lately and I’ve been cutting the corners off all my projects.  This one included.  So I trimmed the corners off on the miter saw on the end where I will glue the tile on before I actually glued it.

I could have gone ahead and trimmed all four corners, but I was in a hurry, so I trimmed the other two corners later.  You can go ahead and trim them now.  It doesn’t make any difference.

Step 4: Glue Tile in Place

Then, I glued the tile in place using Clear Gorilla Glue and clamps.  If you plan to actually use this for food serving, make sure that whatever adhesive you use for this is food safe.  I just plan to use this for decoration, so I wasn’t too concerned.  Plus, you sand all the glue squeeze out off later, so I think it’s okay.

Step 5: Trim Tile

Once the glue had fully dried, I needed to trim the tile off to fit the wood piece.  For this, I used my new Ridgid 18V Octane Cordless Angle Grinder with a segmented diamond blade.

.

Now, I should tell you that the manufacturer doesn’t RECOMMEND using cut off blades with this OR ANY of their angle grinders (although this blade is made for angle grinders).  However, they did say that have seen customer success with it.  It worked great for me.  So just keep that in mind while using it.

It cut super easy, but one side chipped a little when it was cut.  It would have been better to cut it from the top side in hindsight, I think.

Anyway, once it was trimmed down, I swapped wheels on the grinder to an 80 grit sanding wheel and sanded the edges smooth and flush to the walnut board.

I’ve never used a grinder in the shop before now and it really made quick work of polishing and flush sanding this marble tile.  If you’re interested in adding one to your shop, be sure to check out this Ridgid Octane Cordless Angle Grinder.

Step 6: Chamfer Edges of Board

At this point, it just needs a good sanding and a nice finish to be done.  However, I really wanted to add one more detail.

.

I used my router and a chamfer bit to chamfer the top edges of the walnut board being careful not to get too close to the marble because I don’t think it would be very good news to knick the edge of that tile with a carbide router bit.

But since I couldn’t use the router top chamfer the edges of the marble, I picked up my angle grinder again with the sanding wheel and sanded the corners to as close of a perfect chamfer I could to match the one on the wood.  It’s not perfect, but unless you’re really looking, you can’t tell.

It took a while to sand, but it was totally worth it.

Step 7:  Finish

Once I had gotten the chamfer as good as I thought I could, I gave the whole thing one final finish sanding with my orbital sander and applied some beeswax finish.

Then I brought this classy piece inside to stage it with cheap sandwich cheese and saltine crackers haha.

I didn’t think about it until after the fact that my staging was kind of…comical.  You get the idea though, right?  Even if the sandwich cheese isn’t the classiest option 😉 At least the grapes look like of upscale, maybe?

Whatever.  Whether you use it for fancy cheese or cheap crackers this is a really fun project and a great excuse to add an angle grinder to your shop 😉

So if you enjoyed this project, don’t forget to check out the video tutorial above and I’d also love if it you’d pin this post for later 🙂

Until next time, happy building! 🙂

DIY Three Drawer Single Sink Vanity

June 10, 2019 by Shara, Woodshop Diaries

How to build a diy vanity with drawers

Want to learn how to build a DIY three drawer single sink vanity?  You’re in the right place.

This post is sponsored by Build Something and The Home Depot and contains affiliate links.  See policies page.

My parents built their current house 20 years ago.  It’s still a really nice place, but obviously, in twenty years, a few of the things inside have gotten a little…out of style.  And also, in twenty years, some things have gotten a little worn out.

.

One of those things that has become a little out of style AND worn out is the biscuit colored, sea shell shaped ceramic pedestal sink in their guest powder room.  It’s had a good run, but it’s finally started to develop a small crack in the sink bowl and they decided to replace it before it gets worse.  (THANK GOODNESS…HA!)  That’s where I come in.

So I partnered with my friends at Kreg Tool and Build Something to build this DIY three drawer single sink vanity for their bathroom and am sharing the free plans so you can build your own over on BuildSomething.com.  Click here for the plans and you can also browse around and find hundreds of other free building plans while you’re there.

.

But before you go, I’ve got three important tips to help you build this vanity.  Oh, and as usual, a video 🙂

Check your plumbing locations

Because this piece is a functioning vanity, it will have supply line hookups and a p-trap for the drain.  Because of this, the drawers will need to be cut out to fit AROUND the plumbing when they are closed.  In my case, I was able to leave the bottom drawer whole, but had to cut out the middle drawer and I made the top drawer fake just for safe measure.

Before building, you will need to check your plumbing locations to see how you will need to cut out your drawers to fit properly.  You may need to cut out your bottom drawer as well OR you may not have to cut out any of the drawers.  Likely, the measurements I provide in the build plans will fit most standard plumbing applications.

Grab a 90 Degree Drill Attachment

Because I had to cut out my middle drawer, it was a SUPER tight squeeze to get a screw driver in to tighten the screws on the middle drawer pull.  Actually, “tight squeeze” sounds like it was possible, just a little difficult.  No, it was 100% impossible.

.

So this DeWalt MAX FIT Right Angle Magnetic Attachment was a life saver.  It’s magnetic for faster retention and has a super compact 1 ½″ front to back design.  So it fit easily in this tight space to help drive my screws.

It’s a great little handy attachment to have around the shop.  Plus, it’s designed to be impact resistant so you can use it in your impact driver.  Get one for your shop here.  I’ve used mine a thousand times since I got it.

Dry Fit Faucet Before Installation

Because this vanity had a large vessel sink, it didn’t leave a lot of room to add the faucet hole in the back.  Everything fit well from the top side, but when I started to install the faucet in the hole that I drilled, the washer that secures the faucet to the counter top wouldn’t fit because it was so close to the back frame.

Instead of taking the whole thing apart and cutting this out, I used a hole saw to drill this section out.  You could also use a large spade bit, or even a multi tool.

.

Hole saws usually have a drill bit in the middle of them to keep the saw from “walking” while it’s cutting.  But in this case, I didn’t have any wood in front of this frame to drill into to keep it in place.  SO I took a scrap 2×4 and clamped it in front of the frame piece (you can see this better on the video above) to drill into in order to cut out this section of the back frame.

This may not be a problem for you in your case, but in case it is, I wanted to give you that tip on how to handle it 🙂  It’s free, so I won’t charge you for the extra info if you don’t need it haha.

Check Your Vanity Height

Since this vanity has a vessel sink that sits ABOVE the counter top, I wanted to make the vanity shorter than standard.  Typical vanity height is about 36″ tall.  But I didn’t want my vanity to be 36″, then with the sink on top, make it 41″.  So I subtracted the height of y m sink from 36″ and made it that tall.  Depending on the type of sink you get (you may even want an undermount sink), you may want to adjust your height to make the total 36″.

How to Build a Single Sink Three Drawer Vanity with Drawers

Find a Bathroom Vanity Design You Love 😉

And if you just simply aren’t a fan of this particular design and want to see some other DIY bathroom vanity options, I’ve got a few more to choose from below 🙂


DIY Faux Drawer Double Vanity

DIY Floating Double Vanity

Free building plans to make your own modern DIY Floating bathroom vanity. Plenty of storage, clean straight lines and stained in Minwax Provincial, this gorgeous bathroom vanity will really make a statement in any DIY Bathroom remodel!

DIY Single Vanity with Doors

How to Build a DIY Single Bathroom Vanity

DIY Modern Bathroom Vanity

And if you like this design, but just didn’t want to use it as a vanity, it would also make a great nightstand or dresser or even a console in an entryway.  It’s a pretty versatile piece.

How to build a diy vanity with drawers

And did I mention, you can totally customize the trim on the drawer fronts??  Leave plain or choose any trim you want.  I’m just a big fan of the half round molding doors…also seen on another recent project I made for my parents–the DIY tilt out laundry hamper cabinet.

.

But if you like this vanity just as it is, be sure to head over to BuildSomething for these plans and hundreds of other free building plans. And don’t forget to check out the video and pin this for later 🙂

How to build a DIY single bowl three drawer vanity--DIY Vanity with Drawers--Free plans and video tutorial

I’ve got so much more to share, but that’ll wait for another day.  Until next time, friends, happy building 🙂

DIY Tilt Out Laundry Hamper Cabinet

May 20, 2019 by Shara, Woodshop Diaries

How to Build a DIY Tilt Out Laundry Hamper Cabinet with Hamper Baskets and Laundry Room Storage--Free Plans and Video Tutorial

In this post, I’ll show you how to build your own DIY Tilt Out Laundry Hamper Cabinet! It’s got two tilt out sections and a middle storage cabinet!

*This post was sponsored by Kreg Tool and contains affiliate links. See policies.

DIY Tilt Out Laundry Hamper Storage Cabinet with doors closed

A while back my mom wanted me to help her figure out a way to add some storage to her tiny laundry room.  Because it’s a really small space (like 7′ x 7′), I had to get a little creative.

.

She needed somewhere to actually put her dirty clothes hamper, some extra laundry room storage, and somewhere to fold the clothes when they got finished in the dryer.

.

So I built her this DIY tilt out laundry hamper storage cabinet and I’m sharing the plans with you! Watch the video here to see how it was built, and check out the plans following.

I’ve got all the details below and you can grab the printable plans here on KregTool.com.

.

For this Laundry Hamper Cabinet, you will need:

Tools:

  • Kreg Rip Cut & Kreg AccuCut (Check out this post to see how to use them!)
  • Kreg Pocket Hole Jig (Check out this post to see which jig is best for your shop!)
  • Kreg Concealed Hinge Jig (Check out this post for how to use the hinge jig!)
  • Kreg Shelf Pin Jig
  • Circular Saw
  • Miter Saw
  • Drill
  • Jig Saw
  • Bandsaw (optional)

Materials:

  • 4×4 post (You just need about 24″)
  • 1 ½ sheets ¾″ plywood
  • ¼ sheet ¼″ plywood
  • (1) 2x10x8 board
  • (3) 2x2x8 boards
  • (1) 1x3x8 board
  • Half Round Molding (optional…four 8′ sticks)
  • 2 ½″ pocket hole screws
  • 1 ¼″ pocket hole screws
  • Wood Screws (various lengths)
  • Wood Glue
  • 3 pair concealed hinges
Overall Dimensions of tilt out laundry hamper cabinet--16" deep x 42" wide x 35 ¼" tall

Step 1: Cut Tapered Feet

I cut the feet for this cabinet from a leftover 4×4 post I had from a previous project. However, you could definitely customize your own foot design or just buy precut feet to make it easier.

.

To make my feet, I measured out the taper I wanted on the end of my 4×4 on two sides and cut it out on the band saw. I made my feet 4″ tall with 2 ¾″ at the top and tapered two sides to 1 ½″ on the bottom.

Close up of 4x4 post with marks to make tapered foot

I cut out these legs on the bandsaw and sanded them well to give me 4 tapered feet for the bottom of the tilt out laundry hamper.

cutting tapered foot on bandsaw for laundry storage cabinet

If you don’t have a bandsaw, you could also cut your tapered end on the miter saw, then trim it to length.

tapered foot diagram 2 ¾" at top and 1 ½" at bottom 4" tall

Step 2: Assemble Laundry Hamper Cabinet Base

I cut a piece of ¾″ plywood to use as the base of the hamper cabinet and edge banded the plywood edges since they’ll be seen.

RELATED: Check out how to apply edge banding in this post!

.

Then, I glued and screwed the 4 feet from step 1 into the corners of the base. You can use 2″ or 2 ½″ wood screws here. I attached them so that they were ⅜″ in from each edge and the tapers faced the inside.

Legs of laundry hamper attached to base panel

Step 3: Assemble Cabinet Frame

I made the frame of the cabinet from 2x2s and assembled using 1 ½″ pocket holes and 2 ½″ pocket hole screws.

RELATED: Check out this post for how to use a pocket hole jig!

Tilt out laundry hamper cabinet frame assembled with pocket holes and screws

I haven’t had much luck using 2 screws on my pocket holes on 2x2s and 1x2s.  I’ve found that my wood likes to crack if I get too close to a corner. 

.

So when I’m working with these small boards, I only drill one pocket hole on the ends instead of two and add some glue to help hold it in place when I screw it together. 

.

Once the frame was assembled, I added ¾″ plywood side panels using ¾″ pocket holes and 1 ¼″ pocket hole screws like shown below. I attached these so that they were flush across the inside of the frame.

Install side panel into tilt out laundry hamper frame

Step 4: Attach Cabinet Frame to Base

Once the base and the frame were assembled, I attached them together using 2″ wood screws through the bottom panel into the bottom of the frame.

.

The frame should sit on the base with ⅜″ overhang on each side and ⅜″ overhang on the front.

laundry hamper frame attached to base panel with feet

The frame should be flush across the back edge of the base.

Step 5: Add Laundry Hamper Divider Panels

This cabinet had three sections–two for tilt out laundry hampers and one for storage in the middle. 

.

I used ¾″ plywood panels for dividers, but in order for them to fit within the frame, the top two corners and the bottom back corner need to be cut. I used a jig saw to cut a 1 ½″ square from these three corners and drilled ¾″ pocket holes like shown.

Divider panel with corners removed to fit into frame

Then, I installed these panels into the frame using 1 ¼″ pocket hole screws leaving 12 ¼″ space for each section of the cabinet.

Divider panels installed into tilt out laundry hamper frame

I chose to use this center section for storage space for adjustable shelves. So after these dividers were installed, I used my Kreg shelf pin jig to drill shelf pin holes down the sides of the middle cabinet dividers to install shelves later.

Using drill and Kreg shelf pin jig to drill out adjustable shelf pin holes in laundry cabinet

Step 6: Build and Install Laundry Hamper Doors

I made these doors from ¾″ plywood and edge banded all sides to cover the edges. To dress them up a little, I cut and glued half round molding onto the front.

.

To install this trim on these doors, or any other doors I’m doing, I measure out from the edges how far in I want the molding to start, then cut my pieces to fit within that area.  To attach, I found it easiest to apply a little wood glue (not too much to avoid squeeze out), and tape in place using painters tape like shown.

Shara taping half round molding onto front of tilt out laundry hamper doors

These doors should be ¼″ smaller in both width and height than the openings they will cover.

Door sizing diagram

Once the doors were cut and trimmed out, I used my Kreg concealed hinge jig to drill the cups for the hinges. I drilled for the hinges on the sides of the middle door, but at the bottom of the outside doors.

Using Kreg concealed hinge jig to drill concealed hinge cup holes into tilt out hamper doors

I installed concealed cabinet hinges for INSET frameless doors into these holes, then installed them into the cabinet.

.

Notice that the hinges will screw to the divider panel for the middle door so it will pivot and swing open like normal, but the outside doors will mount to the base so they will pivot and tilt out from the bottom.

Shara installing doors into tilt out hamper cabinet

Step 7: Add Bottom of Tilt Out Doors

I cut two ¾″ plywood pieces (one for each side) to 11″ x 13″ to use as the bottom of the tilt out doors.

.

I drilled ¾″ pocket holes along one 11″ wide edge and attached onto the back side of each door right above the hinges with 1 ¼″ pocket hole screws.

Attaching tilt out bottom panels and supports

Then, I cut two pieces of 1×3 (you could also use scrap plywood strips) to 22″ long with one end mitered 35 degrees and one end mitered 55 degrees not parallel.

.

I drilled ¾″ pocket holes into each end and attached between the door and the bottom panel so that they were square using 1 ¼″ pocket hole screws.

Diagram of tilt out hamper door

Because with inset European concealed hinges, the doors have a tendency to pull in further than you’d like, I added an adjustment block underneath these bottom panels.

.

I screwed a 2×2 block into the bottom of the cabinet, then added a screw in the top for fine tuning.  The bottom of the tilt out will rest on the top of this screw, so you can screw it in to allow it to tilt in more, or screw it out to allow less tilt in.

Adjusting stop block to prevent door from closing too far

Step 8: Attach Top to Laundry Hamper

I glued together a top panel using a 2×10 and trimmed it down to be 16″ deep and 42″ wide. Check out this post for how to glue up a table top.

.

You could also use ¾″ plywood for the top if you prefer.

.

I centered the top on the frame leaving ⅜″ overhang on the sides and the front (it should be flush to the back) and screwed in place through the top frame using 2 ½″ wood screws. You could also use figure 8 tabs to account for wood movement if you want. Learn about that method here.

Diagram showing top panel dimensions of tilt out laundry hamper cabinet

Step 9: Add Back Panel and Shelves

I cut a ¼″ plywood piece to staple (nail or screw is fine, too!) over the middle cabinet.

Back panel diagram and dimensions for laundry storage cabinet

Then, I cut a couple shelves 12″ wide and used shelf pins to install them in the center cabinet using the shelf pin holes.

Step 10: Add Door Stops and Finish

All that was left was adding some door stops and some stain 🙂

.

I needed to create a positive stop for the tilt out so that my mom isn’t opening her door and it open all the way out and spill laundry everywhere.

.

For this, I used another small scrap plywood block and opened the door about as much as I thought it needed to open, then screwed the block into the side of the cabinet so that the door would catch it when it opens.

screw positive stop block into DIY laundry hamper storage cabinet

If needed, you can also add a stop block to the middle cabinet to keep the door from swinging too far in if that’s an issue.

.

I finished up this build with a coat of Rustoleum Summer Oak stain and a few coats of Polycrylic.

RELATED: Check out this post for how to finish DIY furniture.

.

I added these handles to finish it up!

Finished DIY tilt out laundry hamper cabinet stained with summer oak

What About The Hamper Baskets:

And finally, one last thing…If you want to build a DIY tilt out laundry hamper cabinet, but don’t already have hampers, I got these kind of stiff laundry hampers from Amazon.

DIY Tilt Out Laundry Hamper Cabinet with Hamper Baskets and tilt out doors open

They’re a little bigger than you need for these tilt outs, but they hold their shape really well so they stand on their own in these doors and you can shape them enough to fit.

.

I really like how unexpected this cabinet is with the middle section being storage and the outside sections being laundry hampers. 

.

If you wanted to skip the tilt outs and just use regular doors as well, this could also be a really cute entry way cabinet or console cabinet for a dining room.  Or even a TV stand.

DIY Tilt Out Laundry Hamper Cabinet with Storage and Two Hamper Sections--Free Building Plans and Video Tutorial on Woodshop Diaries

Let your imagination run wild haha.  A huge thank you to Kreg for sponsoring this post and allowing the plans for this project to be free on their site here.

.

If you’re looking for more laundry room projects, be sure to check out one of these:

  • Laundry Room Storage Solutions
  • Sliding Door to Laundry Room
  • DIY Washer and Dryer Pedestal Stands for a Fraction of the Price for the Plastic Ones--How to Build Your Own
    Washer & Dryer Pedestals

And be sure to pin this for later 🙂

DIY Tilt Out Laundry Hamper Cabinet--Learn how to build your own laundry hamper storage cabinet with these free building plans and video tutorial

Until next time, happy building 🙂

DIY Round Pedestal Coffee Table

May 13, 2019 by Shara, Woodshop Diaries

How to Build a DIY Round Wooden Pedestal Coffee Table

Want to see how I built this DIY round pedestal coffee table from a simple leg, a couple 2x4s and a couple 2x10s?  (And also see a prime example of why we should measure twice and cut once?? HA!) Then read on 🙂

How to Build a DIY Round Pedestal Coffee Table--Video Tutorial and Free DIY Woodworking Furniture Plans

I recently built this coffee table mostly because it’s been a while since I made a coffee table and I thought it was probably time to make one.  I mean, I doubt anyone else is counting the years it’s been, but just in case someone is, I figured I’d make one so they can restart the clock haha. (PS if you want to see all the DIY projects over the years, be sure to check out my new projects page)

.

Anyway, when I started thinking about design ideas I wanted to try, I immediately thought of this really old orangey oak pedestal coffee table my granny has in her living room–the room you’re only allowed to hang out in when it’s time to open presents at Christmas.  Weird.

.

Her table was probably made by someone who’s been woodworking for 40 years and had to walk uphill both ways in the snow to buy a chisel.  You know…FANCY.

.

So, I set out to make my own version, a little less fancy, but with the same general idea in mind–a big trunk with four big “feet” at the top and at the bottom with a round top.  And also, a great project for someone who hasn’t necessarily been woodworking for 40 years 🙂  We can still build amazing things.  YOU can still build amazing things.

DIY Pedestal Coffee Table from construction lumber DIY furniture plans

So if you’re ready to see how I did it, let’s get building.  This post contains affiliate links.  See policies for details.

.

Check out my video here first, then the tutorial and materials list below 🙂

For this build, you will need:

(1) Table Leg (Use code WSD10 for free shipping if you purchase anything from Highland Manor Wood Products site)

(3) 2x4x8 boards

(2) 2x10x8 boards

Miter Saw

Band Saw

Jig Saw

Router (optional)

Drill

Sander

Pocket Hole Jig

Wood Glue

2 ½″ pocket hole screws

L brackets

Step 1: Find a Good Trunk for the DIY Coffee Table

The first thing I did was find a good “trunk” for the table.  Highland Manor Wood Products reached out to see if I’d like to use one of their products for this project and I was able to find the perfect short, thick table leg on their website.

DIY Round Pedestal Coffee Table Leg

If you’d like to order one (or any other product they offer), be sure to use the code WSD10 for free shipping 🙂

.

Once the leg arrived, I measured the height and width of the flat areas at the top and bottom.  I wanted to make sure I made the feet the right size to look nice proportionally and also be able to fit when I started assembly.

Measure DIY Round Pedestal Coffee Table Leg

Step 2: Glue up Coffee Table Feet

After I had my measurements checked, I started preparing the wood to make the feet.  I made my feet from standard 2x4s, but I was going to be gluing them together to make a wide foot.  Standard construction lumber usually doesn’t have the smoothest surface right from the store, so I like to plane them down first, especially if I’ll be gluing. If you don’t have a planer, you don’t HAVE to smooth the edges before gluing, but if you have a sander, sanding would work well, too.

Once the boards were planed, I also cleaned up the sides a little by running them through the table saw to get a nice square edge.  Of course, this is not necessary either if you don’t have a table saw.  It just makes the joints a little cleaner when it’s glued up.

Now that the boards are nice, smooth, and square, I cut them down to 12” long pieces at the miter saw.  Actually, I cut them about 11 ⅞” long because you have to account for the blade width in your cuts—I’ve learned that the hard way multiple times.

I used three pieces for each foot and four feet for the top and four for the bottom.  So I needed twenty four 12” boards.

.

This is the part where I really wish I had more clamps.  I brought all the clamps I had over and started gluing the boards together in threes.  It took several rounds of gluing since I didn’t have a million clamps.  But eventually, I had 8 glued up feet.

Step 3: Glue Up DIY Round Pedestal Coffee Table Top

While the glue was drying, I started working on the table top.  For this, I planed and squared up some 2×10 boards, then glued them together.  I found a top about 34” diameter worked well for my leg plus about 12” long feet.  But, you could also go a little smaller or even larger if you wanted.

For the table top boards, I cut my middle boards about 35″ long and the two end pieces were about 27″ long.  Since It’s going to be cut in a circle, the end pieces didn’t have to be as long as you can see.

While the glue was drying on my table top, I moved back to the feet.

Step 4: Cut out DIY Pedestal Coffee Table Feet

Now here was where things got really frustrating.  I needed to cut out the curvy shape on these feet.  So I kind of freehanded a design I liked on one of the feet.

Then, I pulled out my bandsaw and realized they were too thick to cut on my tiny saw.  Side note: I REALLY need a bigger bandsaw, but…you know….lack of funds haha.  Anyway, I didn’t even check that first before I started this project.  Let that be a lesson, friends.  MEASURE twice and cut once.  The key here is you have to measure in the first place haha.

So, after trying to figure out any other way imaginable I could cut these pieces out, I decided my best option was to cut them in half, then cut the curve out twice for each foot.  I knew that this would require gluing them back together, AND a TON of sanding, but I didn’t see any other way around it.  So I ripped each foot in half down the middle, then cut the curve on the first half, traced that onto the second half, then cut out the second half to match.

And of course, then I had to glue them back together.  This took several rounds again because, you know…lack of clamps haha.

Step 5: Cut out Round Coffee Table Top

So while the glue dried on those, I moved back to my table top.  Are you seeing a pattern here?  Glue one thing, work on another.  Glue that thing, move back to the other thing.  Over and over.  The majority of this project is just gluing things.

.

So once the top was dry, I used a homemade circle jig for my router to cut out the round table top.

I used a ½″ straight bit to cut and cut a little at a time in multiple passes.  However, my router is a little too small for cutting such a big piece, so once I cut through most of the material, I finished off by cutting the rest with my jig saw.

This left a lot of sanding work to smooth out the edges, but it was easier to do that than keep wrestling with my router.  In addition to a bigger bandsaw, I also need a bigger router.  Looks like I need a third job HA.

.

Anyway, you could cut the entire top with a jig saw OR use a larger router.  You could even use a band saw if you had an extra set of hands to help hold it while you cut.


Step 6: Sand Coffee Table Feet and Top

Now back to the feet.  I used my belt sander to clean up and smooth out the glue joints from gluing them back together after the bandsaw adventure.

Because of all this chaos, all of the curves on the feet weren’t 100% exactly the same, BUT they’re close enough that you can’t tell unless you are really looking for it.  I’m just calling it character haha.

.

I also sanded the edges of the table top smooth after the router and jig saw adventure.


Step 7: Attach Feet to Coffee Table Leg

To attach the feet, I used my Kreg pocket hole jig to drill pocket holes into the flat sides of the feet and attached using wood glue and pocket hole screws.  I was worried that with the feet being so long, they would be a little wiggly, but with the screws and glue, it was solid as a rock.

.

One thing to note here, as you can see, these feet wouldn’t fit into my pocket hole jig, so I set up my Kreg Jig for drilling in 1 ½″ material and just marked the height on the foot that the jig needed to be placed, then removed the adjustable drilling piece and clamped onto the foot to drill the holes.

I worked my way around the trunk attaching feet with 2 ½″ pocket hole screws and wood glue.

Step 8: Attach DIY Coffee Table Base to Top

Once the legs were attached to the trunk, and the table top was sanded to perfection (or as close as I will ever get it haha), I flipped everything upside down to attach the base to the top using some small L brackets like shown.

I may have gone overboard with the brackets.  I think just four or five would have sufficed, but I went ahead and added like 8 or 10 just for kicks and giggles.  There may be a better way to attach this, but I found this SUPER easy and once it’s painted, you’ll never notice the brackets.


Step 9: Finish DIY Coffee Table

After the table was in one piece, I started the finishing process.  I hate finishing.  Anyone else like the building process, but HATE when it’s time to start finishing??

.

I gave the top a coat of stain and some poly, and primed and painted the base a nice pretty black.

How to Build a DIY Round Wooden Pedestal Coffee Table

Then I carried that bad boy inside and set it up.  I think it’s a pretty close match to the one my granny has–only much more my style and my budget 😉

DIY Round Coffee Table--DIY Furniture Plans

My mom actually came over and noticed the similarity, then decided she would like to have it.  So being the nice daughter I am, I let her have it.  I mean, I’m always needed another project anyway, so I’ll just build another one haha.

DIY Round Pedestal Coffee Table

I really love how this one simple table leg and a couple 2x4s made such a neat looking coffee table base when you get a little creative.

So I hope you guys enjoyed this project and if you’re looking for a new project idea, be sure to head over to my YouTube channel or projects page for more DIY projects and how tos.  Until next time happy building! 🙂

DIY Modern Outdoor Chair

April 25, 2019 by Shara, Woodshop Diaries

DIY Modern Outdoor Wooden Patio Chair

Want to see how to build this DIY Modern Outdoor Chair?  Learn how to build your own DIY modern outdoor chair for your porch or patio with this tutorial, video, and plans. It’s an DIY weekend project using construction lumber!

How to make your own DIY concrete planter pot with wooden base

If you’ve been following along, you know that last year we built a garage apartment house.

.

Even though this was just a temporary home, one of the things I was adamant about was that we had to have a porch. 

.

I like to do my computer and blog work outside when it’s nice and at the end of the day when we lived in our old house, we would sit on the front porch and unwind after work.  Those times were some of my favorite parts of the day.

.

Our old house had a couple of steps that we would sit on, but our new place is just a slab on grade.  So I’ve been sitting on the concrete or in the bed of my truck lately to work outside and I think the neighbors are questioning my sanity haha.

Shara sitting in the back of her red pickup truck working on her laptop

I thought maybe I would look less like a crazy person (do keep in mind that looks can be deceiving haha) if I built us a set of chairs to enjoy the outdoors in, now that the weather is starting to get nice.  So I built a pair of sturdy and inexpensive chairs out of standard construction lumber.

.

I’ve got the downloadable plans here and all the details and tutorial below.  But first, check out my video tutorial below. PS if you aren’t subscribed to my YouTube channel, you’re missing out. Head over and click subscribe to be one of the cool kids 😉

Before we build, check out these related projects:

DIY Front Porch Wagon
DIY Concrete Landscape Curb
How to Make a DIY Concrete Planter for Your Front Porch!
Concrete Planter Pot

How to Make a DIY Modern Outdoor Chair

This post contains affiliate links.  See policies for details.

For this build, you will need:

  • (1) 2x2x8 board
  • (2) 2x6x10 boards
  • (4) 2x4x8 boards
  • Wood Glue
  • Wood Dowels
  • 2 ½″ wood screws
  • Speed Square
  • Straight Edge
  • Miter Saw
  • Circular Saw
  • Dowel Jig
  • Drill
  • Sander
  • Clamps

Step 1: Assemble Sides

I built these chairs from 2x4s and 2x6s.  The first thing I did was plane and square the rounded edges of all the boards.  This isn’t necessary, but it makes the surfaces of the boards much cleaner and the glue joints more seamless.

.

Once all the boards were prepared, I took the 2x6s over to the miter saw and cut them with a slight 5 degree miter on each end.  Each side of the chair used 3 2×6 boards plus a smaller “foot” piece at the front.  But I’ll explain the foot piece a little later.

Setting the angle on the miter saw

I laid the boards out on my workbench and used a square to mark where I would be putting my dowels.  I didn’t measure this exactly to space them any specific distance apart, but just simply eyeballed it and marked.

Marking on wood using a speed square and pencil

Then I used my dowel jig to drill dowel holes at each mark on the boards and assembled them with wood glue and dowels. 

.

I like using dowels and it’s a pretty simple method of joinery, but if you prefer another option, pocket holes and screws would also work. Bear in mind that you will see the pocket holes unless you plug them.

drilling dowel holes into board
Joining two boards together using dowels and tapping into place with rubber mallet
clamping three boards together for glue to dry

I made two of these pieces…one for each side of the chair. While those dried, I cut two smaller pieces of 2×6 to use as the “foot pieces” of the chair. 

.

I cut these with the same 5 degree miter as the other boards and once the glue had dried on the main sections, I laid the foot out and marked again where I wanted to put the dowels to attach this piece.

drilling dowel holes

Then I used dowels and wood glue to attach the feet to the main sections.

On the floor clamping project together

While that dried, I moved on to making the back of the chair. I get a little out of order from the building plans here, but I mixed a few of the steps around to save time while the glue was drying. 

Step 3: Cut Back Side Pieces

The remainder of the chair was assembled using 2x4s.  I cut two pieces for the sides of the back first.  Then I tapered them.  This is totally optional, I just liked the way the taper looked.

.

I don’t have a tapering jig for my table saw, so for this, I just drew a line where I wanted to taper it and carefully cut it with my circular saw.  

.

A jigsaw would have worked better, but I didn’t have a blade long enough for the 2x material.  Next time I’ll try to be more prepared.  But the tapering idea was a last minute design decision and I didn’t think it through all the way haha.

marking a tapering line on piece of wood with a level
cutting piece of wood with a circular saw

Step 4: Assemble Back Slats

Once both side pieces were tapered, I laid out the back design on my workbench to make sure everything fit, then started marking where to place the dowels for the back vertical slats. 

.

Then I used my dowel jig to drill dowel holes at all the marks and assembled the back as shown using wood glue and dowels.

drilling dowel holes
assembling part of DIY modern outdoor chair using dowels
clamping project together to dry

By the way, if you like my workbench, planer stand, or miter saw stand that you see in these pictures and in the video, be sure to check out those tutorial posts as well here on the site 🙂

Step 6: Finish Back of DIY Modern Outdoor Chair

Once the back slats were glued and dried, I added the tapered side pieces.  I used dowels at the top and screws at the bottom since the screws would be covered later.  You could use either dowels or screws for both if you wanted.

building the DIY modern outdoor chair back

I clamped the back while the glue dried and moved back to the chair sides.  This is where we go back to step 2 of the building plans.

Step 2: Mark and Trim Sides

I marked ⅝” from the bottom back corner and drew a straight line from that mark to the front corner as shown.  Then I used my circular saw to cut along these lines so that the chair side would slant a little backward.

marking the side of DIY modern outdoor chair to trim
cutting the sides of the chair using a circular saw

I also used my circular saw to trim up the front and back edges so the boards were nice and flush and gave them a good sanding.

Step 7: Assemble DIY Modern Outdoor Chair

Once all the glue had dried and everything had been sanded well, I started assembling.  No, wait, just kidding.  I stained the sides and the back first because that will make things way easier on me later haha.  Also, I used an indoor stain for this but will finish it with an outdoor sealant later to protect the wood.

.

THEN, it was time for assembling.  I made a mark 3” in from the back of the side of the chair and lined up the chair back along this line.  Then, I glued and screwed it in place.

marking the back side of the chair
screwing the back of the chair to the side

Step 8: Add DIY Chair Seat Slat Runner

The chair seat slats will have to be attached somewhere, so I used some 2x2s along the sides to attach the slats to the final step.  I just glued and screwed these 2×2 runners in place keeping it parallel to the top of the chair sides. 

.

I mitered the ends of the 2x2s so that the front apron piece will be perpendicular to the ground.  That’s just a personal preference.

assembling the chair

Step 9: Add Front Apron

For the front apron piece, I glued and screwed a 2×4 into the front of this runner leaving 1 ½” of it above the top of the 2×2.  That’s so when I add the seat slats, it’ll sit flush.

assembling the chair

I flipped the chair over and attached the back piece, the runner, and the front apron the same way using wood glue and screws.

assembling the chair

Step 10: Add Seat Slats

Once this was done, all that remains are the seat slats.  Before adding those, I went ahead and stained the apron and the runners, then added 2×4 seat slats, staining as I went. 

.

It’s a lot easier to stain before everything is assembled.  I eyeballed the spacing of the slats, then screwed them in place.

adding seat slats to the DIY modern outdoor chair

Then I brought it out to the porch to see how it looked.  I built two and stained them different colors (the lighter is Varathane Summer Oak and the darker is Minwax Early American) because I didn’t know which I liked better.  *facepalm*

arranging DIY modern outdoor chairs on the porch

That was a dumb idea because I had to go back and stain both the opposite color to blend it in and get them to match.  And remember when I said it would be way easier to stain before they were assembled?? AND you’ll notice they STILL don’t match HAHAHAHA I laugh to keep from crying HA.

closeup of DIY modern outdoor chair on the porch

Whatev…it’s fine.  Totally fine.  I’m just going to leave them and pretend I totally did that on purpose as a design element 😉 In other words, I don’t have time to do anything about it right now, so I’m leaving it 🙂  I’m only telling you this so you don’t make the same mistake.

.

To finish them off and protect them from the elements, I gave them a couple of coats of an outdoor polyurethane.  And now they are ready for those nice summer evenings and all my summer blogging/video editing sessions.  This has got to be way better than hanging out in the bed of my truck, right??

Overhead view of DIY modern outdoor chair sitting next to concrete planter with wooden base

I’ll probably be adding a small side table to the to do list so I’ll have a place to set my plate of Oreos and tea while I’m chilling here.  But for now, I’ll survive without one.  I’ve got plenty more projects to get done in the meantime.  And by the way, if you like the concrete planter pot, be sure to check out this post to make your own!

closeup of DIY modern outdoor chair on the porch next concrete planter with wooden base

So, if you’re ready to get building, be sure to head over and grab the downloadable plans and pin this for later!

Image collage DIY modern outdoor chair on porch sitting next to modern concrete planter with wood base  and mock up of plan overview with text overlay "DIY Modern Outdoor Chair"

Until next time, happy building 🙂

Need more outdoor project inspiration?  Click here for plenty more outdoor projects!

DIY Modern Outdoor Wooden Patio Chair

DIY Modern Outdoor Chair

Yield: 1 Modern Outdoor Chair

How to build your own DIY modern outdoor chair for your porch or patio.

Materials

  • 6x10 boards
  • (4) 2x4x8 boards
  • Wood Glue
  • Wood Dowels
  • 2 ½" wood screws

Tools

  • Speed Square
  • Straight Edge
  • Miter Saw
  • Circular Saw
  • Dowel Jig
  • Drill
  • Sander
  • Clamps

Instructions

  1. Make cuts according to the plans and assemble the chair sides using wood glue and dowels.
  2. Once the glue dries, trim the bottom on the chair sides.
  3. Cut the back side pieces using a jigsaw or circular saw.
  4. Assemble the back slats wood glue and dowels and finish the chair back.
  5. Assemble the chair using wood glue and 2 ½" wood screws.
  6. Add seat slat runners using glue and 2 ½" wood screws.
  7. Add front apron.
  8. Add seat slatts using 2 ½" wood screws.
  9. Paint or stain in the color of your choice!
© Shara, Woodshop Diaries
Project Type: DIY Furniture Plans / Category: DIY Outdoor Projects

DIY Concrete Planter Pot–With Wooden Base

April 19, 2019 by Shara, Woodshop Diaries

How to make your own DIY concrete planter pot with wooden base

Want to learn how to make a DIY concrete planter pot?  I’ve got you covered in this post!

How to make a DIY concrete planter pot with a wooden base--great way to spruce up your front porch and add some easy DIY curb appeal

With spring finally here, I’m so excited to be able to spruce up the front porch of our new garage apartment house. 

.

The past few years, I’ve made some fun wooden planters for the front porch (these modern ones were a unique design, and these louvered planters are a favorite of mine), but this year, I wanted something a little different. 

.

So, instead of wood, I went with a concrete planter pot!

.

I’ve worked with concrete a little before (like to make this concrete landscape curbing), but making this concrete planter pot was a bit of a learning curve.

.

But don’t worry, I’ll walk you through it step by step.

.

So if you’re ready to make something awesome, let’s get started.  The how to video and the step by step tutorial both are below.  This post contains affiliate links.  See disclosure policy for details.

What you need to make a Concrete Planter Pot:

  • 5000 concrete mix (you can use regular, but I recommend the 5000 kind)
  • 2×4 board (optional–the wooden base is an optional piece)
  • Wood Glue
  • Construction Adhesive
  • 5 gallon bucket
  • 2 gallon bucket
  • Spare bucket to mix in (I used another 5 gallon bucket)
  • Utility knife
  • Miter Saw
  • Band Saw or Jig Saw
  • Clamps
  • Sander
  • Router (optional)
  • Sealer

Safety First: when working with concrete, always follow the safety precautions on the bag.  At the least you should wear a dust mask and gloves.  Concrete can burn your skin and is harmful if inhaled.

.

Step 1: Glue up Base (OPTIONAL)

I started out knowing I wanted this wooden base for the pot (which is totally optional, by the way), but didn’t know how thick I wanted it to be. 

.

I played around with different sized boards and decided that a 2×4 turned on its side looked good proportionally, so I went with that.

2x4 as wooden base of DIY concrete planter pot

I took the board to the miter saw and cut twelve 4” long blocks and two 8” long blocks for the ends. 

I arranged these like shown below to make sure that the bucket I would be using for the concrete mold would fit on top.  Then I began the gluing process.

arrange boards for DIY concrete pot base

Now, it may have been easier in the long run to cut progressively longer boards to glue together instead of doing it this way with a big hole in the middle. 

.

But this way saved lumber and gave me an automatic drainage hole.  You do whichever you want…in the end, it’ll end up the same.

.

I arranged the blocks like shown and made sure the edges of the boards were barely sticking out from under the bucket and traced around it.  Then I proceeded to glue the boards together lining up the lines where I had traced.

tracing around wood base of DIY concrete planter pot
Gluing up wooden base for DIY concrete planter pot
DIY Concrete planter pot with wooden base glue up

Once everything was glued, I set it in two bar clamps, but it was hard to keep it nice and level. I fidgeted with it a little, then decided it might be best to clamp it to a scrap piece of plywood to keep it flat while it dried. 

.

I was sure to wipe the excess glue before I did that so I didn’t glue the plywood to the base.

Keep wooden base of DIY concrete planter pot level with plywood top

Step 2: Pour the Concrete Pot into the Mold

While the glue dried, I moved on to the concrete part of the project.  Because I wanted a nice smooth surface on my pot, I used the Quikrete 5000 high strength mix and I highly recommend it for this pot. 

.

It’s much stronger than the regular concrete mix, and cures up much faster and smoother.  It’s a little more expensive, but totally worth it.

.

I used three plastic buckets for this–two 5 gallon buckets and one 2 gallon.  I used one 5 gallon for the outside of the mold and one for mixing. And I used the 2 gallon for the inside of the mold.

.

I mixed the concrete in small batches so it would be easy to mix and pour.  I mixed WAY more water than is recommended on the bag, but it made it so much easier to level and to work with. 

.

I used a piece of scrap wood to stir until everything was moistened. Once it was the consistency of a thick milkshake, I poured it into the mold bucket.

mixing concrete for the Concrete planter pot in batches
Pour concrete into concrete planter mold bucket

Ignore that PVC pipe in the bottom of the bucket.  I tried using that for a drainage hole, but it got filled with concrete, so scratch that idea…we will deal with that later.

.

Once the bottom half of the mold bucket was full, I placed the 2 gallon bucket in and used my (GLOVED!) hands to work the concrete around the sides of it until it reached the top. 

.

If you notice the air bubbles in my finished pot, it’s where I wasn’t able to get the bubbles out on these sides.  It’s so narrow, it’s hard to work it down and get all the air out.  Just do the best you can and call it “character” if you get a few bubbles in your planter.

work concrete around concrete planter mold

Because the small bucket was trying to float, I used some leftover tile from our kitchen to hold it down and in place (any heavy object would work). 

weigh down small bucket for DIY concrete planter pot

Once the small bucket was situated, I backed away and didn’t touch it anymore while it cured.

Step 3: Remove the Concrete Pot from the Mold

Then I waited three LONG days.  I probably should have waited a little longer, but I’m impatient.  To remove the concrete from the mold, I used a utility knife to cut out the small bucket and to cut away the big bucket.  It was a chore to cut through these buckets.

.

My concrete was still a little wet when I did this, so you can see some knife marks on the outside of the planter pot.  Whoops…that’s just more character.

Cut out concrete mold for planter pot
Cut DIY concrete planter out of mold bucket

Step 4: Finish the Wood Base

Once I got the concrete free, I carried the pot over to the base from step 1 and traced around it.  Then I cut the base out along this line on the bandsaw and sanded the edges smooth.

Trace concrete pot onto wooden base
cut DIY concrete planter pot wooden base on bandsaw

Because the pot had a rounded bottom, I used my router to round over the edges of the base so it wouldn’t look so stark against the round edge when I glued them together.

Round over wood base edges

Then I applied a wood stain. 

Step 5: Drill Drainage Holes and Glue Together

I flipped the pot over and remember me telling you about that PVC pipe for drainage?  Well, it filled up as you can see, so I just used a concrete drill bit and drilled a small drainage hole in the center. 

.

I had a concrete drill bit from when we framed out the inside of our garage house and anchored the walls to the floor.  However, if you didn’t have one and didn’t want to buy one, you can skip the drainage hole altogether.

Drill draining hole in DIY concrete planter pot

Because this is pretty heavy, I went ahead and moved it to where I wanted to put it on the porch to glue the base to the pot so I wouldn’t have to haul it as one big piece later. 

.

I applied some Gorilla Glue construction adhesive to the base and set the pot on top.  I made sure it was centered and any squeeze out was wiped off before leaving it to dry.

Attach DIY Concrete Planter to Wooden Base
Set DIY Concrete Planter in place

Then I applied some sealer–I simply brushed on a couple coats of Minwax Helmsman Water Based Spar Urethane.  I read online somewhere that this was okay for concrete, so I’m just taking their word for it. 

.

It’s working fine for me so far haha.  I made sure to cover all the wood and the concrete with it to protect it from the elements.

.

Then I planted a cute little lambs ear plant in it and it was finished!  I love how simple this project is and how inexpensive it was, too. Cheap projects are everything haha.

How to make your own DIY concrete planter pot with wooden base

It’s far from perfect (you know…air bubbles and knife marks…) and I learned a lot in the process (like how to prevent air bubbles and knife marks), but I kind of don’t mind the scratches from the knife and the air bubbles. 

.

I think it adds some character and gives it some interest.  At least that’s what I’m telling myself anyway haha.

How to Make a DIY Concrete Planter for Your Front Porch!
DIY Concrete planter pot with wooden base

So I hope you guys enjoyed this project! And if you’re looking for more outdoor project ideas, check out some of these!

.

If you’d like to save this DIY concrete planter pot project for later, be sure to pin it! 🙂

How to make a DIY concrete planter pot with a wooden base--great way to spruce up your front porch and add some easy DIY curb appeal

Until next time, happy building!

DIY Closet Cabinets

March 25, 2019 by Shara, Woodshop Diaries

How to Build Your Own Stand Alone DIY Closet Cabinets With Clothes rod and adjustable shelves and even a shoe rack!

Need a some extra closet storage? Check out this post for how to build this stand alone DIY closet cabinet!

How to Build Your Own Stand Alone DIY Closet Cabinets With Clothes rod and adjustable shelves and even a shoe rack!

When we built our garage apartment house a few years ago, our plan was that eventually, when we built our forever house next door, this would become my shop space. 

.

So we wanted it to be as open as possible for later when I had workbenches and tool carts in here.  But that means we didn’t want to build out a closet.

.

I thought living here for a year, or two without a closet wouldn’t be a big deal.  But, one week in and we were both already sick of the mess. 

.

So, I decided to do something about it and built these fun modern DIY closet cabinets to organize and hide all our clothes and shoes. 

DIY Closet Cabinet Plans--With Clothes Rod, Adjustable Shelves, and a shoe rack built into the door

If you’re living in a home with little to no closet space…or maybe you just have more clothes than you know what to do with, I’ll show you how to add some closet space with these easy DIY cabinets. 

.

I’ve got the downloadable PDF plans available here and I’ll walk you through the process below. 

NOTE ABOUT THE BUILD: One of these cabinets was built with rods for hanging clothes and the other was built with adjustable shelves and a shoe rack.  The cabinets are the same size, the only difference is on the inside. 

.

I’ve included details on both in the plans.  And I’ve also got a tutorial and video for you below. 

This post contains affiliate links.  Please see policies page.

.

What You’ll Need to Build These Closet Cabinets:

  • (4 ½) sheets ¾″ PureBond plywood (builds two cabinets like shown)
  • (2) sheets ¼″ plywood
  • (3) 2x2x8 boards
  • (2) 1x4x8 boards
  • (2) 1x2x8 boards
  • (1) 1 ½″ diameter dowel rod 6′ long
  • (8) concealed hinges
  • (4) door pulls
  • Circular Saw
  • Kreg Rip Cut
  • Kreg AccuCut
  • Miter Saw
  • Kreg Pocket Hole Jig
  • Drill
  • Nail Gun (optional)
  • Kreg Concealed Hinge Jig
  • Kreg Shelf Pin Jig
  • Shelf Pins
  • Wood Glue
  • 1 ¼″ Pocket Hole Screws
  • 2 ½″ wood screws

.

Step 1: Build Closet Cabinet Base

The first thing I did with this DIY closet cabinet build was start with the base.  The base isn’t necessary for this project, but I liked the idea of the cabinet being off the floor and being able to vacuum underneath. 

.

The base is very simple and made from 2×2 material.  I simply glued and screwed the frame together with 2 ½″ wood screws.  I built it 33 ½″ wide, 18″ deep, and 8″ tall overall. Since I was painting, I just puttied the holes and sanded. 

.

However, if you were going to stain these, I recommend using pocket holes or dowels so you don’t see the screws from the outside.

Screw base of Closet Cabinet together

You can download the PDF building plans here.

.

Once the base was assembled, I puttied and sanded and painted it black.  While the paint was drying, I moved onto the actual cabinet.

Step 2: Build the Closet Cabinet

As mentioned earlier, I built two different types of cabinets, but they were both the same size. 

.

So, I cut down the plywood and assembled two carcasses using ¾″ pocket holes and 1 ¼″ pocket hole screws like shown here.  I always recommend using PureBond plywood for building cabinets and furniture of any kind.

RELATED: Check out this guide for how to cut down your plywood sheets!

I built these cabinets 18″ deep (because that was about as deep as it needed to be for my clothes hangers to fit and still be able to close the doors).  You can make them as tall as you wish.

.

I assembled them together using ¾″ pocket holes and 1 ¼″ pocket hole screws.

But when it came time to add the middle shelf in the cabinets, for the hanging clothes cabinet, I put it in the middle and for the adjustable shelf cabinet, I installed it slightly off center making the top section a little larger than the bottom. 

.

The middle shelf isn’t 100% necessary, but it helps keep the sides from bowing out and helps sturdy up the cabinet.

Add middle closet cabinet shelf

One other difference between the two types of cabinets besides the placement of the middle shelf is the shelf pin holes.  For the cabinet with adjustable shelves, I added shelf pin holes using my Kreg shelf pin jig.

Of course, you can do stationary shelves instead, but adjustable shelves are really nice so you can place them wherever you want in the cabinet. 

.

When I drilled these, I made sure that they were no more than 11″ from the back side of the cabinet.  You don’t want the shelves too deep, so you leave room for the shoe rack on the back of the doors.

.

One thing to note here is that I didn’t think about it until after I had already built these is that because these may have a tendency to be top heavy, it’s recommended that you attach them to the studs in the wall to prevent them from tipping over. 

.

In order to do this, you will need to have a board running between the sides at the top of the two cabinet sides.  You can see this in the plans, but you can use a scrap piece of ¾″ plywood and secure between the cabinet sides at the top using pocket holes and screws or simply 1 ¼″ wood screws through the cabinet sides. 

.

Then screw through this piece into the wall studs when they are in their final place.

Step 3: Attach Cabinet Carcasses to Base

Once the cabinets were assembled, the paint was finally dry on the bases, so I attached the cabinets to be bases using 1 ¼″ wood screws like shown.

Step 4: Attach Backer to Cabinet Carcasses

Then, I cut a piece of ¼″ plywood to use as a backer and attached using my nail gun and brad nails.  If you don’t have a nail gun, finish nails and a hammer work just fine or a hand stapler 🙂

Step 5: Add Doors to the Closet Cabinets

Next up are the doors.  I cut down two doors from ¾″ plywood and added some edge banding. 

.

Check out how to install edge banding in this post.

.

I made these as full overlay doors, so they would cover up the cabinet sides.  My cabinets were 33 ½″ wide, so I cut my doors 16 ½″ wide to allow ⅛″ on each outside and ¼″ gap in between. 

.

Then I added full overlay concealed hinges from Liberty Hardware onto each door using my Kreg concealed hinge jig. I have a helpful guide for installing concealed hinges here.

Once the hinges were in place, I went ahead and hung the doors on the hanging clothes cabinet and all that was left to do was add the closet rods. 

Step 6: Customize Closet Cabinet Details

I cut 1 ½″ dowel rods 32″ long to fit inside the cabinets and secured from the cabinet sides into the rod with 2 ½″ wood screws.  However, you could also use closet rod hanging hardware.  Screws are cheaper, though…just saying 😉

.

Make sure when you install these, you test fit your hangers to make sure the rod is located where the hangers will hang freely and fit.

.

But, for the cabinet with adjustable shelves, there was still work to do.  I used 1x4s and 1x2s to build a quick little shoe shelf like shown below. This should be about 15 ¾″ wide and slightly shorter than the top section of the cabinet carcass.

.

There were just three shelves, but I spaced them about 14″ apart.  If your shoes are smaller than that and you want to add move shelves, you can.  You just have to make sure that you don’t lengthen the height of your overall shelf.  It has to fit above the middle divider shelf in the cabinet.

I used wood glue and brad nails to attach the shelves, but on the top and bottom of the back side, I used screws to attach two 1×2 boards.  You can see this below. 

.

These are how you attach the shelf to the door.  Since they will be holding all the weight, I went with screws.

One thing to note here is that the shelf was so wide that I had to trace and cut out a little on this shelf so it would fit around the concealed hinge in order to close the door on the closet cabinet. 

.

I set the shelf at the height I wanted it on the door (1″ down from the top) and traced around the hinge, then cut it out using my jig saw.

Then, I screwed the shelf in place onto the door.

You can find all the dimensions and details in the downloadable PDF plans here.

.

Once the shoe shelves were attached to the doors, I installed the doors onto the adjustable shelf cabinet. 

.

And finally, the last thing to do was cut a few shelves and add those in with shelf pins.  You can add as many shelves here as you want, but make sure the ones at the top are only about 11 ¼″ deep or the doors with the shoe shelves won’t be able to close.

.

Also note: once the cabinets are in place, be sure to securely attach to the studs in the wall.

.

Then fill those things with ALL THE CLOTHES!

DIY Closet Cabinet Plans--With Clothes Rod, Adjustable Shelves, and a shoe rack built into the door

And all the shoes!

How to Build a Closet Cabinet with Shoe Storage
Shoe Shelf on DIY Closet Cabinet

It may not be a typical closet or enough clothes storage for everyone, but for our tiny garage apartment and the few clothes we have, it’s perfect.  And it matches our simple, modern style, too, just like the kitchen in our garage apartment 🙂

How to Build Stand Alone DIY Closet Cabinets

For a little extra storage and to give me a place to do my work, I added this simple little desk and mobile drawer box.  But that’s another story for another day haha.

I really love that when we build our forever home next door to this garage apartment, I can simply move this DIY closet cabinet to our new closet and build onto it.  So, if you’re ready to get building, be sure to check out the plans available for download here. 

.

And be sure to pin this for later 🙂

How to Build a DIY Closet Cabinet--With Closet Rod, Shoe Shelf, and Adjustable Shelves

If you would like some more organization ideas from several other super talented friends of mine, check out these ideas below.  We joined together to share some of our latest ideas and DIY projects to help keep you organized 🙂

.

Until next time, happy building 🙂

$100 Knockoff Project–DIY Modern Shelf

February 25, 2019 by Shara, Woodshop Diaries

Build Your Own Modern Bookshelf DIY Console Table Stacked Shelf

DIY Modern Shelf–A Knockoff for Under $100

How to Build this Modern Contemporary DIY Shelf from $100 or less in Materials--Walnut and White Oak Modern DIY Shelf

It’s no secret I love a good modern furniture design.  I mean, those clean lines, natural wood tones, and simplicity–they just get me every time.  So when I was challenged to come up with a project that I could “knockoff” for under $100, I started looking at all my favorite modern furniture stores and found this contemporary shelf design from CB2 that was SO me.

.

Not only is it super cute, it’s also really versatile, and it’s SO EASY TO BUILD.  So it makes a great beginner project or a quick weekend project if you’re looking for something to whip together in just a few hours.

.

For more great beginner projects, be sure to check out:

                        How to build a simple, little DIY bookshelf  How to Build a DIY Bar Cart from One Board

.But back to the challenge I mentioned earlier.  I, along with several of my other (crazy talented) DIY blogger friends were challenged to replicate a furniture piece from a designer store for under $100 in materials.  So several of us (mostly them haha) built some pretty amazing pieces and I’m linking to all the other projects at the end of this post.  And they are SO GOOD so you want to be sure to check them out!

.

And for more knockoff projects you might enjoy, check these out:

                       Pottery Barn Inspired DIY Entryway Storage Bench--#PlywoodPretty Challenge  DIY Ballard Designs Knock Off Pantry Cabinet  

Now, I have to confess and warn you about something real quick before we get to the how to.  The original CB2 shelf is made from walnut and white oak (well, TECHNICALLY it’s a walnut veneer and white oak), and when you get into buying these hardwoods, the lumber price can add up really quick.

.

But I really wanted to try it with the actual walnut and white oak instead of the standard pine and spruce I’m used to building with.  So I ended up maxing out my $100 materials budget with the lumber.  BUT, to build this shelf, that’s basically all you need anyway–just a little wood glue and a few screws are the only other things you need and I already had that on hand–so I was still able to keep it to $100.

Walnut and White Oak DIY Modern Shelf

However, if hardwood isn’t in the budget, it would look just as awesome to build it out of the spruce and pine you get at the lumber yard or big box store and just stain it contrasting colors so it LOOKS like oak and walnut.  That would save you about 50-60% of the lumber cost.

.

I’ve partnered up with the amazingly talented Jen Woodhouse from The House of Wood to bring you the plans for this project here.  I’ve also got the video tutorial, the written tutorial, and what I learned from working with hardwoods below.

This post contains affiliate links.  See disclosure policy.

.

For this build, you will need:

(3) 1×12 boards

(3) 1×2 boards

(3) 2×2 boards

Miter Saw

Kreg Pocket Hole Jig

Drill

2 ½″ pocket hole screws

2″ wood screws

Wood Glue

Clamps

.

Step 1: Mill Up the Lumber for the DIY Shelf

If you aren’t using hardwood for this project, you can skip on down to step 3.  But if you are curious how this worked with hardwood vs. standard bog box store lumber, keep reading 🙂  It doesn’t cost anything for the extra info.

.

Since I used hardwood, there was some prep work that needed to be done before I could start with the plans.  You can purchase hardwood already milled to the size you need from Home Depot (some locations) or a local hardwood store.  However, these are REALLY PRICEY.  So I got my lumber rough sawn for under half the price as already milled up.

.

But, that meant that I had to spend quite a bit of time at the planer and the table saw to get my lumber to the sizes I needed to work with.  You may already know that 1x material (which is what the plan calls for) is ¾″ thick.  But rough sawn lumber (at least where I get it from) will typically come somewhere around 1″-1 ¼″ thick.  So the first thing I did was plane all my wood down to ¾″ thick making sure that both sides were smooth in the process.

.

Once everything was the same thickness, I moved to the table saw and cut down my boards into three 1x12s (from walnut) to use for the shelves, then cut the rest of the wood down to three 1 ½″ wide strips of walnut and several 1 ½″ wide strips of white oak.

Cut down walnut boards to make DIY modern shelf

Step 2: Glue up 2x2s for DIY Modern Shelf Supports

Now, you may be thinking, “wait a minute, you milled all your lumber to ¾″ thick but the plans call for 2x2s which are NOT ¾″ thick…what are you thinking??”  Good point.

.

Where I get my rough sawn lumber, your only option is the 1x stuff (by the way, this is called 4/4 in the hardwood world), so I couldn’t get 2x wood.  I had to make my own.  But, if you do the math, ¾″ x 2 = 1 ½″ which is the thickness of a 2×2.  So all I had to do was glue two strips of ¾″ thick wood together to get a 1 ½″ thick piece and have a 2×2.

.

So that’s what I did.  I laid out all my strips of white oak that I cut down in step 1 and applied glue.

Then I folded them on top of each other to glue two together at a time.  NOTE: I only had so many clamps, so I clamped these all at once.  However, I wasn’t gluing them all together, so there was only glue between every other board.  Just wanted to clarify 🙂

Once the glue was dry, I removed the clamps and sanded all the glue off the sides and ta-da! 2x2s 🙂

Working with hardwood made this project a little more time consuming at the beginning, but once step 1 and 2 were done, it’s smooth sailing.  If you bought your lumber already milled up or you bought standard sizes from the lumber yard or big box store, here’s where you start your work–in step 3.

Step 3: Glue Up Shelves for DIY Contemporary Shelf

This is actually step 2 of the plans, but I did this part first so the glue could be drying while I assembled the other pieces.  Each shelf consists of a 1×12 on the bottom and a 1×2 glued on the back.  So I applied wood glue and clamped the 1×2 in place.  You could also brad nail these on from the bottom side or use screws from the bottom side as well.

Step 4: Cut and Assemble Shelf Supports

This is step 1 of the plans.  Sorry, I got a little out of order…I hate waiting on glue to dry so I try to stay busy while it’s doing its thing.

.

I trimmed all my 2x2s down to the sizes on the plan and assembled using 2 ½″ pocket hole screws and 1 ½″ pocket holes using my Kreg Jig.  Now, in the video, I warn you about this.  So I will warn you here as well.

Warning 1: If you are using hardwoods, you need to use fine threaded pocket hole screws.  I tried to use coarse and it was SO HARD TO DRIVE.  Like, basically impossible.  I ruined two square bits.  Not smart.  Don’t be like me.

.

Warning 2: Pocket holes and screws make these so easy and quick to assemble.  However, it is a little difficult to get your drill in to drive the screws once you add the second leg on each support.  If you have difficulty with that, try a 90 degree drill attachment OR try a driver (which is typically not as long as a drill) OR instead of using pocket holes, you could try dowels.

Step 5: Attach the Shelves to the Supports

Once the glue was dry on the shelves, I trimmed them down as one whole piece to make sure I got nice smooth ends, then attached to the shelf supports.

Because it’s kind of a tight squeeze, I started with the top shelf then worked my way down.  I used 2″ wood screws through the front to back supports to screw the shelves in place like the plans show.  Instead of screws, you could also use 90 degree L brackets as well, but the cost starts adding up with extra hardware.

Once the top shelf was screwed in place, I slid the middle shelf in and attached the same way.  Then, finally the last shelf.

Step 6: Finish as Desired

I simply finished the shelf off with a couple coats of Rustoleum Triple Thick Poly.  It bought out the natural coloring of the walnut and oak.  However, you can finish yours however you want and even do contrasting stain colors if you wanted.

How to Build a DIY Stacked Bookshelf Console Table

I’m always a fan of natural wood colors.  You can tell that from my modern nightstands, modern bed, modern rustic storage trunk, and contemporary dining table builds.

DIY Console Table Stacked Modern Bookshelf--Build your own with this tutorial

I think this shelf would be super cute in an entryway just decorated with a few of your favorite things, or even for shoe storage.  The spacing between the shelves is a great distance to stick a pair of shoes or boots in.  But, then again, I’m not sure you’d want to put your dirty boots on walnut shelves haha.

.

Either way, whatever you use it for, this is a great little shelf to make for less than $100–which is less than 25% of the designer version.  Can’t get much better than that 😉

Build Your Own Modern Bookshelf DIY Console Table Stacked Shelf

Speaking of $100 designer knockoffs, I told you earlier I had some more fun ideas to show you from some of my builder friends.  Be sure to check out all the other awesome knockoffs in the links below and don’t forget to pin this project for later!

How to Build this Modern Contemporary DIY Shelf from $100 or less in Materials--Walnut and White Oak Modern DIY Shelf

Until next time, happy building! 🙂

Check out these other awesome $100 or Less Knockoff Projects:

Addicted 2 DIY

RemodelaCasa

Woodshop Diaries

The Inspired Workshop

The Awesome Orange

DIY Huntress

Reality Daydream

Not Just A Housewife

How to Build Your Own DIY Raised Garden Bed

February 15, 2019 by Shara, Woodshop Diaries

Spring is right around the corner and if you want to get a head start on your garden, now is the time.  These DIY raised garden beds can be built in just a few hours so you can be on your way to deciding what all you want to plant–personally, I’m a fan of the tomatoes and the squash.  But, hey, to each their own.

.

Either way, these raised garden beds are great no matter what you decide to plant 🙂

Learn how to build your own raised garden beds with this easy to follow tutorial

.They are 6’x6′ garden beds with an extra section on the top in the middle.  You can build it with or without the top piece, but it adds a little bit more visual interest and helps keep your plants separated–tomatoes on the left, zucchini in the middle and squash on the right 🙂 Or whatever combination you like.

.

I’d just plant squash in each section and call it done.  YUM!  I’m a squash-a-holic when we have a garden haha.

.

You can have one made in just a couple short hours and you’ll only need a drill and a miter or circular saw.  Easy.  So if you want to build one–or four–check out the video below and the tutorial below!

This post contains affiliate links.  Please see disclosure policy for details.

For this build, you will need (PER RAISED GARDEN BED):

(2) 2x12x12′ treated boards*

(2) 2x4x12′ treated boards*

3″ wood screws

Wood glue

Drill

Miter saw

OR

Circular saw

.

*NOTE: People have used treated lumber for this kind of thing for years.  However, it’s recently been found that the chemicals found in treated lumber may be unsafe to use for a garden.  Do your own research before determining whether this is right for you.  An alternative would be using standard lumber and just knowing that it’ll need to be replaced fairly quickly OR using a naturally water resistant lumber like cedar.

.

Step 1: Cut Boards Down for DIY Raised Garden Bed

This build is SOOOOO simple, I’m not even sure how to start, here haha.  First, I cut my two 2×2 boards in half to get four 6′ long 2x12s.  I did this with my miter saw, but you could also do it with a circular saw.  Since this is just a raised garden bed, it doesn’t have to be a PERFECT cut.

Cut DIY raised garden bed boards to begin assembly

Step 2: Assemble Main Box of Raised Garden Bed

Now that I had four 6′ long 2x12s, I began assembling them using wood glue and several 3″ long wood screws like shown.

Notice here that two of the 6′ boards run between the two on the ends.  So the overall size is actually 6′ on one side and 6′ 3″ on the other since you add the width of the two 2x12s on the ends.

Step 3: Cut Boards for Small Top Section of Raised Garden Bed

Next, I used my miter saw to cut down my 2×4 boards into two 6′ pieces and two 2′ pieces.

Step 4: Assemble Small Top Section of Raised Garden Bed

Using 3″ wood screws and wood glue, I assembled the top section box just like shown here screwing the 2′ boards between the two 6′ boards.

Step 5: Attach Top Section of Raised Garden Bed

Using wood glue and 3″ wood screws again, I centered this top section on the main box, then toenailed (screwed in at an angle) them into the side of the main box.

I used several (I think four) screws per side to attach the small section.  Now just one more thing before it’s ready to plant!

Step 6: Add Stretcher Support in Middle

I have no idea what to call this piece, but I added it to keep the sides from bowing once the beds get full of soil.  The top piece will hold it in one direction, but I wanted to add something else to help it in the other direction.  So I cut another 6′ long 2×4 to screw like shown so that it was centered and running perpendicular to the top section.

Honestly, I don’t know that this is really necessary, but I don’t think it hurts anything.  But you have to be sure to use treated lumber, otherwise this will rot quickly.

.

And that’s it!  Just add soil, seeds, water, and a little time and you got yourself a garden.

How to Build Your Own Raised Garden Beds

How to Build a DIY Raised Garden Bed

One thing to note about this build is that it will only take a couple hours max–that’s the pro.  The con is that this uses treated lumber, which sometimes is a little smelly AND keep in mind it’s much heavier than standard untreated pine.  But, treated lumber will hold up A LOT longer outdoors than untreated, so it’s highly recommended for this project.

So what are you waiting for?  Spring will be here before you know it, so get out there and get building…and planting.  Be sure to pin this for later and also check out the video tutorial as well before getting started 🙂

How to Build Your Own DIY Raised Garden Bed--Video and step by step tutorial--Build a garden in a couple hours! Great beginner project!.

And for more outdoor and/or plant projects, check out some of these:

DIY Modern Planter Boxes

How to build your own modern plant stands for front porch or even inside the house

DIY Louvered Planter Boxes

DIY Louvered Wood Planters

DIY Lutyen’s Bench

How to Build a DIY Lutyens Outdoor Garden Bench

Until next time, happy building! 🙂

Build Your Own DIY Dresser

February 8, 2019 by Shara, Woodshop Diaries

In this post, I’ll show you how to build your own five drawer DIY dresser!

DIY 5 Drawer Dresser

I love a good DIY Dresser build.  You may have guessed that because I’ve built several haha. 

.

Each one has it’s own personality and it’s own design.  But this one is one of my favorites!

.

I think it’s the legs.  Want to know something funny? They’re actually vanity legs–not dresser legs.  I actually used some exactly like it to build a bathroom vanity a while back.

.

For more dresser builds, check out these beauties!

  • DIY Mid-Century Modern Dresser
  • DIY Dresser Desk
  • Simple DIY Dresser
  • DIY Modern Dresser
  • DIY Faux Drawer Dresser

But, if you are ready to get building your own DIY dresser just like this one, I’ve got the YouTube video tutorial here and the step by step directions and plans below!

This post contains affiliate links.  Please see disclosure policy.

For this DIY Dresser build you will need:

Tools:

  • Circular Saw
  • Kreg Rip Cut
  • Kreg AccuCut
  • Miter Saw
  • Table Saw or Router (optional for drawer dadoes)
  • Drill
  • Pocket Hole Jig

Materials:

  • (4) Vanity Legs (if you want more simple legs, you could also use 4×4 legs instead)
  • (1 ½) Sheets ¾″ Plywood
  • (1) Sheet ¼″ Plywood
  • (3) 2x2x8 boards
  • (2) 1x2x8 boards
  • 1 ¼″ pocket hole screws
  • 2 ½″ pocket hole screws
  • 2″ wood screws
  • Wood Glue
  • Edge Banding
  • (5) pair 16″ drawer slides

Some Notes About the Build:

The overall dimensions of this dresser ended up being 20″ deep, 33″ tall, and 56″ wide.

Some posts you might find helpful during the build:

  • How to cut down plywood sheets
  • How to cut your own 2x2s
  • How to use a pocket hole jig
  • How to measure, build, and install drawers and drawer slides
  • How to cover plywood edges

Step 1: Assemble Side Panels

I made this dresser 33″ tall overall, so subtracting the ¾″ plywood top, I needed to cut my legs 32 ¼″ long. 

.

These legs come 34 ½″ long, so if you don’t want to cut them down, you don’t have to.  But I cut mine to 32 ¼″ long.

Cut legs down for DIY dresser

Once the legs were trimmed down, I cut four 13″ long 2×2 side frame pieces attached like shown using 1 ½″ pocket holes and 2 ½″ pocket hole screws and wood glue. 

.

I left a 21 ½″ space between the 2x2s and also attached them FLUSH to the INSIDE of the leg.  I had two of these, obviously, one for the left, one for the right of the dresser.

Assemble DIY Dresser side panel with wood glue and pocket hole screws

Then I used my circular saw and Kreg Rip Cut to cut down ¾″ plywood panels to fit inside this frame. 

RELATED: Check out how to cut down plywood sheets with this step by step guide.

.

I drilled ¾″ pocket holes along the edges of the plywood panel, then installed it and the other leg onto this frame to complete the two sides of the dresser.

RELATED: Learn how to use a pocket hole jig in this post.

.

TIP: Attaching this plywood panel flush to the inside of the leg helps later with installing the drawer slides.  If it wasn’t flush, you would have to use spacer blocks to mount the drawer slides to.

Step 2: Assemble the Frame of the DIY Dresser

Next, it was time to combine the two side panels and make the dresser frame. 

.

I cut four 2x2s to 48″ and drilled 1 ½″ pocket holes into each end of each piece and attached like shown using wood glue and 2 ½″ pocket hole screws.

RELATED: How to cut your own 2x2s.

.

There should be 21 ½″ between the top and bottom frame pieces just like on the side panels.

.

Side Note: For 2×2 and 1×2 material, I always drill one pocket hole in each end and use wood glue to help hold it in place.  I’ve found using two pocket holes tends to cause the wood to crack when you drive the screws.

RELATED: How to use pocket holes

Step 3: Add Drawer Dividers to Dresser

I added drawer dividers to the dresser both for looks and for function.  I like the separation between the small top drawers and the large bottom drawers, BUT this also makes for an easy way to mount drawer slides for those top drawers, as well.

.

I cut two 1x2s at 48″ long, drilled ¾″ pocket holes into the ends, and attached like shown on the front and the back side of the dresser using wood glue and 1 ¼″ pocket hole screws. 

.

I attached these so that there was a 6″ opening between the top 2×2 and this 1×2 divider piece.

Then, I screwed 6″ long 1×2 pieces between the 2×2 and 1×2 to divide the top three drawers. 

.

I just used regular 2″ wood screws through the top 2×2 and 1 ¼″ wood screws through the bottom 1×2.  I spaced these evenly so each drawer would be the same size.  The space ended up being 15 ½″ apart.

I did this on both the front and back of the dresser.  That way I could easily attach the next piece.

.

I cut two pieces of ¾″ plywood scrap (but you could also use 1×2 scrap if you wanted) to fit between these 1x2s and attached like shown using ¾″ pocket holes and 1 ¼″ pocket hole screws. 

.

This is what I mounted the top drawer slides to in the next step.

Step 4: Attach Drawer Slides to DIY Dresser

Next, I attached five pair of 16″ ball bearing drawer slides to the dresser body. 

.

Two pair will go on the bottom section of the dresser for the bottom drawers and two pair on the top.

RELATED: How to install drawers and drawer slides

Step 5: Build and Install Drawer Boxes

I cut all the pieces for the drawer boxes for all five drawers from ¾″ plywood. Then, I cut ¼″ deep x ¼″ wide dadoes ½″ from the bottom side of all the drawer pieces on my table saw.  This is so I could install the ¼″ plywood bottom panel inside.

RELATED: I have a detailed guide for building drawer boxes here.

.

All the dimensions can be found in the printable plans here.

.

HOWEVER, if you don’t have a table saw, you could also use a router with a ¼″ straight bit to cut the dadoes. OR you can skip the dadoes altogether and just glue and staple the plywood onto the bottom of the drawer box.

.

I assembled these drawer boxes using pocket holes and screws and was sure to install the ¼″ plywood bottom before attaching the fourth side of the drawer box.

Then, I installed the drawer boxes into the dresser frame. 

.

I used scrap spacer blocks to set the boxes on to prevent them from rubbing anything when they were opened and closed.  Then, I pulled the slides out and drove the screws into the slide.

.

This drawer building guide walks you through how to install drawer boxes step by step.

For a cleaner look, apply iron on edge banding to the top side of the drawer boxes to cover the plywood edges.

RELATED: How to apply iron on edge banding

Step 6: Add Drawer Fronts

I always cut my drawer fronts to fit just in case I get anything off a little in the build. 

.

I always try to be careful, but no one is perfect and it’s always best to measure your drawer opening and subtract ¼″ off each dimension so that you will have a ⅛″ gap on all sides of the drawer front.

.

Once I had my drawer fronts cut from ¾″ plywood, I attached edge banding around all sides for a cleaner look.  Then I placed them onto their drawer, and screwed in place from the inside of the drawer box leaving ⅛″ gap on all sides.

Step 7: Add Top to DIY Dresser

I cut the ¾″ plywood top 20″ x 56″ to allow for a one inch overhang on both sides and a one inch overhang on the front. 

.

I applied edge banding to cover the plywood edges.

.

To attach, I applied wood glue along the top of the dresser then placed the top on and made sure everything was centered with 1″ on each side.

Then, I used 2″ wood screws to attach the top to the dresser through the top frame 2x2s along the front and back.

.

You’ll have to remove the top drawers to access this 2×2.

.

Ball bearing drawer slides have little tabs on the side to make drawer removal and re-install very easy. You just flip the tabs and pull out, then slide the drawer back in when you’re done.

The final step is to finish as desired AND add a backer…if desired.  I go back and forth with backers on pieces that have drawers. 

.

Backers (just a piece to cover the back side) really finish out the piece.  HOWEVER, I can’t tell you how many times I’ve filled my drawers too full and gotten stuff stuck back there and cant reach to get it out. 

.

That’s when, if you don’t have a backer, you can just reach around the back side of the dresser and clear the jam.  There are pros and cons to having a backer on a dresser.

.

So it’s a personal preference. Add the backer, don’t add the backer…it’s up to you.  But if you do, simply cut and place ¼″ piece of plywood centered on the back side and staple in place.

.

And if you are curious about the finish here, I went simple with Minwax Early American stain and a clear coat of water based poly on top. 

RELATED: How to finish raw wood furniture

.

Then I added my favorite drawer pulls ever–the same ones I used on my nightstands and in my new kitchen (just in varying sizes).

I was really excited about how this dresser turned out, and honestly, I just really love HUGE drawers.  These big bottom drawers would be SO GOOD for large bulky sweaters, fluffy blankets, and things that just take up a lot of room. 

.

Because who wants to waste a whole dresser drawer with just one big fluffy blanket??

How to Build Your Own DIY Dresser--Tutorial and Video for this Easy to Build Dresser

Don’t forget to check out the building plans if you want to build your own. You can grab them here.

.

If you enjoyed this project and want to see more, subscribe to my newsletter so you get first access to brand new projects and plans.

And if you liked this project and want to save it for later, I would love if you give it a pin or share it on your favorite social channel and be sure to check out the video 🙂

How to Build a DIY Dresser with Five Drawers--Traditional style works well in bedroom or in living or dining room as a console--Free tutorial and video

Until next time, happy building 🙂

DIY Modern Rustic Storage Bench–with PureBond Plywood

February 1, 2019 by Shara, Woodshop Diaries

How to Build a Modern Rustic DIY Storage Bench

*This post is sponsored by PureBond Plywood.  This post also contains affiliate links.  Please see disclosure policy for details.

How to Build a Modern Rustic DIY Storage Chest--DIY Storage Trunk--DIY Storage Bench--DIY Toy Box

When it comes to saving, what’s the number one thing you want to save?  Time? Money? Your sanity?  Oh, maybe that one is just me?  (Who are we kidding?  I’ve already lost half my sanity already haha)

.

What if I told you that you could save all three with one product?  And this isn’t some kind of sales gimmick you see on late night infomercials.  I promise.  This is legit.

.

It’s plywood. WHAT!?

.

I know it sounds crazy, but I found a new plywood product from PureBond that literally saved me SO MUCH GRIEF, and so much waste, and so much time building this DIY modern rustic storage bench. Do you know how much time and frustration it would have taken me to cut down and glue planks together to make something like this?  Like the whole gluing them together and then dealing with uneven seams and gaps you have to fill–not to mention all the glue squeeze out you have to clean up–yeah, no thanks.  But what you see below isn’t planks.  It’s solid plywood.

In fact, this entire bench was made from 100% PureBond Rough Sawn ¾″ Birch Plywood.  Oh, yeah…did you notice that “rough sawn” part?  I didn’t even mention the best part!  The plywood panels come with “planks” that each have their own rough saw marks so it really looks like individual rough sawn planks joined together.  It’s the perfect solution for when you want to build rustic, but don’t want to deal with milling down and joining actual rough sawn lumber. (Side note: real rough sawn wood=splinters=not good)

These panels come in 2’x4′ sheets and you can buy them online here at The Home Depot.  I used this particular kind because I like the extra character of the colorful birch, but they also have clear birch and oak as well.

.

For this build, I used 5 sheets and a few tools mentioned below.  I’m sharing the written tutorial below and the video right here:

Tools and Materials Needed:

(5) 2’x4′ Panels PureBond ¾″ Colorful Birch Rough Sawn Plywood

Edge Banding

Circular Saw

Kreg Rip Cut

Kreg AccuCut

Kreg Pocket Hole Jig

Miter Saw

Drill

Nail gun (or hammer and trim nails)

Clamps

Wood Glue

1 ¼″ Pocket Hole Screws

30″ Piano Hinge

Rustoleum Triple Thick Poly

Cut List:

(2) Side Panels: 18″ x 20″

(4) Trim for front and back side panels: 3″ x 20″

(2) “Chevron” front panels: approx 17″ x 17″ (see step 2)

(1) Back Panel: 17″ x 34″

(1) Bottom Panel: 18″ x 34″

(2) Bottom faux box piece: 3″ x 18″

(4) Top and Bottom Trim Pieces: 2 ¼″ x 34″ (cut to fit)

(2) Side strips for floating top: 2 ¼″ x 16 ½″

(1) Top: 19 ½″ x 35 ½″

Step 1: Sort Through the Plywood Panels

The first thing I did before starting to cut everything down was to sort through my panels.  Since these panels are the “colorful” variety, not every panel looked the same.  I wanted to make sure I used the most colorful ones for the front, top and sides and the not quite as colorful ones for the bottom and back since they won’t be seen as much.

Pick lumber for DIY storage bench

You’ll have to cut some thinner strips for trim off each panel, but for the most part, one panel will be the front, one the back, one the bottom, one the top, and one the sides.  So I picked which panel I wanted to use for each piece and labeled them before cutting.

Step 2: Cut Down the Plywood Panels

I’ve provided the cut list above for all the pieces of the storage trunk, BUT here’s a quick look at how to cut down the 5 panels to get all your pieces:

Panel 1:

(1) 3″ strip

(1) 2 ¼″ strip

(2) side panels

Panel 2:

(2) Chevron Panels (see diagram below)

Panel 3:

(2) 2 ¼″ strips

(1) Back panel

Panel 4:

(1) 3″ strip

(1) 2 ¼″ strip)

(1) Bottom

Panel 5:

(1) Top

A few of the pieces of this build will be cut to fit, but most of them can be cut before assembly to save time.  Here’s a few tips though.  For those panels that need thin strips ripped off, rip those first.  I recommend using a circular saw and a Kreg Rip Cut for this.

I also recommend using a Kreg AccuCut and a circular saw for cutting down panels as well.

I also cut out my chevrons BEFORE I cut my back piece because I needed the back to be exactly the same size as my front panel and just in case any measurements got off with the chevrons, I wanted to cut them first.

.

I’ve provided a diagram to help explain how I cut my chevron pattern from the panel.  This will give you two pieces (in black below) ABOUT 17″ square and with “planks” running at a 45 degree angle.

You can see from the video that I traced out my first square, then cut it out with my circular saw, but to get the inside corner of the first square, I had to use a jig saw to get a nice clean corner.

Then, I traced that square onto the other side to get them the same size.  Once I had both cut out, I laid them out to measure so that I could cut the back side the same size.

Then I cut down my third plywood panel to get my back piece making sure that it was the same size as the front chevron panel.

Lastly, I cut down the panel for the bottom side and cut the four 3″ x 20″ trim pieces before I started assembling.  I applied glue on edge banding to the plywood edges that would be exposed once assembled for a cleaner look.  I used regular edge banding for this (not rough sawn) because it’s so small, it isn’t noticeable.

Step 3: Assemble the Front Panel

You’ll see above, my front panel was already assembled.  I got a little ahead of myself.  I got all my pieces cut out and ready to assemble, then did all the assembly at once after I edge banded.  But, before I could edge band the front panel, I had to attach it together.  To do this, I drilled a couple ¾″ pocket holes into the joining edges of the chevron panels, then glued and clamped, and added 1 ¼″ pocket hole screws to help hold it in place.

Once the glue was dry, I CAREFULLY sanded any squeeze out glue off the front trying not to remove all the saw marks.  You don’t want to sand too heavily so you don’t accidentally sand off the “rough sawn.”

Step 4: Assemble the DIY Storage Bench

Now, finally, it’s time for the fun stuff.  I drilled ¾″ pocket holes along the edges of the front and back panel and attached to the side panels like shown to make a box using 1 ¼″ pocket hole screws.

One thing to note about this box is that I designed it to have a “floating top.”  You don’t HAVE to build yours this way and it adds nothing to the structure–it’s purely for looks.  But, I did this by attaching the front and back panels so that they were ¾″ higher than the top of the side panels.  If you don’t want a floating top, then attach them so that the tops line up with each other.

Step 5: Add Bottom of Storage Bench

Once the box was assembled, I screwed the bottom panel onto the box using 1 ¼″ screws like shown below.

Step 6: Add “Leg” Trim

This storage trunk doesn’t actually have “legs,” but I made trim on the front and back to make it LOOK like two really thick boards made up the sides.  I cut two pieces from what was leftover after cutting the side panels to fit perfectly underneath the box like shown below.

This just helps create a “hollow box” that will look like one thick piece of wood.  Then, I glued this piece and one of my 3″ wide trim pieces and nailed everything together like below.

I did this on all four corners (two on front and two on back), then clamped while the glue dried.

Step 7: Add Remaining Trim

While the “legs” dried, I cut to fit four trim pieces of trim to finish out the front and back sides of the box.  I cut these pieces from all the 2 ¼″ strips I ripped from the plywood panels earlier, then applied edge banding before attaching.

Two on the front and two on the back.  I attached my top trim pieces so that they were ¾″ down from the top of the front and back panels for that “floating top” look.

.

Finally, the last trim pieces I added was just to finish out the two short sides for the floating top.  I cut to fit two pieces to fit on the INSIDE of the box like shown to sit ¾″ higher than the side panels of the trunk.  I glued and nailed these pieces in place on each side.

Step 8: Add Top

Once all the glue was dry (tip: clean up as much glue squeeze out as possible before it dries so you don’t have to sand so much later to clean it up and accidentally remove those saw marks), I added the last piece–the top.  I cut this piece to be the exact dimensions of the outside of my storage chest.

Then, I added edge banding and attached the top to the back using a 30″ long piano hinge.

Step 9: Finish the Storage Bench

Here’s where I had a hard time–deciding on finish.  A darker stain would bring out the rough sawn marks on the panels better, but the poly would bring out the colors better.  I really love the look of the lighter, more natural wood, but I also loved the rustic touch of the marks.

But after going back and forth and back and forth, I decided to just go with a clear poly.  The darker stain made all the boards look the same color and hid that pretty color variation.  With the poly, you can still see the saw marks, just not as noticeably, but you do see that eye catching color variation with the poly and that’s my favorite part!

DIY Storage Bench-Modern Rustic Style with Rough Sawn Plywood--Free plans and tutorial

Can you believe this DIY storage trunk/bench/chest/box (whatever you want to use it for) was made completely from plywood??

DIY Storage Bench--Free plans and video tutorial--Modern Rustic Plywood Storage Trunk

I’ve got it sitting next to my front door as a nice entryway bench to sit on while putting on shoes, but also as an extra storage place in out tiny little garage apartment.  But it would be great DIY toy box, end of bed storage, coffee trunk, or just extra storage in the living, bedroom or office.

How to Build a Modern Rustic DIY Toy Box Storage Trunk

And did you notice that little floating top detail?  It’s just a small gap between the top and the “body” of the trunk.  But I used this same detail on my nightstands and my dining table recently and really like it.  Of course, it’s also easy to build WITHOUT the “floating top” and just do a regular top…but where’s the fun in that?? HA!

.

I hope you’ve enjoyed this project and I hope you give out the new PureBond Rough Sawn Plywood a try–I really had fun building with it.

,

If you’ve enjoyed this project, I would love if you’d pin for later, and be sure to check out the video on my YouTube Channel and above.

How to Build a Modern Rustic DIY Storage Chest--DIY Storage Trunk--DIY Storage Bench--DIY Toy Box

And if you are looking for more storage bench ideas, check these out:

DIY Storage Trunk

Free building plans to make your own storage chest

Simple DIY Storage Box

DIY Faux Slat Toy Box

And for more PureBond inspired projects:

DIY Storage Armoire

DIY Faux Drawer Vanity

So there is plenty of inspiration to get out there and get making:)  Until next time, happy building 🙂

DIY Mobile Workbench with Plans

January 28, 2019 by Shara, Woodshop Diaries

In this post, I will show you how to build a sturdy and versatile DIY Mobile Workbench!

Pinterest image showing DIY mobile workbench in workshop with text "how to build a mobile workbench"

This post is sponsored by Kreg Tool and contains affiliate links.  See policies for details.

A workbench in any shop is a valuable asset. In my old workshop, I built some narrow, stationary workbenches along one of the walls and it served its purpose for a while…

But, I quickly found that mobile work surfaces are much more versatile (and easy to clean under) than stationary. And the narrow bench tops I had built originally just weren’t large enough to do much assembly on.

So, when I moved to a new shop space, I decided to change things up and built a MOBILE workbench that was ALSO large enough to actually work on. 

I also made the workbench frame exactly the right height to serve as an outfeed table for my table saw and gave it some storage space underneath for my most used items. It’s been a game changer for my workshop!

So, if you’re looking for the ultimate mobile workbench for your own workshop, I’m excited to be sharing the free woodworking plans for this one below.

What to know before building a DIY Mobile Workbench

This workbench is a workhorse! It packs plenty of storage space on the bottom shelf and plenty of worksurface on the top.

Workbench Sizing Considerations

Before we build, let’s discuss a couple details about the size of this basic workbench. The overall dimensions of this DIY workbench are 51″ x 99″ x 34 ½″.

DIY mobile workbench 3D diagram with overall dimensions

I used full plywood sheets for the work surface and the bottom shelf, so it is fairly large. However, you can easily modify your size just my changing a few measurements in the workbench plans linked below. 

Adjust the frame in step 1 to your desired workbench size, then just cut your plywood bottom shelf to fit as needed.

How tall should a workbench be?

A comfortable workbench height is between 34″ – 36″. If you want something easy to compare this to, most standard kitchen counter heights are 36″ tall.

This specific workbench design is 34 ½″ tall because that’s the height of the surface of my table saw.  So this height works out perfect for an outfeed table. 

If your table saw isn’t 34 ½″ tall like mine or you don’t care to use it as an outfeed table and want it taller or shorter, simply adjust the height of your legs in the plans.

NOTE: Double check the actual overall height of your caster wheels before assembling. Caster wheel designs will vary and they come in various sizes. Without the wheels, the workbench frame is 30 ¾″ tall.

Does a Workbench Need Built in Clamp Tracks?

The short answer here is no. Clamp tracks on a workbench are COMPLETELY optional.

I added some to my workbench here (the blue rails on the work surface you see in the photos are Kreg Clamp Traks). But I’ll be honest…in the 4+ years that I’ve been using this workbench, I’ve only used them maybe twice.

DIY mobile workbench with clamp tracks

If you think you’ll use them regularly, they are easy to add and can be a great addition! However, if I were to build another workbench, I personally don’t use them enough to add them again.

What type of wood should be used for a workbench?

You can build a workbench from all kinds of materials. If you want to get fancy and aren’t on a budget, hardwood is a great option for a workbench.

However, in most cases, since workbenches will get beat up and be well used, you probably don’t want to splurge on materials.

So in these cases, construction lumber is a great option for workbenches as it’s budget friendly, readily available, strong (they literally build houses out of it!), and comes in various sizes.

I used basic pine/spruce construction lumber for all my workbench framing and I used sanded pine plywood for my bottom shelves.

Since my top shelf will be subject to more wear and tear, I opted for a hardwood birch plywood for it since it’s a little more durable. It’s still going strong 4+ years of heavy use–although it does have some stains as seen below ha!

Drill and wood shavings on stained wood workbench

One good thing about this workbench design is that the top plywood panel is easy to replace if needed.

Tools & Materials

Tools:

  • Circular Saw
  • Drill/Driver
  • Kreg Pocket Hole Jig
  • Kreg Clamp Trak (OPTIONAL–you can add these to your workbench top if desired)

Materials:

  • (3) ¾″ plywood sheets (I used pine for the bottom and dividers and birch for the top)
  • (2) 4x4x72 posts
  • (9) 2x4x8 boards
  • 1 ¼″ pocket hole screws
  • 2 ½″ pocket hole screws
  • 1 ¼″, 2″, 2 ½″, and 3″ wood screws
  • Caster Wheels--the exact wheels I used are discontinued, so I don’t have a link

How to Build a DIY Mobile Workbench

This build is a great weekend woodworking project! It’s a fairly quick and straightforward project with simple joinery.

I’m sharing the detailed step by step instructions below with tons of tips along the way. And I’ve also got a video tutorial here as well.

Don’t judge too harshly…this is one of my older videos and they’ve come a long way since then haha. Check out my YouTube channel for the latest project videos!

Prefer to print? Grab the free mobile workbench plans on KregTool.com.

Step 1: Assemble Top and Bottom Mobile Workbench Frames

First, I decided what size to make my workbench. I used full plywood sheets for mine, so I made two frames the size of my sheets–4 ft x 8 ft.

I assembled this frame from 2×4 boards using 1 ½″ pocket holes and 2 ½″ pocket hole screws.

Check out this post for more on how to use a pocket hole jig in woodworking projects.

2x4 frame diagram assembled with pocket holes and screws

I made TWO identical frames like shown above–one will be used for the top and one for the bottom of the mobile workbench.

TIP: If you wanted your workbench smaller, simply modify the overall size of the frame in this step.

Step 2: Attach Bottom Workbench Panel

Once the frames were assembled, I screwed my bottom shelf plywood sheet (I used sanded pine plywood for the bottom panel) onto one of the frames using 1 ¼″ wood screws from the top side.

Diagram of plywood panel attached to 2x4 frame of mobile workbench

Obviously, if you are making this smaller than a full sheet, you will need to trim your plywood sheet to the size you want.

For tips on cutting plywood sheets, check out this guide for easily and accurately cutting down plywood sheets using a circular saw!

I set the second frame from step 1 aside to use in a later step.

Step 3: Attach Mobile Workbench Corner Posts

Next, I cut four corner posts/legs from 4x4s. If you didn’t want to use 4x4s, you could also just glue and screw 2x4s together to make your own 4×4 posts.

NOTE: 4×4 posts are 3 ½″ x 3 ½″. If you screw 2x4s together to make your own, this will give you 3″ x 3 ½″. However, in this project, the slight difference shouldn’t matter.

Corner posts installed onto workbench bottom frame diagram

This DIY mobile workbench is 30 ¾″ tall without the casters if these legs are cut to 26 ¼″ long. So consider the height of your caster wheels and adjust the legs longer or shorter as needed if you want a taller or shorter workbench height.

I used two 3″ long wood screws to attach these posts from the bottom side of the 2×4 frame at each corner.

Step 4: Attach Caster Wheels to Workbench Frame

Next, I attached caster wheels at each corner and added two in the middle along the long sides to help prevent sagging.

You can use just about any size and style of caster wheel you’d like, but make sure they are heavy duty since this workbench (and what you put on top of it) will be pretty heavy.

Shara Woodshop Diaries installing caster wheels on bottom of mobile workbench

I installed 3″ caster wheels and simply used 1 ¼″ wood screws through the holes on the plates. I don’t have a link to the exact wheels I used because they are discontinued.

Step 5: Attach Top Frame at Corners

I brought out the second frame from step 1 and secured at the top corners of these legs using 2 ½″ wood screws.

Top 2x4 frame installed onto corner posts of workbench

Step 6: Attach Top Workbench Panel

I mentioned this earlier, but for the rest of this project, I used sanded pine plywood. However, for the top, I splurged for good quality hardwood birch plywood.

I used good plywood for the top to ensure I would have a smooth, durable surface to work on.

Just like in step 2, I attached a full sheet on top of this top frame. If you modified the size of the sheet in step 2, do the same here–just trim to size.

I attached this sheet to the top frame using 2″ wood screws from the bottom side of the top frame. You can use 1 ¼″ wood screws through the top side instead, but I didn’t want to see the screws.

Top plywood panel attached to top frame of workbench

Step 6.5: Install Kreg Clamp Traks (OPTIONAL)

I added Kreg Clamp Traks to my workbench surface–of course, these are optional.  They come in kits of different sizes depending on what size you make your bench.  I used the 27″ x 69″ kit.

If you are adding these as well, you will need to follow the instructions to trim down your top panel from step 5 for your traks to fit into.

Finished DIY plywood top mobile workbench with clamp tracks installed

I had built my frames for this project from 2x4s before my tracks came in and I didn’t have the instructions.  Once they arrived, I realized they were designed to be installed onto ¾″ thick surfaces.  But I was using 2x material so it was 1 ½″ thick.  Whoops.

Check out the Kreg Trak installation instructions here.

So, what I did was follow the instructions to drill the holes for the bolts through the surface I was mounting to.  I just drilled all the way through my 2x4s.  (You can see this in my video above.)

Then I used a larger drill bit (one that was large enough for the head of the bolt to fit into), to countersink a hole ¾″ deep into the BOTTOM SIDE of the top 2×4 frame. 

Now, my bolts would fit up into the hole ¾″ and it was ESSENTIALLY just like mounting to ¾″ material.  It’s a little extra work, but not too bad.

Installing Kreg Clamp Traks onto workbench top

Step 7: Trim Around Workbench Top

Now, this workbench is large and could have a tendency to sag in the middle. You could add some supports in the middle to help prevent that, but I wanted this space open.

So, instead, I attached some 2x4s along the end to provide a little extra support and help prevent excessive sagging.

I simply cut to fit a 2×4 frame around the top edge of the workbench and screwed in place using 2 ½″ wood screws.

Top of workbench framed with 2x4s 3D diagram

Step 8: Install Divider Panels/Storage Section on End of Workbench

To add some extra storage and organization to the workbench, I installed some side panels and a shelf on the end. I built this section using ¾″ sanded pine plywood.

First, I cut and installed a plywood panel like shown here using ¾″ pocket holes and 1 ¼″ pocket hole screws 13″ from the inside edge of the legs on one end.

Mobile workbench middle divider panel installed toward one end to add shelving

Then, I added side panels on each side flush to the INSIDE of the legs using ¾″ pocket holes and 1 ¼″ pocket hole screws.

Side panels installed with pocket holes into DIY mobile workbench 3D diagram

Lastly, I used ¾″ pocket holes and 1 ¼″ pocket hole screws to install a stationary shelf between these two panels.

NOTE: Double check your own shelf length and cut accordingly. If you didn’t use 4×4 posts, your length may vary slightly.

End of mobile workbench shelf installed with pocket hole screws

I added some scrap wood triangles on my shelf to act as dividers, but that’s totally optional. I used 1 ¼″ wood screws to secure them to the back and shelf panels.

End of workbench storage cubby with divider panels for tools and jigs

And with that, I completed one of the most helpful projects I’ve ever built for my shop–a DIY mobile workbench!

This has already become my most used piece in the shop.  I love the cubbies on the end, for all my jigs, and the large area underneath for my vacuum and a bucket to toss small scraps into while I’m working.

DIY Mobile workbench with storage underneath for vacuum and buckets

If you are ready to start working on an ultimate DIY mobile workbench instead of on the shop floor, head over to Kreg Tool for the printable plans. 

.

And if you liked this project, I would love it if you’d pin it for later and don’t forget to subscribe to my newsletter below so you don’t miss out on the awesome projects to come!

Looking for more workshop organization projects?

If you enjoyed this project and want to see more workshop and garage organization and storage projects, here are a few favorites!

How to build a mobile Miter Saw Stand with storage drawers, and fold down extension wings
Mobile Miter Saw Stand
EASY DIY Lumber Rack
Battery Charging Station
Lazy Susan Garage Cabinet
Workshop cabinets
How to Build Workshop Cabinet Boxes
Scrap Wood Clamp Rack

Want to be the first to know about new projects and plans? Subscribe to the FREE newsletter below for priority access!

Save this project for later by pinning it to Pinterest or saving to your favorite social network!

Pinterest collage of DIY mobile workbench--Shara Woodshop Diaries with workbench on top and workbench with clamp tracks on bottom

Until next time, happy building! 🙂

How to Make a Custom DIY Picture Frame

January 20, 2019 by Shara, Woodshop Diaries

How to make your own Custom DIY Picture Frame for any size picture or print you want to frame. Save hundreds by making your own with these plans!

In this post, I’m sharing How to Build a DIY Picture Frame with glass panel and a custom cut mat!

Custom picture frame made from Kentucky coffee wood with mitered corners, large mat board

For Christmas a few years ago, I built my Dad a custom picture frame for a print he had gotten after someone in his family passed away.

.

Dad had kept that print in a spare bedroom for a while with intentions of getting it framed (but it was there for so long that I think he kind of forgot about doing anything with it).  So, I drove over and picked it up when Dad was out working so he wouldn’t know I took it.

.

So, just in case you’ve got an old piece you’re needing to frame, I’m sharing how to make a custom picture frame to fit any print or picture you want 🙂

.

Now, here’s a disclaimer–you can build a DIY picture frame a million different ways, but for this one, I used mitered corners, wood dowels and routed edges. This is a semi-advanced way of making frames.

.

If you want a simpler way to make picture frames with just a saw and a nail gun, I’ve got a tutorial for 3 styles of easy floating DIY picture frames here.

.

But, if you’re up for dowels and routers, let’s get building. Here’s a quick video and the written tutorial is below.

This post contains affiliate links. Please see disclosure policy for details.

For this Custom DIY Picture Frame, you will need:

  • 1×3 board(s) (amount and width depends on the size you are making)
  • Dowels
  • Dowel Jig
  • Clamps
  • Drill
  • Wood Glue
  • Miter Saw
  • Router
  • Roman Ogee Router Bit
  • Rabetting Bit
  • Chisel
  • Glass panel
  • Picture Mat
  • ExactoKnife
  • Picture Frame Tabs
  • ¼″ plywood or cardboard

.

Step 1: Determine the Size of Your Custom Picture Frame

Your picture frame size will depend on the size of the picture you are framing and the size of the mat that you want.  I’ll share the formula to figure it out. 

.

First, you need the dimensions of the picture you are framing, the width of the mat you want around the picture, and lastly, the width of wood you want your frame pieces to be.  Then the formula for your board lengths is:

Width=width of picture + (2 x width of mat) + (2 x width of frame) – ¾″

Height= height of picture + (2 x height of mat) + (2 x width of frame) – ¾″

.

For reference, I made my mat 3″ wide on each side of the picture and I used 1x3s for the frame which are 2 ½″ wide.

Custom picture frame made with Kentucky coffee wood with routed edges, glass and a large mat board

So my top and bottom pieces = width of the picture + 6″ mat + 5″ frame – ¾″

And my side pieces = height of picture + 6″ mat + 5″ frame – ¾″

.

To determine how much lumber you need for the frame, take 2 x height from above + 2 x width from above.

Step 2: Cut DIY Picture Frame Pieces

I used Kentucky Coffee Wood for this frame and I ripped it down to 1x3s boards–2 ½″ wide. But you can buy 1x3s off the shelf for this as well.

Shara Woodshop Diaries ripping coffee wood on table saw

I adjusted the miter angle on my miter saw to 45 degrees and cut 2 pieces with miters NOT parallel so that the total length (long end to long end) equaled the width from step 1. 

.

Then I cut 2 pieces the same way, but with length equal to the height from step 1.

Shara Woodshop Diaries cutting miters on ends of 1x3s in miter saw

Step 3: Drill Dowel Holes in Frame Corners

Next, I sanded all the boards well (this is easier to do now, before you start assembling), and used a ⅜″ dowel jig to drill dowel holes ¾″ deep into each corner. 

.

As always, with dowels, make sure that your holes CORRESPOND when you drill them.  They need to align perfectly or your DIY picture frame will be crooked or unsquare. You can get more details on this in my DIY cabinet door post here.

.

I lined the edge of my dowel jig on the INSIDE corner of the miter on each piece and clamped in place while I drilled the holes.

Shara Woodshop Diaries drilling dowel holes into mitered corners to assemble

Just make sure that you always line up the jig in the same location on each piece.  Once all your holes are drilled on each end of each piece, it’s time to glue up.

Step 4: Glue DIY Picture Frame Together

Glue ups are always a little stressful.  So it is handy to have a second set of hands for this if possible.  I applied glue to one corner at a time to give me time to get everything together. 

.

I glued each corner, and made sure to get some into the holes and inserted the dowels.  Then squeezed together the best I could.  You can see in the video I shared above that I started on one corner and worked my way around.

Assembling one corner of DIY custom picture frame using dowels and wood glue
Applying wood glue to mitered joints on picture frame made with dowels

Once all the dowels are started into their holes, I used long pipe clamps to help me push everything together really tight and to help make it nice and square.

Picture frame gluing up with pipe clamps

A ratchet strap or one of those crank style picture frame clamps works well, too if you don’t have pipe clamps.

Step 5: Route Decorative Edge Along Frame (Optional)

Once the glue was dry, I gave the corners a good sanding to get rid of any leftover glue from squeeze out, then put a Roman Ogee router bit into my router and went along the outside edges to give it a little decorative detail.

Roman Ogee edge being routed along DIY picture frame with palm router

This is totally optional.  You can leave your edges plain and square OR use something else besides the Roman Ogee. It’s purely decorative, so it’s up to you how or if you do it. 

.

But side note: when routing edges like this along the outside, go counterclockwise.

.

For more information on routers and how to use them, check out this router guide.

Step 6: Route Rabbet for Glass

If you think of this print as a sandwich, it would go glass in front, mat board and print in the middle, and backer board on the back side. 

.

The glass I was going to use (more on that later) was ⅛″ thick, the mat board and print were negligible (too thin to matter) and the backer board was just ¼″ plywood I had leftover in the shop.  (You could also use cardboard if you didn’t have plywood.)

.

So I needed a rabbet cut into the BACK INSIDE of the frame about ⅜″ deep so that everything would set inset into the frame and be flush on the back side.

.

For this, I used a rabbeting bit in my router. 

.

This particular one I used is adjustable to different widths, but I cut mine ⅜″ wide.  I just took off a little at a time until it was ⅜″ deep. NOTE: route the inside edges here clockwise.

routing clockwise around inside of custom frame to make rabbet

The thing about rabbeting bits is that they makes rounded corners.  So I used a chisel and carefully squared my corners. OR, in hindsight, you could route these rabbets prior to assembling to avoid having to use a chisel here.

Rabbeted corner chiseled square

Step 7: Cut Mat Board

Now the frame itself is finished (except for actual finishing–paint, stain, poly.  I polyed mine with three coats of Polycrylic.  While it was drying, I cut the mat board.)

.

The last thing that needs to be done is cut the mat board.  You can buy mats in standard sizes precut at any craft store or even online.  But, since my print was so big, the precut mat was like $60 and it wasn’t even really the size I wanted.

.

So, I just bought a $10 mat board at Hobby Lobby and cut out the opening for the print using an exacto-knife (a pocket knife works, too).  These are really nice to use when you need a custom size that you can’t buy standard.

Marking and cutting large mat board using exacto knife and level

I traced out and cut the board the overall size the mat board needed to be to fit inside the rabbet from step 6.  Then, measured and marked in 3″ from each side and cut out the opening for the print to fit into. 

.

Once the opening was cut, I taped the corners of the print onto the back of the mat so that everything was lined up and it would stay that way.

Step 8: Install the Print and Finish

Now, it’s time to put everything together.  I ordered a piece of picture frame glass from my local glass place so that it would fit into the groove cut from step 6. 

Placing glass onto picture frame rabbet

Order it slightly smaller than the exact opening because you can’t cut glass very easily if it’s too big.  If it is too big, you will need to chisel out the frame until it fits.  And that stinks, so avoid it if possible haha.

.

Note that many big box stores will also cut you custom size glass pieces if you don’t know a local place OR, you can cut your own plexiglass pretty easily using this tutorial.

.

Once I had the glass, I placed it into the groove, then I placed the mat and print in, then cut a piece of ¼″ plywood I had in the shop to fit in the groove. If you don’t have plywood for this, some good, stiff cardboard works, too.

Place backer board into rabbet on back of picture frame

Finally, I attached these (I’m not sure what they are called) “twisy picture frame holder thingies” around the edge of the back side of the frame so that they hold the picture and backer in place.

Attaching turn buttons onto back side of custom picture frame

Now all that’s left is to hang the frame.  If I had a keyway router bit, I would have loved to use it here, but I don’t have one. 

.

So instead, Dad had two small eye screws and some metal frame hanging twine.  We put one eye screw in each side of the frame and tied the twine between the two to hang.

Dad next to his custom DIY picture frame with eagle print in his blue office
Custom picture frame with poster on blue wall.

I really like the look of the decorative edge and the mitered corners.

Close up of top corner of custom built frame using Kentucky Coffee wood
Close up of mitered corners and decorative edges of DIY custom picture frame

Making custom picture frames is really a fairly simple project once you get your measurements figured out and it could save you HUNDREDS of dollars vs buying a custom built frame.

.

The process is the same no matter how wide you choose to make your frame or your mat or the size of your picture, so it’s really easy to customize however you want if you can do a little basic math. 

.

So if you are ready to get building, or you want to save it for later, don’t forget to pin this post!

DIY custom picture frame with glass and a mat board with routed edges and  mitered corners

Until next time, happy building! 🙂

Modern DIY Bed Frame

January 5, 2019 by Shara, Woodshop Diaries

How to build your own Modern Style Bedroom Suite

In this post, I’m sharing how to build a modern DIY bed frame with video tutorial and printable building plans!

DIY Modern Poplar Bed and Matching nightstands

This modern DIY bed frame is simple and elegant, so it can fit any design style and is perfect to mix and match with your existing furniture.

.

However, if you want an entire matching bedroom set, I’ve got you covered with that, too 🙂

.

Want to check out the entire modern DIY matching bedroom Set? Check out all the pieces here!

This modern DIY bed frame was made from poplar wood and some ¾″ plywood pieces for the bed slats and supports.  I used rough sawn poplar and milled it down to the size I needed.

.

But, the plans below show you how to build it with standard size lumber to make things easy.

.

To build the DIY bed frame and two matching nightstands, I purchased 100 board foot of poplar (for about $200 at the time).  Obviously, I had some waste, but I also had a little leftover.  But that gives you a rough idea how much it cost to build.

.

Check out the video, plans, and tutorial to build your own DIY bed frame below!

**This post contains affiliate links.  See disclosure policy for details.

.

Tools and Materials:

Tools:

  • (4) 4x4x8 boards (I glued mine together, then milled down to slightly under 3” x 3” posts.  Either will work—see step 1)
  • (3) 1×8 boards (headboard)
  • (3) 1x10x8 boards (bed rails and footboard)
  • (1) sheet ¾” plywood OR 1x4x8 boards for slats
  • (3) 2x2x8 boards (bed slat supports)
  • Bed rail Hardware
  • Dowels
  • 2 ½” pocket hole screws
  • 1 ¼” wood screws
  • 2 ½” wood screws

Materials:

  • Miter Saw
  • Table Saw (optional)
  • Kreg Rip Cut (optional)
  • Circular saw
  • Kreg AccuCut
  • Wood Glue
  • Clamps
  • Dowel Jig
  • Pocket Hole Jig
  • Drill
  • Sander

Grab the Modern DIY Bed Frame printable plans here:

.

NOTE: The following tutorial shows building a QUEEN size bed.  The plans for a king OR queen are linked above.  The building process is the same for a queen and a king, but dimensions are slightly different.

Step 1: Prepare the Bed Frame Posts

Because I built my DIY bed from poplar, I was at the mercy of whatever I could find at the hardwood store for bed posts.  Unfortunately, all they had was 1x material.  So to make thicker bed posts, I had to laminate the pieces together.

.

So first, I planed the boards to remove the rough saw marks and get them all down to the same thickness. 

.

Then, I ripped the boards in 3” wide strips on my table saw, and cut them down to slightly longer than the lengths I would need for all four posts and the two top “runners” that connect between the two posts on the headboard and the two on the footboard.

.

The two headboard posts are 48” long and the two foot board posts are 23” long.  The two posts that go between them are each 62” long (for a queen size bed). 

.

Since three pieces make up each of these, I had 6 pieces slightly longer than 48”, 6 pieces slightly longer than 23”, and 6 slightly longer than 62”.  Then I glued and clamped them together to make my “posts.”

Apply Glue to glue up modern bed frame posts
Glue and clamp together modern bed frame legs

Once the glue was dry, I trimmed them down to the exact lengths I needed (48”, 23”, and 62”), then planed the laminated edges to get them nice and clean, flat and square. 

.

Now my bed posts were ready.

Bed posts ready for assembly

If you are working with 4×4 posts instead, simply cut them down to the final lengths needed.  You can skip the messy and tedious step of laminating everything 😉

Step 2: Prepare the Head Board Panel

For the large panel that makes up most of the headboard, I simply glued and clamped 3 boards together. 

.

Mine weren’t all the same width (that’s the “beauty” of working with whatever wood you can find at the hardwood store), but glued together, they made a panel 23” wide. 

.

This is ALMOST the equivalent of three 1×8 boards if you’d rather use that instead.

.

I cut my boards a little longer than 62″ long (62″ is the final length, so I left enough to trim off nice and clean).  Then I ran them through the table saw to square the edges for a cleaner glue up. 

.

You can read this post to see more about squaring off board edges.  Then simply glued them together.

rip edges of DIY modern bed headboard panel to glue together
Trim DIY modern bed head board pieces to length
apply glue to headboard panel on DIY modern bed frame
Glued up modern bed frame panel

Once the glue was dry, I trimmed the boards down to make the panel its final length. 

.

The Kreg AccuCut comes in handy here with a circular saw.  Actually, it comes in handy all the time–check out this post for how to use it.

Trim head board panel to size

This was my first project ever using dowels.  It was a learning curve.  My best advice for using dowels is to PAY ATTENTION to where and what orientation you drill your holes.  It’s not bad as long as you are PAYING ATTENTION.

.

Okay, SO, that being said, I used my Rockler Dowel Jig and drilled ⅜″ dowel holes ¾″ deep along the short sides of this headboard panel spacing them about 4” apart. 

.

Your spacing is totally up to you, but make sure you stay consistent…you will have to drill corresponding holes in the bed posts later.

measure and mark dowel holes on modern headboard
Drilling dowel holes into modern bed head board

Step 3: Assemble the Head Board

Okay, so the dowel holes were drilled in the headboard panel, but now I had to drill “matching” holes in the headboard post. 

.

So first, I drilled 4 dowel holes in the top inside of the headboard post for the connecting post to attach.  Then, I left a 4” space between where the top post will be and the top of the headboard panel.  It’s handy to make pencil marks so you know what’s what.

.

After my 4” space, I drilled corresponding dowel holes along the back edge of the inside of the headboard posts like shown making sure the holes lined up with the holes drilled on the headboard panel.

Drill dowel holes into modern bed posts

Then, I drilled corresponding holes in the edges of the top post to match the ones I drilled in the corner post.  Lots of hole drilling if you haven’t figured it out. 

.

You don’t HAVE to use dowels…you could use pocket holes or just glue.  But dowels help to hold it and line it up better without having to see the pocket holes.

.

Anyway, once all the dowel holes were drilled, I glued in the dowels on the top of one side of the headboard post and assembled the top post to it.

Dowels glued into bed frame posts

Then, I glued in the dowels on one side of the headboard panel and glued it onto the headboard post.

.

Finally, glue in the dowels, and assemble the other side post and clamp everything in place.

Glue and clamp head board assembly

Just a warning—it will be messy with all the glue.  You may want to pull your hair out.  But DON’T!  It’s not a good idea to touch your hair with wood glue covered hands.  Trust me. 

.

But, I PROMISE this is worth it.  Just take a deep breath, laugh it off, and keep building 🙂 Everything will be okay.  The hardest part is done.  I know this from experience.

Step 4: Assemble the Foot Board of DIY Bed Frame

After the fiasco with the headboard and the dowels, I decided to use pocket holes for the foot board.  This will all be under the mattress anyway, so I really didn’t care if the holes were there.

.

I assembled the posts with dowels just like the headboard—four dowels per joint.

Foot board of DIY modern bed glued up

But, I cut a 1×10 poplar board for the footboard “panel” and drilled ¾” pocket holes along the short ends.

RELATED: How to use a pocket hole jig

drill pocket holes in footboard panel

Then, I attached using 2 ½” pocket hole screws so that this board was 4” under the top post (just like on the headboard).

Install foot board panel into foot board frame

Step 5: Assemble the Bed Frame Rails

The bed rails are also easy.  I just cut two 1×10 poplar boards for the sides.

.

Then, I ripped a full sheet of ¾” plywood to two 6″ pieces and ten 3 ½” wide strips using a Kreg Rip Cut (check out this post for how to use it). 

.

If you would rather, 1x4s would be fine for this as well.  But a sheet of plywood is cheaper than a bunch of 1x4s.

Rip plywood strips for bed rails

I just applied glue to one side of these 6″ pieces and then glued and screwed (using 1 ¼” screws) onto the INSIDE of each 1×10 bed rail 3 ½” from the top.

screw bed slats supports into bed rail
modern bed slats assembled

Step 6:  Add Bed Rail Hardware

To attach the headboard, footboard and bed rails so that you can later disassemble easily for moving or whatever, this hardware is GREAT.  I’ve used it on another bed I built earlier and it worked great for quick and easy assembly and disassembly.

.

First, attach the (I don’t even know what to call the different parts) part with the holes to the foot board and headboard like shown using 1 ¼” wood screws.

.

Make note of how far off the ground you attached them and be consistent on each corner.

Install slotted bracket into head and foot board

Then screw in the bracket piece with the teeth on the bed rails like shown.  Make sure that you attach these so that when it’s installed, it’s the correct height off the floor that you want. 

.

Your preference may be different than mine.  I just tried to line up my bed rail sides with the foot board so they were all on the same visual level.  Attach these bracket pieces using 1 ¼” wood screws.

Install teeth part of bracket into modern bed rails

Now the bed was ready for assembly and finish.

Step 7: Test Fit Bed Frame and Finish

I assembled the bed frame to make sure everything fit okay, then finished the bed with Danish Oil to match the nightstands I made to complete the set.

.

The last thing left to do was to add the slats.  There are a million ways to add slats or extra support for the mattress, but I just did it the easy way by adding horizontal slats and 2x2s in the middle.

Screw slat supports into bed slats

I measured from the ground to the top of the plywood piece on the bed rails and cut ten 2x2s this length.  Then, I cut my ten 3 ½″ wide plywood strips from step 5 to fit across the width of the bed. 

.

I glued and screwed the 2x2s in the center of each slat like shown above, then evenly spaced these along the rails and attached using screws (once it was in place in the bedroom obviously…not out in the driveway haha).

.

And that’s it!  That’s how I built my Modern DIY Bed Frame.  It’s a really simple design and I’m really glad I used poplar.  I like that the color variation adds a little character to the clean modern design.

DIY Modern Bed Frame with matching nightstands

You could build this same design using plenty of other methods besides dowels if you wanted, but I thought it was a fun project to try dowels with.  To each their own 🙂

.

Don’t forget you can check out the entire collection–bed, nightstands, and dressers here.

DIY Modern Bed Frame with matching nightstands poplar
Modern poplar bed with matching nightstand

Now, it’s time to get building your own Modern DIY Bed Frame 🙂  Be sure to save this for later and share it with your friends (I always appreciate a share!!). 

.

And don’t forget to check out the video and subscribe to my YouTube channel for plenty more where that came from 😉

Until next time, happy building 🙂

New Home, Smart Home–The Smart Products We Used in our New Home Build

December 22, 2018 by Shara, Woodshop Diaries

*This post was sponsored by The Home Depot.  See disclosure policy for details.

When we decided to build our little garage apartment, we started making lists of things we knew we wanted in a new home.

.

On the top of Danny’s list was a keypad entry front door handle.  Of all the things…  But, he’s been wanting one for years.

.

On the top of MY list was a smart garage door opener–One I could open from my phone.  Every single one of the garage door openers that you slide on your sun visor in your car that I’ve had in the past only worked about half the time.  Could have been operator error, but let’s assume that’s not the case for sake of my dignity 😉

.

So as I started shopping the smart home products on HomeDepot.com for a keypad handleset and garage door opener, I ran across a bunch of cool stuff I didn’t even know existed.  I mean, I don’t get out much, so maybe that’s not saying anything.

.

But who even knew they had smoke alarms to send you alerts if they go off when you aren’t home?  And who even knew they made light bulbs that you can change colors from your phone?  You want a white light?  Swipe your finger.  Yellow light? Swipe again.  It’s like….MAGIC!!

.

Maybe you already knew that.  But I was in awe.  I needed all these things for the new house!  BUT, the budget was kind of tight and I couldn’t justify ALL the things.  So, we narrowed it down to the few that we thought would be the most useful for our garage apartment.

.

Want to see what we picked and how we like them so far?

.

Okay, so first things first, Danny’s keypad handleset.  Can we all take a minute to appreciate the matte black finish here??

.

As popular as black hardware is right now, it’s still slim pickings when it comes to a true black finish.  Usually, you just get oil rubbed bronze.  Which is fine, but with this black door, I needed a black handle because the bronze would clash.  Thankfully Schlage made this GORGEOUS modern (a modern style handle was another must have for me) handleset with a matte black finish.

.

And my review of it?  I admitted to Danny that he was right….we should have gotten one of these years ago.  It’s 100% worth it not to have to carry a thousand grocery bags to the porch, drop them, dig my keys out of my purse, unlock the door, then pick all the bags back up off the ground.  Keypads are life changing.  I had no idea.

.

It’s even got a programmable alarm, and if you use a Z-Wave network, it can be included in your home automation as well.

.

Next up, let’s talk about these Nest smoke alarms.  They’re also Danny’s new favorite thing.  It’s a two-in-one where it’s a smoke detector AND a carbon monoxide detector.

.

What we love about them is that you connect them to your WiFi, download the app, and you can test it, check it, look at its alarm history, and get alerts all from your phone.  It’s a little extra peace of mind to know that if something is going on while you are away, you will stay informed so that you can take action.

.

Something else that I love about them is that they come with a built in night light.  Danny has it set up so that between the hours of 9 PM and 5 AM, if it detects movement (it’s motion activated), the night light will come on for a few seconds.  We placed ours in our new home right between the bed and the bathroom so that if we need to go in the middle of the night, we have a little light leading the way haha.  It’s not super bright, so it won’t wake everyone in the house up or anything.  But it’s just enough to be able to see where you are going.

.

Next up, we have a few of MY favorite things.  One of those is these Phillips Hue Light bulbs.  These are the coolest!  Have you seen them before?

.

I knew there were “smart lights” on the market already, but I didn’t know they made them so that you could totally change the light color.  For bloggers and people trying to take a lot of photos indoors, this is SO COOL.

.

I always like a warm light in my house day to day, but a lot of times, if I don’t have good daylight for my indoor blog pictures, warm lights just make everything look yellow and dim.   So, really, I need a bright white light for my “blogger life” and a warmer, more yellow light for my “normal life.”

So we installed these throughout the house and I love that I can turn them off and on from my phone.  I can set them to dim, or several other filter options.  Or, if I just want to manually control their color completely, I can set them to bright cool white light for my photos, then back to a warmer, more yellow light for my “normal life.” How cool!

.

Plus, when I get in bed and realize I forgot to turn off the light, I can just press a button and don’t have to get back out of bed…because I’m lazy.  #bloggerconfessions

.

And up next is just another enabler to my laziness–the robot vacuum.  Who’s going to complain about someone else vacuuming their house for them?  CERTAINLY NOT ME.

.

With the new house build, we still have a TON of mud around the house because our grass hasn’t filled out yet after all the dirt work.  So between the two of us, visitors, and our sweet dog, Lou, we track in a lot of dirt particles–and dog hair.

.

So I love that I can set this iRobot to vacuum the house at a certain time everyday.  I can set up the schedule in an app on my phone, OR I can manually go in and press it whenever I want it to run…whether I’m home or not.

It works pretty good on our rough concrete floors (although I think it would probably work better if we had smooth floors like tile or finished wood), but I’ve been really impressed with how it easily transitions from bare floor to on top of my rugs, then back to bare floor again.

And finally, let’s talk about that garage door opener 🙂

It was one of the last things we got installed on the house because we wanted to get the garage ceiling up before installing it and we needed to get the garage drywall done before the ceiling and we needed to get other more important things finished in the house before moving to the garage…so all that to say, it’s been a long time coming but I LOVE this opener.

.

It’s literally the quietest garage door opener EVER.  We were a little afraid that the 1 ¼ horsepower opener wouldn’t be able to handle our double garage door, but it’s a beast!

.

Danny and I both love the features on the app.  You can open and close anytime, anywhere, right from your phone.  So, like, the lumber yard guys bring a load of lumber and I’m at work?  No prob.  I’ll open the door, they can put it inside and I’ll close it when they’re done.  Or I’m sitting in my truck right in front of it? Yeah, I can open it there, too haha.  It’ll also alert you if the door is opened when you aren’t home.  I love having that extra security and peace of mind.

And, if I’m in the garage and just simply want to open the door, there’s always that option, too with the manual button.  And it tells me the time and the temp and there’s even a light on it so that’s handy, as well 😉  Oh and I almost forgot to mention that it’s battery backed up so if the power goes out and I’m late for work?  I can still open the garage door with the opener.

So there you have it…all the deets on our favorite smart home products in our new house.  If you’re in the market for some smart home upgrades, I definitely recommend all of these products personally.  But, if you want to take it even further, Home Depot has TONS more smart home products on their website, too.

.

Now, I’ve got a few more house projects to finish before I can give you all the grand tour 😉  So I’m going to get back to it.  But stay tuned for plenty more projects, and house updates coming your way soon!

.

Be sure and pin this for later and until next time, happy DIYing 🙂

Smart Home Products from The Home Depot that will change the way you use your home.

DIY Faux Slat Toy Box

December 17, 2018 by Shara, Woodshop Diaries

*This DIY Toy Box post was sponsored by Build Something.  This post also contains affiliate links.  See disclosure policy for details.

How to Build a Simple DIY Toy Box with Faux Slats--Great Storage Trunk or Blanket Chest

For some reason, I’ve become really infatuated with faux things in my builds lately.  I mean, we’ve been over the fact I don’t have a very big appreciation for fake things. 

.

BUT, I’ve discovered that “faking it” in woodworking has some pretty cool advantages sometimes.

.

Like with this faux slat DIY toy box.

.

I mean, you could totally build this with ACTUAL slats.  BUT, that would be a ton of screws and joinery and then you have to make sure your boards are perfectly straight or your slats may have gaps.  It’s just a WHOLE lot easier to fake it in this case.

.

And if anyone judges you for faking it, you just smile and wave and show them your gorgeous new toy box.  You don’t have time for that kind of negativity 😉  You have pretty things to build.

.

I’m sharing the tutorial below, the printable plans over on Build Something and the YouTube tutorial video here:

https://youtu.be/QV41KP9Acgc

For This Slatted Toy Box Build, You Will Need:

  • Kreg Pocket Hole Jig
  • Kreg Rip Cut
  • Kreg AccuCut
  • Drill
  • Miter Saw
  • Circular Saw
  • Piano Hinge
  • 1 ¼″ pocket hole screws

Step 1: Cut Faux Slats in Toy Box Side Panels

First, I cut two small side panels and two larger front and back panels of ¾″ plywood.

RELATED: Check out this post for how to Easily Break Down Plywood Sheets.

.

Then, I cut ¼″ deep and ⅛″ wide dados in the panels like shown.

Diagram of dado locations to make fake slats

You can do this several ways. One way is to set up the table saw rip fence 3 ½″ from the blade and set the blade depth to ¼″ deep. Run the panels through once, then do the same on the opposite side.

.

Then, repeat the process setting the rip fence 7″ from the blade.

Shara woodshop Diaries cutting faux slats into box side panels

But, if you don’t have a table saw, you can do this with a circular saw and a straight edge OR using the Kreg AccuCut track.

RELATED: Check out how to cut dadoes with a circular saw on this post.

.

Simply set the circular saw up to cut ¼″ deep and clamp a straight edge on the piece (or use an AccuCut Track) so that the blade will cut 3 ½″ from the edge. Then repeat for 7″ from the edge.

.

Then, repeat until you’ve made all four cuts on all four panels.

Step 2: Assemble Toy Box Side Panels

Once the panels were “slatted,” I cut 20″ long 2×2 legs and assembled two side panels like shown using ¾″ pocket holes and 1 ¼″ pocket hole screws.

Side panel diagram of toy box

Keep the plywood panels flush to the INSIDE of the legs.

Step 3: Assemble Rest of Toy Box Sides

Attach front and back panels the same way using ¾″ pocket holes and 1 ¼″ pocket hole screws like shown.

Attaching front and back panels onto toy box carcass

If desired, before attaching front panel, use a jig saw to cut out a slot to help prevent fingers from getting smashed when the lid shuts.

Step 4: Install Bottom Panel

Install ¾″ plywood bottom panel into toy box using ¾″ pocket holes and 1 ¼″ pocket hole screws so that it’s flush with the bottom of all side panels.

Bottom panel diagram for installation into toy box

Step 5: Install Lid

All that’s left is to add the top!

.

Now, because these panels are inset to the inside of the legs, in order to use a piano hinge, I needed to add a scrap block to the top of the back panel like shown.

Adding scrap block diagram to back side of toy box

This doesn’t have to be a specific size, it just needs to be long enough to mount the piano hinge to. Attach using wood glue and brad nails OR 1 ¼″ wood screws.

.

Then, attach a ¾″ plywood lid like shown using a 30″ piano hinge.

Attaching lid to top of storage chest

I also added in soft close hinges since this was for my 1 year old nephew and I didn’t want him to smash his fingers on a heavy lid.  These are actually not really “hinges”, but more like gas filled springs. 

.

I used a 30″ piano hinge for the actual hinge, but added these to each side for the soft close feature.  I used them once before on another toy box and they worked great!

Soft close hinges mounted onto DIY toy box lid

At this point, it’s ready for edge banding (to cover the plywood edges, if desired) and finish. I painted this white, but it would look nice stained, too.

.

Just a note: you need a tiny brush to brush paint or stain into the little slats–or a sprayer. The only downside to faux slats is that they’re a little difficult to get paint into. There are always pros and cons haha.

DIY Faux slat toy box painted white used as an entryway bench

This simple slatted toy box makes an excellent Christmas or birthday gift, or keep it for yourself for an entryway bench or extra storage at the end of the bed.

Simple DIY Toy Box made from one board and a little plywood--free plans and video tutorial

Check out these other “faux” projects:

Faux Drawer Dresser

DIY Fake Drawer Dresser Cabinet--Faux DIY apothecary cabinet

Faux Drawer Vanity

Faux Brick Fireplace

How to DIY a Faux Brick Fireplace and you'll never believe how easy it is!!

And Here’s a Few More DIY Toy Box Ideas:

Simple Toy Chest

Free building plans to make your own DIY Storage chest

DIY Storage Chest

DIY Hope Chest

So if you’re ready to get building, head over to Build Something for the printable plans for this toy box and for hundreds of other free plans and designs to build for every room in the house.

Pinterest collage of faux slatted toy box--finished at top and 3d sketch on bottom

Until next time, happy building!! 🙂

How to Choose the Right Appliances for Your Kitchen

November 15, 2018 by Shara, Woodshop Diaries

Modern Kitchen with Jeffrey Court Tile

*This post is sponsored by The Home Depot.  See disclosure policy for details.

When is the last time you spent a romantic date night wandering the endless aisles of your local Home Depot?  Or is it just us that does that?

.

When we started planning our new garage apartment build, we would walk around every department of our nearest Home Depot and look at prices and get ideas for what we wanted and what we needed.  Toilets, showers, faucets, lighting, lumber.

.

Oh and obviously, appliances were one of those things we needed, too.  That was my favorite thing to walk around and look at haha…well, besides the lumber 😉

.

In our last kitchen in our old house, we installed stainless steel appliances.  And while I loved them, this time I wanted something different.  I wanted to modern, bold, yet simple feel in the kitchen and I knew there would be lots of grey.  So I needed something with some contrast.

.

The dark look of the slate appliances immediately caught my eye, BUT I love Whirlpool and they didn’t have slate.  Whomp whomp…

.

Luckily, though, what they did have was even better–black stainless.  All the heart eyes, you guys…if I had sound effects on here, I would play the sound of angels singing…or what I imagine is like a heavenly “ahhhhhh” or something.  You get the idea.

I mean, have you seen black stainless in person?  I’d invite you over to look, but, that’s kind of weird.  You’ll just have to take my word for it and check out these pictures.

Modern Kitchen with Jeffrey Court Tile

FABULOUS amiright?  Also, I never say “fabulous,” so if I do, you know I mean it.  Anyway, I had my appliances picked out before I even had my kitchen cabinet design picked out.  It was love at first sight.

.

But the challenge was designing my kitchen around my new appliances.  There were lots of things to consider like color, style, size, and layout.  It can be a little overwhelming.  So if you are designing, remodeling, rebuilding a kitchen and feeling overwhelmed with choices and possibilities, I’m going to help you out 🙂

I’m so excited to be partnering with The Home Depot to share with you how to choose the right appliances and design your kitchen space with your appliances in mind.  You can find all my advice and tips over on The Home Depot Blog as well as detailed pictures of each appliance and how to chose the right ones for your space whether you are building a brand new kitchen or remodeling an existing one.  (I’ve got experience with both, so hopefully I can share some good advice 😉 ).

.

But just in case you just want to know what appliances I used, I’ve got you covered:

.

The most gorgeous fridge you’ve ever seen is this Whirlpool 27 cu. ft. French Door Refrigerator. It’s finger print resistant, and has TONS of space inside for me to store my million half empty water bottles (am I the only one who does that?) and weeks worth of milk cartons (what?  I eat a LOT of cereal…don’t judge me).  Seriously, though, this fridge is my favorite.

And for the quietest dishwasher you’ve ever…not heard, we got this Whirlpool Top Control Built In Dishwasher with Stainless Steel Tub. I have never been so fascinated by a dishwasher in my life.  It’s SO QUIET.  Again, I’d invite you over to listen, but that’s weird, so just take my word for it 😉

.

We got this Whirlpool 5.3 cu. ft. Electric Range as well and it’s all we will ever need for cooking.  It’s big enough for a turkey and a casserole both for Thanksgiving dinners, it boils Danny’s tea quick, and the glass top cleans up super easy.

.

Last, but not least, is the Whirlpool 1.9 cu. ft. Over the Range Microwave.  It was the first appliance we installed (because I needed it installed before I could do the backsplash haha), and it was where we stored our stress relieving Oreos while we were still working on getting the kitchen finished for the Jeffrey Court Renovation Challenge.  We used it to warm up our random food items to eat for supper while we added finishing touches to the house in the late evening hours.  Somehow I feel am emotional and sentimental attachment to it.  Is that weird?

Ultimately, these appliances were the foundation for my kitchen design and I’m excited to be sharing all the details and tips for choosing the right ones and using them in your own space over on The Home Depot Blog.  I’d love for you to hop over and check it all out.

.

In the mean time, check out the whole kitchen renovation story here and see the tutorial for building your own kitchen cabinets here.

.

And be sure to pin this for later 🙂

.How to Design Your Own Kitchen and Choose the Right Appliances for it

Until next time, happy kitchen designing!

.

*I acknowledge that The Home Depot is partnering with me to participate in the 2018 Appliances Campaign.  As part of the program, I am receiving compensation in the form of products and services, for the purpose of promoting The Home Depot.  All expressed opinions and experiences are my own words.  My post complies with the Word of Mouth Marketing Association (WOMMA) Ethics Code and applicable Federal Trade Commission guidelines.

DIY Kitchen Cabinets–From Only Plywood

November 13, 2018 by Shara, Woodshop Diaries

This post about building your own DIY kitchen cabinets is sponsored by PureBond Plywood.  All opinions are my own.  This post also contains affiliate links.  See disclosure policy for details.

Beautiful kitchen with handmade DIY kitchen cabinets with hickory doors on bottom and gray cabinets on top--Modern Kitchen Design

Building your own DIY kitchen cabinets seems like a pretty intimidating project…or is it just me?  When we started planning out our garage apartment house, I was like, “building my own kitchen cabinets?? HA! No big deal!” 

Then the closer we got to time to actually start DOING the work, my tune changed a little to something more like this, “BUILDING KITCHEN CABINETS?!  AM I INSANE??”

But when you’re in the middle of a high stakes six week renovation challenge and living with your mother in law until you can get your new house livable, you just grit your teeth and get to work.  Do your best and caulk the rest, right?? HA.

But, you know what I found out??  Building your own DIY cabinets is really an easy project to take on and it’s totally doable with just a few basic tools and some good quality plywood.

Shara Woodshop Diaries  cutting down plywood using Kreg AccuCut on saw horses
[feast_advanced_jump_to]

Prefer to print? Grab the PRINTABLE BASE CABINET building plans here!

And grab the PRINTABLE WALL CABINET building plans here!

Why I Built My DIY Cabinets Using Only Plywood

I built ALL my DIY kitchen cabinets from plywood.  PURE PLYWOOD.  I didn’t plane, join, or mill a single piece of hardwood (except for the countertop). 

And since plywood is much easier on the wallet than solid hardwood, that saved a ton of money…and we all know how cheap I am 😉 But without having to mill all the lumber, it saved, most of all, TIME. Plus I didn’t need a ton of fancy tools!

I built my cabinet carcasses using full sheets of ¾” Birch PureBond Plywood because they are more cost efficient and the carcasses wouldn’t really be showing.

Plywood stacked to use for DIY Kitchen Cabinet build

But I wanted a really nice, natural color for the bottom doors, so I used the ¾” Hickory 2’x4’ PureBond Plywood panels for the doors on the base cabinets and pantry. 

Purebond hickory plywood panel out of the box

So even if you don’t want to build all new cabinets, but just want to replace your cabinet doors, all you need is a little plywood and some edge banding and everyone will be complimenting you on your cabinets 😉

PS If you’re looking for a more traditional style door, check out this tutorial to make Shaker style doors.

So, let’s get to building these cabinets.  I’ve got a video for you here, but there’s a lot of info to cover, so you’ll find some extra helpful tips I didn’t have time to mention in the video below in this post.

What you will need to build your own DIY Kitchen Cabinets:

Materials:

  • ¾” Birch PureBond Plywood (full sheets are best, but 2×8 sheets would work as well)
  • ¾” Hickory 2×4 PureBond Plywood Panels
  • ¼” Birch PureBond Plywood (full sheets are best, but 2×8, 2×4, or 4×4 sheets would work as well)
  • 1 ¼” pocket hole screws
  • Birch Edge Banding
  • Hickory Edge Banding

Tools:

  • Circular saw
  • Kreg Rip Cut
  • Kreg AccuCut
  • Kreg Track Horses (optional)
  • Drill
  • Miter Saw
  • Jig Saw
  • Kreg Pocket Hole Jig
  • Tape Measure
  • Square
  • Pencil
  • Iron

RELATED: Check out the Top Ten Tools I Recommend for Cabinet and Furniture Building in this post.

Step 1:  Determine and Cut Cabinet Depth

A Note About Cabinet Depth: I built these DIY cabinets frameless, with full overlay doors to avoid having to use anything except plywood to build them. 

That said, the total depth of my base cabinets including the door was about 24” deep and upper cabinets was about 13 ¾”.  If you want to change the depth of your own cabinets, rip your plywood narrower or wider as needed.

So for my base cabinets, I ripped my full plywood sheets down to 22 ¾” strips.  I saved the thin strip leftover to use later as the top supports.

Plywood cut diagram for DIY base cabinets

For a detailed guide on how to cut down a plywood sheet, check out this post.

Shara Woodshop Diaries using Kreg Rip Cut to trim down plywood sheets

For my upper cabinets, I ripped my plywood to 12 ½” wide.  Once you rip 3 strips at 12 ½” wide, you have a strip about 10 ½” or so leftover.  Save this for your shelves later.

Plywood cut diagram for DIY upper kitchen cabinets

Step 2: Cut Base Kitchen Cabinet Carcass Pieces

Typical base cabinet height is about 34 ½” tall then you have a 1 ½” countertop to make it 36” total.

I recommend sticking to that standard and cutting your base side panels 34 ½” long.  I cut two side panels from each 22 ¾” strip from step 1.

Shara Woodshop Diaries cutting down plywood sheet

For this, I used my Kreg AccuCut and circular saw for quick, clean cuts. See more on how to cut down plywood here.

From the remaining plywood, I cut the bottom panel. Here’s a helpful diagram:

Plywood cut diagram for base cabinets

A Note About Cabinet Width: I made my kitchen cabinets overall size 24 ¼” wide.  This was so that I didn’t have to trim the width of the 24″ wide Hickory Plywood Panels for my doors.  (Check out this post for door sizing guidance.) So that’s what my measurements will be based off of. 

Full overlay door sizing diagram

However, if you want different cabinet sizes, it’s easy to modify. Simply take the overall width you want your cabinet box to be and subtract 1 ½″. That is the length you need to trim your bottom panel and top support pieces.

In my case, 24 ¼″ – 1 ½″ = 22 ¾″.

Diagram to help determine cabinet carcass sizing to cut plywood

I cut 3 top supports to the same length as my bottom panel (in my case, 22 ¾″ long) for each base cabinet. Remember that thin strip leftover from step 1 ripping the plywood for base cabinets?  That’s what I used for this.

Shara Woodshop Diaries trimming cabinet support pieces on miter saw

Step 3: Cut Out Toe Kicks on Base Cabinets

Now before assembling, I needed to add two more details.

Most kitchen cabinets have toe kicks on the base cabinets.  You can go without toe kicks, but I am pretty careless and rough on things, so I would be accidentally kicking the bottom of the cabinets constantly and scuffing them up.  So I added toe kicks.

DIY Kitchen cabinet toe kick diagram

To do this, I drew a line 3 ½” from the BOTTOM of EACH base cabinet (only the base, not the uppers) side panel and another line 4 ½” in from the front bottom side of the side panel.  The corner where these lines meet needs to be cut out with a jig saw.

Shara Drawing out toe kick cuts
Shara cutting out cabinet toe kicks with jig saw

Step 4: Apply Edge Banding

The last detail before assembling the carcasses, is adding edge banding.  Since these are frameless DIY kitchen cabinets, there won’t be a frame on front to cover the plywood edges. 

So, I applied iron on edge banding on the FRONT edges of my cabinet pieces in order to hide them.  This goes on the FRONT sides of everything that will be exposed.

RELATED: How to apply iron on edge banding

Using an iron to apply glue on edge banding

I sanded everything well before moving on.

Step 5: Assemble the Base Kitchen Cabinet Boxes

I used ¾” pocket holes and 1 ¼″ pocket hole screws to assemble these cabinet boxes. I drilled pocket holes along the side edges of the bottom panel and the ends of the support pieces.

Drilling pocket holes in Kreg pocket hole jig

I attached the bottom panel between the side panels 3 ½” from the bottom of the sides–just above the toe kick. Then, I attached the three support strips so that one runs along the back, and two along the top-one in the front and one in the back. 

Assembling DIY base cabinet carcass plywood box

Make sure the one in the front is the one with the edge banding applied.  That gives you your cabinet box.

Assembling top supports into Plywood cabinet box
DIY kitchen cabinet base carcass diagram

PREFER TO PRINT? Grab printable base cabinet building plans here!

Step 6: Add Backs to DIY Cabinets

Adding the backs sounds pretty simple…and it is.  But it’s also a critical part of the process.  Make sure when cutting your back panels, that they are square and make sure when you attach them, that your cabinet is also square to this back piece.

I cut ¼” PureBond plywood panels to fit over the back side of my cabinet boxes.  Simply nail or staple in place.

Nailing back panel onto DIY cabinet carcass

Step 7: Add Doors, Drawers, Shelves to Cabinets

Cabinet Doors:

Now, I made full overlay doors for most of my cabinets.  I wanted the entire cabinet carcass to be hidden and basically let the doors steal the show. 

So to cut the doors, I measured my cabinet box and cut the hickory panels ¼” smaller on in both directions than the front of the box. 

So my boxes were 24 ¼” x  32 ½” and I cut my doors 24” x 32 ¼”.  Make sense?

Base cabinet measuring for door size

I’ve got a full explanation for how to size your cabinet doors in this post if you want more details.

Once they were cut to size, I applied hickory edge banding to all sides of the doors and sanded well.

I’ve also got a whole post over here showing how to install these doors using soft close concealed hinges.  Check that out for all the details.

Shara Woodshop Diaries installing kitchen cabinet doors onto pantry

Cabinet Drawers:

Also, if you choose to install drawers instead of doors, I’ve got a drawer building series to walk you through each step:

  • How to size drawer boxes
  • How to build a drawer box
  • How to install drawers and drawer slides
  • How to install drawer fronts
DIY kitchen cabinet with drawers open

Cabinet Shelves:

Lastly, I added some shelves using shelf pins so they are adjustable.  My Kreg Shelf Pin Jig came in handy for this and I cut ¾″ plywood to use as shelves for my cabinets. 

Learn how to add adjustable shelves to any project here.

Kreg Shelf pin jig and pins on workbench

Step 8: Install DIY Base Cabinets

Now, to install these cabinets, I used shims to level them up where they go, screwed them TOGETHER through the side panels, then attached them to the studs in the wall through the top back support.

Base cabinet diagram showing back supports for installation
DIY kitchen case cabinets installed

Once all the base cabinets were in place, I glued up a solid hickory wood countertop (like in this post) and attached through the top supports of the cabinet boxes. You can install whatever type of countertop you prefer.

countertop installed on top of DIY kitchen cabinets

And the final piece, was adding the toe kicks at the bottom. For the toe kicks, I ripped ¾″ plywood pieces 3 ¼″ wide and nailed into place like shown. 

Shara Woodshop Diaries nailing toe kicks onto base cabinets

You’ll have to trim down the size you need to cover each section of cabinets you have put together.  Then just nail into the carcass side panels using finish nails.

Step 9: Assemble Upper Kitchen Cabinet Boxes

Now, the plywood strips have been cut for the upper cabinets in step 1. But they need to be cut to length and assembled.

Upper cabinets are a little trickier as your side panels will vary depending on if you want them to go to the ceiling, how high your ceilings are and how far off your countertop you want them to be. 

They’re SUPPOSED to be AT LEAST 18 inches from the countertop to the bottom of the upper cabinet. 

upper and base cabinets should be 18 inches apart diagram

You will have to determine what height your uppers need to be (I used 40″), but the top and bottom panel pieces should be figured and cut just like the base cabinets in step 2 based on how wide you want your cabinet box to be.

Diagram of upper kitchen cabinet assembly

Now…I bet you’re wondering why there’s a space at the top in my diagram above. I wanted my cabinets to go all the way to the ceiling, BUT I was adding a piece of trim between the cabinet and the ceiling and needed something to nail that trim to. 

So I attached my top panel 3 ½” from the top of the side panel.  That way, when I hang my cabinets, I can attach the trim along the top of the cabinets and have something to nail to.

cabinets installing in kitchen without trim yet

If you aren’t going to the ceiling or aren’t doing the trim, then attach your top panel flush with the top of the sides and same with the bottom. 

I assembled these using ¾” pocket holes and 1 ¼” pocket hole screws like the bases. 

Shara Woodshop Diaries assembling kitchen cabinets

This time, I attached thin plywood strips between the side panels—one at the top and one at the bottom—like shown below.  This is so how you will hang them on the wall.

Shara Woodshop Diaries installing back supports onto upper kitchen cabinets

At this point, repeat steps 6 & 7 for these cabinets as well (adding a back, doors, and shelves).

Then install them by leveling, shimming, and attaching them together and into the wall studs through the support pieces on the back.

All kitchen cabinets installed ready for finish

As a side note: you can easily modify the dimensions and use these instructions to build a pantry and a refrigerator box cabinet as well. It’s the same concept, just slightly different dimensions.

PREFER TO PRINT? Grab printable wall cabinet building plans here!

Step 10: Install Ceiling Trim (Optional)

Depending on your own preferences and how you built your cabinets, adding this trim is optional.

But, I just glued and nailed a 1×3 onto a 1×4 board and nailed this along the top as the trim. You could do crown molding or some other type of trim, but I just kept it simple and modern.

Modern upper cabinet trim diagram

Step 11: Finish DIY Kitchen Cabinets

You can finish the cabinets before or after installation…I painted the uppers before installing and polyed the base cabinets after. So that’s totally up to you.

I simply applied a few coats of Minwax Helmsman Water Based Poly on the bottom cabinets and the countertop.

Modern Kitchen with Jeffrey Court Tile

And for the top cabinets I applied one coat of Kilz primer (water based), and two coats of Sherwin Williams Dorian Grey on top after it dried.

Once the finish is dry, you can add your door and drawer hardware.  I LOVE these Liberty Artesia pulls for a clean, modern look.  I also used these same pulls on my DIY modern nightstands recently.

Modern kitchen cabinets installed into gray and wood kitchen

See, now? Building cabinets isn’t difficult. Cut, assemble, install, finish 🙂 You got this, my friend!

Modern wood and grey kitchen with backsplash tile and black stainless refrigetator

And if you want more details on the backsplash tile, check out this tutorial.

Modern kitchen cabinets installed with black stainless appliances

This post was LONG, but there is so much to say about building your own DIY cabinets.  But…I have no doubt that if I can do it, you can, too.

When you think of kitchen cabinets as simple boxes, its really a simple build you can do yourself if you give it a little thought and double check your measurements 🙂

Now get out there and get building your new kitchen…Right after you pin this for later 🙂

How to build kitchen cabinets pinterest collage with diagram and unfinished cabinet

Until next time, happy building 🙂

Fall Renovation Challenge 2018 with Jeffrey Court–Final Kitchen Reveal

November 7, 2018 by Shara, Woodshop Diaries

IT’S REVEAL DAY!!!  For six long, sweaty, physically exhausting, expensive, and stressful weeks we have been building our new garage apartment house and focusing mainly on getting our kitchen finished for the Fall Renovation Challenge with Jeffrey Court.

.

Around week 3, I’ll be honest, I wasn’t sure we would make it to today with anything to show that looked remotely like a finished kitchen.  We didn’t have power, water, or cabinets at that point and things were a little overwhelming.

.

But, you guys, today we made it.  And I’ve got a finished and functional kitchen and I couldn’t be more excited to be about to move into our new home!!

But first, before I spill all the beans, let’s look back over the last six weeks to appreciate a little bit better where we are.  I’ve partnered up with Jeffrey Court to bring you weekly updates of our kitchen along with 11 other bloggers who are all participating in the Fall Renovation Challenge.  To summarize the last six weeks in photos, here’s week 1:

And week 2:

Week 3:

Week 4:

Week 5:

AND, finally, here’s what it looks like at the end of the six weeks!!!

Modern Kitchen with Jeffrey Court Tile

Dream Kitchen with Hickory Cabinets and Black Stainless Appliances

While I had my head down doing all the work, I just kept putting the pieces together and hoping they looked okay.  Once I finally took a step back and took it all in, I was so excited to see that it really turned out better than I expected!

We were very lucky to not run into any major snags along the way, but with new construction, I guess you get what you see, so there were no hidden “secrets” to find in this reno like you might in an older home.  However, with new construction, you also have to start completely from scratch which means, you have to work to get power, work to get water, work to get lights, outlets, walls, etc.  Pros and cons, I guess.

.

For the first few weeks, we worked after work each day and on the weekends until it got so dark we couldn’t see since we didn’t have power for lights.  I was finishing drywall with the flashlight on my phone one night.  I don’t recommend that HAHA.

.

I’d take my tool batteries home each night to my mother in laws (where we’ve been staying while we build) to charge to get ready for the next day.  The struggle was real.

.

They dug our new well the same week we got approved for power, but it took over a week for them to get us power once we were approved, so we had water, but not power to pump it out.  That was pretty frustrating.

.

BUT, we survived, and we FINALLY got power around week three or four (I’m sleep deprived and I don’t remember), and then things really started moving.  We could stay and work after dark each day so we gained a couple hours in our work day.  We were exhausted, but productive haha.

.

During this last week of the reno, I focused on finishing touches, like adding toe kicks and drawers to the cabinet boxes I built, window trim, ceiling trim, etc.

Danny focused on getting the plumbing hooked up and getting everything finished for our final electrical inspection.  This was the week where all those little things we kept putting off doing had to be done.

.

Oh, and we also got the rest of the appliances installed.  Black stainless is the way to go, you guys.  It’s GORGEOUS in person.  Also, side note: having the fridge hooked up and not having to haul a huge cooler of water to work here each day was life changing haha.  What did we do before refrigerators?!

One of the things that goes along with the trimming is the caulking.  No good trim job is complete without caulk.  But, also, no good tile job is complete without caulk either.  I had to caulk around the edges where the tile met the countertop, trim, and cabinets.  Caulking is time consuming, but definitely makes your job look more finished.  Really, I’m just telling you all this so that I can show you this gorgeous picture of the tile.  I used Tundra Grey tile from Jeffrey Court and it looked SO GOOD!

Doesn’t it give you all the heart eyes?  Everyone we’ve had come in to do our final inspections has commented on the tile.  And the cabinets that I built myself…but I’m trying not to brag 😉

.

Our goal with this kitchen was to create a clean, modern space that wasn’t “too little” or “too much,” but juuuuuuuust right.  I had this idea in my head with warm wood cabinets on bottom and grey on top and some grey tile and black hardware.  But I really couldn’t see it all together in my head, so I wasn’t 100% sure about it until it was done…not really a good time to be sure, but this time, we got lucky HA.


Oh and remember that table I was building last week?  I got it finished and I’ve got building plans and a tutorial for you guys coming soon! 🙂

Modern Dining Table in Fall Renovation Challenge Reveal

The biggest obstacle (besides having no power, no water, and no air conditioning in 90+ degree weather building a house…) we faced during the reno was the fact that the kitchen window wasn’t where we originally planned for the garage builder to put it.  It was only 6″ off, but when you design cabinets based around the location of the window/sink, it kind of throws you off.

.

I ended up making the pantry cabinet more narrow and moving the cabinets down.  This caused me to have to move the dishwasher outlet in the back of a cabinet.  And it also left a gap on the right side of the kitchen, so I added a narrow baking sheet cabinet on the bottom and a narrow shelf for cookbooks and decor on the top to fill the spaces.  I really think it worked out nicely and doesn’t look TOO much like an afterthought haha.  You and I know the truth, but maybe guests won’t notice 😉

Narrow Cabinets to fill space in Kitchen Cabinet Design

And remember when I told you about the light above the stove a week or so ago?  Well, I decided to do the right thing (instead of being lazy like I really wanted to) and move the light centered over the stove.  I’m glad I did, but this whole window location thing really drove me nuts.  Note to self…measure the window BEFORE you lay out your outlets, lights, and cabinets.  That tip was free…it won’t cost you anything haha.

.

So, let’s go back to the beginning and check out our to do list ONE MORE TIME and see if we got everything.

.

Here’s all the to dos we started out with:

Install divider wall between kitchen and bathroom

Get electricity

Wire outlets, switches, and lights

Finish plumbing
Insulation 

Drywall

Paint

Build cabinets
Finish (paint and poly) cabinets
Install cabinets
Install appliances
Install countertops
Trim out window
Install tile backsplash
Build dining table
Move in

.

WE DID IT!!!  We marked everything off the list….EXCEPT move in.  We didn’t have time to actually move in yet, but the weekend is coming and that’s what weekends are for 🙂

.

I can’t believe we did this in six weeks.  I’m EXHAUSTED.  But I’m also SO EXCITED to use our new space, get moved into our new home, and get back to our normal life.  Which means getting back to furniture building tutorials and woodworking projects SOON.

Before and After Jeffrey Court Fall Renovation Challenge

If you’ve followed us on this journey, THANK YOU.  If you’ve cheered us on, voted for us, admired our work, THANK YOU.  And if you are looking forward to the upcoming tutorials for the table, cabinets, hardware installation, window trim, etc from this renovation, THANK YOU.  Give me just a minute to get caught up, take a nap, eat a REAL HOME COOKED MEAL (it’s been three months since I cooked my own meal on my own stove) and I’ll get those posted ASAP 🙂

.

In the mean time, let’s take a minute to look at what a difference six weeks makes.

Six Week Major Kitchen Transformation in the Jeffrey Court Fall Renovation Challenge Final Reveal

WOWZA.  That’s a lot of blood and sweat (no tears, surprisingly) crammed into one graphic haha.  I still can’t believe we pulled this off in just six weeks.

.

It’s bittersweet that this challenge is ending.  I’ve enjoyed working and updating and feel a little strange that it’s over.  But when one project ends, another begins.  Stay tuned for what’s next! 😉

Jeffrey Court Fall Renovation Challenge 2018 Final Reveal Modern Kitchen

In the mean time, I’d so appreciate it if you’d pin any of the images from this post to share about our renovation 🙂

Amazing Before and After DIY Kitchen Renovation from Studs to Fully Finished in just six weeks! Modern Kitchen Design totally DIYed!

Until next time, happy renovating! 🙂

DIY Contemporary Shelf–Christmas Stocking Shelf

November 1, 2018 by Shara, Woodshop Diaries

How to Build a Modern, Minimalist Wooden Shelf

This post is sponsored by Build Something and Kreg Tool as part of their Holiday Campaign to share holiday themed projects, and gift ideas as we start the Christmas season 🙂  This post also contains affiliate links.  See disclosure policy for details.

DIY Contemporary Shelf used as a Christmas Stocking Holder and place to display Christmas village

Can you even believe it’s November?  This year has FLOWN faster than any year I can remember.

.

Probably because we’ve been busy moving, buying land, and building a tiny garage apartment house…HA.

.

Speaking of that, our new garage apartment home is only 850 sq ft.  It’s plenty for us, but doesn’t leave a lot of room for our Christmas decor.  It also doesn’t leave a lot of room for clutter.  Or a fireplace mantle…or anywhere to put my DIY wooden Christmas village.

DIY Scandinavian Christmas Village--little wooden houses make such a cute Christmas village!

So with Christmas time getting closer, I needed somewhere to hang my stockings and display my Christmas decor without taking up a lot of space, or making it feel cluttered or “busy.”

DIY Contemporary Modern Christmas Stocking Shelf

And it also had to be something that can transition into “normal” decor because I don’t have room to store one more thing for only “special occasions” in our little space.

.

So I made a simple, DIY contemporary shelf with a minimalist style that is perfect for hanging stockings and showing off my wooden Christmas village I made last year.

How to Build a DIY Contemporary Shelf--Christmas stocking holder Shelf

I love love love how simplistic this little shelf is and how versatile it can be.  Obviously, I used it for stockings and a Christmas village here, but I also plan to use it above my desk to hold books and office decor once the holidays are over.  It would even look great with pictures, artwork, books, or whatever you’re into 🙂

.

It’s got that minimalist/modern style I’m going for in our new space too, and you can flip the edges whichever way you want to fit your needs.

How to Build a Modern, Minimalist Wooden Shelf

And all you need is a 1×8 and a 1×2 board, a Kreg pocket hole jig, Kreg screws and a drill.   WHAT?!

.

You can build a couple of these in different configurations in just an hour!  You can have your Christmas decorations up in no time 😉

.

I’m sharing the free building plans for this stocking shelf over on Build Something.  And I’ve got a great tutorial video for your here:

So head on over and check out all the projects in the Holiday Campaign and build something awesome this season 🙂  And if you do, don’t forget to post a picture and include #madewithkreg to show off your work 😉
.

And if you want some more Christmas project ideas, check out a few of my favorites:

DIY Christmas Village

How to make your own DIY wooden Christmas village perfect for Scandinavian Christmas decor. Easy and free project tutorial

DIY Grinch Pillow

Check out this awesome Grinch Pillow--a Pottery Barn Knock Off!

Scrap Wood Ornament Signs

DIY Snowflake Shelf

Snowflake Pillow

How to make a DIY Snowflake pillow for Christmas decor! Easy DIY Christmas project and great for beginners!

Christmas Lantern Post

DIY Christmas Lantern Post from Wood Scraps!

Until next time, happy building 🙂

Renovation Challenge Fall 2018 with Jeffrey Court–Week 5: Almost Doesn’t Count

October 31, 2018 by Shara, Woodshop Diaries

It’s week FIVE of the SIX week fall renovation challenge I’m participating in with Jeffrey Court.  Did you catch that?  Week five of six.  That means only ONE. WEEK. LEFT.  Don’t panic, don’t panic, don’t panic.

.

I’m panicking.

.

I would love it if you’d take a few seconds to click on this link and vote for me to win the challenge.  As much fun as it’s been participating, I’d still love to win the bragging rights 😉  So I’m shamelessly begging for your vote!

.

I think we will make it to the deadline (IT’S NEXT WEEK!), but it’s going to be close.  This week things finally started to feel like we were making progress.  But the more that got done, the more we realized there needed to be done….like trim.  TRIM EVERYTHING…doors, windows, ceilings, baseboards, cabinets.  It’s never ending!!

.

But, let’s take a second to get everyone caught up.  If you are just joining me, check back at the past weeks’ progress posts and get all the details on our kitchen renovation.  If you’ve been following along, you will remember from last week that we ended here.

We had most of the ceiling hung and few of the cabinets installed.  It felt like a productive week.  But this week, things really started to take shape!.

.

This week, I bought the wood for the countertop and dining table…can you see it in that pile? You have to look REALLY hard 😉 haha.

Then, I built the countertop, finished building and installing the cabinets, installed the countertop, sink, and….wait for it….the BACKSPLASH.  All the heart eyes.

The tile saw is my favorite part…despite what my face looks like HAHA.  I was concentrating…apparently REALLY hard.

When I painted the cabinets, I really started freaking out that the tile color and cabinet color weren’t going to look good together.  The paint color almost looked tan when the paint was wet.  But the tile was DEFINITELY GREY.  Not a good combination. (Side note…I love grey…I also HATE tan)

.

But thankfully (for mine and Danny’s sanity), once the paint dried, it looked a lot more grey.  I wasn’t about to switch tile (I loved this tile!), but I had no idea how to pick a new paint color in a split second and repaint the cabinets.  So I went with it anyway.  I was still a little hesitant, but once the tile started going on, I had no doubts.  This tile is GORGEOUS and worked perfect with the paint color.  It’s Tundra Grey by Jeffrey Court and I LOVE it with the white grout.

You’ll have to forgive the dark daylight free photos.  My apologizes, but after working all day at the day job, then working all afternoon on the space, the progress photos are always taken after the sun goes down.  And if you think it looks good in the dark, it looks even better in the daylight haha.  Promise I’ll get some better photos this last week!

.

We also got the microwave and dishwasher in place this week too as you can see.  I was so excited to see everything start coming together because I was honestly afraid that it was going to look like a train wreck and I was pleasantly surprised it didn’t HA.

Things went pretty smooth this week, although I didn’t get as far as I had hoped (of course…story of my life haha).  So I don’t have any great stories from the project to share…except to tell you about how I decided to take down the ceiling piece from last week with the stove light, move the light and cut another piece of ceiling because I just couldn’t stand that it was so far off center of the stove.  Remember that?

I am glad I did that.  It was time consuming and I wasted a sheet of plywood on the ceiling, but I think it was the right decision.  But not everything I did this week was right…I do have a few screw ups to mention.

.

Since I built the cabinets in the kitchen (which, I’m pretty proud of, not going to lie), I deviated a little from the standard dimensions.  I didn’t think this would be an issue until the dishwasher was installed and there was about a 2″ gap between it and the countertop. Whoops.

So I carefully cut a little piece of trim to glue on the top to cover the gap and now it looks like nothing ever happened 😉 but you know the truth.  My Dad always said the difference between an amateur and a pro is that a pro knows how to cover their mistakes HAHA.  I don’t consider myself a professional, but I’ve made enough mistakes to have to figure out a few ways to cover them up.

Also, let’s not talk about how long it took to get those pantry doors halfway square and lined up.  I didn’t take as much time as I should have getting my cabinet installed perfectly square…that makes a difference when it comes time to install doors.  Who knew? *face palm*

But nothing worth doing is going to be easy and that’s part of it 🙂

.

So let’s review our to do list and see what we were able to check off up until this week.

Install divider wall between kitchen and bathroom
Get electricity to the space
Wire outlets, switches and lights
Finish plumbing
Insulation
Drywall
Paint
Build cabinets
Finish (paint and poly) cabinets
Install cabinets
Install appliances
Install countertops
Trim out window
Install tile backsplash
Build dining table
Move in

.

When I look at the list, it looks a little frustrating because so many of them are halfway done, but almost doesn’t count (except in horseshoes and hand grenades), so I can’t mark them off quite yet.

.

For example, the window trim…it’s halfway done…and has been for a week haha.

Also, the appliances (we still have to install the stove and fridge…), and the dining table.

By the way, stay tuned for tutorials on the window trim, cabinets, dining table, and more details on the appliances we chose and why 🙂

.

BUT, things we can totally mark off never to remember again after this week 😉 are:

Finish plumbing (our final plumbing inspection is tomorrow!!!)

Build cabinets
Finish (paint and poly) cabinets
Install cabinets

Install countertops

Install backsplash

.

It doesn’t look like much is left, but I assure you, there is.  Take a look at the ceiling…needs trim.  And the cabinets…need toe kicks and handles.  No baseboards, window trim needs to be completed and painted.  Everything (I mean EVERYTHING) still needs caulk.  And my dining table needs to be built.  Then, I need to dig out my decor from the storage unit to stage it for final photos because…priorities haha.

.

Wish us luck as we head into our final week!!!  Here’s to knocking this thing out and meeting that six week deadline.  Think we can do it?  I think so, maybe, but only if I stop typing so much 😉  I’ll stop right here with a final image of week five.

Stay tuned for next weeks FINAL REVEAL and all the design details for the space!

.

Until next time, happy building! 🙂

Fall Renovation Challenge with Jeffrey Court–Week 4: Ceilings, Cabinets, and POWER

October 24, 2018 by Shara, Woodshop Diaries

Welcome back to week 4 of the Fall Renovation Challenge with Jeffrey Court!  This week, some real progress was made and I’m pretty pumped to show you 🙂  But first, let’s recap.

.

If you’re new and just joining in on this chaotic adventure, welcome.  I’m glad you are here!  And if you’ve been following along, bless you.  You are enduring quite the mess of a reno along side me, and for that I am grateful.

.

So, basically, we are renovating (more like building from the ground up) our kitchen in our new garage house.  The deal is that with the Fall Renovation Challenge hosted by Jeffrey Court, this must be completed in six weeks.  This ends week 4.  (Commence panic attack, then get it together because we don’t have time to panic…now get back to work!)

Quick shameless plug:  I need your help with this!  If you’ve enjoyed this challenge and are cheering me on, or are a loyal subscriber and friend, I would LOVE to ask if you’d take just a few seconds to head over to this link and vote for me!  Each week the designer with the most votes gets two bonus points towards winning the challenge and I can’t do this alone!  I need your vote!  We have worked out tails off for this challenge, so I would love the chance to win.

.

We started our day one of the six weeks here:

And our to do list was long:

Install divider wall between kitchen and bathroom

Get electricity to the space

Wire outlets, switches and lights

Finish plumbing

Insulation

Drywall

Paint

Build cabinets

Finish (paint and poly) cabinets

Install cabinets

Install appliances

Install countertops

Trim out window

Install tile backsplash

Build dining table

Move in

.

Since we are currently living with my mother in law while we build our garage apartment house, the hubs and I are both really just looking to that last item on the list, but every little thing we can check off just gets us closer 🙂

.

In week one, we got the divider wall and some wiring done.

Week two was all about finishing the wiring. 

Week three was insulation, drywall, and painting.

And now, week 4–the week of the cabinets and ceiling.  AND WE GOT POWER THIS WEEK, YOU GUYS.  We can turn on lights and plug in tools and get water out of our well and USE FANS in the heat.  It’s life changing…literally…to have power out here now.  I’m pretty impressed that we’ve gotten this far without power…but I’m not going to complain that we have it now.

.

Here’s where we ended week 4 of the challenge.  With a dark, poorly lit view of our mostly installed, freshly painted kitchen cabinets.  The cabinets I’ve been working on ALL WEEK.

Let’s break down what all happened this week one thing at a time.

.

Cabinets:

Once we had the drywall up and painted last week, I immediately started working on building cabinets.  And as a maker/woodworker, I’ve thoroughly enjoyed this part of the project.  The cutting, the dust, the building, the dust, the assembling….and the dust.  Our house is so dusty right now it’s not even funny.  It’s a mess.

But after working my tail off all week, I finally got all but one of the cabinets built and installed.   HALLELUJAH!

I’ve still got to finish installing the doors, but the paint was still wet when I took this picture and left for the night, so that’ll have to wait till another day 🙂

.

As you can see, I’m painting the top cabinets a darker grey and leaving the bottom cabinets natural hickory.  I’m REALLY hoping this turns out as pretty in real life as I see it in my head…sometimes that happens.  And sometimes it doesn’t….

.

Stay tuned to find out.  Also, I’ll be making my own hickory countertops to match the hickory cabinets next week 🙂

.

Design Solution for Window Placement:

One thing I mentioned in the last post was that I found out (a lot too late) that the kitchen window wasn’t where I had planned for it to be.  This threw off my original cabinet design about 6″.  I had to decide to center the sink on the window, or offset it, or figure out a way to cover up this extra 6″ I didn’t plan to have on the right side of the window.

.

We decided to move the appliances on the right side of the sink (dishwasher, range, and microwave) to the left about 6″ which meant that the dishwasher outlet now had to be inside a cabinet.  Not ideal, but doable.

This also meant I had a 6″ space to fill between the original cabinets I had planned for and the bathroom wall.  I came up with a simple solution that I’ll have to show you next week in better detail.  I used this space for a small open shelf on top and for a small cookie sheet holder cabinet on the bottom.  Hopefully it will look okay next to these large, wide cabinets.  Who knows haha.  You can see the skinny top cabinet in the photo below.

.

And one thing I didn’t realize until last night was that this means the light we placed above the stove is now 6″ off center of the stove.


Whoops.

.

Not a big deal, I get it.  BUT now that I see it, I know that every time I look at it, I will wish we had fixed it and it will drive me nuts.  So now we have to decide if it’s worth it to move it, or just keep moving on.  At this point, it’s a matter of time, not resources, to get this kitchen done seeing as we ONLY HAVE TWO WEEKS LEFT.  But it will be a lot easier to change now than later due to the ceiling.  Stay tuned to find out what we end up doing 😉

.

Ceiling:

Oh yeah, and one other thing that got partially accomplished this week was the ceiling in case you didn’t catch that!  We are doing something a little different in here for the ceiling, so I’m also hoping that turns out pretty (not pretty ugly), too.  We will see….  It’s plywood panels and we will trim them out later.  So when you see it, just know this isn’t the finished product.  It’s still in progress, so bear with me.

So now that we ended week 4, let’s check that to do list again.  This week we got to mark off:

Get electricity to the space (yes, they finally got us POWER this week!! Life changing…literally.  We got power on Friday and also got our well hooked up, too!  It was a big week)

Build Cabinets (all but one is finished)

Paint Cabinets

Install Cabinets (all but two are installed)

.

And something we need to add to the list is:

Poly and trim out ceiling

.

So what’s next??  Well, I’ve picked up the lumber to build the counter tops and dining table AND I’m gearing up to install our new backsplash with tile from Jeffrey Court.  Sneak peek below…isn’t is GORGEOUS??

There’s two weeks left and still so much to do.  Tune in next week to see what get’s done and see if you think we can still pull off this reno in just six short weeks.  I’m having doubts but trying to stay confident haha (nervous laughing).

.

Until next time, happy building 🙂

Renovation Challenge Fall 2018 with Jeffrey Court Week 3–Hurry Up and Wait

October 17, 2018 by Shara, Woodshop Diaries

Welcome to week three of the renovation challenge that I’m partnering with Jeffrey Court to share with you!  If you’ve been following along, you will know that we are “renovating” (more like building from the ground up) our kitchen in our new garage apartment house for this six week challenge.

.

And if you haven’t been following along…let’s get you up to speed.  We are “renovating” the kitchen in our new garage apartment house in six short weeks!  And that’s it in a nutshell 🙂

.

In my first post here, I shared the before, the future plans and the long to do list for this kitchen space.

Last week, I shared about the ups and downs of the electrical, what we have finished so far, and the things I added to the to do list just to check off to make me feel more accomplished.  Don’t act like you don’t do that, too 😉

This week, let’s talk about how it’s halfway through the renovation, and I’m already starting to freak out.  Oh, and we will also cover things like insulation and drywall and new deliveries that have arrived this week that I can’t wait to install *all the heart eyes*

.

First thing is first.  Let’s review the original to do list:

Install divider wall to separate kitchen and bathroom

Get electricity to the space

Wire light fixtures, outlets, switches

Finish plumbing

Insulation

Drywall

Paint

Build cabinets

Finish (paint and poly) cabinets

Install cabinets

Install appliances

Install countertops

Trim out window

Install tile backsplash

Build dining table

Move in ?

.

As you can see, after week one, only two tiny things had been marked off the list.  HOWEVER, cut me a little slack here because wiring the entire garage house took SEVERAL days and getting in the service panel took another couple days.  Since we are just covering the kitchen here, it seems like we are slacking, but I assure you, we aren’t.  I’ve literally ached for days from running wires.  #outofshape.

Anyway, with week one over and not a lot to show for it, it was time to get in gear and start making some major progress.  My plan for the second week was to have all the drywall hung and finished.  I’d like to tell you that’s what happened and we were super productive.  But, that’s not what happened.  Instead, we waited  several days on the electrical inspector.

.

And legit, that was basically the whole week.  Danny got the service panel installed on a Friday, but not in time for the inspector to come.  Nothing can be covered (so no insulation or drywall) until the inspection, so the weekend was useless.  To pass time, I insulated and drywalled the bathroom (since the wires could be inspected from the other side of the wall), but couldn’t do anything with the kitchen.

.

Monday, by the time Danny called, the inspector was booked for the day, so that was another wasted day.  But, finally, Tuesday, we got the inspector out and we passed our inspection.  HALLELUJAH!!  But that pretty much ended the second renovation week, soooooo there we were.  Not a lot closer to being done than after week one.

.

I was determined that week three would be a major comeback.

.

In week three, we got a new well dug (we hired that out, but it was exciting because now we can get water once we get power), still don’t have any electricity (UGH and it’s 130 degrees in here!), and got insulation, drywall, and paint finished in the kitchen.  We also got a delivery of tile that I can’t stop staring at, ordered our appliances, and started building kitchen cabinets!

.

First was the insulation.  All my clothes are in storage, so I didn’t have any long sleeves.  But, FYI, pants work as sleeves when you’re in a pinch 😉 haha.  Here’s a look at the wall with the insulation installed.

But let’s go back to the no power thing and the drywall.  I finished the entire garage drywall with only a little bit of daylight from the windows and the flashlight on my phone.  Be impressed.  Also, don’t look too close at it 🙂 Since the entire kitchen wall will be covered by a combination of appliances, cabinets, and tile, I wasn’t too concerned that it was finished PERFECT.  I just made sure it was sealed and pretty smooth and flat.

.

During the week, I also had a couple small freak out moments after realizing that we are at the half way point.  HALF WAY!  This is a 6 week (SIX WEEKS!!!) challenge.  So my kitchen has to be finished in THREE MORE WEEKS.  At the start of this, I never doubted this was doable.  Today, well, I’m really starting to think I must have been crazy when I signed up for this.  Do you see all those things on the to do list that still need….DOING??!

As many things that might seem overwhelming right now, there were some exciting things happening this week, too.  Like….we got a delivery of tile from Jeffrey Court and I CANNOT wait to get it on the wall.  It’s going to look so good with our color scheme–dark grey and natural wood.  I also ordered some black stainless appliances this week that I think are also going to look awesome in this space, too.  Stay tuned 😉.

Lastly, let’s talk cabinets.  I’m building my own kitchen cabinets.  We are doing a very modern style with no face frames and full overlay doors.  Without power still (apparently they are scheduled to get us power from the provider tomorrow…we will see how that plays out), I can’t use many of my tools to help me get the cabinets built.  BUT, I do have a few battery powered tools and I’ve been cutting down sheets of plywood into manageable sizes to work with.  I’ve made a couple “cabinet carcasses” to help me visualize and lay out the space.

But, fun fact: the garage builders got our window 6″ off what I had told them.  No big deal EXCEPT now I have to come up with a solution to still keep the appliances where we already put the outlets for them AND a way to keep the sink centered on the window at the same time.  Why am I just now measuring to figure this out??

….

Send prayers…and chocolate (for the stress relief 😉 haha).  We are full force ahead to get cabinets built as soon as we have power, finish installing all the outlets, install the ceiling, window trim, tile, countertops….basically ALL THE THINGS!  Tune in next week to see what we get done and how far behind we are when we get to the TWO WEEK LEFT MARK.  (I’m hyperventilating over here, you guys.)

.

Before I sign off, let’s see what we can check off the to do list after the half way point:

Insulation

Drywall

Paint

.

*Cue panic attack*  I gotta go…I’ve got a kitchen to finish!  Check back next week for a week 4 update!

.

Until next time, happy building 🙂

Renovation Challenge Fall 2018 with Jeffrey Court–Week 2 It’s Electric

October 10, 2018 by Shara, Woodshop Diaries

Welcome back to the chaos that is our kitchen renovation!

.

If you are returning from week 1 where I showed you the before of our space, thank you 🙂 After seeing what we started with, I wasn’t sure if anyone would venture back here for the rest of the story haha!

.

But if you’re new here and have no idea what’s going on, let me get you up to speed.

.

In this blog post, I shared how we sold our old home and decided to build a small garage apartment.  We hired someone to put up the actual building, but we are finishing everything out on the inside ourselves.  Last week, I shared the before photos and the plans for our new kitchen.

I’m so excited to be partnering with Jeffrey Court to bring you weekly updates on our kitchen renovation!  This week was the first week we actually started the work.  So let’s go over what’s been done this past week, what’s left to do, and the things we didn’t know we would be doing…like trying to find a bathroom in a field of soybeans…in the rain.

.

But, first, let’s take a look at that to do list from the before blog post:

Install divider wall to separate kitchen and bathroom

Get electricity to the space

Wire light fixtures, outlets, switches

Finish plumbing

Insulation

Drywall

Paint

Build cabinets

Finish (paint and poly) cabinets

Install cabinets

Install appliances

Install countertops

Trim out window

Install tile backsplash

Build dining table

Move in

.

The last one is the big one I’m shooting for 😉  But all the ones before it have to be done first, so we are trying to knock them out as quick as we can.

.

Let’s start with the first thing on the list–the walls.  Now, the kitchen itself is wide open to the rest of the space–remember, it’s studio style.  BUT, to save money and make things simple, we put all of our plumbing along one wall and on the back corner closest to the septic tank.  This means the kitchen is right next to the bathroom.

Obviously the bathroom isn’t going to be open to the rest of the space, so we did have to build a couple walls to block it off from the kitchen.  We also had to build a divider wall to separate the garage and the living space…but that’s another story for another day.

I used some leftover 2x4s from building the garage and framed out the bathroom walls and the bathroom door pretty quick, easy and painless.  Honestly, I was surprised nothing major went wrong since I’d never built a wall before…so that was a nice confidence builder.

.

So now that we were filled with pride and momentum and the thought that we can totally do this and it will be easy and awesome and everything else will go quick like the walls, we headed straight into the electrical part of the project.  BUT, we quickly realized that wasn’t going to be anywhere close to “easy and awesome and go quick like the walls.”  It took 12,735 trips to the hardware store, approximately $1.34 million, and well over a week to get all the wires run, and the meter and breaker boxes mounted.

Okay, so I may be exaggerating, but not by much.  Seriously…wire is CRAZY expensive (the wire for the stove alone was over $200) and basically everything in a kitchen has to be on it’s own circuit.  That means the wire has to be run from each individual outlet in the room all the way back to the breaker box on the other side of the garage…above all the trusses…in 100 degree weather…with no air flow.  HA.

.

But, you gotta do what you gotta do and we had to get the outlet boxes mounted, the can lights hung and run the wires and we had to get it all done ASAP so that we could 1. get inspected to get power to the house and 2. get inspected so we can move on to hanging the drywall.  (You can’t cover up the wiring until it’s been inspected.) We spent the rest of our week running wires and mounting our new breaker box.  Not exactly exciting work, but definitely necessary. I promise next week will get a little more exciting.  But when we are finishing our apartment out all by ourselves, sometimes it’s slow going.

While Danny mounted the outlet and light switch boxes, I hung the can lights and the dining room light boxes.  Now that I’m typing this out, it really doesn’t seem like we did much work, but I swear, we did.  While I’m only sharing about the kitchen here, do keep in mind that we are actually working on the entire house at the same time.  SOOOOO don’t think we are slacking too bad :).

So that brings us to the end of week one.  So far, our updated to do list has two things marked off:

Install divider wall to separate kitchen and bathroom

Wire light fixtures, outlets, switches

.

Because our to do list still seems long and overwhelming, and after a week we’ve only gotten two things marked off, I decided to add a few things to the list that I wasn’t expecting I would have to do just so that I could mark them off.  These things included:

Drink +25 bottles of water and Gatorade in three days (it’s HOT out there you guys)

Find a spot to use the bathroom in a soy bean field in the rain because we have no functional bathroom yet (just…don’t ask.  Also, see the previous item listed above haha)

Find (and wear continuously) a tool belt that fits my kid sized waist

Mis measure all the can lights (multiple times) then decide to just leave them in the wrong locations

Climb a ladder 26,128 times

Bust my finger with a hammer

Burn my leg with a hot concrete drill bit

Break out the emergency stress chocolate (twice)

.

It seems like a much more productive list when you look at it now 🙂

.

Next week will be more exciting and will at least look a lot different than it does now.  Next week, we will get an electrical inspection, a new well dug, insulation and drywall!  That is…if everything goes as planned 🙂

.

Stay tuned!  Until next time, happy renovating 🙂

Renovation Challenge Fall 2018 with Jeffrey Court–Week 1 The Before

October 3, 2018 by Shara, Woodshop Diaries

They say the kitchen is the heart of the home.  I say that in my case, my kitchen is like the heart…and the lungs…and all those other important organs (you know, besides like the appendix) of my home!  Why?  Because we are going to be living in a studio garage apartment and the kitchen is basically the entire space.

.

If you’ve read my blog post where I explained our plans for our new home, you’ll know we are building a garage and finishing out half to live in and half to work in (temporarily 🙂 ).  We opted for a studio style living space (where everything is open except for a bathroom–for obvious reasons) so that when we build our future house, my woodworking shop can move into this space and it’ll be open to allow room for my tools and furniture pieces.

.

Since it is all one big room, I wanted a kitchen that would serve as a nice focal point of the space, but not be so busy that it would take away from the rest of the room.  We are trying to go simple, clean, and minimal, so we don’t want too much going in in such a small space that it makes it feel stressful.  I THINK I’ve got some good ideas…but we will see haha.

.

I’m so excited to be partnering up with Jeffrey Court to bring you our kitchen renovation (more like our kitchen built from the ground up) over the next six weeks!  Each week I will update you on the progress and tell you about how it’s going–if there have been any freak out moments, funny stories, or close calls.  You can check out the other 11 bloggers I will be competing with for this reno project over at this link.

.

And at the end of the six weeks, we will see if I survived, if Danny survived, and if all my kitchen ideas were awesome…or awful HAHAHA…that’s me nervous laughing because I’m honestly not sure how this will turn out HAHA <–see? there it is again.

.

Okay, so now that you’ve got the general information, let’s look at specifics.  How about we start with some before pictures of this kitchen?

This is the living space of the garage.  Not much to see but studs and trusses.  (But, when you’ve been living with your mother-in-law and all your stuff has been in storage for 2 ½″ months, those studs and trusses sure do look good going up.)

Our kitchen space will be along this wall right here and the bathroom goes in this back corner where all the plumbing pipes are.  It’ll be about 22′ of kitchen cabinets, so it’s a good sized kitchen, but due to the space and layout constraints, we opted for a single wall kitchen instead of an L or U shaped kitchen.  And instead of an island, we will have a dining table that we can take with us when we move into our future house later and this space becomes my shop.

As far as style and color, the plan is light colored woods, greys, blacks, and whites.  I’m attempting to make this a very modern/European style space.  I’ll be building the cabinets myself (pray for me), so simple not only fits the style, but also makes it easier on me while building.  Win-Win!

.

I’m thinking medium grey upper cabinets, wood toned bottom cabinets and matching wood countertop.  I’m also thinking white walls and dark grey backsplash tile in a fun, unique design.  We’ve got black and oil rubbed bronze hardware and fixtures and black stainless appliances.  In my head it looks pretty cool.  Hoping that transfers to real life 😉

.

Right now, with just our stud walls, the to do list seems overwhelming, but we will try to take it one step at a time.

Things we need to get done:

Install divider wall to separate kitchen and bathroom

Get electricity to the space

Wire light fixtures, outlets, switches

Finish plumbing

Insulation

Drywall

Paint

Build cabinets

Finish (paint and poly) cabinets

Install cabinets

Install appliances

Install countertops

Trim out window

Install tile backsplash

Build dining table

Move in 😉

.

That last one is the main one I’m working towards haha.  We cannot wait to have our own home again!  Stay tuned for next week to see how much progress we’ve made on our kitchen…or how much setback we’ve run into HA.  Hopefully I’ll have more to show than just some stud walls 🙂

.

In just six short weeks, I’ll be showing the full reveal…can you believe it???  ME EITHER.  I gotta get to work!

.

Until next time, happy (and hopefully quick!) building 🙂

Faux Drawer DIY Double Bathroom Vanity

September 17, 2018 by Shara, Woodshop Diaries

Gorgeous faux drawer bathroom vanity with granite top

How to Build a Faux Drawer DIY Double Bathroom Vanity

How to build a faux drawer DIY bathroom vanity cabinet that will maximize your style and your storage space. With the look of drawers, but the function of doors, this easy to build vanity is perfect for a double sink in a master bathroom! Grab the free plans here.

*This post was sponsored by Build Something.  See disclosure policy for details.  This post also contains affiliate links.

I love a good drawer as much as anyone.  They’re cute, they’re practical, they’re fun to make.

.

But, despite all the pros about drawers, there are also plenty of cons.  Drawers require more hardware than doors (which can be pricey), and they also require more wood to make than doors.  But the thing that most people don’t think about with drawers vs. doors is that drawers take up A LOT more space…which leaves you with a lot less space to actually put your stuff in.

.

Sometimes, that’s okay, like with this mid-century modern dresser and this modern nightstand and this mobile miter saw stand.

.

Other times, it’s not okay…like when you really need that storage space and a place to put your sink.

How to build a DIY bathroom vanity to maximize your storage space

Think about it….you’ve seen all those people turn dressers into vanities, and I’m sure you’ve also seen plenty of vanities available to purchase that only have drawers.  They’re so trendy and so pretty.  BUT, usually the top drawer is fake…as in it doesn’t even open.  AND the second drawer usually is cut out in some weird shape to fit around the plumbing.

.

So now, basically, you just have one or maybe two bottom drawers that actually function.  That’s just not practical.  Why not make the under sink space LOOK like drawers, but actually be a cabinet where you can maximize your storage space??

DIY Faux Drawer Bathroom Vanity Cabinet Maximizes Storage Space with Full Open Cabinet Under Sink

See all that space in there???  The drawers in the middle are still handy to have as actual drawers.  But the two under sink cabinets can now store towels, toilet brushes, cleaning supplies, toiletries, etc.  And you don’t have to cut out anything weird to fit around the plumbing (note: plumbing not installed yet here).  You can stack your stuff all the way to the top of the cabinet!  Maximum storage is always a good idea 🙂

.

If you’re thinking this looks familiar, you may have seen this faux drawer dresser I built a while back using the same concept.  I give a detailed explanation of how to cut the faux drawers using a Kreg AccuCut in that post.

DIY Fake Drawer Dresser Cabinet--Faux DIY apothecary cabinet

This same idea works perfect for this project as well.  The AccuCut is a tool I highly recommend getting.  I use mine ALL THE TIME.

.

Anyway, if you’re ready to get building your own faux drawer DIY bathroom vanity, head over and grab the free plans on Build Something.  Build Something (if you didn’t already know) is Kreg Tool’s website for free building plans from small decor items to large built ins and furniture pieces.  With hundreds of creative and high quality plans, you’ll find plenty of projects you’ll want to get building 🙂

.

I’ve got a few tips and tricks below before you get building, and also check out my latest YouTube video of this build as well:

I know a few questions that will come from this project, so let me do a quick FAQ (maybe it should be more like QIAA–questions I anticipate answering HAHA) below:

.

What kind of wood did you use?

Typically, (due to price) I use standard pine wood for my builds.  In this case, this build also used a lot of plywood.  I love birch plywood.  LOVE LOVE LOVE birch plywood.  I think the grain is pretty and it stains very similar in color to the pine that I use with it.

How to Build a DIY Faux Drawer Bathroom Vanity Cabinet with PureBond Plywood and Kreg Tools

Lately, I’ve been using PureBond plywood for a few reasons.  It’s by far the best quality plywood I’ve used (and I’ve tried several).  It doesn’t tear as easily and doesn’t have voids between the plys.  It’s formaldehyde free, made in the USA, and I can grab a sheet while I’m at The Home Depot for cheaper than I can get the imported stuff at the local lumber yard.  It’s a win-win.  I’ll never go back to basic plywood.

Where did you get your granite and what color is it?

There’s a local granite place where I live that I use.  I have no idea what color it is because they have scraps leftover from kitchens and I go and pick a piece of scrap large enough to cut out for a vanity top and that’s just what you get.  I don’t look through catalogs and pick a color, I just pick from what’s there and I never know the color names.  I just know it’s pretty.  They cut it to the size I need and cut out the sink holes and attach the sinks.

Gorgeous faux drawer bathroom vanity with granite top

Where did you get your hardware?

I got these drawer pulls from D Lawless Hardware.  I highly recommend them.  The link to the ones I used on this project are here.  They fit the style I was going for perfectly.

What tools do you recommend using for a project like this?

I am always a big fan of anything that makes my job easier.  In this build, there was lots of plywood.  Being a scrawny girl, it’s hard to maneuver a full sheet of plywood around my shop, much less CUT it.  I know I always say this, but if you are cutting down plywood a lot, you NEED a Kreg Rip Cut and a Kreg AccuCut.  It saves you so much time, gets you more accurate results, and keeps you from throwing out your back trying to move around those huge, heavy sheets.

.

But, in addition to cutting plywood, I always recommend using a Kreg Pocket Hole Jig.  Pocket holes make building (especially for DIYers and beginners) so much easier.  I use mine on almost every project.  But, two new jigs I used for this build were the Drawer Slide Jig and the Cabinet Hardware Jig.

They are both reasonably priced and do exactly what it sounds like–help you install drawer slides and hardware (drawer pulls).  I’ve installed both in multiple occasions without a jig…but having the jig saves you about half the time…and time is money, so it pays for itself pretty quick 😉

And lastly, since you want your faux drawer doors to look as real as possible, you will need to use concealed hinges.  They are easy to install, but require you to cut out a hole on the back side of the door for the cup to fit in.  Luckily, Kreg also has a Concealed Hinge Jig that makes doing this a breeze.  Plus, the little wood chips that come from it are fun to play with haha.

.

Kreg actually makes a kit that comes with all three here.

.

Now, if you have any more questions, feel free to comment below or message me 🙂  Otherwise, it’s time to head over to Build Something and grab those free plans, don’t ya think?

.

Don’t forget to subscribe to my YouTube channel for videos on my latest projects and follow along on Instagram for all the behind the scenes and sneak peeks!  Oh, and sharing is caring so if you like this project, I would LOVE it if you’d pin it for later and share with your friends 🙂

How to build a faux drawer DIY bathroom vanity cabinet that will maximize your style and your storage space. With the look of drawers, but the function of doors, this easy to build vanity is perfect for a double sink in a master bathroom! Grab the free plans here.

Until next time, happy building 🙂

From the Ground Up–You’re Building a WHAT?

August 26, 2018 by Shara, Woodshop Diaries

If you follow along on Facebook or Instagram, you may have caught bits and pieces, and you may know that we are building a new home!!

.

BUT, it’s a little more complicated than “just building a home” and I’ve been getting LOTS of questions.  So I am going to try to keep all the details together on my blog for those who are interested.  So here we are 🙂  Blog Post #1 on this new adventure.  There is a lot of info in this post, so bear with me.

.

Um, maybe let’s start at the very beginning??  I’ll try to keep it condensed…a lot of things led up to this point haha.

We had a dream.

Over six years ago, Danny and I were living in a tiny apartment looking to get out.  We casually considered building vs buying, but ultimately just bought a house that we ended up hating (mainly because it was in a subdivision).  So we sold it and rented a house while we hunted for a new one.  During that time, we more seriously considered building vs buying (more serious meaning that we bought a book of house plans and looked at it a few times HAHA).  But, again, we ultimately bought our last house.

Clean, modern, and simple landscape update with Indiana river rock and concrete edging

This time, we LOVED it.  This was going to be our forever home.  We remodeled almost every room and put a lot of blood, sweat, and tears into it.  It’s where I started my first shop and learned how to tackle home improvement projects.  We had even made a goal to pay it off in less than 5 years and we were right on track.  Things were good.

Modern landscape with concrete edging and Indiana river rock really improves home's curb appeal

And our dream of building was put aside as an idea we might have tried if other things hadn’t happened first.  No big deal.

But then, we sold our forever house…

But last fall, I couldn’t take my desk job anymore and I quit, took a 35% cut in pay at a new job, and we realized our goal of paying off the house may not be attainable anymore.  At the same time, some things were going on in our neighborhood that we weren’t really sure we liked and all of this caused us to reevaluate our “forever” in that house.  Long story short, we decided to list the house after lots of prayer…and tears.

.

We had a buyer back in April, but they wanted 2 ½″ months to close.  Since we didn’t have anywhere to go, we were fine with that so that would buy us some time to find a new home.  They were getting a VA loan and there was a roller coaster of ups and downs with inspections and paperwork and all that comes with a government loan.  The sale almost feel through two days before closing (after waiting 2.5 months for it!) and we were a nervous wreck.

.

But, we finally closed early July.  It was SO SAD, but we just knew deep down, God was in control.  If it wasn’t for Him pushing us out of our comfort zone, we would have never left that house.  And if He pushed us into uncomfort, then we knew He was doing it to lead us somewhere else.

Meanwhile, before closing day…

So while all of this was going on with the house, we started house hunting.  This time, we VERY seriously considered building vs buying and decided this was a very real option.  We could save a ton by finishing much of it ourselves and after living in an older home for a while, we knew some things we would change and what we wanted our priorities to be in a new home.  But land in this area is HARD to find, so we didn’t know how this would work out timing wise.

.

Long story short, we miraculously found some land within a few weeks, had house plans drawn up and started looking into the loan process and getting prices to build.  But, there were a few things about the land we weren’t crazy about–mostly, it had restrictions.  Our house had to be so many sq. ft. and had to use specific materials on the exterior and any shops or detached garages had to match, etc.  Basically, it was going to cost us a lot more $$ than we wanted to spend.  But we had accepted that and were still ready to get started…even though it wasn’t REALLY what we wanted.

But, the land sale fell through (which was probably for the best, but it didn’t feel like it at the time) after a soil test and we were devastated.  Here we were, about to literally be without a home (we hadn’t found a place to rent yet that would accept us with our three cats and a dog) and without a prospect, a plan, or a light at the end of the tunnel.  We were down…like REALLY down.

But then, Danny called.

I had an appointment to meet with a contractor to get a price the day after we found out about the bad soil test.  Danny called during the meeting and I knew it must be important because he knew I was busy.  So he texted me a screenshot of a piece of land that had literally JUST come on the market within the last hour.  Right after the meeting I drove out to see it and IT. WAS. AWESOME.  It was clear, open, and had rolling hills.  The neighbors weren’t too close, and the area was so quiet and peaceful.  AND IT HAD NO RESTRICTIONS!  Answer to prayer?  I think so.

I called our real estate agent immediately and told her we wanted all the info we could get.  We made an offer a few days later and it was accepted!

.

But since we now had no restrictions, that opened up a whole new world of options.  Originally, when we talked about building, we wanted a small, energy efficient home with a huge shop and a big yard.  This wasn’t an option at the first land we looked at, so now we had to decide to go with the original plan or the plan with the bigger house that we had drawn up house plans for already.

We decided to stick to the original plan.

Because we are really working towards being debt free, and didn’t want another loan, we decided to go with an option we could pay for and decided to build small first with the option of building the house we have plans for later, if we so decide.  Also, getting a loan and building a larger house would take more time and we needed a place to live ASAP.

.

Basically, we decided to build a garage to live in until we can save the money to build the house.  For a few years, we’ve casually talked about having a maintenance free, small, energy efficient home and a bigger shop…instead of the exact opposite–which is what our old house was.  Since starting my woodworking shop, we spend less time in the house and more time outside and in the shop, so it just made sense to have a bigger, nicer shop and a smaller house.

.

Building a “garage apartment” lets us have a taste of “tiny living” to see how we like it and if we decide we need something bigger, we’ve got the house plans drawn up already and will be ready to go.  And the plan is to move my shop into our living space if we ever do get around to building the house later.  So nothing will be wasted 🙂

.

It’s really funny to see this play out.  I don’t talk about dreams and goals a lot or get very personal on here, but looking back over the last 6-7 years, it’s crazy how this little hint of a dream has grown and grown and now is becoming a reality.  After buying our last house, I never in a million years thought any of this would be happening just a few years later.

That gives you a little back story to what’s been going on behind the scenes of Woodshop Diaries for the last year or so.  Currently, all our stuff is in storage and we are living with Danny’s mom while we build our garage.  It’s been an adventure and it’s been stressful, and scary, and uncomfortable, and expensive, but we are hoping to be moved into our new home this fall!

.

In the meantime, I’ll be sharing sneak peeks, progress updates, and lots of interesting happenings over on Instagram, so be sure to follow along there 🙂  They’re putting up our garage walls this week, so things are about to get pretty busy!

.

I’ll write some more update posts as we go (and as I get time), but for right now, I’ve had a ton of questions and I’ll do my best to answer them below.  If you’ve got other questions, feel free to ask in the comments.

What exactly are you building?  Will it be like a barndominium?

We are building a 30×50 garage with a small porch on the front.  We will divide it down the middle and live in one side and use the other side as my shop/Danny’s storage.  It will be vinyl sided, so it won’t really look like a barn.  The side we live in will be about 850 sq ft and will have one small bathroom and the rest will all be open like a studio apartment.  Once we build our actual house (in a few years if we actually do end up building it), we will move my shop into the living space and Danny will have the whole garage space to himself.

How many acres do you have?

We have a little over 8 acres.  It’s currently being farmed.  We bought the farmer out of a few acres so we could go ahead and start building our garage before winter.

Are you building it yourself?

We hired a garage builder to put up the shell and we are finishing out everything.  So basically, we had him pour the concrete and put up the exterior walls and siding.  We are doing the plumbing, electrical, insulation, drywall, and cabinets, doors, showers, toilets, etc.  The very first thing we did was hire someone to put in our driveway and septic tank, then the builder came in.

Once the builder got the footer dug, we dug the trenches and installed the plumbing.

Hopefully we will have our structure up this week, and we can start our work.  Once we get started, we should be ready to move in in about 6 weeks.  Crossing our fingers!!

What about permits?

We live in the county and the same rules won’t apply everywhere so I’ll tell you what WE did, but that doesn’t mean it’s the same in your location.  Just keep that in mind.  But since we live in the county, the only permits we needed were for the septic, plumbing and electrical.  The septic guy took care of the septic, we got the plumbing and we haven’t gotten yet (but will) the electrical.  Everything has to be inspected before covering it up.  So our plumbing had to be inspected before the concrete, it’ll have to be inspected again before drywall, then once it’s all hooked up, it’ll get a final inspection.  Electric is the same way.

What about construction loans?

I looked into a construction loan when we first planned to build the house on the restricted land.  In a nutshell, no one wanted to work with you if you were going to act as your own contractor (which we were).  And when we did find someone willing to, they wanted a detailed breakdown of exactly how much we planned to spend on each and every item and house plans.  They planned to take all of that, basically create an appraisal for how much your house would be worth once it’s built and loan you 80% of that.

.

They would periodically inspect to make sure you were actually using the money to build the house and you would be required to finish the house completely within a year.  It took 45 days minimum to get the loan and you had to close twice…so two sets of closing fees…which is expensive.

.

Because we decided to build the garage instead of the house, we decided to forget the loan and just paid out of pocket.  We planned to have a home again (though it may be small) within just a few months tops and didn’t want to deal with the hassle of the loan process.

Why didn’t you build up instead of out for your apartment space?

Have you guys seen lumber prices lately?  Holy smokes.  Apparently at this point, it’s cheaper to go out than it is to go up.  So that’s what we did.  We originally wanted a little upstairs apartment instead, but the prices for going up were higher AND you had less living space because of the rooflines cutting in.  Also, once we moved out, we’d never use that space for anything so it would have been a waste.  Whereas, downstairs, we can store tractors, tools, lawn mowers, etc so it would be more practical to spend money on that vs a useless attic haha.  If we had kids, that might have been a cool play room, but we just knew that we wouldn’t ever use that for anything.

What does your house plan look like?

You guys are going to be so disappointed when you see our new home HAHA.  It’s very simple.  Nothing fancy, just kind of basic.  We didn’t want to spend money on fancy rooflines just to deal with ice dams and maintenance all the time.  It’s an open living/kitchen/dining, with two spare bedrooms on one side and a master, on the other.  Just what we need…nothing extra.  Our style has (MY style…Danny doesn’t have a style haha) shifted to simple, modern, minimal lately and I want to keep that look with the garage and the house.

.

We had a local guy we found draw us up exactly what we wanted and he was AWESOME.  I took him a rough sketch of the floor plan I wanted, and a picture of the front of a house I liked and he put the two together and had us HAND DRAWN (hand. drawn.  It was impressive) drawings of everything in just like a week.  If we ever build it, I’m going to frame a set of them as wall decor 🙂

How are you doing all of this with full time jobs?

Nights and weekends, baby.  Nights and weekends.  That’s what we did remodeling our last house.  It was exhausting, but you can do anything for 6 weeks.  Even survive on cereal and 2 hours sleep a night.  We will sleep when we are retired, everything paid for, and we have a home haha.  No rest for the weary.

Why not just buy something?

Good question.  There are always pros and cons.  We wanted a few acres, a small house, a large shop, energy efficiency, and custom to our our style.  That’s IMPOSSIBLE to find in our area in our price range.  I mean it.  In our old house, when I’d use my miter saw in the shop, the lights in the house would dim.  It wasn’t set up to do what I was doing. This time, we are wiring everything up for EXACTLY what we plan to use it for.  We are insulating to keep bills low, we are building small so if we need to grow later, we can.  We are building this house for US and with our priorities, our preferences, and our budget in mind.  We are looking to the future for a house we are building now.  That way, we can grow into it.  It’s going to be built BY us and FOR us.

Wow that was a long post!  I hope I answered most of your questions.  I’ll keep you updated (hopefully with shorter posts haha) as we go, but felt like I needed to get everyone who was interested up to speed first.  If you have questions I haven’t answered already, feel free to leave a comment below and I’ll do my best to answer it.

.

As always, thank you so much for following along on our journey and adventure.  We are so excited and humbled for the opportunity to build our home.  Hopefully I can inspire you with ideas, projects, and dreams for the new place.

.

Keep updated with posts on Instagram and stay tuned for some really awesome projects coming from this, too 🙂

.

Until next time, happy building 🙂

Modern DIY Wood Clock

August 6, 2018 by Shara, Woodshop Diaries

In this post, I’ll show you how to build your own DIY wood clock!

Simple two tone modern DIY wooden wall clock--walnut and hickory wood

I love making clocks. I’ve made a few through the years, but this is probably my favorite because it’s so eye catching, but also SO simple.

.

If you can glue, cut a circle, and follow instructions to install the hands, you can make a clock 🙂 I promise.

.

I’ll show you how to make a two tone DIY wood clock in this post, but if you want to check out some other cool clock ideas, I’ve got a couple you might enjoy here. Click the image to head to the tutorial to make it!

  • DIY Wooden wall clock with personalization--make your own with this free tutorial
    DIY Personalized Wall Clock
  • DIY Industrial Wall Clock

This two tone modern DIY wood clock is a super simple project and I’ve got the how to video for you right here.  And of course, the step by step below 🙂

This post contains affiliate links.  Please see disclosure policy for details.

.

For this DIY Wall Clock, You Will Need:

  • 1 board of one type of wood ( about 20″ long, about 5-6″ wide)
  • 2 boards of another type of wood (about 25″ long, about 9-10″ wide each)
  • OR
  • The equivalent of the above in one type of wood (if two tone isn’t desired)
  • Miter Saw
  • Wood glue
  • Clamps
  • Router (optional)
  • Straight bit for router (optional)
  • Drill and drill bits
  • Sander
  • High Torque Clock Kit and Large Clock Hands
  • Danish Oil

NOTE: If you don’t have different wood types to work with, you can use one type of wood and just stain them different colors to create the two tone look.

.

ALSO NOTE: Feel free to use wood scraps for this project and mix and match widths as needed.

Step 1:  Cut Wood Boards Down to Size

First, I cut my boards to size.  I made this clock about 24″ diameter.  If you want a smaller clock, you can cut your boards shorter, but I cut my darker walnut board to about 20″ and my lighter hickory boards to about 25″ long.

trimming walnut board to length on miter saw
trimming hickory wood to length on miter saw

Then, I trimmed the edges off of my boards on my table saw for a nice clean joint to glue.  You don’t HAVE to do this, it just makes a nice smooth, flush clock surface.  I just barely trimmed off the edges to get a square side. 

trimming edge of walnut board on table saw

Step 2: Glue DIY Clock Boards Together

Now, it’s time for the glue up.  I laid my pipe clamps out and situated my boards how I wanted them, making sure I could get a 24″ round out of it, then applied glue to the edges and clamped. 

.

Make sure to wipe off any glue squeeze out for easier sanding and clean up later.

applying glue to walnut and hickory boards to make clock panel
walnut and hickory panel gluing up

If you don’t have large clamps, you could also use pocket holes and screws to attach the boards together as well.

Step 3: Cut Wood Round for Clock

Once the glue was dry, I cut the round with a router–but you could also use a jig saw.

.

I measured to find where I wanted the clock center and drilled a hole at that point, leaving the bit sticking up.  Then I removed the bit from the drill leaving it in the wood.

drilling center hole into panel to cut out circle

Using a router circle jig (you can find out how to make one here), measure from the outside edge of your straight bit to HALF the diameter you want your clock to be and drill a hole there into the jig. 

RELATED: Want to learn more about routers? Check out this Router Guide Post.

.

So, for example, my clock was 24″ diameter, so I measured 12″ from the edge of the bit, down the jig and drilled a hole.  I placed this hole onto the bit I left in the center.

using a shop made router and circle jig to cut wood clock

I SLOWLY cut out the circle, cutting only about ¼″ deep at a time.  I made several passes, going deeper each time until it was cut all the way through.  Then, I removed the bit.

Using a router and circle jig to cut out two tone wooden clock

Again, if you prefer, you can draw your circle and cut out with a jig saw instead.

Step 4: Route Out Hole for Clock Mechanism

Now, in order to attach the clock mechanism, the clock thickness must be only ¼″.  The shaft of the mechanism needs to go through the center hole and stick out the front enough to be able to screw on a nut to tighten it in place.

.

Since this wood clock is about ¾″ thick, I had to route out a hole to “inset” the clock mechanism. 

.

First, I found a drill bit that was SLIGHTLY larger than the shaft of the clock mechanism and drilled through the center hole.

Drilling hole in center of round wood piece

Then, I inserted the shaft on the back side and traced around the square body.

tracing around clock mechanism to cut out

Using a router and a straight bit, I cut out this traced spot going deeper each time until the mechanism fit snug and there were some threads on the shaft coming through the front side (this is important to be able to attach the hands).

Using router to remove material to place clock mechanism
Clock mechanism inset into back side of wood clock

If you don’t have a router, you can also use a Dremel tool, or a chisel, or an oscillating tool to remove this material as well.

Step 5:  Sand and Finish

Finally, I gave the clock a good sanding and a couple coats of Danish oil for finish.

Shara Woodshop Diaries sanding round wood plate to use as a clock
Pouring Danish oil onto hickory and walnut wood clock

Then, I followed the instructions that came with the clock kit for attaching the hands.

Shara Woodshop Diaries installing clock hands on two tone wood clock

Assembling the clock hands is really simple–just make sure to follow the instructions.  Just be sure to remove the protective peely things on the hands BEFORE you put it all together.  It makes things MUCH easier 😉

.

And that’s it…that’s how you make a large DIY wood clock!

.

The mechanism comes with a clip you can install in order to hang this on the wall if you wish. But, I prefer it sitting on a desk or a shelf.

Large two tone walnut and hickory wood clock

Such a simple project, but so cute! 

Two tone DIY wood clock sitting on modern two drawer nightstand with vase and book

By the way, did you see the post about how to build these nightstands??  I love the clean lines and simple design. 

.

For more two tone projects, check out how I mixed poplar and walnut in this simple keepsake box 😉

.

And if you want to save this project for later, be sure to pin it! 🙂

Two tone modern wall clock sitting on nightstand with vase and flower against grey wall

Until next time, happy building 🙂

How to Build a Kids Table and Chair Set

July 16, 2018 by Shara, Woodshop Diaries

In this post, I’m sharing how to build a simple DIY kids table and chair set!

Wooden kids table with two chairs play set with chalkboard on wall

This play set includes an easy to build DIY kids craft table plus two matching chairs–the perfect combination for a good time of coloring, drawing, painting, and just being a kid.

This small table and chair combo is the perfect addition to a kids play room. But even if you don’t have a designated room for play, it takes up a small foot print, so it could fit in a bedroom or living space, too!

So, if you need to give your kids a place to hang out, be creative…and stay off your dining room table and kitchen counter with their school work and coloring books…then grab the building plans to make the complete set below.

Tools and Materials

*This post contains affiliate links.  See website policies for details.

Tools:

  • Circular Saw
  • Kreg Accu Cut
  • Kreg Rip Cut
  • Kreg Pocket Hole Jig
  • Miter Saw
  • Jig Saw
  • Drill/Driver
  • Speed square
  • Measuring Tape

Materials:

  • (1) sheet ¾″ plywood
  • (1) 4x4x8 board
  • (4) 2x2x8 boards
  • (1) 1x3x8 board
  • 2 ½″ pocket hole screws
  • 1 ¼″ pocket hole screws
  • 2″ wood screws
  • Wood Glue
  • Iron On Edge Banding

What to Know Before Building

This is a very simple build using basic joinery and materials. I’d consider this a great first woodworking project and, if your kids are old enough, a great project to get them involved with.

It should only take a couple hours to assemble.

Kids Table & Chair Dimensions

This table and chair set is an ideal size for kids about 3-10. The table height is 24 ¾″ and the seat height is 14 ¾″.

Overall dimensional diagram of DIY kids table and chair playset

If these dimensions are a little too tall or a little too short for your liking, modifying is as easy as adjusting the length of the table and chair legs.

Add a couple inches to the legs to make them taller and take a couple inches away to make them shorter. You can keep all other dimensions the same.

Sanding & Rounding Edges

I always recommend sanding any DIY woodworking project well for best results and proper finish. However, since this is a kids project, I definitely recommend sanding it especially well to avoid any splinters.

If you’d like to remove sharp edges, you can use a roundover bit with a router to smooth out some of the rough corners, or just use a sander to help smooth them out a little.

Keep in mind that the plywood edges will be exposed if you do this on the plywood panels.

Helpful Resources for this Project

You may find these posts and guides helpful while building this project:

  • How to cut your own 2x2s
  • How to cut plywood sheets with a circular saw
  • How to apply iron on edge banding
  • How to use a pocket hole jig

How to Build a Kids Table and Chair Set

I’ve got the step by step tutorial with additional tips below, but if you prefer to watch, I also have a video tutorial as well.

PLEASE NOTE: This is a very old video–one of my firsts–so please don’t judge too harshly. My more recent videos are MUCH improved and I’d encourage you to head to the channel and check them out.

And if you prefer to print, I’ve also got the printable woodworking plans for this DIY kids table and chair set here:

Step 1: Assemble Kids Table Base

The simple kids table base here is made from 4×4 post legs and 2x2s for the frame.

First, I cut four table legs from my 4×4 to 23 ⅞″ long. I recommend cutting these just slightly under 24″ so they’ll all be equal length.

HELPFUL TIP: Why not cut them to 24″? Since the 4×4 board is 8 ft long, if I cut the first 3 legs to 24″, the last one would be too short because of the blade kerf.

cutting kids table leg 4x4 post using miter saw

Then, I cut six 2x2s to 24″ long and drilled 1 ½″ pocket holes into the ends of each.

Not sure how to use pocket holes? Check out this guide to using pocket holes in your woodworking projects!

I only drill one pocket hole in the ends of my 2×2 boards because using 2 tends to cause them to split.

Close up of pocket holes drilled in 2x2s

I sanded all my 4x4s and 2x2s well, then assembled the table base like shown using wood glue and 2 ½″ pocket hole screws.

Notice that the table apron pieces (the 4 pieces around the top) are attached so that they are flush to the outside of the legs.

Wooden kids play set table base assembled in workshop

The two shelf supports toward the bottom are attached flush to the inside of the legs and 6″ up from the bottom.

Step 2: Attach Table Top

For the table top, I cut a piece of ¾″ plywood to 33″ square using my circular saw and cutting guides.

You can learn how I cut my plywood sheets in this post.

Shara Woodshop Diaries cutting plywood with circular saw and Kreg Rip Cut

I recommend using a hardwood plywood for this project (like birch, maple, or oak) as these tend to be higher quality and smoother than most other options.

Normally, I apply iron on edge banding to the edges of my plywood to give it a cleaner look. But, this is an old project that I built before I knew about edge banding, so you’ll see in the photos below that I didn’t add any here.

If I were to do this project over again, I’d definitely edge band, but it’s an optional step. Learn how and why to apply iron on edge banding in this post.

.

To attach the top, I flipped it and the table base upside down on top of it, making sure it was centered. There should be about 1″ overhang on all sides.

Then, I predrilled pilot holes through the 2×2 table aprons and used 2″ wood screws to secure. DON’T skip predrilling–this helps prevent splitting.

Using a drill to attach kids table top to table base upside down on workshop floor

Prefer to print? Grab the printable kids table and chair set plans here.

Step 3: Attach Table Shelf

To finish up the table, I cut another piece of ¾″ plywood to 20″ x 27″ to serve as the shelf. Edge banding is optional, but again, it does look a little cleaner.

I centered the shelf across the supports on the table (it’s still flipped upside down in the picture below) and clamped it in place.

Then, I predrilled and drove 2″ wood screws through the supports to secure it.

Using a drill to secure shelf to frame of kids toddler table

I added the screws from the underside so they won’t be seen in the finished project, but you could certainly screw from the top side if you didn’t mind seeing them.

Now the table is finished and it’s time to build the chairs.

Step 4:  Assemble Kids Chair Backs

The chairs are made from ¾″ plywood for the back and seat, 2x2s for the legs and 1x3s for the seat frame.

First, I assembled the back portion of the chairs. So I cut two 2x2s to 28″ long (per chair) and one ¾″ plywood panel 11″ x 11″ (per chair).

I used a jig saw to cut a curve along the top edge of the plywood panels just to give it a little more visual interest, but that’s definitely optional.

Using a jig saw to cut curve on wooden backs for kids chairs

If you need some help drawing a nice curve to cut, check around your shop for buckets, paint cans, or other round objects to help you trace a curve. Or check out this post for 3 easy ways to draw a curve or circle.

I secured these panels between the 2x2s using 2″ wood screws through the sides. The bottom of the plywood panel was positioned 17″ up from the bottom of the 2x2s.

Kids chair back frame assembly

Make sure to predrill before driving the screws to prevent the wood from splitting.

Using a drill to secure back curve panel for wooden kids chair set

I repeated to make two identical chair backs for two identical chairs.

Step 5: Build Chair Frame

For each chair, I cut 4 pieces of 1×3 to 11″ long and 2 pieces of 2×2 to 14″ long. 

TIP: If you wanted to make your chair seat height taller or shorter, you can modify the length of these 2x2s–shorter for a lower seat and longer for a taller seat.

I drilled ¾″ pocket holes in the ends of the 1x3s and used 1 ¼″ pocket holes to secure them between the 2×2 legs and the 2x2s on the back of the chair.

Shara Woodshop Diaries assembling frame for wooden kids chair on workbench

Make sure to line up the 1x2s on the back side 14″ from the bottom so everything stays square.

Wooden childrens seat frame assembled in workshop

I repeated this for both chairs to make two identical frames.

Step 6: Attach Seat

The final piece was adding the chair seat. I cut these seats from ¾″ plywood and made them 14″ square. As always, you can apply edge banding to cover the edges…or not.

In order for these to sit onto the frame properly, the back corners need to be notched out around the 2x2s.

Shara Woodshop Diaries using square to mark notches in back corners of kids chair seat

So I used a jig saw to notch 1 ½″ squares off the back two corners of each seat panel.

using a jig saw to cut notches in plywood panel

To install the seat, I placed it onto the frame and used 3″ wood screws through the 1x3s. BE SURE TO PREDRILL PILOT HOLES BEFORE DRIVING THE SCREWS.

Driving a screw through such thin material is likely to cause splitting, so make sure to go slow and predrill.

Shara Woodshop Diaries attaching kids chair seat panel to chair frame

OR, if you don’t mind seeing the visible screws, you can use 2″ screws through the top of the seat instead to secure.

At this point, the kids table and chair play set is complete! Make sure to sand well and apply a finish of your choosing.

Wooden kids table and chair set unfinished in workshop

I finished mine with Minwax Golden Oak stain and Minwax Polycrylic and it was ready for play.

Whether you paint or stain, I recommend adding a clear coat like Polycrylic over the top to give it a little extra protection. This will make it easier to clean and less prone to wear as quickly.

Wooden toddler table and chair set stained and finished

Make sure to check manufacturer’s specs for cure times before applying a clear coat on top of your finish. Some finishes have to dry for longer before you add anything on top!

This is the perfect little table for a playroom or a kid’s room.  It’s small enough to put in the corner of your living room, too so you can keep an eye on your kiddos while you are doing your own thing. 

Wooden play set with toddler table and chair with crayons and coloring books on top

And the shelf underneath can hold craft or coloring supplies, or a basket of toys.  Such a cute little project!

Finished wooden kids table and chair set

Ready to build your own? Print the building plans here.

Looking for more DIY kids projects?

Here are a few favorite kid projects you may enjoy checking out!

Kid’s Storage Table
Shara Woodshop Diaries reading in DIY Kids House Bed Frame
DIY House Bed
This easy to build four sided Kid's bookshelf is a really fun way to add functional storage to your kid's playroom. Get the free building plans to build your own DIY version of a spinning bookshelf here!
4 sided bookshelf
One Sheet Plywood Bookshelf

If you enjoyed this project and want to see more, be sure to sign up for our FREE newsletter for priority access to the latest projects and plans below!

Save this project for later by pinning it or sharing to your favorite social network!

DIY childrens table and two chairs in front of chalkboard

Until next time, happy building!

DIY Simple Vintage Inspired Dresser

June 18, 2018 by Shara, Woodshop Diaries

YOU GUYS!  I can’t even with all the cuteness!  Doesn’t this little vintage inspired DIY dresser give you all the heart eyes??

But, if that’s not enough, just a few extra steps can take this dresser and make it a DIY changing table, too!!  (Speaking of changing tables, I’ve got free plans for another style changing table here)

This post was sponsored by Build Something, Kreg Tool’s website for free furniture building plans from small to large and for every room in the house…and outside the house, too!  This post also contains affiliate links.  See disclosure policy for details.

.

What what!?  I can’t figure out if it’s the little curve on the trim detail on the front, the large drawers, the white color, or the brass handles, but something about this dresser has me wanting to build one for every room in my house!

.

But, this particular adorable piece went to my husband’s cousin who is expecting their first baby–hence the changing table 😉

I’ve got the free plans for you over on Build Something and I have the video tutorial for you right here and on my YouTube Channel:

The simple design makes it a pretty easy build, and those GINORMOUS bottom drawers can really pack away the storage without taking up a huge footprint in your room. (The drawers make me think of that old Vacation Bible School song we used to sing…deep and wide, deep and wide, there’s a fountain flowing deep and wide…or were we the only kids who sang that song?? Haha…anyway…)

Speaking of drawers, one thing to note…on this and future builds too…is to consider the size of your fronts when you plan to add edge banding.  (By the way, this is the edge banding that I highly recommend…great quality and very easy to apply.)  General rule of thumb is to cut your drawer fronts so that you can have ⅛″ gap on all sides (so you cut it ¼″ smaller in both directions than the hole it should fit in).

.

Sometimes, I get adventurous and make these gaps slightly smaller (don’t do that…it’s almost always a bad idea), but then, when I add edge banding on your plywood edges, the thickness of the banding makes my drawer fronts bigger so they don’t fit in the hole anymore and the sides rub.  A LOT of rework went into this dresser because I did that.  So take note: when applying edge banding, cut your drawer fronts slightly smaller than they should be so this doesn’t happen to you 🙂

.

Also speaking of drawers, these gold drawer pulls are from D Lawless Hardware and they are gorgeous!  They were heavy, and high quality and very reasonably priced.  They give the dresser a nice modern, sleek look.

DIY White Vintage Inspired Dresser with Brass Drawer Pulls and Plenty of Storage

This whole dresser was made with just a few tools and some hardware.  It’s mainly plywood and I always recommend using a Kreg Rip Cut and a Kreg AccuCut to cut down sheets of plywood.  They are massive time savers and help scrawny people like me cut full sheets down to manageable sizes haha.

.

The build also calls for several 1 ¼″ pocket hole screws and some ball bearing drawer slides.  I always buy my screws and drawer slides on Amazon…they are so much cheaper than anywhere else I’ve found.

.

So, if you are ready to get building, head on over to Build Something and grab these free plans to make your own dresser or changing table 🙂  And, don’t forget to pin this for later!

How to Build Your Own DIY Changing Table Dresser with Free Woodworking Plans

And if you need some more stylish storage ideas, check out a few of my favorites below.  Until next time, happy building 🙂

Toy Storage Cabinet

How to build a combination toy storage cabinet

DIY Armoire Cabinet

How to Build a Wardrobe Storage Cabinet that looks great in any room in the house! Finished in Sherwin Williams Alabaster and made from PureBond Plywood, this gorgeous DIY piece is one you'll be proud you made yourself!

DIY Storage Bed

How to Build a Farmhouse Style DIY Storage Bed--Free Woodworking Plans and video tutorial!

DIY Storage Chest

How to Build a Simple DIY storage chest for toys, blankets, and keepsakes

How to Build a DIY Modern Planter Box

May 14, 2018 by Shara, Woodshop Diaries

DIY Modern Planter Boxes you can make from scrap wood! Give your front porch a modern feel with these easy to build plant stands!

How to Build a DIY Modern Planter Box

Want to add some modern flare to your outside (or even inside!) decor? Grab the free building plans to build your own DIY Modern Planter Boxes and check out this quick tutorial video here! These DIY plant stands would look great on a modern front porch or even inside the house to show off your favorite house plants. Easily customizeable to make in any size you want--get the free woodworking plans here.

*This post was sponsored by Build Something, Kreg Tool’s website for free building plans from small decor items and furniture all the way to large built ins and king size beds!  Check out all the free building plans they offer over on BuildSomething.com.  See disclosure policy for details.

Change is hard.  I mean, even the littlest changes, sometimes I have trouble with.  Anyone else out there relate?  I know this is super trivial…but the struggle was real when I realized the my old planter boxes on my front porch had seen better days and I needed to replace them.

.

They had been good to me and my standard front porch ferns and fall mums for three full years.  The design was cute and the unfinished wood color was nice.  PS if you want the plans for them, I’ve got the plans for these DIY louvered planter boxes here.  Oh and the tutorial for the DIY spring wreath is here.  AND the front door makeover post is also here 🙂

Spring Front Door Refresh Worthy of All the Heart Eyes

But there comes a time when change is needed and for these boxes, it was time.  The winter had taken a toll on them and instead of just painting over the discolored wood, I thought it best to replace them.

.

If you don’t follow me on social media, you may not know that we are moving soon, if all works out (fingers crossed!), and I’m wanting our next house to have a more modern vibe.  So I decided that the replacements for these planters should be a little retro so they can transition into the next house with us.  This is what I came up with and I think these little tapered legs give it such a fun modern feel.

How to build your own modern plant stands for front porch or even inside the house

After I built one (the one on the left), I decided it would be fun to make a set of three, but didn’t want them to match exactly.  What’s awesome about the building plans for these is that it’s SO easy to customize and modify to build in whatever size you need.

.

Speaking of building plans, you can grab the free plans for these planter boxes over at Build Something.  And be sure to check out my latest YouTube video of the build right here:

What’s also really cool about these plans is that since these boxes are fairly small, likely, if you dig around your scrap wood pile enough, you can probably make them completely out of wood scraps!

DIY Modern Planter Boxes you can make from scrap wood! Give your front porch a modern feel with these easy to build plant stands!

Speaking of scraps, if you need some help organizing your piles in your shop, check out this super easy to build scrap wood cart that has completely changed the way I move around in my shop.  Life. Saver.

.

Anyway, these boxes would be great both inside and outside the house.  I wasn’t sure about them on the porch at first, but now I like them so much I’m not even missing my old planter boxes…that much 😉  Shh don’t tell, but I’ve still got the old ones out by the shop because I’m an emotional hoarder and can’t let them go just yet haha.

So if you’re looking for a great spring/summer project to do in a few hours or a good beginner project, these are perfect!  Build a few different sizes and become a crazy plant lady like me! HA! The free plans can be found here and don’t forget to check out the video tutorial, too!

How to Build a Modern Planter Box from Wood scraps! Great beginner project

I’d love for you to follow along on YouTube, Instagram, and Facebook to catch sneak peeks of all my latest projects and to get all the details on new plans as soon as they’re posted 🙂

.

And please pin this for later, too!  Until next time, happy building! 🙂

DIY Wooden Keepsake Box with Splines and Picture Frame Top

May 3, 2018 by Shara, Woodshop Diaries

In this post, I’ll show you how to make a DIY Wooden Keepsake Box with Splines and Picture Frame Top!

How to make a DIY Wooden Keepsake Box with Splines and Picture Frame Top--Beautiful Poplar and Walnut Wooden Box allows you to frame your keepsake for display and store the rest inside--free building plans and video tutorial

I have the best Granny.  She’s hilarious.  But not in the slapstick comedy, or joke telling kind of way.  She just makes me laugh because of how predictable…and yet,unpredictable…she can be. 

.

For example, for every birthday and Christmas gift, she will ALWAYS throw in some sort of weird, random trinket.  BUT, there’s no telling what it might be.

.

One year, she got me and my sister these fat, round figurines.  Mine was a fat owl, and hers was a fat squirrel.  I have no idea where she found them…or what made her think to buy them for us, but that’s just how Granny is.  It’s almost become comical to see what she will give us next. 

.

But, obviously, this isn’t something I want to display around the house.  (And neither is most of the other random trinkets she gives me.)  But they’ve got sentimental value, so I want to keep them.

.

So I started thinking about how to keep these items together, hidden, but not just collecting dust in some forgotten cardboard box in the back of the closet.  That’s when I decided on a DIY wooden keepsake box with a picture frame top.  I can display the box, without having to display what’s inside 🙂

How to build a DIY wooden keepsake box with splines and picture frame top

Side note: That little piece of paper towel I framed on the box was from the first day I moved into my first apartment.  She came over to help me clean and she brought lots of goodies. 

.

One thing she brought was a roll of paper towels and she wrote “Love U, Granny” with her signature smiley face in the “U” on the corner of the top towel.  I tore it off and have kept it ever since.  It’s been almost 8 years!  It was the perfect piece to frame 🙂

.

So if you need a DIY keepsake box to keep all your random Granny trinkets in, let’s get to the how to.  I’ve got a YouTube video tutorial here and the written instructions below.

For this box, to make the corners nice and clean, I mitered the corners and to add a little strength and detail, I added splines.  This is totally optional, but made it look really nice.  It was my first time trying splines and they turned out better than I expected.  So let’s get building.

.

This post contains affiliate links.  Please see disclosure policy for details.

.

For this DIY Wooden Keepsake Box, you’ll need:

  • 1x4x8 for the box sides (I cut this from some poplar wood I had on hand)
  • 1x2x8 for the top (I also cut these from some poplar I had)
  • 2×4 piece of ¼″ plywood
  • ⅛″ glass panel (cut to fit)
  • Wood scraps for splines
  • Wood Glue
  • Picture Frame Tabs
  • 2 small hinges
  • 1 small latch
  • Table Saw (optional)
  • Miter Saw
  • Sander
  • Router
  • Rabbet Bit
  • Picture Frame Clamp
  • Drill
  • Hand saw

.

Step 1: Cut boards for DIY Wooden Keepsake Box Sides to Size

First, I ripped my boards to 3 ½″ wide on the table saw.  I used poplar I had in the shop.  But, you can also use an off the shelf piece of pine or oak or whatever wood species 1×4 for this.

Rip boards to size on table saw for DIY keepsake box

I cut two pieces from these boards 20″ long and two pieces 17″ long.  I mitered the ends of each board at 45 degrees not parallel to each other. 

.

You can modify these dimensions, I just picked a size I liked.  By the way, if you’d like to build your miter saw a new stand, check out these plans for this one 🙂

cutting mitered ends on poplar boards
Board cut with mitered ends to make box

Step 2:  Cut Dadoes into DIY Keepsake Box Sides

I used the table saw to cut some ¼″ dado grooves along the bottom of these boards to accommodate the ¼″ plywood bottom.  However, if you don’t want to cut the dadoes, you could also just staple or glue and nail the plywood bottom onto the box once it’s glued together.

.

I cut my dadoes about ¼″ deep, so I cut a piece of ¼″ plywood 16″ x 19″ to fit into the grooves for the bottom.

Step 3: Glue Wooden Keepsake Box Boards Together

I applied glue to the corners and clamped the corners together using this picture frame clamp. 

applying glue to mitered keepsake box corners

I inserted the ¼″ plywood bottom before gluing the last side on.

plywood bottom placed into dadoes on keepsake box
mitered corner box glued up with corner clamps

I let the glue get good and dry.  While it was drying, I built that simple spline jig you see in the top left of the picture above to cut the splines for the next step. 

.

I followed Mad Raven’s tutorial here to build it from some plywood scraps I had in the shop.

Step 4: Cut Splines in Keepsake Box Corners

Basically, a spline is just a groove cut in the corner of a box.  Using the jig shown above, I simply placed the box corner into the jig and cut a groove on the table saw like shown. 

Spline jig running through table saw

I played with the blade height to get it where it was cutting the corner, of the box, but not cutting all the way through to the inside of the box.  I also played with the left to right spacing of the spline, too.

.

There’s no right or wrong spacing (or maybe there is, but I don’t know the rules haha), just get it however far apart you like.

.

I placed the box into the jig with the bottom side facing the rip fence, ran it through the saw, then turned it around so the top was now facing the rip fence and cut again. 

.

I did this for all four sides.  That way, I cut two splines in the box and both splines were cut the same distance from the top and from the bottom.

splines cut and ready to be glued into box corners

For the actual spline pieces, I used a scrap piece of walnut and cut very thin pieces on the miter saw.  You want to cut these pieces about the same thickness as your saw blade so they will fit into the grooves.  I applied glue and placed them into the grooves.

Splines glued into corners of picture frame keepsake box

Once the glue was good and dry, I cut off the excess with a hand saw (you could also use an oscillating saw and a flush cut blade) and sanded until it was nice and smooth.

flush cutting splines on box corners

Now the box is done, and it’s time for the top frame.

Step 5: Assemble the Picture Frame Keepsake Box Top

I cut my own 1x2s from poplar to match the bottom of the box, but again, off the shelf 1x2s would work fine here.  I cut two pieces 20″ long and two 17″ long with mitered corners at 45 degrees not parallel to each other.

cutting picture frame pieces

Then, I applied glue and clamped with my picture frame clamp.

gluing up keepsake box top lid frame

Step 6:  Route Groove for Picture Frame Glass and Backing

I wanted my picture frame glass and backing to sit down in the frame so that it is flush across the underside of the frame.  So since the glass is ⅛″ thick and I used ¼″ plywood backing, I needed to route out a ⅜″ deep rabbet. 

.

I used my router and a ⅜″ rabbet bit set to ⅜″ deep and routed along the underside of the frame once the glue was good and dry.

Routing groove for picture frame glass

Once I had the rabbet cut, I used a chisel and hammer to carefully square up the corners.

Step 7: Finish and Attach Top

Once the box and top was complete, I finished them both with Danish oil.  It was my first time using Danish oil, and I really liked the finish.  It’s a natural finish that really made the grain pop.

finishing with danish oil

Once the oil was dry, I attached the top to the box with two small brass hinges and added a latch.

attaching hinges onto box lid
keepsake box complete except for adding glass panel

Finally, I got a piece of glass cut to fit in my rabbet groove and framed my paper towel 🙂

Shara placing glass panel inside picture frame lid

I placed the glass in first, then I used a painted piece of ¼″ plywood as a backing and put my paper towel between the two.  I used these simple swiveling picture frame tabs to hold it in place.

Shara placing picture frame backer onto box lid

Then, I filled it with all the trinkets, post cards, birthday cards, bookmarks, and figurines I’ve been hoarding and closed it up.

Picture Frame keepsake box made from poplar sitting on table

It’s such a simple project, but I really loved how it turned out and I really love the backstory for it.  And I’m glad I finally have a place to store all my keepsakes that’s pretty enough to display, too 🙂

Lid of picture frame box open showing trinkets inside
front view of DIY picture frame keepsake box with splines on corners
DIY picture frame keepsake box lid closed

If you haven’t already subscribed to my YouTube channel, I would love if you would!  I’m posting new videos every couple weeks!

.

Thanks for following along!  If you’re looking for more fun box projects, check these out:

  • DIY Scrap Wood Keepsake Box
  • Retro Bluetooth Speaker Box
  • DIY Cake Box Carrier
  • DIY Louvered Planter Box

.

Stay tuned for plenty more project coming soon!  Until next time, happy building! 🙂

DIY Washer and Dryer Pedestals with Storage Drawer

April 23, 2018 by Shara, Woodshop Diaries

DIY Washer and Dryer Pedestal Stands for a Fraction of the Price for the Plastic Ones--How to Build Your Own

This post is sponsored by Build Something.  See disclosure policy for details.

I’ll be honest, I don’t really understand the whole washer and dryer pedestal thing.  I’ve got the cheapest washer and dryer you can possibly purchase from the big box store and you just don’t really attempt to dress those up–it’s a hopeless case HA!

.

So I’ve never really had need for a washer and dryer stand, so they never crossed my mind to build any–but my mom on the other hand…

.

She just got a really pretty front load washer and dryer set.  (I’m just a little PB and jealous in case you wondered…)  But when she saw the price for the stands, she had a better idea.

How to Build Your Own DIY Washer and Dryer Pedestal Stands with Storage Drawer

That idea was me making her some for a small fraction of the price in the store haha.

.

Lucky for me (and for you guys, too!), this comes just in time for Mother’s Day next month, so if you’re looking for a great DIY mother’s day project, here you go 🙂  Even if your mom hates doing laundry (and seriously, who actually LIKES laundry??), she’d probably appreciate being able to add some pretty storage to her laundry room 🙂

How to Build a Set of DIY Washer and Dryer Pedestal.

I’ve got the plans below for the build, but also have a quick YouTube video to show you how it’s done right here.  If you aren’t already, I’d LOVE it if you’d subscribe to my YouTube channel as I’m working really hard to produce quality videos and grow my following 🙂

I’ve got the free building plans over on Build Something so head on over and be sure to check it out!  Build Something is Kreg Tool’s site for free building plans for pieces for every room in your house!  They’ve got free building plans for beds, vanities, tables, decor, and everything in between.  So while you’re over there, browse all the awesome plans–including several of my own 😉

.

Now, there are several DIY washer and dryer pedestal designs floating around on Pinterest, but these are a little different. .

DIY Washer and Dryer Pedestal Stands for a Fraction of the Price for the Plastic Ones--How to Build Your Own

For these, I made two separate stands instead of one big stand, and I added drawers instead of leaving it open.  This mimics the original stand design that goes with the washer and dryers.  Also, my mom has a window above her washer, so she needed something not quite so tall.  These fit perfect!.

The build is really simple and you can have two of them knocked out in a weekend easily 🙂

How to Build Your Own DIY Washer and Dryer Stands with Drawer Storage

One note about these–you will see in the free building plans over on Build Something, that I drilled some shallow holes to place the feet in on top of the stands.  Although you don’t HAVE to do this, it will help prevent the washer or dryer from walking off the edge of the stands since they vibrate during use.

In order to do this, you will need to measure the center to center dimensions of the feet on the washer and dryer.  These holes need to be as exact as possible for the feet to sit down in them.  Draw out where the foot holes will be and use a spade bit slightly larger in diameter than the feet to drill down about ¼″-½″ deep.

.

Then, when the washer and dryer is set on top, the feet should sit down in these holes for extra stability.  This isn’t guaranteed to prevent walking, but it’s working for my mom’s pretty good so far.

The drawers underneath are perfect for storing stain remover products, cleaning rags, dryer sheets, and more.  I love pretty and practical storage, don’t you?? 😉

.

But, if washer and dryer stands aren’t your cup of tea and you’re looking for some more DIY Mother’s Day gift ideas, try one of these:

DIY Planter Boxes

DIY Louvered Wood Planters

DIY Lazy Susan

How to make a Personalized DIY Lazy Susan

DIY Large Wall Clock

How to make a DIY Rustic Wooden Clock--full plans and tutorial to make your own with a personalized touch

Don’t forget to head over to Build Something for the free plans and to YouTube for the video tutorial for these stands!  Oh, and also pin this for later 🙂

How to Build Your Own DIY Washer and Dryer Pedestal Stands with Storage Drawer

Until next time, happy building! 🙂

DIY Standing Desk or Kiosk

April 9, 2018 by Shara, Woodshop Diaries

How to Build Your Own Standing Desk--With planked sides and a shelf, this makes a great cashier kiosk or standing desk

Am I the only one that kind of thinks it’s weird that it took us this long to come up with the concept of standing desks?  Like…I’ve never really seen one until fairly recently.

.

Maybe they’ve been around and I just haven’t noticed until now (highly likely…), but what a life changing concept, amiright??  No wonder they’re becoming so popular.  And science (I’ve always wondered who exactly “science” is, haven’t you?) has shown that it’s much healthier to stand than it is to sit.

.

Can you tell I’m really selling the idea of a standing desk to you? Haha.  That’s because I made one and I’m going to show you the how to to make your own!

How to Build Your Own Standing Desk--With planked sides and a shelf, this makes a great cashier kiosk or standing desk

Actually, truth be told, this was originally built for a friend’s boutique store to serve as the cashier kiosk, but I thought it would also make a really cool looking DIY standing desk.

.

Side Note: If you’re looking for more desk ideas, check out these:  mobile craft desk, industrial pipe desk, and corner storage desk 🙂

.

Corner Floating Shelves
How to Build the Easiest Desk Ever
Build Your Own Corner Desk {That Looks Like A Pro}
DIY Corner Desk

Anyway, back to the standing desk…This desk was fairly large, but the size is SUPER easy to modify and it’s got lots of space for storage on the back side along with a shelf you can store notebooks, laptops, etc.

DIY Standing Desk with Wood Planked Detail and shelf

So if you’re ready to get to work at your new fancy standing desk, let’s get building 🙂

.

This post contains affiliate links.  Please see disclosure policy for details.

.

You will need:

(9) 1x6x10

(1) sheet ¾″ plywood

(4) 2x4x8

(5) 2x2x8

(2) 2x6x8 (optional)

¾″ edge banding

Miter Saw

Circular Saw

Kreg Rip Cut (optional)

Drill

Kreg Pocket Hole Jig

Nail Gun

Wood Glue

2 ½″ wood screws

2″ wood screws

2 ½″ pocket hole screws

.

Step 1: Build two Side Frames for DIY Standing Desk

First, I built two side frames.  Keep in mind, this desk was 27″ deep and 42″ tall.  If you want something different, modify this step for your application.

.

I assembled the sides with 2x4s and 2x2s as seen below.  I cut the two side pieces at 36″ (see step X for more information on the height), and the pieces in the middle here at 17″ long.  I left 6″ between the top and middle piece for the shelf.  You can totally adjust however much you want.

Build two side frames for DIY Standing desk

I built two sides just like the image above and assembled using 1 ½″ pocket holes and 2 ½″ pocket hole screws.

Step 2: Build DIY Standing Desk Frame

Now that the sides are assembled, it’s time to move on to the rest of the desk frame.  I cut 2x4s for the top and 2x2s for the rest of the frame pieces and assembled like shown using 1 ½′ pocket holes and 2 ½″ pocket hole screws.

I made this desk 8 ft. long.  I know that’s probably bigger than most people will want.  I cut these pieces 89″ long.  Modify this length as desired to get the size desk you’d want.

.

Keep in mind that when you modify this dimension, just trust me when I tell you to take your total length desired and subtract 6 ½″ to get the dimension these pieces need to be.

.

Also, note the pocket holes all face the outside EXCEPT for the 2×2 on the front where the shelf will go.  The planks will cover the pocket holes this way 🙂

Step 3: Add Shelf to DIY Standing Desk

Using a circular saw and a Kreg Rip Cut (the Rip Cut is optional, but super handy for this step), I ripped a sheet  of plywood down to one 21″ x 8 ft strip and one 27″ x 8 ft strip.  The 27″ wide strip will be the top, so I set it aside for later.   I cut the 21″ wide strip down to match the length of the frame pieces from step 2–so 89″.

.

I inserted the shelf this piece like shown below and used 2″ wood screws to screw it in place through the 2x2s along the side of the frame.

Step 4:  Add Supports to DIY Standing Desk

You may have noticed in the image above, I had a support in the middle that I didn’t mention.  Sorry, I got ahead of myself before I took the picture.

.

I added this little support piece and also one at the back on the bottom like shown using 2x2s.  This just helps add some support to the shelf piece.  I used pocket holes and screws on the piece at the bottom and used 2 ½″ wood screws to attach the piece at the front.

.

Since the 2×4 at the top is 3 ½″ thick, the screw wont go all the way through, so I just toenailed it in at the top.  Also, I point out in the image below the screws I used for screwing the shelf in in step 3 in case you were wondering 🙂

Step 5: Attach Top Middle Support

Using 1 ½″ pocket holes and 2 ½″ pocket hole screws, I attached a 2×4 middle support piece like shown.  This just helps keep everything square and keeps it from bowing.

“

Step 6: Attach Wood Planks to DIY Standing Desk

This is the fun part.  I cut SEVERAL pieces of 1×6 board at 36″ long and glued and nailed them into the frame like shown. (SORRY!  The piece for the top is leaning up on the front, but you get the idea, right?)  It’s easiest to start in the middle of the front here and work your way out.  When you get to the edges, you may have to rip them down to the exact size you need so it doesn’t hang off too far.

Then, just continue around the sides.  Get excited…it’s almost done!

Step 7:  Drill Holes for Cords

This step is optional, but I used a 1 ½″ spade bit on my drill and drilled holes in the shelf and the top for power cords for computers, etc.  This isn’t necessary, but will help keep that mess of cords hidden later 🙂

Step 8:  Add Bottom Toe Kick to DIY Standing Desk

This step is also optional.  I thought this made it look a little more like the kiosk it was going to be used for than a standing desk, but I added a piece at the bottom here for extra height, but also as a sort of “toe kick” like a lot of cabinets have.

.

Basically, I cut 2x6s to make the piece you see below that would fit perfectly inside the bottom of the desk.  I attached the boards using glue and 2 ½″ wood screws, then screwed it to the desk like shown using 2 ½″ wood screws.

Then, I glued and screwed it onto the inside of the bottom of the desk like shown using 2 ½″ wood screws.

Step 9: Attach the Top to the DIY Desk

Remember that leftover piece of plywood from step 3?  That’s the top.  I edge banded the plywood edges to give it a more finished look, drilled holes for the cords like in step 7, then centered it onto the desk and attached by toenailing  through all the top supports into the plywood top using 2″ wood screws.  You could also do pocket holes and screws here, but I just toenailed.

Just putty, sand, finish, and get to work 🙂  I used Rustoleum Weathered Grey stain for the bottom and Minwax Golden Oak for the top.  I really like the two tone look.

.

For added storage, you could also build doors on the back to hide what you store underneath or even add drawers under there, too.

DIY Standing Desk with Wood Planked Detail and shelf

Also, in case you are wondering, I took these pictures in front of my garage in between rain storms.  I know that made for an odd backdrop, but it was way to heavy to carry in the house just for pictures then carry it back out for my friend to pick it up haha.  I’m too weak for that.

.

So what do you think??  I really like the planked look and the option to hide so much stuff behind it.  Is this something you’d try for your next desk??  If so, I’d love if you’d pin this for later!

How to build your own DIY standing desk with planked sides! Could also be used for a store kiosk desk or display. The contrasting colors between Minwax Golden Oak and Rustoleum Weathered Grey give it s fun farmhouse feel.

And stay tuned for lots more fun builds coming up soon 🙂

.

Until next time, happy building 🙂

Simple Modern DIY Bookshelf

April 2, 2018 by Shara, Woodshop Diaries

How to build a DIY bookshelf that's simple, modern, and provides plenty of display storage

This year, I challenged myself to try some new joinery techniques in some of my projects.  One of these projects is this simple modern DIY bookshelf.

Simple, modern unfinished wooden DIY bookshelf with alternating shelf dividers

However, sometimes this “new joinery” adventure turns out good…like with this retro Bluetooth speaker box.  And other times…like now…there is a little learning curve and things don’t go exactly as intended…

.

For this modern DIY bookshelf project, I tried using dadoes for the shelves to help sturdy it up a bit and also help me with getting things aligned perfectly with so many shelves and dividers.  Everything worked great EXCEPT THAT I didn’t realize I was using the wrong size router bit.  *face palm*

.

Since the plywood I was using was actually 23/32″ thick instead of ¾″, I should have been using a 23/32″ bit, but I was using ¾″.  The plywood fit in the grooves, but there was too much wiggle room for it to fit snugly.  So, in addition to the dadoes, I also had to use screws to hold it together.  Live and learn.

.

On the bright side, it really did help quite a bit with alignment and making sure my shelves and dividers were square and evenly spaced.  So there’s that…pros and cons 🙂

.

I’m sharing the video and the how to below and I’ll give you some tips to avoid the mistakes I made 😉

This post contains affiliate links.  Please see disclosure policy for details.

.

It turned out great, but could have been made just as easily using pocket holes and screws.  So if you’d rather, you can try that method instead.  Either way, I’m going to show you how I did it and might I suggest investing in a 23/32″ router bit??

.

Other than that, here’s what you’ll need to build this modern DIY bookshelf:

(2) sheets ¾″ plywood

(3) 1x2x8 boards

(1) 1x4x8 board

Edge Banding OR ¾″ square dowels

Circular Saw

Kreg Rip Cut

Kreg AccuCut

Miter Saw

Router

23/32″ router bit (or bit same size as the plywood you are using)

Kreg Pocket Hole Jig

Drill

Nail Gun

Wood Glue

1 ¼″ wood screws

1 ¼″ pocket hole screws

Square

.

Step 1:  Cut Plywood Down to Size for Bookshelf

Here’s the deal…I made this shelf for a customer with specific measurements.  But the size he wanted was super wasteful, so I had a lot of leftover plywood–which is fine because I’ll use it for something.

.

BUT, if you want to save a full sheet of plywood on this project, I suggest making the horizontal shelves 4ft instead of 5ft like I did.  So, I’ll share the 4 ft version…just keep in mind it’s 1 foot narrower than what is pictured.

.

So first, I used my Kreg AccuCut to cut a full sheet of plywood in half to two 4 ft square pieces.

Cut plywood in half to build DIY bookshelf

Then, I set my Kreg Rip Cut up to cut 11 ¼″ wide and ripped these 4 ft pieces PLUS one more full sheet of plywood into four 11 ¼″ wide strips per sheet.

Rip plywood to size to build DIY bookshelf

Finally, I used my miter saw to cut all these strips down to their final size.  The 4 ft strips should already be the size they need to, but from the full sheet I cut down, I cut two strips to about 88″ long.  These will be the shelf sides.

.

By the way, if you like my miter saw stand, I’ve got the plans for you here 🙂

Measuring to cut plywood strip for bookshelf sides

Trim plywood sides to length using miter saw

So, just to recap…at this point, I had 2 strips 88″ long and 8 strips 4 ft long.  Shew, that was a lot of cutting!  NOTE: Keep all those scraps, you will use them later for the shelf dividers.

Step 2:  Route Dadoes for Easier DIY Bookshelf Assembly

As I mentioned earlier, I used dadoes to help join these boards, but since I ended up having to use screws anyway, if you want to skip the dadoes and just use screws, you can do that and skip to step 3.  But the dadoes really did help with getting everything lined up.

.

I inserted a ¾″ straight bit into my router (should have used a 23/32″ bit…whoops!) and made some test cuts on a scrap piece to make sure it was a good fit.  I made my dadoes about ¼″ deep.

Installing ¾" router bit into router to cut dadoes for DIY bookshelf

Test cutting dado for bookshelf assembly

I used a scrap board and some clamps as a straight edge guide for my router as seen above.  I tested a piece of plywood in the groove to make sure it fit.  Other than being a little loose, it worked good, so I moved on to the actual shelf boards.

Test fit plywood pieces into dadoes for bookshelf assembly

On one of the 88″ long boards, I measured up 3 ½″ from the bottom and marked a line across it.  I set up my straight edge so that my router bit would run just under this line.

Use router to cut dadoes to assemble Modern DIY bookshelf

Then, I measured from this edge up about 11 ¼″ and made another mark, and cut another dado directly above this line.  I did this all the way up so that there were 8 total dadoes and there was 11 ¼″ between each one.

Measure where to cut bookshelf dadoesRouting dadoes to join DIY bookshelf boards

Once one was finished, I copied the exact same thing onto the other 88″ board.

Dadoes evenly spaced along bookshelf sides

Now that the sides are done, it’s time for the shelves.  I cut dadoes in the center of one side of each 4 ft shelf board and then flipped it over and cut two more dadoes, cutting the board into thirds like shown below.  Once finished, sand everything before assembly.

Dadoes cut on shelf tops and bottoms

Step 3: Assemble DIY Bookshelf

Now that the cutting and routing is finished (FINALLY….amiright?!), it’s time to assemble.  This is the fun part.  This is where the dadoes come in handy.   I applied glue into the dadoes and placed the horizontal boards into the slots making sure the dadoes on the shelf boards were facing the right direction.  They should alternate like shown below.

Applying glue into shelf side dadoes to assembly DIY bookshelf

Placing shelves into dadoes to assemble modern DIY boookshelf

Screw diy bookshelf together

Then, I screwed the shelves in place using 1 ¼″ wood screws.  It’s helpful to use a square, here.  Once one side is attached, I flipped it over and attached the other side.  The only reason I flipped it over is because I didn’t have room in my shop…flipping it isn’t required haha.

Bookshelf flipped on side to screw on side panel

Step 4: Insert Shelf Dividers into Bookshelf

Remember those scraps from step 1?  Those will be the shelf dividers.  I cut 10 pieces 11 ¼″ x 11 ¾″ (cut to fit the length here…it may be slightly +/- 11 ¾″ depending on how deep you cut your dadoes) and insert them into the dadoes.  Then I screwed them in place using 1 ¼′ wood screws.

Installing bookshelf divider panels into modern DIY bookshelf

By the way, at the bottom in the middle (as you can see above), I also cut a small piece to serve as a support so the shelf doesn’t sag in the middle.  I attached this using 1 ¼″ wood screws through the bottom shelf into the support.

Step 5: Attach Face Frame to Modern DIY Bookshelf

I cut two 1x2s the height of the shelf (88″) and one 1×4 the width of the shelf MINUS 3″ and one 1×2 this same length.  The 1×4 will be on the bottom and the 1×2 will be on the top.

.

I used a pocket hole jig to drill pocket holes in the top and bottom pieces and to assemble the face frame using 1 ¼″ pocket hole screws.

Assemble face frame for DIY stand alone bookshelf

Then, I glued and nailed this face frame in place.

Nailing face frame onto DIY modern stand alone bookshelf

For the horizontal shelves, you can use edge banding, ¾″ square dowels or rip some 1x boards down to ¾″ or 1 ” strips.  I cut, glued and nailed these in place.

Nail front edge trim onto DIY modern stand alone bookshelf

Then, I cut to fit some to fit on the shelf dividers as well.

Add trim to diy shelf dividers

Step 6:  Putty and Add Trim to Bookshelf

I puttied all the nail and screw holes and finally applied some small crown molding to the top.

Unfinished stand along diy bookshelf

My customer was going to paint this himself, but honestly, I like the unfinished look the best 🙂  You could add a backing here, but I like it open.  It’s simple, modern, and clean.

Stand alone unfinished Modern DIY Bookshelf with offset dividers

With the design of the alternating shelf dividers, it’s really sturdy and that helps prevent any sagging in the middle.  It’s a really simple design, but usually bookshelves are haha.

Stand alone unfinished DIY bookshelf with modern style offset dividers

Unfinished pine plywood DIY bookshelf with crown molding

DIY unfinished stand alone bookshelf with offset shelf dividers

Pretty nice Modern DIY Bookshelf, right?  I would LOVE it if you’d pin any of the images above for later! 🙂

.

If you are looking for some more DIY bookshelf designs to try, how about one of these?

DIY Bookshelf with Feet

How to Build a DIY Bookshelf

Simple Little Oak Shelf

How to Build a Small Simple DIY Bookshelf--free woodworking plans

Four Sided Bookshelf

Get the free building plans for this DIY Four Sided Spinning Kid's Bookshelf

Until next time, happy building! 🙂

How to Build an Outdoor Community Pantry

March 26, 2018 by Shara, Woodshop Diaries

How to Build an Outdoor Community Food Pantry--Free Building Plans

Have you ever wanted to use your love for building, woodworking, making, and crafting to help others in your community?  Then you’re in the right place.  This DIY community pantry is a fun build that will help those who may have a little extra give to those who may have a need.

How to Build an Outdoor Community Food Pantry--Free Building Plans

It’s similar to those little community libraries that are becoming popular where people share books with each other in the community.  Except in this case, people stock the pantry with food and people who need some can come and take what they need.

.

It’s a great way to give back to your community and to encourage others to get involved, too!  I can’t take credit for this idea though…a sweet friend asked me to build one and now she’s got me inspired to find other ways to build things to help the community 🙂

.

So, if you’re ready to get involved in helping others around you, let’s get to the building, shall we?

.

This post contains affiliate links.  Please see disclosure policy for details..

You will need:

1 sheet ¾″ treated plywood

1 treated 4x4x8 post

(2) 1x2x8 PVC boards

⅛″ thick plexiglass (cut to fit…see step 7)

Scrap 2×2 pieces

Roof protection-like sheet metal or shinges (optional)

2 hinges

1 latch

1 ¼″ exterior wood screws

2 ½″ exterior wood screws

Wood Glue

Circular Saw

Miter Saw

Router and ⅜″ rabbet bit (optional)

Nail Gun (optional)

Drill

.

Step 1:  Cut Out the Back Side of the Pantry Box

First, I cut a piece of the ¾″ treated plywood for the back side.  You can modify your measurements as desired for this pantry, but I made my back piece about 22 ½″ x 24″. Since the sides of the box are slanted, it’s also best to bevel the top edge of the back side to about 14 degrees for a better fit. (See step 3)

Step 2: Cut Sides of Pantry Box

Next, I cut a piece of ¾″ treated plywood to 16″ wide and 48″ long.  I measured up from one end 22″ and made a mark on the edge of the plywood.  Then did the same on the other side and drew a straight line to connect the two marks.  This gave me two identical sized pieces of plywood with a slant on one end going from 22″ up to 26″.  I cut along this line with my circular saw to make the two sides.

Step 3:  Attach Sides and Back of Box

Then, I glued and screwed (using 1 ¼″ exterior grade wood screws) the sides and back together like shown.  Since it’s rather large and I only have two hands, I used the clamp to hold the pieces in place while I attached.

Adjust the cut on the back piece as needed to allow it to fit flush along the back edge with the two sides.

Step 4:  Add the Top to the Pantry Box

For the top, I cut a piece of ¾″ plywood about 27″ x 20″ and glued and screwed onto the top of the box like shown.  It’s important here that you check that the box is square before screwing together.  Again, I used wood glue and 1 ¼″ exterior wood screws.  I left 1″ hanging off the back side and about 2 ½″ off the front.

Step 5: Add the Bottom of the Pantry Box

I cut a piece of ¾″ treated plywood to 24″ x 15 ¼″ for the bottom and screwed in place using 1 ¼″ exterior grade wood screws through the back and sides.

Also, at this point, you could add a shelf the same way if you wanted.

Step 6: Add Face Frame to Community Pantry Box

For the face frame and the door frame, I used 1×2 PVC board.  You could also use treated 1xs here, but the PVC looks much cleaner.  It’s basically plastic, so it won’t rot being outside in the rain.  You can find PVC boards at Lowes, Home Depot, or your local building store.

.

I cut these to fit around the front of the box and glued and nailed in place like shown.  I beveled the top piece to about 14 degrees just like I did the back side for a better fit.

Step 7:  Build Door for Pantry Box

I built a door frame  that was about ¼″ smaller in both dimensions than the opening for it.  So, the opening here was 22 ½″ wide and 23″ tall, so I made the door 22 ¼″ x 22 ¾″.  I assembled the door using 2 ½″ wood screws like shown.

Then, I routed out a groove to place the plexiglass in on the back of the door frame.  One thing to note: PVC will melt if the router bit gets hot.  If you look closely, you can see some spots where the bit cut a little deep into the sides of the frame.  Whoops.  In hindsight, I would have used some clips to hold the door in place OR cut dados in the frame to slide the glass into.

.

I used clear Gorilla Glue to hold the plexiglass in place in the back of the door frame.  By the way, you can purchase plexiglass at Lowes and/or Home Depot and cut it yourself with a special cutter, have them cut it, or buy it from your local glass place precut.  I chose option one and it was very difficult to cut myself without cracking and/or marring it.  I recommend doing either of the other options haha.

Once the door was good and dry, I attached with simple hinges, and added a latch.  Also, if you haven’t at this point yet, now is a good time to add a shelf before you attach the door.

Step 8:  Add the Post

I added a 5 ft 4×4 post to the bottom so that about 2 ft could go into the ground and that means the pantry box would stand about 3 ft off the ground.  Feel free to adjust as desired.  I simply glued and screwed the post to the box through the bottom (making sure it was centered) using 2 ½″ exterior grade wood screws.

For some added stability, I also added some scrap 2x2s on each side.  I mitered the ends 45 degrees and screwed one end into the post and the other to the box.

Step 9: Finish the Pantry

Finishing the box with exterior grade paint will help protect the wood from damage from the elements since it will be outside.  For some added protection, I used clear silicone caulk along all the joints on the inside of the box and around the roof.  This will help protect the items inside from getting wet when it rains.

Once it’s painted and sealed, it’s ready for use!

How to Build a DIY Community Pantry Box

An optional step is to add some sheet metal, or shingles to the roof.  It’s not required, but any extra protection never hurt 🙂

.

These pantries are great for helping those in need in your church, community, or even at a local school.  Simply stock it and encourage others to do so.  Then, those who need it can come take what they need.  It’s a great way to get involved in giving back locally 🙂

How to Build a Simple Community Pantry that can help others in need--A DIY project that can give back to your local community

A DIY project that gives to those in need…I mean, what are you waiting for??  Get out there and get building!  And don’t forget to pin this idea for later and to inspire others who see it 🙂

.

Until next time, happy building 🙂

How to Build a DIY Storage Bed

March 19, 2018 by Shara, Woodshop Diaries

Free Building plans to build your own DIY King size storage bed

In this post, I’m sharing how to build your own DIY storage bed!

This post was sponsored by Build Something. This post also contains affiliate links.  See disclosure policy for details.

Unfinished DIY storage bed in small woodworking shop

I had “whoops moments” a lot with this project.  Since this was the first time building a bed, I learned several things during the process and made several mistakes.  I’ve since built a few more beds with a few less mistakes haha.  I learn everything the hard way…

.

You might also notice that I learned it wasn’t the best idea to build a King Size bed in a one car garage workshop haha. Good thing it’s built in pieces for easy disassembly!

.

For more of my bed builds, check these out:

  • Shara Woodshop Diaries reading in DIY Kids House Bed Frame
    DIY House Bed
  • DIY Modern Bed

The free building plans over on Build Something give you all the details on a King size bed.  You’ll see the mistakes I made and I explain how to fix them in those plans.

.

But I’ve since rewritten the plans with diagrams and graphics (and without those mistakes) for both a Queen and a King Size Bed and you can find them here.

And to help visualize the assembly better, I made a YouTube video for this bed build.  It’s old, so don’t judge me too harshly 🙂  It’s still a really helpful instructional video.  Here’s the DIY Storage Bed video.

Now, the printable plans can be found in the links above. But I’m sharing an overview of the build and some tips below.

.

I like to build my beds in sections to break it down a little and to make it easy to move around if you have to take it from your shop to the bedroom it’ll be placed in…or if you move houses (which we seem to do a lot).

.

I designed this DIY storage bed to be made in four separate pieces plus slats so that it would be easy to assemble and disassemble.  First, I built the headboard.  Then the footboard, then the 2 sides, and finally, the slats.

Graphic showing headboard plus 2 side boards plus one footboard makes a bed

Building in parts makes the build more “digestible” and not so overwhelming

.

Okay, now, let’s get building 🙂

Step 1: Assemble Bed Posts

The first part of this build is assembling the bed posts. I actually made these to be hollow posts made from gluing and screwing 2×6 boards together.

Two halves of bed post assembled

I used pocket holes to make “L shaped” pieces first, then used glue and 2 ½″ wood screws to attach two Ls together to make a post.

Bed posts assembled as a hollow post

The headboard posts were six foot tall and the foot board posts were three foot tall for both the King and the Queen Size bed.

.

For the top, I glued and screwed a piece of 9″ square ¾″ plywood on the posts.

Top plate installed onto bed posts

Then, just to give it a little more detail, I glued and nailed some small crown molding around the top and some 1×4 trim cut to fit along the bottom of each bed post.

trim added to head and foot board posts

Step 2: Build DIY Storage Bed Headboard

Once the posts were complete, it was time to add the headboard. Now depending on the size you’re building, the headboard pieces will vary in size, so refer to the plans for specifics.

.

But I cut the headboard from ¾″ plywood and attached using pocket hole screws and glue.

Headboard panel attached between headboard posts

Then, I cut to fit 1x4s like shown to trim out the headboard. I lined the inside of the frames with cove molding for a little extra detail as well.

Headboard trim installed using 1x4s and cove molding

The last part is adding a support piece at the bottom to attach the sides onto once they are built. I used pocket holes and screws (plus glue) to add a 2×6 board at the bottom for this.

Bed rail support piece added onto headboard

Step 3: Build Storage Bed Footboard Panel

Now that the headboard is assembled, it was time to move to the footboard. Since the footboard of this project has drawers installed in it, the footboard panel needs to be cut out for that.

.

Just like the headboard, I cut the footboard from ¾″ plywood.

.

Then I laid out where to put the drawers and cut this out with a jig saw and attached to the footboard posts with glue, pocket holes, and screws.

Drawer holes cut out for footboard storage

In the next step, I’m going to be adding some framing for the drawers to mount onto made from 2x4s.

.

Now, when you’re working with pocket holes in 2x material, it’s best to use 1 ½″ pocket holes and 2 ½″ screws. But since the plywood was only ¾″ thick, 2 ½″ screws would be too long and shorter screws wouldn’t have as good of a hold.

.

So to “turn ¾″ plywood into 2x material,” I just glued and screwed some scrap blocks to it where the drawer framing will go.

Scrap wood blocks on foot board to attach framing

You’ll also notice above that I added a 2×2 board across these scrap blocks. This is to 1. help keep the footboard from bowing and 2. act as a support for the bed slats later.

Step 4: Install Drawer Box Framing into Storage Footboard

The framing for the drawers to slide into was built from 2x4s and assembled with pocket holes and screws.

Assembling drawer framing for footboard on storage bed

After the framing was installed, I added some little feet to support the back end once the drawers were installed.

Attaching "feet" supports to back side of drawer framing on foot board

Step 5: Install Drawers into Storage Bed

I mounted 22″ ball bearing drawer slides onto the 2×4 framing for the drawers.

.

Then, I built the drawers from ¾″ plywood for the sides and ¼″ plywood for the bottoms.

.

I have a detailed guide on how to build drawers here that shows you how to install the slides, size and build the drawers, and install them.

.

Once the drawers were built, I installed them into the footboard.

Drawers installed into storage bed foot board

Finally, I cut ¾″ plywood pieces for the drawer fronts and added some cove molding around the edges (the molding is optional–it just adds some pretty detail).

.

I centered the fronts onto the drawer boxes and shot a nail to hold it in place while I securely attached it from the inside of the box with 1 ¼″ wood screws.

Installing drawer fronts onto drawer boxes in foot board
Finished footboard of DIY storage bed

Step 6: Assemble Side Boards

The side boards are also made from ¾″ plywood. The outside is 16″ tall, but I glued and screwed an 8″ wide strip onto the inside for the slats to rest on.

Attaching slat support onto bed rail sides

Once the two side boards–which were just an 8″ strip attached to a 16″ strip–were together, I added the bed brackets.

.

As I mentioned earlier, I designed the bed to be built in four separate pieces.  They assemble using these bed brackets. 

.

You mount the bracket with slots onto the head and foot boards, and the brackets with “hooks” or “teeth” onto the bed sides. Below they’re shown on my modern bed frame build. But this is done the same way with this bed.

  • “Teeth” part of brackets
  • “Slot” part of brackets

When you’re ready to assemble, it’s super easy to slide the teeth on the side rails into the slots on the head and foot board and the bed is assembled in about 60 seconds and if and when you need to pack up and move it, it also disassembled in about 60 seconds as well.

Unfinished DIY storage bed frame in workshop

NOTE: When I originally built this bed, I didn’t use the 2×6 support I mention in step 2 on the headboard. I made it much harder than it needed to be by adding two support pieces on each side. That’s why you don’t see it above. Using the 2×6 is easier so I recommend it in this post and in the plans.

.

No fancy hardware or joinery needed. I highly recommend using these brackets when building beds.

Step 7: Install Bed Slats

It’s almost done! All that’s left is the bed slats!

.

I used 1x4s for the slats and added some 2×2 posts in the center with 2 ½″ screws to prevent sagging. You could also rip plywood strips for the slats instead of 1x4s.

Slats placed along side rails of storage bed frame
Slats installed onto DIY storage bed frame

Step 8: Finish DIY Storage Bed

For this finish, I just applied a SUPER EASY whitewash technique. This is NOTE A SCIENCE and is super easy to do.

.

First, I stained the entire bed (well–all the parts you would see) in a medium to dark brown color. I used Minwax Dark Walnut.

Dark stain used as first coat before a whitewash effect on unfinished wood

After the stain dried, I took a plastic cup and a cheap paintbrush and mixed some regular latex (water based) white paint with water. I mixed it about 50/50. The exact color and type of paint you use here doesn’t matter as long as it’s water based (latex).

How to whitewash wood--white paint and paintbrush

I brushed it on, let it sit about 10 minutes, then took an old towel (or t shirt works, too) and wiped it of/smeared it in. It’s easiest to work in sections.

.

So, I did one headboard post, then wiped it off. Then did half the headboard, wiped it off. Then the other half of the headboard, wiped it off. The other headboard posts, wiped it off.

.

If you want it lighter, let it sit longer before wiping. If you want it darker, don’t let it sit as long. If you wipe it off and it’s darker than you wanted, just brush on another coat.

.

DON’T MAKE THIS COMPLICATED–it’s literally wipe on, wipe off 🙂 You’ll get the hang of it as you go.

Free Building plans to build your own DIY King size storage bed

If you’re interested in a black wash vs a white wash, I did this same method with black paint on this desk.

.

Now, just add some handles to the drawers, a mattress, some bedding, and take a nap–bed building is exhausting 😉 haha.

DIY King Size Storage Bed

What’s cool about this build is that since it’s built in separate pieces, you can build only the headboard if you want, leave the storage off the end, and modify the size pretty easily.

.

Now, go grab the free plans over on Build Something for a King size, OR head over here for the updated King OR Queen Size, and get out there and get building!

How to Build a DIY Storage Bed--Free Building Plans for this farmhouse style storage bed

And if you’d like to save this for later, feel free to pin this graphic to your favorite Pinterest board!

Until next time, happy building! 🙂

Simple DIY Storage Trunk

March 18, 2018 by Shara, Woodshop Diaries

The older I get, the simpler I like things.  This goes for food (especially when I’m cooking it haha), clothing, paperwork, and storage solutions.  You can get “fancy” with large complicated storage solutions and systems, or you can build a simple, stylish box.  Yeah, I’m going to go with the simple DIY storage trunk box idea 🙂

Simple DIY Storage Trunk with lid open

This post contains affiliate links.  Please see disclosure policy for details.

.

I’ve built a storage trunk in the past that was about this same size, but the design was a little more detailed.  I really like the simplicity of this plywood box with mitered corners.  And the added baseboard is just enough detail to make it pop 🙂

DIY Simple Storage Trunk Blanket Chest with soft close lid closed

For this build, I mitered the corners of the plywood pieces to 45 degrees and glued together.  But, to make it even simpler, you could totally just butt the pieces together and cover the edges with edge banding.  I explain all the details in the plans below.

.

So, if you’re ready to get building, here’s what you need:

Tools and Materials:

  • Circular Saw (and AccuCut saw guide–optional)
  • Jig Saw
  • Table Saw (optional)
  • Band Clamp or Ratchet  Straps
  • Drill
  • Nail Gun
  • Miter Saw
  • Iron to apply edge banding (optional)
  • (1) Sheet ¾″ plywood
  • (1) 2x2x8 (for inside corner supports)
  • (1) 10′ stick of 3 ¼″ baseboard trim
  • Glue On Edge Banding
  • (1) 30″ piano hinge
  • (1) pair soft closing lid hinges (optional)
  • Wood Glue
  • Brad Nails
  • 1 ¼″ wood screws

Cut List:

  • (2) ¾″ x 16″ x 34″ with 45 degree beveled ends (box front and back sides)
  • (2) ¾″ x 16″ x 17″ with 45 degree beveled ends (box short sides)
  • (1) ¾″ x 15 ½″ x 32 ½″ (box bottom)
  • (1) ¾″ x 18″ x 36″ (box top)
  • (4) 2×2 @ 14 ½″  (see step 7 below)
  • Baseboard Trim cut to fit

Step 1: Cut DIY Storage Trunk Side Pieces

This box was made with mitered corners for a cleaner look.  But, this makes this project a little more challenging.  If you wish, feel free to  not miter the corners and just join the boards by butting them together using wood screws or pocket holes.  However if you choose to miter them like I did, you can do this with either a table saw, a circular saw, or miter saw (if you have a miter saw large enough, this would be the easiest option) by setting the blade tilt (bevel) to 45 degrees.

Plywood pieces cut to size to assemble DIY storage trunk

If you choose not to miter the corners, just cut the pieces to size without a miter.  And also, if you don’t miter the corners, you need to adjust your short side pieces to be only 15 ½″ long instead of 17″.

Step 2: Cut Front Side Finger Slot

Before assembling the pieces, I wanted a slot on the front along the top to help prevent smashed fingers.  For this, I used a straight edge and marked out where I wanted my slot on the front side piece.  I used a stain can to trace around for the rounded corners.  Then, I carefully cut along the line with a jig saw.

Trace out to cut finger slot on DIY toy box to prevent smashed fingers

Step 3: Finish Edges of DIY Storage Trunk Pieces

One more step before putting the pieces together…this is optional, but gives the project a more finished look.  I applied glue on edge banding to the top edges of the plywood box pieces using an iron before assembling the pieces together.  I sometimes use tin foil between the iron and the edge banding to help keep glue from getting on my iron.

Apply edge banding to DIY storage trunk pieces before assembling

Step 4: Glue Together Storage Trunk Sides

Now, this is the hard part.  It’s helpful to have some clamping jigs or an extra set of hands (so grab a friend!) for this.  I laid out my side pieces with the miters facing up and applied wood glue in the grooves.  If you’ve seen my tile top keepsake box project, this is a large scale version of that glue up process.  NOTE: If you skipped the miters and chose to butt join instead, you can simply screw the pieces together using pocket holes for a much easier assembly process.

Apply glue to storage trunk joints

I carefully folded up each side and secured using a brad nail or two.  You can also use painters tape, but since this glue up is so large, it might need more than just tape.

Fold up sides of DIY storage trunk to glue and nail joints together

Once all the corners were glued together and nailed, I quickly moved onto the next steps before the glue dried.

Nail corner joints of DIY storage trunk box

Step 5: Install the Bottom of DIY Storage Trunk

I cut the bottom of the storage trunk box and placed it into the bottom of the glued up box.  Once it was flush along the bottom of the box, I used 1 ¼″ wood screws along the bottom of the sides to secure this piece in place.  These screws will be covered later.

Insert bottom of storage trunk chest box

Screwing bottom panel of storage chest in place

Step 6: Clamp Storage Box While Glue Dries

Now, my corners weren’t perfect so to help clamp everything together while the glue dries and pull my corners closer together, I used a band clamp (ratchet clamp works well, too) to wrap around the box.  If you still have some gaps or the corners still aren’t perfect, you can fix that later.

Band clamp to tighten corners of storage box

Step 7: Add Inside Braces to Storage Trunk

I added some scrap blocks to the inside corners for extra support once the glue had dried.  To make these blocks, I cut a couple strips of a scrap 2x board with my blade tilted 45 degrees on my table saw.  You could also do this with a circular saw, or simply use some 2×2 blocks.  This just gives the corners a little extra holding support.  I glued and nailed (or you could screw if you wish) these blocks into each corner.

Corner braces to strengthen miter joints of storage chest box

Step 8: Add Base Board Around Bottom of Box

I cut to fit the baseboard trim along the bottom of the box and mitered the corners at 45 degrees so they line up nicely at the corners.  I simply glued and nailed each piece in place and worked my way around all the sides.

Mitered baseboard along bottom of storage trunk box

Step 9: Add the Top and Finish

Now that the box was complete, I cut the top according to the cut list and applied edge banding on the sides for a cleaner look.

.

It’s easier to go ahead and finish the box before attaching the top.  So, because mitered corners are really hard to get perfect, I puttied the corners of the box and the trim and also all the nail holes.  Once it was dry, I give it a good sanding and stained the box and the top with Minwax Early American wood stain and sealed it with a couple coats of Minwax Polycrylic.

.

Then, I attached the top using a 30″ piano hinge making sure to leave equal overhang on both the left and right side.  I found it easiest to attach the hinge to the top first, then attach that to the box.  As an optional step, you can also add some soft close hinge supports to the sides if you wish.  And that’s it!  You have a pretty new storage chest!

Simple Plywood storage trunk with lid open and soft close hinges

It’s a really simple design that is great for end of the bed storage, toy storage, or even a coffee table or entryway storage bench.  It’s nothing fancy, but perfect for simple storage without all the bells and whistles.  Sometimes a box works just fine 🙂  Plus, you can build the whole thing from a single sheet of plywood!

Corner close up of Simple mitered corner storage trunk blanket chest

.DIY Simple storage chest with finger slot to prevent smashed fingers

Speaking of other simple storage solutions, be sure to check out these other DIY storage ideas:

DIY Storage Chest

DIY Storage Chest perfect for blanket storage

DIY Toy Box

DIY Modern Storage Trunk

DIY Storage Bench-Modern Rustic Style with Rough Sawn Plywood--Free plans and tutorial

DIY Hope Chest

DIY Entryway Storage Bench

Pottery Barn Inspired DIY Entryway Storage Bench--#PlywoodPretty Challenge

So whatever your preference, there’s plenty of storage options.  Get out there and get building your favorite…Right after pinning this for later 🙂

Storage Trunk Blanket Chest Pinterest Collage Image.

Until next time, happy building 🙂

Shara Woodshop Diaries Sign Off

  • « Previous Page
  • 1
  • …
  • 9
  • 10
  • 11
  • 12
  • 13
  • …
  • 16
  • Next Page »

Hi! I'm Shara, the designer, maker, and videographer behind Woodshop Diaries. Let's get building, friends :)

Learn more →

Woodworking Tips & Guides

  • How to make simple Shaker style cabinet doors!!
    DIY Simple Shaker Cabinet Doors
  • 5 Tools To Get Started Woodworking
  • DIY Kitchen Cabinets–From Only Plywood
  • How to Square Board Edges and Make Your Own 2x2s

Footer

↑ back to top

Tips to Take Your Projects to the Next Level

--5 Secrets to Professional Looking DIY Furniture

--How to Properly Paint Wood Furniture

--How to EASILY Cover Plywood Edges

--How to Sand Wood

--10 Must Have Tools for Furniture and Cabinet Building

Printable Building Plans

Check out our shop to browse printable PDF building plans!

Website Policies

This website is for entertainment purposes. Using any information provided is to be at your own risk.

This site uses cookies to provide you with a better experience.

All images and text on this site are property of Woodshop Diaries, LLC. Please be respectful and don't steal this content.

See Policies and Privacy page on this site for more information.

Want to get in touch? Contact Us Here

Copyright © 2026