Woodshop Diaries

  • Shop
  • About
    • Work With Me
    • Frequently Asked Questions
  • DIY Projects
    • DIY Furniture Plans
      • DIY Bed Plans
      • DIY Dresser Plans
      • DIY Nightstand Plans
      • DIY Desk Plans
      • DIY TV Stand Plans
      • Coffee and Side Table Plans
      • Tables
      • Shelves and Bookcase Plans
      • DIY Storage Trunk Plans
      • DIY Bench Plans
      • DIY Storage Cabinet Plans
      • DIY Bathroom Vanity Plans
      • Kids Projects and Furniture
    • DIY Scrap Wood Projects
    • DIY Workshop Projects
    • DIY Home Decor Projects
  • Getting Started
    • Cabinet Building
    • Woodworking Basics
    • Furniture Finishing Tips
    • Tool Guides & Reviews
  • Blog
menu icon
go to homepage
  • Shop
  • About
    • Work With Me
    • Frequently Asked Questions
  • DIY Projects
    • DIY Furniture Plans
      • DIY Bed Plans
      • DIY Dresser Plans
      • DIY Nightstand Plans
      • DIY Desk Plans
      • DIY TV Stand Plans
      • Coffee and Side Table Plans
      • Tables
      • Shelves and Bookcase Plans
      • DIY Storage Trunk Plans
      • DIY Bench Plans
      • DIY Storage Cabinet Plans
      • DIY Bathroom Vanity Plans
      • Kids Projects and Furniture
    • DIY Scrap Wood Projects
    • DIY Workshop Projects
    • DIY Home Decor Projects
  • Getting Started
    • Cabinet Building
    • Woodworking Basics
    • Furniture Finishing Tips
    • Tool Guides & Reviews
  • Blog
search icon
Homepage link
  • Shop
  • About
    • Work With Me
    • Frequently Asked Questions
  • DIY Projects
    • DIY Furniture Plans
      • DIY Bed Plans
      • DIY Dresser Plans
      • DIY Nightstand Plans
      • DIY Desk Plans
      • DIY TV Stand Plans
      • Coffee and Side Table Plans
      • Tables
      • Shelves and Bookcase Plans
      • DIY Storage Trunk Plans
      • DIY Bench Plans
      • DIY Storage Cabinet Plans
      • DIY Bathroom Vanity Plans
      • Kids Projects and Furniture
    • DIY Scrap Wood Projects
    • DIY Workshop Projects
    • DIY Home Decor Projects
  • Getting Started
    • Cabinet Building
    • Woodworking Basics
    • Furniture Finishing Tips
    • Tool Guides & Reviews
  • Blog
×
Home

Understanding Lumber Sizing–for beginners!

May 11, 2023 by Shara, Woodshop Diaries

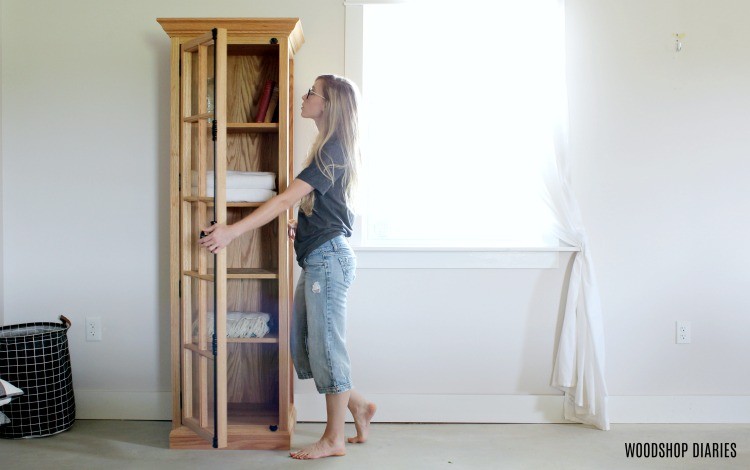
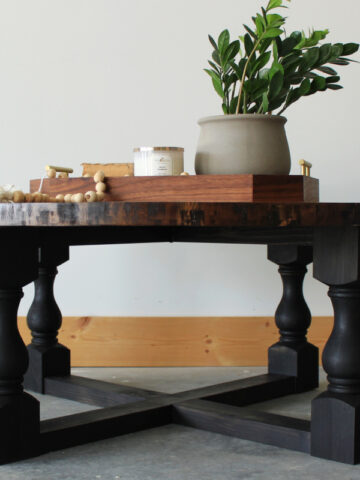
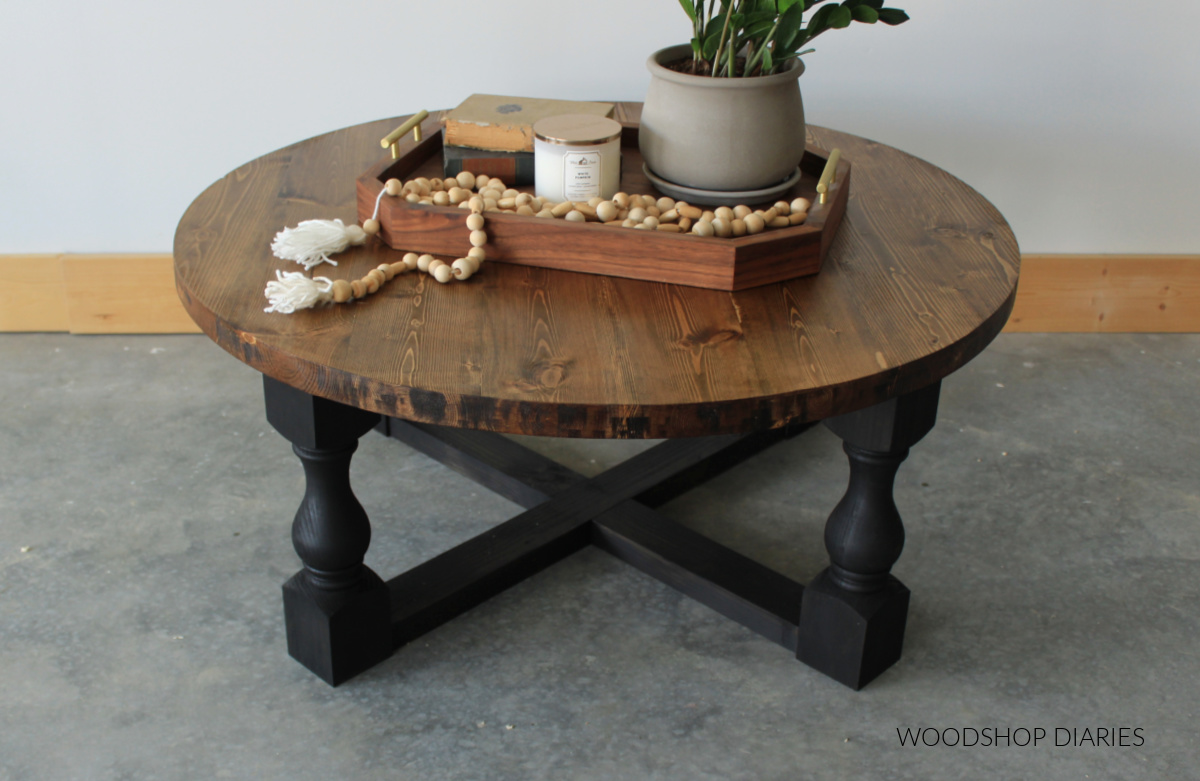
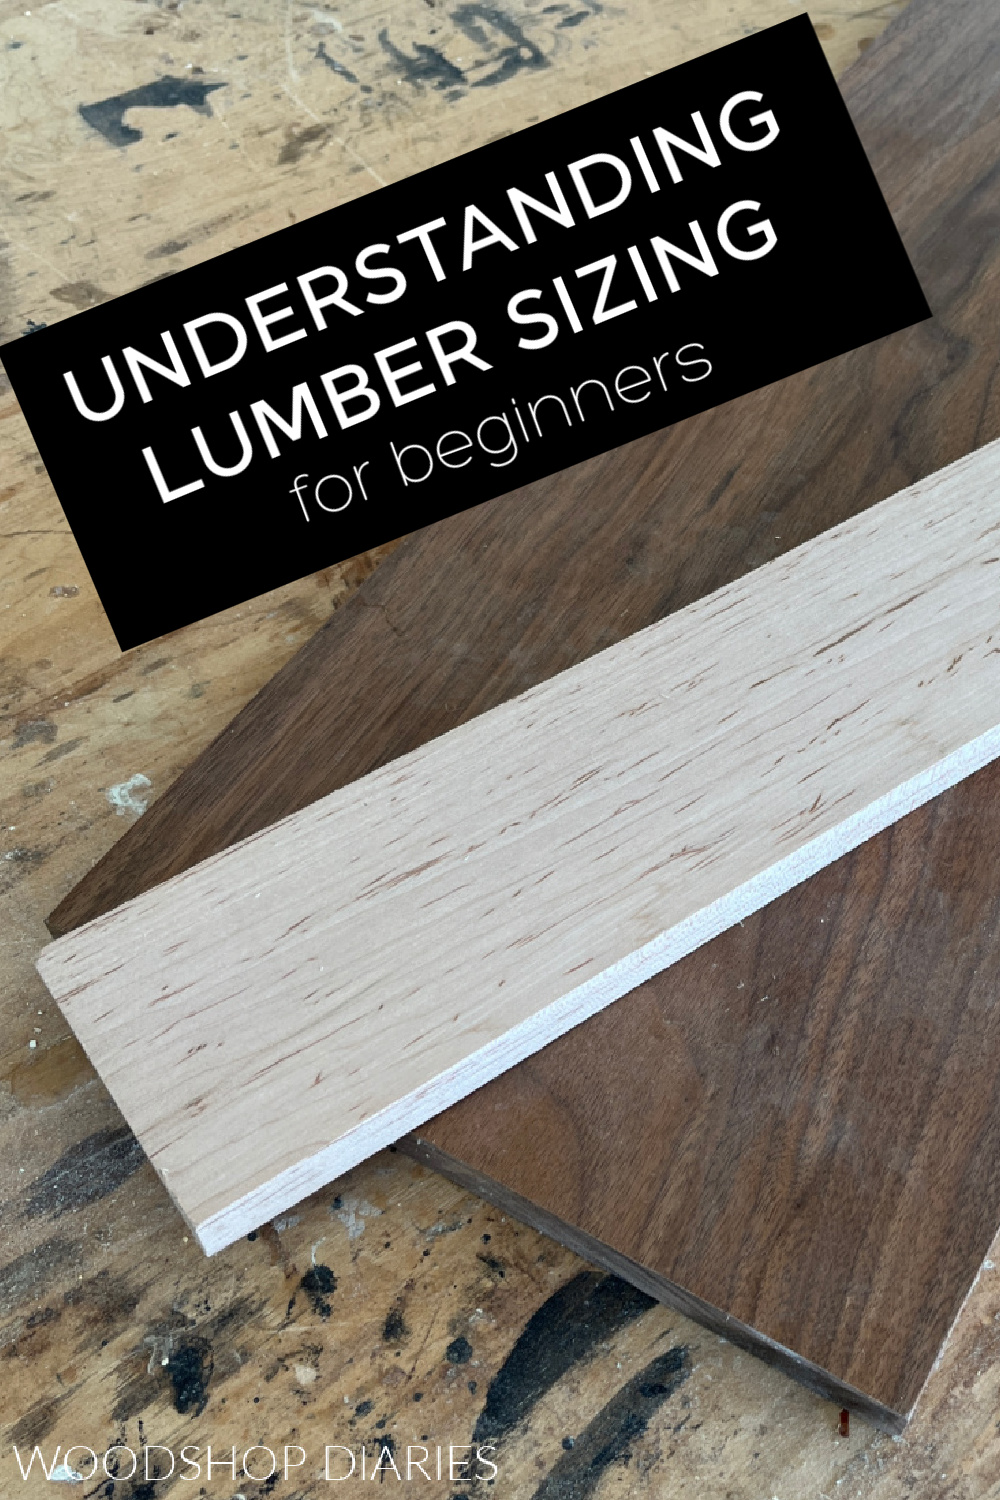
Confused about lumber sizing? You aren’t alone!

In this post, I’m sharing common sizes of lumber so you know exactly what you’re working with when buying or building with wood.

white oak lumber stacked in a pile on concrete floor

One of the most confusing (and most often asked about) things about buying and working with lumber is understanding the sizing. Don’t get overwhelmed, though.

Lumber sizing may seem confusing at first, but it’s not difficult once you realize what you’re looking at.

This post contains affiliate links. See policies page.

Types of Lumber

The way lumber is dimensioned and sold will vary depending on where you’re shopping for it and what you’re buying.

Construction Lumber

Construction lumber is wood that is commonly used to build homes and structures. Hence, the name “construction lumber.” Ha!

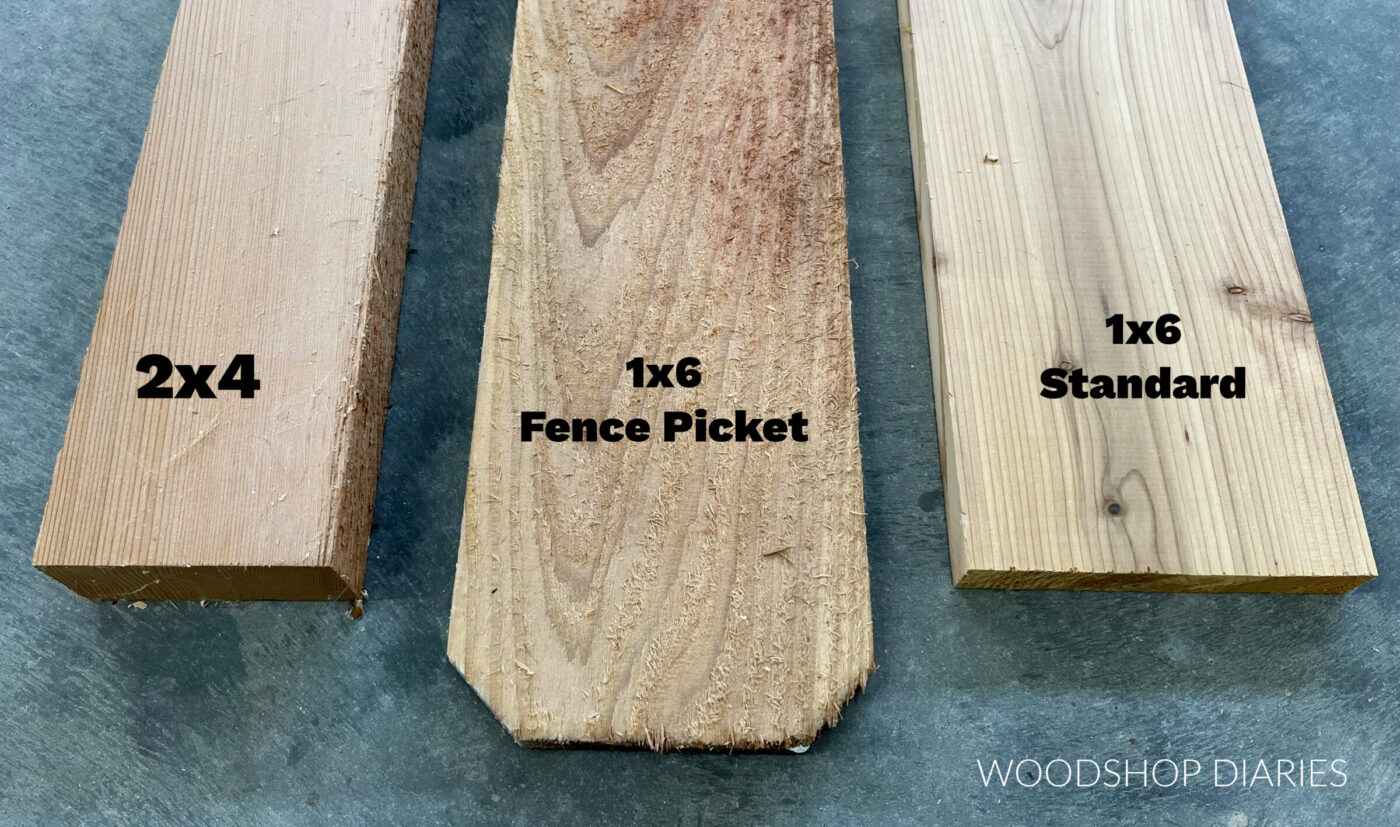
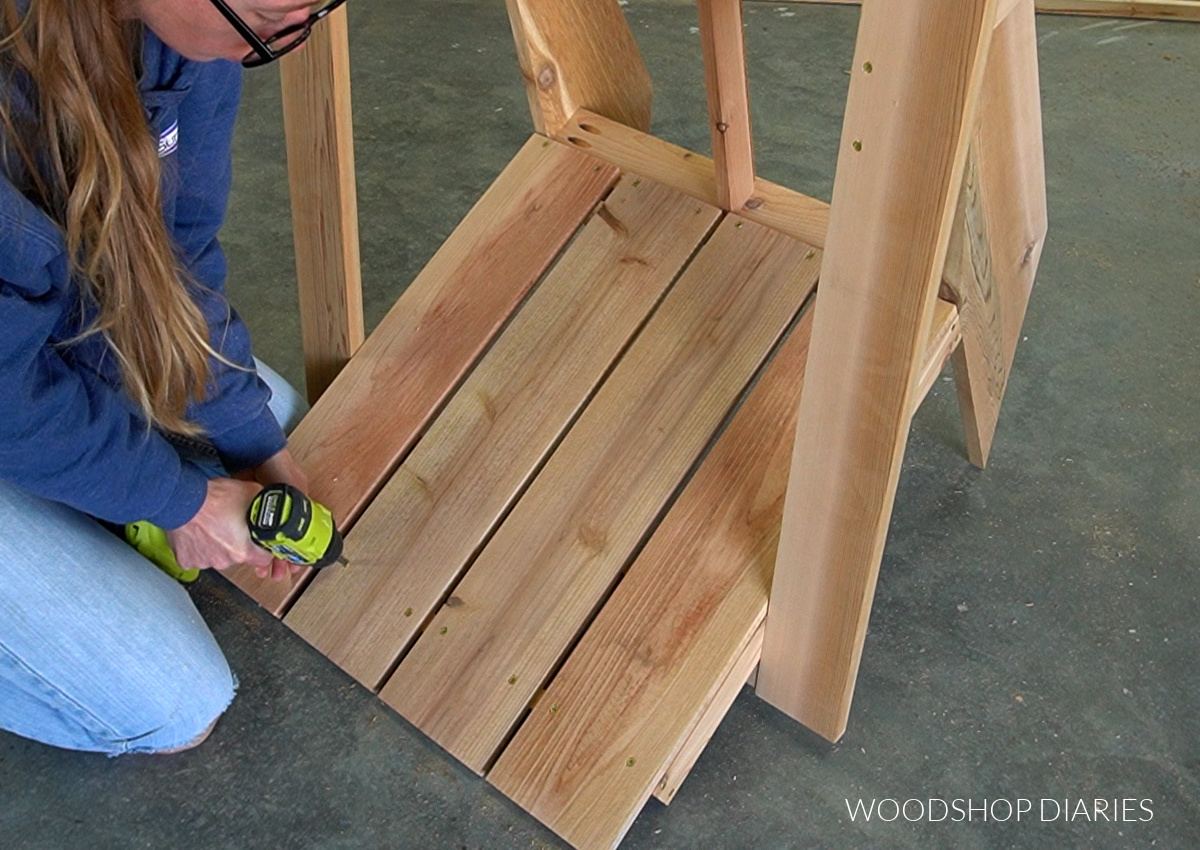
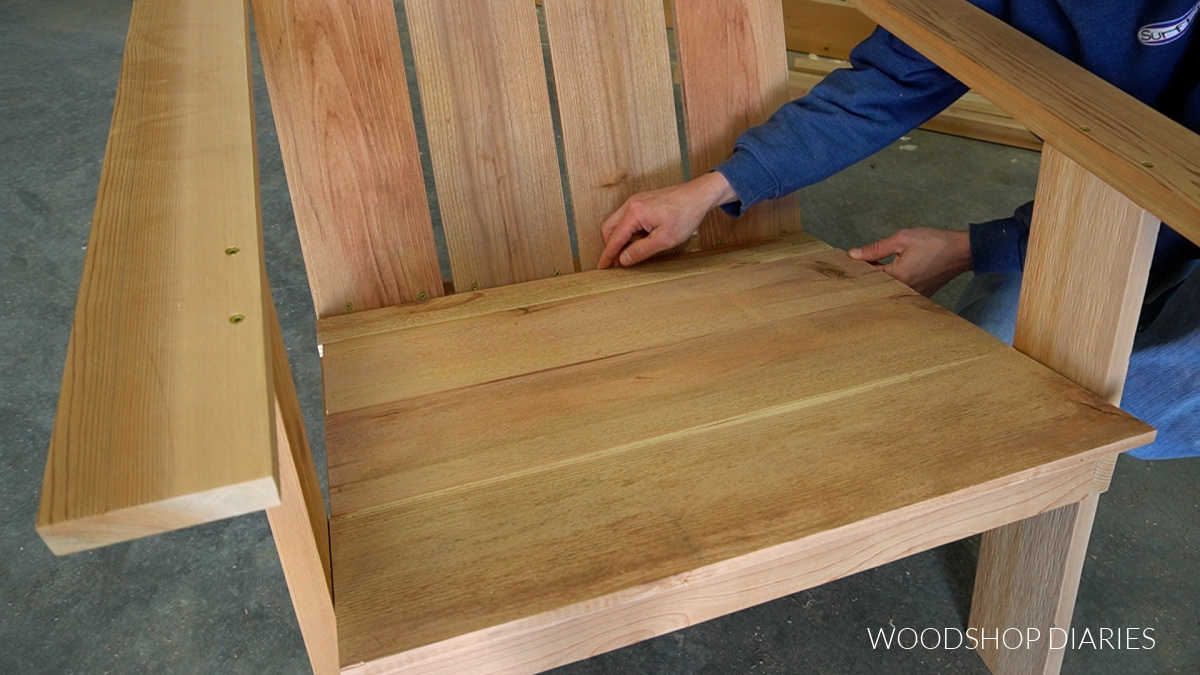
This is what you see at the big box stores and building supply centers–things like 2x4s and 1x6s, etc.

2x6 boards laid out on workbench

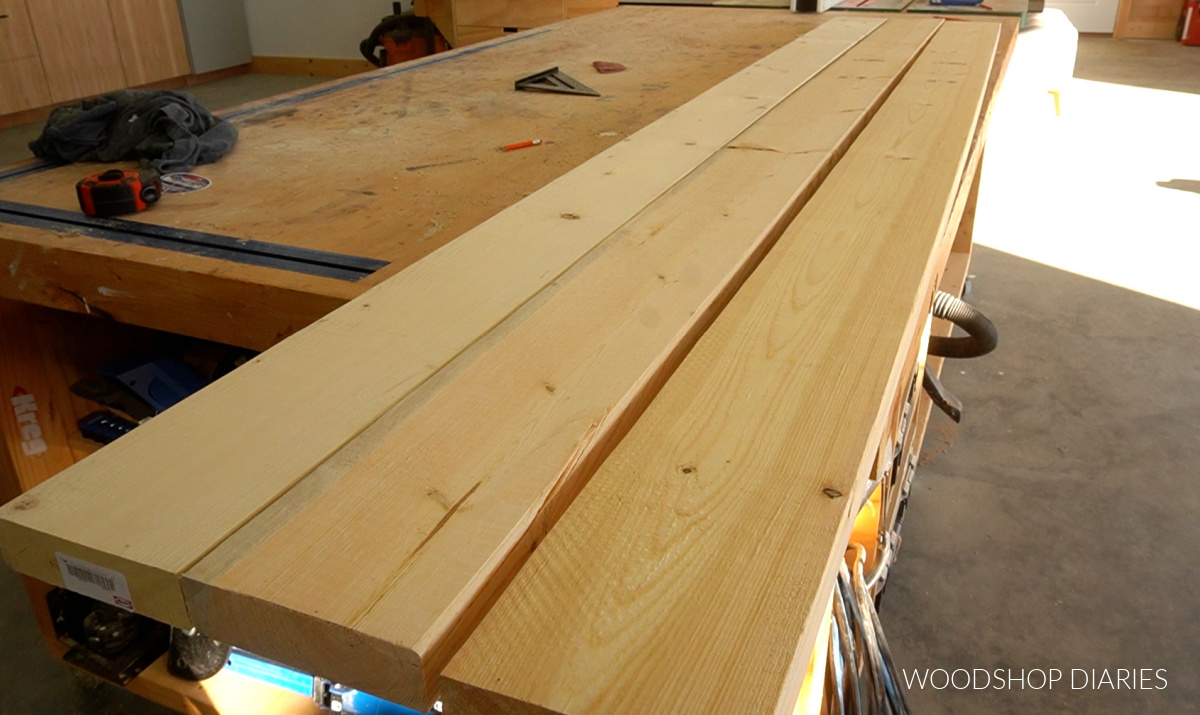
Depending on your location, construction lumber is usually cut from softwoods like spruce, pine and/or fir wood. Many times, these three are lumped together under the acronym SPF and have their own grades (levels of quality).

Common boards are a lower grade and allowed to have a certain level of defects (like knots). Select boards are a higher grade and allowed little to no defects.

MDF

MDF is medium-density-fiberboard. This is a manufactured wood product made from wood fibers mixed with resin and pressed into a sheet.

Basically, it’s sawdust and glue pressed together. So, it’s quite heavy!! Whether it’s considered “real wood” is up for debate, but it is made from real wood fibers, so there’s that.

I don’t personally use MDF much in my own projects, but it’s a budget friendly alternative to plywood for project, especially if you plan to paint.
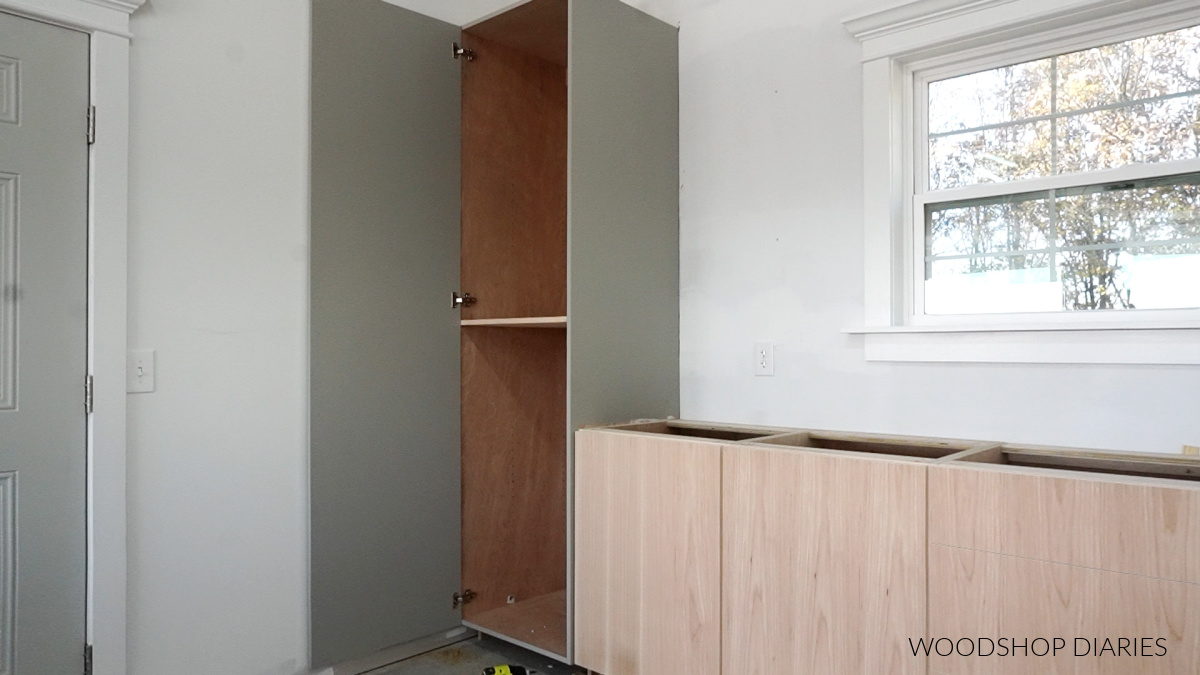
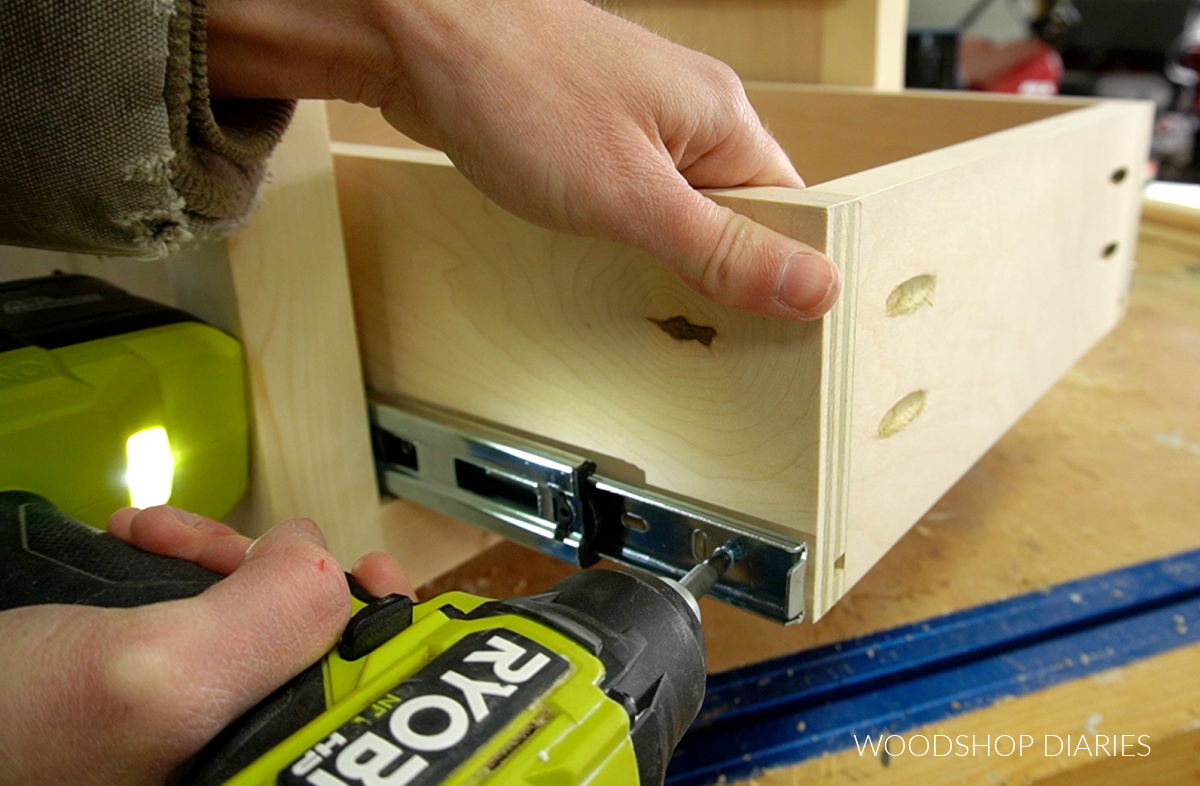
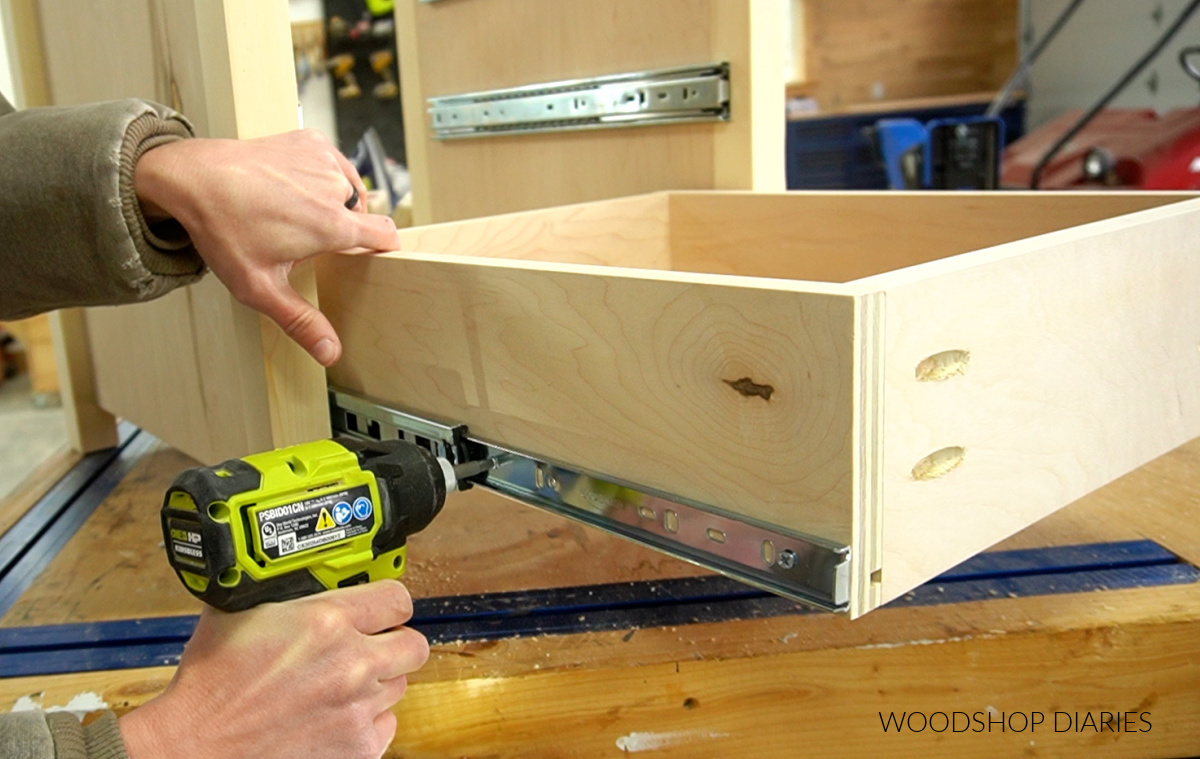
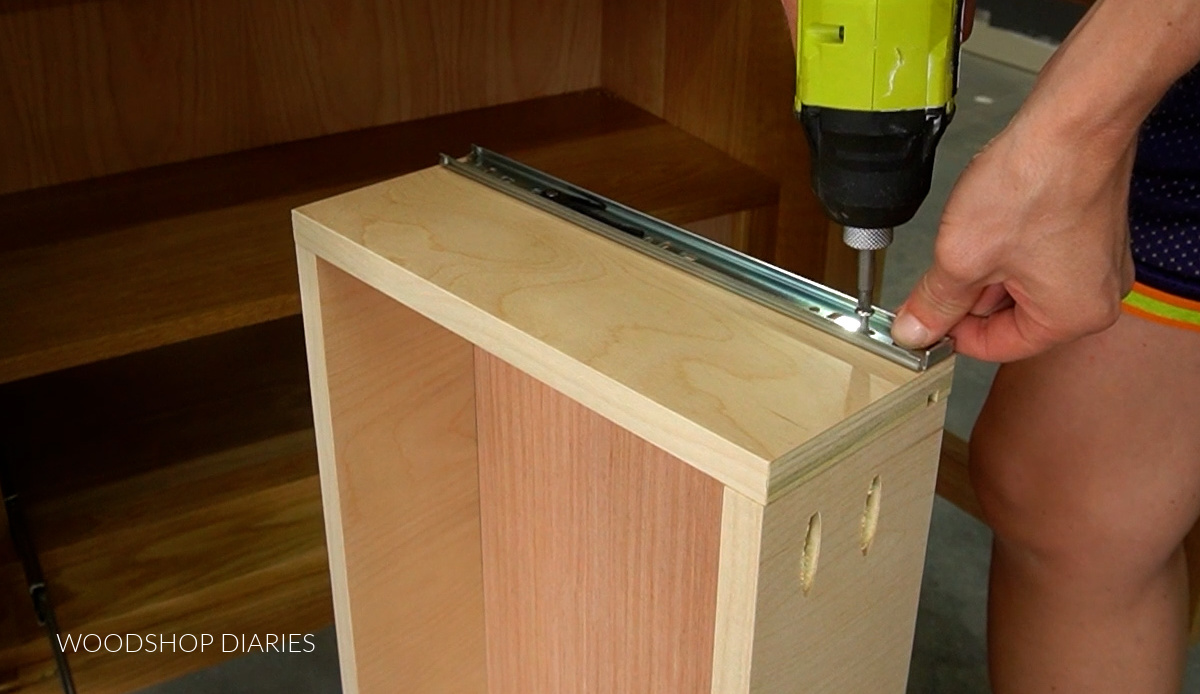
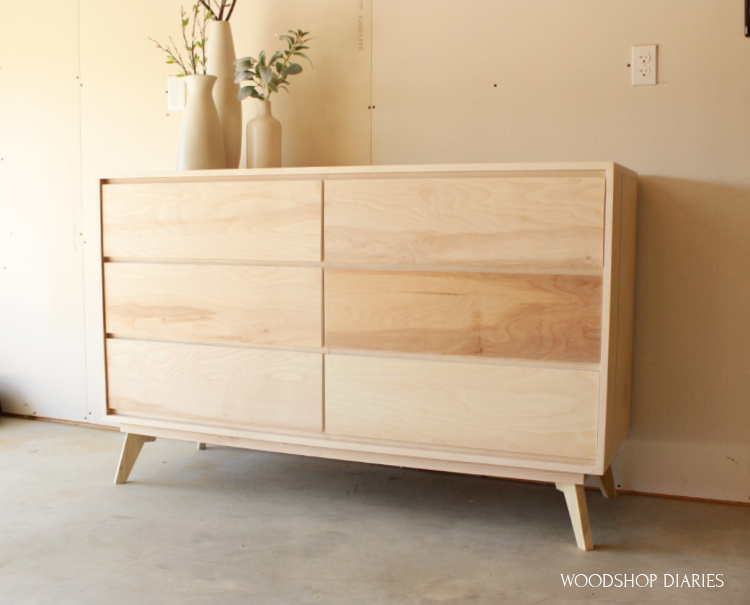
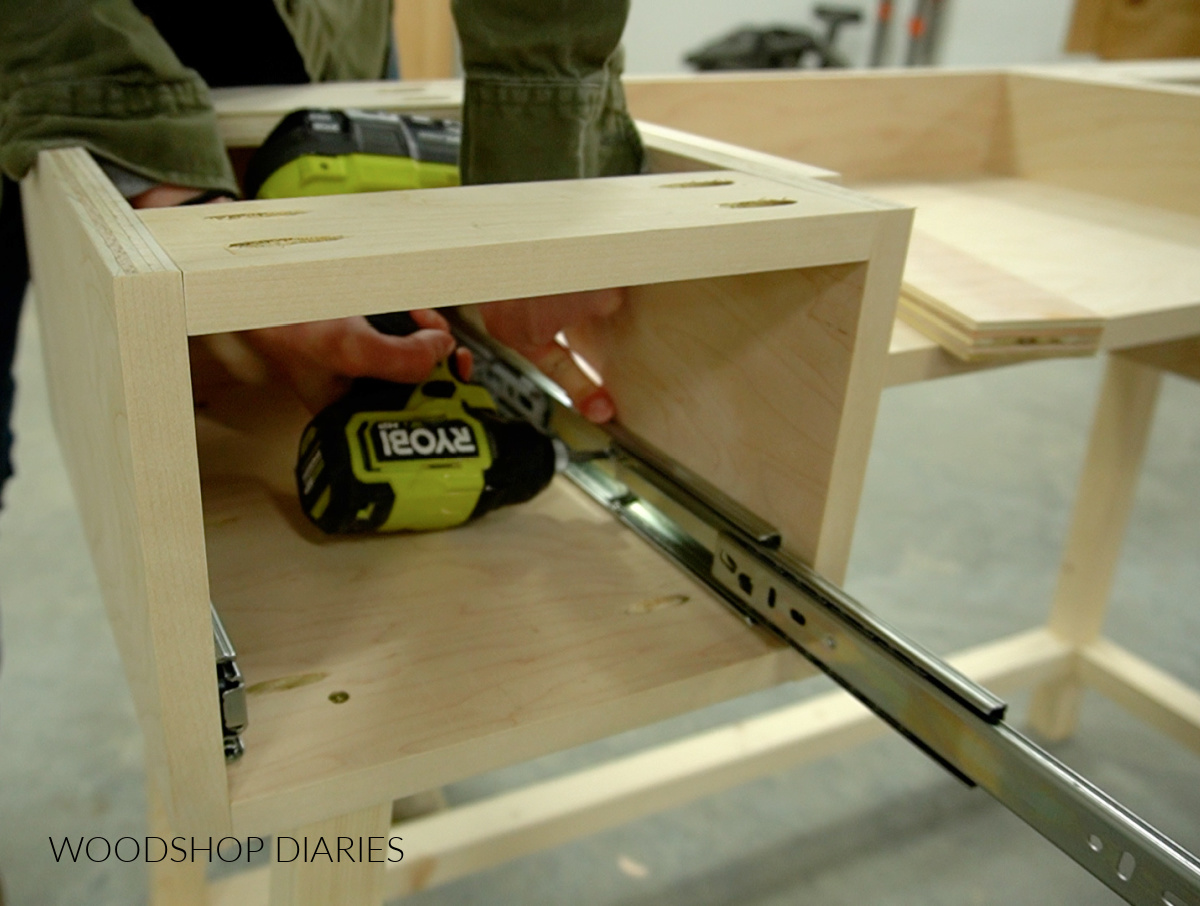
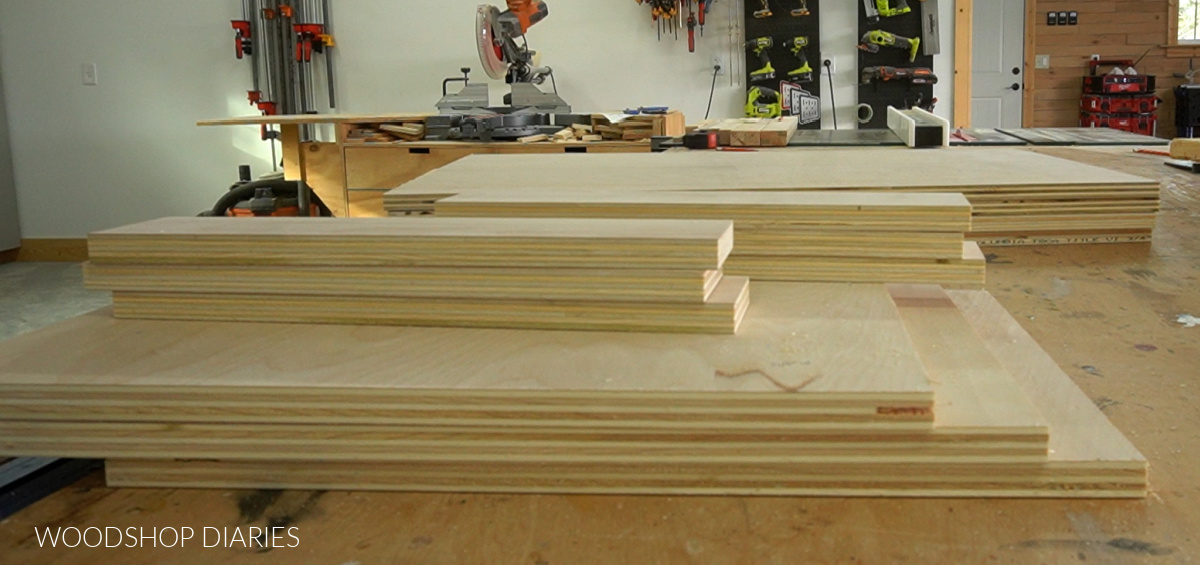
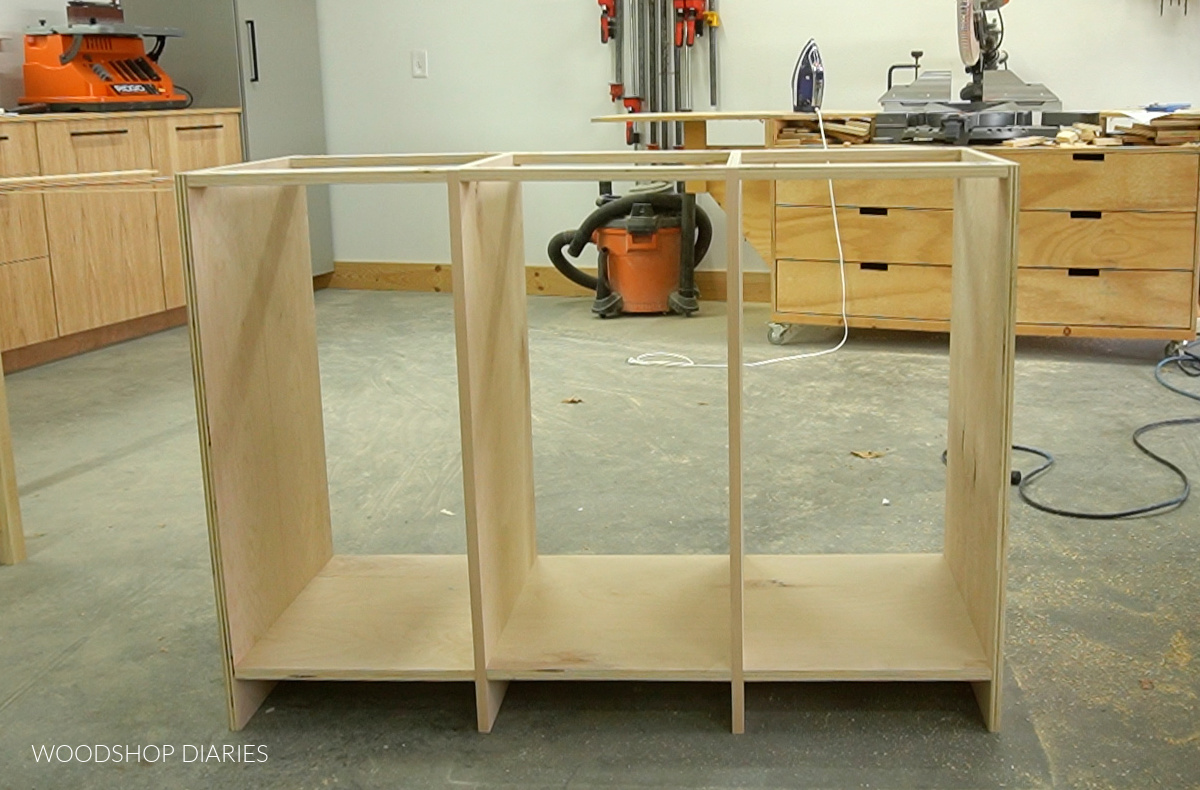
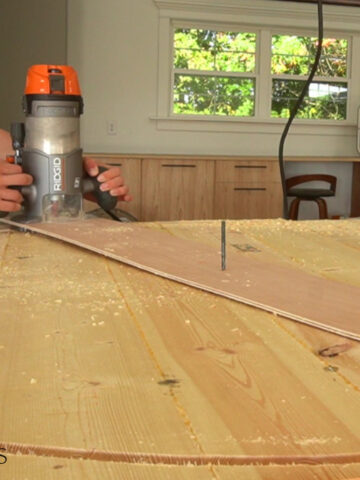
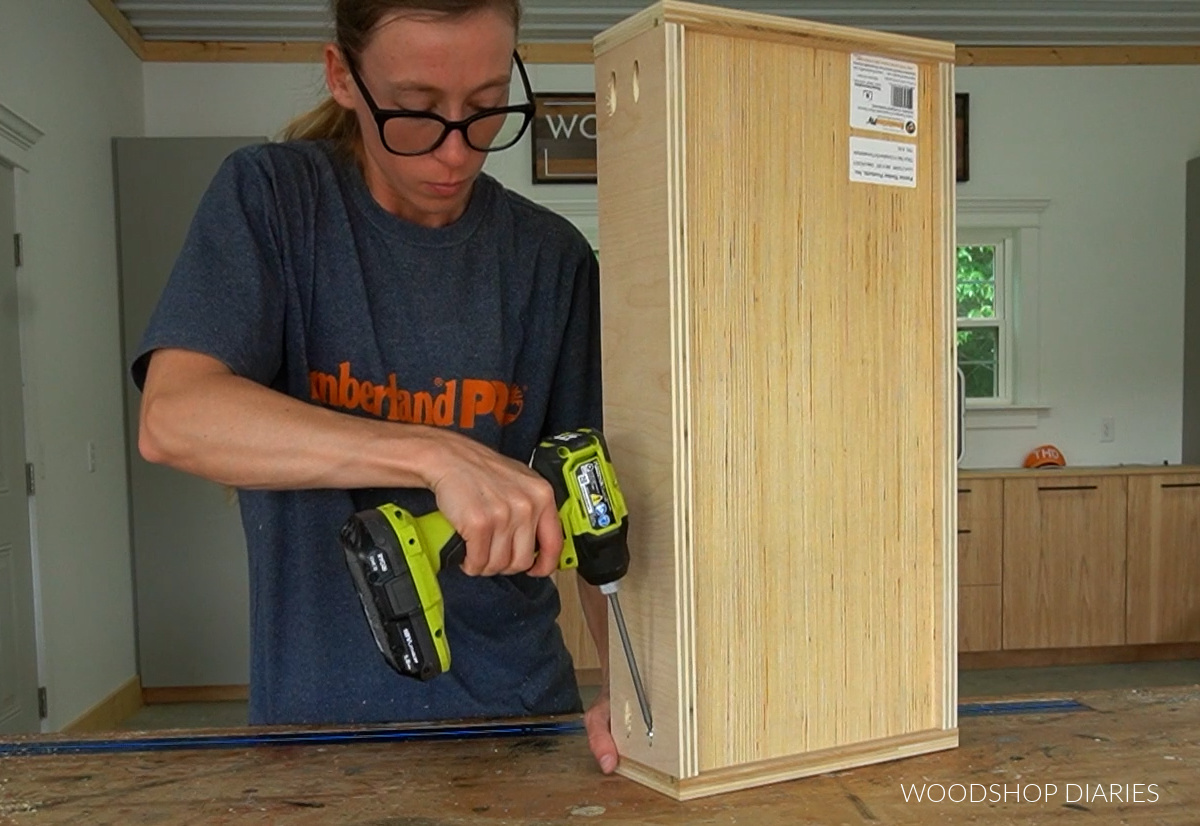
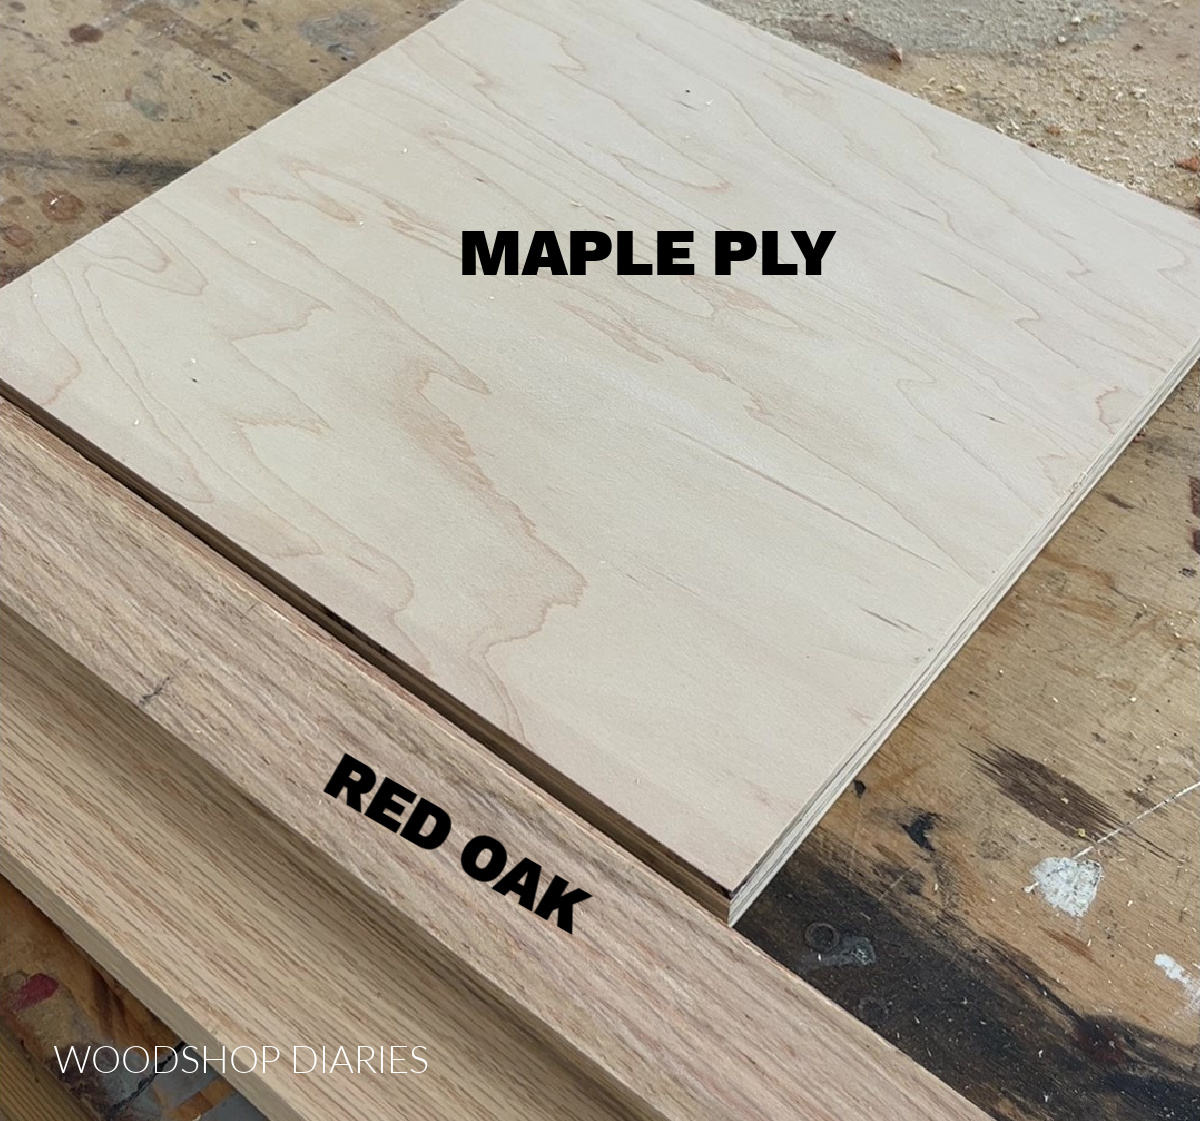
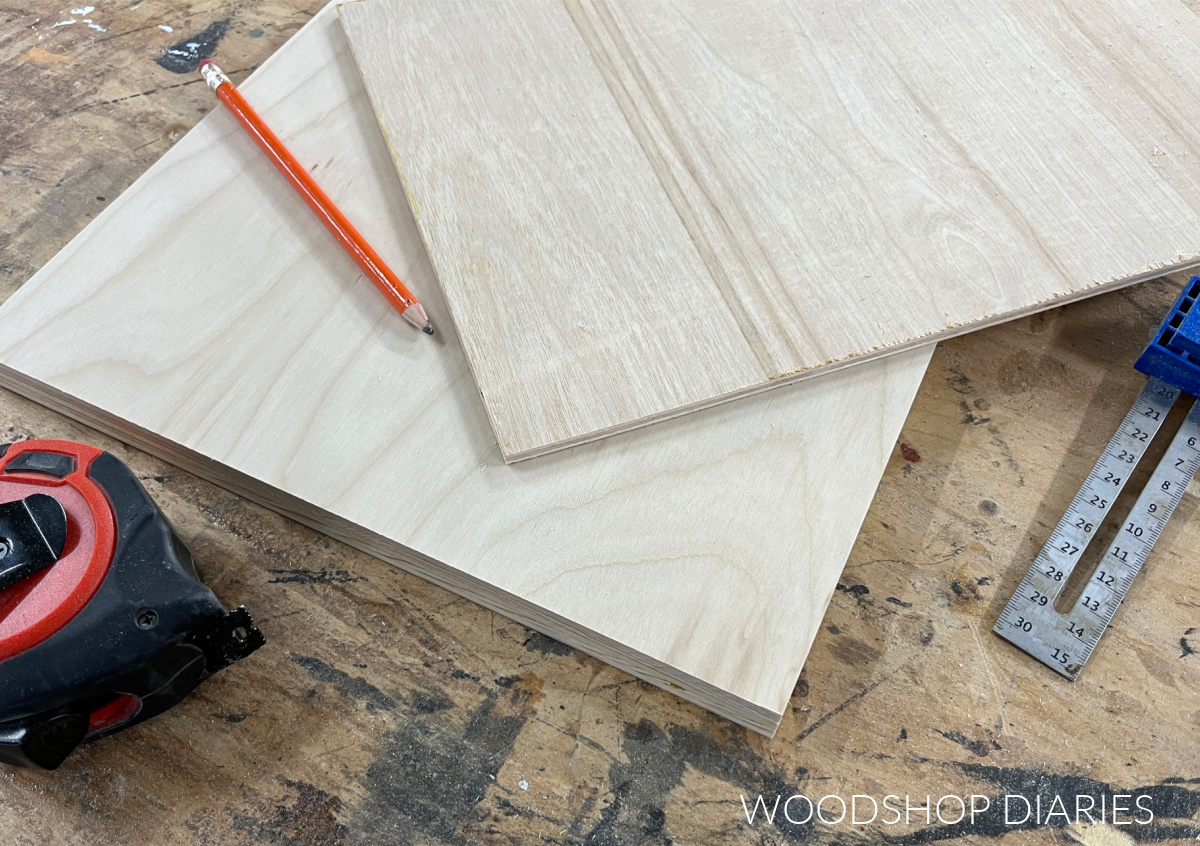
Plywood

Plywood is a manufactured material made from laminated wood veneer with alternating grains. The plies, or layers of material, are glued together with alternating grain patterns to promote stability.

For this reason, wood movement with plywood is minimal–but that’s another topic for another day.

close up of plywood edge showing one side edge banded vs the other side not edge banded

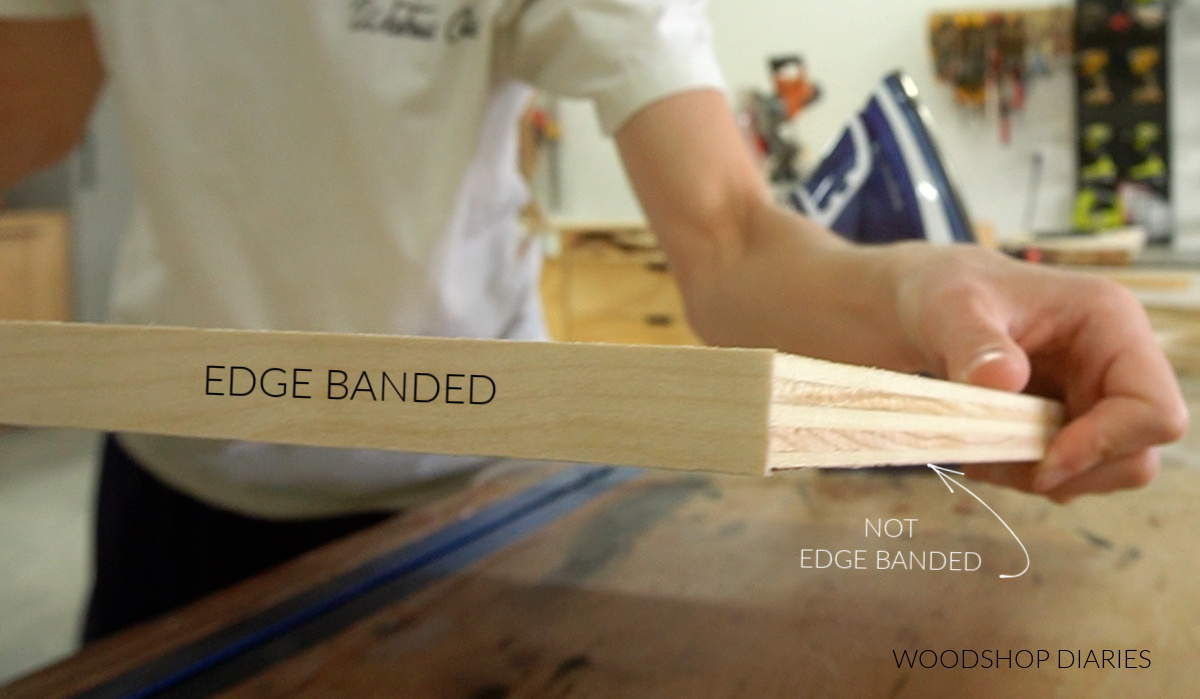
Plywood can have a different number of layers depending on the thickness and type.

RELATED: How to cover plywood edges to look like solid wood

In some cases, some of these layers may be MDF, but in many cases, especially with higher grades, the layers are real wood. So ultimately, plywood IS real wood. It’s just not one solid piece.
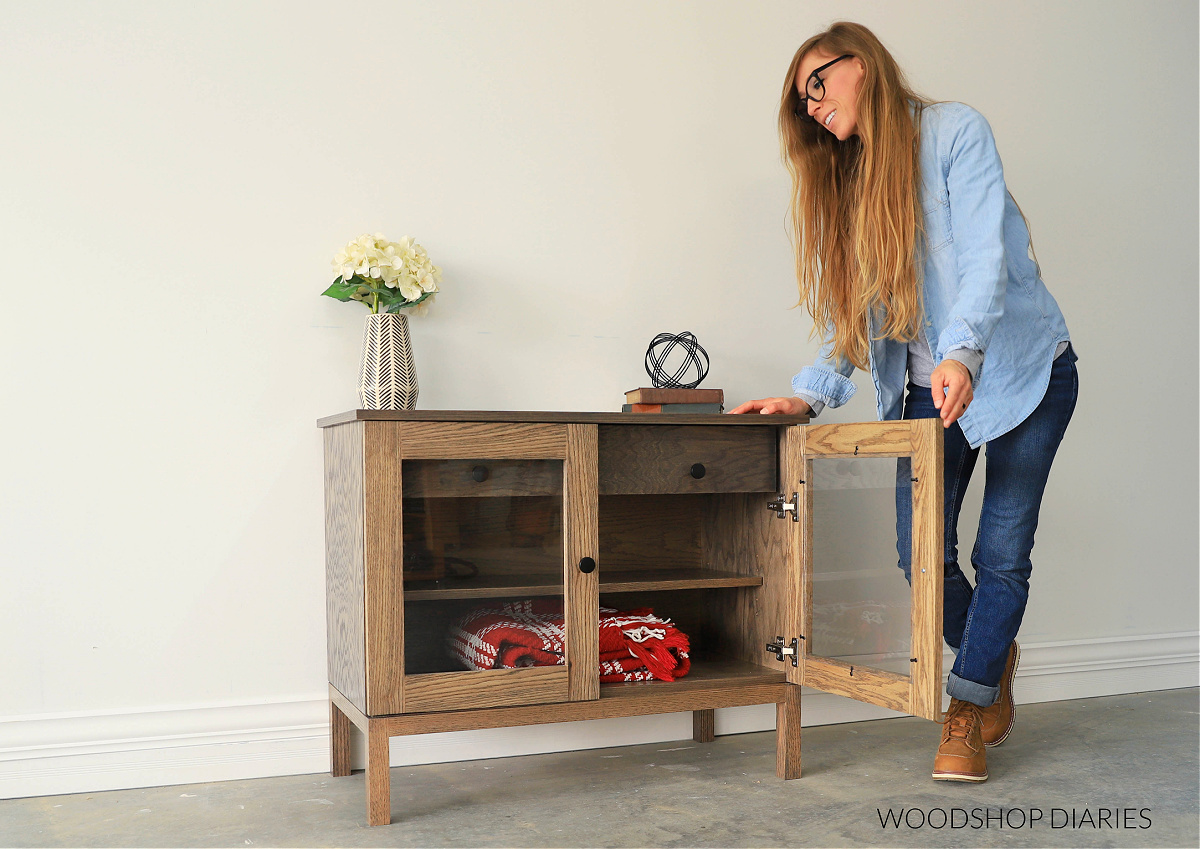
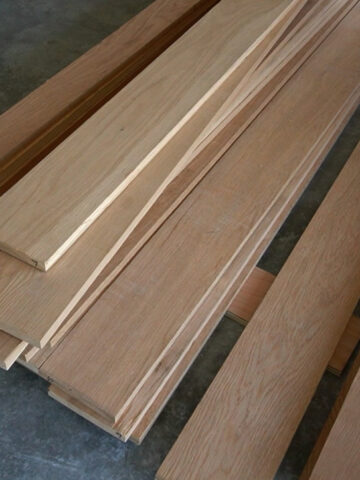
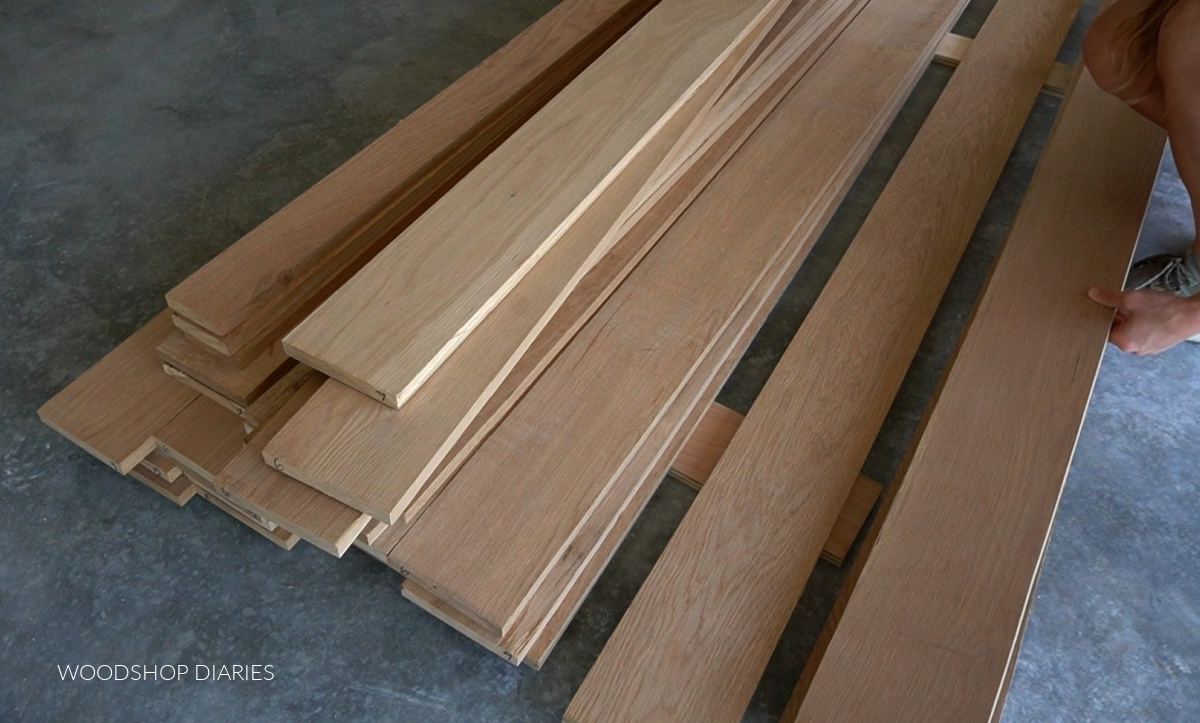
Hardwood

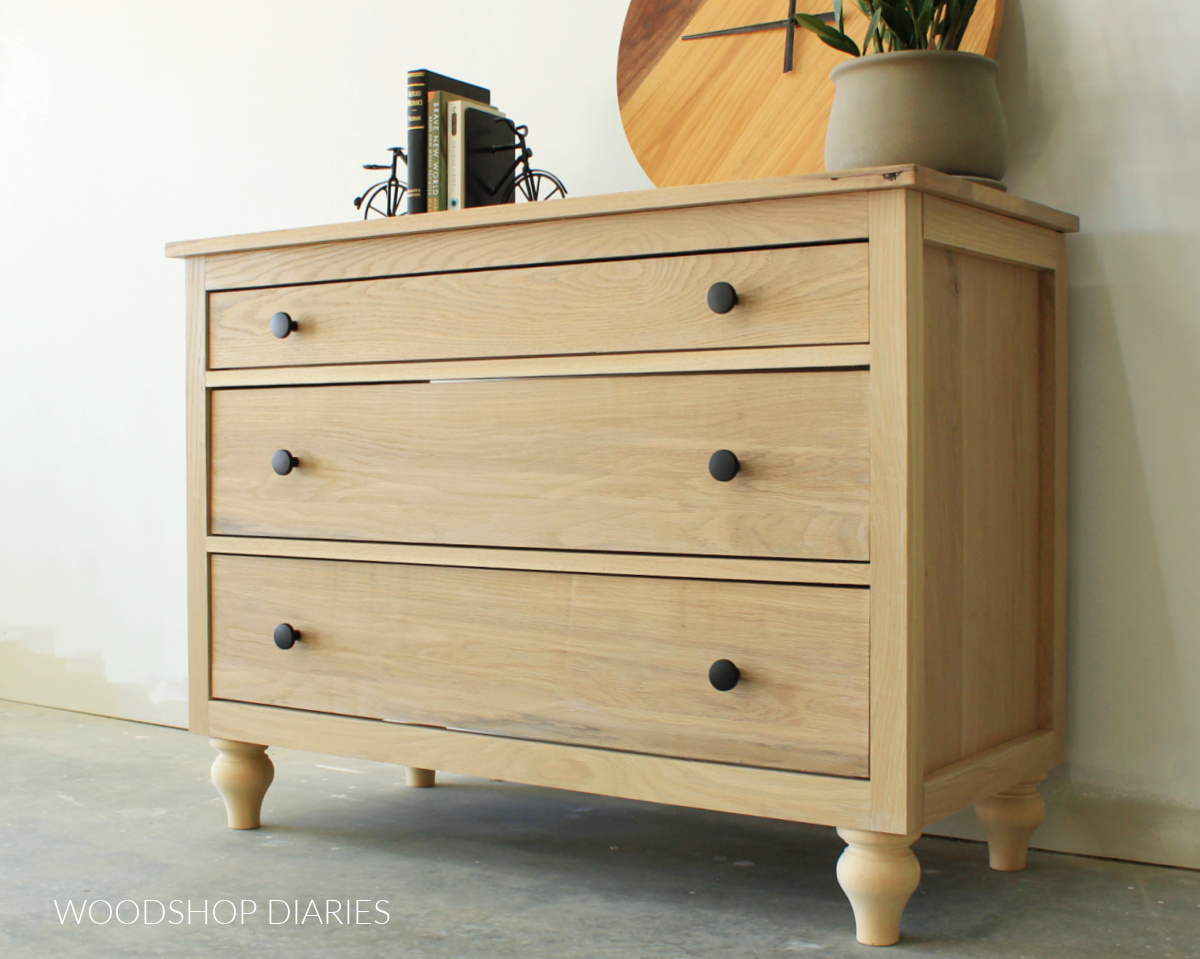
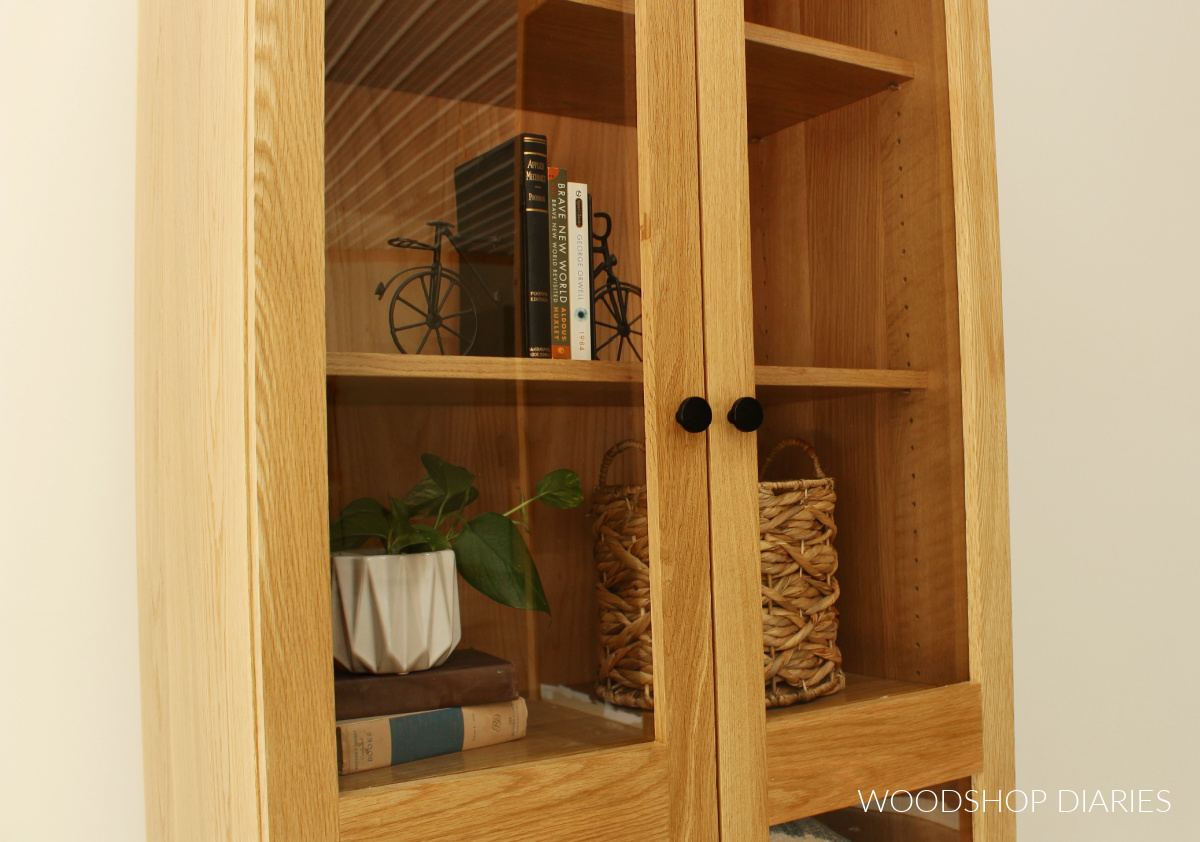
Common hardwoods used in furniture and cabinet building are oak, maple, walnut, cherry, hickory and birch. These aren’t the only hardwoods, but they are the most common for furniture (at least where I live).

maple board laying on top of walnut board

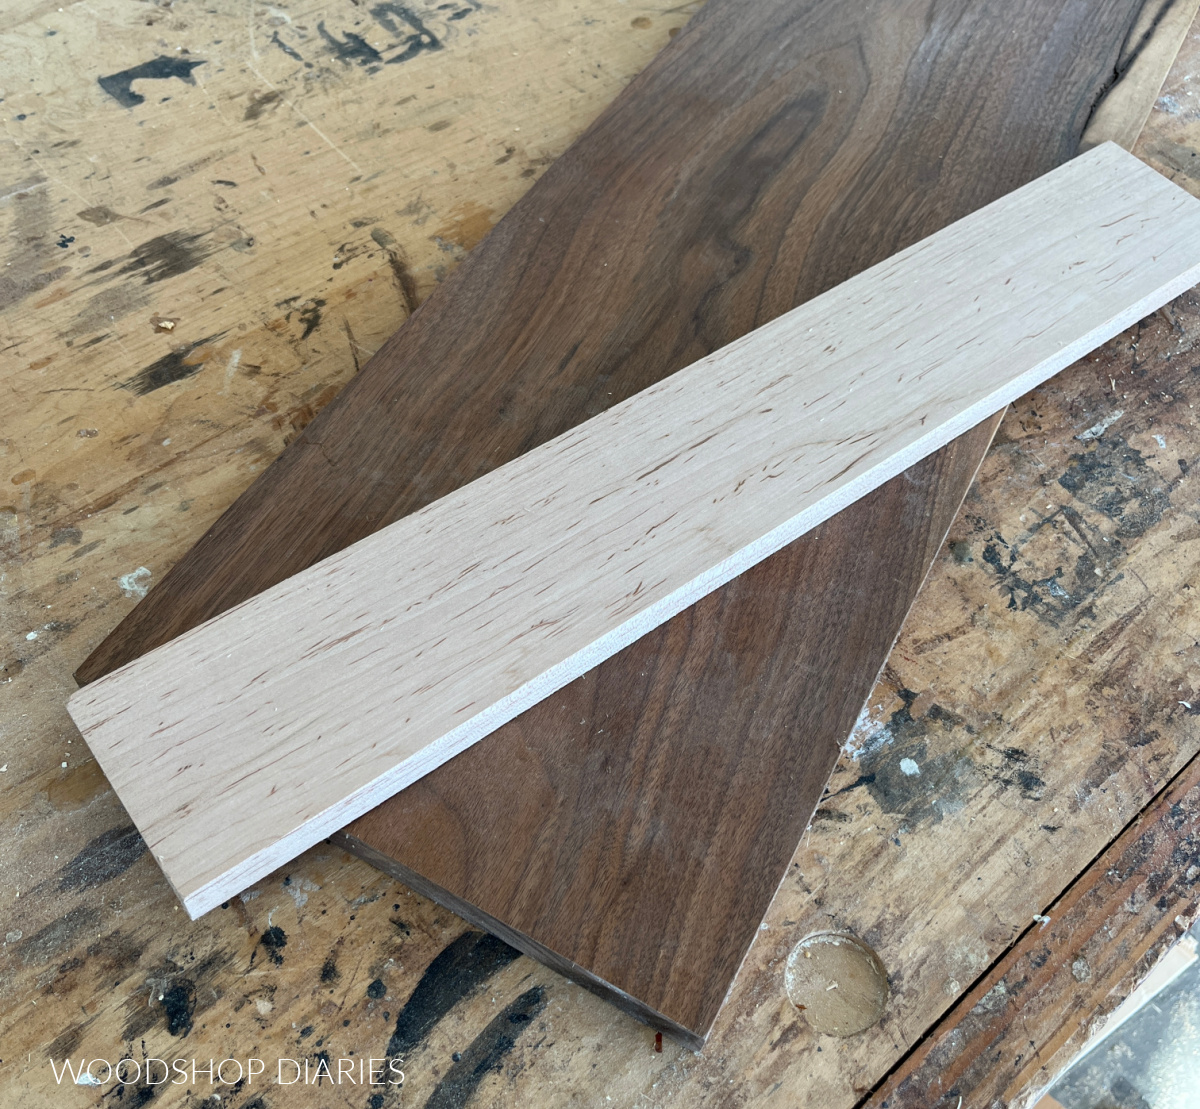
Hardwood trees lose their leaves every year and they grow slower and denser than softwood. This makes the wood heavier, harder, and with tighter grain patterns than softwood.

For this reason, hardwood tends to be much more expensive and harder to find than softwood.

Lumber Sizing

Construction lumber and basic building materials are cut to standard nominal sized boards in 2 ft length increments from 8′ to 16′.

Hardwood and specialty woods don’t have “standard sizing” many times. So these are usually sold in linear feet or board feet. I’ll discuss this more below.

Nominal vs Actual Dimensions

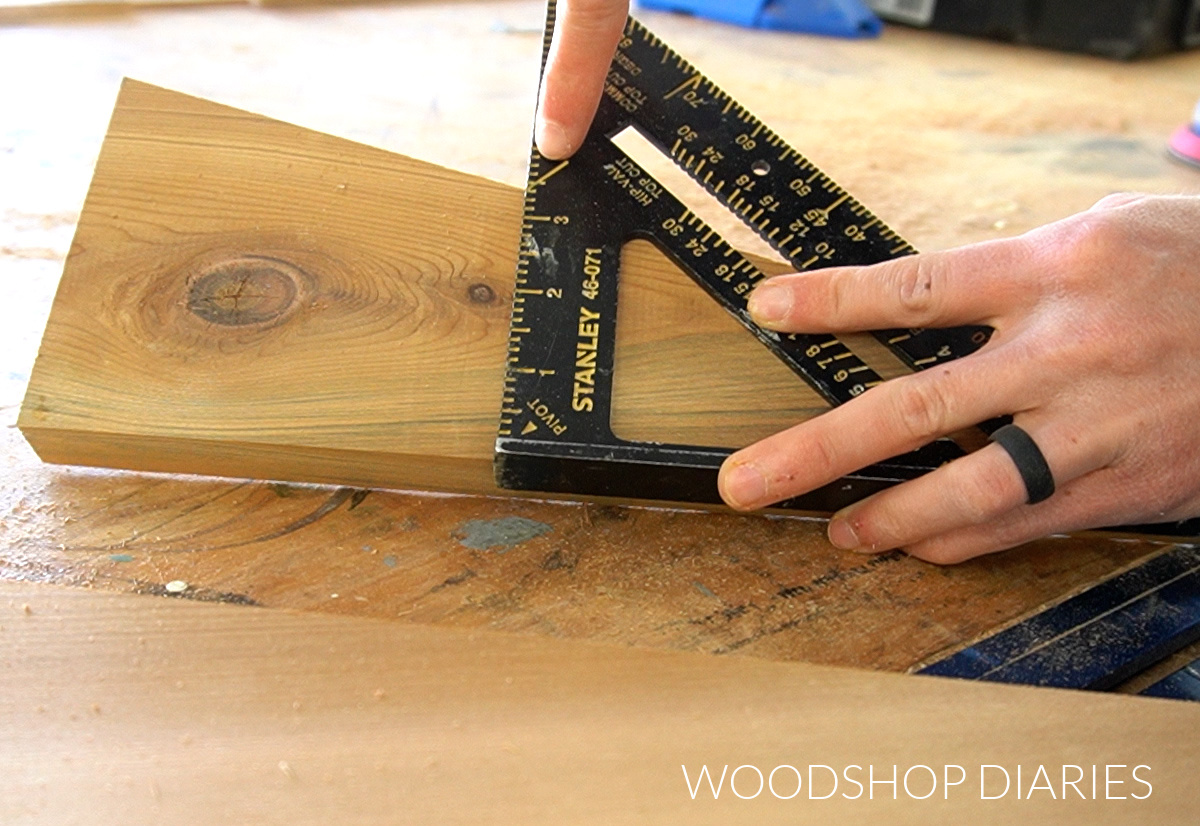
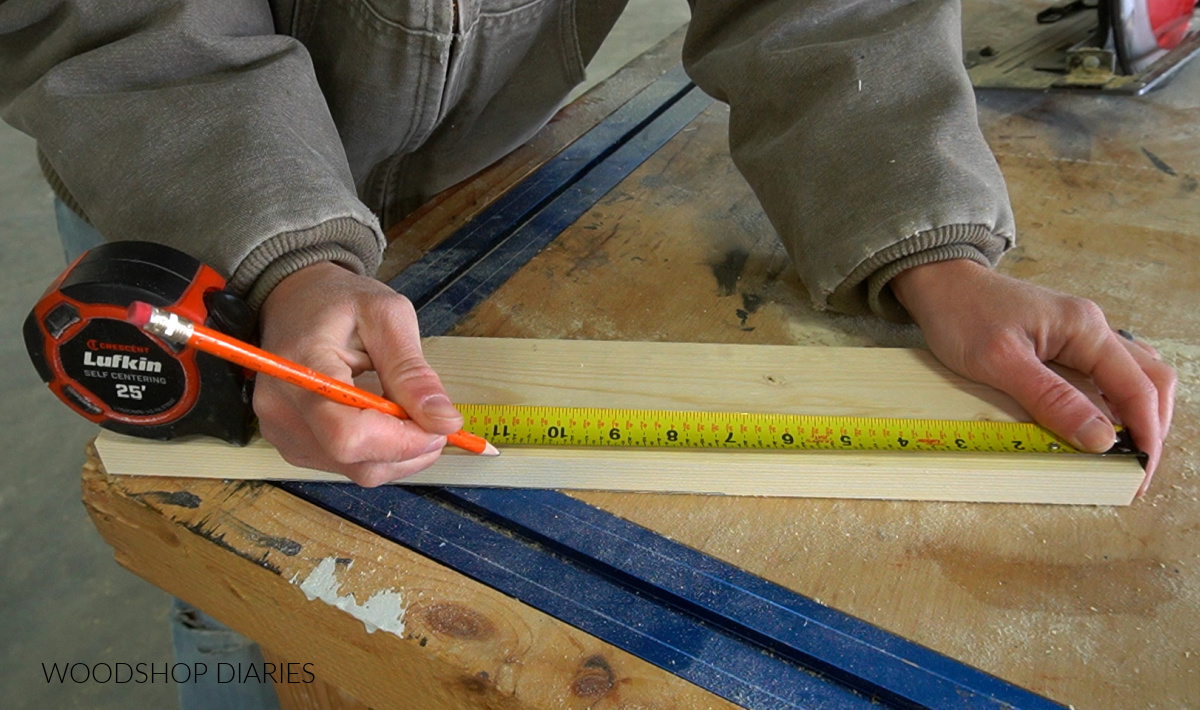
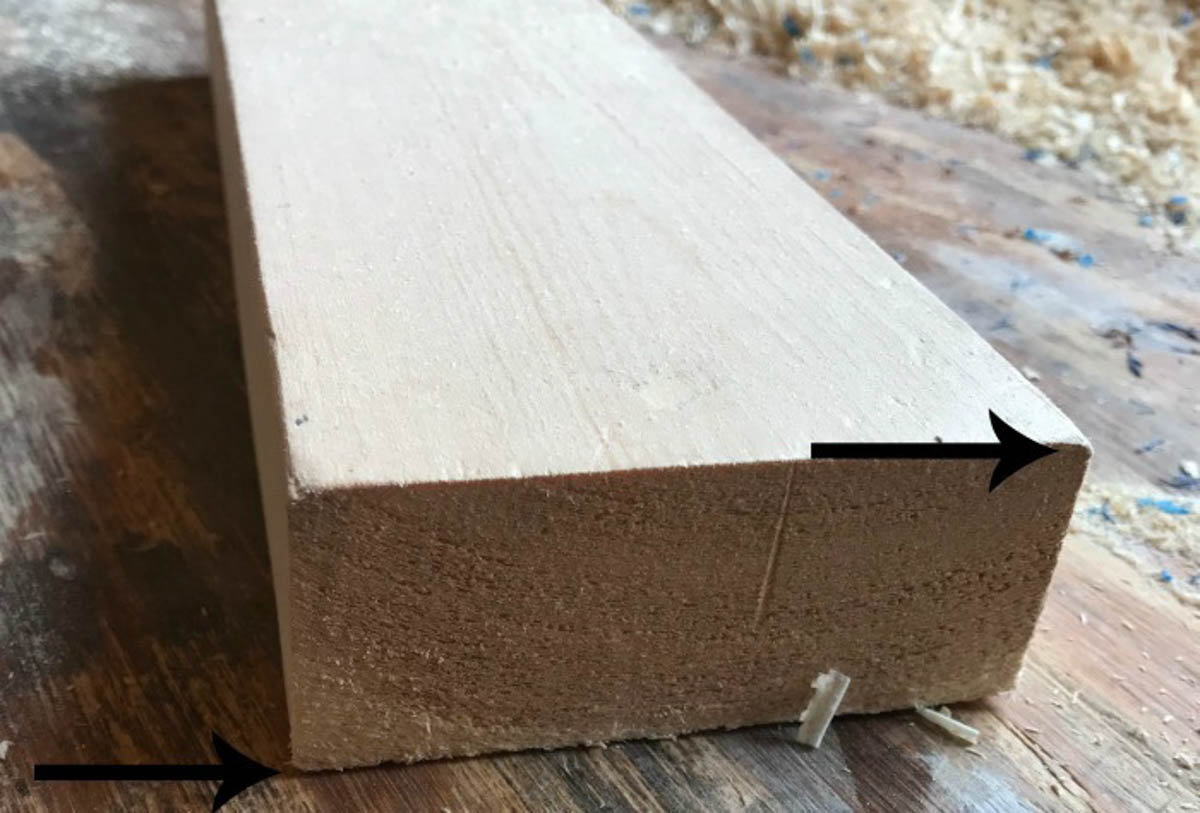
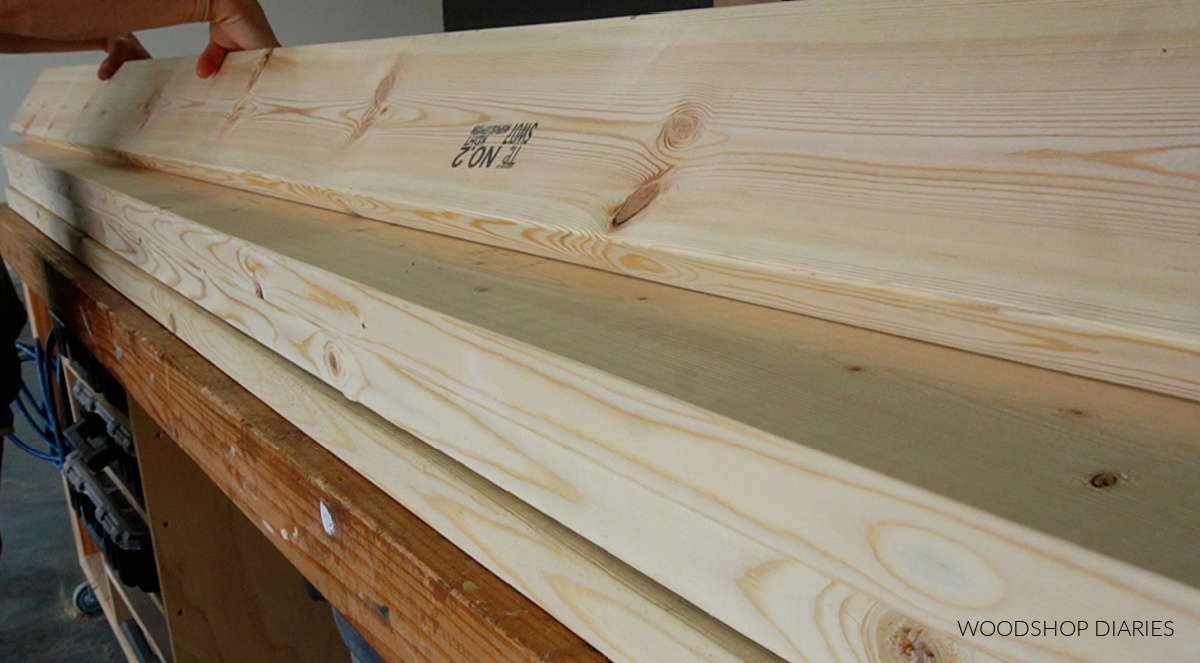
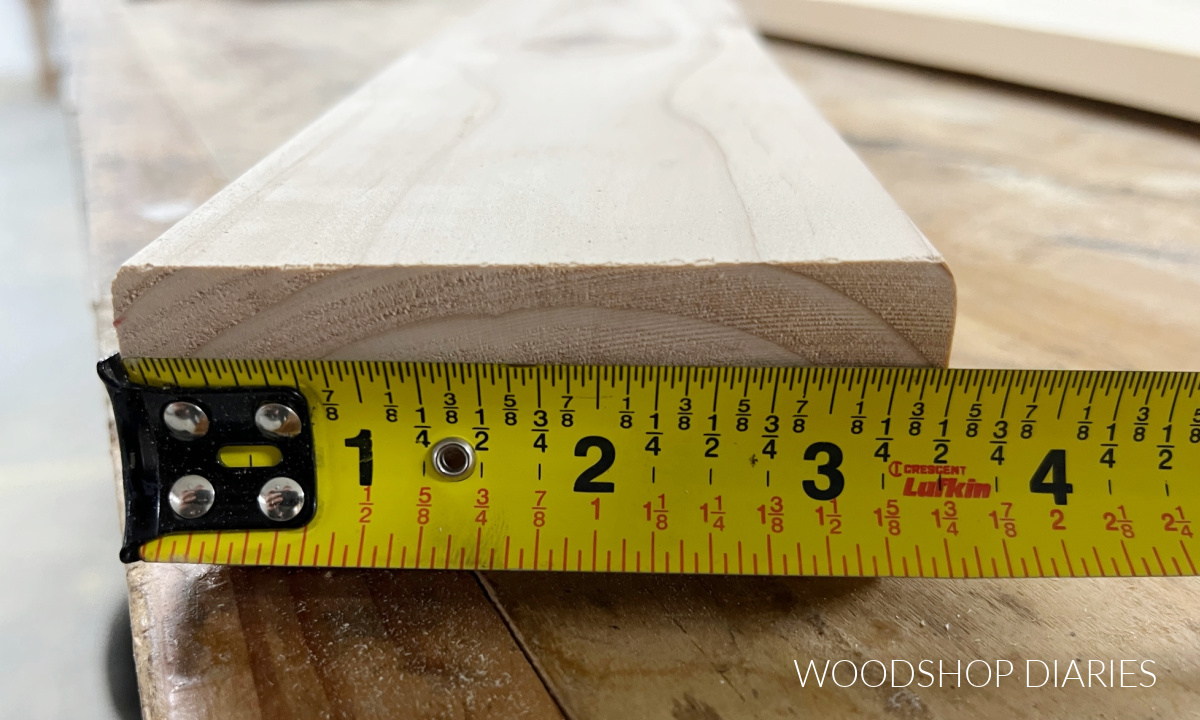
When purchasing construction lumber (like 2x4s or 1x6s, etc.), these come in standard sizes. However, the “sizes” are what’s called a nominal dimension–these aren’t the ACTUAL dimensions.

An example of a nominal dimension is a 2x4x8.

The first number is the board thickness.

The second number is the board width.

The last number is the board length.

Nominal dimensions are roughly what the boards measure before they are surfaced and milled down to final size. So the ACTUAL size is slightly smaller than the nominal dimension.

This seems confusing, but once you use them a few times, they’re pretty easy to memorize.

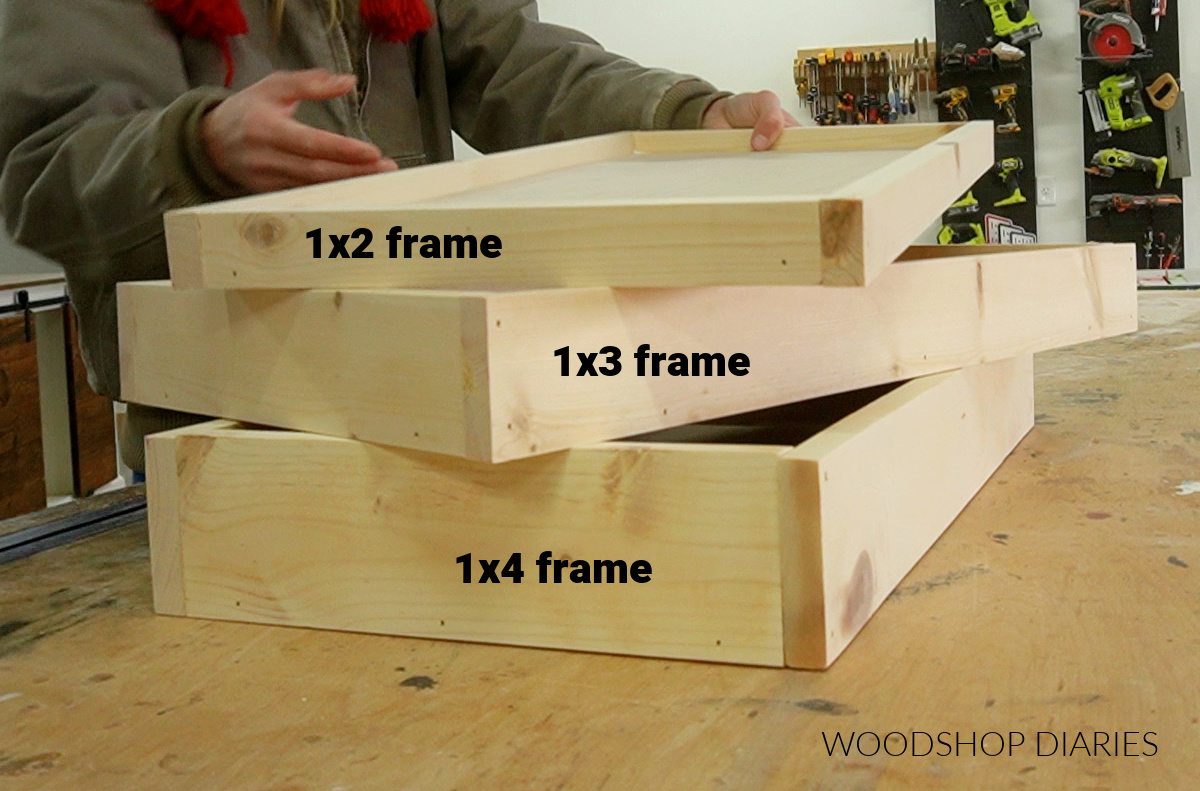
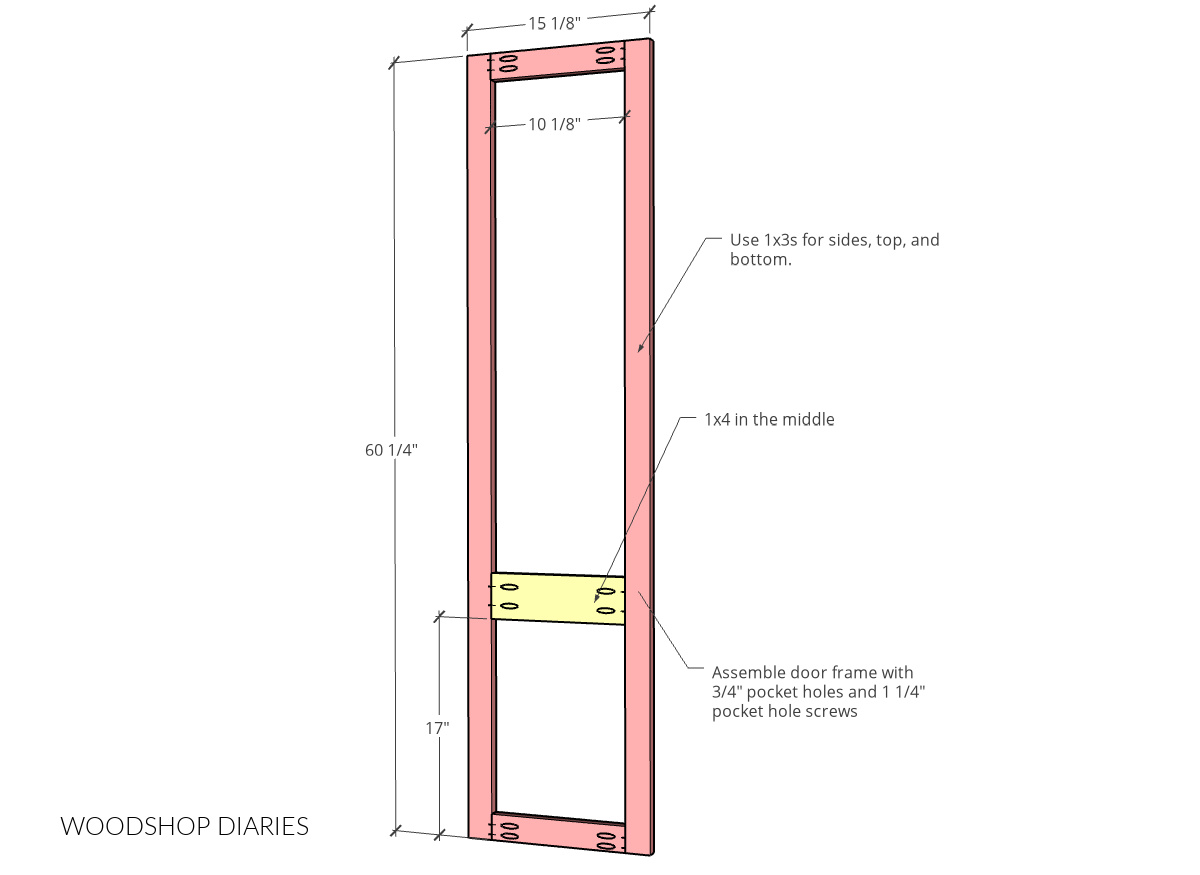
Construction lumber comes in three common thicknesses–1x, 2x, and 4x.

  • 1x nominal = ¾″ actual
  • 2x nominal = 1 ½″ actual
  • 4x nominal = 3 ½″ actual

These boards are cut to seven common widths–x2, x3, x4, x6, x8, x10, and x12.

  • x2 nominal = 1 ½″ actual
  • x3 nominal = 2 ½″ actual
  • x4 nominal = 3 ½″ actual
  • x6 nominal = 5 ½″ actual
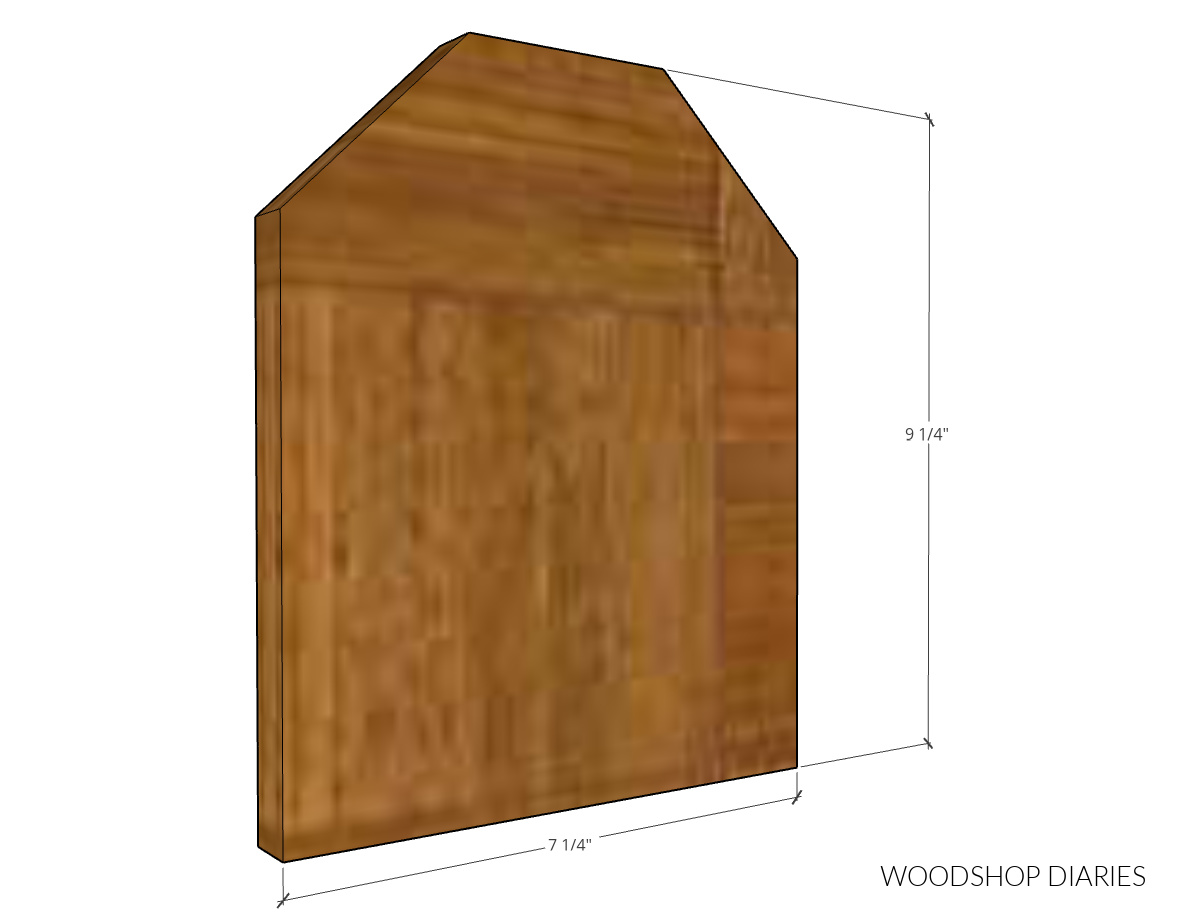
  • x8 nominal = 7 ¼″ actual
  • x10 nominal = 9 ¼″ actual
  • x12 nominal = 11 ¼″ actual
tape measure showing width of a 2x4 is 3 ½"

Construction lumber boards typically come in 2 ft length increments from 8′ to 16′. Unlike the other two dimensions, the length is not a nominal dimension. It actually is what it says it is.

These boards are found in five common lengths–x8, x10, x12, x14, and x16.

  • x8 = 8′
  • x10 = 10′
  • x12 = 12′
  • x14 = 14′
  • x16 = 16′

To sum this up, here are a few examples:

  • 1x8x10 is actually ¾″ x 7 ¼″ x 10′
  • 2x4x8 is actually 1 ½″ x 3 ½″ x 8′
  • 4x4x8 is actually 3 ½″ x 3 ½″ x 8′.

NOTE: An exception–2x4s are commonly used for building walls. You may run into 2x4s that are 92 ⅝″ long sometimes called “2×4 studs.” This length allows builders to add the required framing at the top and bottom to create an 8′ high wall–which works great for 4×8 sheets of drywall.

How do you know if you’re looking at nominal vs actual dimensions?

In most cases, ACTUAL dimensions will be specified with an unit like inches or feet. Nominal dimensions will not have specific units.

For example, if you see 2x4x8, this is assumed to be a nominal dimension since there are no units specified. However, if you see 2″x 4″ x 8′, this is assumed an actual dimension since it specifies inches and foot units.

In my building plans, unless specified with a unit (like inches), the sizing on boards is considered to be a nominal dimension.
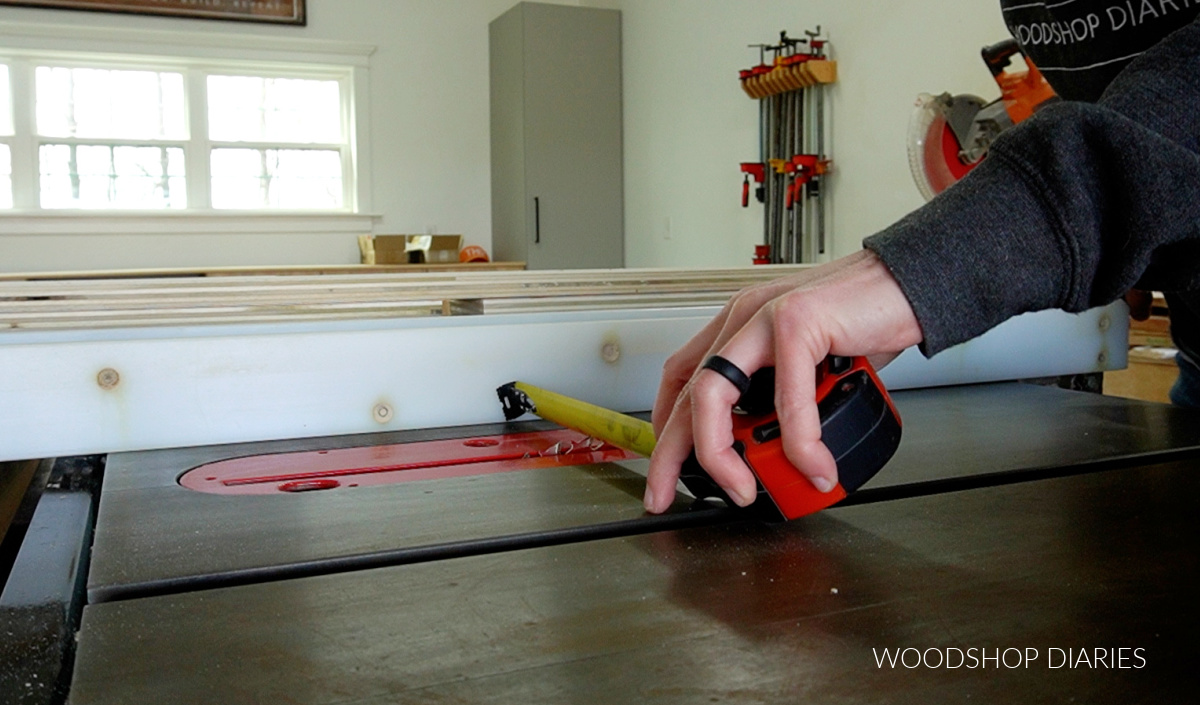
Plywood Dimensions

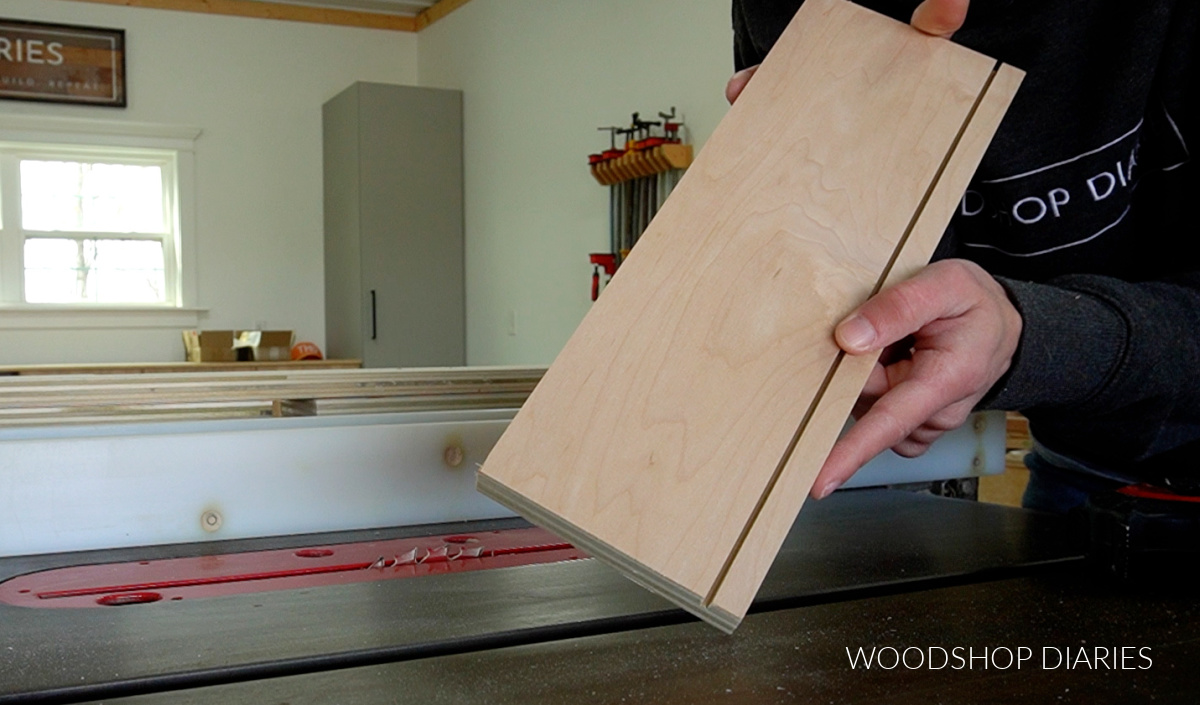
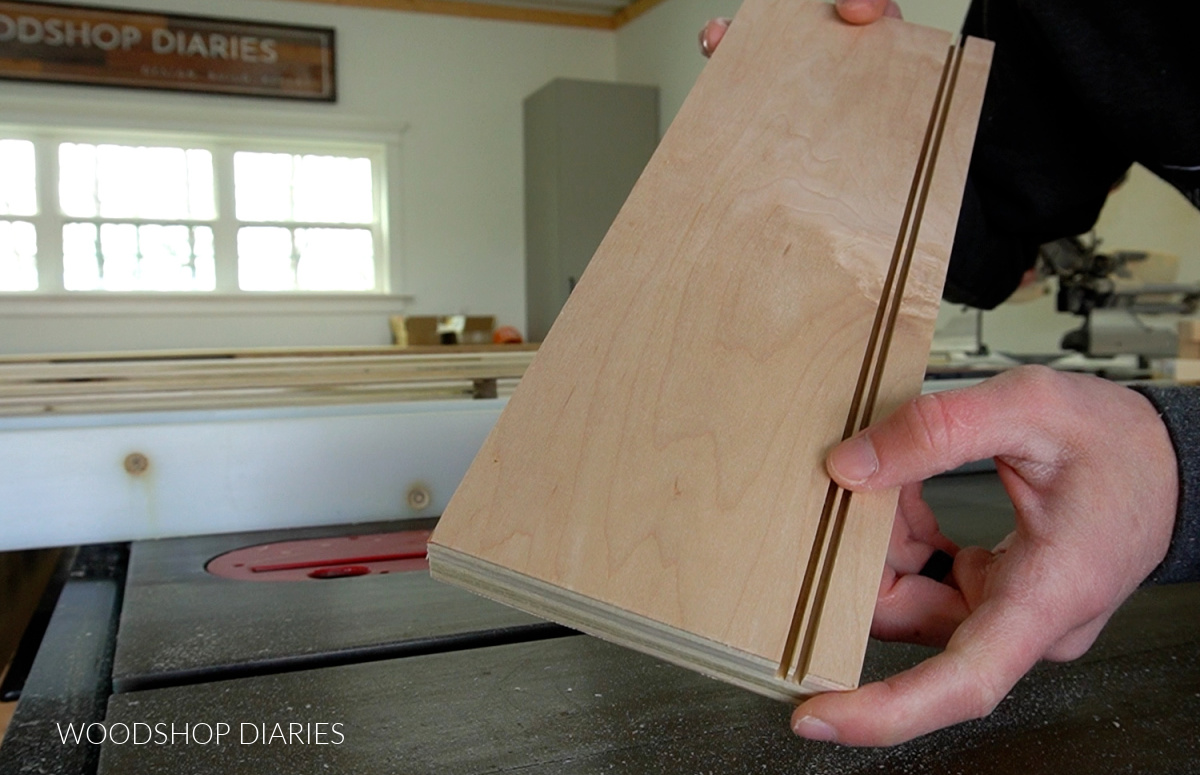
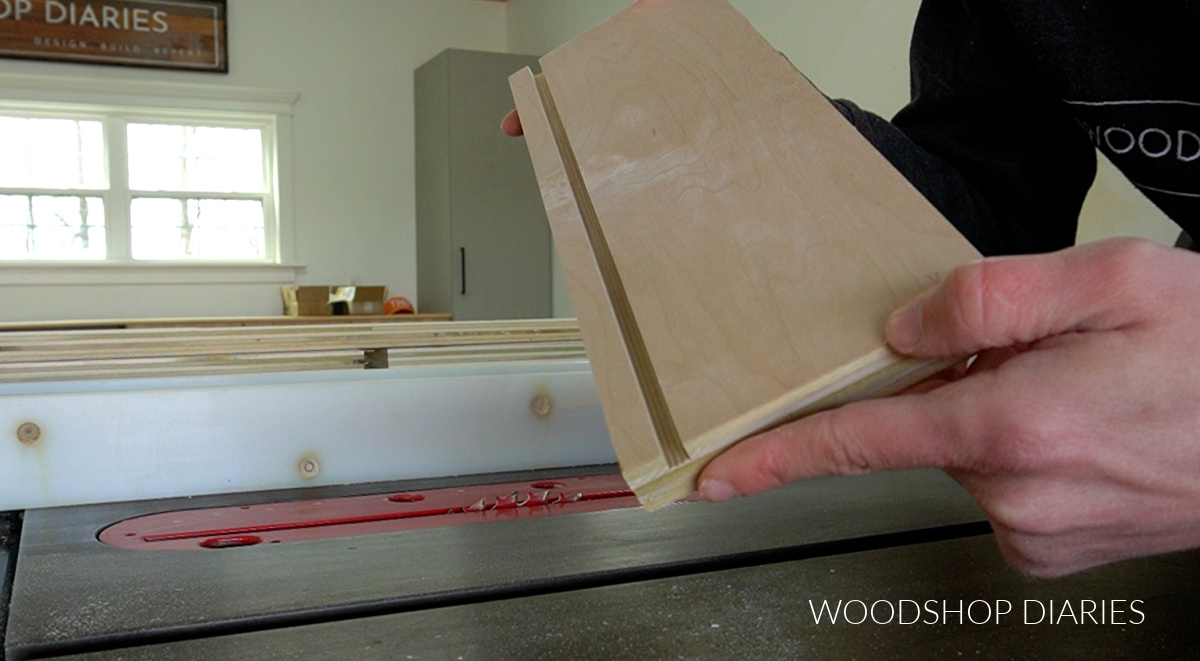
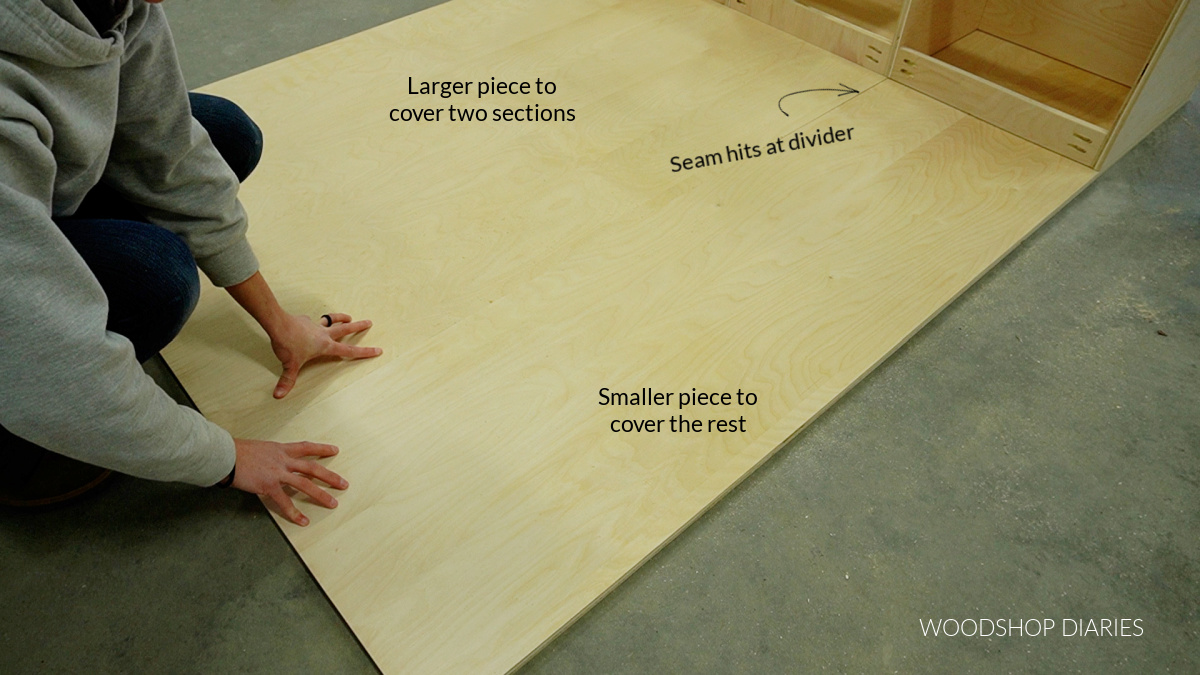
Plywood usually comes in what’s called “sheets.” A full sheet of plywood is 4′ x 8′. But, it comes in SEVERAL different thicknesses depending on what kind you’re looking at.

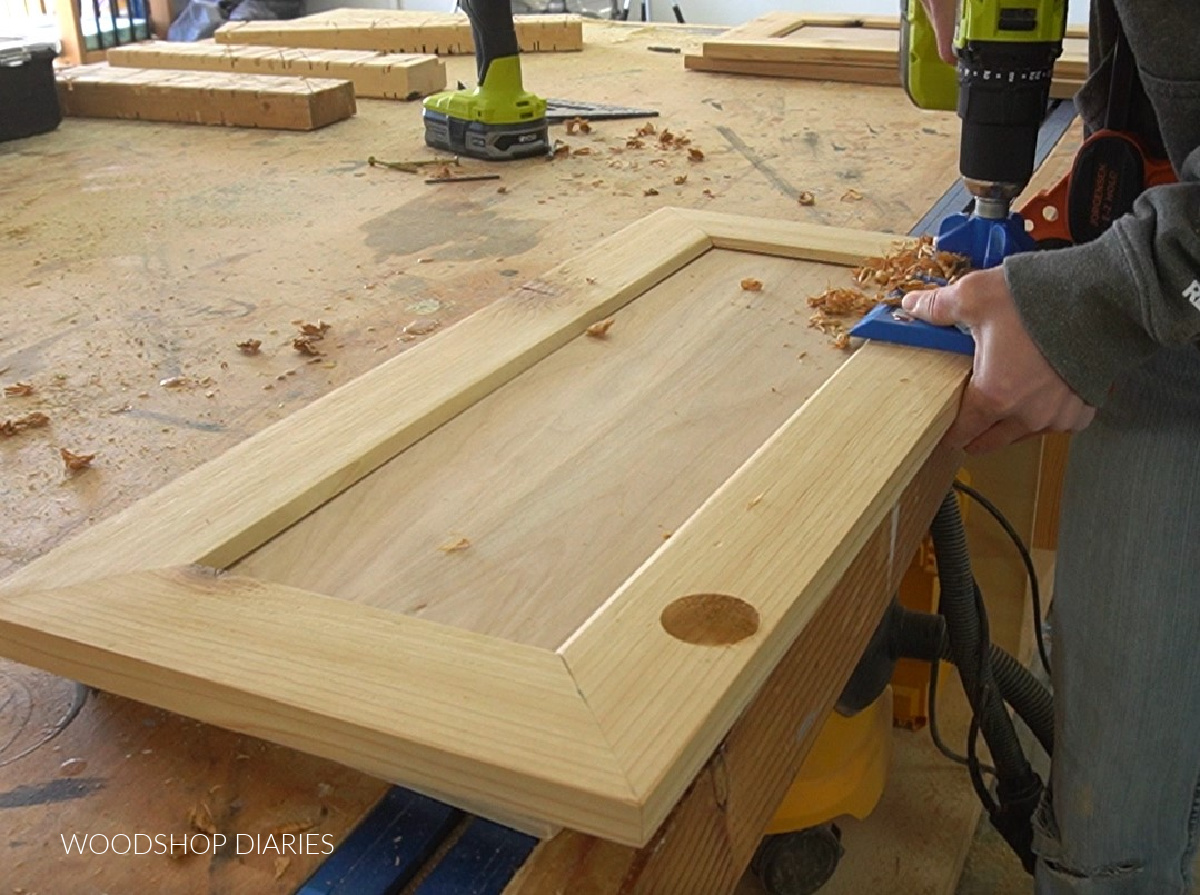
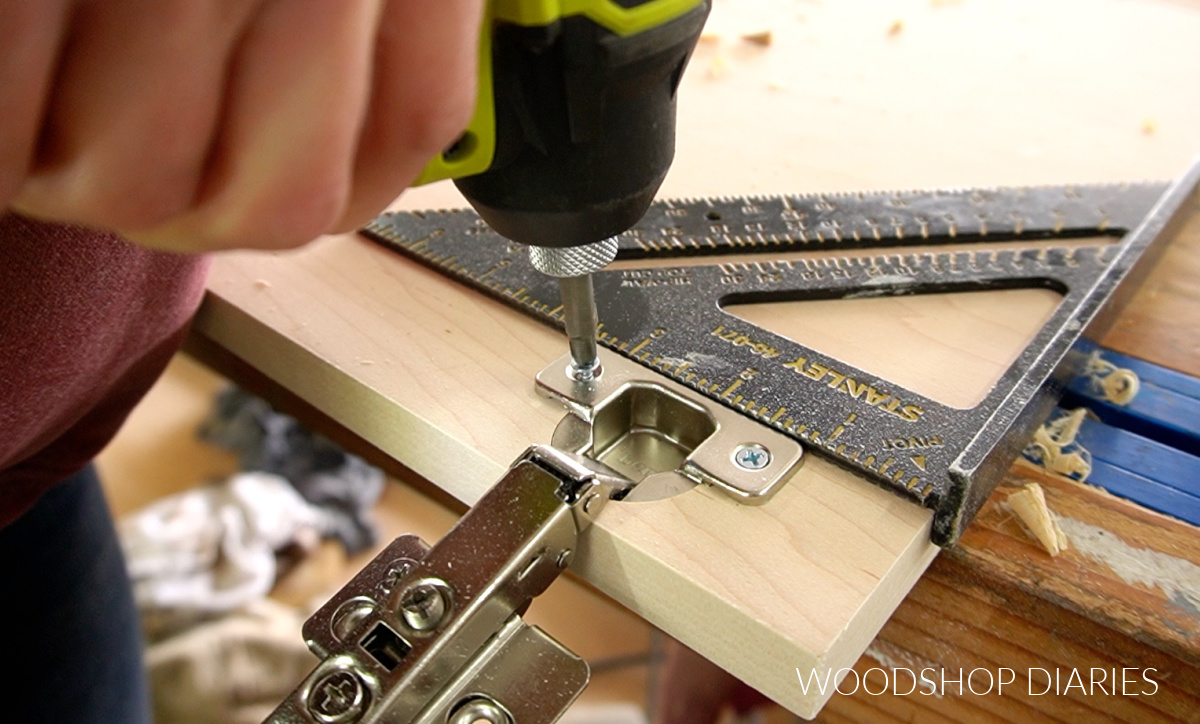
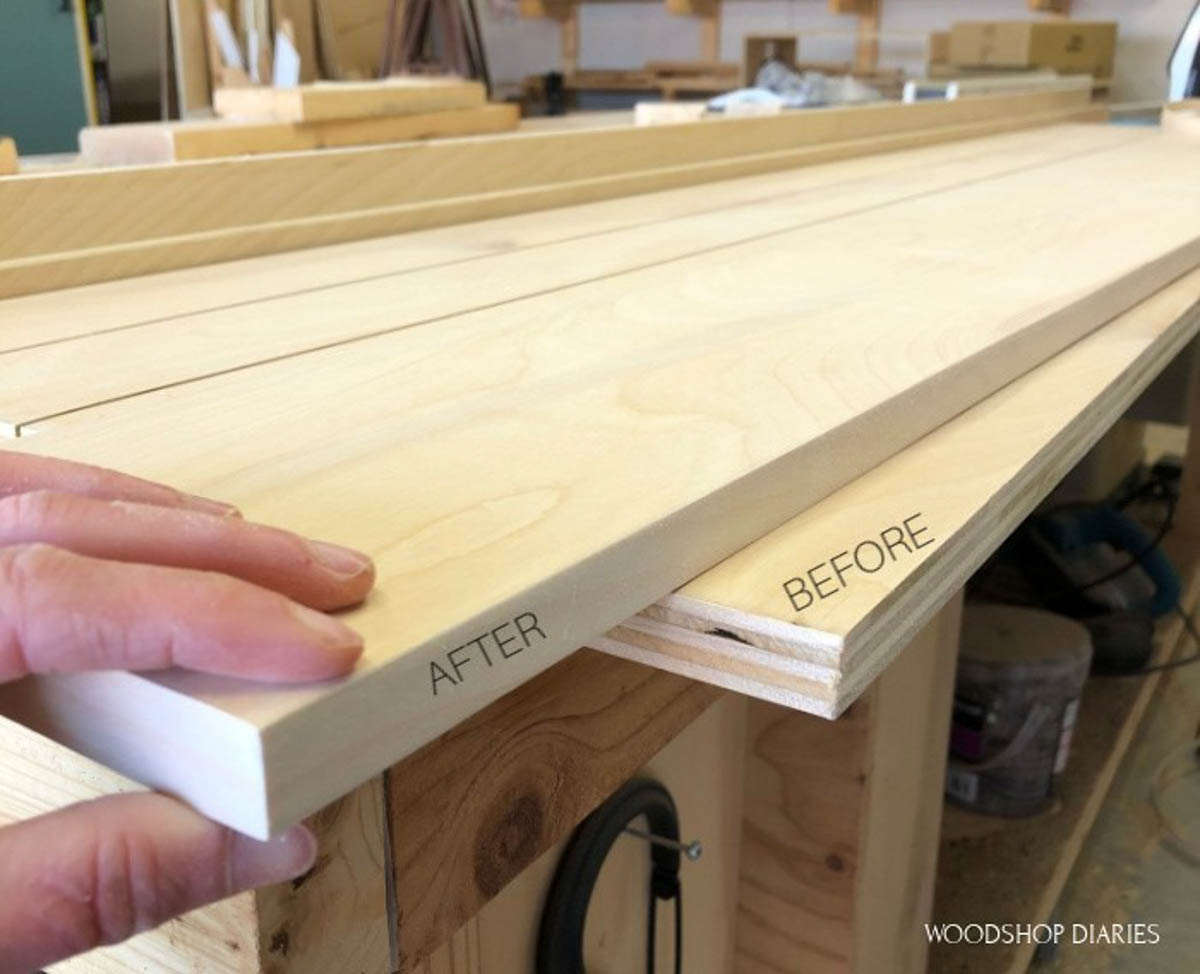
Since I’m dealing with building furniture, I’m going to focus on cabinet/furniture grade hardwood plywood. These come in three common thicknesses–¼″, ½″ and ¾″.

¼" piece of plywood on top of a ¾" piece of plywood

Much like construction lumber, these are not the actual sizes. Different manufacturers’ exact dimensions will vary slightly, but these are the dimensions for the brand I use (PureBond):

Common hardwood plywood thickness:

  • ¼″ plywood = 13/64″ actual thickness
  • ½″ plywood = 29/64″ actual thickness
  • ¾″ plywood = 45/64″ actual thickness

Dealing with dimensions like this would be a mess when building, so instead of using the actual size, they round up to the nearest “easy” fractions like ¼″, ½″ and ¾″.

When building with plywood, make sure to measure your plywood’s exact thickness as some plywood brands will vary. In 99% of cases, this slight difference in thickness is negligible, so simply using ¾″ in your calculations and measurements instead of 45/64″ will work just fine.

But, it’s helpful to be aware of these dimensions as you build in case you do need to accommodate for them.

What is linear feet?

Sometimes, when shopping for hardwood, moldings, or trim pieces, stores may sell boards by the linear foot. Linear feet is simply the length of a board in feet.

Stores may price specific size boards as $x.xx per foot. As an example, a 1×6 oak board may be $2/linear foot. So if you needed a 4 ft long piece, then that’s 4 linear feet, so you’d pay $8.

Or they may price crown molding trim as $1/linear foot. So if you bought an 8′ long piece, you’d pay $8.

Prices will vary based on the board thickness and width, but the linear foot is simply the length of that board in feet.

What is board feet?

Board foot is a measurement of the volume of wood. One board foot is equal to 1” x 12″ x 12″ of wood. This would be a 1″ thick piece of wood 12″ square.

Board foot is commonly used when pricing and purchasing hardwood. Since many hardwood suppliers and lumber mills don’t have standard size boards, they use this measurement to price and sell.

To figure your board foot, multiply the thickness (in inches) x the width (in inches) x the length (in inches) and divide that number by 144 cubic inches.

For example, if you have a 1″ x 6″ x 96″ board, then that’s 4 board foot:

  • 1″x6″x96″ = 576 cubic inches then divide by 144 cubic inches = 4

If you call up a local lumber hardwood mill (at least this is how it works at my local mill) and order 200 board foot of maple, you may get boards in varying widths, thicknesses and lengths. But the total VOLUME of wood will equal 200 board foot.

hardwood lumber stacked and strapped down in truck

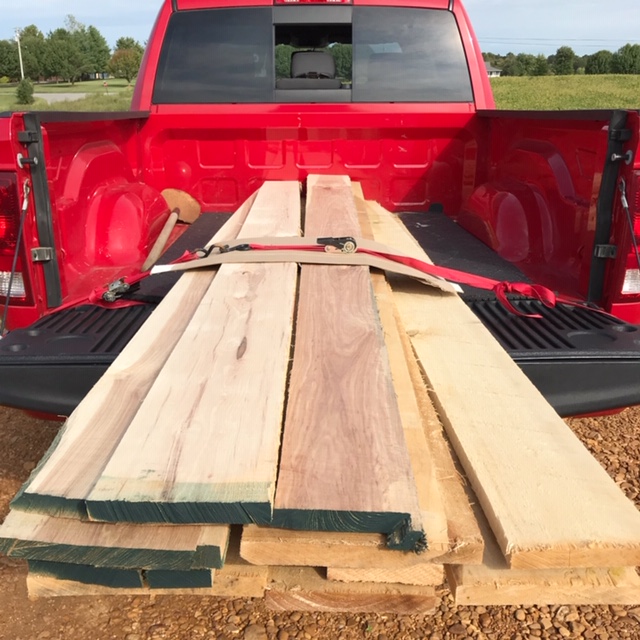
TIP: Hardwood suppliers will usually charge $x.xx per board foot depending on the species of wood. So, it’s helpful to have an idea how many board foot you may need for your project before shopping so you know which wood species are within your budget. Hardwoods can be pricey.

Ready to get building?

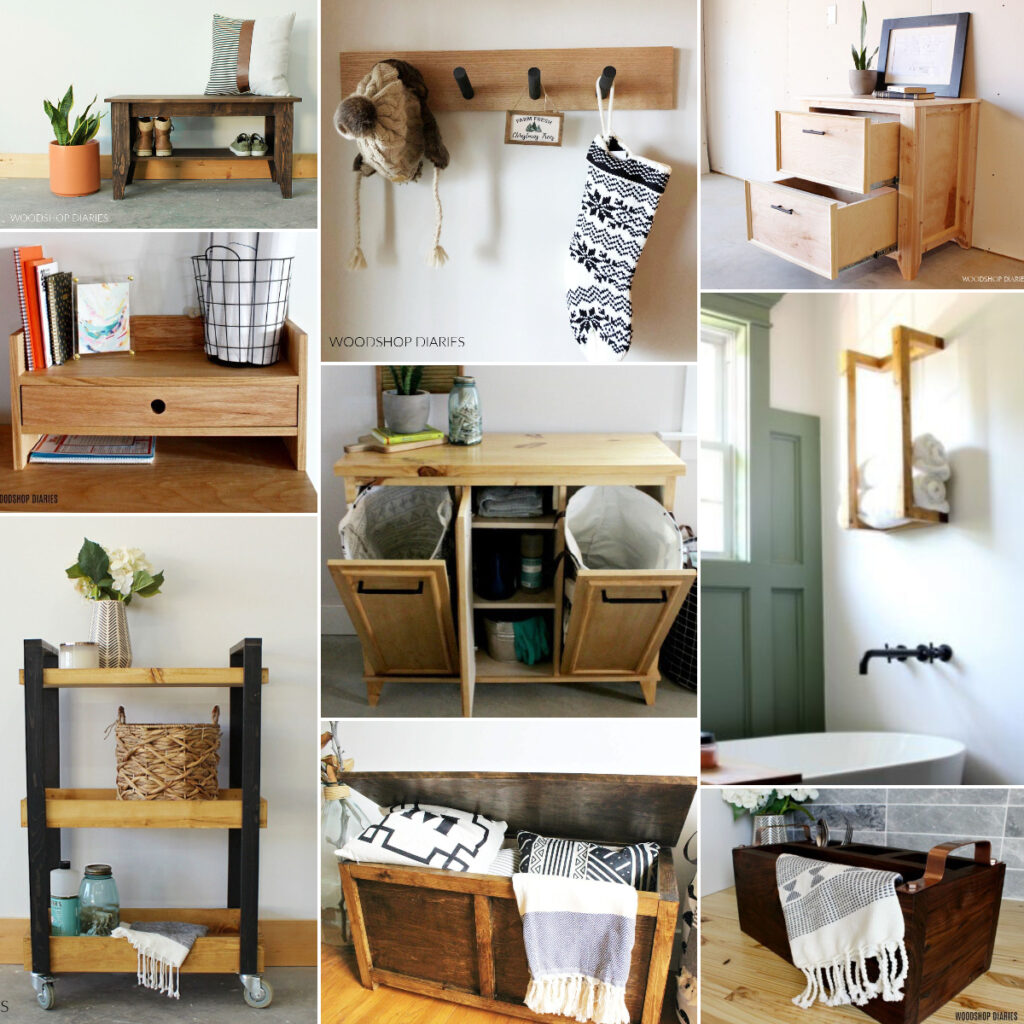
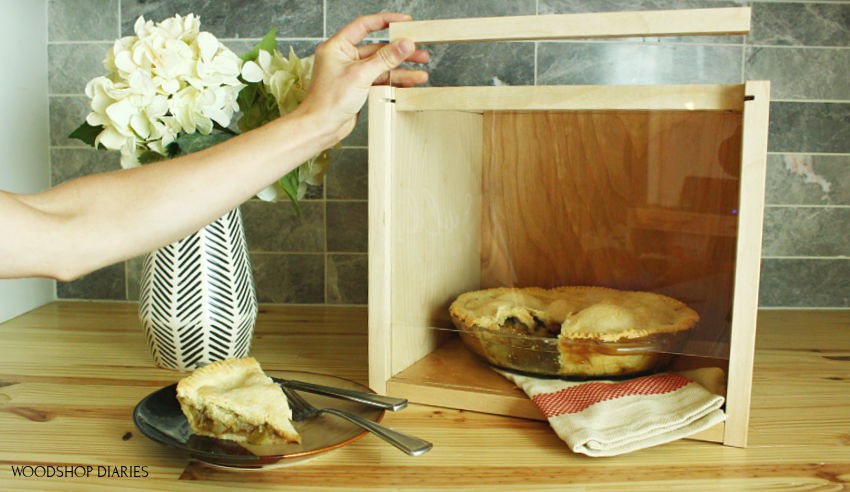
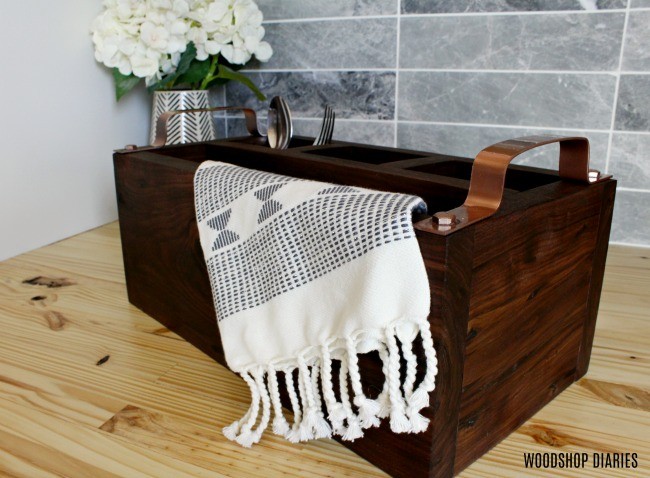
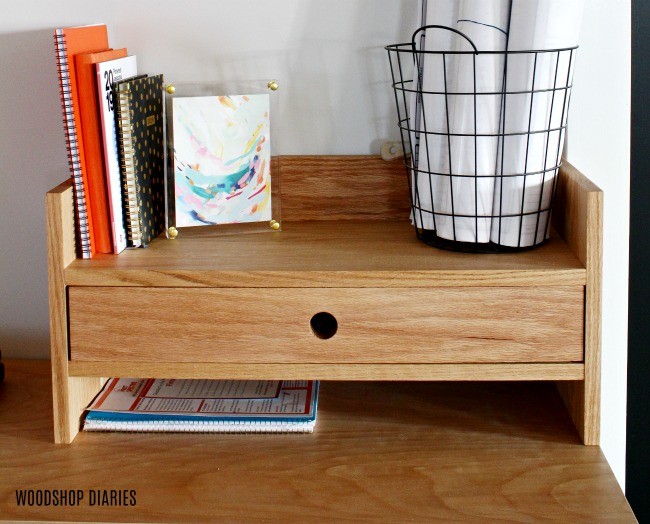
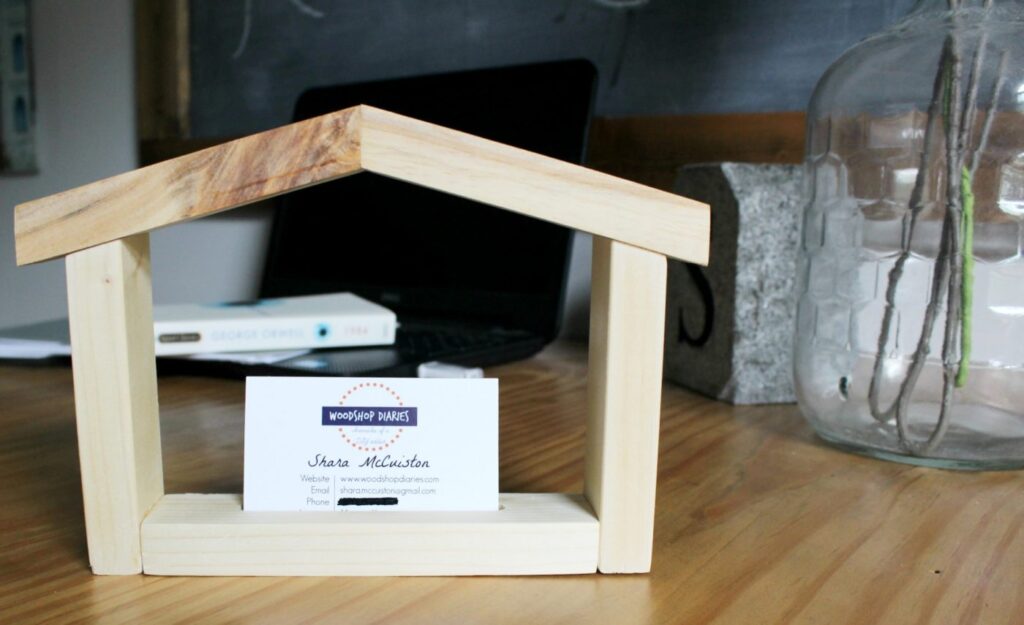
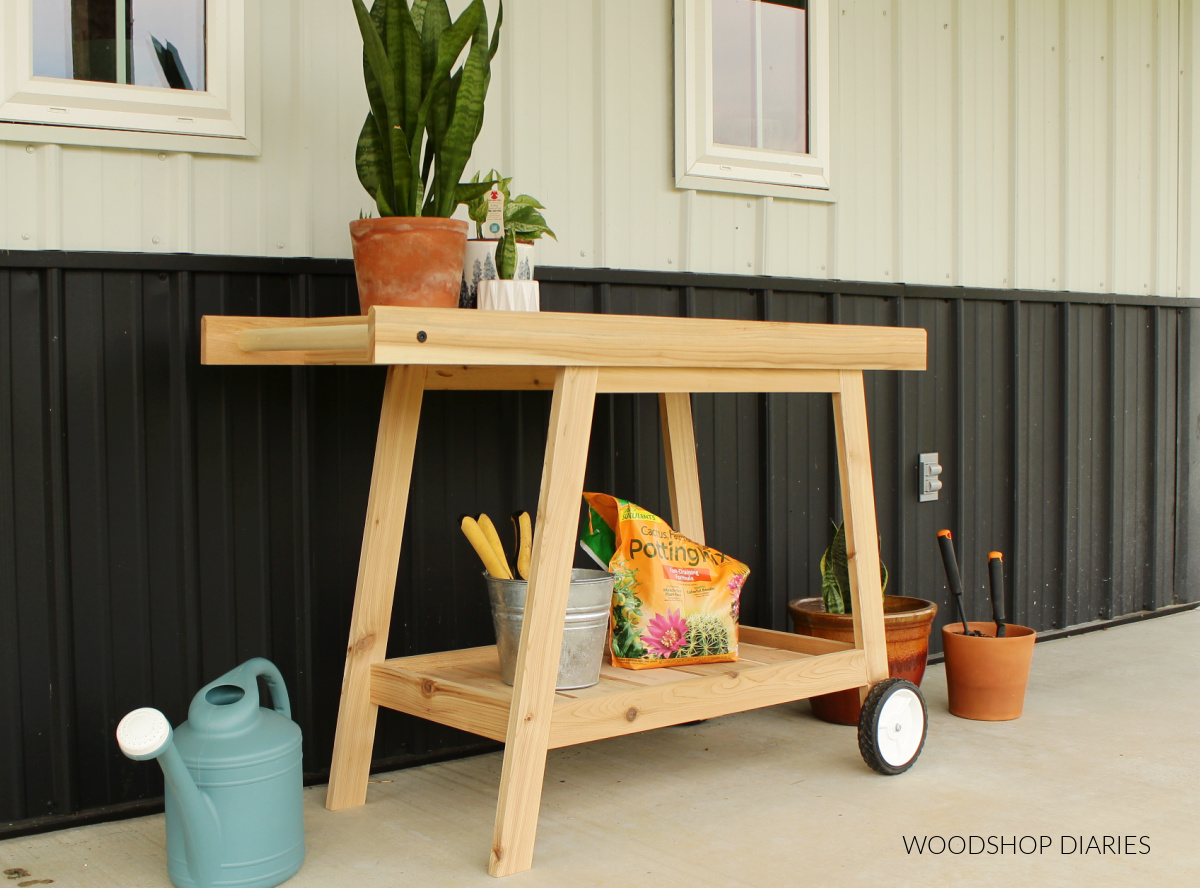
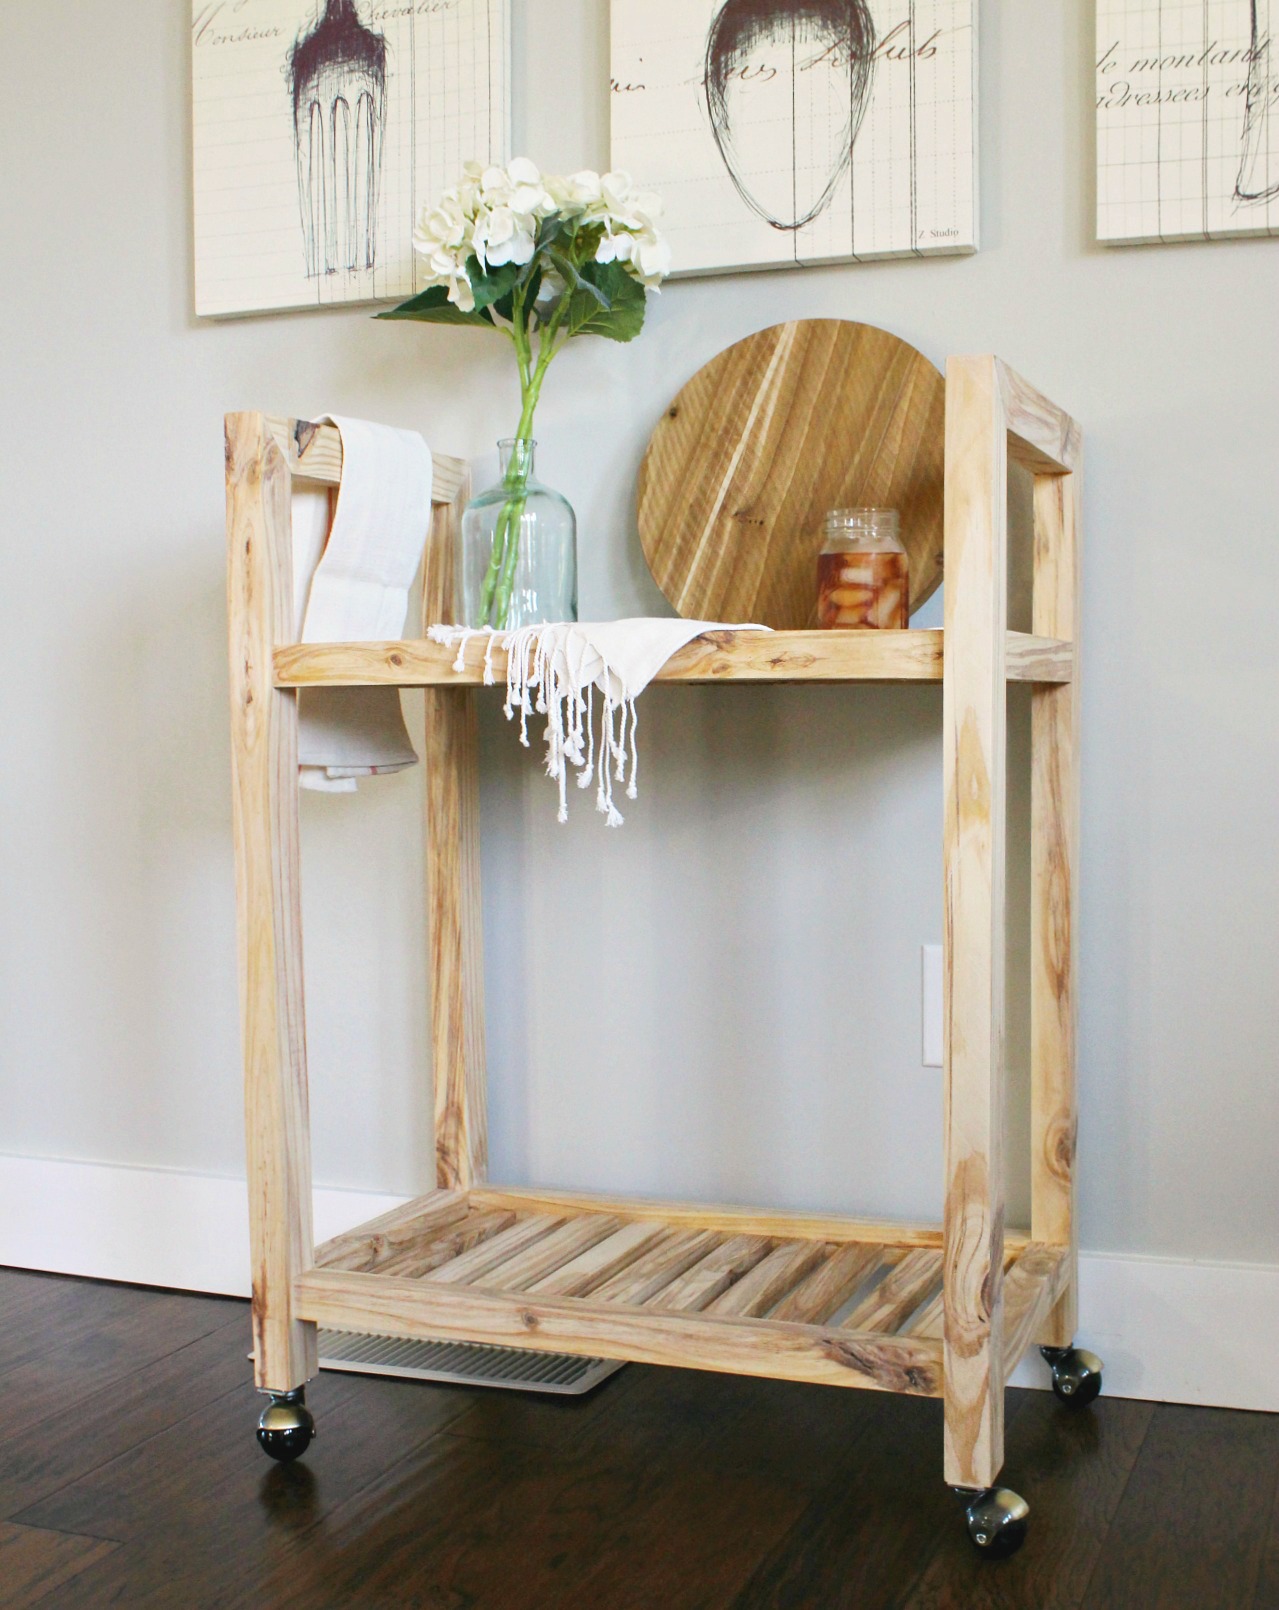
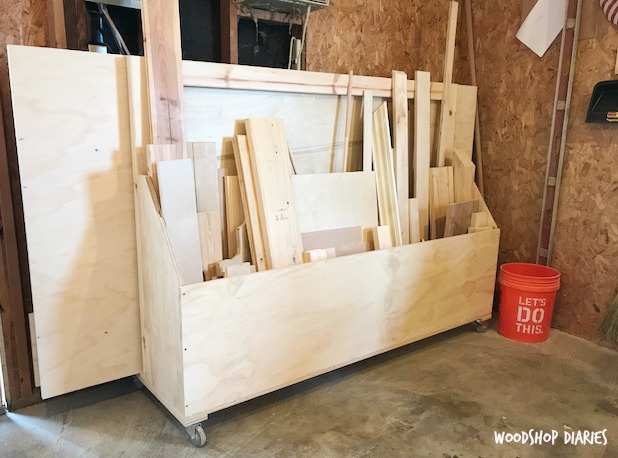
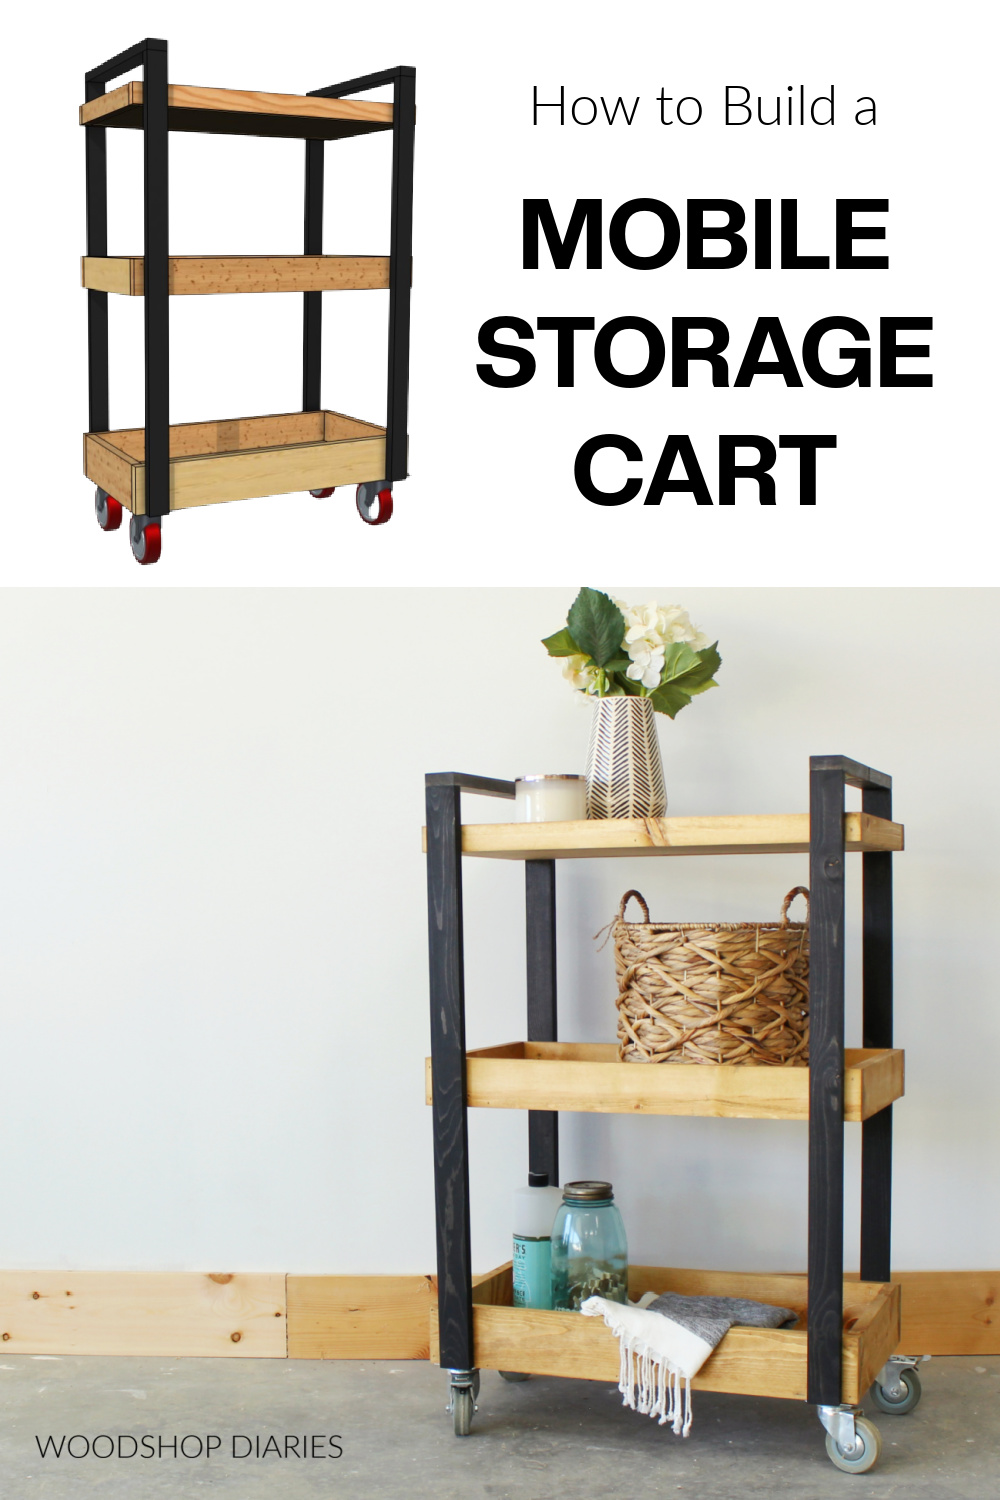
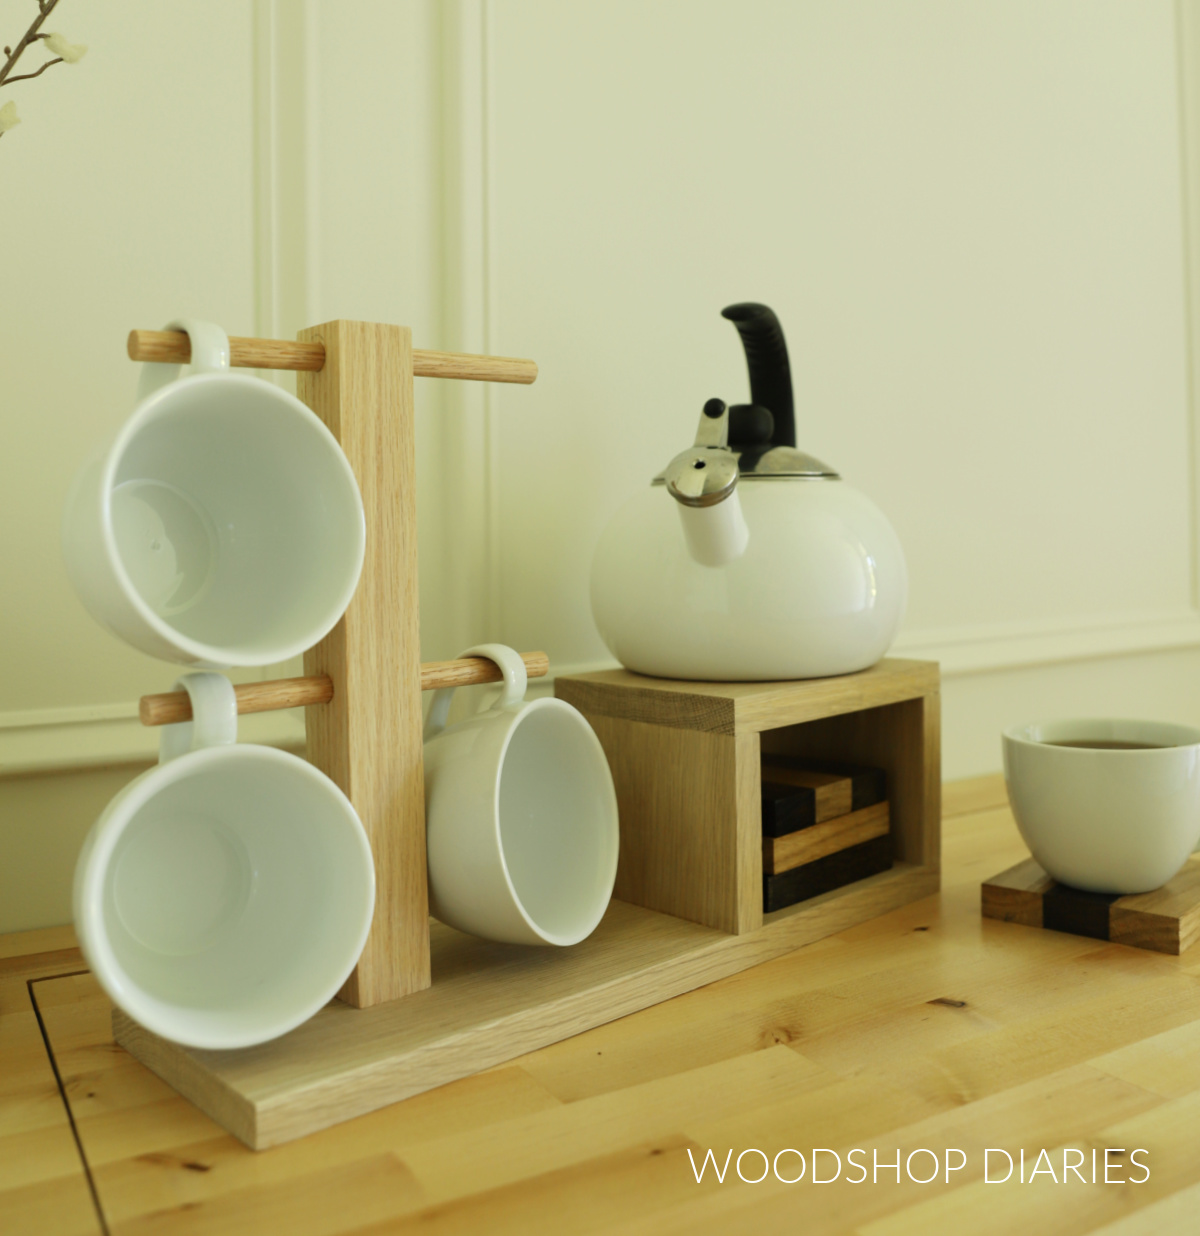
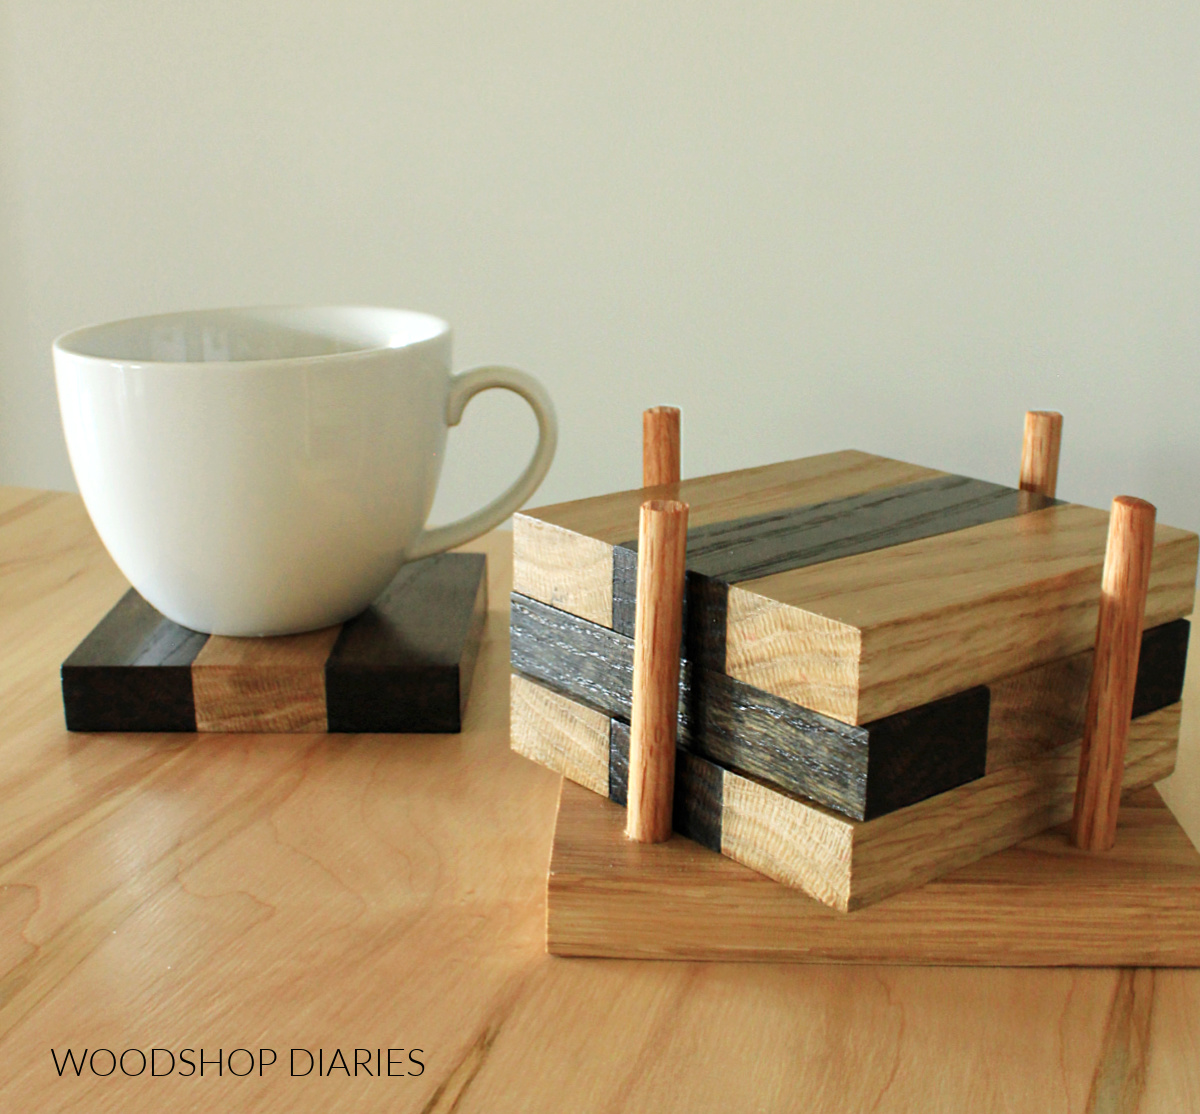
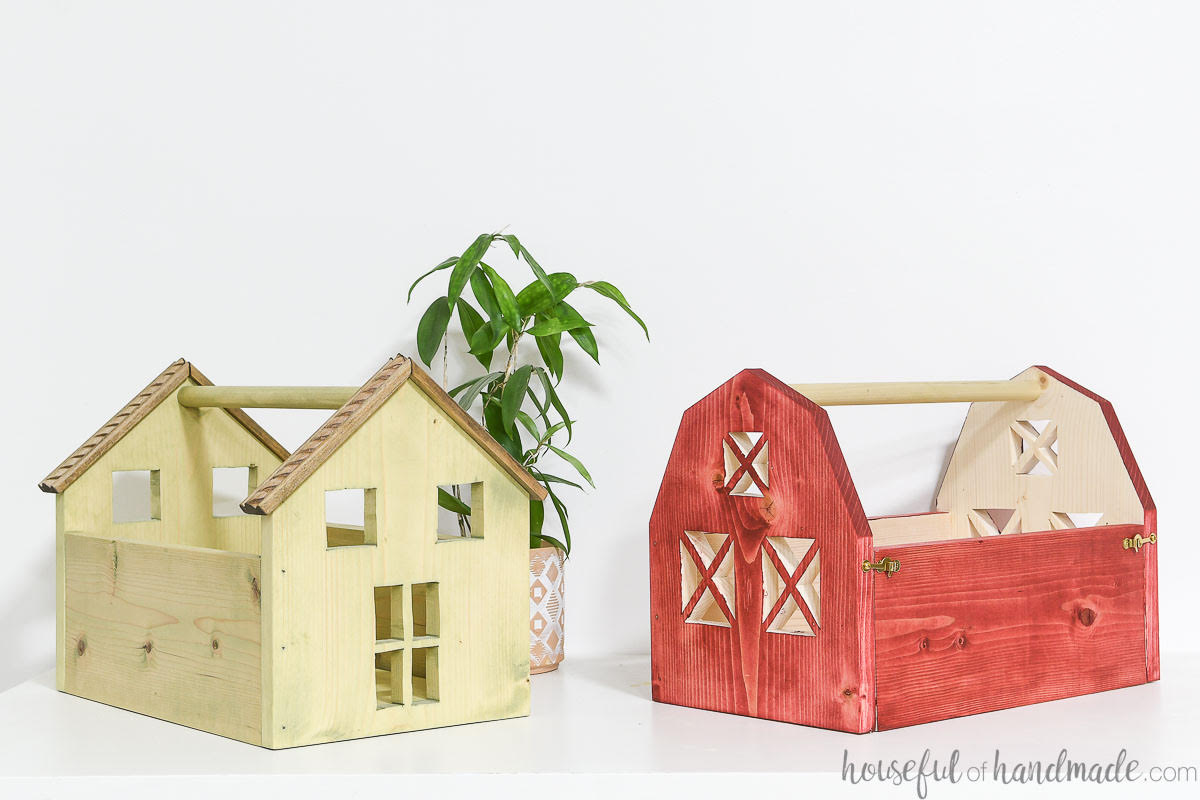
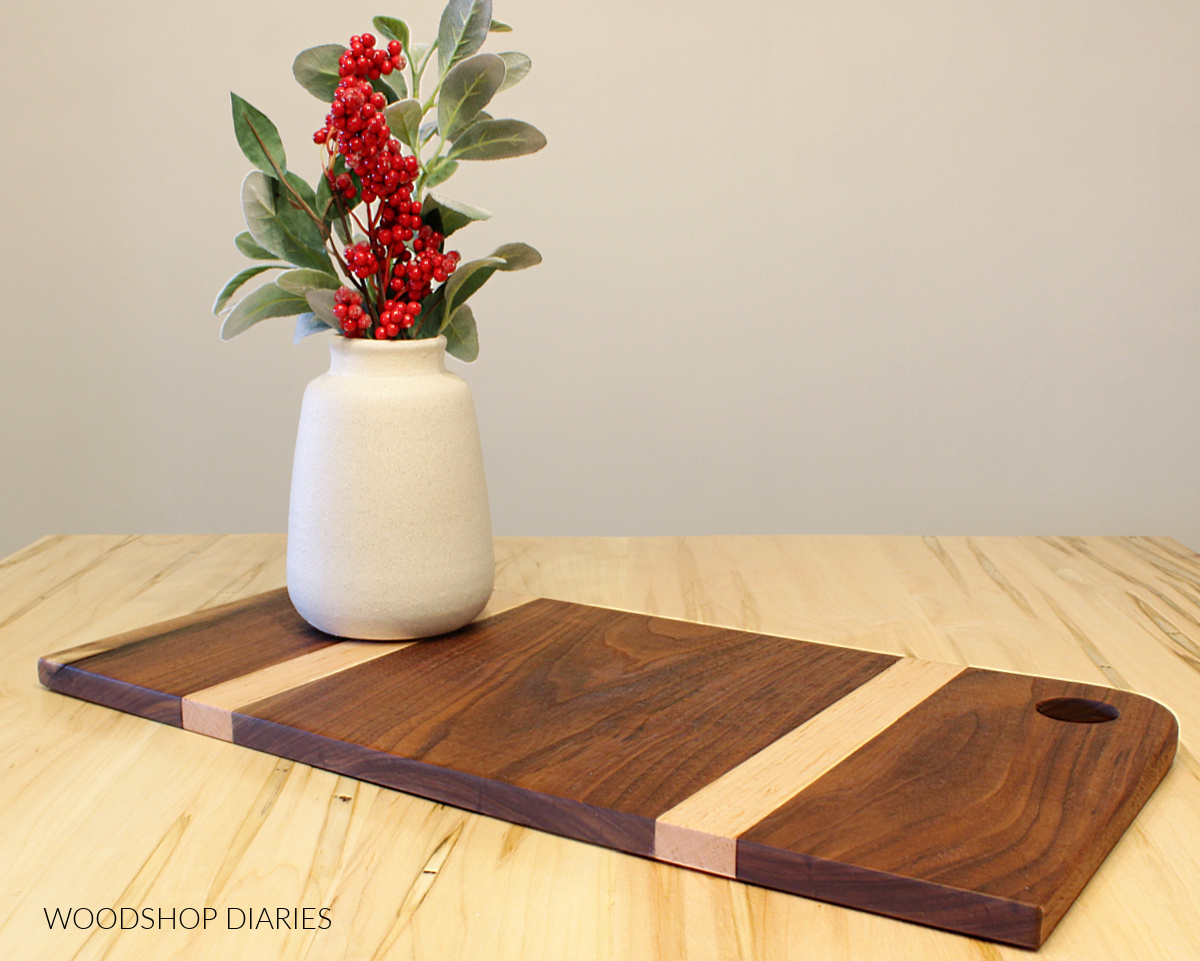
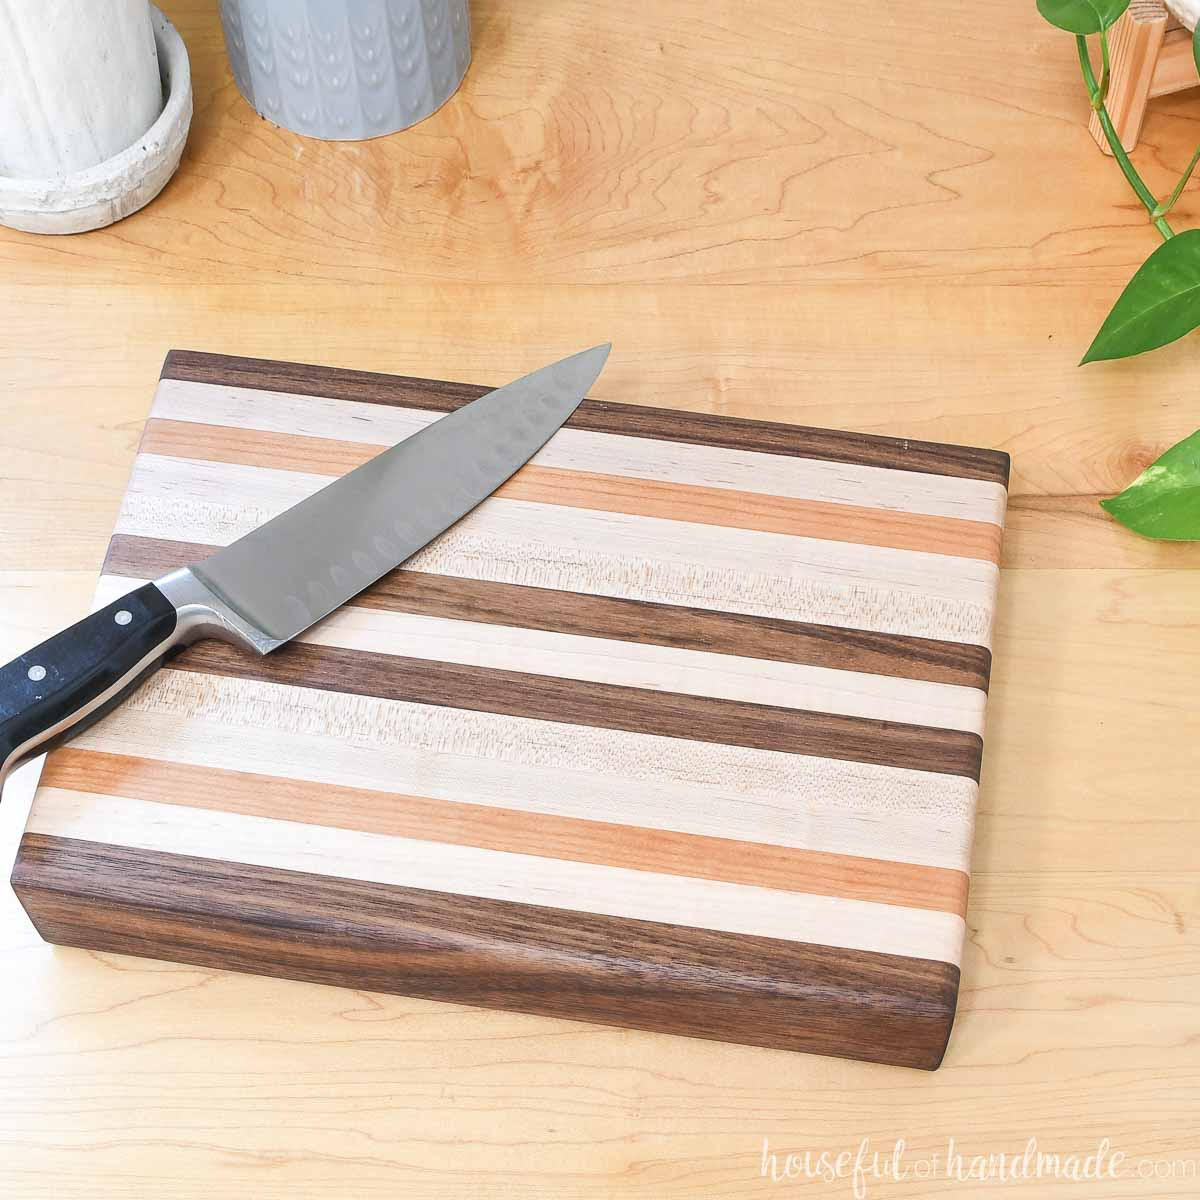
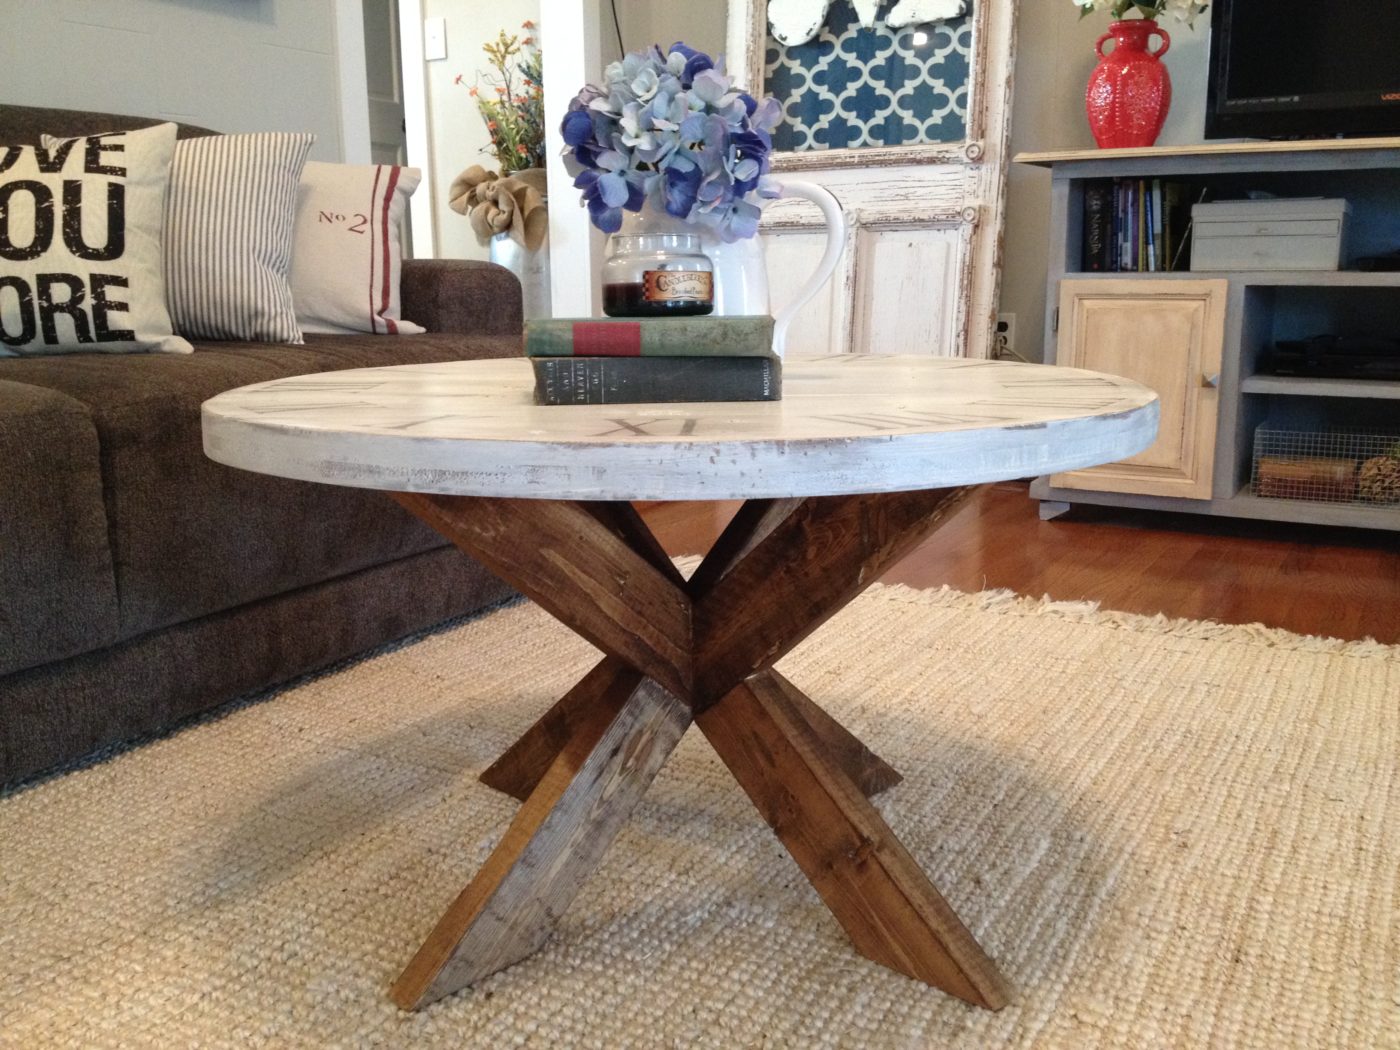
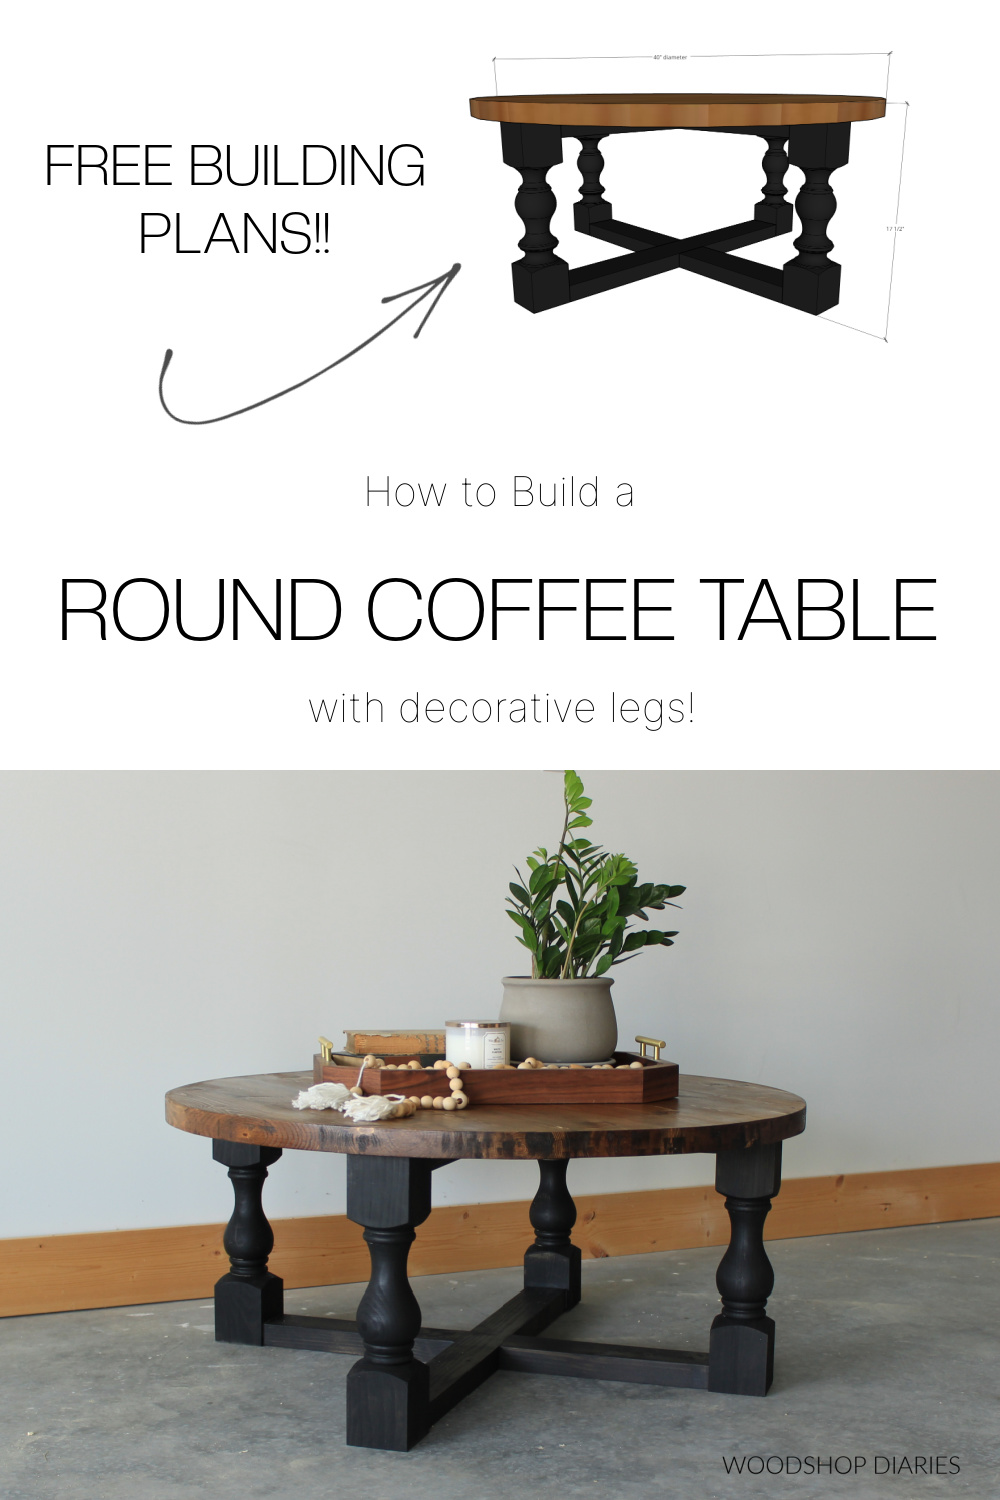
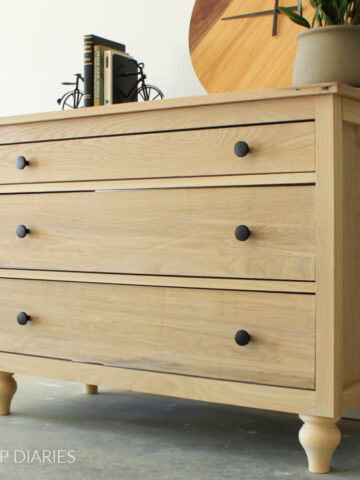
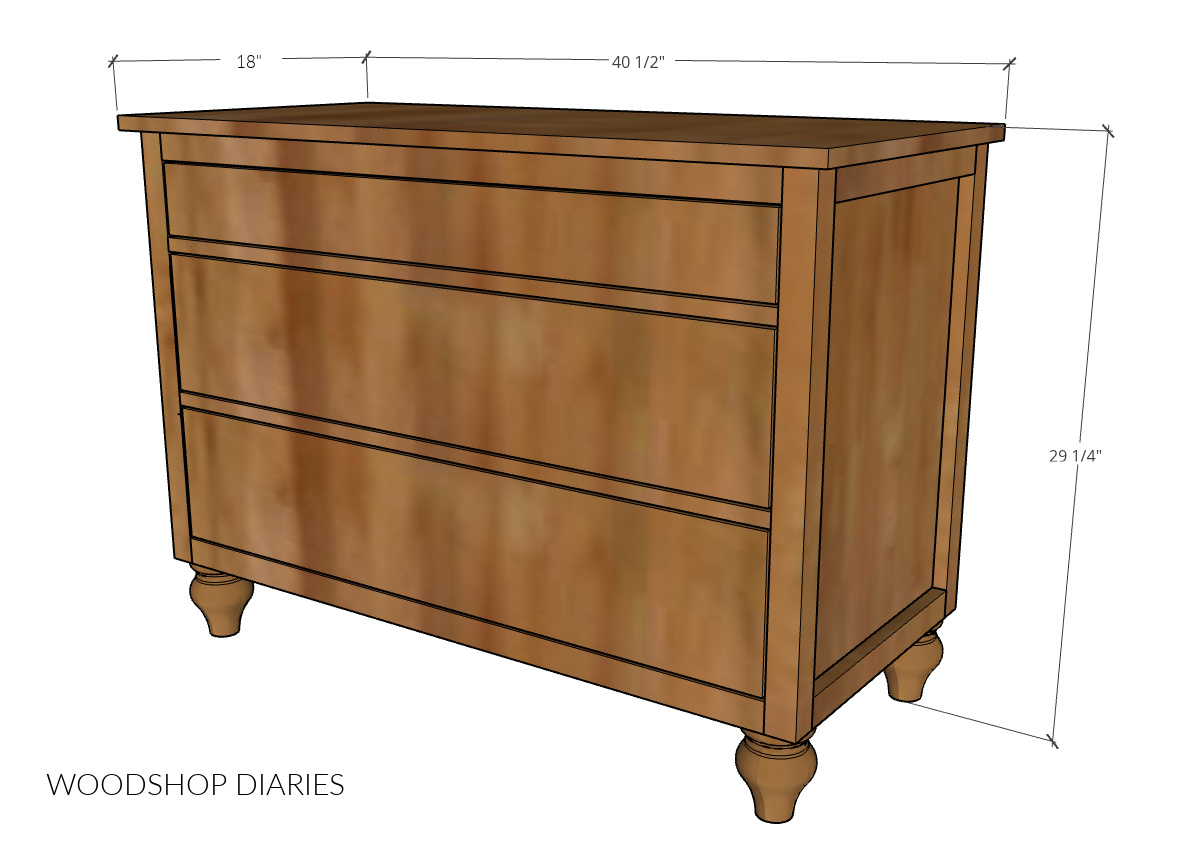
Now that you understand lumber sizing, it’s time to get building! Here are a few other posts you may find helpful to learn more:

  • How to square board edges
  • How to cut plywood sheets
  • 5 tools you need to get started

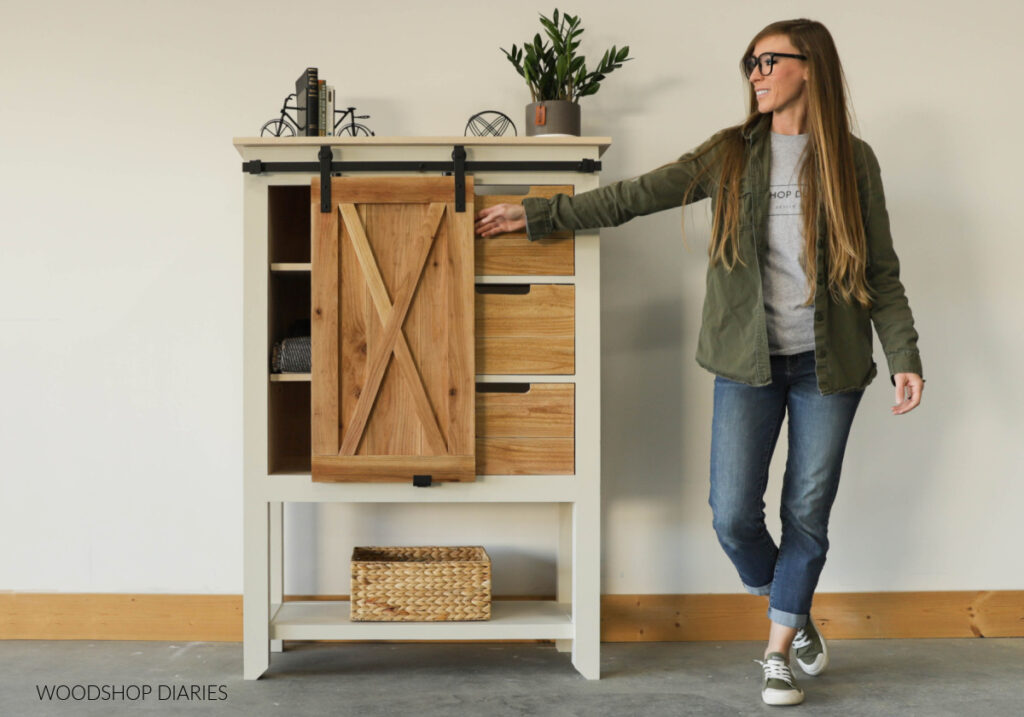
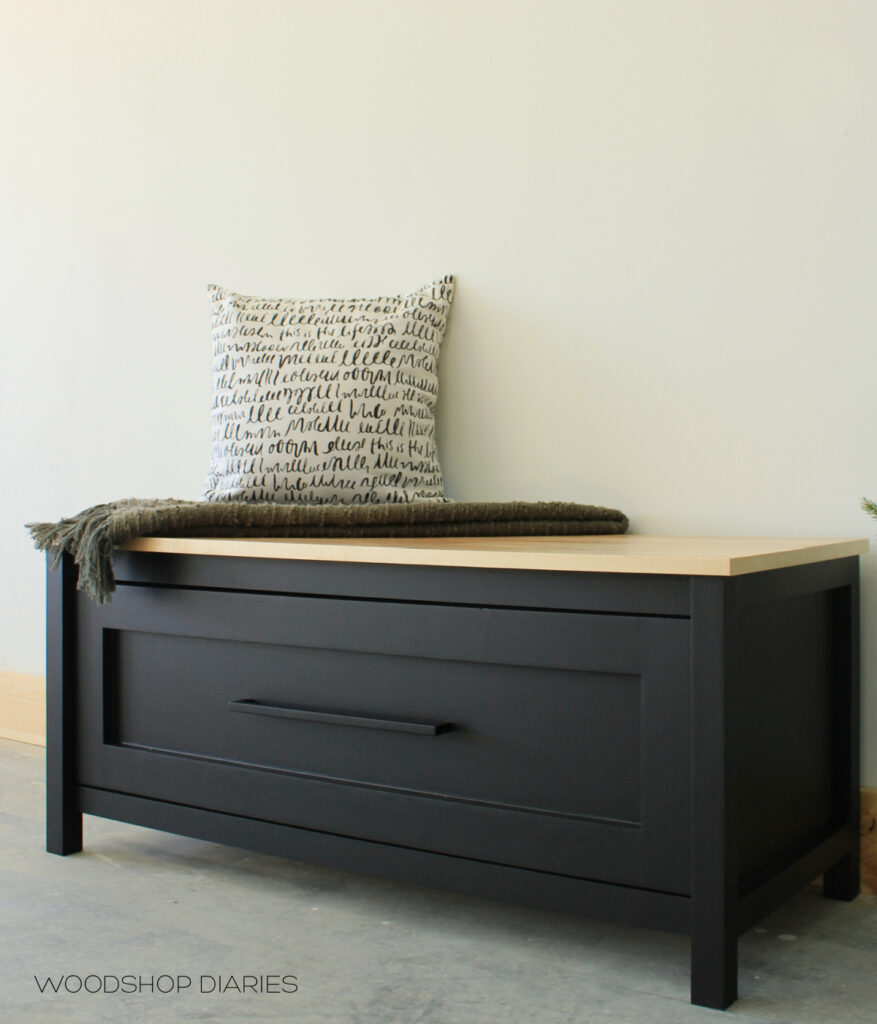
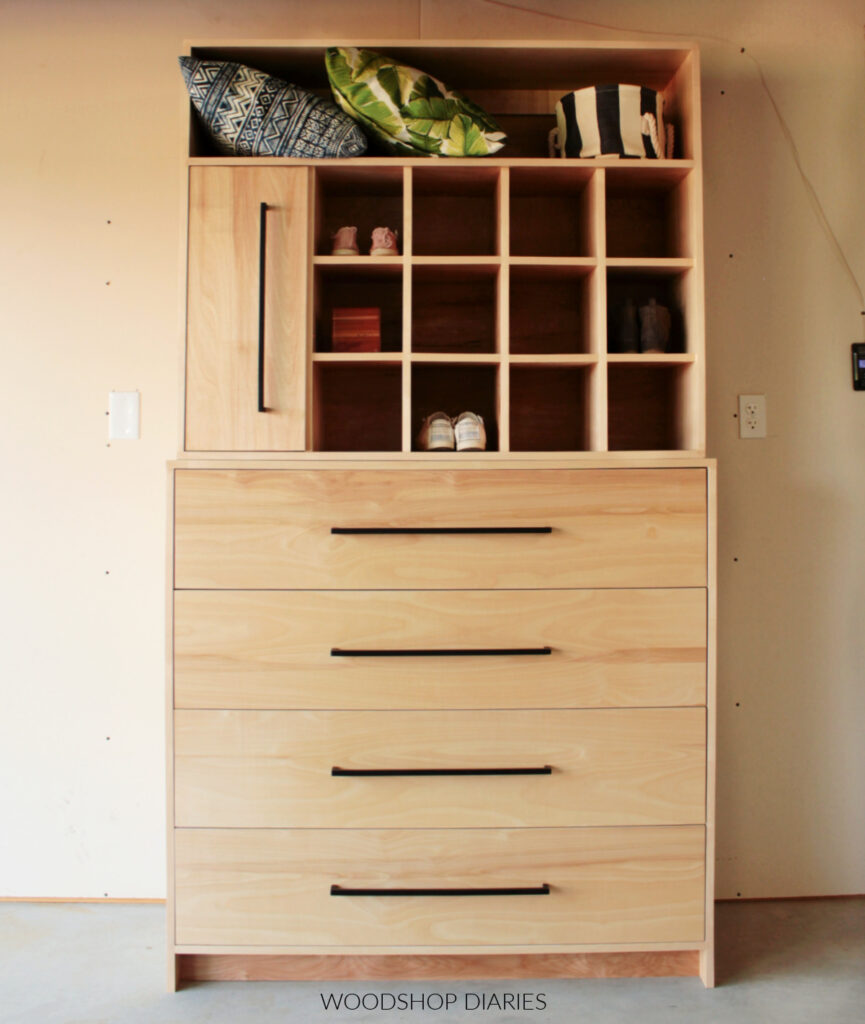
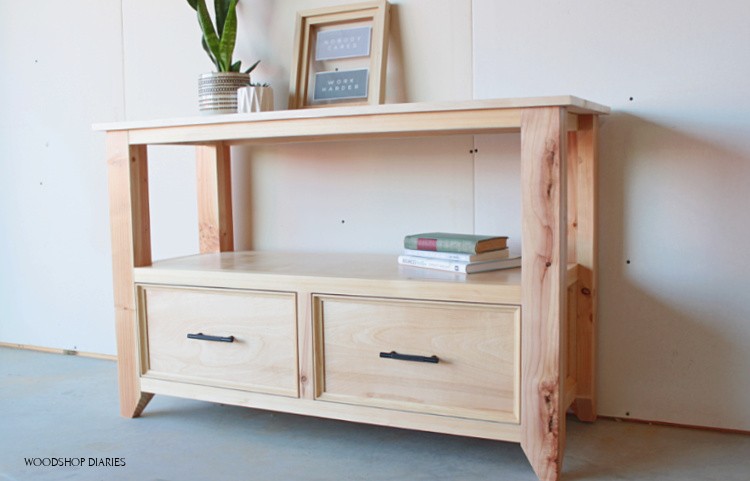
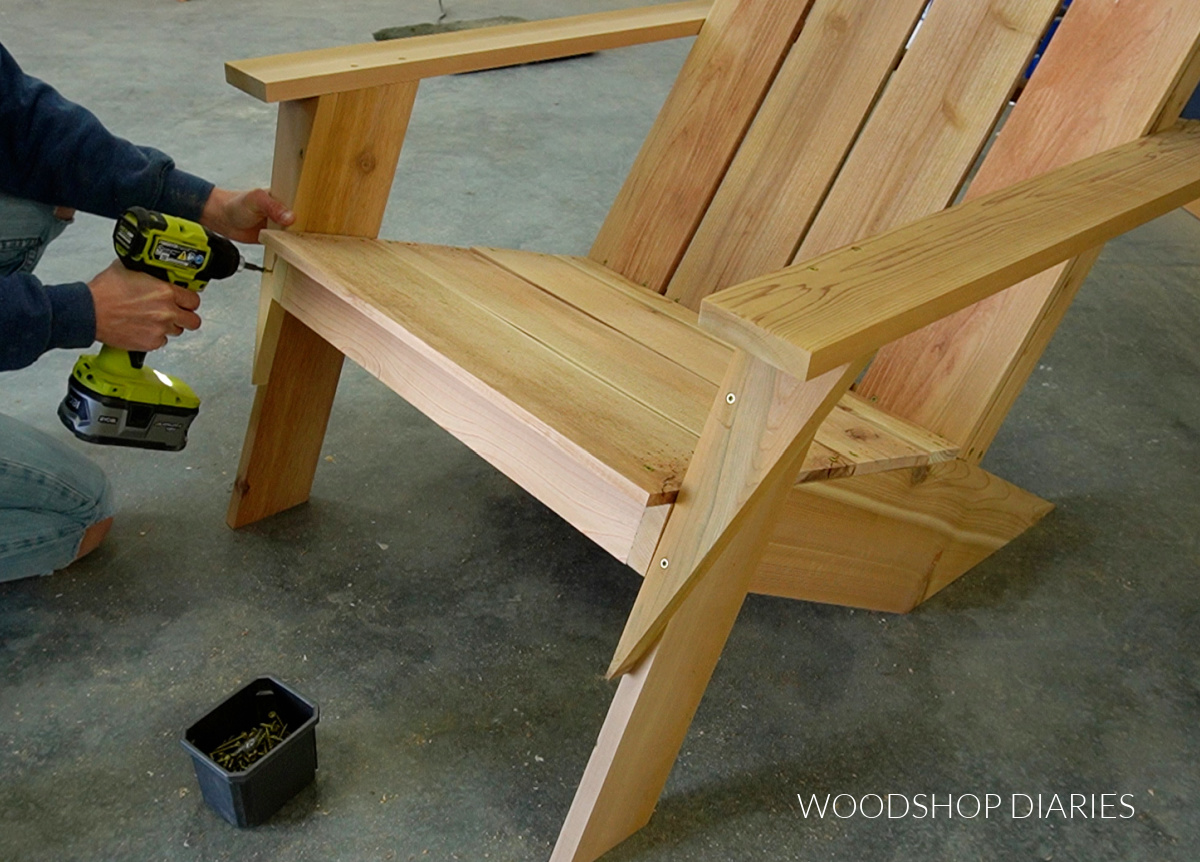
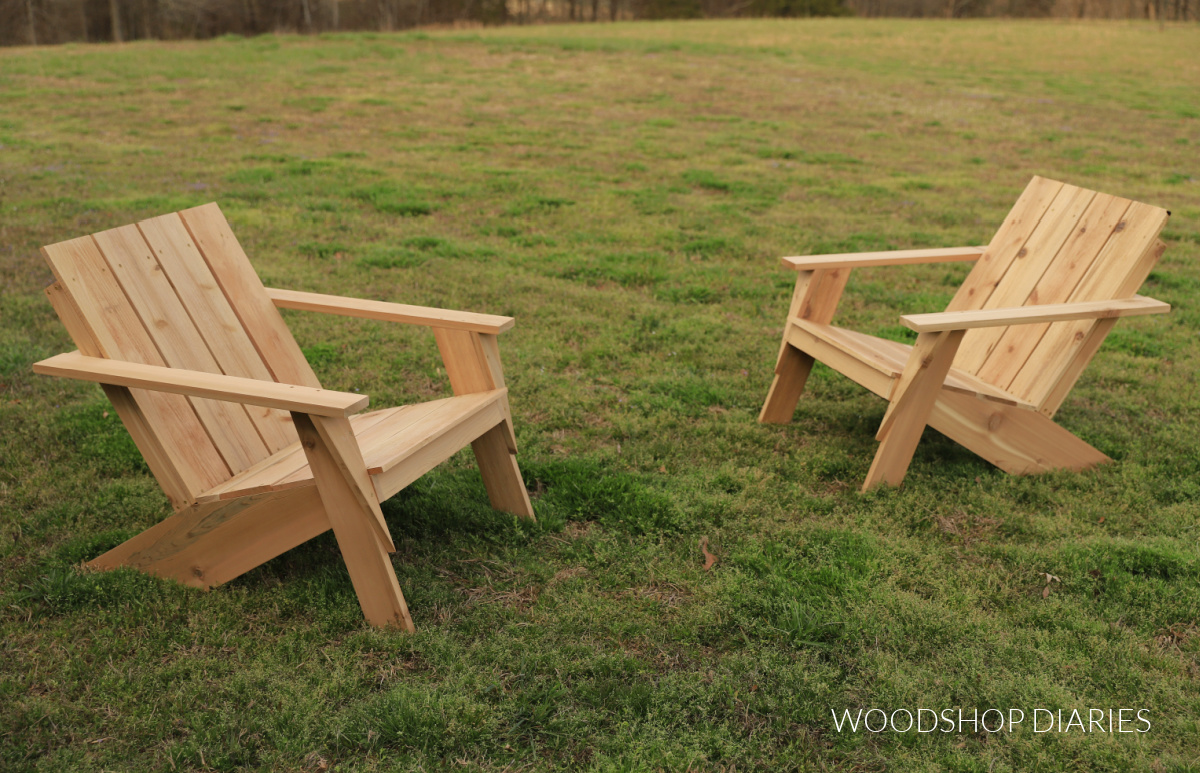
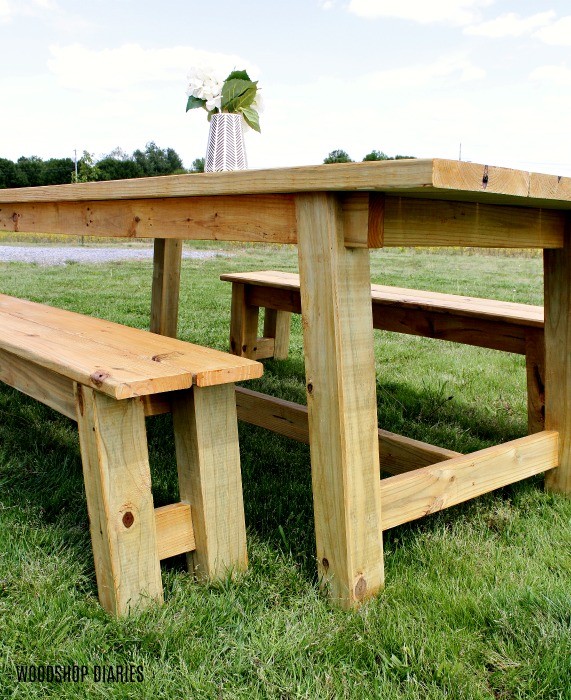
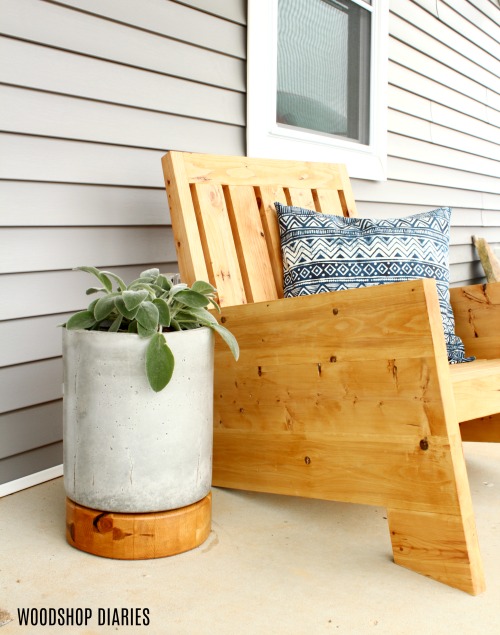
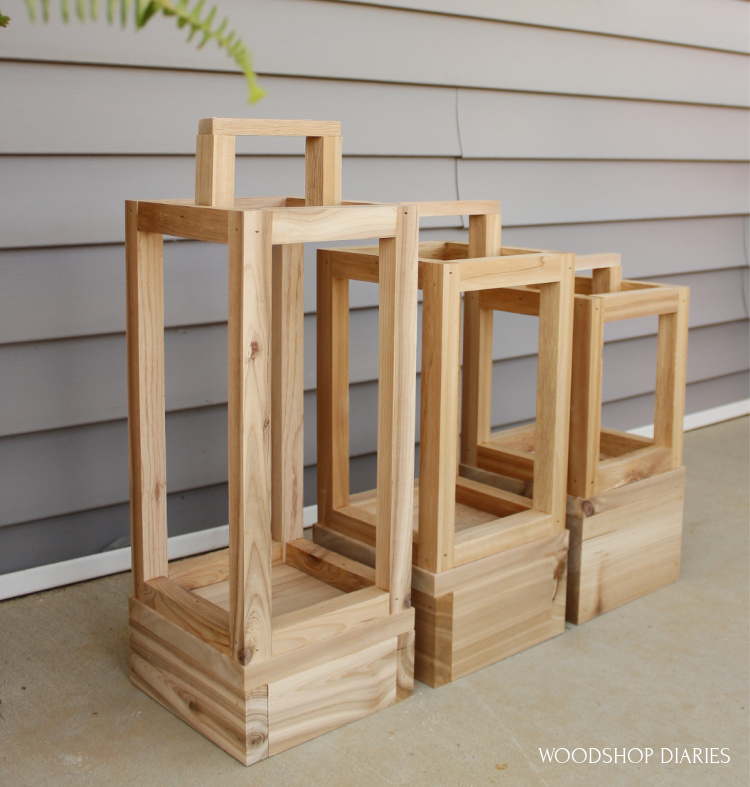
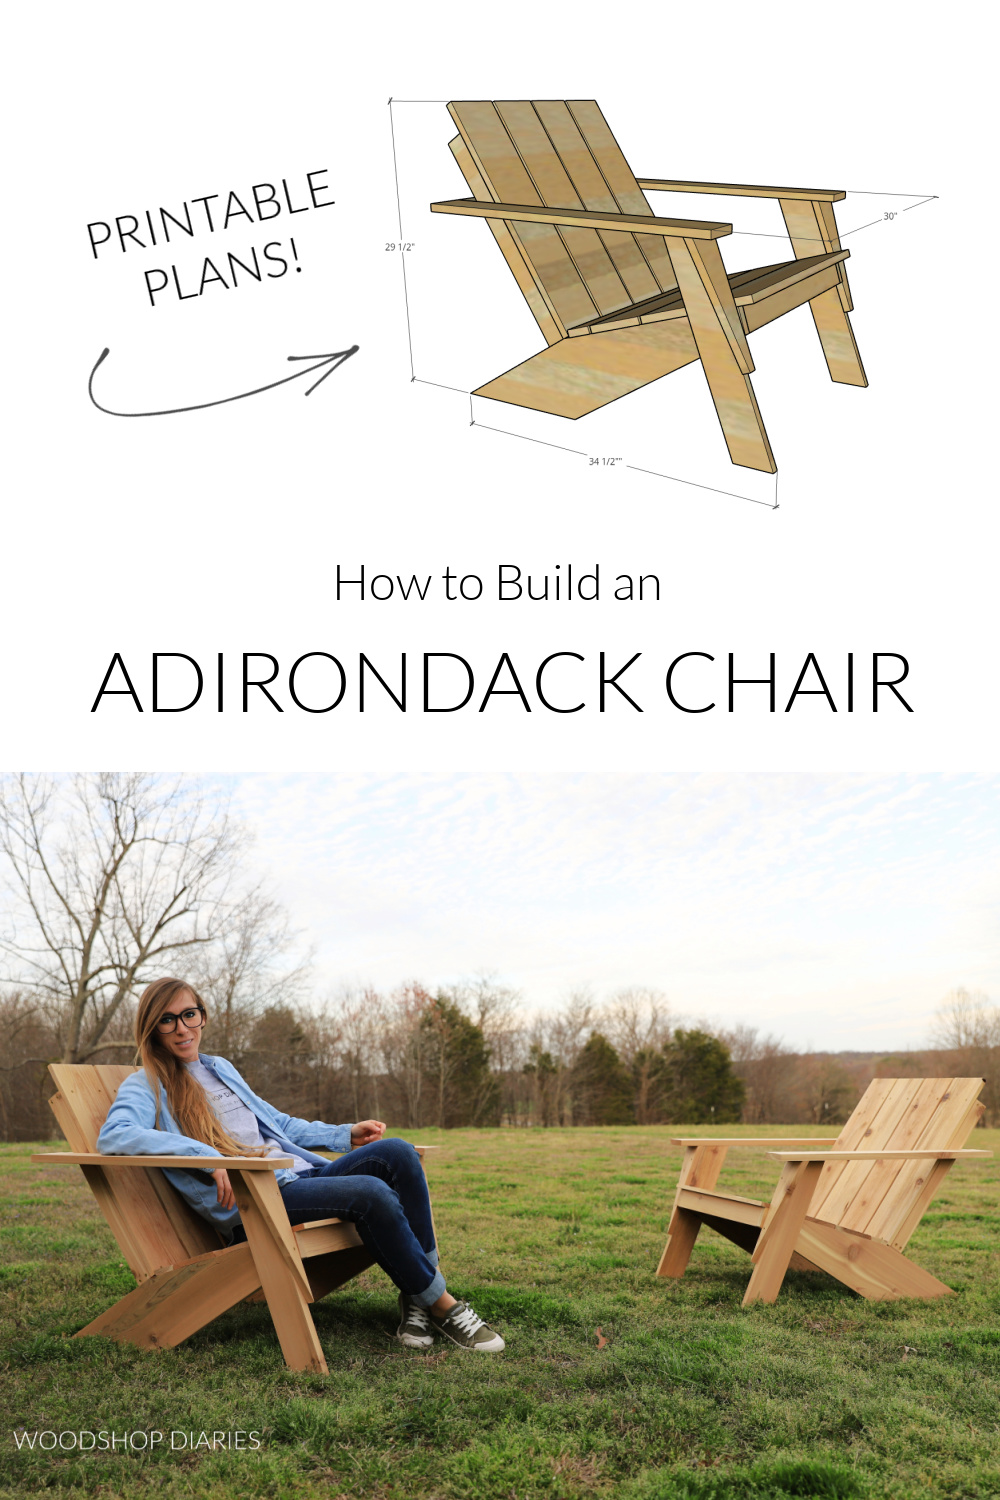
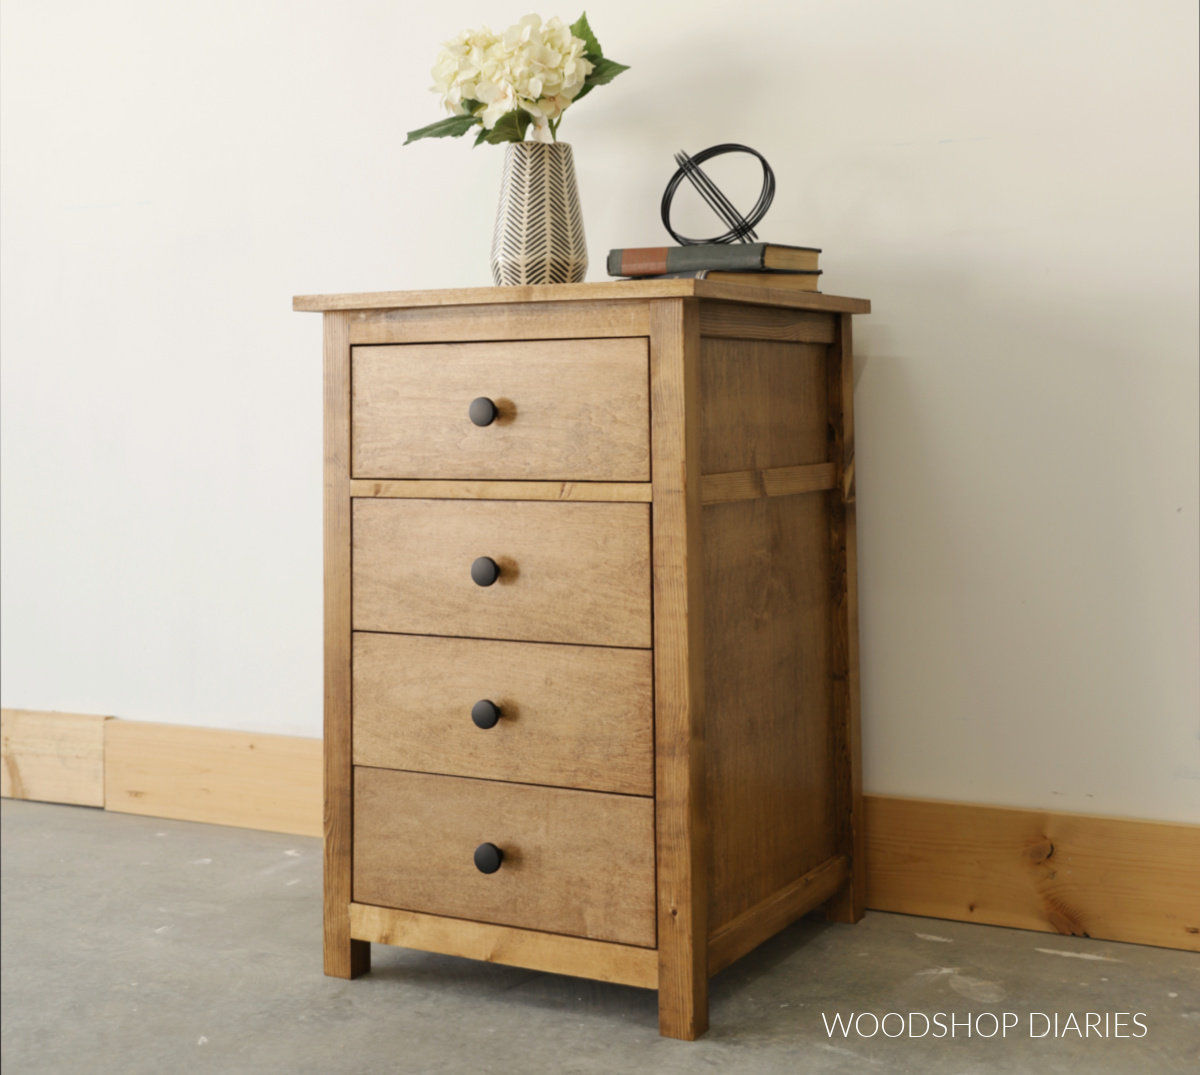
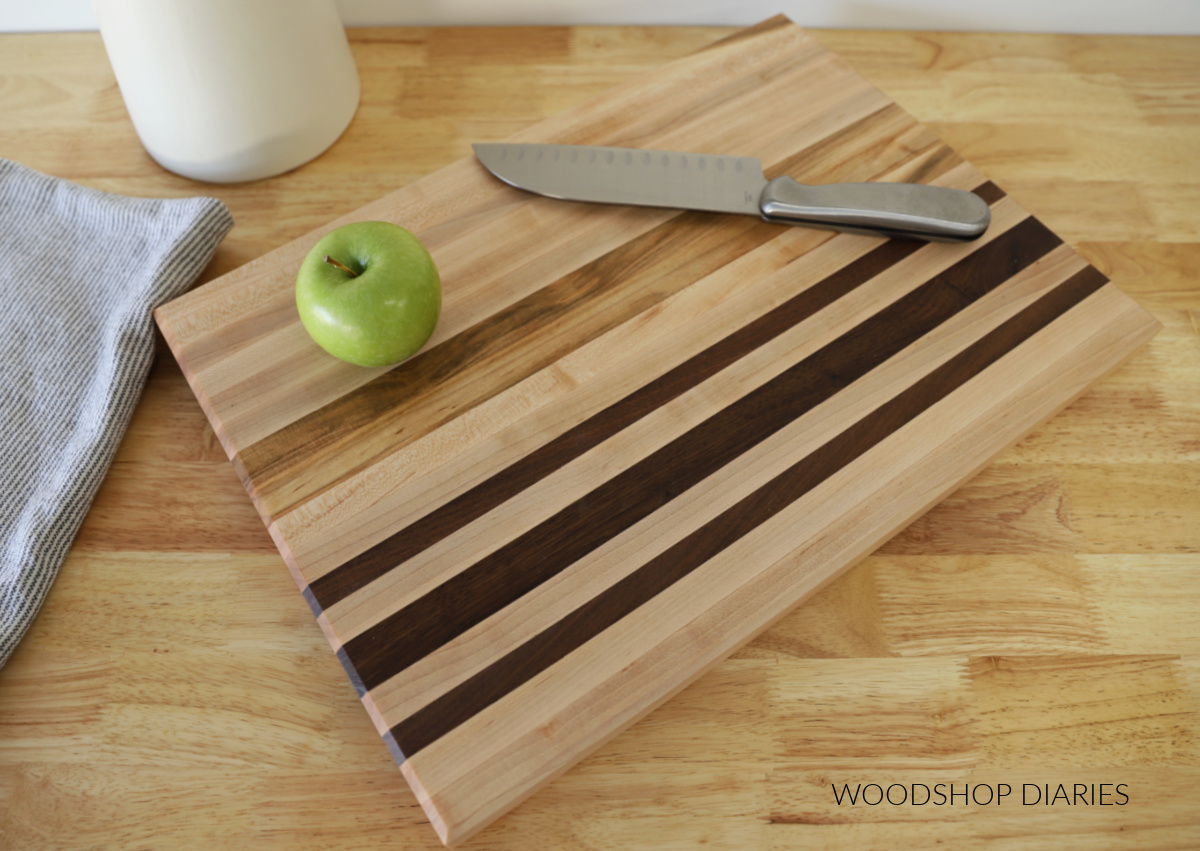
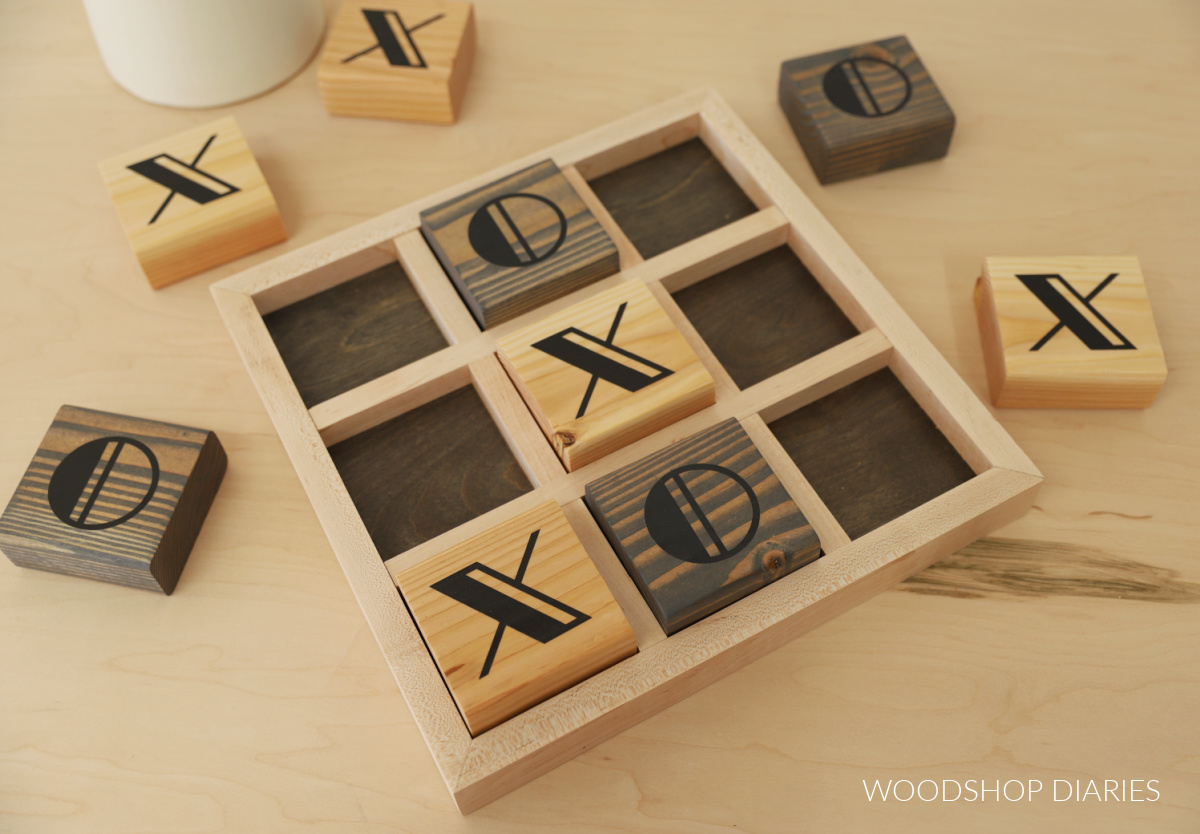
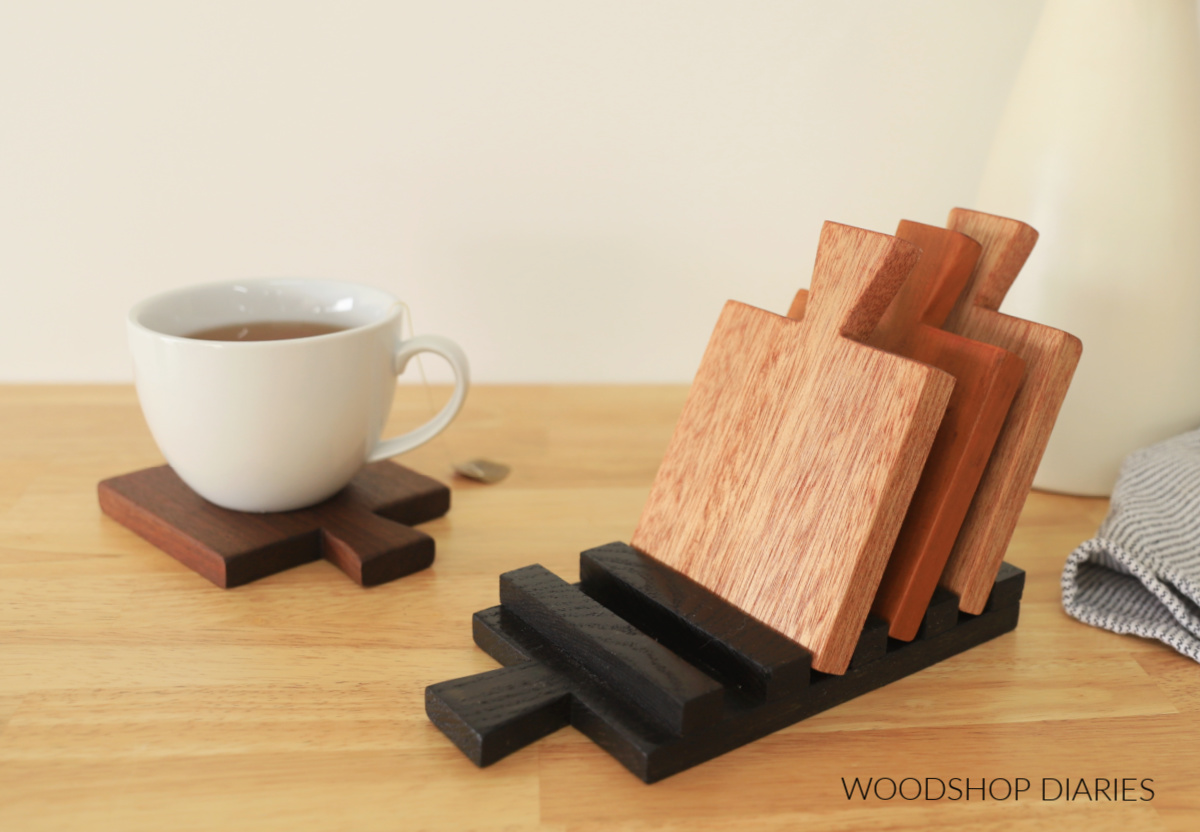
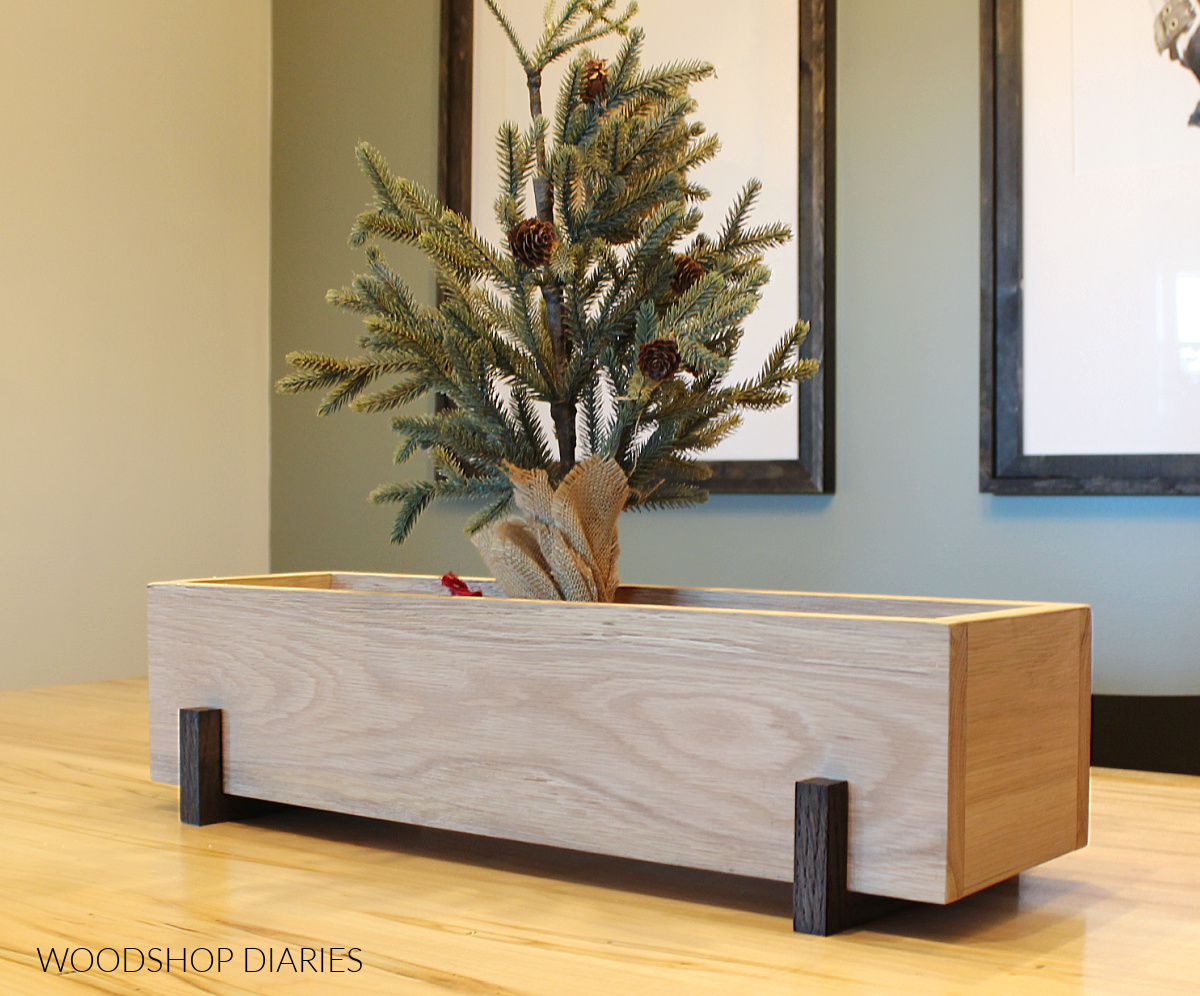
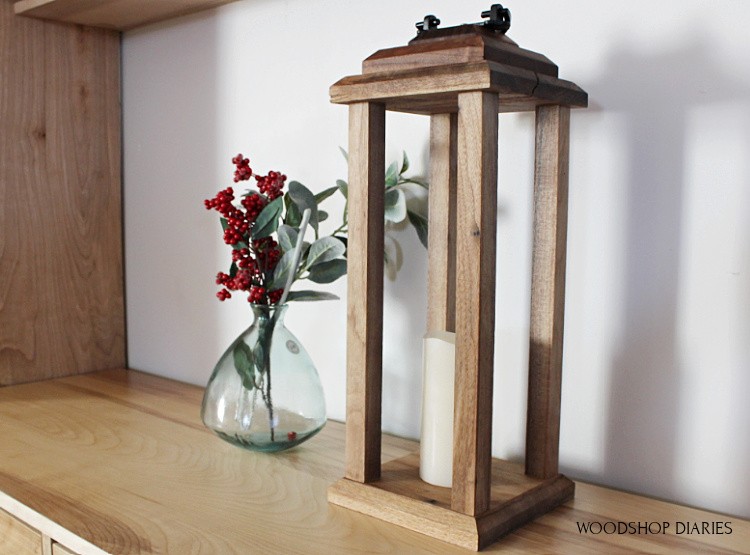
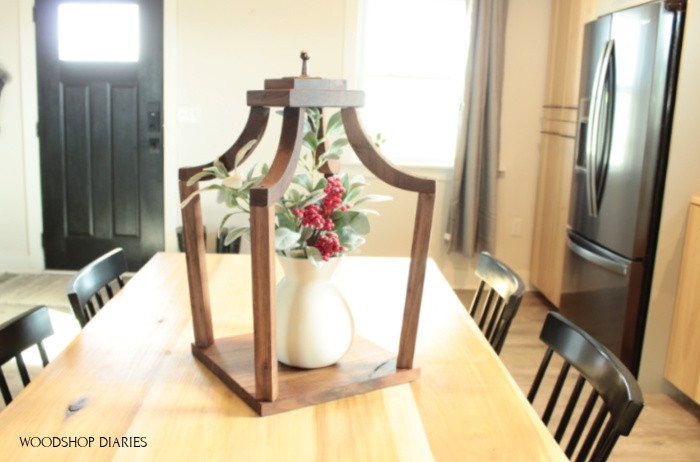
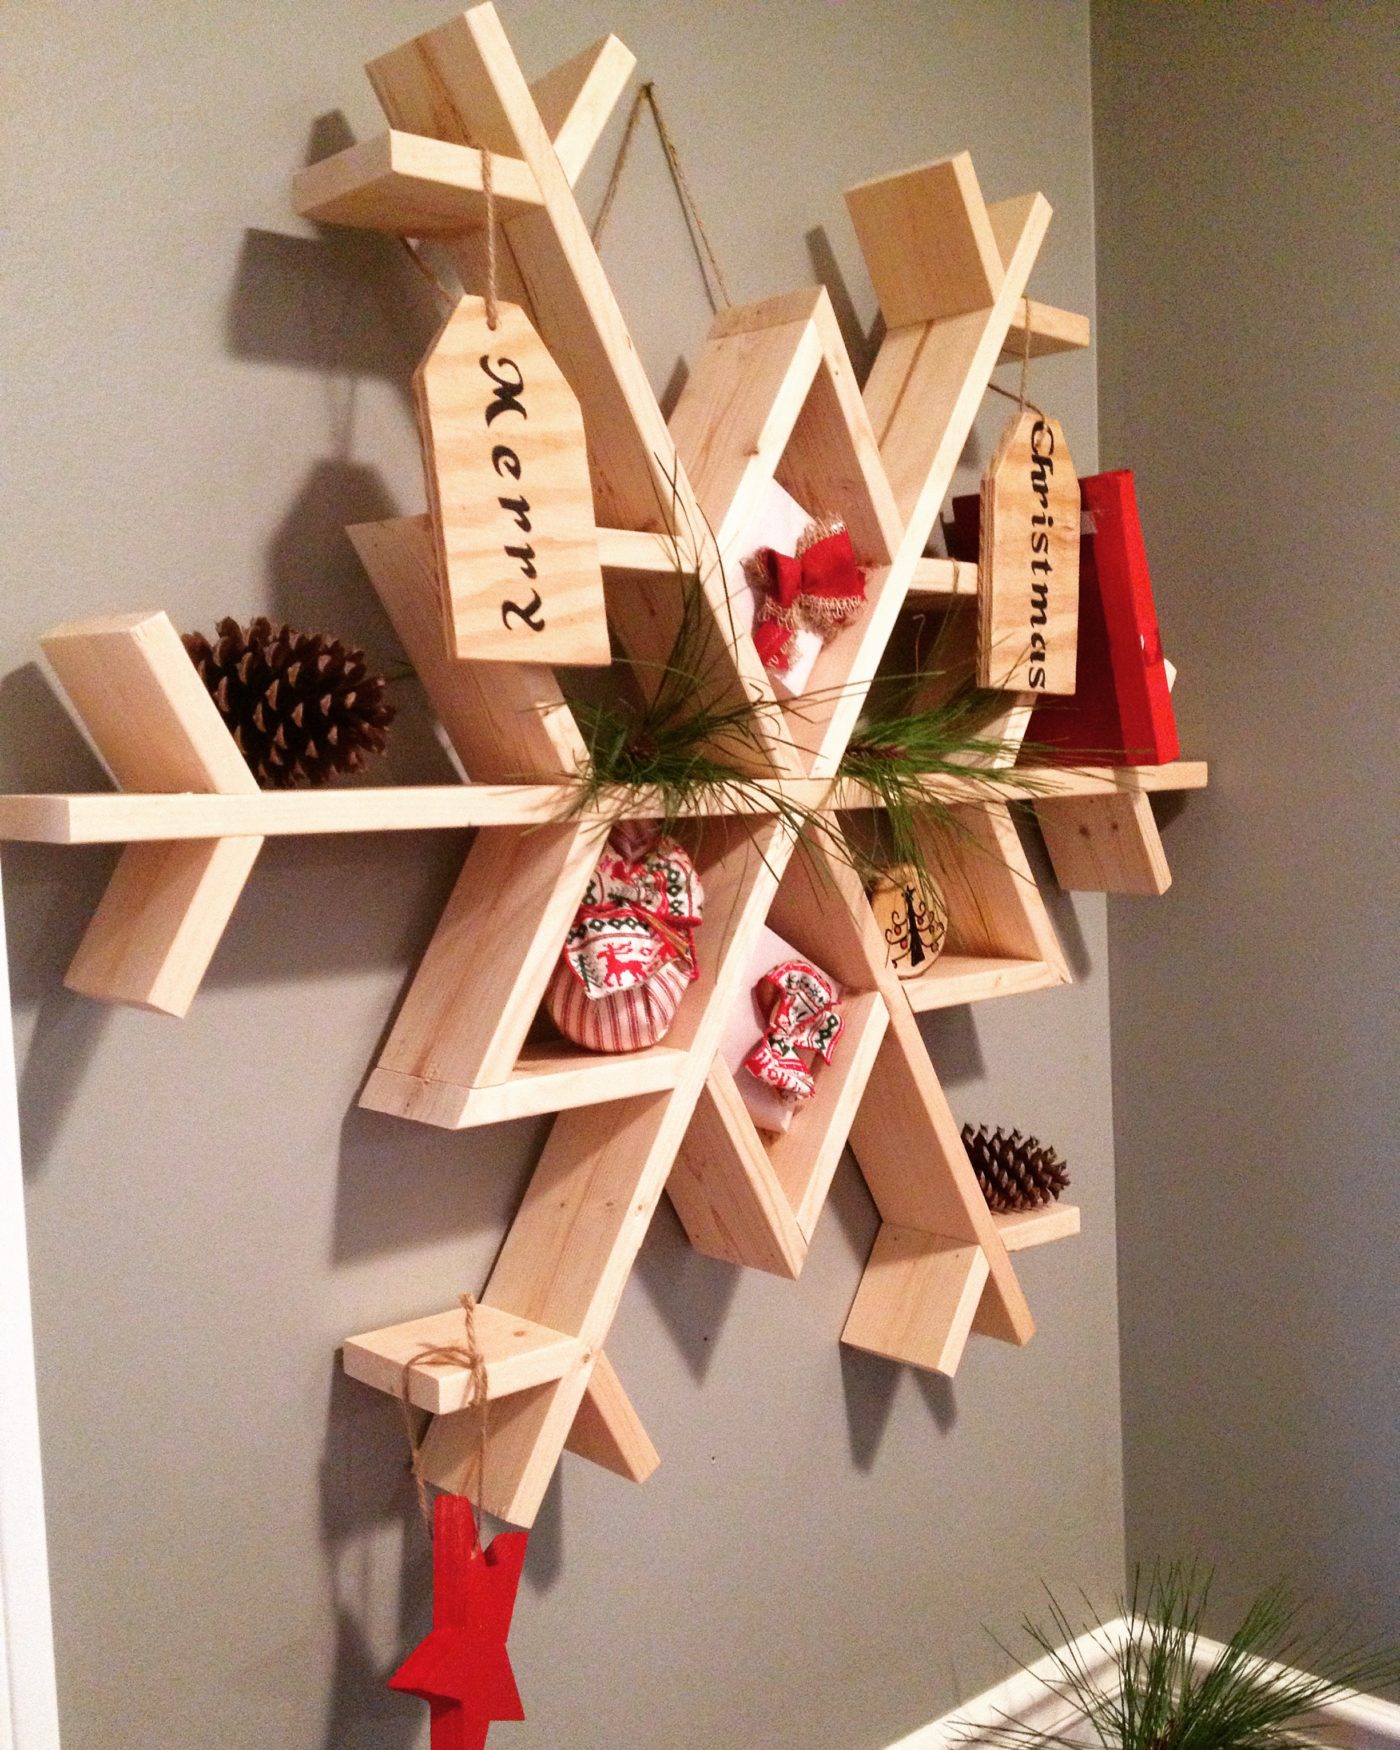
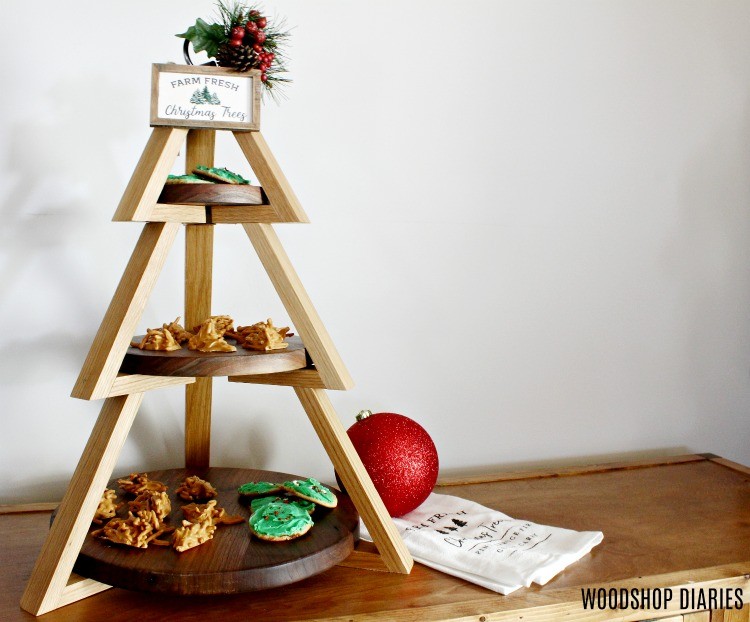
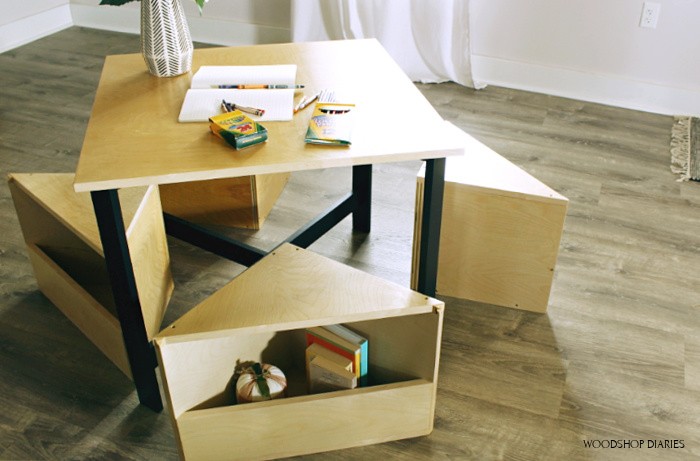
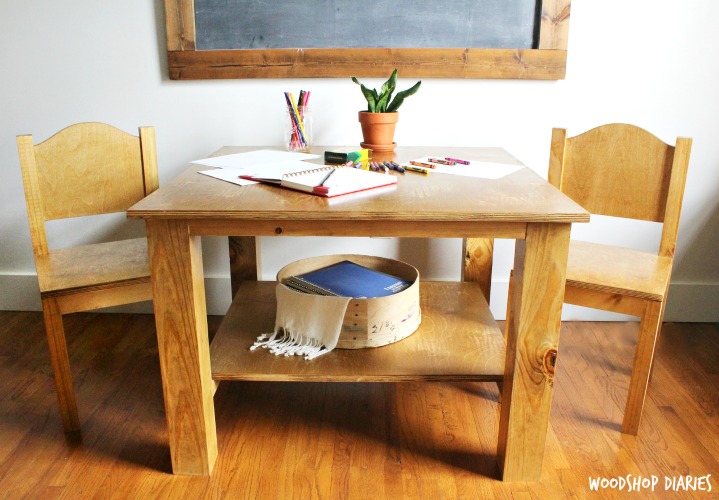
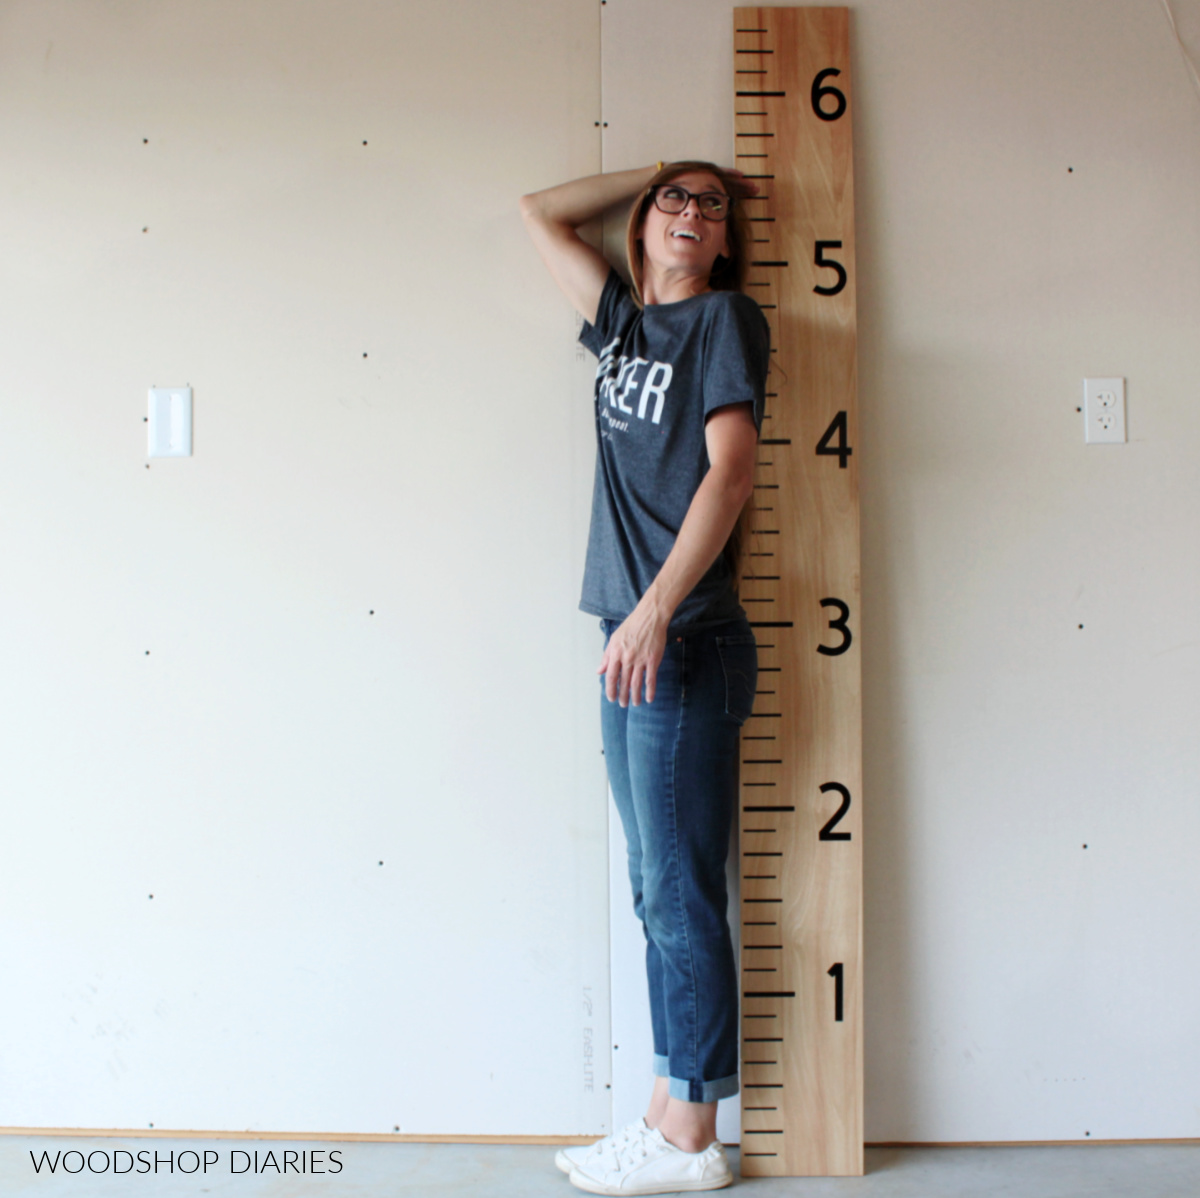
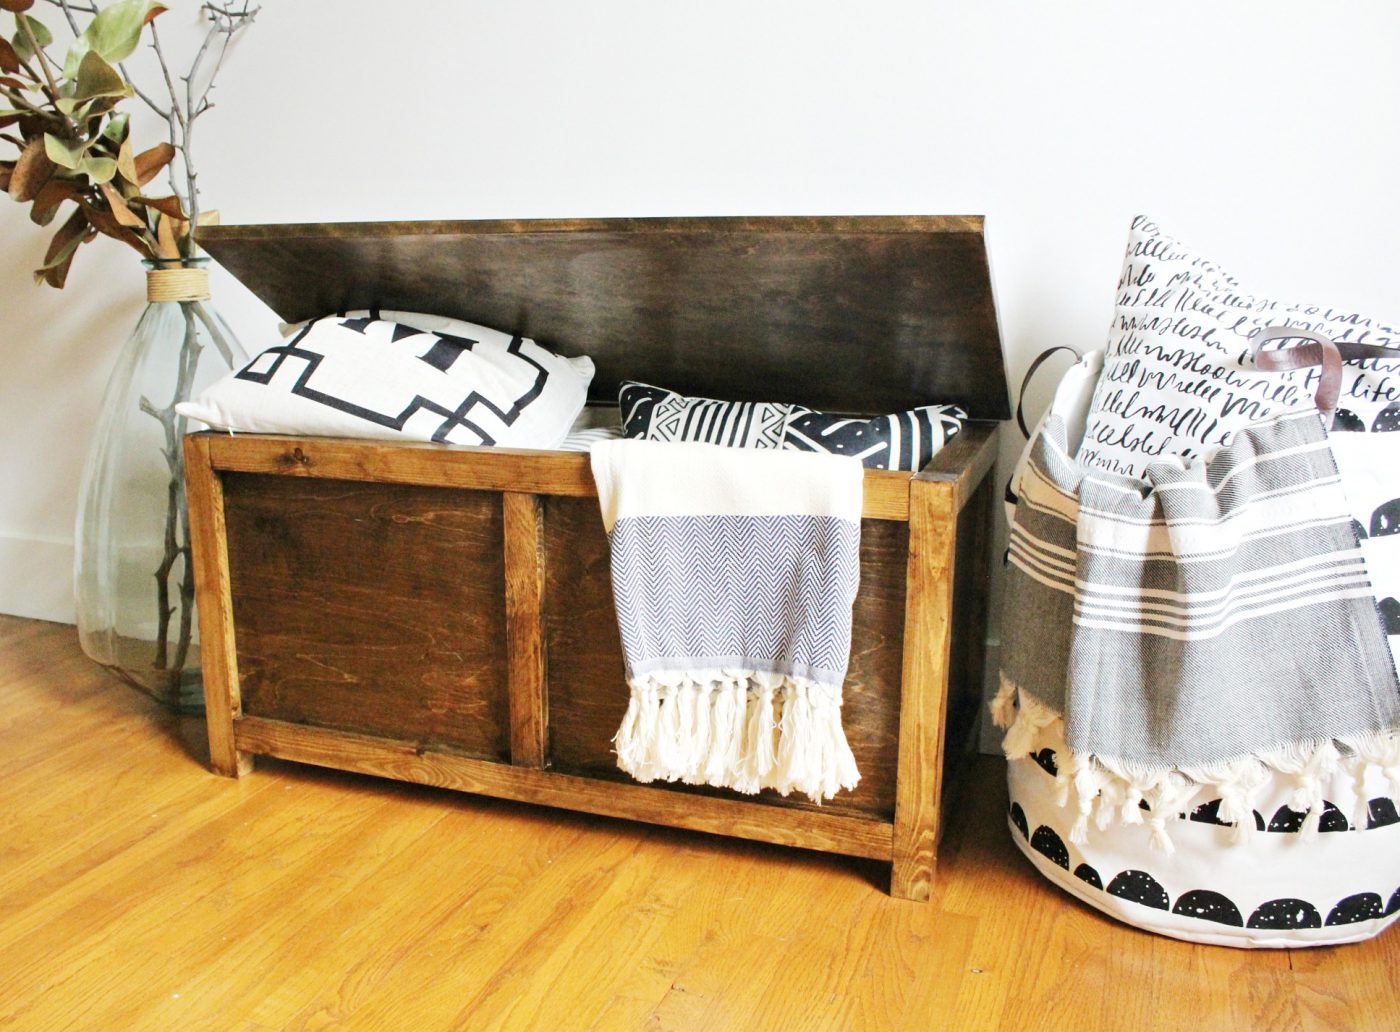
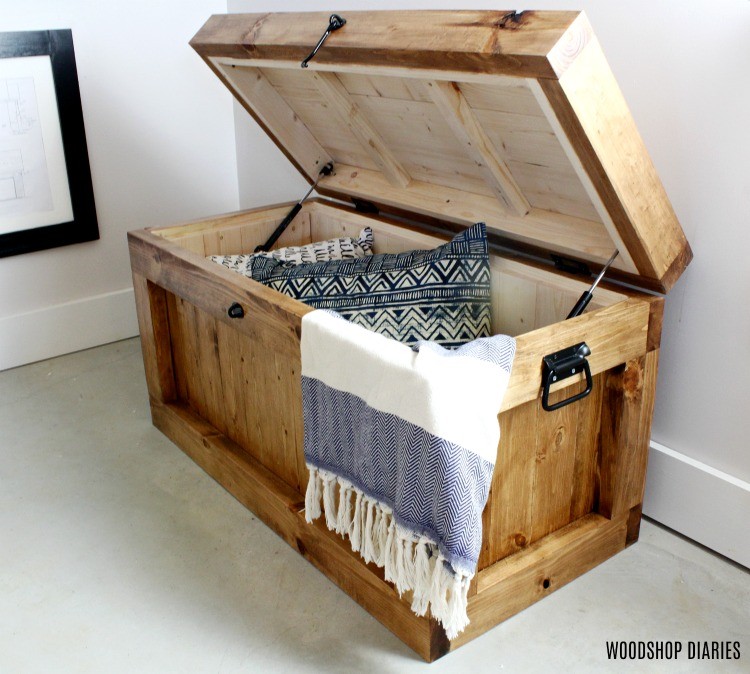
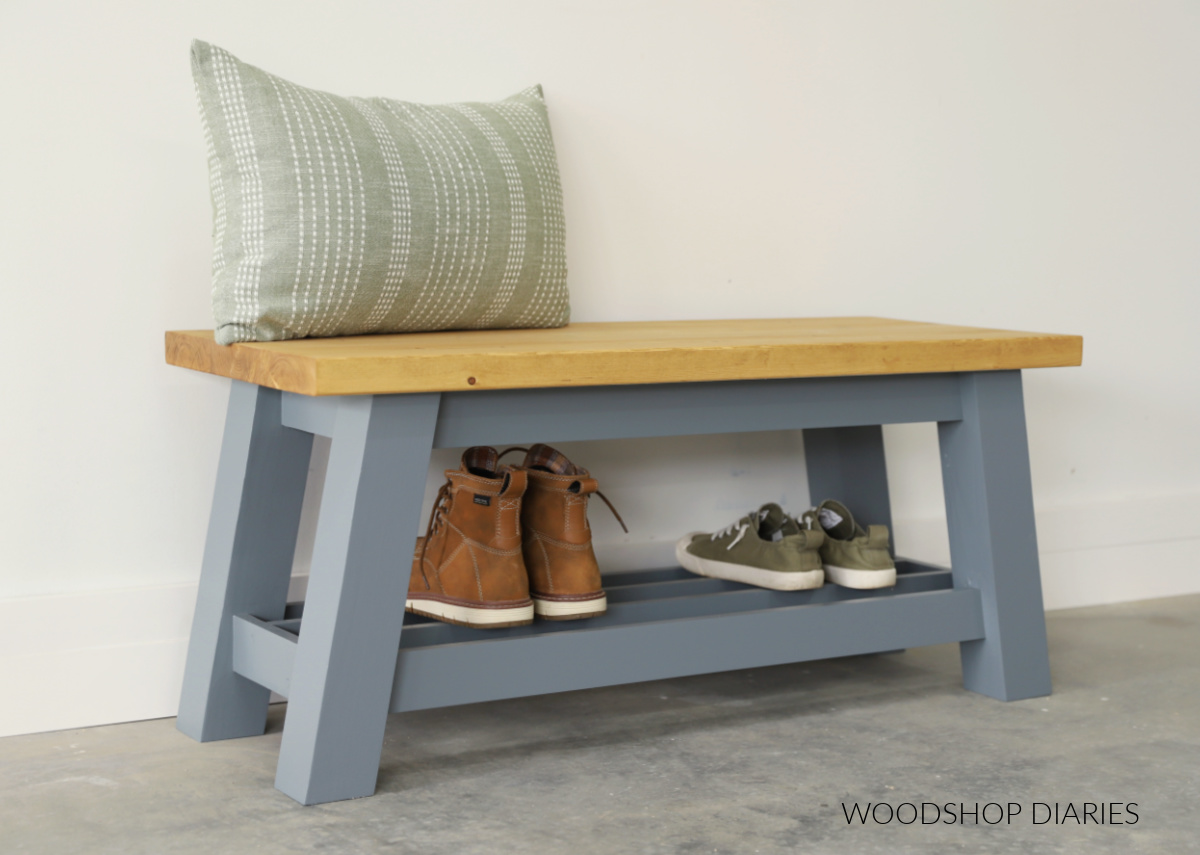
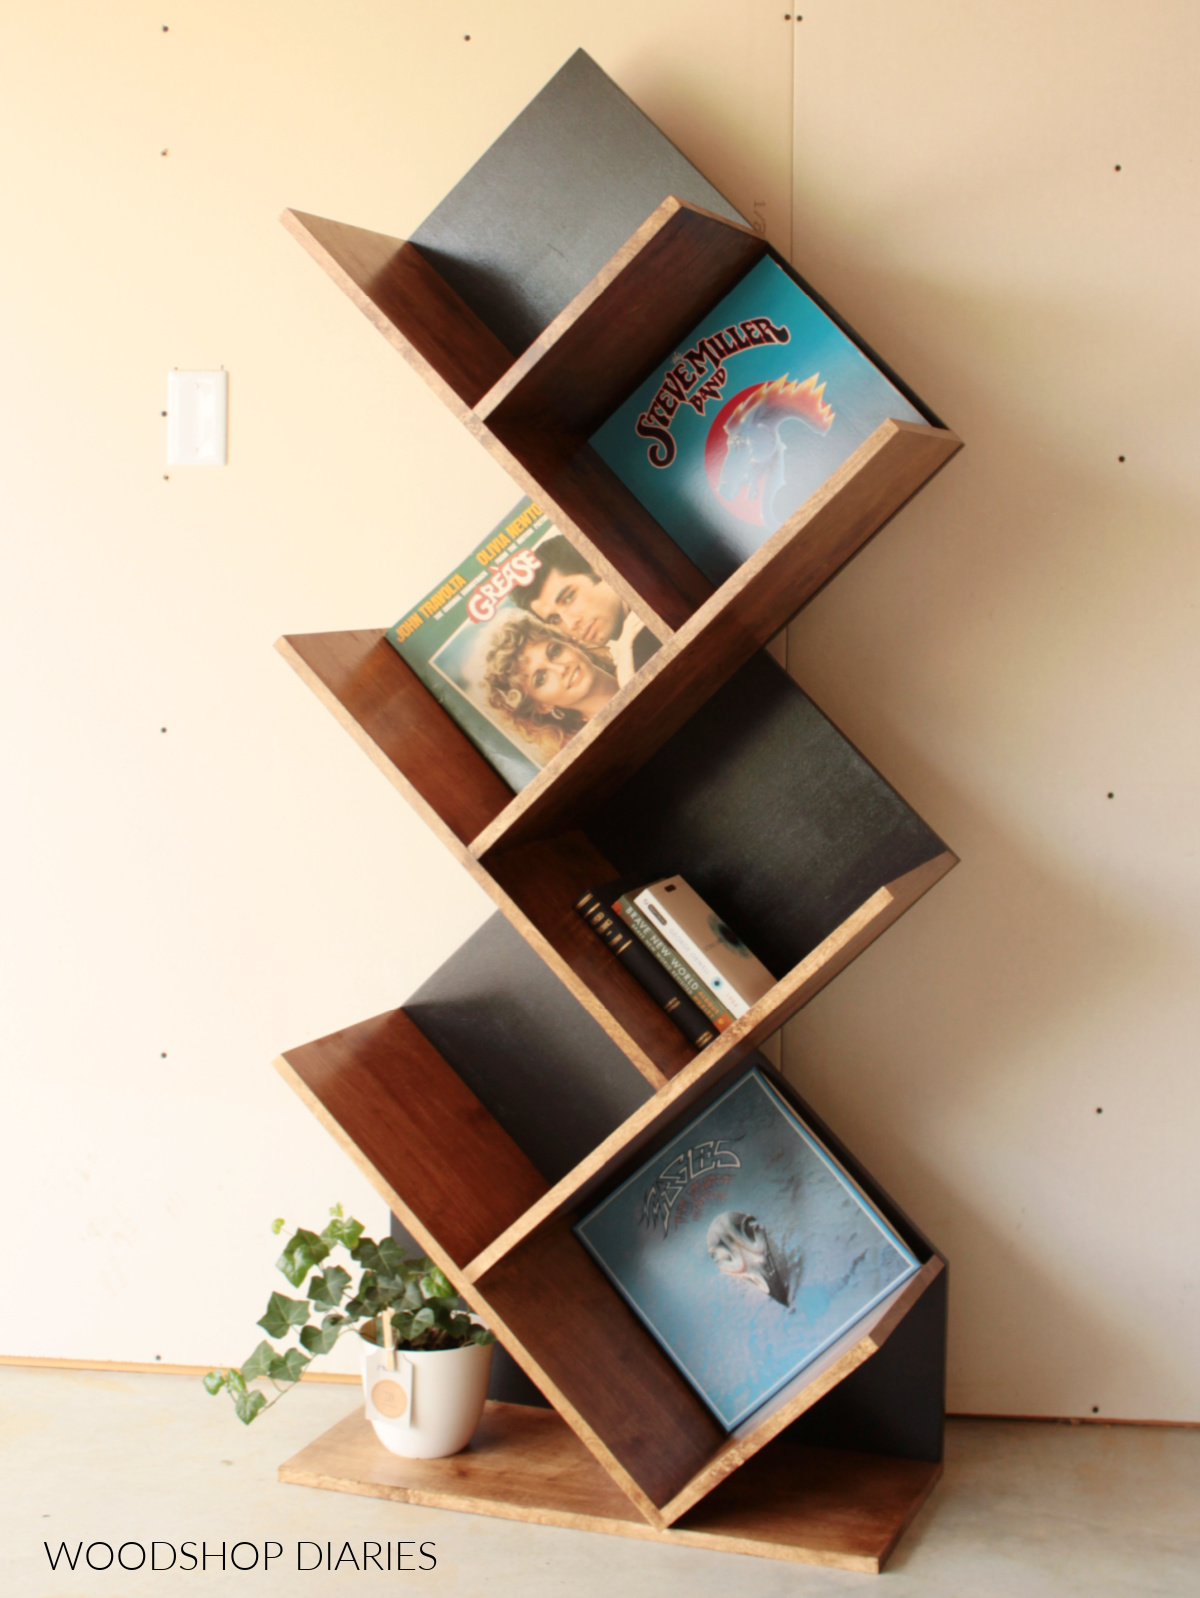
And here are some easy beginner DIY project ideas you can build today!

Tea Box with Mug Holder
Scrap Wood Drink Coasters
DIY Wooden Centerpiece Box
Scrap Wood Tiered Plant Stand
Scrap Wood Footed Tray

If DIY projects and woodworking tips are your thing, be sure to subscribe to the newsletter to be the first to know when new posts and videos are out!

And if you’d like to save this for later, be sure to pin it or share to your favorite social channel!

walnut and maple lumber sitting on workbench with text overlay reading "understanding lumber sizing for beginners"

Until next time, friends, happy building!

DIY Coffee Bar Storage Cabinet

May 5, 2023 by Shara, Woodshop Diaries

In this post, I’m sharing how to build a DIY coffee bar storage cabinet with step by step building plans!

This simple DIY accent cabinet would make a great place for a coffee bar, a bookshelf, a linen storage cabinet or even a nice addition to a home office.

Wooden DIY coffee bar cabinet project made from pine and plywood stained in minwax early american with door and drawer

*This post was originally published on June 27, 2016. It was updated and republished on May 5, 2023.

If you’re looking for unique storage ideas for a small space, this adorable accent cabinet is it!

It’s packed full of storage and the perfect size to fit in a small corner or nook in the kitchen, bathroom, laundry, or office.

If you’d like to learn how to build your own I’m sharing the plans and build video below! Here’s what you’ll need.

Tools & Materials:

*This post contains affiliate links. See policies page.

Tools:

  • Miter Saw
  • Drill/Driver
  • Circular Saw
  • Cutting Guides (optional, but helpful–Kreg Rip Cut & Kreg AccuCut)
  • Pocket Hole Jig
  • Shelf Pin Jig
  • Brad Nailer (and/or Stapler)
  • Clamps
  • Square
  • Tape Measure

Materials:

  • (4) 2x2x8 boards
  • (1) 2x10x6 board
  • (1) 1x2x8 board
  • (1) ¼″ x 1 ½″ x 8′ piece of lattice trim
  • (1) 4×8 sheet ¾″ plywood
  • (1) 2×4 sheet (¼ of a full sheet) ¼″ plywood
  • (1) pair 16″ ball bearing drawer slides
  • (1) pair cabinet butt hinges
  • (2) knobs/pulls
  • Shelf Pins
  • 1 ¼″ pocket hole screws
  • 2 ½″ pocket hole screws
  • 2″ & 2 ½″ wood screws
  • Figure 8 Fasteners OR Z clips (optional to attach top)
  • Edge Banding (optional)
  • Wood Glue

Want to print your plans? Grab printable building plans for this DIY Accent Cabinet here!

Shara Woodshop Diaries standing next to DIY accent cabinet with door on left side and open shelves with drawer on the right side

Want your DIY projects to look professional?

Here are my top 5 must know tips to professional looking DIY furniture!

What to know before building a DIY coffee bar cabinet

I’d consider this an intermediate level project. It’s definitely not difficult, but it does have several parts to put together. It’s assembled using simple pocket hole joinery, and basic tools.

If you’re determined (and not easily distracted like me haha), you can likely complete this build in a weekend or over a couple days. It’s a really fun project that is great to team up with a friend on!

Overall Coffee Bar Cabinet Dimensions:

This accent cabinet is approximately 18″ deep x 27″ wide x 40″ tall.

Overall dimensional diagram showing coffee bar cabinet dimensions

..

Cabinet Door Hinge Options

For this project, I used simple cabinet butt hinges. You can get these in different sizes and finishes to accent the style you’re going for.

If you prefer to use concealed hinges, take note that the door here is 1″ thick (¾″ plywood plus ¼″ thick lattice trim on top). So you’ll need to make sure to use concealed hinges for inset doors at least 1″ thick.

RELATED: Learn more about installing concealed hinges here.

Alternatively, you can build you door a different way to make them ¾″ thick like in this DIY shaker style cabinet door building tutorial.

Installing the Top

The top panel in this project is made from gluing together pieces of 2×10.

RELATED: How to glue up a table top.

Since this is a solid wood top, you’ll need to allow for wood movement. You can do this by installing the top using figure 8 fasteners or Z clips.

RELATED: Step 8 of this post shows how to install figure 8 fasteners on a table top.

Or, a simpler method is to drill oversized pilot holes through the top framing and use wood screws with washers through these holes. I discuss this more in the video below.

Or, if you didn’t mind a thinner top, you could also just cut the top from ¾″ plywood and not have to worry about wood movement. In that case, you could just use 2″ wood screws through the top 2×2 framing to secure the plywood top panel in place.

Helpful resources for this project

You may find these posts and resources helpful throughout the building process.

  • How to cut plywood sheets
  • How to use a pocket hole jig
  • How to square board edges
  • How to make a table top
  • How to apply edge banding
  • How to build a drawer box
  • How to install a drawer
  • How to plug a pocket hole

How to Build a Coffee Bar Storage Cabinet

Are you ready to dive into the how-to? I’m sharing the project details, tips, video and building plans below.

If you prefer to watch, check out this full build video packed full of tips along the way.

And if you prefer to print your plans, you can grab the printable building plans here with cut list, plywood cut diagram, step by step diagrams and instructions.

Step 1: Build Cabinet Sides

The sides of the cabinet are made from ¾″ plywood and 2x2s.

You can find the full plywood cut diagram in the printable plans, but I cut two side panels to 14″ x 31″. Check out this post for more information on how to cut plywood sheets.

Shara Woodshop Diaries using a circular saw and Kreg Rip cut to cut down plywood sheet on workbench

Then, I drilled ¾″ pocket holes along the sides to attach them to the legs. Check out how to use a pocket hole jig here.

I cut the legs from 2x2s at 38 ½″ long. To give the front legs a little extra detail, I adjusted my miter saw to 65 degrees and cut a taper on the inside corners.

Close up of miter saw cutting tapers on cabinet legs

That is optional and you can taper all four legs if you wanted.

I assembled two identical side panels like shown below using 1 ¼″ pocket hole screws so that the panels were flush to the inside of the legs.

Shara Woodshop Diaries assembling side panels between coffee bar storage cabinet legs using pocket holes

TIP: Pay attention to the direction of the tapers as you assemble to make sure they face the right way..

Step 2: Assemble Accent Cabinet Frame

I cut three 2x2s to 22″ long and drilled 1 ½″ pocket holes into each end. Then, I cut a ¾″ piece of plywood to 15 ½″ x 22″ for the bottom panel and drilled ¾″ pocket holes along the sides and front edge.

The 2x2s will go between the side panels–two at the top and one toward the bottom on the front side. I secured these in place using wood glue and 2 ½″ pocket hole screws.

Shara Woodshop Diaries Driving pocket hole through 2x2 frame piece

TIP: Make sure to place the pocket holes where they won’t be seen in the finished project.

Then, I placed the plywood bottom panel into the cabinet and secured it to the bottom front 2×2 and the side panels using 1 ½″ pocket hole screws.

Shara Woodshop Diaries adding bottom panel of coffee storage cabinet using pocket holes

This completed the main cabinet body frame. It already looks adorable!

Main body of accent cabinet assembled using pocket holes

Step 3: Add Middle Cabinet Divider

This coffee bar cabinet is divided into two sides–the left side has the door and the right side has open shelves at the top and a drawer at the bottom. In order to separate these sections, I needed to install a divider.

I added a 2×2 piece at the top and one along the front in the center to serve as the divider framing. I installed these with 1 ½″ pocket holes and 2 ½″ pocket hole screws.

Diagram showing how and where to attach divider framing pieces in storage cabinet

Then, I cut a piece of ¾″ plywood to fit into this space as the divider panel. I used ¾″ pocket holes and 1 ¼″ pocket hole screws along the front edge to secure it to the front 2×2.

NOTE: The divider panel is not installed directly in the center. It’s installed so that it’s flush to the drawer side of the divider 2×2 framing pieces.

Diagram showing where and how to attach middle divider panels of storage cabinet

But I used 2″ wood screws through the top and bottom to secure. Pocket holes would work fine, but I was trying to use as few as possible so they won’t be visible in the end project.

TIP: Place the pocket holes on the front of the divider panel so they will be on the door side of the project–that way, they’ll be hidden behind the door.

Step 4: Install Stationary Shelf

All the shelves in this coffee bar cabinet are adjustable EXCEPT the one above the drawer. That is a stationary shelf.

But, that shelf is going into a pretty tight space. So to make things a little easier, I assembled the shelf together first before installing it into the cabinet.

I cut a piece of 2×2 to 10 ¼″ and drilled 1 ½″ pocket holes into each end. Then, I cut a piece of plywood 10 ¼″ x 15 ½″ and drilled ¾″ pocket holes along the sides and front edge.

Placing stationary shelf assembly into right side of cabinet above drawer

I secured the plywood to the 2×2 using 1 ¼″ pocket hole screws first, then slid this into the right side of the cabinet so that there was a 9 ½″ space between the shelf and the bottom frame.

I secured the front 2×2 using 2 ½″ pocket hole screws first. Note that the image below is showing the cabinet and shelf assembly turned upside down so I could access the pocket holes on the bottom side.

Installing shelf with pocket hole screws

Then, I flipped the cabinet over and secured the plywood to the sides using 1 ¼″ pocket hole screws.

TIP: Make sure the shelf is straight and square front to back.

ADDITIONAL TIP: Since this is a tight space, use a short square bit or a 90 degree driving attachment to drive the pocket hole screws.

Step 5: Assemble and Install Top

The top is assembled using 2 pieces of 2×10 board. However, you can glue up any combination of 2x material to get a panel 18″ wide. OR you can cut this from plywood if you don’t mind it being a little thinner. See notes above.

To make the top, I trimmed down two pieces of 2×10 to about 27 ½″ long. The finished top will be 27″ long, so I cut these boards a little long so I can trim them down to the exact size later.

I squared the rounded edges on each board for a cleaner glue up on the table saw. That’s an optional step and you can learn how to square board edges here.

Then, I glued and clamped these two boards together and allowed to dry. Check out this post for how to glue up a table top.

Shara Woodshop Diaries gluing up table top with pipe clamps

Once they were dry, I trimmed the panel down to 18″ x 27″ and sanded it well.

Since this is a solid wood top, it’s best to attach in a way that accounts for wood movement. Figure 8 fasteners and Z clips are great options, but you can also simply drill oversized pilot holes through the top framing of the cabinet and use wood screws with washers through these holes to attach the top.

Drill drilling out oversized holes in 2x1 top framing pieces

I drilled oversized holes (a hole larger than the screw, but smaller than the washers you’re using)–two in the front and two in the back of the top 2x2s and used 2 ½″ screws with washers to secure the top.

Driver driving screw with washer to attach cabinet top

There should be 1″ overhang on each side and the front.

Step 6: Add Drawer to Storage Cabinet

I installed 16″ ball bearing drawer slides into the bottom right section of the cabinet so that they were ¾″ inset from the front edge.

RELATED: How to install side mount drawer slides

Driving screws to install drawer slides into storage cabinet

Then, I assembled a basic drawer box to fit the opening. I used ¾″ plywood for the drawer box sides and ¼″ plywood for the drawer bottom.

RELATED: How to build a drawer box

Prefer to print? You can find all the measurements for the drawer and the rest of the cabinet in the printable plans here.

Stapling bottom panel onto drawer box for coffee bar cabinet build

Once the drawer box was assembled, I installed it onto the slides in the cabinet. Then, I cut a piece of ¾″ plywood for the drawer front and installed it onto the box using 1 ¼″ wood screws from the inside.

Diagram showing how to install drawer front

Step 7: Add Shelves

I love the option of having adjustable shelves, so for the left side of the cabinet and the top right side, I used a shelf pin jig to drill shelf pin holes to allow for adjustable shelving.

Shara Woodshop Diaries using a shelf pin jig to drill shelf pin holes in cabinet

This jig basically allows you to drill evenly spaced holes so you can place pins in the ones you want to use and rest your shelf on the pins.

I drilled holes along the back and the front on each side of both sections.

TIP: You may want to plug your pocket holes before drilling shelf pin holes. Some of the holes may end up being where the pocket holes are.

Check out how to plug a pocket hole here.

Once the holes were drilled, I cut shelves to fit into these cabinet sections from ¾″ plywood.

Note that the shelves on the left side will be slightly wider than the shelves on the right side since the middle divider panel wasn’t placed directly in the center.

I made sure they fit, but didn’t install them yet because I wanted to stain everything first–see step 10.

Step 8: Attach Back Panel & Trim Sides

TIP: Before adding the back panel, remove the drawer from the cabinet using the tabs on the drawer slides. This will make it easier to stain/paint later and once the back is installed, you won’t be able to pull the drawer out without a knob or a pull.

For the back panel, I cut a piece of ¼″ plywood to 24″ x 30″ and centered and stapled it onto the back side of the cabinet.

Shara Woodshop Diaries stapling back panel onto cabinet

You could also brad nail or screw the panel in place if you don’t have a stapler.

And, as an added (optional) detail, I cut to fit 1×2 trim pieces to trim out the top and bottom of each side panel. I just glued and brad nailed these pieces in place.

Shara Woodshop Diaries installing side panel trim onto coffee bar storage cabinet

Step 9: Assemble and Attach Cabinet Door

I cut the cabinet door from ¾″ plywood and glued lattice trim on the front to make it look like a Shaker style cabinet door.

The plywood should be ¼″ smaller in height and width than the opening. Then, I cut to fit the lattice trim and glued it along the front.

Lattice trim clamped around sides of door panel

If you wanted to get a little “fancier” you could make a frame and panel cabinet door using this tutorial instead.

Or you could make a “cheater” cabinet door using this method with tongue and groove boards.

Once the door was assembled, I used simple cabinet butt hinges to install. You could use concealed hinges instead, but since this door is 1″ thick, you need to make sure the hinges will work with 1″ thick doors OR build your door a different way to make it ¾″ instead.

Shara Woodshop Diaries installing door onto cabinet using butt hinges

TIP: You may want to go ahead and stain/paint/finish the door and cabinet separately before installing it.

Step 10: Finish Coffee Bar Storage Cabinet

Once I had the cabinet, the shelves, the door, and the drawer assembled, I stained each piece separately to make things a little easier. I stained them all with Minwax Early American.

Once the stain was dry, I reinstalled the drawer (don’t forget to add a knob or pull first so you will be able to open it again!), added the shelves with shelf pins, and installed the door (see step 9 above).

DIY coffee bar storage cabinet with door and drawer open showing shelving inside

Want to print these plans? You can! Grab the printable building plans for this DIY Accent Cabinet here.

Looking for more storage cabinet ideas?

Enjoy the build but looking for more ideas? Here are a few favorite storage cabinet ideas you might enjoy!

DIY Display Console Cabinet
Sliding Door Storage Cabinet
DIY Display Cabinet
DIY Storage Bench
DIY Closet System
Small Linen Cabinet
DIY Display Shelf with Storage

Want to save this project for later? Don’t forget to pin it or share to your favorite social channel!

Pinterest collage image showing Shara Woodshop Diaries standing next to coffee bar cabinet at bottom and dimensional diagram at top with text "how to build a simple storage cabinet"

Until next time, friends, happy building 🙂

How to Install Concealed Hinges

April 17, 2023 by Shara, Woodshop Diaries

In this post, I’m sharing how to install concealed hinges to hang cabinet doors or add hinged elements to your projects!

Doors and drawers are two of the most common elements to add into your cabinets and furniture projects.

Shara Woodshop Diaries opening pantry doors installed with concealed hinges

Unfortunately, they’re also two of the most intimidating elements to add.

A lot of people will shy away from tackling a project that involves doors or drawers because they are not sure how to install them.

But installing cabinet doors is SUPER simple, especially when using concealed hinges (also referred to as European hinges).

Close up of installing concealed hinges to a cabinet door

Concealed hinges are my personal favorite to use for installing doors onto furniture and cabinets because they are hidden in the finished project, they’re inexpensive, and they’re easy to adjust for a perfect fit.

If you’re ready to learn how to install concealed hinges on your project, I’ll show you how below.

*This post contains affiliate links. See policies page for details.

What Tools Do You Need to Install Concealed Hinges?

Once the door is assembled–which is a whole other tutorial in itself–you only need a few basic tools to install the hinges and attach the door to the cabinet.

RELATED: How to build cabinet doors

To install the hinges and the door, you will need:

  • Concealed hinge jig
  • Clamp
  • Drill/Driver
  • Screwdriver

Concealed hinges have a “hinge cup” that gets installed onto the door and a mounting plate that mounts the hinge to the cabinet.

Two concealed hinges on workbench top with text and arrows pointing out the cups vs the mounting plates on each hinge

The cup requires a hole to be drilled into the back side of the cabinet door for it to fit into. I use the Kreg Concealed Hinge Jig to easily locate and drill these holes. The clamp holds the jig in place while drilling.

Using Kreg Concealed hinge jig to drill hinge cup holes in plywood door

The drill and/or driver is used to screw the hinge into the door and onto the cabinet and the screwdriver is used to make adjustments on the hinges.

RELATED: Check out this list of my Top 10 Must Have Tools for Cabinet Building

What to Consider Before Installing Concealed Hinges

Concealed or European hinges come in a wide variety of style options. So before installing them, you need to ask yourself a few questions.

What type of concealed hinge do you need?

There are different types of doors and cabinets, so it makes sense that there are different types of hinges to accommodate each application. First, you need to determine the type of hinge that will fit your specific application.

RELATED: How to choose the correct cabinet door hinges for your project

Collage image showing four different types of concealed hinges

To decide which one you need, first, determine whether your cabinet is frameless or does it have a face frame? Concealed hinges will mount differently for frameless cabinets vs those with a face frame so it’s important to know which you’re working with.

Second, are you installing inset or overlay doors?

Concealed hinges will specify the type of cabinet (frameless vs face frame) and the type of door (inset vs overlay) they are designed to work with, so once you’ve answered those two questions, you can determine which type of hinge you need.

NOTE: There are specialty hinges to fit all kinds of odd situations, BUT below are the four most common, basic cases you’ll run into.

The 4 main types of concealed hinges:

  • Frameless Cabinet Inset Door Hinges
  • Frameless Cabinet Overlay Door Hinges
  • Face Frame Cabinet Inset Hinges
  • Face Frame Cabinet Overlay Hinges

Take note that with frameless cabinets, the overlay is almost always considered a “full overlay” and with face frame cabinets, there are several different options for overlay.

The overlay is how much of the frame is covered by the door, so the hinges come in varying overlay amounts that you can choose from.

RELATED: How to measure and size cabinet doors

How Thick Should the Door Be?

The general “rule of thumb” with concealed hinges is that the door should be approximately ¾″ thick.

This works great for basic ¾″ plywood solid panel doors, or shaker style doors built using 1x material (which is actually ¾″ thick) for the door frame.

However, in special cases, the hinges may allow for thicker doors if needed. If you’re building thicker doors, be sure to check the hinge specifications to ensure they will work.

How Far From the Door Edge Should the Hinge Be Installed?

Different styles, brands, and types of hinges may vary as far as how far from the edge of the door they should be placed.

The installation instructions included with the hinge should specify this distance. It will be somewhere between 3-6mm–this is the distance between the edge of the door and the edge of the cup hole drilled out for the hinge to sit into.

The concealed hinge jig has little knobs along the bottom that allows you to easily adjust this setting as needed so that you drill your cup holes the correct distance every time.

Adjusting spacing blocks on concealed hinge jig using screwdriver

That said, I’m a bit of a rebel and I rarely follow the instructions included with the hinges. I install 99% of my concealed hinges with my jig set at 5mm. There is enough adjustment in the hinges (which we will discuss below) that I’ve found this works well in most cases.

But of course, do as I say and not as I do haha. If the instructions specify something different, always follow the manufacturer’s instructions for spacing.

Where Should Concealed Hinges Be Placed?

There isn’t really a right or wrong answer for this. Personally, in normal circumstances for average size cabinet doors, I center my hinge cup holes about 4″ from the top and bottom edges of the door.

My reasoning is simply because that means I can just line the edge of my concealed hinge jig with the edge of the door.

Installing drill bit onto concealed hinge jig

Or, for smaller doors, I may install them closer to the edge–more like 2″ or so. This is just so that they are closer to the edge than the middle of the door. There really isn’t a “rule” here.

There may be special circumstances that require you to space them differently.

In this DIY display cabinet project, I placed the top hinges further down from the edge so the drawer wouldn’t hit them as it opened.

Shara Woodshop Diaries opening cabinet door  to reveal concealed hinges inside

Basically, you just want to install one hinge toward the top and one toward the bottom of the door. Exact placement isn’t critical as long as it doesn’t interfere with other elements–like drawers, shelves, frames, etc.

In some cases, with large or abnormally heavy doors, more than two hinges may be required. Refer to manufacturer’s specs for weight limits on the hinges.

If you need to add more than two hinges to your door, try to evenly space them out along the edge.

Again, exact placement isn’t critical, so if you can’t space them exactly even (like in the case below because the shelf is in the way), that’s okay. Just get them close.

Concealed hinges inside large pantry plywood door in workshop

New vs Existing Cabinet Doors

Since I am typically building furniture and cabinet projects from scratch, most of my examples I have to share are installing brand new doors on brand new cabinets.

However, if you are just wanting to replace your hinges (maybe you want to swap from regular to soft close) or swap out your existing doors, the same process applies here.

The only difference would be that you may or may not need to drill out your cup holes for the hinges. If they’re already there, simply skip step 2 below.

How to Install Concealed Hinges & Cabinet Doors

Once your doors are assembled, installing them is the easy part. Below, I’ll walk you through the simple process to using concealed hinges to install cabinet doors.

If you’d like more information on building the doors first, check out how to build cabinet doors here.

If you prefer to watch, I’ve shared a detailed video with tons of tips, behind the scenes, and additional details on my YouTube Channel here.

Youtube thumbnail image of Shara Woodshop Diaries with small cabinet and text "how to choose and install cabinet hinges"

 1. Determine Hinge Type and Locations

First, determine the type/style/number of hinges you need for your application. See notes earlier in this post.

Then, determine where you need to install them. Again, reference the notes above.

Take note which edge of the door the hinges need to be installed closest to and which way the door will need to swing open.

2. Drill Hinge Cup Holes

Concealed hinges have two main parts–the cabinet mounting plate that attaches to the cabinet or face frame, and the hinge cup that installs onto the door.

In order to install these hinges onto the door, you will need to drill out a “cup hole” using a forstner bit on the back side of each door. This is made easy using a simple concealed hinge jig.

Set the correct spacing using the adjustments on the jig (see notes above regarding how far from the edge the hinges should be installed). Then, clamp the jig onto the back side of the door.

Make sure the edge of the door is pushed flat against the spacers and that the center of the hinge is where you want it. Then, drill out the hole.

Shara Woodshop Diaries drilling hinge cup holes with a concealed hinge jig

NOTE: The bit that comes with the jig has a stop collar on it to help prevent you from drilling the hole too deep. Make sure to drill the hole deep enough that the hinge cup sits fully into it, but not so deep that you drill completely through the door.

Repeat for the other hinge(s), making sure to install them at the locations you decided on from step 1.

One hole drilled and one being drilled out to install hinge cups on cabinet door

3. Install Hinges to Cabinet Door

The jig has holes to drill pilot holes for where the screws will go to install the hinges as well, but I never use them. Feel free to use them if you’d like. See video.

Once the cup holes are drilled out, place the hinges into the holes so that the mounting plate hangs off the edge.

Use a square (or just eye ball it) to ensure they are straight, then drive the screws (usually included with the hinges) through the holes on the cup plate to secure them in place.

Close up driving screw to install concealed hinge onto cabinet door

4. Attach Doors onto Cabinet

Once the hinges are installed onto the doors, all that’s left is installing the doors onto the cabinet.

To install overlay doors, I usually butt them up to the front of the cabinet, then, I simply hold my door as close as possible to its correct vertical location. Sometimes a foot (shown below), some scrap blocks or an extra set of hands can help.

Shara Woodshop Diaries screwing hinge onto cabinet

Kreg also makes a cabinet door mounting jig that clamps to the bottom of your project to rest your door on–you know, if you don’t want to use your foot haha.

Then, I use the screws that came with the hinges to secure them onto the cabinet or face frame at this location.

Inset doors are installed similarly, except that they sit inside the opening of the cabinet (they don’t butt up to the front like overlay doors) about ¾″.

Inset doors should also be up off the bottom of the cabinet about ⅛″ so that there’s an ⅛″ gap at the top and the bottom (a thin shim or some playing cards work well here to help with spacing).

TIP: First, I add one screw in each hinge to make sure it’s a close fit (minor adjustments are covered in the next step).

Once I have one screw in each hinge, I close the door to see how it fits. If it’s way off, I remove the screws and try again adjusting as needed. If it’s pretty close, I add the second screw in each hinge.

Shara Woodshop Diaries installing cabinet door onto cabinet with concealed hinges

5. Adjust Hinges

The great thing about concealed hinges is that they have plenty of adjustment options to get the perfect fit. 

The bad thing about concealed hinges is that although they each have adjustment options, they will all vary a little by type and brand. I go into detail on installing and adjusting each type of hinge in this video.

So what’s shown below may not look EXACTLY the same as what you’re working with. But, in all cases, you will find a few screws and/or slotted holes on the mounting plate that allow for adjustments in all three directions.

Concealed hinge adjustment locations

Be sure to check your specific hinges installation instructions for tips and guidance. But, if you’re like me and just learn by playing around with it, you can just use a screwdriver and turn each screw a little to see how the door moves.

Here is a quick video showing how to make these hinges adjustments.

There will be adjustment screws to move the door vertically, side to side, and front to back. For slotted holes, loosen the screws, adjust, and retighten. For screw adjustments, just turn the screws–counterclockwise will adjust one way and clockwise will adjust the opposite way.

Adjust all hinges as needed so that gaps/overlays are even and the door opens without rubbing on anything.

Once you are happy with your adjustments, take a step back and admire your beautifully installed cabinet doors!

Workshop cabinets along wall with doors and drawers

I hope this helps you be a little less intimidated by installing doors onto your projects. I promise after you do a couple, it’s really simple.

Concealed hinges make life a lot easier since the adjustment options allow you to dial in your spacing after installation vs installing them perfect the first time.

Looking for Projects with Doors to Practice on?

Here are some fun DIY projects with doors to give you some practice now that you know how to install them!

DIY Display Console Cabinet
Workshop cabinets
How to Build Workshop Cabinet Boxes
DIY Display Cabinet
Stenciled Door Console
Small Linen Cabinet
DIY Modern Console Cabinet

If you enjoyed this tutorial and want to be the first to know when new projects, plans, and how tos are live, be sure to subscribe to the free newsletter below!

Don’t forget to save this for later by pinning or sharing to your favorite social platform!

Pinterest collage showing images of installing concealed hinges

Until next time, friends, happy building!

How to Build a Display Console Cabinet

April 14, 2023 by Shara, Woodshop Diaries

In this post, I’m sharing how to build a DIY display console cabinet with drawer and shelving!

Red oak Glass door display cabinet with drawer and shelf against white wall stained Minwax Aged Barrel

I’ve been wanting to build a simple DIY display console cabinet for a while. Truth be told, I really wanted to build one twice this long, but I just didn’t have the space to put it.

So I built a “mini” version and I actually think I love this one more than my original “double size” because this one can work for so many spaces.

It would make the perfect TV stand for a small living room, a cute entryway console, a linen cabinet in a bathroom, a coffee cabinet in the kitchen. The list could go on.

It’s small in size, big in style, and versatile with glass doors, shelving, and a large drawer!

Red oak DIY display cabinet with doors open and drawer extended

If you want to build your own, I’m sharing all the details below! Here’s what you’ll need…

Tools & Materials

*This post contains affiliate links. See website policies.

Tools:

  • Miter saw
  • Drill/Driver
  • Circular Saw
  • Kreg Rip Cut and Kreg AccuCut (optional but helpful cutting guides)
  • Pocket Hole Jig
  • Dowel jig (optional)
  • Shelf Pin Jig
  • Concealed Hinge Jig
  • Stapler or Brad Nailer
  • Router with ⅜″ rabbeting bit
  • Chisel
  • Clamps
  • Square
  • Table Saw (optional)

Materials:

  • (1) 4×8 sheet ¾″ plywood
  • (1) 4×4 sheet ¼″ plywood
  • (2) 1x3x8 boards
  • (2) 2x2x6 boards
  • 1 ¼″ pocket hole screws
  • 2″ wood screws
  • ⅜″ x 1 ½″ dowel pins (optional–see notes below)
  • 2 ½″ pocket hole screws (optional–see notes below)
  • (2) pair concealed hinges for frameless full overlay doors
  • (1) pair 14″ ball bearing drawer slides
  • Shelf Pins
  • Plexiglass/Acrylic panel (20″ x 32″)
  • Picture Frame Turn Buttons
  • Edge Banding
  • Wood Glue

Want a printable version? Grab the printable building plans here!

What to Know Before Building

This DIY display console cabinet is a great intermediate level build. It doesn’t require a lot of materials or complicated joinery methods, but it does require a variety of tools.

I built this glass door cabinet using red oak plywood and red oak lumber. But, any wood type would work well for this.

Birch plywood and pine/spruce are my usual lumber choices and they are great options if you are working on a budget.

Should You Use Pocket Holes or Dowels?

For the display cabinet door frames and the base, you can use either pocket holes and screws OR wood glue and dowels to assemble.

RELATED: How to use a pocket hole jig

I used wood glue and dowels so that I didn’t see any visible pocket holes in the finished project.

RELATED: How to use a dowel jig

Also, the red oak I was using here is a hardwood and hardwoods require fine threaded pocket hole screws. I only had coarse threaded screws stocked up in my workshop (and I didn’t want to drive to the store haha!). So that was another reason I opted for dowels here.

But, pocket holes and screws work fine and you can also plug them if you’d like.

RELATED: 4 ways to plug pocket holes

If you choose not to use dowels for these parts, you can scratch dowel pins from the materials list above. But if you do choose to use dowels for the base, you can scratch 2 ½″ pocket hole screws because you won’t need those.

Consider Finish Pieces Separately Before Assembling

Since there are several “parts” to this project, I recommend building the cabinet, the drawer, the doors, the base, and the shelf separately and staining and/or painting them all first before assembling.

I used Minwax Aged Barrel wood stain for this project.

Close up of minwax stain can and brush applying stain to red oak plywood

So some of these steps listed below in the tutorial can be mixed and matched in a different order as needed to make finishing a little easier.

Cutting Acrylic/Plexiglass Sheets

You can have your local big box store cut your plexiglass/acrylic sheets. Most (but not all) home centers usually offer cutting services if you buy it there.

But, I always recommend cutting your own pieces for more accurate results. You can cut acrylic using a circular saw and a fine finish blade. Simply cut it like you would plywood or other lumber.

Circular saw cutting acrylic sheet on workbench

PRO TIP: Make sure it’s well supported underneath to help prevent it from chipping or cracking. And make sure to leave the protective film later on until you’ve finished cutting to protect it from scratches!

Overall Display Console Cabinet Dimensions

The overall size of this DIY display console cabinet is 17″ deep x 30″ tall x 37″ wide.

Computer drawn diagram showing DIY display console cabinet  overall dimensions

You may find these posts and resources helpful throughout this project build:

  • How to cut plywood sheets
  • How to use a pocket hole jig
  • How to apply iron on edge banding
  • How to build a drawer box
  • How to install drawers
  • How to use a dowel jig
  • How to install concealed hinges
  • How to use a router

How to Build a Display Console Cabinet

Since this DIY display console cabinet was made mostly from plywood, the very first step was cutting the plywood sheet down into more manageable pieces to start building.

I like to use my circular saw with Kreg Rip Cut and Kreg AccuCut guides to cut down my plywood sheets. But a circ saw and a straight edge or a table saw works fine, too.

RELATED: How to cut plywood with a circular saw

Shara Woodshop Diaries cutting plywood with circular saw and Kreg Rip Cut

You can find the complete cut list and plywood cut diagram in the printable plans here:

I’m sharing the step by step build below but if you prefer to watch, I’ve got a build video for this project full of pro tips, tricks and some bloopers here:

YouTube Thumbnail for DIY display cabinet video

Step 1: Assemble Console Cabinet Main Body

The first part I assembled here was the main console cabinet body. This was made using ¾″ plywood.

Diagram showing dimensions of display console cabinet box assembly

So first, I cut down a top, two sides, and a bottom panel and applied edge banding around the plywood edges that will be exposed.

Edge banding is optional, but when working with plywood, it hides the plys to make it look a little cleaner. I’ve got a guide for how to apply iron on edge banding here.

After sanding, I drilled ¾″ pocket holes along the top edges of the side panels and into both ends of the bottom panel.

Close up of drilling pocket holes in plywood panel using Kreg 720 pocket hole jig

I flipped the top panel upside down and centered the bottom panel on it. Then I secured the side panels on each side using 1 ¼″ pocket hole screws.

Shara Woodshop Diaries securing side panels to top panel on workbench using pocket hole screws

Once the sides and top were together, I flipped it on its side and installed the bottom panel between the sides using 1 ¼″ pocket hole screws.

Step 2: Add Back Panel

The back panel was cut from ¼″ plywood and it can simply be stapled or brad nailed onto the back side of this cabinet box from step 1.

However, if you’d like, you could also use a router with a ⅜″ rabbeting bit to cut a ¼″ deep rabbet along the inside of the cabinet to place this panel down into so it’s flush across the back.

Shara Woodshop Diaries stapling back panel onto console cabinet

I opted to cut the rabbet as you can see above. For more information on using a router, see this beginners guide to using a router.

Check out the video for additional details on installing this back panel.

Step 3: Build and Install Drawer Box

In order for the drawer to clear the doors that I will add to this cabinet later, I needed to use some “spacer blocks” to push the slides out from the side of the cabinet.

So I cut two pieces of ¾″ plywood to 5 ¼″ x 14″ and installed the drawer slides onto then 3 ½″ from the top.

Then, I secured these plywood pieces into the cabinet–one on each side–flush against the top and the back using 1 ¼″ screws.

RELATED: How to install side mount drawer slides

Diagram showing drawer slide spacer block and drawer slide installation locations

Once the slides were installed, I assembled a drawer box to fit the space using ¾″ plywood for the sides and ¼″ plywood for the bottom panel.

Check out how to assemble a basic drawer box here.

Shara Woodshop Diaries with assembled drawer box on workbench

Then, I mounted the slides flush to the bottom of the drawer box and installed it into the cabinet.

Close up of installing drawer slide into side of drawer box

To finish up the drawer box, I cut a drawer front from ¾″ plywood and applied iron on edge banding to all sides.

Note that this drawer front should be 5 ¼″ x 33 ¾″. This leaves ⅜″ gaps on the left and right side between the drawer front and the cabinet sides.

Typical gaps are ⅛″…but this is a special case since the doors on the cabinet require the drawer front to be cut undersized in order to open.

Using screws from inside drawer box to secure drawer front on console cabinet

I centered the drawer front onto the drawer so that there was ⅜″ gaps on each side and ⅛″ gap along the top. Then I secured from the inside of the drawer box using 1 ¼″ screws.

Prefer to print your plans? Grab the printable building plans here!

Step 4: Add Shelf

In the cabinet space below the drawer, I added one adjustable shelf.

You could add multiple if you’d like, but there isn’t a ton of space to add very many depending on what you plan to store there.

Diagram showing shelf dimensions and installation inside console cabinet

I used a Kreg Shelf Pin Jig to drill shelf pin holes along both sides of the cabinet.

These pin holes allow me to place shelf pins where I want to rest the shelf on. That’s what makes it adjustable.

Using a drill and a shelf pin jig to drill shelf pin holes in side of cabinet

The shelf is 11 ½″ deep, so make sure not to drill the front line of holes more than 11″ from the back of the cabinet.

Step 5: Assemble and Install Base

The base of this cabinet was made from 2x2s. I assembled it using wood glue and dowel pins, but 1 ½″ pocket holes and 2 ½″ pocket hole screws would work just as well.

Diagram showing dimensions of console cabinet base made of 2x2s

To give the base a little more detail and dimension, I used a router and a rabbeting bit to rabbet a shallow groove around the top outside edge of the base. This is optional.

Rabbet cut on top outside edge of assembled cabinet base

NOTE: If you assembled the base with screws, take care not to accidentally hit a screw with the router if you do this!

Before installing the base to the bottom of the cabinet, I went ahead and stained the cabinet (Minwax Aged Barrel) and the base separately to make things a little easier.

I flipped the cabinet and the base upside down and drilled oversized pilot holes through the base–2 holes on each side.

Then, I secured the base to the cabinet through the pilot holes using 2″ wood screws.

Using a drill to secure base to bottom of cabinet in workshop

Note that the base should be flush along the back of the cabinet and overhang the front about 1″.

Step 6: Build and Attach Display Cabinet Doors

The doors were assembled from 1x3s. I cut pieces to build two identical doors to fit the cabinet and laid them out on the workbench.

I used wood glue and dowels to assemble the two door frames, so I laid my pieces out how I wanted them and used a speed square to make a mark at each joint to drill my dowel holes.

Close up of using a rockler dowel jig to drill dowel holes in display cabinet door frame

I used a simple dowel jig to drill ⅜″ dowel holes at each mark. Check out this video for how to use a dowel jig.

Dowel holes drilled in door frame board

Then, I assembled the two frames using wood glue and ⅜″ dowel pins. I clamped them tight until the glue dried, then sanded well to remove any leftover glue residue.

Using a rubber mallet to assemble door frame using dowels on workbench

I used a router and ⅜″ rabbeting bit to route a rabbet along the inside edge of each door frame the same depth as the thickness of the plexiglass/acrylic I was using for the doors.

The corners needed to be square, so I used a chisel to square off the corners (the rabbeting bit leaves them rounded) of these grooves.

Close up of chisel squaring door frame corners

Then I cut two plexiglass/acrylic pieces to fit into these grooves. See notes in the “What To Know Before Building” section above on how to cut plexiglass.

TIP: I recommend staining and/or painting the doors before installing the plexiglass and hinges.

After I stained the doors, I installed the plexiglass using these simple picture frame turn button tabs.

Close up of picture frame turn buttons installed on display cabinet doors to hold plexiglass panels in place

Finally, I used a Kreg Concealed Hinge Jig to drill cup holes to install the concealed hinges for frameless full overlay doors.

NOTE: In order for the drawer to be able to open, install the top hinge so that the center of the cup hole is AT LEAST 6 ½″ from the top of the door.

RELATED: How to install concealed hinges for cabinet doors

Then, I added the hinges and installed these doors onto the cabinet so that there was ⅛″ gap at the top and bottom and ⅛″ gap between doors.

Shara Woodshop Diaries installing glass doors onto display cabinet

Step 7: Finish and Add Hardware

At this point, the assembly is complete and all that’s left is the finishing touches!

I applied a couple coats of clear coat to seal and protect the surfaces of the project.

Sealing oak cabinet using Minwax Polycrylic and paint brush

Then, I added these simple modern knobs to the drawer and the door and it was ready for use!

Shara Woodshop Diaries opening display cabinet door

Looking for more console cabinet ideas?

Want some more console cabinet project ideas? Here are a few favorites!

How to build a DIY X base console table with middle shelf for added storage--free building plans!
DIY X Base Console–Large
DIY Modern Console Cabinet
Stenciled Door Console
Sliding Door Console
DIY Display Shelf with Storage

If you enjoyed the project and want to be the first to know when new projects and plans are out, be sure to sign up for the free newsletter below for priority access!

Be sure to save this for later by pinning it or sharing it to your favorite social platform!

Pinterest collage showing overall dimensions at top and completed DIY display console cabinet at bottom with text "how to build a display console cabinet"

Until next time, friends, happy building!

Modern DIY Adirondack Chair

March 31, 2023 by Shara, Woodshop Diaries

In this post, I’m sharing building plans for this DIY Adirondack chair!

This is a simple and modern take on this popular outdoor chair style that you can build in just a couple hours with basic tools and common materials!

Modern cedar DIY Adirondack chair sitting in grass in front of tree line

Place these beautiful DIY Adirondack chairs around a fire pit, on your porch, under a pergola, or by the lake.

One of my favorite features of this outdoor chair is that it’s lightweight and easy to carry, so you can grab it and move it wherever you feel like lounging this summer.

This is a really simple, fun, and quick weekend woodworking project and I’m sharing how to build it in the plans below!

But, first…

*This post contains affiliate links. See website policies for details.

What is an Adirondack Chair?

An Adirondack chair is defined as an outdoor lounging chair with wide arm rests, a tall, slatted back, and a backward sloping seat.

Shara Woodshop Diaries sitting in modern Adirondack chair with empty chair next to it

The original Adirondack chair was created in 1903 by Thomas Lee who wanted to create the perfect outdoor chair for his lake house. It was originally called the Westport plank chair–named after the city it was created in.

Eventually, they became more widely know as Adirondack chairs–named after the Adirondack mountain range in New York.

Adirondack chairs have been a very popular outdoor chair style for over 100 years and there are thousands of varying styles, sizes, and designs to pick from.

This particular design I’m sharing here leans a little more modern with the clean, straight lines, and angled features.

What Do You Need to Build an Adirondack Chair

Tools:

  • Miter saw
  • Drill/Driver
  • Circular Saw
  • Kreg Rip Cut and Kreg AccuCut Cutting Guides (optional, but helpful)
  • Pocket Hole Jig
  • Speed Square

Materials:

  • (1) 1x8x8 board
  • (2) 1x6x8 boards
  • (1) 1x4x8 board
  • (2) 1x3x8 boards
  • 1 ¼″ exterior pocket hole screws
  • 1 ¼″ exterior wood screws
  • Wood Glue

What to Know Before Building an Adirondack Chair

This is a great weekend woodworking project as it only takes an hour or two to assemble. It requires minimal tools and is a great beginner project.

What type of wood should you build an outdoor chair out of?

It’s important to consider what type of wood you use for outdoor projects since it will be exposed to the elements continuously. While any wood would work fine…for a while, there are some types that will last outside much longer than others.

For this project, I used cedar wood to build my chairs as it’s readily available where I live. Cedar is a naturally rot and moisture resistant wood.

Cedar boards laid out on workbench

Other great lumber options for outdoor projects are red wood, cypress and white oak depending on the availability where you live.

You can use pressure treated lumber as well, but it’s not always the most desirable since it’s heavy and often has a green tint and an odd smell when it’s fresh.

Untreated, regular pine wood would work fine if you’re on a budget, but it weathers and rots quickly if not protected. So if you use it for outside projects, take care to properly finish and seal it with an outdoor paint for longest life.

Untreated pine can last several seasons outside if properly sealed.

Use Exterior Grade Hardware and Finishes

Any time you are building an outdoor project, make sure the glue, screws, hardware and finishes you use are rated for exterior use.

In this case, I used Gorilla Wood Glue since it’s rated for exterior use and I used decking screws since they are coated with a corrosion resistant coating to prevent rust.

Gorilla wood glue and exterior screws laid out on workbench

I also used Kreg Blue Kote pocket hole screws that are designed for outdoor use.

Make sure the paint or stain you apply is rated for exterior use as well so that it will hold up to the UV rays and moisture it will be exposed to outside. I sealed these chairs using Minwax Helmsman Water Based Clear Coat.

Overall Adirondack Chair Dimensions

The overall size of this DIY Adirondack chair is 29 ½″ tall x 30″ wide x 34 ½″ deep. The seat height from the ground at the front is about 14 ½″.

Overall dimensional diagram showing dimensions of Adirondack chair

How to Build a DIY Adirondack Chair

I’m sharing the step by step how to so you can build your own Adirondack chair below.

But if you prefer to watch, I’ve also put together a detailed build video you can check out here:

How to build an Adirondack chair faux YouTube thumbnail

And if you prefer to print, be sure to grab the printable building plans here:

Step 1: Cut and Assemble Leg Assemblies

The first pieces I cut for these chairs were the legs.  I have a complete cut diagram with dimensions detailed in the printable plans.

The back legs are cut from the 1×8 board. First, I adjusted my miter saw to 15 degrees and cut off the very front corner of my board.

close up of miter saw angle showing 15 degrees

I cut this front corner of the board a little at a time until the cut edge was about 2 ½” long. 

close of of measuring 15 degree miter edge on corner of board on miter saw

Once this 15 degree corner was cut, I measured down the board the length of the seat, adjusted the miter saw to 58 degrees the opposite way and cut across the board.

I highly recommend checking out the video for tips on cutting these back legs.

I brought this leg to the workbench and used a square to draw a 90 degree line from the 2 ½″ edge I cut off the corner.

using a large square to mark line on back leg of Adirondack chair

After drawing this line, I placed the leg on some scrap blocks, clamped it in place, and used a circular saw and Kreg AccuCut to cut right along this line.  And that gave me my first back leg for the chair.

Circular saw on Kreg AccuCut cutting top edge of Adirondack chair leg

I hung onto the triangle piece I cut off here to use in the very last step.

Once this first back leg was cut, I traced and cut a second one just like it from the same 1×8 board. Then, I set the remaining 1×8 board to the side to use later.

For the front legs, I cut two pieces of 1×4 with simple mitered ends–these were a lot simpler than the back legs haha!

Again, all the angles, dimensions and cut diagrams can be found in the plans here.

arranging pieces of leg assembly on workbench

I arranged the front and back legs on my workbench so that the bottom edges were even.

Once I positioned everything, I predrilled my holes first, then applied an exterior wood glue, and secured with 1 ¼” screws. 

driving screw through cedar boards for leg assemblies

Predrilling first allows me to move the pieces to add the glue, but still line them back up once I drive the screws.

I repeated this for the other side of the chair, making sure to mirror them so that this time the front leg is on the opposite side of the back leg.

diagram showing mirrored legs of Adirondack chair so that back legs are in center

That way, when they come together like this, the two back legs are on the inside—this is where the seat slats will rest later.

Step 2: Assemble Adirondack Chair Frame

Once the two leg assemblies were together, I cut two pieces of 1×3 and drilled ¾″ pocket holes into the ends of each.

RELATED: How to drill pocket holes

I attached these between the two leg assemblies using 1 ¼″ exterior pocket hole screws.

Shara Woodshop Diaries securing seat frame with pocket holes and screws

The front piece goes flush to the front of the back legs, and the back piece is installed square to the top edge of the back of the leg right behind the angle change.

Once these pieces were installed, I cut another piece of 1×3 to fit between them–the front edge is cut square and the back edge should be mitered 15 degrees.

I installed using ¾″ pocket holes and 1 ¼″ exterior pocket hole screws so that it was centered side to side in the frame.

Prefer to print? Grab the printable plans to build your own here.

Step 3: Attach Back Rest Frame

I cut four pieces of 1×3 to assemble a basic rectangle frame for the back rest.

I used 1 ¼″ screws to secure the frame together making sure to predrill before driving to prevent wood splits.

Once the frame was together, I applied some wood glue to the back 1×3 on the seat frame and clamped this frame on top of it so it was flush across the front edge.

Then, I predrilled and drove 1 ¼″ screws through the top to secure.

driving screws to secure back frame to seat frame

At this point, the back frame may be a little flimsy, but it’ll stiffen up once the arm rests are attached.

Step 4: Assemble and Install Arm Rests

In step 1 after cutting the back legs, I set the remaining 1×8 board to the side. At this point, I brought it back out and trimmed it to 30″ long.

I ripped this piece in half down the middle for my two arm rests. You can use a table saw for this if you have one, but a circular saw and a straight edge or cutting guide would work as well.

Then, I cut a piece of 1×3 to attach them together across the back.

I assembled this “U” shaped arm rest frame using ¾″ pocket holes and 1 ¼″ pocket hole screws.

I set this onto the chair frame so that the arm rests sat flat on the top of the front legs and so that the 1×3 on the back was pushed up against the back frame of the chair.

measuring to make sure arm rest assembly is equal height on both sides

Before securing, I measured to make sure the frame was at the same height on both sides (you don’t want to install it crooked).

Then, I used 1 ¼″ screws through the top of the arm rests to secure into the front legs.

I also used a couple 1 ¼″ screws through the inside of the back frame to secure it to the sides of the arm rests on each side.

Securing back frame to arm rests on modern Adirondack chair

Step 5: Add Back and Seat Slats

Now it’s starting to look like an Adirondack chair! It’s time to add the slats.

I used 1×6 cedar fence pickets for the seat slats because this saves quite a bit of money compared to using regular 1×6 cedar boards.

comparing cedar 2x4, fence picket and 1x6 side by side

Cedar fence pickets in my area are about $4 each (for a 6 foot picket) and cedar 1x6s are about $34 (for an 8 foot board).

However, fence pickets are a little rougher and come with a lot more variation in sizing. They are also ⅝″ thick vs the full ¾″ thick that you get with an actual 1×6 board.

If you’re worried about weight, go with the full 1×6 for the extra support. However, if you’re on a budget, try the fence pickets–just be sure to sand them well.

Shara Woodshop Diaries installing back slats onto back seat frame

I cut four cedar fence pickets for the back slats and evenly spaced them onto the back frame. I used 1 ¼″ screws to secure them in place.

Once the back slats were installed, I cut four more pieces of fence picket for the seat slats. I ripped the fourth piece in half so that the seat was three full width pieces and a half strip.

Arranging seat slats on Adirondack chair seat frame

I left about ¼″ space between each seat slat and secured them into the back legs below using 1 ¼″ screws. Make sure to predrill before driving the screws to prevent wood splits!

Step 6: Install Arm Rest Supports

Remember those triangles left from cutting the back legs in step 1? I brought those back out to add as the very last piece of this DIY Adirondack chair.

I used a speed square to find where the width of the triangles was 3 ½″ and marked this line.

Close up of speed square finding triangle width of 3 ½"

Then, I adjusted my miter saw’s bevel angle to 20 degrees and cut along this line so that the front of the triangle was shorter than the back.

I repeated this on the other triangle making sure to swap my bevel sides so that the triangles mirrored each other.

Triangles with mirrored top edge beveled 20 degrees

Once these were cut, I installed these on each side of the chair directly underneath each arm. The beveled cut should allow it to sit nice and flush up against the bottom arm rests.

I used 1 ¼″ screws to secure them into the front legs. And with that, the build was complete!

Shara Woodshop Diaries installing triangle supports underneath arm rests

Step 7: Finish

The final step, if you so desire, is to apply an outdoor finish or sealant to protect the wood.

If you use a naturally rot resistant wood like cedar or red wood, this isn’t really NECESSARY as the wood will still hold up well. However, sealing it will help it continue to look nice and make it easier to clean after being out in the weather for a time.

Left unsealed, the wood can quickly turn grey from the sun and the moisture can cause it to feel rough.

To keep the natural color, but provide protection, I like to use Minwax Helmsman Water Based Clear Coat.

two matching modern DIY Adirondack chairs sitting in grass yard

Paint, stain, and seal as desired, and once dry, enjoy your new DIY Adirondack chair!

Looking for more outdoor project ideas?

Don’t forget to grab the printable DIY Adirondack chair building plans if you’d like to build your own!

When you’re finished building these fun chairs, check out these other awesome outdoor projects to build this summer!

Shara laying in hammock on floating deck stand small
DIY Hammock Stand
DIY Outdoor Table & Bench
mobile bbq cart prep table small
2 Tool Outdoor Grill Cart
How to make your own DIY concrete planter pot with wooden base
DIY Outdoor Chair
DIY Outdoor Garden Cart
DIY outdoor lanterns small
Scrap Wood Lanterns

If you enjoy the projects, be sure to sign up for the FREE newsletter for priority access to the latest new projects and plans below!

Don’t forget to save this project for later by pinning it or sharing to your favorite social media channel!

Pinterest collage image showing overall dimensional diagram at top and Shara Woodshop Diaries sitting in Adirondack chair at bottom with text "how to build an ADIRONDACK CHAIR"

Until next time, happy building!

Simple DIY End Table with Drawers

March 18, 2023 by Shara, Woodshop Diaries

In this post, I’m sharing how to build a simple DIY end table with drawers!

Wooden DIY end table with 4 drawers and black knobs

This post is sponsored by my friends at Kreg Tool and contains affiliate links. See website policies.

This adorable table is the perfect addition for adding a little extra storage next to your office desk, your couch, or even your bathroom vanity.

The tall, but skinny design packs plenty of storage without taking up a lot of floor space. The size and shape would even make a great nightstand or bedside table, too!

No matter what you use it for, it’s a really fun build and if you’re ready to see how it came together, let’s get building!

Tools & Materials

Tools:

  • Miter Saw
  • Circular Saw
  • Cutting Guides (Kreg Rip Cut & Kreg Accu-Cut)
  • Drill/Driver
  • Kreg Pocket Hole Jig
  • Brad Nailer
  • Table Saw (optional)

Materials:

  • (1) 4×8 sheet ¾″ plywood (birch used here)
  • (1) 4×4 (half sheet) ¼″ plywood
  • (2) 2x2x8 boards
  • (2) 1x2x8 boards
  • (4) pair 16″ ball bearing drawer slides
  • 1 ¼″ pocket hole screws
  • 2 ½″ pocket hole screws
  • 2″ wood screws
  • Wood Glue
  • Iron On Edge Banding

What to Know Before Building an End Table with Drawers

This DIY end table build is an excellent weekend woodworking project. Made with basic materials and simple joinery, it’s a fairly quick build.

Tips on Building Drawers

If you’re second guessing this project because it has drawers, DON’T! This is the perfect project to practice and learn a little more about building and installing them.

Shara Woodshop Diaries holding drawer box up close with blurred background

Check out these posts for additional tips and videos on building and installing drawers:

  • How to measure and size drawer fronts and drawer boxes
  • How to build a drawer box
  • How to install drawer boxes and slides

Overall End Table with Drawers Dimensions

The overall dimensions of this project are 21″ deep x 21″ wide x 30″ deep.

Diagram showing DIY end table with drawers overall dimensions 21" x 21" x 30"

Helpful Resources to Use with this Build

You may find these resources and posts helpful when working on this project.

  • How to cut your own 2x2s
  • How to cut plywood sheets using a circular saw
  • How to use a pocket hole jig
  • How to apply iron on edge banding
  • Complete guide to drawer building

How to Build an End Table with Drawers

I’d consider this an intermediate level project build. I’m sharing the step by step process with some tips along the way below.

But if you prefer to print, you can grab the printable plans on KregTool.com.

Back Panel Options

The printable plans linked above vary slightly from what I actually built below. From the front and sides, they are exactly the same. The only difference between the two is the back side.

In many cases, end tables are placed in the middle of a room (not against a wall), so the back side is exposed. So I made the plans so that the back panel is assembled the same as the sides–using ¾″ plywood with trim in case you wanted to use it that way.

However, the cabinets I was actually building were going to be placed between two desks and against a wall, so the back side wouldn’t be seen.

So, to save on materials, I used 2×2 framing on the back and stapled a ¼″ plywood panel over it. See step 7 below.

You could build this project either way depending on how you plan to use it and whether you want the back to match the sides.

Step 1: Assemble Side Panels

The sides of the end table are made up of 2x2s for the legs and ¾″ plywood for the panels. I’ve included a full cut list with plywood diagram in the plans here.

I like to cut my own 2x2s, but you can certainly use the precut ones from the store. Check out this post about how I make 2x2s if you’re interested in making your own!

I cut four 2x2s to 29 ¼″ long for the legs and then cut two ¾″ plywood panels to 16″ x 27 ½″ for the sides.

Shara Woodshop Diaries using circular saw and Kreg Rip Cut to cut plywood sheet

RELATED: How to cut plywood sheets using a circular saw

I drilled ¾″ pocket holes along the sides of the plywood, then used 1 ¼″ pocket hole screws to secure them between the 2×2 legs.

Shara Woodshop Diaries driving pocket hole screws to assemble side panels of end table

RELATED: How to use a pocket hole jig to assemble furniture projects

I made two identical panels like this making sure to keep the plywood panel flush to the inside edges of the 2x2s.

Step 2: Build End Table Frame

Once the side panels were assembled, I completed the rest of the end table frame using 2x2s. This is where these cabinets differ slightly from the printable plans.

In the plans, I show using a ¾″ plywood panel on the back side, but below, I just used a 2x2s on the back instead.

I cut four 2x2s to 16″ long and drilled 1 ½″ pocket holes into the ends of each. Then, I assembled a frame like shown using wood glue and 2 ½″ pocket hole screws.

Shara Woodshop Diaries driving pocket hole screws through 2x2s to assemble end table frame

The top 2x2s should be flush to the top edge of the sides. There should be 24 ½″ space between the top and bottom 2x2s.

Make sure to place the pocket holes toward the inside or down so they won’t be seen in the finished project.

Once the frame was assembled, I added a single drawer divider to separate the top drawer from the bottom three. I used a 1×3 for this, but a 1×2 would work fine.

Shara Woodshop Diaries driving pocket hole screws to add drawer divider into end table frame

I installed this piece 6″ down from the top 2×2 using pocket holes and screws.

End table main frame assembled sitting on workbench

Step 3: Assemble Drawer Boxes

I cut the four sides of my drawer boxes from ¾″ plywood and the bottom panel from ¼″ plywood.

You can find all the measurements in the plans.

Shara Woodshop Diaries assembling drawer box on workbench with pocket hole screws

I cut ¼″ dadoes ¼″ deep ½″ up from the bottom edge of the four sides to install the bottom panel into. This is optional–you can simply glue and screw/staple the bottom on if you don’t want to bother with dadoes.

Check out this post about how to assemble drawer boxes for more details. I built four identical drawer boxes like this to go into the end table.

Step 4: Install Drawer Slides and Drawer Boxes

I installed 4 pair of 16″ ball bearing drawer slides into the end table. Since this project would have inset drawer fronts, I installed them ¾″ inset from the front edge of the cabinet.

Close up installing drawer slides into cabinet

Then, I installed the drawer boxes from step 3 onto the slides.

Close up using driver to drive screws through drawer slide into side of drawer box in end table cabinet

Check out this post for more information on how to install drawer slides and drawer boxes.

Step 5: Add Drawer Fronts

I cut four drawer fronts 5 ¾″ x 15 ¾″ from ¾″ plywood and applied iron on edge banding to the edges for a cleaner look.

Iron on edge banding is totally optional, but it hides the plys and makes the end result look a little nicer.

Using an iron to apply iron on edge banding to drawer front pieces

Learn how to apply edge banding to plywood here.

Then, I installed these onto the drawer boxes leaving ⅛″ gaps around all sides.

There are tons of ways to install drawer fronts, but one trick is to drill the holes into the drawer front where you want your knobs or pulls to go.

Lay the project over on its back and place the drawer fronts where you want them making sure the spacing is even. Drive a screw through the knob/pull hole(s) to temporarily position the fronts in place.

Driving screws through center of drawer front to temporarily secure drawer fronts

Then, flip it back right side up and use 1 ¼″ wood screws through the inside of the drawer box to permanently secure them in place.

Using a driver to secure drawer fronts from inside of drawer box

TIP: If you didn’t want to drill these holes, double sided tape (like Krazy Tape) would work well to temporarily position the fronts so you can screw them on.

Step 6: Attach Top

The top panel is a 21″ square piece of ¾″ plywood. I applied edge banding along all sides to hide the plys–but again, that’s optional.

I removed the top drawer from the cabinet so I could access the top frame. Then, I flipped the top upside down and centered the end table on it so that there was 1″ overhang on all sides.

Then, I used 2″ wood screws through the 2×2 frame at the top of the front and back to secure.

Driving screws through top frame to secure top panel of end table with drawers

NOTE: If you follow the printable plans where you add the ¾″ plywood back panel, then you attach the top using pocket holes and screws through the plywood on the side and back panels.

Step 7: Attach Back and Trim

I used some scrap strips I had cut from other material for to trim out the sides, but 1x2s would work perfect as well.

I cut to fit these pieces and glued one at the top and one at the bottom of the side panels. Then I added one towards the middle so that it was even with the drawer divider on the front.

Trim added to sides of end table

Finally, I cut and stapled a ¼″ plywood back panel over the back side.

Using a stapler to attach back panel

Obviously, if you already installed the ¾″ plywood back panel according to the plans (like I’ve mentioned already…are you tired of hearing about it yet?), then you wouldn’t need to add the back here.

Step 8: Finish

After the glue dried on the trim, I stained it in Minwax Early American.

Shara Woodshop Diaries applying wood stain to frame of cabinet

Once the stain was dry, I added a few coats of Minwax Helmsman Water Based clear coat, then added these simple black knobs to finish it up.

And now this simple table is ready to use as an end table, a nightstand, and entryway catch all, linen storage, etc.

Shara Woodshop Diaries pulling out second drawer of end table

Don’t forget to check out the plans for this end table with drawers on KregTool.com!

Looking for more End Table Ideas?

Enjoy the project, but looking for more ideas? Here are a few favorites you might like to check out:

DIY Plant Stand
Modern Round Coffee Table
Mid Century Nightstand
DIY One Drawer Nightstand

If you want to be the first to know about new projects and plans, be sure to subscribe to the newsletter for priority access!

To save this project for later, don’t forget to pin it or share it to your favorite social network!

Pinterest collage image showing overall dimensional diagram of end table at top and completed build at bottom with text "how to build an end table with drawers"

Until next time, friends, happy building!

How to Install Drawers with Side Mount Drawer Slides

March 17, 2023 by Shara, Woodshop Diaries

In this post, I’m sharing how to install drawer boxes into your projects using side mount drawer slides!

If you have seen many of my projects, you may have guessed that I love building and installing drawers. The large number of dresser plans may have given that away ha!

Close up of drawer fully open in end table with side mount slides showing

I love drawers so much that I decided to put together a whole series of videos and posts on measuring, building and installing them into your projects!

If you haven’t already, be sure to check out part 1 on how to measure for drawer fronts and drawer boxes. Then, head to part 2 on how to build a drawer box.

In this post, we are diving into part 3 of the series–how to install the drawer box and the drawer slides.

I’ve been using side mount drawer slides in my DIY projects for this for years (and highly recommend them!) so that’s what I’ll be installing in this tutorial.

*This post contains affiliate links. See website policies.

Why Use Side Mount Drawer Slides?

There are many types of drawer slides out there–undermount, side mount, the small white ones that mount to the corners, even wooden options.

However, after trying my hand at all of the above, I’ve settled on my own personal favorite style–the side mount.

Shara Woodshop Diaries pulling drawer out of end table with 4 drawers

Side mount drawer slides install directly to the side of the cabinet (or piece of furniture) so they don’t usually require any additional bracing like undermount or wooden slides do.

They come in common sizes from 10″ to 24″ long (in 2″ increments) so it’s easy to find the size you need for your project.

Benefits of side mount drawer slides:

  • Lots of size options
  • Can get with or without soft close
  • Inexpensive
  • Long Lasting
  • Heavy Duty
  • Easy to Install and Adjust

These slides have two sections that separate using tabs on the sides so you can easily remove a drawer from a cabinet if needed.

To separate the sections, fully extend the slide and you’ll see a tab (it’s usually plastic). Push the tab up or down (the slide on one side of the drawer will go up and the other side will go down) and pull forward at the same time.

Side mount slides fully extended with arrow pointing to tab that separates sections

The slide will separate into two sections–one section mounts to the cabinet and the other section mounts to the drawer.

Image showing Drawer removed from cabinet--section of slide attached to side of drawer

MOST side mount drawer slides can hold up to 100 lbs per pair (check your specific slides for specifications), so they’re great for both basic furniture and heavy duty workshop applications.

For the best price, I buy my side mount slides in bulk on Amazon since I use them in projects quite often.

What Tools Do You Need to Install A Drawer?

Installing a drawer box doesn’t require any fancy or specialty tools. Essentially, you’re just driving a few screws.

All you really need is a drill and/or driver (something to drive screws) and some basic measuring tools.

Tools & Materials:

  • Drill/Driver
  • Measuring Tape
  • Square
  • Scrap wood blocks (various sizes)

I use scrap wood blocks to help me space out my drawer boxes when I’m installing them onto the slides. No specific size wood blocks are required, I usually just mix and match whatever scraps I can find around the shop.

[feast_advanced_jump_to]

How to Install Drawer Slides

If you prefer to watch, check out this video that details the installation process over on my YouTube channel:

YouTube Thumbnail for drawer installation video

If at all possible, I recommend laying your cabinet or furniture piece on its side to install the slides. You’ll notice most of my photos below are shown this way.

This makes measuring, marking, and placing the slides MUCH easier. In most cases with stand alone furniture and cabinet projects, this is possible.

However, if it’s not possible to lay the project over, you can use clamps, scrap blocks, or a Kreg Drawer Slide Jig to help hold your slides in place while you screw them in.

Kreg Drawer Slide Jig clamped onto cabinet with drawer slide on top

Inset vs Overlay Drawer Slide Installation

Before installing drawer slides, you need to consider whether the drawer fronts of the project will be inset or overlay.

Check out this post to learn more about inset vs overlay drawer fronts.

Inset drawer fronts set INSIDE the frame while overlay drawer fronts LAY OVER the front of the frame.

Diagram showing inset vs overlay drawers computer drawn graphic

If your drawer fronts are overlay, you can install the drawer slides so that the front edge of the slide is flush to the front edge of the cabinet or furniture frame.

Close up of side mount slide flush to front edge of cabinet

However, if your drawer fronts are inset, you need to push the slides back from the front edge the thickness of your drawer front.

For example, if you’re drawer fronts will be ¾″ thick, install the slides ¾″ inset from the front edge of the cabinet.

Close up of drawer slide inset from front edge of cabinet

Drawer Slide Spacing Tips

If there is any kind of framing underneath a drawer–like a bottom panel or dividers between drawers–I always mount my slides directly above these.

Those situations are the easiest. You simply place the bottom edge of the slide up against the frame or panel below it and use a speed square to ensure it’s square front to back as you screw it in. No need to measure or mark anything.

drawer slides installed onto center section of vanity directly above drawer dividers

However, if there aren’t dividers or framing between all drawers, you’ll have to measure where to space out your slides.

There are several ways to do this, but I’ll share two of my favorite ways to figure out my drawer slide spacing below.

Before you dive into spacing, you’ll need to know your drawer front heights and gap rules. Check out this post on measuring for drawer sizing for details.

Drawer Slide Spacing Method #1: Drawer Front Heights + 1″

For this method, you simply take the heights of the drawer front(s) below the slide you’re installing and add 1″. This is where you line up the BOTTOM edge of your next drawer slide.

In the example below, the drawer fronts are all 5 ¾″ tall. The top and bottom slides mount flush to the bottom of the frame directly below them.

But for the middle two, the second from the bottom should be installed 5 ¾″ + 1″ up from the inside edge of the frame, and the next one should be 5 ¾″ + 5 ¾″ + 1″ up.

Computer diagram with transparent drawer fronts showing drawer slide spacing locations for inset cabinet

NOTE: If you’re installing inset drawer fronts, you measure this from the INSIDE of the frame. But, if you’re installing overlay drawer fronts, you would need to measure from the OVERLAY.

For example, if your drawer fronts will overlay your frame by 1″, then measure from 1″ outside the opening. See diagram below.

computer diagram with transparent overlay drawer fronts showing drawer slide spacing locations

Drawer Slide Spacing Method #2: Align Bottom of Slide with Bottom of Drawer Fronts

For this method, you simply align the bottom edge of your drawer slides with the bottom edge of the drawer fronts.

In part 1 of this series–how to measure and size drawers–I showed you how to figure out your drawer front sizing/spacing.

You can reference that here to help you determine where the BOTTOM EDGE of each drawer front will be in the project. Then, line up the bottom edge of your slide at this location.

In the example below, with inset drawer fronts, measuring from the inside of the frame, I’d add ⅛″ for the gap at the bottom + 5 ¾″ for the drawer front + the ⅛″ gap between drawer fronts = 6″.

This is where the bottom edge of my next drawer front would be, so this is where I line up the bottom edge of my drawer slide.

Inset drawer front diagram showing drawer slide spacing locations lining up bottom edge with drawer fronts

Working my way up, for the next slide, I’d add the height of another drawer front + the ⅛″ gap (which is 11 ⅞″) and this is where the bottom edge of my next drawer front would be. So this is where I’d mount my next slide.

NOTE: If you’re installing inset drawer fronts, you measure this from the INSIDE of the frame. If you’re installing overlay drawer fronts, you would need to measure from the OVERLAY.

Install Drawer Slides

Once you figure out your spacing and slide locations, actually installing them is the easy part! All you need is a few screws.

Want to take this to the shop with you? Grab the printable drawer building guide here!

Normally, I’m installing slides into ¾″ (or thicker) material, so I’ll use some basic #6 x ⅝″ wood screws so they don’t go all the way through and poke out the other side.

Place the slide at the exact location you want it, hold it tight and extend it out. You’ll see several holes in the slide–some are small and round, some are large and round, and some are slotted.

Driver driving a screw into slotted hole in side mount drawer slide

I typically add a screw in a horizontal slotted hole around the middle and at the back. Then, I’ll add another screw in a round hole toward the front.

The exact holes you use isn’t critical–I just aim for one screw at the front, one in the middle, and one at the back. See video for more information.

The slotted holes allow for wood movement if your side panels are solid wood. But in the case where your sides are plywood, the wood movement is minimal, so you don’t really have to use them.

Face Frames and Spacer Blocks

If your side panel is flush across the inside like shown below, the slides simply install directly to the sides.

Installing drawer slides onto a flush surface inside cabinet

However, if you have a face frame or the inside panel isn’t flush to the opening, you will need to install “spacer blocks” to mount the slides onto.

Basically, these are just strips of wood that will mount to the side panels and come flush to the inside edge of the frame. See video for more information.

This desk is a great example of this. It was built with a face frame so the plywood side panels weren’t flush to the inside opening where the drawers will go.

Shara Woodshop Diaries installing spacer blocks to mount drawer slides onto in desk with face frame

So I had to cut and install spacer blocks to mount the drawer slides to. The drawer slides need to mount to something that is FLUSH TO THE INSIDE of the opening so they can slide open and closed.

You can see above that I glued and screwed some wood strips into the desk cabinet and you can see below that these are what I mounted the slides on.

Computer drawn diagram showing drawer slides installed onto spacer blocks in desk cabinets

I try to build my projects in such a way that mostly avoids the need for this. However, there are times when it’s necessary and simple spacer blocks work great.

How to Install Drawer Boxes

Once the slides are installed, you can add the drawer boxes into your project. There are several ways to do this.

I’ll share my two favorite methods below.

Installing Drawer Boxes Using Spacer Blocks

This is how I usually prefer to install my drawer boxes. First, place ¼″ plywood scrap strips across the bottom framing of the cabinet or furniture piece and extend the slides on both sides.

Extending drawer slides in cabinet to prepare for installing drawer boxes

Just like when installing the slides to the cabinet, you’ll notice that there are round holes and slotted holes here, too.

Set the drawer on the plywood strips so that it’s sticking out the front of the cabinet about half way and move the slides so that they are flush to the front edge of the drawer box.

If your drawer boxes are made with ¾″ plywood sides, you can use the same #6 x ⅝″ screws to install the drawers as you did to install the slides. First, add one screw in a round hole at the front of each slide.

Close up of installing front screw in slide to install drawer box

Then, fully extend the drawer box and add screws on each slide at the middle and at the back. See video for more information.

The slotted holes are great for making adjustments, but keep in mind that if you use the vertical slotted holes, the drawer can drop if weighed down.

Close up of driving middle screw in slide to install drawer box

Once the bottom drawer is in place, you can simply use some scrap blocks to space out the boxes above it and repeat this process to install them.

The number and size of scraps you’ll need will vary depending on how tall you made your drawer boxes, but you can mix and match scraps until you’re about to the bottom of the next drawer slide.

In this case, some ¼″ plywood and a 2×2 worked great.

Using spacer blocks to space out drawer boxes during installation

Extend your slides, stack your next drawer on, and install exactly the same way with screws in the front, back and middle.

Work your way up, double checking that each drawer box is properly spaced so that it won’t interfere with the drawer front(s) above or below it.

Installing Drawer Boxes by Separating Slides

At the beginning of this post, I shared that side mount drawer slides have tabs that allow you to separate the section of the slides that mount to the cabinet from the section of the slide to mounts to the drawer.

Another way to install drawer boxes is by separating the slides this way and mounting them flush to the front and flush along the bottom edge of the drawer box.

Installing drawer slide section directly to side of drawer box

After installing the slides on each side of the drawer, you can simply slide the box(es) back onto the slides in the cabinet.

And at this point, one way or the other, you should have your slides and your drawers installed into your project!

Ready to Wrap up Your Drawer Building Project?

Now, head to this post to learn how to install your drawer fronts to wrap up the entire drawer building process.

If you want to be the first to know when new posts and videos are out, be sure to subscribe to the newsletter below!

In the mean time, be sure to check out this complete drawer building guide and take a look at these projects to get some practice with drawers:

DIY Mid-Century Modern Dresser
3 Drawer Dresser
Hidden Drawer Bookshelf
DIY Storage Bench

To save this guide for later, be sure to pin it or share it to your favorite social channel!

Pinterest collage image showing computer diagram of slide spacing at top and Shara Woodshop Diaries pulling drawer out of end table at bottom with text "how to install drawer slides and boxes"

Until next time, friends, happy building!

How to Build a Drawer Box

March 14, 2023 by Shara, Woodshop Diaries

In this post, I’m sharing how to build a basic, simple drawer box for your next furniture or cabinet project!

If you haven’t already, be sure to check out this post about how to measure and size your drawers first. That will help you determine the overall size you need to make your drawer.

Shara Woodshop Diaries holding drawer box

Once you know the dimensions you need, then it’s time to make some sawdust and start assembling drawer boxes!

Before we start cutting anything, let’s first discuss tools and materials.

*This post contains affiliate links. See website policies.

What Wood Should You Use to Build a Drawer Box?

If you ask 100 people this question, you’re likely to get 100 answers. And that’s because there isn’t a specific wood you “should” or “shouldn’t” use.

Some people prefer using solid wood for their drawer boxes. Others prefer plywood. Some people like thinner material and others like thicker material.

Personally, I use ¾″ hardwood plywood (like birch or maple) for the drawer box sides and ¼″ plywood for the drawer bottoms.

¾" plywood and ¼" plywood laid out on workbench

I always like to say, “if it works, it works.” There are a million options that would work fine for drawer boxes–so don’t stress that you have to use something specific. Use what works best for you!

For the method shown below, in addition to the lumber, the only other materials you will need for assembly are 1 ¼″ pocket hole screws and edge banding, which is optional.

Materials needed to build a drawer box:

  • ¾″ plywood
  • ¼″ plywood
  • 1 ¼″ pocket hole screws
  • Iron on edge banding

Why is plywood a good option for drawer boxes?

One of the main reasons I prefer to use plywood for drawer boxes is because plywood is more stable than solid wood–the wood movement is practically negligible.

So plywood drawer boxes are less likely to expand, warp, or put stress on the drawer slides due to wood movement than solid wood.

Hardwood plywood is also cheaper than solid hardwood lumber and more readily available in most locations.

Plywood is also easy to cut down to your desired sizes, where using solid wood may require glue ups depending on how large your drawers will be.

Shara Woodshop Diaries using circular saw to cut down plywood sheet

I tend to keep ¼″ and ¾″ plywood on hand in my shop, so that’s what I use for most everything. However, many people build drawer boxes from ½″ plywood instead and that works fine, too!

You can check out this video for details on why I don’t use ½″ plywood.

As for the bottom panels, since I usually have ¼″ plywood stocked in my shop, I use that to save on costs. However, if you wanted to build the entire box from ½″ or ¾″ plywood, you certainly can.

As long as your drawer box ends up being the overall dimensions you want it to be, you can build it from just about any material that you’d like.

DIY Storage Desk Plywood Drawers
How to Build Drawers

In this tutorial, I’ll be using ¾″ plywood for the drawer box sides and ¼″ plywood for the bottom panel since that’s what I usually use in my projects.

What Tools Do I Need to Build a Drawer?

These are the tools I use when building my drawer boxes. Note that some of these tools are optional.

I know a lot of people don’t have a table saw or a router and I don’t want you to think that you have to have one or the other to build a drawer. You can still build a drawer without a table saw or a router!

Tools:

  • Miter Saw
  • Drill/Driver
  • Circular Saw (only need if using plywood)
  • Kreg Rip Cut (optional)
  • Pocket Hole Jig (optional)
  • Table Saw or Router (optional)

I use the table saw to cut dadoes in my drawer boxes, but a router can cut them, too. And, if you don’t have either, that’s absolutely fine because I’ll show you how to build your drawers both with and without dadoes in the steps below.

I like to cut down my plywood sheets down using a circular saw and Kreg Rip Cut cutting guide. However, if you’re not building with plywood, the circular saw and cutting guide is not necessary.

If you don’t have a pocket hole jig, you can skip the pocket holes and use regular wood screws instead.

So the bare minimum needed here is a miter saw and a drill/driver. If you have these, you can build a drawer box!

How Much Weight Can a Drawer Box Hold?

How much a drawer box can hold will largely depend on the type of slides you’re using–not necessarily the drawer box itself.

Most standard side mount ball bearing drawer slides are rated for 100 lbs. However, some heavier duty slides are rated for more. Check manufacturer’s specs on your specific slides.

I weigh more than 100 lbs and I made a video showing how I can stand in a drawer that I built using the dado method shared below and the bottom holds just fine.

@woodshopdiaries

Is ⅕” plywood enough for a drawer bottom? #learnontiktok #tiktokpartner #buildityourself #furnituremaker #testitout

♬ original sound – Woodshop Diaries

So if the drawer box can hold over 100 lbs, then you’re most likely limited by the rating of the slides, not the structure of the drawer box.

How to Build a Drawer Box

This is definitely not the only way to build a drawer, but I’m sharing my personal step by step process below.

This way of assembling drawer boxes is very simple, basic and requires few tools. But, it produces sturdy, strong, and nice looking results that are repeatable and easy to build.

If you prefer to watch, I’ve got a drawer building video here as well:

YouTube Thumbnail for how to build a drawer box video

Step 1: Cut Drawer Box Sides

As I mentioned previously, I build my drawer box sides from ¾″ plywood. So, first, I rip strips of ¾″ plywood to the width that I want my drawer box height.

For example, if I’m building drawer boxes 4 ½″ tall, I rip my plywood to 4 ½″ wide. You can figure your drawer box dimensions using this post about how to measure and size your drawer boxes.

From these plywood strips, I cut 2 pieces the length that I want my drawer box (shown in blue below) and 2 pieces 1 ½″ shorter than the width that I want my drawer box (shown in pink below).

dimensional diagram of drawer box sides and what lengths to cut them

The blue pieces above are the SIDES of the drawer box and the pink pieces are the front and back of the drawer box.

NOTE: Most of the plywood that is referred to as ¾″ is ACTUALLY 23/32″ thick. So it’s 1/32″ shy of a full ¾″. So when you put the drawer box together, the overall width would be 1/16″ shy of your desired overall drawer box dimension.

You can certainly add this 1/16″ to the drawer box front/back pieces if you’d like to be super precise, but there is enough wiggle room with side mount slides, that this slight variation is negligible. Personally, I don’t consider it in my own calculations and I just figure my measurements using the full ¾″.

Obviously, if you’re using something other than ¾″ thick material, you’d need to adjust your front and back piece lengths accordingly.

But once the 4 sides of the drawer box are cut to length, dry fit them together to make sure the overall dimensions are correct for your drawer box.

four sides of drawer box fit together on workbench

If you’d like, you can apply iron on edge banding to the top edges of the drawer box pieces. Iron on edge banding is optional, but I like to add it on my own drawers as it looks a little cleaner.

Close up of plywood edge banded vs not edge banded

I have a guide to applying iron on edge banding to plywood here.

Step 2: Cut Dadoes to Install Drawer Bottom (optional)

I cut dadoes into my drawer box sides to install the ¼″ plywood bottom panel. This is a sturdy and simple way to add the bottom panel without needing a bunch of additional hardware.

Shara Woodshop Diaries installing ¼" plywood bottom into drawer box dadoes on workbench

However, this is an optional step, so if you don’t have a table saw or router to cut the dadoes–or you simply don’t want to cut them–you can skip this step.

To cut the dadoes, I use a table saw. I detail this process in the YouTube video, but first, I adjust my blade height to about ¼″ using a Kreg MultiMark tool. This allows me to cut my dadoes ¼″ deep into my drawer box sides.

I don’t normally use a dado blade to cut my dadoes–I just use a general purpose blade and make a couple passes. If you have a dado blade, feel free to use it.

Close up of adjusting table saw rip fence

If I’m just doing a few cuts, I don’t usually bother with swapping out my blades because it’s kind of a hassle.

I like to cut my dadoes about ½″ from the bottom edge of the drawer. So I adjust the rip fence so that the OUTSIDE of the blade will cut ½″ from the bottom edge and run each drawer box side through to make a cut.

Close up of plywood drawer box side with partially cut dado

In this case, my drawer box pieces were 4 ½″ wide, so I adjusted the outside of my blade to 4″ from the rip fence.

Then, I adjust the rip fence so that the INSIDE of the blade will cut ¾″ from the bottom edge of the drawer box.

In this case, my drawer box pieces were 4 ½″ wide, so I adjusted the inside of my blade to 3 ¾″ from the rip fence and ran the boards through again.

plywood drawer box side with two blade cuts

Then, I adjust back a little and run through again just to cut out this middle piece.

Fully cut dado in drawer box side piece

I know that seems like a long process, but if you’re doing it in batches and only for a few drawers at a time, it goes really quick.

You can also use a ¼″ straight bit in your router to route this dado instead.

RELATED: How to use a router

Step 3: Size and Cut Drawer Bottom Panel

To figure the size the plywood bottom should be to fit into the dadoes, you simply take the size of the opening plus ½″ in both directions. That allows for ¼″ on all four sides–which was the depth of the dadoes.

Drawer box sides dry fit together on workbench with tape measure measuring inside dimensions

You can also figure this as the length of the front and back pieces + ½″ x the length of the sides – 1″.

Let’s look at an example, when I fit my drawer box pieces together, if the opening is 12 ½″ x 14 ½″, then I need to cut my ¼″ plywood bottom panel 13″ x 15″.

Overall dimensional drawer box diagram example--computer drawn exploded drawer box

However, if you skipped cutting the dadoes, simply cut the ¼″ plywood bottom panel to the overall size of the drawer box.

Computer diagram showing drawer box with plywood panel over bottom side--plywood bottom not installed in dadoes

Step 4: Assemble Drawer Box

I assemble my drawer boxes using pocket holes because it’s simple and strong. So that the holes are hidden in the end result, I drill them into the front and back pieces of the box on the OPPOSITE side as the dadoes.

Close up of drilling pocket holes for drawer box assembly

Since I’m using ¾″ plywood for these pieces, I drill ¾″ pocket holes.

RELATED: How to use a pocket hole jig

Then, I use 1 ¼″ pocket hole screws to assemble three of the four sides.

Shara Woodshop Diaries assembling drawer box pieces on workbench with pocket hole screws

I slide the ¼″ plywood bottom panel into the dadoes before adding the fourth side using 1 ¼″ pocket hole screws.

The pocket holes at the back won’t be seen once installed and the ones in the front will be hidden by the drawer front once it’s installed.

Shara Woodshop Diaries assembling drawer box with bottom panel installed

However, if you didn’t want to use pocket holes, you can certainly just use wood glue and finish nails or wood screws through the sides instead.

NOTE: I don’t personally use wood glue when assembling drawers with pocket holes. However, if using nails or screws through the sides, I’d definitely recommend using it.

If you opted not to cut the dadoes for the bottom panel, you can assemble the four drawer box sides the same way, just without the bottom panel.

Then use wood glue and staples or screws to secure the bottom panel onto the bottom side of the box.

Drawer box assembled and shown upside down with plywood bottom panel placed on top

NOTE: If you add the bottom panel onto the bottom of the drawer box, keep in mind that will add to the overall height of the box. You may want to adjust how wide you cut your drawer box sides to accommodate the additional thickness.

How to Ensure Your Drawer Box Stays Square

This is a VERY common question when it comes to building drawers. My number one tip is to make sure to cut your pieces nice and square first. It’ll be impossible to build a square drawer with unsquare cuts.

But my second tip is similar, only with more emphasis on the bottom panel. Make absolutely sure your bottom panel is square–whether you’re installing it directly to the bottom or inside dadoes.

The bottom panel should fit snug either way, so if it is square, it will pull the drawer box square to it once it’s installed. However, if it isn’t square, it will pull the drawer box sides out of square.

Another, more obviously tip is to use some corner clamps to help hold your pieces perfectly square as you screw them together.

How to Check for Square

You can check both the bottom panel and the drawer box (once it’s assembled) for square by simply measuring across the diagonals and seeing if they are equal.

Shara Woodshop Diaries measuring diagonal of drawer box

Mathematically, if two diagonals of a rectangle are equal, then the corners are square.

Ready to Install Your Drawer Box?

There are SO many ways to build a drawer box. The method I shared above is the one that I use in all my projects and I hope you find it helpful to build for your own projects.

3 assembled and completed drawer boxes stacked on top of each other

If you are ready to learn how to install your drawer boxes, I have a complete guide plus video on installing drawer boxes here. After that, check out how to finish up your drawer installation by installing the drawer fronts.

if you want to take the entire drawer building series to the shop with you as a printable, you can grab the printable drawer building guide here:

If you enjoyed this tutorial and want to be the first to know when new projects and posts come out, be sure to subscribe to the newsletter below!

To save this for later, don’t forget to pin it!

Pinterest collage image showing exploded drawer box diagram at top and Shara Woodshop Diaries holding completed drawer box at bottom with text "how to build a drawer box"

Until next time, friends, happy building!

How to Measure and Size Drawers

March 11, 2023 by Shara, Woodshop Diaries

In this post, I’m sharing how to measure and size drawers for your next project!

This guide will help you easily determine your drawer front and drawer box sizes no matter what you’re building.

Shara Woodshop Diaries holding drawer with text "drawer building part 1 how to measure and size drawers"

*This post contains affiliate links. See website policies.

The first step to adding drawers to any project is figuring out what size they need to be. So in this post, I’m going to discuss drawer dimensions and how to find them.

This may seem complicated at first, but the more you work with drawers, the easier this will be…I promise!

Fair warning, there is some math involved here, but don’t get overwhelmed! It’s just your basic addition, subtraction and division.

Before we dive into the numbers, let’s talk about some of the different styles of drawers and cabinets that you’ll run into.

Cabinet and Drawer Styles

Whether you are working with furniture or cabinets, you’ll run into different styles and types of drawers and framing.

It’s important to understand the terminology and how to recognize what you’re dealing with in your various projects.

Inset vs overlay

Drawers can be either inset or overlay. This has to do with the style of the drawer fronts.

Inset means that the drawer fronts are set inside the frame like this.

Vanity with inset drawers and doors

And overlay means that the drawer fronts lay over the frame like this.

desk with overlay cabinet drawers
How to Build Cabinet Boxes

Frameless vs Face Frame Cabinets

In cabinet design, frameless means that the front edge of the cabinet box is not framed out—the “frame” is simply the plywood edge. 

This is how I built my workshop cabinets.

Frameless workshop cabinets being installed

On the other hand, face frame cabinets will have an additional frame added onto the front of the box making the front edges thicker.

You can see below that I’m adding a face frame onto the front of this cabinet.

Shara Woodshop Diaries nailing face frame onto cabinet

This same concept applies to furniture pieces as well—not just cabinet boxes.

Framed vs Not Framed Drawers

You’ll also run into instances in both frameless and face frame projects where the drawers may be individually framed out or not individually framed out. 

I’ll share some examples to make this a little clearer.

These drawers are inset and not framed—notice there is no framing or dividers between drawers.

Modern 5 drawer dresser with no drawer dividers

These drawers are inset and framed out—notice there is framing between each drawer.

Simple 3 drawer dresser with drawer dividiers
3 Drawer Dresser

These drawers are overlay drawers, not framed out. 

Frameless Workshop cabinets
How to Build Cabinet Boxes

And these are actually a combination of inset and overlay and they are individually framed out.

Mid century modern dresser with drawer dividers
DIY Mid-Century Modern Dresser

Now that we’ve covered some basic definitions, let’s dive into the dimensions.

Prefer to watch? Check out how to measure and size drawers in this video:

Finding the Drawer Front Height

The first dimension I like to find is the drawer front heights because this is the most challenging.

That doesn’t mean it’s difficult, it just has a lot of variables that you have to consider.

To find your drawer front heights, you need to ask three questions.

  1. How many drawers do you want?
  2. Will they be inset or overlay?
  3. And will they be individually framed out.

Using this information, we can calculate the “drawer front height availability.” Or DFHA—this is definitely not an official term, but one that I just made up ha! 

Basically, this is the amount of vertical space you have available for drawer fronts. Once you have that, you can divide it out amongst our drawers.

This will vary based on whether you want inset or overlay.  Inset is the easiest to work with, so let’s look at an inset example first.

How to Calculate Drawer Front Height on Inset Drawers

One rule of thumb to remember with inset drawers is that you want to leave ⅛” gap around all sides between the drawer fronts and any surrounding framing.

Step 1 is determining the available vertical space I have for drawer fronts. There is no exact “equation” for this because every project design varies.

But, I think you can get the idea by taking a look at an example. So here I have this simple cabinet and I want to add 4 equally sized drawers into it. 

But, I want the top drawer to be framed out.  You can see here that I already added this frame piece in the sketch below where the top drawer will be.

Computer drawn diagram of simple cabinet with drawer divider

I personally think doing a quick sketch (even just on notebook paper) is really helpful to get a visual and make some notes.

So let’s sketch this out.  I have a 24 ½” opening to begin with, but then I added a divider.  I used a 1×3 turned on its side for the divider, which is ¾” thick. 

Adding this piece will take away ¾” of my opening space, so now I only have 23 ¾” space to work with.  But, I’ll also need ⅛” gap above and below the top drawer.

And I’ll need ⅛″ gap between all the bottom drawers as well.  So that’s 6/8” of gap space—or ¾”, so I have 23” of available vertical space for my drawer fronts.

Image of inset cabinet drawer example with text breaking down the math to determine drawer front heights

Once I calculate my available space for drawer fronts, I can divide this out between my drawers.

Since I want 4 equal sized drawers, I simply divide this by 4 to give me the height of my 4 drawer fronts—which is 5 ¾”.

Now obviously, you can make them different sizes—maybe you want a deep drawer at the bottom and shallow drawers at the top. That’s totally fine! 

You can divide up the sizes however you’d like as long as the sum of all the fronts equals the available space.

How to Calculate Drawer Front Height on Overlay Drawers

For overlay, the concept is very similar, only instead of subtracting ⅛” gaps from the opening size, you’ll be adding an overlay to it.

The “overlay” is the amount of the frame you want the drawer fronts to cover. For example, if you want a ½″ overlay, the drawer fronts will cover ½″ of the frame.

Let’s look at this cabinet example again, this time, as an overlay design. If I wanted overlay drawers in this case, I need to first determine how much overlay that I want. 

The framing on the outside of this example is 1 ½” wide.  So let’s say I want the drawer fronts to overlay 1” of it all the way around. I made the drawer fronts transparent in the image below so you can see how they overlay the frame all the way around.

Computer drawn diagram with translucent overlay drawer fronts

You can determine how much overlay you’d like–you may want to cover more or less of the outside frame based on your own design.

Just like before, I like to sketch this out to figure my available drawer front space. So I take my 24 ½” opening and add 1” overlay at the top and 1” at the bottom so that gives me 26 ½”.

But I need to subtract ⅛” gap between drawer fronts so that leaves me with 26 ⅛” drawer front height availability.

Overlay drawer front diagram with text breaking down the math to figure drawer front dimensions

For 4 equal sized fronts, I’d just divide by 4 to give me 6.53125”…which is 6 17/32”. So that would be the height I’d need to make each of my drawer fronts in this case.

A Note About Rounding

Now, this is just my personal advice—take it or leave it.  But there is a time and a place for exact precision. But there is also a time and a place for what I like to call “close enough.”

Drawer fronts is a “close enough” situation.  You want your gaps to be approximately ⅛”, yes.  But, it’s more important that they are EVEN than that they are ACCURATE.

Your eye won’t notice if the gaps between drawers are 1/32” bigger than your standard ⅛″ gaps.  But they will notice if they are uneven. 

So, if I divide and get some weird numbers, I usually round down to the nearest 16th of an inch to keep the math a little simpler.

In this case, with 6 17/32″, I’d round down to 6 16/32″ which is 6 8/16″ or 6 ½″. Rounding down to the nearest 16th just keeps the math a little easier to deal with.

How to Calculate Drawer Front Height on Full Overlay Drawers

If you want FULL overlay drawers, basically, you want the drawers to cover the entire front so that it’s fully overlaid. This is what I did for my shop cabinets. 

In this case, you calculate the same as inset, only you take the outside dimensions of the cabinet instead of the inside.

With inset, you take the inside dimensions and subtract ⅛″ gaps, but with full overlay, you take the outside dimensions and subtract ⅛″ reveal. The reveal is the part of the frame left exposed after the overlay.

Full overlay drawer front dimension breakdown with diagram and text

With 29″ of available drawer front space, I can divide it out among my drawers however I’d like. For three equal sized drawers, I could divide by 3 and get ~9 ⅝″ for my drawer front heights.

Or, I could do two 12″ deep drawers at the bottom and one 5″ deep drawer at the top–like shown above. Any combination of three drawers whose heights sum to 29″ would work.

If you add dividers into this situation, the math for the drawer fronts stays the same, unless you want to leave a larger gap between drawers so that you see more of it.

That’s a pretty custom situation.  In any case, I recommend drawing it out to give you a visual to work with.

Once you have your drawer front heights, everything else is smooth sailing.  I promise.

Finding Drawer Front Width

The drawer front widths follows the same general rules as the heights, only there’s a lot less variables in most cases, so it’s much easier to figure.

For inset drawer front width, take the width of your opening and subtract ¼”—that will allow you ⅛” gap on both sides.

Computer drawn diagram showing inset drawer front width measurement

For overlay drawer front width, add 2x your overlay to your opening.  So if your overlay is 1”, then you’d add 2” to the opening.

Computer diagram showing drawer front width for overlay drawers

For full overlay drawer front width, take the overall width, subtract ¼” so that you have ⅛” reveal on each side.

Computer drawn diagram showing drawer front width for full overlay drawers

Easy as that! So now we’ve got our overall drawer front sizes.  Let’s talk about the drawer box.

Finding Drawer Box Height

There is no set rule for this, so it’s really just a personal preference here.  But this is what I usually do.

When determining the drawer box height, you have to consider again whether your drawers are framed out or not.

If they’re framed out, I make my drawers 1-2” shorter in height than the opening.  So in this example, if my opening is 6” tall, I’d make my drawer box 4-5” tall. 

Diagram showing opening in cabinet and an arrow pointing to drawer box

If the drawer boxes aren’t individually framed out, I typically make them about 1-2” shorter than my drawer fronts.

For inset drawers, 1″ works well, but for overlay, I usually lean closer to 2″ since some of the drawer front will be hanging over the frame.

So we know how tall to make the drawer boxes, now we need to now how wide.

Finding Drawer Box Width

The drawer box width is easy to determine because it’s basically the only measurement that does actually have a “rule.”

In this drawer building series, I’m using side mount ball bearing drawer slides.  These are my favorite slides to use for several reasons and I’ll discuss that more in the installation post.

The measurements here are determined based on using side mount ball bearing drawer slides. For other types of slides, this may vary.

The drawer box width is determined by measuring the opening the drawer will go into and subtracting 1” for the thickness of the slides—½” on each side.

So if my opening is 16”, my drawer box needs to be 15” wide overall.

Diagram showing the width of the opening in cabinet with arrow pointing to drawer box width

NOTE: Double check manufacturer’s specs on your specific slides. I’ve never seen any side mount slides that don’t follow this rule–it’s a pretty common standard. But that doesn’t mean there aren’t some out there that will be different.

Finding Drawer Box Depth

Just to clarify, the depth here is I guess what you might also call the length—the distance from front to back.

Diagram of drawer box with dimension showing the depth/length for clarity

Typically, I make my drawer depth the same length as my slides.  This isn’t really a hard rule, but it’s what I do personally.

So if I go with a 16” drawer slide, I’ll make my drawer box 16” deep.

How long should your drawer slides be?

I prefer to use side mount ball bearing drawer slides in my projects. You can purchase them with or without the soft close option.

Shara Woodshop Diaries installing drawer slides into cabinet

They are relatively inexpensive, easy to install, and don’t require additional bracing and framing like other types usually do.

These drawer slides come in 2” increments.  You can find them in common sizes from 10” up to 24” long.

The length of your slide will depend on the size of the cabinet you’re installing into.  Obviously, you don’t want to put a 20” long slide into an 18” deep dresser or it’ll stick out the back.

back side view of installing drawer slides into nightstand

So choose a slide length that will fit what you’re installing it into and keep in mind that if the drawers are inset, you have to accommodate the drawer front thickness as well.

If installing inset drawers, subtract the thickness of your drawer front from the depth (front to back) of your cabinet. Chose a drawer slide smaller than this measurement.

If installing overlay drawers, choose a drawer slide smaller than the cabinet depth (front to back.

Ready to Build a Drawer?

At this point, you now have all the measurements you need to get started building.

We figured the drawer front height and width.  And then we figured the drawer box overall height, width, and depth.

Diagram with dimensions specifying drawer front height and width, drawer box height, width and length

Check out how to take these numbers and apply them in this post about how to build a drawer box.

Then, check out the rest of the drawer building series including how to install drawers and how to install drawer fronts.

Prefer to print? Download the drawer building guide so you can print and take to the shop with you!

Be sure to subscribe to the channel and/or the newsletter below to be the first to know when new posts and videos come out!

I hope this helps make a little more sense of how to measure for your drawers.

If you’d like to save this for later, be sure to pin it or share to your favorite social channel!

Pinterest collage image showing drawer dimension diagram at top and Shara Woodshop Diaries holding drawer box at bottom

Until next time, happy building!

How to Build a Sliding Door Dresser Chest

March 3, 2023 by Shara, Woodshop Diaries

In this post, I’m sharing how to build a sliding door dresser chest with drawers and a sliding barn door!

Shara Woodshop Diaries with sliding door dresser

Sliding doors have been trendy for several years. Some people love them and some people hate them. It’s just one of those things, you know? Ha!

But they’ve recently started showing up not only in and on houses, but also on furniture!

This modern farmhouse style chest of drawers is a great example of combining a basic furniture cabinet design with a sliding barn door.

If you’d like to learn how to build a sliding door dresser with shelves and drawers, I’ve got you covered with the plans and video in this post below.

First, here’s what you’ll need.

Tools & Materials

*This post contains affiliate links. See website policies.

Tools:

  • Miter Saw
  • Drill/Driver
  • Circular Saw
  • Cutting Guides–Kreg Rip Cut & Kreg AccuCut used here (optional, but helpful)
  • Pocket Hole Jig
  • Table Saw
  • Shelf Pin Jig
  • Brad Nailer
  • Jig Saw
  • Speed Square
  • Clamps
  • Sander

Materials:

  • (1 + ¼) 4 x 8 sheet ¾″ plywood
  • (1) 4×4 sheet ¼″ plywood (½ sheet)
  • (4) 2x6x8 boards
  • (4) ⅝″ x 5 ½″ x 6′ cedar fence pickets
  • (1) 1x6x8 board
  • (2) 1×2 boards (optional)
  • 1 ¼” pocket hole screws
  • 1 ¼” wood screws
  • 2 ½ ” pocket hole screws
  • 1 ” & 1 ¼″ brad nails
  • (3) pair 14″ ball bearing drawer slides
  • 36″ sliding cabinet door hardware kit
  • Wood Glue
  • Shelf Pins
  • Edge Banding (optional)
  • Wood filler, caulk, wood finish of your choice

What to Know Before You Build a Sliding Door Dresser Chest

I would consider this sliding door cabinet build an intermediate level project. It’s assembled using basic pocket hole joinery and using common materials.

However, you will need a table saw to be able to custom cut some of these pieces and the corner posts. See notes below.

Check out the YouTube video below for tips on installing the sliding door hardware and the X trim on the sides and door.

How to Cut the X Trim

This short video has some tips for using a speed square to find the angles on the X trim.

The full build video of this sliding door cabinet project on YouTube also has some additional tips as well.

I HIGHLY recommend checking it out and using this method to double check your own angles for a more precise fit.

Why I Used Cedar Fence Pickets for Door and Drawer Fronts

I wanted this project to have a “rustic” feel, so I wanted to use “rougher” material for the door and drawer fronts.

I used cedar fence pickets for these because they are inexpensive and they look really nice after they’re sanded. You can see what they look like before sanding in the middle below.

cedar 2x4, fence picket and 1x6 board laid side by side to compare

I made sure to sand these down with 100 grit sandpaper to knock off the really rough spots but not smooth them out completely.

The extra texture really adds some nice character–plus since it’s cedar, so it smells amazing!

Sliding Door Hardware Installation Tips

There are several different brands and styles of sliding cabinet door hardware that you can purchase to use with this. Each manufacturer will have slightly different instructions and dimensions.

test fitting rollers onto sliding door hardware rail to make sure it doesn't hit top panel

Always follow their specific instructions for installation and double check the specifications of the kit you are using. This is the kit I used.

The YouTube video below gives some additional tips for installation.

Custom Sized Board Cuts

This project used some “non standard” size lumber. This means that many of the pieces will need to be custom cut using a table saw.

I provided several diagrams in the printable plans below to help give you a visual of the cuts.

Overall Project Dimensions

The overall dimensions of this project are approximately 17″ deep x 38″ wide x 54 ¾″ tall. This does not include the sliding door.

Overall dimensional diagram of sliding barn door dresser chest of drawers cabinet

This is a great size cabinet to use as a chest of drawers in a bedroom, or as a storage cabinet in the kitchen or dining room.

It’s versatile with adjustable shelves on the left, drawers on the right, and open shelving below. It can be a great addition to any room in the house!

Additional Resources For This Project

You may find these articles helpful during the building process.

  • How to square board edges
  • How to cut plywood sheets
  • How to use a pocket hole jig
  • How to apply iron on edge banding
  • How to build and install drawers
  • How to finish raw wood furniture without a sprayer

How to Build a Sliding Door Dresser

Now, for the how to! In the steps below, I explain the assembly process and share several tips I learned while building this sliding door dresser.

But, if you prefer to watch, I’ve also got a YouTube video as well.

Are you subscribed to my YouTube channel? Don’t miss out on the latest videos! Subscribe to the channel here.

Prefer to print? All the dimensions, diagrams, and project details can be found in the printable plans available here:

Just for clarity here–I always build the project before I make the plans. That way, I can see what I would do differently and adjust the plans to make it easier for you guys.

So you may notice that the order of the steps in the printable plans don’t 100% match my photos below and the video above.

I learned while building that some of the pieces would have been easier to attach in a different order–so I made the printable plans to show that.

Step 1: Assemble Side Panels

The corner posts of this project were 2 ½″ square. There are many ways to make a 2 ½″ square post, but I used 2x6s ripped in half and glued together.

A 2×6 is actually 5 ½″ wide, so I cut my 2x6s a little longer than I wanted my corner posts, then set my table saw rip fence to about 2 ¾″ from the blade and ripped them down the middle.

Close up of ripping 1x6 board on table saw

Then, I glued them up in pairs to make 4 “posts.”

Gluing and clamping corner posts to build a sliding door dresser

Once the glue was dry, I took them back to the table saw to trim them down to 2 ½″ square posts to use for the legs.

I cut down two pieces of 2×2 and two ¾″ plywood panels to assemble the sides of the cabinet.

RELATED: How to cut down plywood sheets

I used pocket holes and screws to assemble two identical sides like shown here.

Shara Woodshop Diaries assembling side panels of DIY sliding door chest of drawers

RELATED: How to use pocket holes for building

Step 2: Assemble Dresser Frame and Shelf

Once the side panels were assembled, I continued building the remainder of the dresser frame.

I installed two more 2x2s at the bottom even with the ones on the side, a 1×3 in the middle at the front where the bottom of the cabinet will be and a 4″ wide piece at the top where the sliding hardware rail will mount.

Please ignore the shop cat on the workbench…he likes to be in the middle of everything.

Shara Woodshop Diaries assembling main frame of sliding door dresser cabinet

To keep things simple, I installed all the pieces using pocket holes and screws.

Once the frame was together, I added the plywood shelf that will be the bottom of the cabinet. This should be installed flush across the top of the 1×3 piece on the front.

Bottom cabinet panel installed on sliding door chest

Then, I installed a ¾″ plywood panel between the 2x2s at the bottom to create the bottom shelf.

Shara Woodshop Diaries installing bottom panel of sliding door cabinet

Step 3: Install Dividers

To divide the cabinet into a shelf section and a drawer section, I added a 1×2 in the center at the front of the chest frame.

I used pocket holes and screws from the back side (so they’re hidden). Then, I installed a ¾″ plywood panel behind it.

dimensional computer drawn diagram showing how to install the middle divider panel into the sliding door dresser cabinet

The 1×2 is centered in the opening, but I installed the plywood panel off center so that it’s flush to the drawer side of the 1×2.

This just saves me from having to use spacer blocks to install the drawer slides later.

Then, I added a couple 1x3s into the drawer section to evenly space out the drawer boxes using pocket holes and screws.

Dimensional diagram showing where to install drawer dividers in sliding door dresser

Step 4: Add X Trim on Sides

The trim on the sides was one of my favorite parts of this project! I cut to fit 1x3s to glue and brad nail at the top and bottom.

Shara Woodshop Diaries nailing 1x3s on sides of cabinet

When I cut my corner posts, I had some thin ⅜″ x 2 ½″ wide pieces left. You can see this in the video above.

I ripped these to 1 ½″ wide strips to make the Xs from, but you could also use 1x2s if you wanted.

I marked and cut these pieces to fit, then glued and taped them on each side of the cabinet. In the notes above, I share how to find the angles for Xs of any size. All you need is a speed square!

painters tape used to hold X trim pieces in place on side of dresser cabinet

You could also use brad nails to secure these pieces if you had some the right length (I didn’t at the time).

Step 5: Install Top Panel

I actually didn’t install the top panel until much later in the project, so you can add it now, or at a later time. Just make sure you install it before adding the sliding door hardware.

To add the top panel, you will need to add some supports to attach to. So I cut some scrap plywood strips to secure between the sides and the divider like shown below.

Diagram showing top support installation into sliding door chest

At this point, I went ahead and painted the body of the chest. Since the top, drawers and doors would be left a natural wood color, it was easier to go ahead and paint the cabinet before moving on.

RELATED: How I paint my furniture

Then, I could cut the top from ¾″ plywood and use screws through these support pieces to secure it in place.

Computer diagram showing installing top panel of sliding door dresser

Plywood edges aren’t usually very pretty. You can cover them easily using edge banding. I recommend applying edge banding to the front and sides of the top to make it look a little cleaner.

RELATED: How to apply iron on edge banding

Step 6: Build and Install Drawers

I added 3 pair of 14″ ball bearing drawer slides into the cabinet so that they were ¾″ inset from the front edge.

Shara Woodshop Diaries installing drawer slides into cabinet

This post shows you how to install drawer slides.

Then, I assembled three identical drawer boxes to install onto them. The printable plans detail all the dimensions used here and this drawer building guide shows you exactly how I build drawers.

Shara Woodshop Diaries assembling drawer box using pocket holes and screws

Of course, there are many ways to build drawer boxes, but that’s my personal favorite way.

Once the boxes were assembled, I installed them into the cabinet ¾″ inset from the front edge.

Shara Woodshop Diaries installing drawer boxes into dresser cabinet

RELATED: How to install drawer boxes

Step 7: Add Drawer Fronts

I mentioned earlier that I wanted to use a “rougher” material for the drawer fronts, so I went with cedar fence pickets.

These come in what they refer to as a 1×6, but they are actually ⅝″ x 5 ½″ and they have some rather large tolerances, so they tend to have some variation.

Since these drawer fronts needed to be about 9″ x 14 ½″ overall, that meant that I needed to piece the fronts together because one piece wasn’t going to cover the whole thing.

So I cut to fit 6 pieces like shown–two for each drawer–to make the drawer fronts.

Cedar fence pickets cut to fit for drawer fronts

Make sure to leave ⅛″ gap around all sides of the opening.

I used a jig saw to cut out “finger holes” in the top pieces of each drawer front to give me a way to open the drawers later.

Adding a knob or a pull would likely interfere with the sliding door, so I needed an alternative way to open them.

Once the pieces were cut and prepped, I used wood glue and brad nails to secure them to the front of the drawer boxes.

Step 8: Add Back Panel

I have a personal pet peeve about adding a back panel over projects with drawers–I know most people think I’m crazy for that.

So I didn’t want to add a back panel over the entire project–I only wanted to add it over the shelf section.

Since I didn’t want to add a panel over the entire back side, I used a router to cut a rabbet into the back of this section to install a ¼″ plywood back panel. See YouTube video for more information.

However, if you don’t want to deal with a router and you do want to cover the whole back, you can simply cut a ¼″ plywood panel to glue and nail (or staple) across the back like shown below.

Computer diagram showing how to install back panel

Step 9: Build and Install Sliding Door on Dresser

Just like the drawer fronts, I built the door with cedar fence pickets. I used three full width boards for the back.

Then, I ripped pickets in half to add a frame piece at the top and bottom, and onto the sides.

Brad nailer securing boards onto sliding barn door

I ripped 1 ½″ wide strips to create the X on the front using the same “speed square trick” as on the sides.

Speed square finding angle of miter cut for X trim

I just glued and brad nailed these pieces together, then mixed some wood glue and sawdust to fill in the nail holes.

Using a brad nailer to secure X trim on barn door

At this point, I highly recommend finishing the cabinet and the door separately (if you haven’t already) before installing. Paint, stain, poly as desired.

I used this 36″ sliding door hardware kit to install the door. I used this on a sliding door console cabinet previously and it worked really well.

Of course, there are tons of other brands and styles, so this isn’t the ONLY kit you can use.

However, be sure to follow the manufacturer’s instructions to install the kit as they may vary.

I mounted my rail onto the cabinet so that it was about 1 ⅞″ down from the top panel.

Shara Woodshop Diaries installing sliding door hardware into dresser chest

Then I installed the rollers onto the door so that the bottom edge was 3 ⅝″ down from the top of the door.

Again, different styles and brands vary, so double check this will work in your application before installing.

using a drill to secure sliding door roller hardware onto door

Then I hung the door on the rail and added the included stop blocks that came with the kit to prevent the door from falling off the rail. See YouTube video above for additional details.

The kit also comes with a piece to go on the bottom to keep the door from swinging. This is two parts–one part mounts to the cabinet like shown.

Using a drill to install bottom piece of sliding door hardware to run underneath door

And the other part screws into it and adjusts front to back to accommodate the thickness of your door.

Sliding door installed onto chest of drawers

Step 10: Add Shelves

The last part was using a shelf pin jig to drill shelf pin holes inside the left side of the cabinet to install adjustable shelves.

Close up of shelf pin jig used to drill shelf pin holes into cabinet

Shelf pin jigs are simply the guide for drilling equally spaced holes. You place shelf pins into these holes where you would like, then place the shelves on top.

It’s a great way to add shelves into any cabinet–especially if you are indecisive like I am and like the ability to move them up and down as needed haha.

Painted farmhouse style chest of drawers with wood tone sliding door and drawer fronts

And at that point, the project was complete and ready to use!

Looking for more DIY Dressers and Storage Ideas?

I hope you enjoyed watching this sliding barn door dresser chest come together. I think it turned out so pretty!

But if you are still looking for more dresser and storage ideas, here are a few favorites!

3 Drawer Dresser
DIY Mid-Century Modern Dresser
DIY Modern Dresser
Sliding Door Console
Stenciled Door Console

If you enjoyed this project and can’t wait to see what’s next, sign up for the FREE newsletter below for priority access to all the latest projects and plans!

Save this project for later by bookmarking, sharing to your favorite social channel or pinning it!

Pinterest image showing computer diagram of sliding door dresser at top and Shara Woodshop Diaries with finished dresser at bottom and text "How to build a sliding barn door dresser"

Until next time, happy building!

Modern DIY Propagation Station

February 20, 2023 by Shara, Woodshop Diaries

In this post, I’m sharing how to make a modern DIY propagation station from scrap wood!

walnut and maple wood propagation station using test tubes

I’d love to tell you that I’m an excellent green thumb and an expert with house plants.

But, I’d be lying! The only plants I can seem to keep alive are the ones they claim are impossible to kill–the snake plants, the ZZ plants, and the pothos.

These easy to grow plants are also easy to propagate and since they tend to grow pretty quickly, they make plenty of cuttings to practice with!

Now, while I can’t give you any great advice on propagating your plants–I’ll have to refer you to the experts on that one–I can show you how to make a simple, fun station to set up your cuttings!

Let’s dive into the wood scraps pile and get building! Here’s what you’ll need.

Tools & Materials:

*This post contains affiliate links. See policies page for details.

Tools:

  • Miter Saw
  • Drill
  • Forstner Bits
  • Clamp (optional)

Materials:

  • Scrap 1×2 (approximately 15″ long)
  • Scrap 1×3 (approximately 21″ long)
  • Scrap dowel rod (½″ or ¾″ diameter work great)
  • Wood Glue (I used Krazy Glue Fast Dry Wood Glue, but other glues can work as well)
  • Test Tubes

How to Make a Scrap Wood Propagation Station

This fun little DIY propagation station only took about 15 minutes to assemble, and is a great option for a first time build or beginner project!

Feel free to customize the size if you’d like a few more or a few less propagation tubes in your project. This one fit 5 tubes.

The overall dimensions of this DIY propagation station are 2 ½″ deep x 8 ⅜″ tall x 17″ wide.

Overall dimensional diagram of scrap wood propagation station

Step 1: Cut Scrap Wood to Size

For this project, I used some scrap 1×2 for the top (mine was maple wood), scrap 1×3 for the bottom (mine was walnut wood), and some wood dowels to connect the two.

wood, glue and test tubes laid out on workbench

The dowels I used here were ½″ diameter, but you could use larger ones if you wanted.

I cut my top 1×2 piece to 15″ long with square ends. But for the bottom piece, I beveled the ends.

The 1×3 pieces for the base were cut with 20 degree bevels. The top piece was 15 ½″ long, and the two sides were about 2″ long. If you wanted it taller, you can cut these sides longer.

Exploded diagram of parts to build DIY propagation station

Then, I cut my dowels to 5″ long.

Step 2: Assemble the Base of Propagation Station

I sanded the 1×3 pieces before assembling. Then, I just used some Krazy Glue Fast Dry Wood Glue to glue the top onto the sides.

Using Krazy Glue on piece of walnut wood

You can certainly use regular wood glue and/or brad nails to secure instead. But the fast dry wood glue was quick and easy. Since it dried quick (like, within seconds quick) I didn’t have to worry with clamps on these weird angles.

I could just hold the pieces together for about 10-20 seconds, then move on to gluing the next piece.

Propagation station base assembled

I made sure the sides would angle out on both sides before allowing the glue to dry.

Step 3: Drill Holes for Test Tubes

Once the base was together, I worked on the top half. In order for the test tubes to go into the propagation station, I needed to drill out holes in the top 1×2 piece.

First, I measured the diameter of my test tubes–mine were 1″ overall. So I grabbed a 1″ forstner bit and installed it into my drill.

I measured out 5 evenly spaced locations on my 1×2 leaving plenty of room on the ends to attach the dowels later.

Locations for test tube holes on propagation station diagram

TIP: Draw a mark down the centerline of the board, then measure and mark your hole locations along this mark. That way, the holes stay straight down the length of the board.

Once the hole locations were marked, I used my drill with forstner bit to drill them out. Make sure to keep the drill as straight as possible so your test tubes will stand straight.

If you had a drilling guide or a drill press, that would be great to use here as well.

Close up of forstner bit drilling test tube holes in maple board

NOTE: Make sure to securely clamp the workpiece before drilling!

Step 4: Assemble Propagation Station

I used Krazy Glue Fast Dry Wood Glue again to assemble the dowels between the top and the base here. This held fine with just the glue.

However, in hindsight, I wish I had drilled out some holes for the dowels to go into just to give it a little more surface area for the glue to adhere to.

NOTE: If you want to paint or stain any of the pieces, do so now before assembling. I stained the dowels in Minwax True Black, making sure to avoid getting stain on the ends.

I applied some glue to the base on each end and held the end of the dowels on it until it dried (about 30 seconds).

Close up of gluing dowel onto walnut propagation station base

NOTE: If you paint or apply an oil based stain to any of the pieces, keep in mind the glue may have a hard time sticking to it. So in those cases, I definitely recommend drilling out some holes in the base and the top to insert the dowels vs just gluing them onto the surface.

To make this a little more secure, use a forstener bit the same diameter as your dowels and drill out holes about ¼″ – ½″ deep in the top side of the base and the bottom side of the top piece where you want your dowels to go.

Add wood glue into the holes and insert the dowels. I used this method on this DIY wooden drink coaster project.

Once the dowels were secured to the base, I added some more Krazy Glue to the tops of each dowel and added the top.

Applying wood glue to top of wood dowels

I held the pieces together tight until it dried–about 30 seconds.

holding top of wooden test tube station on dowels while glue dries

Then, I allowed the glue to fully cure for a few minutes according to the instructions.

Step 5: Finish and Add Propagation Tubes

Once the glue was completely cured, I applied some Walrus Oil Furniture butter to bring out the colors of this maple and walnut and give it a little protection.

Then, I slipped the test tubes in, added some water, and dropped in my plant cuttings.

Finished DIY propagation station made from scrap wood with test tubes and plant cuttings

I love the simple, modern vibe of this project and am excited to watch my cuttings sprout roots and swap them out for new cuttings every few weeks.

If you didn’t want to use this as an actual propagation station, it would certainly make a cute vase as well. Just drop in a few flowers or some greenery and use it as a centerpiece.

Looking for more DIY plant projects?

I hope you enjoyed this simple scrap wood propagation station project and if you’re looking for more DIY plant projects, here are a few fun ones!

DIY Plant Stand
Scrap Wood Tiered Plant Stand
DIY Fall Planter Boxes
DIY Ladder Shelf Plant Stand

Don’t miss out on all the latest projects and plans! Subscribe to the FREE newsletter for priority access to new content!

If you’d like to save this for later, be sure to pin it or share it to your favorite social channel!

Easy Modern DIY Propagation Station pinterest collage image showing overall dimensional diagram at top and finished project at bottom with text "how to build a modern propagation station"

Until next time, friends, happy building!

DIY Vanity Desk with Flip Top

February 18, 2023 by Shara, Woodshop Diaries

In this post, I’m sharing how to build a simple DIY vanity desk with flip top center section!

Collage image showing left side DIY vanity desk closed and right side vanity desk with flip top open

I couldn’t decide whether to call this a desk or a vanity. It could easily be both! Either way you use it, it was SO much fun to build.

This space saving, multipurpose DIY desk project features a flip top, a flip front, two drawers and a center section for storage.

Wooden vanity desk with flip top open with mirror--two drawers on each side on a modern style base

It’s perfect for small spaces, but can be easily modified if you need it a little bigger.

I actually built it because I had so many requests from people wanting plans to build a small, simple DIY makeup vanity for their daughter, granddaughter, and/or niece.

So I made this one compact–big enough to grow into, but not too big to crowd a room.

And even if you don’t want this for a makeup vanity, it’s a great little desk as well. The center section is perfect for storing pencils, notebooks, etc.

I’m so excited to share the building plans for this DIY vanity desk with flip top! So if you’re ready to get building, let’s dive right in. Here’s what you’ll need.

Tools & Materials:

*This post contains affiliate links. See policies page.

Tools:

  • Miter Saw
  • Drill/Driver
  • 90 degree driver attachment
  • Circular Saw and cutting guides (Kreg Rip Cut & Kreg Accu-Cut)
  • Pocket Hole Jig
  • Dowel Jig (optional)
  • Table saw (optional)
  • Clamps
  • Sander

Materials:

  • (1) 4×8 sheet ¾″ plywood
  • (1) 2×4 sheet ¼″ plywood (quarter of a sheet)
  • (2) 2x2x8 boards
  • 1 ¼” pocket hole screws
  • 1 ¼” & 2 ½″ wood screws
  • Wood dowel pins OR 2 ½″ pocket hole screws (to assemble base)
  • (2) pair full overlay concealed hinges for frameless cabinets
  • (2) pair 14″ ball bearing drawer slides
  • 12″ diameter (or other size as desired) mirror and mirror clips
  • Wood Glue
  • Edge banding (optional)
  • Wood finish

What to consider before building a DIY Vanity Desk

This was a simple project using pocket hole joinery and basic materials. However, it combined several additional elements like the concealed hinges (for the flip top) and the drawers.

So overall, I’d consider this an intermediate level build.

Overall Dimensions:

The overall dimensions of the DIY vanity desk are 16 ¾″ deep x 30″ tall x 43″ wide.

Overall dimensional diagram of vanity desk when closed

But with the top flipped open, the overall height is 46″.

Dimensional diagram of vanity desk with flip top open

Standard desk height is 30″ for adults. So this vanity desk is standard height, but I recommend using a 16″ or shorter chair with this desk to allow for ample leg room.

Before building, check out the end of the video below for additional tips on sizing of this desk.

If you plan to use this as a vanity with a mirror installed, first, sit whoever will be using it in the chair they plan to use with it and measure the eye height from the ground.

Compare this to the 46″ overall height of the vanity with flip top open and make sure the mirror height will be adequate.

Keep in mind that you can also try accordion and tilting-style mirrors to offer additional flexibility with mirror location and height.

Mirror Sizing

Ideally, a 12″ diameter mirror would work best for this. In my photos, I’m using a 10″ mirror (it’s all I had at the time haha).

The inside opening of the center section of the desk is only 13″, so if you get a mirror much larger than 12″, it won’t fit to close properly–it will hit the top of the flip front piece.

But, if you wanted, you could cut the flip front panel a little shorter to allow for some extra room for the mirror so they don’t hit when it’s closed–that’s just one way to allow for a larger mirror.

Or you can make the center section a little deeper–that’s another way to allow for a larger mirror.

You can also consider installing a tilting style mirror for more flexibility with the mirror location. Check out the end of the video below for additional notes.

Helpful Resources to Use with This Project

You may find these articles helpful while building:

  • How to cut your own 2x2s
  • How to cut plywood sheets
  • How to apply iron on edge banding
  • How to use a pocket hole jig
  • How to build and install drawers
  • How to install concealed hinges

How to Build a Flip Top Vanity Desk

I’m sharing the step by step tutorial to build this DIY vanity desk below, but if you prefer to watch, I’ve also got a video here.

The video has tons of helpful tips and additional notes you may find helpful.

And if you’re looking for printable plans, I’ve got those too! Grab them here:

Step 1: Assemble Back and Sides

I guess, actually, the first step is cutting down the ¾″ plywood sheet into more manageable pieces to work with. I’ve shared the plywood cut diagram in the printable plans.

I used a circular saw and Kreg Rip Cut and Accu-Cut guides to cut down my plywood sheet. You can check out how I cut down my plywood sheets here.

Shara Woodshop Diaries using circular saw and Kreg Rip Cut to rip plywood sheet

Because I was staining this project, I wanted to make sure to cover up the exposed plywood edges.

So, at each step as I added different pieces, I paid close attention to which edges will be showing in the finished project and applied iron on edge banding to these.

Close up of edge banded vs not edge banded plywood panel

Edge banding is totally optional, but it covers the plys and makes things look a little cleaner. It stains just like wood, so if you’re staining your project, it’s a great option.

RELATED: How to apply iron on edge banding to hide plywood edges

In this step, I was assembling the back and sides. So I edge banded the top edge of the back panel and the front edges of the side panels. These will be exposed in the finished project.

Diagram showing how to attach DIY vanity desk back panel to sides

Once I had my back and side pieces cut down and edge banded, I drilled ¾″ pocket holes into the ends of the back piece and attached it between the side panels using 1 ¼″ pocket hole screws.

RELATED: How to drill and use pocket holes

Step 2: Install Bottom Panels

Then, I cut two ¾″ plywood bottom panels to go into each corner. I edge banded the front edges of these since they’ll be exposed in the finished project.

To install, I drilled ¾″ pocket holes along the long edges and one of the short edges of both panels.

Close up of Ryobi drill drilling pocket holes on Kreg 720 Pocket Hole Jig

Then, I screwed these into each corner flush to the bottom edge using 1 ¼″ pocket hole screws.

Shara Woodshop Diaries installing bottom panels into DIY vanity desk frame using pocket holes

Step 3: Install Inside Panels to Vanity Desk

Next, I added two panels to the inside of these bottoms–shown in green below. I edge banded the front edges since these will be exposed in the finished project.

Then, I drilled ¾″ pocket holes along the back edge and secured it to the back panel using 1 ¼″ pocket hole screws.

Diagram showing how to attach inside panels on desk

Once it was screwed to the back, I drove 1 ¼″ pocket hole screws through the bottom panel to secure it there as well.

Shara Woodshop Diaries driving pocket holes in bottom panel of vanity desk build

This is a tight space, so I had to use a shorter driving bit. You could also use a 90 degree drill attachment as well.

Step 4: Add Top Supports

Then, I added some top supports into these two outside sections using ¾″ pocket holes and 1 ¼″ pocket hole screws. These are basically there in order to attach the top panel later.

Diagram showing top supports in makeup vanity assembly

Note that the front edge of two of these pieces will be exposed in the finished project, so I edge banded these.

I actually had to temporarily remove these later in order to install the base, but we will get there in a minute. If you wanted to wait to install these until after the base is attached, that would work fine.

Step 5: Install Center Section of Flip Top Vanity Desk

Now that the outside sections are built, it’s time to turn to the center section.

I added two pieces of ¾″ plywood on each side using wood glue and 1 ¼″ wood screws. These will be the sides of the center section.

Diagram showing where to attach center supports in makeup vanity desk

Notice that I made them only 13″ deep–so this center section will be inset from the two outside sections.

I did this because I thought it would add some extra dimension and look neat. But also, this allows the flip front not to stick out so far in the front when it’s open.

Once the two side pieces were installed, I flipped this whole thing upside down and installed the bottom panel to the underside using wood glue and 1 ¼″ wood screws.

Shara Woodshop Diaries installing center bottom panel into desk

Notice again which edges will be exposed–I edge banded all exposed edges before installing.

Step 6: Assemble Vanity Desk Base

The base of this desk was built using 2x2s. I mitered the ends of the legs 5 degrees so they slanted just slightly inward at the top. This is optional.

You could certainly assemble this using pocket holes and screws, but I didn’t want to worry with seeing or plugging the pocket holes, so I used wood glue and dowels.

First, I cut the legs and the two side stretchers and laid them out on the workbench so I could mark where to drill the dowel holes.

Shara Woodshop Diaries marking dowel locations on sides of desk base

Then, I used a dowel jig to drill dowel holes at these locations. The video shows this process in more detail.

Close up of Ryobi drill drilling dowel holes using a dowel jig

Once the holes were drilled, I assembled two identical sides like shown using wood glue and dowel pins.

Dimensional diagram showing how to assembly the makeup vanity desk base sides

After the glue was dry, I cut another piece of 2×2 to run along the back. Note that the ends on this back piece are mitered 5 degrees to match the angle on the legs.

I attached this between the two sides using wood glue and dowels and when I clamped, I made sure to keep the sides square to the back using corner clamps.

Shara Woodshop Diaries gluing up vanity desk base with corner clamps

But, again, you can certainly use pocket holes and screws to assemble if you prefer not to deal with dowels and messy glue ups.

Step 7: Attach Vanity Desk to Base

After the glue was dry on the base, I sanded to remove any leftover glue residue and squeeze out. Then, I applied wood glue to the tops of the legs and placed the desk assembly from step 5 on top so that it was centered.

Here is where I had to temporarily remove the top supports in order to be able to get into these small spaces to attach the base.

So I removed the pocket hole screws and set these pieces aside, then predrilled and drove 2 ½″ wood screws through the bottom panels into each leg.

Ryobi driver driving screw through bottom panel into desk leg

Then, I replaced the top supports back where they went into the same screw holes–which made it really easy.

Modern base attached to vanity desk top

Step 8: Install Drawer Slides

In order to add the drawers, I installed 14″ ball bearing drawer slides into the two drawer sections so that they were ¾″ inset from the front edge.

Close up installing drawer slides into desk

For more information on installing drawer slides, check out this drawer building guide.

Step 9: Build and Install Drawer Boxes

Building drawers is always my favorite part of every project! If you aren’t familiar with my drawer building process, I’ve got a step by step drawer building guide here.

I cut my drawer box sides from ¾″ plywood and my drawer bottoms from ¼″ plywood.

I like to cut dadoes to install the bottom panel into, but if you don’t want to mess with cutting dadoes, you can certainly glue and screw (or nail or staple) the bottom in place instead.

Shara Woodshop Diaries installing bottom panel into drawer box

Then, I assembled the boxes using ¾″ pocket holes and 1 ¼″ pocket hole screws.

All the drawer measurements can be found in the printable plans.

Shara Woodshop Diaries assembling drawer box using pocket hole screws

Once the drawer boxes were assembled, I installed them onto the slides. This drawer building guide details step by step how to install drawer boxes onto side mount slides just like this.

Shara Woodshop Diaries installing drawer box into slides

Step 10: Attach Drawer Fronts

I cut my drawer fronts from ¾″ plywood. These should be ¼″ smaller in height and width than the openings since they will be inset. This allows for ⅛″ gap around all sides once installed.

Now, there are tons of techniques for installing drawer fronts evenly, but honestly, I usually just eyeball it. I placed the drawer fronts inside the opening so that the gaps around the sides all looked even.

Then I held it tight while I drove a screw through the inside of the drawer box to secure it in place.

Ryobi driver driving a screw to secure drawer front from inside the drawer box

After the first screw was in, I made sure the spacing stayed right, then pulled the drawer out (for easier access) and installed a second screw.

Step 11: Add Vanity Desk Top

When the desk is closed, I wanted the top to look like one solid piece. There will obviously be some small gaps between the sides and the middle flip top, but I wanted the grain pattern to at least match across the top.

So, I cut a whole piece of plywood the overall size I wanted the top to be–16 ¾″ x 43″. Then, I cut it into three sections–the two outside pieces and the center flip top piece.

Diagram showing where to cut top panel for flip top desk

I edge banded all three pieces, then arranged them on the desk to make sure I installed them so that the grain pattern matched all the way across.

In order to access the inside to install the top side panels, I had to remove the drawers. The drawer slides have these little tabs on the side that allow you to easily slip them in and out.

Once they were removed, I made sure the top panels on the sides were flush to the back edge and flush to the inside edge of the drawer sections.

Then, I installed using 1 ¼″ wood screws through the top supports. This is a really tight fit, so I had to use a 90 degree drill attachment. These are handy to have for driving screws in tight spaces!

Shara Woodshop Diaries installing top side panels onto makeup vanity build

I used a couple screws in the front and back to attach both sides. Then, I could reinstall the drawers.

TIP: Don’t put the drawers back without first adding a knob or a pull to them or else you’ll have a really hard time getting them back open.

Step 12: Install Flip Top

The middle section left from step 11 will be the flip top. I made sure I knew what direction it needed to be installed, then used a Kreg concealed hinge jig to drill out cup holes to install the hinges on the back bottom side.

I installed concealed hinges for frameless full overlay doors onto this panel.

Close up installing concealed hinges to flip top section of desk

Then, I screwed the hinges to the back panel of the desk. Concealed hinges typically come with screws that allow for adjustments in all three directions–X, Y, and Z.

Shara Woodshop Diaries installing hinges to back panel for flip top

I adjusted the hinges as needed until it opened and closed smoothly and the panels were all aligned.

Step 13: Install Flip Front

The flip front was just a repeat of adding the flip top. I cut a piece of ¾″ plywood to fit across the front of the center section and installed concealed hinges for frameless full overlay doors.

Ryobi driver installing concealed hinges to add flip top to vanity desk

Then, I screwed the hinges to the bottom center panel and adjusted as needed for proper function and spacing.

Step 14: Finish and Add Mirror

Now all that was left was finishing and adding the mirror (if desired). I wasn’t really thinking when I installed the flip top and front and decided that it might be easier to stain if these weren’t attached.

So I removed them and stained the pieces separately. However, since the screw holes were already there for where they needed to go, it was really easy to just screw these right back on after the stain was dry.

I applied a coat of Minwax Early American stain to the desk, then reattached the flip sections.

RELATED: How to finish raw wood furniture without a sprayer

DIY wooden makeup vanity desk with top closed stained in Early American with

All that’s left now is adding the mirror. I discussed the mirror in the notes earlier in this post. You can use other sizes, but a 12″ diameter mirror seems to fit best.

Depending on the particular mirror you use, the manufacturer may recommend a different mounting method, but for basic, flat mirrors, I recommend using mirror clips to install.

Make sure to install the mirror on the flip top so that it doesn’t interfere with the flip front when it’s closed.

Flip top makeup vanity desk with top open and mirror attached with chair

Of course, the mirror is optional–if you aren’t using it as a makeup vanity, feel free to skip that part!

Looking for More DIY Desk Ideas?

This simple makeup vanity build was so much fun. But maybe it’s not quite what you were looking for?

Here are some more simple desk ideas you might enjoy!

DIY Keyboard Desk
DIY Computer Desk
DIY Writing Desk
Easy DIY Desk

If you enjoyed this project and want to be the first to know when new projects and plans come out, be sure to subscribe to the free newsletter below!

Don’t forget to pin this project or share it to your favorite social channel to save it for later!

Pinterest collage showing closed makeup vanity desk at top and open makeup vanity desk at bottom with text "how to build a vanity desk with flip top"

Until next time, friends, happy building!

20 DIY Storage Cabinets for Your Home

January 31, 2023 by Susanne Stewart

image collage of eight diy storage cabinets

Looking for storage solutions for your home?

Here are 20 DIY storage cabinets for every room in the house to inspire you.

image collage of eight diy storage cabinets

I have built my fair share of storage cabinets. You might say I’m a little obsessed with storage solutions…and building haha.

When you live in a small garage apartment (like we did for three years), you have to be strategic with small spaces and having enough storage is key.

I have made a lot of home storage solutions over the years. Projects for the bathroom, bedroom, kitchen, office and workshop.

Let’s take a look at 20 DIY storage cabinets you can make to help get your home organized and stylish this new year.


DIY Storage Cabinets You Can Build


1. DIY Sliding Door Cabinet

This DIY Sliding Door Cabinet is simple to create and purposeful in so many ways.  

It’s a great way to add some extra storage to your kitchen or pantry. But it would also make a great console in a dining room or even in your living room as a media cabinet.  

The adjustable shelves provide flexible storage and the sliding doors are a fun addition to add some rustic charm.

But they’re also great for hiding what’s behind them.


Get the plans!


2. DIY Display Cabinet with Drawer

I have had this project on my “to build” list for SO LONG. This storage cabinet is the perfect home storage solution for any space. 

Use it as a linen cabinet in the bathroom, display your favorite dishes in the kitchen, or show off your decor in a living space.

Check out the plans!


3. DIY Modern Console Cabinet

I love this DIY modern console cabinet. You can even use it as a sideboard cabinet in the dining room.

This piece would be perfect for a media cabinet or TV stand. It’s got plenty of storage behind those doors for added home organization.

Build your own!


4. DIY Custom Closet Cabinets

Are you ready to turn your boring closet into a space with functionality?  

These DIY Custom Closet Cabinets and built-ins will add both storage and style to your basic walk-in closet.

Organize your closet!


5. DIY Wardrobe Armoire Cabinet

DIY Wardobe with Drawer

This DIY Armoire Wardrobe Cabinet is made from basic 2x4s and plywood!

It’s so much more than a storage cabinet.  It’s a home storage solution that can have purpose in any room you choose. 

With built-in shelving and a storage drawer below, it will give you all of the organizational space you need.

Get the plans!


6. DIY Cane Linen Cabinet

For whatever reason, I’ve been obsessed lately with tall, skinny cabinet designs.  

This storage cabinet would make the perfect addition to a bathroom to store and hide all of your necessities. 

The cane webbing gives a personal touch to this bathroom storage cabinet idea.

Build your own!


7. Home Office DIY File Cabinet

This is a very basic cabinet that works well as a file cabinet to store all of your office paperwork and supplies.  

It could also make a nice printer cabinet, or even a side table or nightstand to give you added home organization.

Check out the plans!


8. DIY Dresser/Desk with Pull-out Storage Seat

DIY dresser desk with pull out storage cabinet seat

Need a dresser AND a desk?? Build an all-in-one with this genius DIY Dresser Desk with pull-out storage seat!

Nothing screams home storage solution louder than this multi-purpose dresser.  You get storage, a desktop, and a seat as an added bonus.  

Get the plans!


9. DIY Pocket Door Cabinet

This DIY Pocket Door Cabinet looks simple from the outside. But when you open it up…WOW!

The doors slide back into the cabinet and out of the way! How cool!

They work great as simple stand alone cabinets to give you the perfect home organization.

Build your own!


10. DIY Linen Cabinet with Glass Door

I was in search of the perfect bathroom storage that was functional and spacious. Plus, the glass door gives it character! 

So, I put together this little linen cabinet that can house all of my bathroom things (plus some!)

Check it out!


11. DIY Closet Cabinets

Need more closet space and organization? Who doesn’t, am I right?! DIY storage cabinets are the perfect solution.

If you’re living in a home with little to no closet space…or maybe you just have more clothes than you know what to do with.

Add some closet space with these easy DIY cabinets. They certainly were a huge help for us when we lived in the garage apartment.

Plans are here!


12. DIY Coffee Cabinet

Want to add a unique DIY coffee cabinet to your kitchen? 

I am loving how simple yet functional this coffee cabinet is.  It has so much storage space with a cabinet door and storage drawer.  

Check it out!


13. How to Build Base and Pantry Cabinets

After unpacking most of my stuff in the new shop, I still had some paints, spare parts, and just some odds and ends items with nowhere to go.

So I built these base and pantry cabinets and I loved the way they turned out.  It gave me space to work and so much added storage for organization.

If you’re looking to add cabinets to your shop, kitchen, or just make a built-in, this is a simple way to go about it–using only plywood. 

Here are the details!


14. DIY Kitchen Cabinets from Plywood

Building your own DIY kitchen cabinets seems like a pretty intimidating project…or is it just me?  

But, you know what I found out??  Building your own DIY cabinets is really an easy project to take on.

It’s totally doable with just a few basic tools and some good quality plywood…oh and patience!

See them here!


15. Aquarium Cabinet Stand

How to Build a DIY Aquarium Cabinet Stand

When Danny decided he wanted a “man cave” with an aquarium, that meant I was tasked with building him a new DIY aquarium cabinet stand.

I built this stand to be extra sturdy since it was going to be holding quite a bit of weight with all the water.

Even though I built it to hold an aquarium, it would also make the perfect storage cabinet, TV stand, coffee bar, or whatever you need a little extra storage space for.  

Build your own!

16. DIY Tilt-Out Laundry Hamper Cabinet

DIY Tilt Out Laundry Hamper Cabinet with Storage and Two Hamper Sections--Free Building Plans and Video Tutorial on Woodshop Diaries

Are you needing extra laundry room storage space?  This DIY tilt-out laundry hamper cabinet is the answer!  

It’s got two tilt out sections and a middle storage cabinet for extra organization. Plus there is top space to fold your clothes!

Get the plans now!

17. DIY Console Cabinet with Open Shelf

How to build a Gorgeous DIY Console Cabinet

In a world where chalk paint is the queen of Pinterest and furniture makeovers are the hottest trend, I was so glad that the friend that asked me to build this project wanted it left natural!

This console cabinet is the perfect addition to any space you need as it gives you a place for all of your home organizational needs between the cabinet space and also the open space below.

Get the plans!


18. Mid Century Modern DIY Pegboard Cabinet

How to build a Mid Century Modern Pegboard Cabinet

I’ve always had a bit of a “retro style.”  So, digging deep back into 2017, this pegboard cabinet was a fun build!

This storage cabinet is simple to make using only two sheets of plywood!  It is sure to give your space personality and plenty of storage space!

Go retro!


19. DIY Entryway Cabinet

DIY Entryway Cabinet or Shoe Cabinet with a super cool door design!

I  believe that everyone needs a good entryway cabinet!  A place to lay your keys, mail, odds and ends.  But, also a place to hide the mess.

This entryway cabinet gives you so much needed storage for all of your needs not to mention it’s BEAUTIFUL! 

The cabinets give you a place to store blankets or pillows while the drawer gives you a place to lay your keys out of sight but safe keeping!

Build it!


20. DIY Garage Storage Cabinet

When it comes to workshops and garages, they can never have enough storage.

So since it’s impossible to have enough storage space, the key is organization… *wink wink*

This Lazy Susan DIY Garage Storage Cabinet has a place for everything–with added storage for larger items at the bottom, smaller items at the top, and pegboard for items on the side.

Get organized!

I hope this list of DIY storage cabinets inspires you to build your own! Which one is your favorite?

Don’t forget to pin for later!

image collage of eight diy cabinets with text overlay "DIY storage cabinets for every room in your home

DIY Hall Tree with Shoe Storage Bench

January 26, 2023 by Shara, Woodshop Diaries

In this post, I’m sharing how to build a DIY hall tree bench with shoe storage!

This is perfect for a mudroom, entryway, extra wide hallway, or even a double door closet space.

Shara Woodshop Diaries hanging jean jacket on coat hook of DIY mudroom hall tree with storage bench

It’s the perfect place to sit down and take off your shoes or drop your coat after a long day.

The open cubbies in the storage bench seat and basic trim design on the back make this a simple, straightforward build.

Plus, it’s easy to customize the sizing if you need to make it bigger or smaller to fit your space.

This DIY hall tree bench fits any décor style–farmhouse, modern, traditional. But, you can change up the trim, add drawers, and switch up the colors to customize it and make it your own.

I’m sharing how to build your own in the post below!

Tools & Materials:

*This post contains affiliate links. See website policies.

Tools:

  • Circular Saw
  • Cutting Guides–Kreg Rip Cut & Kreg AccuCut used here (optional, but helpful)
  • Miter Saw
  • Pocket Hole Jig
  • Drill/Driver
  • Brad Nailer

Materials:

  • (3) 4×8 sheets ¾″ plywood *see notes below
  • (5) 1x4x8 boards
  • (1) 1x3x10 board
  • (1) 8′ piece crown molding (any size crown works, but I used 3 ¼″)
  • Wooden Coat Hooks
  • Edge banding (optional)
  • 1 ¼″ pocket hole screws
  • 1 ¼″ wood screws
  • 1 ¼″ brad nails
  • Wood Glue
  • Wood Filler, caulk, and wood finish of your choice
  • 2 ½″ – 3″ screws to secure project to wall studs

What to know before building a DIY hall tree bench

Building this DIY mudroom storage bench is an intermediate level project. The assembly is simple using pocket holes and screws and brad nails.

However, it’s a fairly large project and involves several pieces of trim that may require a little cutting to fit.

Plywood Cuts

You can find the complete plywood cut diagram in the printable plans below.

This project can be made from three 3×8 sheets of ¾″ plywood. I recommend using cabinet grade hardwood plywood for this–like birch, maple, or oak.

Besides the bench seat, you can build this entire project with just two sheets of plywood.

RELATED: How to cut plywood sheets with a circular saw

Shara Woodshop Diaries using Kreg Rip Cut to cut plywood sheet

But, if you cut the seat from plywood, you’ll need a third sheet–and you’ll have almost ¾ of it leftover. I use a bunch of plywood in my shop, so I don’t mind having scraps.

But if you didn’t want to buy a whole sheet just to cut the seat from, you can certainly just glue up a solid panel using 1x material instead.

Trim & Seat Overhang

The plans here assume that this hall tree will be on a blank wall and that both the left and right sides will be open.

However, if you plan to place this in a corner where the left and/or right sides will be against a wall, you can.

Just note that you will probably not want to wrap the crown molding around that side and you’ll want to install the bench seat without overhang on that side.

Diagram showing how to handle hall tree bench seat overhang and crown molding if placing in corner

That way, this can sit flush against the wall.

Installing the Hall Tree Storage Bench

This project is built as a single piece unit. That means that the finished project will be heavy, but easier to install.

This should be securely installed to the wall once completed to prevent tip over. You’ll need to cut away the baseboard to allow it to sit flush to the wall.

Use 2 ½″ – 3″ wood screws through the back panel to secure to the wall studs–at least two screws at the bottom (inside the bench) and two screws through the back panel toward the top.

If you don’t want to see the visible screws in the back section, one alternative option is to use some corner brackets behind the crown molding.

Make sure to install securely to the wall studs and the back panel.

Overall Dimensions

The overall dimensions of this DIY hall tree bench project are approximately 20 ¼″ deep (at the seat), 80″ tall, and 61 ½″ wide (including the crown molding).

Overall dimensional diagram if DIY hall tree bench

The overall width of the bench and back panel (not including the crown molding) is 57″.

Helpful Resources For This Build

You may find these guides helpful to reference throughout the project.

  • How to Cut Plywood Sheets
  • How to Use a Pocket Hole Jig
  • How to Cut Crown Molding
  • How to Apply Iron On Edge Banding
  • How to Finish Raw Wood Furniture

How to Build a Mudroom Hall Tree with Shoe Storage Bench

If you’re ready to dive in and get building, let’s go! I’ve got the step by step guide below.

But if you prefer to watch instead of read, I’ve also got the video tutorial here that includes some helpful tips on the painting process.

YouTube thumbnail for hall tree and storage bench build video

And if you prefer to print your plans, you can grab the printable building plans for this project here:

Step 1: Assemble Hall Tree Storage Bench

The main body of the storage bench is made from ¾″ plywood. I kept things simple by just basically building a short cabinet with three sections.

So I cut seven pieces of ¾″ plywood to 18″ square, then cut 6 strips to about 3″ wide x 18″ long.

Plywood pieces to assemble storage bench stacked on workbench

The 6 strips don’t have to be exactly 3″ wide. They’ll be the top supports and the width isn’t critical as long as they are 18″ long.

The complete cut list and cut diagrams can be found in the printable plans for this project.

I drilled ¾″ pocket holes into the ends of the 6 top supports and into the ends of THREE of the 18″ square panels.

RELATED: How to use a pocket hole jig

Drilling pocket holes in the Kreg 720 to assemble storage bench

Once the holes were drilled, I assembled the bench using 1 ¼″ pocket hole screws.

Shara Woodshop Diaries assembling hall tree bench using pocket holes and screws

I installed the bottom panels 3 ⅜″ up from the bottom edge and added two top supports in each section–one at the front and one at the back.

Dimensional diagram showing how to assemble hall tree bench

Step 2: Assemble Face Frame

Once the bench body was together, it was time to add the face frame.

I built the face frame from 1x3s and a 1×4. I used a 1×4 on the bottom, but used 1x3s for the top and dividers.

This face frame’s overall size should match the front dimensions of the bench, so it’s best to measure first, then build the face frame to fit.

I cut my pieces down–one 1×4 for the bottom, one 1×3 for the top, and four 1×3 dividers–and drilled ¾″ pocket holes into the ends of the divider pieces.

Shara Woodshop Diaries assembling face frame on workbench using pocket holes

Then, I assembled using 1 ¼″ pocket hole screws.

Step 3: Attach Face Frame

Once the face frame was assembled, I flipped it over and made sure it fit over the front of the bench first.

Always test fit before gluing–glue is not very forgiving once it’s dry.

Then, I applied some wood glue on the edges, placed the frame on, and used brad nails to secure it.

Shara Woodshop Diaries installing face frame onto front of storage bench with brad nailer

I used several brad nails around the edges and into the dividers. Once it was nailed on, I used some wood filler to putty over the nail holes and to smooth out the joints.

Step 4: Assemble Back Panel

I made the back panel from ¾″ plywood and I made it 6′ 6″ tall. However, it needed to be the total width of the bench, which was 57″.

A standard plywood sheet is only 48″ wide. So that meant that I needed to piece this panel together.

I cut one piece that would fit over two sections of the bench and a second piece that would make up the difference.

This way, the seam would be on a divider and could be hidden.

Plywood panels laid out on floor to assemble back panel from

To attach them together as one solid piece, I drilled ¾″ pocket holes along the edge of one piece and used wood glue and 1 ¼″ pocket hole screws to attach it to the other piece.

Assembling large plywood panel with pocket holes and screws

Step 5: Install Back Panel

After the glue dried on the back panel, I installed it onto the back side of the bench.

Large ¾" plywood back panel clamped onto storage bench frame

I faced the pocket holes toward the front because they’ll be hidden by trim in a later step. But you can put them on the back side as well.

I used 1 ¼″ wood screws to secure the back panel to the back side of the bench in several places along the sides, back and top.

Be sure to predrill to avoid splitting the plywood!

Shara Woodshop Diaries screwing back panel to storage bench on back side

Once this large panel was on, it became kind of top heavy, so be careful not to tilt it over.

Step 6: Cut and Install Storage Bench Seat

I cut my bench seat from ¾″ plywood, but you could also glue up a solid panel from 1x material if you didn’t want to use plywood. Dimensions are detailed in the printable plans.

See notes in the “what to know before building” section above about overhang.

I applied iron on edge banding to cover the plywood edges.

RELATED: How to cover plywood edges with edge banding.

Then, I test fit it on the bench but I didn’t screw it in place…yet. Since I was painting the back, but not the seat, it made things much simpler to finish if the seat wasn’t installed.

plywood hall tree build progress showing bench seat placed on top

However, the trim on the back side needs to sit ABOVE the seat when it’s installed.

So I used the seat as a “spacer block” to place the trim in the next step, then removed it to paint. Once the paint was dry, I placed this seat back on and secured it in place.

That said, you can go ahead and install the seat now, or later. But to install it, I used 1 ¼″ wood screws through the top supports on the inside of the bench.

Step 7: Add Back Panel Trim

The trim on the back panel was cut from 1x4s. You can certainly customize the trim style, spacing, size how you’d like.

But I kept it simple and just framed out the edge and added pieces inside to divide it into 6 sections–3 large at the bottom and 3 small at the top.

Remember to place this trim ABOVE the seat. I cut and installed the two outside pieces first using wood glue and brad nails.

Shara Woodshop Diaries brad nailing trim pieces on back panel of hall tree coat rack panel

Then, I added the bottom–again, ABOVE the seat–using wood glue and brad nails.

Shara Woodshop Diaries installing bottom piece of trim on back panel of hall tree

Then, I began working my way up installing the rest of the pieces, cutting to fit each one for a tight fit.

Shara Woodshop Diaries installing middle trim on back panel of hall tree

Once all the pieces were in place, I used some wood filler to putty over all the nail holes and joints.

After the filler had dried, I sanded everything well. If painting, it’s important to smooth out all the joints as even as possible for a seamless and clean looking paint job.

Step 8: Add Crown Molding

Once the back was sanded well, I applied crown molding around the top.

This is optional and you can customize your trim choices how you’d like. I cut to fit my crown molding pieces on the front and sides, then used wood glue and brad nails to install.

RELATED: How to cut crown molding on a miter saw

Shara Woodshop Diaries applying wood filler to nail holes on crown molding

And again, I used wood filler to fill the nail holes and smooth out the corners.

Step 9: Finish and Install DIY Hall Tree Bench

I sanded any remaining wood filler smooth and removed the bench seat to prep for paint.

Then, I primed and painted the back panel, and the sides and front of the bench. I didn’t paint the inside of the bench.

Shara Woodshop Diaries applying paint to back panel of hall tree

Paint color here is SW Garden Sage.

You can check out my painting process in the YouTube video and check out my tips for painting raw wood furniture in this post.

Between coats of paint, I applied a clear coat poly to the inside of the bench and to the bench seat.

Once all finish was dry, I placed the bench seat back on and secured it.

Shara Woodshop Diaries installing bench seat using screws from the inside

And the final step was adding some wooden coat hooks along the back side to give a place to hang coats, hats, purses, etc.

And then it was time to move it to where it’s going and secure it to the wall.

I built this for a friend, so I didn’t install it here. However, this should be secured to the wall when it gets to it’s destination.

Completed three section hall tree with storage bench painted green with wood seat and wooden coat hooks

You’ll need to trim and remove the baseboard where this will sit so that it can go flush against the wall. Once it’s against the wall, you can use wood screws to secure it to the studs.

Looking for More Entryway Projects?

I absolutely love how this turned out. It’s a simple design and a simple build, but will really dress up an entryway and make it more functional.

I hope you enjoyed watching this DIY hall tree bench come together and if you want to build your own, don’t forget to grab the plans here!

If you want to check out more entryway projects, here are a few favorites I can recommend:

Simple Bench with Shoe Shelf
DIY Storage Bench
One Board Shoe Bench
Scrap Plywood Coat Rack
DIY Accordion Coat Rack
DIY EASY Coat Rack

Stay up to date on all the latest projects and plans by joining our FREE newsletter!

If you’d like to save this for later or share with a friend, be sure to pin it or share it to your favorite social channel.

Pinterest collage showing overall dimensional diagram at top with completed hall tree storage bench at bottom with text "how to build a hall tree & storage bench with building plans"

Until next time, friends, happy building!

Easy Scrap Wood Key Holder Catch All Tray

January 14, 2023 by Shara, Woodshop Diaries

In this post, I’m sharing how to build a simple table top key holder and catch all tray!

Walnut and red oak key holder catch all tray with pegs and bookends to contain books and mail sitting on wood surface next to vase with faux flowers

Do you have a place in your home where you dump your keys, glasses, junk mail, and other odds and ends?

Maybe it’s on an entryway table, a desk, the kitchen island, a nightstand…or all of the above HA!

I got tired of my keys, glasses, guitar picks, and USB adapters laying around everywhere and decided to make a simple scrap wood organizer to keep them all contained in one spot.

This simple catch all has pegs for hanging keys and glasses, a place on the side for books and mail, and a flat surface on the bottom where I can keep my random odds and ends.

It makes a great addition to your nightstand, entryway table, kitchen counter, or your desk to help you stay organized.

Best of all, it’s a quick and easy project that you can make from your scrap pile! I’ll share how I made it below, so let’s dive in.

Tools & Materials:

*This post contains affiliate links. See website polices.

Tools:

  • Miter Saw
  • Drill/Driver
  • Countersink Bit
  • Forstner Bits (½″ & 1 ¼″)

Materials:

  • Wood Scraps (1×8 board, ½″ diameter wood dowel & 1 ¼″ diameter wood dowel)
  • Wood Glue
  • Painter’s Tape
  • 1 ¼″ screws

What to know before building

This is a super quick project you can easily complete in just an hour or two. (And most of that time is spent waiting for glue to dry!)

The size is completely customizable to fit your needs, and you can likely find all the lumber you need in your scrap pile.

For this project, you only need about 32″ of 1×8, but you could also use ¾″ plywood pieces, 1×6, 1×10, or whatever width board that you have on hand.

I used walnut for the tray portion of this build and red oak for the dowels. However, any wood type would work fine.

Walnut board and red oak dowels lying on work surface--materials for key holder tray

Using different woods for the dowels and tray was a fun way to add some contrast.

Overall Dimensions

The overall dimensions of this project are approximately 7 ¼″ deep, 10″ tall, and 16″ long.

Overall dimensional diagram showing overall size of key holder catch all tray

How to Build a Catch All Tray and Key Holder

Grab your wood scraps and let’s dive in!

This is a great beginner level project to help you get some experience with using a miter saw and a drill.

Cut List:

For this build, you’ll need to cut the following pieces.

1×8:

  • (1) piece 16″ long (one end beveled 45 degrees)
  • (1) piece 4 ½″ long (one end beveled 45 degrees)
  • (1) piece 9 ¼″ long

Dowels:

  • (1) 1 14″ diameter dowel @ 11 ¼″ long
  • (4) ½″ diameter dowels @ 2″ long
Walnut pieces cut to size from cut list lying on work surface with tape measure

Step 1: Assemble Main Catch All Tray Body

First, I cut the two 1×8 pieces that will make the bottom and short side of the catch all tray.

So I cut a piece of 1×8 to 16″ long and another to 4 ½″ long each with one end beveled 45 degrees.

diagram showing dimensions of tray pieces assembled together

I beveled the ends so that I could glue them up as a mitered joint. However, that’s not necessary.

If you’d rather not do that, you can certainly just cut these ends square and use wood screws to join them instead.

I laid these pieces on the workbench so that the long sides butted up next to each other and put some painters tape across the joint.

frogtape painters tape placed along mitered edges of walnut boards

Then, I flipped it over, applied wood glue on the beveled ends and folded them together.

I wiped away the excess glue squeeze out and set aside while it dried. If you want to clamp this, you can, just make sure it stays square while it’s drying.

"Folded over" mitered wood joint with glue and tape

Step 2: Assemble Key Holder Rod

While the glue dried on the tray, I began working on the key holder section.

I cut the wood dowels according to the cut list above and set the 1 ¼″ dowel next to a board. I used that to draw a straight line across the dowel.

Then, I measured and marked along this line where to add the pegs. I marked 2″ from the right end for the first peg, then spaced the rest out every 2 ¼″.

oak dowels and pegs cut to length and laid out on workbench

You can adjust your spacing how you’d like to add more or less pegs. Feel free to customize as you wish.

Once they were marked, I used a ½″ forstner bit to drill holes at these marks. I drilled approximately ½″ deep.

close up of forstner bit drilling holes for pegs

NOTE: Be sure to clamp the dowel securely before drilling!

Then, I applied wood glue to the end of the pegs and installed them into the holes.

wooden dowel pegs glued into holes drilled on rod

Be sure to wipe away excess glue! I made sure they all looked straight, then set this aside to dry.

Step 3: Cut and Prepare Key Holder Panel

I cut a final piece of 1×8 to about 9 ¼″ long. To dress it up a little, I trimmed the top corners at 45 degrees, but you could leave these square if you’d prefer to.

dimensional diagram of key holder bookend panel with dog eared top corners

You could also use a jig saw to cut an arch across the top as well…again, feel free to make this your own however you’d like 🙂

I marked 1″ down from the top at the center and used a 1 ¼″ forstner bit to drill a hole about ½″ deep at that location.

Close up of forstner bit drilling hole for key holder rod

Once the glue was dry on the rod from step 2, I used some wood glue to install it into this hole. A rubber mallet is helpful to tap it in nice and snug.

Installing wood dowel into drilled out hole

Make sure the pegs are straight and facing the right direction before allowing to dry.

Step 4: Install Key Holder to Catch All Tray

The last part is simply attaching the tray bottom from step 1 to the key holder assembly from step 3.

To do this, I used a scrap piece of 1×4 that I had lying around the shop to space the 1×8 piece on the hey holder 3 ½″ from the side edge of the tray bottom.

Dimensional diagram showing spacing between edge of catch all tray and key holder panel

You are welcome to space this differently, but 3 ½″ seemed to hold 2-3 average sized books well.

I drilled predrilled and countersunk holes through the bottom of the tray into the 1×8 of the key holder assembly.

Image showing underside of catch all tray with countersunk holes

Then, I drove 1 ¼″ screws through these holes to secure.

Step 5: Finish Key Tray Organizer

The last step is to apply a finish. You can welcome to paint and/or stain as desired.

Since I was using walnut and red oak, I simply applied a natural oil based finish using Walrus Oil Furniture butter. This just rubs in and gives the wood a nice, rich color and feel.

Completed DIY scrap wood catch all tray with key holder--keys and glasses hanging from pegs with books in side section

And now it’s ready to hold keys, glasses, wallets, mail, books, phones, whatever you need your “catch-all” for!

Looking for More Scrap Wood Organization Ideas?

If you enjoyed this project and are interested in more scrap wood organization project ideas, here are a few favorites!

Tea Box with Mug Holder
Scrap Wood Tiered Plant Stand
Scrap Wood Towel Rack
DIY Guitar Bookends--And Easy and Quick Scrap Wood Project
Scrap Wood Bookends
Floating wall shelves from scrap wood with industrial details
Scrap Wood Wall Shelves
DIY Continuous grain walnut box with tile top
Scrap Wood Keepsake Box

If you’d like to stay up to date on all the latest projects and plans, be sure to sign up for the newsletter for priority access!

Be sure to share this to your favorite social platform or pin it so you can save it for later!

Pinterest collage showing key holder and catch all tray at bottom with dimensional diagram at top with text "build it from scrap wood!" and "DIY key holder & catch all tray"

Until next time, friends, happy building!

EASY SCRAP WOOD KEY HOLDER CATCH ALL TRAY

EASY SCRAP WOOD KEY HOLDER CATCH ALL TRAY

Learn how to build a simple table top key holder and catch all tray! Best of all, it’s a quick and easy project that you can make from your scrap pile!

Materials

  • Wood Scraps
  • Wood Glue
  • Painter’s Tape
  • 1 ¼″ screws

Tools

  • Miter Saw
  • Drill/Driver
  • Countersink Bit
  • Forstner Bits

Instructions

  1. Assemble main catch all tray body.
  2. Assemble key holder rod.
  3. Cut and prepare key holder panel using miter saw.
  4. Install key holder to catch all tray.
  5. Finish key tray organizer by applying a finish.

Learn how to build a simple table top key holder and catch all tray!

Project Type: DIY Home Decor / Category: DIY Scrap Wood Projects

DIY Freestanding Ladder Bookshelf

January 12, 2023 by Shara, Woodshop Diaries

In this post, I’m sharing building plans for this DIY freestanding ladder bookshelf!

*This post is sponsored by The Home Depot as part of the ProSpective Program and contains affiliate links.  See website policies for more information.

Shara Woodshop Diaries placing book onto DIY freestanding ladder bookshelf

A bookshelf is such a fun and versatile project.  You can build them a million ways and use them for a million things.

It doesn’t have to be just for books!  You can use it for towels in the bathroom, dishes in the kitchen, décor in the living room, etc.

I’ve noticed that ladder bookshelves are trending lately and I’ve seen some neat designs that lean against the wall.

But this is a freestanding option that is great for renters or those people who just can’t make up their mind (like me!) and like to rearrange furniture often. 

This design (unlike some of the leaning options) stands on it’s own and doesn’t have to mount to the wall.

And best of all, it’s an easy build! I’m sharing how to make your own in the post below.

Tools & Materials:

Tools:

  • Ryobi ONE+ 18V HP 10” Cordless Compound Sliding Miter Saw
  • Ryobi ONE+ 18V HP Drill/Driver
  • Ryobi ONE+ 18V HP Circular Saw and cutting guides (only needed if you use plywood for shelves)
  • Pocket Hole Jig
  • Countersink drill bit (Kreg Quick Flip used here)
  • Clamps
  • Speed Square

Materials:

  • (4) 2x2x8 boards
  • (4) 1x2x8 boards
  • ½ sheet ¾” plywood OR scrap solid wood boards (see notes below)
  • 1 ¼” pocket hole screws
  • 2 ½” wood screws
  • Wood Glue

What to Know Before Building a DIY Ladder Bookshelf

This is a great beginner building project.  Although it’s fairly large in size, it’s made with simple construction and limited tools.

It can be completed in just a few hours, making it an excellent weekend woodworking project!

Shelving Material Options

Since this bookshelf is angled, each shelf gets deeper as it goes from top to bottom, so they’re not all the same width boards.

The shelves can be cut  from ¾” plywood OR you can glue up solid wood boards to make your own panel(s).

If you use ¾” plywood, you only need a little under ½ of a sheet to cut all your shelves from OR you can use plywood scraps if you have them.

If you use solid wood, you can use a 1×8 for the top shelf, a 1×10 for the second shelf, a 1×12 for the middle shelf.  For the bottom two wider shelves, you will have to join a few pieces (glue them up) as these aren’t standard lumber sizes.

The shelves are roughly 27” long, so if you happen to have some wide board scraps lying around, this would be a great use for them.

You can find the exact dimensions in the plans and the tutorial below for each shelf piece.

Just keep in mind that you can use either plywood or solid wood for these.

Must Have Tools

One of the must have tools for building this project is a miter saw.  It’s the most accurate and efficient way to cut these pieces, especially the angled ones.

For this project, I used this Ryobi ONE+ 18V HP 10” Cordless Compound Sliding Miter Saw.

Ryobi 10" compound sliding ONE+ 18V miter saw cutting plywood shelf

What’s great about it? It runs on the same ONE+ 18V batteries I’ve already been using with my other Ryobi tools.

Since it’s cordless, it’s perfect for on the go, working on projects in the house, and working on projects around the yard (think…garden beds, etc.).

It boasts a 12” cross cut capacity, 47 degrees of miter both left and right, and a 45 degree bevel.  Plus, it can make up to 550 cuts on a single 4.0 Ah ONE+ 18V HP Battery.

Close up of Ryobi 10" Sliding Compound miter saw on workbench

It’s available exclusively at The Home Depot and you can check it out here.  You can also see me using it in action to build this project in the video below.

Bookshelf Overall Dimensions

The overall dimensions of this project are 30” wide, 66” tall, and 16” deep.

Overall dimensional diagram of DIY ladder shelf

Helpful Resources to Use During the Build

  • How to Cut Plywood Sheets
  • How to Use a Pocket Hole Jig
  • How to Cut Your Own 2x2s
  • How to Apply Iron On Edge Banding

How to Build a DIY Freestanding Ladder Bookshelf

I’m sharing tips, details and the step by step written tutorial to build your own angled DIY ladder bookshelf below.

However, if you prefer to watch, I’ve also provided a detailed project video over on my YouTube channel as well.  You can watch it here.

YouTube Thumbnail showing ladder shelf with text "how to build a ladder bookshelf"

And if you prefer to print your plans, I’ve also got the printable building plans available here.

Step 1: Assemble the Side Frames

The framing of the project is build with 1x2s and 2x2s.  The side frames are all 2x2s except for the bottom piece.

The bottom piece is a 1×2.  You could use a 2×2 for this, but I liked the look of the inset 1×2 here.

For the side frames, I cut (2) 2x2s with square ends to 66” long for the back pieces.

Using miter saw to cut 2x2 boards for bookshelf frame

But since the bookshelf angles in from the bottom to the top, the front pieces have to be mitered 8.3 degrees on each end.

I know that 8.3 degrees isn’t marked on the miter gauge so you have to “guesstimate” it.  Set it between 8 and 9 degrees, but a little closer to 8.  Don’t panic if this isn’t exact.

Close up of miter gauge on saw showing 8.3 degrees

I cut (2) 2x2s with mitered ends to 66 ¾” long for the front pieces.

Then, I cut (2) 2×2 pieces to 3 ½” long with one square and one mitered end (8.3 degrees again) for the tops.

And I cut (2) 1×2 pieces to 12 ¾” long with one square and one mitered end for the bottoms.

Diagram showing ladder bookshelf side frame assembly

You can grab the complete cut list and detailed diagrams in the printable plans here.

You can certainly assemble this project using another joinery method if you’d like, but pocket holes work great for this.

I used a pocket hole jig to drill ¾” pocket holes into the ends of the 1×2 pieces.  I only drilled one pocket hole to avoid issues with wood splitting, but I made sure to use wood glue at each joint to prevent twisting.

RELATED: How to use a pocket hole jig

pocket holes drilled in ends of 1x2 boards

I installed the 1×2 piece between a front and back 2×2 using wood glue and 1 ¼” pocket hole screws so that it was 1 ½” up from the bottom.

Shara Woodshop Diaries assembling side frames of bookshelf using pocket holes

I installed the top 2×2 piece using wood glue and 2 ½” wood screws.  I countersunk the hole before driving the screw so that I could use wood glue and a wooden dowel to plug it.

Close up of driving screws in countersunk holes

I repeated this to make two identical side frames.

TIP: Make sure the 1x2s at the bottom are “mirrored” so that once assembled, the pocket holes on both frames face the inside so they’re hidden.

Step 2: Install Back Shelf Supports

I cut ten 1x2s to 27” long and drilled ¾” pocket holes into the ends of each one. 

These pieces will go between the side frames from step 1 and support the shelves.

Five of these go at the back and five go at the front.  I installed the 5 back shelf supports first.

Shara Woodshop Diaries installing shelf support rungs onto bookshelf frame

I used wood glue and 1 ¼” pocket hole screws to secure the 1x2s to the back 2×2 on one of the side frames, then flipped it over and installed them at the same locations to the second side frame.

Ladder bookshelf dimensional diagram showing where to install the back shelf supports

Step 3: Install Front Shelf Supports

Next, I installed the other five shelf supports between the frames along the front 2x2s.

To make sure these were at the same height as the supports at the back, I flipped it on its side on the workbench and used a scrap board and a speed square to mark a line on the front 2x2s.  See video for more details.

Close of of using scrap board and speed square to mark shelf support locations

Then, I worked my way down installing these 2x2s using wood glue and pocket hole screws on each side.

Shara Woodshop Diaries installing DIY freestanding ladder bookshelf support rungs using pocket hole screws

NOTE: I tried to install these so that they were square to the floor and straight up and down—not angled with the 2×2. I didn’t measure this exactly, just eyeballed it to make sure it looked straight.

Step 4: Cut and Prepare Shelves

I mentioned in the notes above that the shelves for this are all different widths.  Each shelf gets 2” deeper from top to bottom.

The top shelf is 7 ¼” deep (which is the equivalent of a 1×8), the next is 9 ¼” deep (which is the equivalent of a 1×10), the next is 11 ¼” deep (which is the equivalent of a 1×12.

Color coded diagram showing shelf sizes getting larger from top to bottom

So if you have some wide board scraps in your shop, maybe you can use these here! Each shelf only needs to be 27” long.

For the bottom two shelves, you can glue up a 1×10, a 1×3, and a 1×2 to make a 13 ¼” total width piece. And you can glue up a 1×8, a 1×6, and a 1×3 to make a 15 ¼” total width piece.  Again, these only need to be 27” long.

Shelf size diagram showing overall dimensions for each tier

However, if you’re like me and prefer to use plywood, you can cut all these pieces down from a little less than ½ of a ¾” plywood sheet.

RELATED: How to cut plywood sheets

If you cut from plywood, you can apply iron on edge banding to cover the plys and make it look a little cleaner.

RELATED: How to apply iron on edge banding

To make things easier, I went ahead and applied a finish to the frame and shelves separately. 

I stained this piece all one color, but you can certainly paint or finish however you’d like.  I think a black frame with wood toned shelves would have looked nice, too.

Step 5: Install Shelves

There are a million ways you could install these shelves.  You can use corner brackets or figure 8 brackets on the underside, you can use screws from the top side, you can use dowels or pocket holes.

However, I kept it really simple and just applied wood glue to the tops of the shelf supports and clamped the shelves on until dry.

Shara Woodshop Diaries applying wood glue to shelf support rungs

You could certainly use some nails as well, but I just used glue to avoid seeing any nail holes.  Glue alone should hold just fine.

Shelves on bookshelf clamped in place

And once the glue had dried, and a few coats of poly were applied to seal it, it was ready to load up.

This is such a simple design that could be decorated to fit a farmhouse, or a modern style.

Completed 5 tier wooden DIY ladder bookshelf with decor on each tier

I love the size—not too big, not too small. Perfect for a home office, living room, even a kitchen or bathroom.

Front view of freestanding ladder style bookshelf with books and decor

I hope you guys enjoyed watching it come together and if you want to build your own, don’t forget to grab the printable plans.

Looking for more DIY Shelving Ideas?

Here are some of my favorite shelving projects you can check out and learn how to build:

DIY Corner Shelf
Hidden Drawer Bookshelf
Library Bookshelf with Desk
Industrial Open Bookshelf
Geometric Bookshelf

If you enjoyed this DIY ladder bookshelf project and can’t wait to see what’s next, be sure to subscribe to the newsletter for priority access to new projects and plans!

Don’t forget to share this or pin it for later!

Pinterest collage image showing Shara Woodshop Diaries standing next to completed DIY ladder bookshelf on bottom and dimensional diagram at top with text "How to build a ladder bookshelf"

Until next time, friends, happy building!

DIY Ladder Shelf

DIY Ladder Shelf

Yield: 1 Ladder Shelf

Learn how to build a DIY ladder bookshelf from basic lumber and simple tools.

Materials

  • 2x2x8 boards
  • 1x2x8 boards
  • ½ sheet ¾” plywood OR scrap solid wood boards (see notes below)
  • 1 ¼” pocket hole screws
  • 2 ½” wood screws
  • Wood Glue

Tools

  • Compound Sliding Miter Saw
  • Drill/Driver
  • Circular Saw
  • Pocket Hole Jig
  • Countersink drill bit (Kreg Quick Flip used here)
  • Clamps
  • Speed Square

Instructions

  1. Assemble the side frames using 1x2 and 2x2 boards.
  2. Install back shelf supports using wood glue and 1 ¼" pocket hole screws.
  3. Install front shelf supports using wood glue and pocket hole screws.
  4. Cut shelves and apply edge banding.
  5. Install shelves using wood glue.
  6. Add a few coats of poly and it's ready to decorate!
© Shara, Woodshop Diaries
Project Type: DIY Furniture Plans / Category: Woodworking

25 DIY Storage Projects Made from Wood

January 9, 2023 by Susanne Stewart

image collage of nine DIY storage Projects

It’s a new year and we’re all thinking organizing and storage!

Here are 25 DIY storage projects you can make from wood to inspire you to get organized.

image collage of nine DIY storage Projects

Every new year we all turn our attention to organizing our homes and our lives. Storage, or lack of, can make the process overwhelming.

I have made a lot of DIY storage projects over the years–projects for the bathroom, bedroom, kitchen, and workshop.

I have used scrap wood, plywood, and even just one board to make projects that help me, my friends, and my family with storage.

Let’s take a look at 25 DIY storage projects you can make to help get your home organized this new year.


DIY Storage projects for the laundry room

1. DIY Rolling Cart

3 tier rolling storage cart

This easy to build mobile wooden storage cart features three shelves to store away just about anything you can think of.

It would be perfect for the laundry room to keep your laundry detergents, and cleaning supplies in. Because it’s on wheels you can move it around where ever you need it.

Get the plans!


2. DIY Tilt-out Laundry Hamper Cabinet

DIY Tilt Out Laundry Hamper Cabinet with Storage and Two Hamper Sections--Free Building Plans and Video Tutorial on Woodshop Diaries

I built this for my mom to help her with extra storage in her small laundry room. She needed a place for hampers (that was out of sight), extra storage for supplies, and a place to fold clothes.

I came up with this laundry hamper cabinet and it worked out great! Tilt-out hamper storage really makes this one of the best DIY storage projects I have ever done.

Tutorial and plans here!

Looking for more DIY storage cabinets? I have a whole bunch to choose from you can check them out here!


3. Washer/Dryer Pedestals with Drawers

Washer and dryer on wooden pedestal stands with drawers

My mom got a new washer and dryer when she saw the price for the pedestals she knew I could make her some a lot cheaper.


We came up with a design and I got to work. The things I won’t do for my mom…you understand, don’t you


These DIY pedestals are easy to make and the drawers are great for extra storage in a small laundry room. They definitely make getting into those machines easier!


Tutorial and plans here!


DIY Storage Projects for the Entryway

4. Simple Bench with Shelf

wooden bench with shelf for shoes

I love this rustic little bench. It’s an easy beginner woodworking project that you can use anywhere in your home.


This simple DIY bench design would work perfectly for an entryway and you can use the shelf and space underneath to store shoes.


I kept the design simple so there isn’t any storage under the seat, but you could totally add it if you wanted.


Build your own!


5. DIY Shoe Bench

Shara placing shoes on shelf of shoe bench

Can you believe you can make this DIY storage project with JUST ONE 2×10 board?! It was about $7 at the time I bought it.


I kept the design simple and affordable so it’s the perfect budget-friendly project for your entryway. You can make this with basic woodworking tools and have it built in a day.


Full tutorial and plans here!


6. DIY Accordion Coat Rack

accordion style coat rack

Add some coat storage to your entryway or mudroom with this accordion style coat rack. Use it for hats, coats, umbrellas, or even dog leashes.


I made this entirely from scrap wood so it was FREE to make. It’s adjustable just like the ones they used to make years ago. So cool!


Make your own!


7. DIY Coat Rack with Shelf

Shara holding large fake shiplap coat rack

I will admit this is a BIIIIG coat rack. My friend had a long hallway that she needed to add storage to for coats and backpacks, etc. You can definitely make it smaller to fit your space.


I used plywood to make the back of this DIY storage project and added a little extra detail to make it look like shiplap. I love how it turned out and so did my friend.


Make your own!


8. DIY Built-in Storage Bench

built in storage bench between hallway closets

This simple flip top storage bench was part of an overall hallway makeover project where I updated our hallway. Man can you put a lot of stuff in this storage bench!


You can make your own built-in storage bench for your entryway or mudroom and I show you how to do it step-by-step.


Full tutorial here!


9. DIY Easy Coat Rack

simple wooden dowel coat rack

When you’re looking for a coat rack with a simple design this is it! You can make this easy woodworking storage project for FREE using scrap wood.


It’s the perfect storage solution for a small entryway. You could even use it in the bathroom as a towel rack.


Build your own!


DIY Storage Projects for the Kitchen

10. DIY Tea Storage Box with Mug Holder

tea organizer box with pegs for holding mugs

Love a good cup of tea? Organize and store your tea supplies and mugs with this easy woodworking project.


It fits perfect on the countertop, in the pantry, or tucked away in the cupboard. The best part is you make this from scrap wood so it’s FREE!


Make your own tea storage!


11. DIY Reversible Wall Shelf

wall shelf with dowel rod and hooks

Hang it up for a place to hang mugs or tea towels with a shelf above. Or…

wall shelf with dowel rod

Hang it the other way and use it as a spice rack. It’s perfect for holding cutting boards and cookbooks too!


This is another scrap wood project, so you guessed it, it was FREE to make. Of course you could make two then you would have them both.


Build your own!


12. 3 Tier Wooden Tray

3 tiered geometric tray

The 3 tier tray–A staple in seasonal kitchen decor. But, you could also just be super practical and use it as a fruit tray, too.


Either way, every kitchen needs one of these and this one is really easy to make yourself!


Make your own!


13. DIY Bar Cart

How to Build a DIY Bar Cart from One Board

Great to use for entertaining, this DIY bar cart is an easy DIY storage project that can be use for lots of different things.


I made this using just one board. Hey, I really like those types of projects. They’re budget friendly and beginner friendly projects that anyone can make.


Get the plans to make your own!


14. DIY Pie Box

Plexiglass and plywood pie carrier

Store your next pie and take it to the next family gathering in style with this DIY pie box. It’s easy to make and can be used also as a keepsake box or to display a trophy.


You can make this using scrap plywood if you have enough and finish the edges using edge banding for a professional look. You’ll just a few tools to make one yourself.


Make your own!


RELATED: Learn how to finish plywood edges


15. Wooden Flatware Caddy

flatware caddy wooden

Most normal people probably keep their silverware—you know…forks, spoons and knives—neatly tucked away in a drawer. Of course I have to be the exception, haha.

It’s a long story as to why I don’t, but I made this silverware caddy to store ours and I really love how it turned out. Bonus is that we don’t have to dig in a drawer to find what we need!

Make your own!

Office Storage Projects

16. DIY Desk Organizer

wooden desk organizer with drawer

I was tired of papers stacking up in a mess on my desk and having a hard time keeping track of things.


I built this simple organizer from the red oak scrap boards to help store away all those receipts and paper I didn’t want to mess with.


Make your own!


17. Business Card Holder

How to make a DIY house shaped business card holder

Every business owner needs a business card holder for their desk. It’s a much better way to store them than to just have them sitting in a pile in a drawer.


This easy DIY storage project is made using scrap 2x2s. You can seriously make one of these in less than 30 minutes.


See the tutorial here!


18. Home Office Filing Cabinet

Wooden file cabinet with two deep drawers

I’m not a fan of metal filing cabinets. They’re ugly, they don’t hold up well, and they’re ugly. Did I say that already?


This is a very basic cabinet that works well as a file cabinet, but could also make a nice printer cabinet, or even a side table or nightstand.


Build your own!


More DIY Wooden Storage Projects


19. Modern Towel Rack

Shara placing towel in towel rack

I built a simple scrap wood towel rack to hang over the tub to add some texture and wood tones to a very white wall.


You can build your own in just three simple steps with basic tools. Give your bathroom a spa like feel with this easy DIY storage project.


Build your own!


20. Simple DIY Storage Chest

DIY Storage Chest perfect for blanket storage

This DIY storage chest is the PERFECT size to use as a small coffee table, entryway bench storage, end of the bed storage, toy box storage, or just for keepsake storage.


I made this from ¾″ plywood and 2x2s. It’s a great beginner project and this versitile piece will look great anywhere you use it.


Build this simple storage chest!


You will also love this DIY Wooden Storage Trunk / Hope Chest, this DIY Faux Slat Toy Box, and this Simple DIY Storage Trunk

21. DIY Blanket Ladder

Shara with DIY modern blanket ladder

A blanket ladder is a practical, simple, and creative way to add some style, storage, and life to a room.


You can use it in the bathroom for hanging towels, the living or bed room for storing and displaying blankets.


It’s a simple scrap wood project using 2x2s and dowels. You can make it in a couple of hours and be using it the same day.


Tutorial to build your own!


22. Indoor Plant Ladder Shelf

Shara placing plants on plant shelf

I’ve been meaning to build somewhere to store all my little plants in one easy to water location.


It needed to have a small footprint so it didn’t take up a lot of floor space and I didn’t want to hang it on the wall. This leaning plant ladder shelf was the perfect solution.


You could also use it for books, in your office, or in an entryway for those items you need to grab quickly on the way out the door.


Get the plans to build your own!

23. Keepsake Box

wooden keepsake box with divider panel

We all have those special momentos, the small things that remind us of a time, a person, an event. Build your own keepsake box to store them and keep them safe.


This project is made from scrap wood, so it’s another project that’s FREE to make! It even has a divider and lift off lid.


Make your own!


Be sure to check out my DIY Wooden Keepsake Box and this other DIY Keepsake Box from Scrap Wood


24. Guitar Stand with Stool

simple guitar stand bench

I’ve been tired of keeping my guitar stuck in its case in the corner all the time and wanted to get it out so it was more easily accessible for playing.


I made this DIY guitar stand and stool and added a place to store my music books. It sits perfectly in the corner and I love having my guitar out on display.


Tutorial and plans here!


25. Easy DIY Lumber Rack

2x4 lumber rack

I needed a place to store my lumber. The floor and corner were no longer an option. This simple design is made using 2x4s and wood screws. That’s it. Super easy. Super helpful.


You can see more workshop storage and organizing projects here.


See the tutorial!


This is just a handful of the DIY storage projects you’ll find here on the blog. I can’t wait to hear what you build first!


Be sure to pin for later!

image collage of six DIY storage projects with text overlay

How to Build a Plywood and Scrap Wood Shop Cart

January 7, 2023 by Shara, Woodshop Diaries

How to Build a DIY Rolling Scrap Wood Cart

In this post, I’m sharing how to build a simple scrap wood and plywood storage cart for your garage or workshop!

Mobile scrap wood and plywood storage cart loaded with lumber in workshop with text "how to build a mobile scrap and plywood cart" at top

Everyone’s workshop is different. But if you take a look in mine, it’s always full of scrap wood and plywood sheets.

For a long time, I just leaned my plywood sheets up against my ever growing scrap piles.

And it was a dangerous and chaotic mess and I could never get to what I needed. Here’s a glance at it when I considered it “organized” HA!

Large scrap wood pile in workshop

My workshop was really small so I needed to get this wood up off the floor and on wheels so I could move it around when I needed the extra space.

So I built a mobile workshop cart that could store my scrap wood and my plywood sheets! And it has been a game changer in my workshop space!

If your shop looks like the photo above, and you need a way to round up all your scraps and plywood, I’m showing you how to build your own in the plans below.

Just an FYI & an Update: I built this cart over 5 years ago. It’s moved with me to three other locations since then and I still use it in my workshop today.

As a side note, the fact that it’s on wheels has made it SO MUCH EASIER to move to different shops over the years.

*This post contains affiliate links.  Please see disclosure policy for details.

Tools & Materials:

Tools:

  • Drill
  • Circular Saw
  • Kreg Rip Cut (optional)
  • Kreg AccuCut (optional)
  • Pocket Hole Jig

Materials:

  • 1 sheet ¾″ plywood
  • 1 sheet ¼″ plywood
  • (3) 2x4x8 boards
  • 4 casters
  • 1 ¼″ pocket hole screws
  • 1 ¼″ & 2″ wood screws
  • 2 ½″ pocket hole screws

What to Know Before Building This Scrap Wood Storage Cart

This is an easy beginner build that you can complete in just a few hours.

So it makes a great weekend woodworking project to help organize your garage or workshop! And you can easily modify the sizing to fit your space.

It’s made for storing both Scraps and Plywood

One side is designed as a “bin” to contain smaller pieces of scrap wood and the other side is open to hold full 4×8 sheets of plywood.

Since the plywood is stored so that it’s upright, it takes up less floor space. However, this does mean that there is potential for it to tip over.

Scrap wood and plywood storage cart loaded up with lumber.  Text designating which side is scraps and which side is for plywood

So if you load down the cart with several sheets, use a clamp to simply clamp the sheets to the frame of the middle divider.

This will keep things from shifting while rolling and moving the cart.

Use Heavy Duty Caster Wheels

This project is intended for lumber storage…which can get quite heavy.

You are free to use whatever style, size, and color of caster wheel you’d like. The one’s I used here are no longer available, but here is a similar option.

However, I recommend making sure to get heavy duty wheels that are rated for at least several hundred pounds.

Shara Woodshop Diaries installing caster wheels with mounting plates

I also recommend using caster wheels that come on a mounting PLATE like shown above vs a threaded rod.

This allows you to simply screw the plate to the cart vs having to install an insert.

Overall Dimensions

The overall project dimensions for this scrap wood storage cart are 24″ deep x 49 ½″ tall (not including the caster wheels) x 72″ wide.

Overall dimensional diagram of mobile scrap wood plywood cart

Helpful Resources for the Build

You may find these guides helpful throughout the build:

  • How to cut plywood sheets with a circular saw
  • How to use a pocket hole jig

How to Build a Scrap & Plywood Storage Cart

You can find the step by step instructions to build your own lumber storage cart below.

But if you prefer to print your instructions, I’ve got the printable building plans with dimensions, detailed diagrams, cut and materials list here:

Step 1: Assemble the Bottom of Scrap Wood Cart

To start this project off, I assembled the bottom section of the cart.

I used a circular saw with Kreg cutting guides (I used the Rip Cut and AccuCut) to cut a piece of ¾″ plywood to 24″ x 72″.

RELATED: How to cut plywood sheets with a circular saw

Then, I ripped two 3″ wide strips of ¾″ plywood to 24″ long and glued and screwed this onto the bottom along the outside edges.

bottom panel diagram showing how to assemble for mobile scrap wood cart

I used 1 ¼″ wood screws to secure these pieces.

These extra strips “thicken up” the corners where the caster wheels will go. This allows me to use longer screws, but also gives me a sturdier base to mount to.

Step 2: Add Caster Wheels

I attached the casters on the corners on the bottom side of the thin strips from step 1 using 1 ¼″ wood screws like shown.

plywood panel with scrap strips on sides. Caster wheels installed on the bottom corners

Depending on the brand and type of caster wheel you purchase for this, it may come with it’s own mounting hardware.

Mine did not, so I used some washers (because my screw heads were smaller than the holes) and 1 ¼″ screws to secure them at each corner.

Step 3: Assemble Divider Frame

I assembled a “frame” of 2x4s that was 4 ft tall and 6 ft wide overall to use as the cart divider.

So I cut (2) pieces of 2×4 to 48″ long and (2) pieces of 2×4 to 65″ long. I drilled 1 ½″ pocket holes into both ends of the 65″ long pieces.

RELATED: How to use a pocket hole jig

diagram showing dimensions and assembly of divider frame for plywood storage cart

But I also drilled 1 ½″ pocket holes into ONE end of each 48″ long piece–this will be for the next step.

Then, I assembled the frame together using 2 ½″ pocket hole screws through the 65″ long pieces, making sure the pocket holes on the 48″ long pieces all faced toward the bottom.

Step 4: Install Divider Frame

I placed the frame from step 3 onto the bottom panel of the cart like shown so that there was about 9 ¾″ space on one side and 12 ¾″ space on the other side.

Diagram showing how to install divider frame to bottom panel of plywood storage cart

I faced the pocket holes toward the 9 ¾″ side and used 2 ½″ pocket hole screws to secure the frame to the plywood panel.

divider frame attached to bottom panel on workshop floor

After attaching the frame with pocket hole screws, I flipped the cart on its side and added few 2″ wood screws from the underside up into the frame.

This will help hold the bottom plywood to the frame and prevent sagging in the middle. 

underside view of the bottom plywood panel showing where to install the screws

Step 5: Attach Divider Panel

To help separate the two sections of the cart, I added a piece of ¼″ plywood to cover one side of the frame.  This piece should be cut to 48″ x 72″.

You could use ¾″ plywood if you wanted, but the thicker the plywood, the more “real estate” you are going to waste on the cart. 

I used wood glue and staples to secure the panel on the side where the pocket holes were. But wood glue and 1 ¼″ screws would work fine if you didn’t have a stapler.

¼" plywood panel installed onto scrap wood cart divider frame

Step 6: Add Scrap Bin Front Panel

Next, I cut a piece of ¾″ plywood 18″ wide x 72″ long and drilled ¾″ pocket hole screws along one long end. 

computer drawn dimensional diagram showing front scrap bin plywood panel installed

I attached this panel using wood glue and 1 ¼″ pocket hole screws along the front edge of the scrap side of the cart like shown.

plywood panel installed onto workshop lumber storage cart

I faced the pocket holes toward the inside so you don’t see them from the outside of the cart.

Step 7: Add Scrap Bin Side Panels

Next, I added the side panels to finish out the scrap wood bin.

You could make these simple rectangles, but I liked the look of the sloping sides.  I cut two pieces of ¾″ plywood to 32″ tall x 12″ wide and cut a “slope” down to 18″ on the front edge. 

computer drawn diagram showing dimensions for scrap bin side panels

Then, I drilled ¾″ pocket holes along the back (the 32″ long) edges.

I installed these between the 2×4 frame and the front panel from step 6.

I used 1 ¼″ pocket hole screws to secure it on the back side to the 2×4.

computer diagram showing scrap bin side panels installed onto plywood cart

Then, I used 1 ¼″ wood screws through the front panel to secure the front sides of these pieces.

Step 8:  Add “Lip” on Plywood Storage Side

Finally, to finish off the cart, I added a short “lip” onto the plywood side of the cart to keep the plywood from sliding off the edge. 

NOTE: This won’t prevent the plywood from falling over–you will need to slant your plywood toward the middle frame.  But this little rail will help keep slanting boards from slipping off the bottom of the cart.

For this, I cut a 6″ wide piece of ¾″ plywood 72″ long and attached just like I did the scrap bin front panel from step 6 using ¾″ pocket holes and 1 ¼″ pocket hole screws.

plywood panel added onto front edge of cart to prevent plywood from slipping off edge

Except that this piece went on the opposite side of the cart, of course.

And, now, you have a mobile plywood and scrap wood storage cart!

DIY mobile plywood and scrap wood storage cart loaded up with lumber in workshop

All you have to do now is load it up and roll it out of the way!

Don’t forget to grab the printable plans here to build your own.

Looking for more workshop storage and organization ideas?

I hope you enjoyed seeing this scrap and plywood storage cart come together and if you would like to check out more workshop project ideas, here are a few favorites!

Battery Charging Station
Scrap Wood Clamp Rack
Mobile Workbench
Lazy Susan Garage Cabinet
How to build a mobile Miter Saw Stand with storage drawers, and fold down extension wings
Mobile Miter Saw Stand

If you want to stay up to date on all the latest projects, plans and ideas, be sure to subscribe to the newsletter for priority access to the latest posts and videos!

And if you want to save this for later, be sure to pin it or share it to your favorite social channel!

How to build a Mobile Plywood Cart and Scrap Wood storage cart for your workshop--Great for a lumber storage cart and to move heavy plywood sheets

Until next time, friends, happy building 🙂

HOW TO BUILD A PLYWOOD AND SCRAP WOOD SHOP CART

HOW TO BUILD A PLYWOOD AND SCRAP WOOD SHOP CART

Learn how to build a simple scrap wood and plywood storage cart for your garage or workshop!

Materials

  • 1 sheet ¾″ plywood
  • 1 sheet ¼″ plywood
  • 2x4x8 boards
  • 4 casters
  • 1 ¼″ pocket hole screws
  • 1 ¼″ & 2″ wood screws
  • 2 ½″ pocket hole screws

Tools

  • Drill
  • Circular Saw
  • Kreg Rip Cut (optional)
  • Kreg AccuCut (optional)
  • Pocket Hole Jig

Instructions

  1. Assemble the bottom of scrap wood cart using a circular saw.
  2. Add caster wheels using wood screws.
  3. Assemble divider frame.
  4. Install divider frame using pocket hole screws.
  5. Attach divider panel using wood glue and staples.
  6. Add scrap bin front panel using pocket hole screws.
  7. Add scrap bin side panels using pocket hole screws.
  8. Add 'lip" on plywood storage side.
  9. Load it up and roll it out of the way!Scrap Wood & Plywood Shop Cart
© Shara, Woodshop Diaries
Project Type: DIY Furniture Plans / Category: DIY Workshop Projects

DIY Oversized Nightstand with 3 Drawers

December 29, 2022 by Shara, Woodshop Diaries

In this post, I’m sharing how to build a DIY oversized nightstand with 3 drawers!

You can use this as a large nightstand, small dresser, or a basic console–anywhere you need a little extra storage.

White and wood 3 drawer oversized nightstand with decorative trim along drawer fronts with black knobs

My parents recently bought a new bed and matching dresser. But the nightstands that came with them were a bit too small for what they needed.

So, my mom asked me to make her a custom DIY oversized nightstand pair that would match her new set.

I studied the dresser so I could see what I needed to match and I immediately noticed lots and lots of decorative trim.

So, that’s what I added to these nightstands as well! This is a really fun design and you can customize the trim details however you’d like.

And even if you don’t need a large nightstand, this makes a great little dresser, console, or coffee bar for the kitchen.

So if you’re ready to build it, let’s go!

**This post contains affiliate links. See website policies.

What to Know Before Building This DIY Oversized Nightstand

This project is a great intermediate build! It’s not difficult, but there are a lot of trim details to work with, so it may not be the best option for a beginner.

The materials list below is what you need to build ONE oversized nightstand. If you need two, you’ll need to double it.

Trim Details:

The trim on this nightstand build is completely customizable (and optional), so if you want to skip some of those or change things up, feel free!

The plans call for using cove molding around the top and half round on
the front and sides below the top drawer.

They also call for adding lattice trim and half round molding on the drawer fronts and ¼″ square dowels, additionally, on the two larger drawer fronts.

Close up image of nightstand trim details with arrows pointing to each type of trim

If you decide to do without the trim or change it up, you may want to adjust your drawers a little closer to the front edge of the nightstand if your drawer fronts end up not being quite as thick.

Attaching the Top:

The top of this nightstand is plywood, so there are several options for attaching it.

I used figure 8 fasteners here because that’s what I already had handy in the shop, but I suggest using L brackets (90 degree corner brackets) if you have them.

These are simple, quick, and plenty strong for this application and don’t require the use of any additional tools.

Overall Dimensions:

The overall dimensions of this DIY oversized nightstand are approximately 18″ deep, 32 ¼″ tall, and 35″ wide.

Dimensional diagram of DIY oversized nightstand computer graphic

Helpful Resources for the Build

You may find these posts and how-tos helpful in the building process:

  • How to cut plywood sheets
  • How to use a pocket hole jig
  • How to apply iron on edge banding
  • How to build and install drawers
  • Tips to Professional Looking DIY Projects
  • How to finish raw wood furniture

Tools & Materials

The materials list below is a little long. Don’t let that scare you! A large portion of the materials are trim details–which are optional.

Take a look at the list and the design notes above and feel free to modify how you’d like. Don’t get overwhelmed by the list! You got this 🙂

Tools:

  • Miter Saw
  • Circular saw and cutting guides
  • Drill/Driver
  • Pocket Hole Jig
  • Brad nailer
  • Table Saw or Router (optional–for cutting dadoes in drawers)

Materials:

  • (1) 4×8 sheet ¾″ plywood
  • (1) 4×8 sheet ¼″ plywood
  • (2) 2x2x8 boards
  • (3) 1x3x8 boards
  • (1) 1x2x8 board
  • (1) 8ft piece cove molding (optional)
  • (4) 8ft pieces half round molding (optional)
  • (3) 8ft pieces ¼″ x 1 ½″ lattice trim (optional)
  • (2) 8ft pieces ¼″ square dowel (optional)
  • 1 ¼″ pocket hole screws
  • 1 ¼″ brad nails
  • (3) pair 14″ drawer slides
  • 90 degree corner brackets OR figure 8 fasteners
  • Iron On Edge Banding
  • Wood Glue
  • Wood Finish as desired
  • Knobs/Drawer Pulls

How to Build a DIY Oversized Nightstand with 3 Drawers

If you prefer to watch, I’ve got the video for you here and if you prefer to read, I’m sharing the plans below.

Building an oversized nightstand to match an existing dresser youtube thumbnail image

I’ve provided the step by step instructions to build this oversized nightstand here in this post along with some helpful tips within each step.

However, if you prefer to print your plans, you can grab the printable version here:

Step 1: Assemble Nightstand Sides

I started by assembling the sides of the nightstand. These were made from 2x2s and ¾″ plywood.

So I cut (4) 2x2s for the legs and two pieces of plywood for the panels.

RELATED: How to cut plywood sheets

Computer drawn diagram showing the side panel dimensions of DIY oversized nightstand

TIP: You can use precut 2x2s for this if you’d like, but I like to make my own 2x2s using this tutorial.

I drilled ¾″ pocket holes along the edges of the plywood panels and secured them between the 2×2 legs using 1 ¼″ pocket hole screws.

RELATED: How to use a pocket hole jig

Shara Woodshop Diaries assembling DIY oversized nightstand side panel on workbench using pocket holes

The plywood panel is flush to the inside of the legs and I made two identical sides this way.

Step 2: Build Oversized Nightstand Frame

Once the sides were assembled, I moved on to making the rest of the frame.

For this, I cut four pieces of 1×3 to 30″ long and drilled ¾″ pocket holes into the ends of each one.

Computer diagram showing dimensions of nightstand frame

I used 1 ¼″ pocket hole screws to secure these between the two side panels–2 at the top and two toward the bottom, even with the bottom edge of the plywood sides.

To hide the pocket holes, I faced them all toward the inside.

Prefer to print your plans? You can grab the printable plans for this DIY oversized nightstand here.

Step 3: Install Drawer Dividers

To separate out the three drawers, I added additional dividers on the front to kind of “frame” them out.

For this, I cut one 1×2 and one 1×3 to 30″ long and drilled ¾″ pocket holes into the ends of each.

I installed these into the frame along the front edge.

Shara Woodshop Diaries installing drawer dividers into nightstand frame

The 1×2 goes under the top drawer and runs vertically. But the 1×3 runs horizontally so that it equally divides the two bottom drawers.

You can space these however you’d like if you need different sized drawers, but this is the spacing I used.

Computer diagram showing dimensional locations for drawer dividers

Step 4: Install Drawer Slides

Next, I installed the drawer slides into the nightstand frame.

I used 3 pair of 14″ ball bearing drawer slides for this and installed them 1 ½″ inset from the front edge.

Shara Woodshop Diaries installing drawer slides into nightstand

I spaced them so that the bottom edge of the slides was even with the top edge of the divider/frame piece below it.

TIP: Check out this detailed guide for how to install drawer slides.

Step 5: Build Drawer Boxes

Building drawers is always my favorite part, so this is my pick step haha.

I cut all the drawer box pieces from ¾″ plywood and cut the drawer bottoms from ¼″ plywood.

Exploded view of DIY oversized nightstand drawer box pieces with dimensions

I like to cut dadoes in my drawer boxes to install the bottom into, but if you don’t want to cut dadoes, you can certainly just glue and staple the bottom instead.

RELATED: How to build drawer boxes

I built two deep and one shallow drawer using ¾″ pocket holes and 1 ¼″ pocket hole screws to assemble.

3 drawer boxes assembled stacked on nightstand frame

The deep bottom drawers were 7 ½″ tall. The shallow top drawer was exactly the same size, except only 3 ½″ tall.

Step 6: Install Drawers into Nightstand

Once the drawer boxes were built, I installed them onto the slides in the nightstand.

Shara Woodshop Diaries installing drawer boxes onto drawer slides for DIY nightstand

I used some scrap ¼″ plywood to space these ¼″ up off the framing below so that they wouldn’t rub when they slide back and forth.

RELATED: How to install drawers onto slides

Step 7: Assemble Drawer Fronts

The drawer fronts were probably the most time consuming part of this build simply because there were a lot of trim details added.

Feel free to modify your trim as you’d like if you want a different style or want to keep things a little simpler.

I cut three pieces of ¾″ plywood for the drawer fronts–one smaller one for the shallow top drawer and two larger ones for the deeper bottom drawers.

Trim details and dimensions for nightstand drawer fronts

These should be ¼″ smaller in height and width than the openings on the dresser frame–this allows for ⅛″ gaps around all sides once installed.

Then, I cut to fit ¼″ x 1 ½″ lattice trim with 45 degree mitered corners to glue along the front, flush to the outside edges.

Lattice trim glued onto plywood drawer fronts

HELPFUL TIP: Use painters tape to hold small trim pieces in place while the glue dries.

For the larger drawer fronts, I also cut and glued on pieces of ¼″ square dowel to form a rectangle inside this lattice trim.

square dowel trim glued and taped onto drawer fronts

I didn’t add this onto the small drawer front because there just wasn’t enough space.

And finally, I followed up with cutting half round molding with 45 degree mitered ends to glue over the lattice trim.

Shara Woodshop Diaries taping half round molding onto drawer fronts while glue dries

I cut the half round so that it would run about ¼″ in from the outside edges of the drawer front. But, that’s not a critical measurement.

Step 8: Add Trim to Nightstand Frame

While the glue dried on the trim details, I moved on to adding some trim to the sides of the nightstand.

I cut 1x3s to go on the top and bottom and a 1×2 to go between them even with the the 1×2 on the front.

Shara Woodshop Diaries nailing trim details to sides of nightstands

I glued and brad nailed these pieces in place on both sides of the nightstand frame.

Then, I cut to fit cove molding to line the tops and half round to run along the 1x2s on the sides and front.

Shara Woodshop Diaries nailing cove molding around nightstand top edge

I glued and brad nailed each piece of trim in place, then puttied over the joints and nail holes.

Step 9: Attach Drawer Fronts

At this point, the glue was dry on the drawer fronts, so I installed them onto each drawer box.

Computer diagram showing attaching drawer fronts to nightstand drawers

I used 1 ¼″ wood screws through the front of the inside of each box, making sure to leave ⅛″ gap around all sides once the drawer was slid back in place.

Close up of driving screws through inside of drawer box to attach plywood drawer fronts to DIY oversized nightstand

Step 10: Add Top to Nightstand Base

To add the top, you’ll need access to the inside of the nightstand.

So I used the tabs on the sides of the drawer slides to remove the drawer boxes from the frame.

Tabs on drawer slides to remove drawer box

I cut the top of this nightstand from ¾″ plywood and applied iron on edge banding to the front and sides to make it look a little cleaner.

NOTE: Edge banding is optional, but if you’d like to add it, here’s a guide to applying iron on edge banding.

I stained the top before attaching it. This color is a combination of Minwax Early American and Weathered Oak.

Then, I installed figure 8 fasteners to the top of the nightstand frame.

Screwing figure 8 fasteners to top of nightstand frame

As mentioned in the notes earlier in this post, you can use corner brackets instead–which is what I’d recommend.

Once the fasteners were attached, I flipped it upside down and secured these fasteners to the top panel.

screwing top panel to nightstand frame using figure 8 fasteners

Then, I flipped it back over and reinstalled the drawers back onto the slides.

Step 11: Add Back Panel (optional)

The back panel is optional. I personally have a pet peeve about adding back panels on projects with drawers, so I didn’t add a back here.

However, if you’d like to add a back panel, you can simply cut a piece of ¼″ plywood to fit over the back side and staple in place.

Computer diagram with dimensions--attaching back panel to nightstand frame

Step 12: Finish Oversized Nightstand Build

At this point, it’s ready to final putty, sanding, and finishing as desired. If you enjoyed the tutorial and would like a printable copy, grab the building plans here.

Since I was matching this to my parent’s existing furniture, I had my paint color matched, so this isn’t a specific color name.

But I applied a coat of primer and two coats of paint to finish this up and added these simple, modern, black knobs.

Two 3 drawer DIY oversized nightstands sitting side by side with black knobs

And now it’s ready to deliver to my parents’ house!

Looking for More Nightstand and Dresser Projects?

If you’re searching for more nightstand ideas or small dressers, here are a few favorites you might like to check out!

DIY One Drawer Nightstand
DIY Modern Nightstand
Mid Century Nightstand
3 Drawer Dresser

If you enjoyed this DIY oversized nightstand project and want to stay up to date on all the latest projects and plans, be sure to subscribe to the newsletter below!

And if you’d like to save this project for later, don’t forget to pin it or share it to your favorite social channel!

Pinterest collage image showing Shara Woodshop Diaries with DIY oversized nightstand on bottom and computer diagram of overall dimensions at top with text "how to build an oversized nightstand"

Until next time, friends, happy building!

DIY OVERSIZED NIGHTSTAND WITH 3 DRAWERS

DIY OVERSIZED NIGHTSTAND WITH 3 DRAWERS

Learn how to build a DIY oversized nightstand with 3 drawers! You can use this as a large nightstand, small dresser, or a basic console–anywhere you need a little extra storage.

Materials

  • 4×8 sheet ¾″ plywood
  • 4×8 sheet ¼″ plywood
  • 2x2x8 boards
  • 1x3x8 boards
  • 1x2x8 board
  • 8ft piece cove molding (optional)
  • 8ft pieces half round molding (optional)
  • 8ft pieces ¼″ x 1 ½″ lattice trim (optional)
  • 8ft pieces ¼″ square dowel (optional)
  • 1 ¼″ pocket hole screws
  • 1 ¼″ brad nails
  • pair 14″ drawer slides
  • 90 degree corner brackets OR figure 8 fasteners
  • Iron On Edge Banding
  • Wood Glue
  • Wood Finish as desired
  • Knobs/Drawer Pulls

Tools

  • Miter Saw
  • Circular saw and cutting guides
  • Drill/Driver
  • Pocket Hole Jig
  • Brad nailer
  • Table Saw or Router (optional–for cutting dadoes in drawers)

Instructions

  1. Assemble nightstand sides with plywood.
  2. Build oversized nightstand frame using pocket hole screws.
  3. Install drawer dividers.
  4. Install drawer slides using ball bearing drawer slides.
  5. Build drawer boxes from plywood.
  6. Install drawers into nightstand.
  7. Assemble drawer fronts using plywood and glue.
  8. Add trim to nightstand frame.
  9. Attach door fronts using wood screws.
  10. Add top to nightstand base.
  11. Add back panel (optional)
  12. Finish oversized nightstand build by sanding and painting.Oversized Nightstand with 3 Drawers
© Shara, Woodshop Diaries
Project Type: DIY Furniture Plans / Category: Bedroom Furniture Plans

How to Build a Rolling Storage Cart

December 12, 2022 by Shara, Woodshop Diaries

In this post, I’m sharing how to build a DIY rolling storage cart perfect for laundry rooms, pantries, bathrooms, kitchens, or the garage!

*This post was sponsored by MakeByMe and also contains affiliate links. See website policies.

Black and wood tone three tiered mobile storage cart with cleaning supplies and storage basket

This easy to build mobile wooden storage cart features three shelves to store away just about anything you can think of.

Each shelf has a different height “lip” around the side for storing various objects and keeping them in place.

It would be perfect for the laundry room to keep your laundry detergents, and cleaning supplies on it.

Or you could use it to transport your clean laundry from the dryer to the closet.

You can use it in the bathroom for extra towel and toiletry storage.

It would even be handy in the craft room to keep the sewing machine and craft supplies stored and organized in.

Three tiered storage cart with wheels

You can literally use this DIY wooden cart for practical mobile storage in any room of the house (even the garage!).

So if you’re ready to see how to build one, let’s go!

Tools & Materials

Tools:

  • Miter Saw
  • Circular Saw & Straight Edge Guides (for cutting plywood)
  • Drill/Driver
  • Finish or Brad Nailer
  • Clamps

Materials:

  • (3) 1x2x8
  • (1) 1x3x8
  • (1) 1x4x8
  • (1) ¾” plywood 24” x 48”
  • (4) caster wheels
  • 1 ¼” wood screws
  • 1 ¼” brad or finish nails
  • Wood Glue

A few notes before building

This is a simple project that you can easily complete in just a couple hours at the most.

I designed this so that each “level” or shelf of the DIY rolling storage cart has a different height “lip.”

You’ll notice the top shelf has a 1×2 around the edges, the middle has a 1×3 around the edges and the bottom has a 1×4 around the edges.

If you wanted to do them all the same, feel free! I just liked the look and the fact that it gives a little more versatility to hold items in place as needed.

The overall dimensions of this project are 13″ deep x 24″ wide x 32 ¾″.

Note that this overall size is WITHOUT CASTERS. Casters will add additional height to the cart, however the exact amount will depend on the style and size you use.

DRAWING THE BUILDING PLANS

I partnered with MakeByMe to share the building plans for this mobile storage cart with you at the end of this post.

MakeByMe app rendering of overall rolling cart project

MakeByMe is a 3D modeling app that allows you to draw out your projects in a realistic looking digital environment before ever building anything.

One of my favorite features of the app is that once you’ve “built” your project digitally, the software automatically puts together a materials, tool, and cut list, along with a list of steps for assembling each joint.

Learn more about MakeByMe here.

How to Build a Rolling Storage Cart

Here’s the step by step process for how to build this handy DIY rolling storage cart.

This is a pretty straightforward and simple project to modify, so feel free to adjust your sizing as needed to fit your space and your needs.

The main thing is to make sure all the trays/shelves stay the same width.

Step 1: Assemble Top Cart Shelf

You can find the complete cut list in the plans linked at the bottom of this post.

But, I cut a piece of ¾″ plywood to 10 ½″ x 22 ½″ for the bottom panel.

Then, I cut 1x2s to “wrap” around the sides to sort of “frame” it out. This would be (2) pieces of 1×2 cut to 10 ½″ long and (2) pieces cut to 24″ long.

Shara Woodshop Diaries dry fitting 1x2 frame around shelf panel on workbench

I used wood glue and 1 ¼″ nails to attach these 1x2s around the edges. You could use brad or finish nails–or even screws if you’d rather.

Shara Woodshop Diaries using nailer to attach frame around shelf panel

Step 2: Assemble Middle Cart Shelf

For the middle shelf, I repeated this process to create an identical size tray, only this time, instead of using 1x2s, I used 1x3s.

Shara Woodshop Diaries nailing 1x3s around middle shelf panel

All the lengths of the pieces stay the same. This only changes the height.

Step 3: Assemble Bottom Cart Shelf

And again, I repeated this process one more time to create another identical size tray, only this time, I used 1x4s around the edges.

Three tiered shelves for rolling storage cart stacked on workbench

All the lengths of the pieces stay the same. This only changes the height.

Step 4: Install Rolling Cart Frame Legs

Once the three cart shelves were assembled, I started adding the “legs” that would kind of keep them all together.

For these, I used 1x2s. But, you could certainly use 1x3s or 1x4s if you’d rather have something a little wider.

I cut four 1x2s to 32″ long and two 13 ½″ long and stained them black.

Rolling storage cart leg/frame pieces cut to length laid out on workbench

I also stained the shelves before adding these pieces as it was a little easier to finish them separately. I used Minwax Golden Oak on the shelves.

Shara Woodshop Diaries staining shelves of mobile cart

Then, I used wood glue and 1 ¼″ wood screws through the inside of each tray to attach the first two “legs.”

Shara Woodshop Diaries installing bottom shelf/tray to legs/frame to create rolling storage cart

I placed the bottom tray flush to the bottom of two of the the 1x2s and with about 1″ overhang off the sides.

I placed the top tray 2″ down from the top of the 1×2 with about 1″ overhang off the side.

Shara Woodshop Diaries screwing top shelf to cart frame

Then, I centered the middle tray between them. You can space these out however you’d like…just make sure to keep it consistent as you attach the remaining legs.

Shara Woodshop Diaries screwing middle shelf to cart frame

I screwed each tray to both 1x2s.

Step 5: Install Remaining Rolling Cart Legs

I repeated steps 4 & 5 to install the other two legs exact the same way, but on the opposite side.

Attaching 3rd and 4th frame pieces/legs to rolling storage cart

This gave me the basic cart frame with all the shelves installed.

Step 6: Add Handles

You may be wondering why I installed the top tray 2″ down from the top of the legs.

This is so that I could add some “handles” across the top. If you wanted to skip this part, feel free to attach the top tray flush to the top.

Using nailer to attach handles to top of rolling storage cart

However, I cut two pieces of 1×2 to glue and nail across the front and back legs to use as handles.

I stained these before attaching because it made things a little easier to get to.

Step 7: Add Casters

Now I needed to make this little shelf mobile. So I flipped it upside down and added some caster wheels at each corner.

The size, style and type of caster wheel is completely up to you and what you plan to use it for.

However, to make assembly easy, I do recommend using some that have mounting plates.

Attaching casters to bottom of rolling storage cart

These are what I used here, but again, feel free to use another size or style as you’d like.

I used 1 ¼″ wood screws through washers to secure the mounting places to the bottom of the shelf.

NOTE: Using 1 ¼″ screws through ¾″ plywood means that the screws will stick out the other side.

So, I only added screws in the holes that went into the 1×4 around the outside of the tray. This should be sufficient unless you plan to load this down with REALLY, REALLY heavy stuff.

Step 8: Finish DIY Rolling Storage Cart

Now, I had already stained these pieces during the assembly process.

But just in case you didn’t, the last step would be to paint and/or stain as desired.

And now this simple rolling storage cart is ready to be put to good use!

Completed two tone DIY rolling storage cart with wood stained shelves and black frame

Load it down with crafting, cleaning, or toiletry supplies. Or water bottles, canned goods, and boxed cereal for the pantry.

Whatever you use it for, it’s a simple, but handy cart to have around!

Be sure to grab the building plans on MakeByMe here.

Looking for more Mobile Storage Cart Ideas?

Here are a few simple, yet versatile mobile cart builds you might enjoy!

DIY Outdoor Garden Cart
How to Build a DIY Bar Cart from One Board
One Board Bar Cart
mobile bbq cart prep table small
2 Tool Outdoor Grill Cart
How to Build a DIY Rolling Scrap Wood Cart
Scrap and Plywood Storage Cart

If you can’t wait to see what’s next, be sure to subscribe to the FREE newsletter below for priority access to all the latest projects and plans!

And if you enjoyed this project and want to save it for later, don’t forget to pin it and share it to your favorite social channel!

Mobile storage cart pinterest collage with diagram of MakeByMe rendering at top and completed project at bottom with text "how to build a mobile storage cart"

Until next time, happy building!

DIY Rolling Storage Cart

DIY Rolling Storage Cart

Yield: 1 rolling storage cart

Build a DIY rolling storage cart perfect for laundry rooms, pantries, bathrooms, kitchens, or the garage!

Materials

  • (3) 1x2x8
  • (1) 1x3x8
  • (1) 1x4x8
  • (1) ¾” plywood 24” x 48”
  • (4) caster wheels
  • 1 ¼” wood screws
  • 1 ¼” brad or finish nails
  • Wood Glue

Tools

  • Miter Saw
  • Circular Saw
  • Straight Edge Guides (for cutting plywood)
  • Drill/Driver
  • Finish or Brad Nailer
  • Clamps

Instructions

  1. Make cuts according to the cut list and assemble the top cart shelf using wood glue and ¼" finish or brad nails.
  2. Assemble the middle cart shelf the same way as the top shelf.
  3. Repeat again for the bottom cart shelf.
  4. Stain the shelves and legs for the cart.
  5. Using 1 ¼" wood screws, attach shelves to first to legs
  6. Repeat with the other 2 legs of the rolling storage cart
  7. Attach handles to the top of the legs
  8. Add casters and you're done!
© Shara, Woodshop Diaries
Project Type: DIY Furniture Plans / Category: Woodworking

How to Build a Simple Bench with Shelf

December 9, 2022 by Shara, Woodshop Diaries

In this post, I’ll show you how to build a simple bench with a shelf underneath!

*This post was sponsored by MakeByMe and also contains affiliate links. See website policies.

Dark stained wooden bench with shoe shelf next to floor plant

This simple DIY bench design would work perfect for an entryway and you can use the shelf and space underneath to store shoes.

It would also make a great piano bench and you can store books and music notes on the shelf.

You could even add it to the end of the bed for some extra seating.

I kept this design very simple, so I didn’t add storage under the seat.

However, if you wanted to create some shallow storage under the seat top, you can attach the seat with a piano hinge and add a solid bottom to the seat frame.

This is an incredibly fun weekend woodworking project so if you’re ready to build a simple bench, let’s go!

Tools & Materials:

Tools:

  • Miter saw
  • Circular saw
  • Cutting Guides (optional, but helpful)
  • Finish Nailer (optional, can use screws instead of nails if you’d rather)
  • Drill/Driver

Materials:

  • (1) 1x2x8
  • (1) 1x3x8
  • (2) 1x4x8
  • (1) ¾” plywood 24” x 48” (you only need ¼ sheet)
  • 1 ¼” wood screws
  • 1 ¼” finish nails
  • Iron On Edge Banding
  • Wood Glue

A Few Notes Before Building the Bench

This is a great beginner project build that should only take a couple hours (at the most) to build.

You may even be able to find many of the pieces you need in the scrap pile, so be sure to check there first before buying any new lumber!

For a full cut list, see the plans linked below.

DRAWING THE BUILDING PLANS

I partnered with MakeByMe to share the building plans for this simple bench with you.

MakeByMe is a 3D modeling app that allows you to draw out your projects in a realistic looking digital environment before ever building anything.

Computer drawing showing the completed bench project from MakeByMe

One of my favorite features of the app is that once you’ve “built” your project digitally, the software automatically puts together a materials, tool, and cut list, along with a list of steps for assembling each joint.

Learn more about MakeByMe here.

Overall Dimensions

The overall dimensions of this bench are 18 ¾″ tall, 35″ wide, and 15″ deep.

Completed simple DIY bench project with shoe shelf stained dark brown

Helpful Resources for This Project:

  • How to cut plywood sheets
  • How to use a pocket hole jig
  • How to apply iron on edge banding
  • 5 secrets to professional looking DIY furniture

How to Build a Simple Bench with Shelf

If you’re ready to get building, let’s dive into the details.

This project should only take a couple of hours (at the most!) and just a few basic tools.

Step 1: Assemble Bench Leg

The bench legs here consist of two 1×4 boards assembled together on the edge to make a “corner post.”

However, to add some extra detail, I tapered these pieces before putting them together. This is completely optional, but is easy to do.

I cut two pieces of 1×4 to 18″ long and measured and marked 11″ down from the top of each board.

Measuring out 11" from the top edge of leg board on workbench

Then, I marked the center of each piece at the bottom and drew a line between the two marks.

Line drawn from 11" mark to center of bottom edge of leg board

Then, I used a circular saw to cut along this line on both pieces.

If you didn’t want to use a circular saw, a jig saw, band saw, or even a taper jig on the table saw would work as well.

Bench leg pieces cut with slight taper laying out on workbench

After sanding smooth, I used wood glue and finish nails to assemble them together.

Using finish nailer to build basic tapered leg

If you didn’t want to use nails, you can certainly use wood screws OR dowels if you prefer.

Step 2: Assemble Second Bench Leg

I repeated the process of step 1 to make a second leg, BUT…

This time, I paid close attention to the orientation of the legs at the corners and made sure this one “mirrored” the first one.

Shara Woodshop Diaries showing two bench legs mirrored each other on workbench

Notice that the full piece sides should be opposite–these will face the front and back of the bench.

The sides that show the joint will go on the sides of the bench.

Step 3: Add Bench Side Bracing

Next, I cut a piece of 1×3 and a piece of 1×2 to 11″ long.

I used wood glue and 1 ¼″ wood screws to secure the 1×3 between the bench legs on the inside so that it was flush to the top.

Using screws to secure the top frame piece between simple bench legs

Note that the legs are positioned so that the full 1×4 faces the front and back.

Then, I used wood glue and 1 ¼″ wood screws to secure the 1×2 between these legs so that the top edge was about 11″ down from the top of the legs.

One bench side frame assembled laying on workbench

Step 4: Build Second Bench Side

Then, I repeated steps 1-3 to create another bench side frame identical to the first one.

Two identical bench side frames assembled on workbench

Step 5: Add Bench Seat Supports

I cut two pieces of 1×3 to 30″ long and used wood glue and 1 ¼″ wood screws to secure these to the inside of the front and back legs flush to the top.

Building simple bench frame securing top support between side frames
Adding top bench support between bench side frames

This created the bench frame.

Step 6: Prepare Bench Shelf

For the bench shelf and top, I used ¾″ plywood.

You only need ¼ of a sheet to get these two pieces from, but if you’d rather, you can certainly use solid 1x material instead of plywood.

I cut a piece of ¾″ plywood about 9″ wide x 31 ½″ long and test fit it into the bench across the supports on each side.

Shara Woodshop Diaries adding shelf panel into bench to test fit

Once I made sure it would fit, removed it and applied iron on edge banding to the edges for a cleaner look.

Edge banding is totally optional, but it does make the plywood edges look a little cleaner.

Close up of edge banded vs not edge banded plywood edges

You can check out how to apply edge banding in this post.

It will be easier to paint/stain the bench before installing the shelf, so I didn’t secure it in place just yet.

Step 7: Prepare Bench Seat Top

I made the top just like the shelf. I cut a ¾″ plywood panel to about 15″ deep x 35″ and applied edge banding on the sides.

Shara Woodshop Diaries applying iron on edge banding to top bench seat panel

I made sure this piece fit on the bench and allowed for 1″ overhang on both sides and about 1 ¼″ overhang on the front/back.

But I didn’t attach it just yet.

Step 8: Finish Bench and Attach Shelf

Now that the bench frame, top and shelf are prepared and ready to go, I went ahead and stained the pieces separately.

Feel free to stain and/or paint as desired. I stained this project in Rustoleum Kona.

Shara Woodshop Diaries applying wood stain to bench frame on workbench

Then, I applied a little wood glue along the bench shelf supports and placed the shelf on top.

I used finish nails to secure, but you could also use screws if you’d rather.

Using a finish nailer to secure shoe shelf into bench frame

Step 9: Attach Bench Seat Top

To attach the top, you could use a few different methods. You could drill pocket holes through the top supports to secure the seat panel.

You could also use 90 degree L brackets to secure the bench top to the 1×3 supports on the bench like shown below.

Close up of L brackets used to secure bench frame to bench top

You could also use figure 8 brackets or Z clips.

Because I already had some L brackets in my shop, that’s what I used here.

I flipped the top panel upside down on the workbench, made sure the base was upside down and centered on it, then installed four L brackets between the top and the frame.

Inside view of underside of bench--showing L brackets used to secure top to frame

Since the top is plywood, wood movement really isn’t a concern here, so pocket holes and screws or even wood glue and screws or nails from the top side would also work fine.

And once the top was attached, I added a little poly to seal it and it was ready for use!

Completed simple wooden bench with shoe shelf stained dark brown

Looking for More DIY Bench Plans?

Here are a few favorite DIY bench projects to check out:

DIY Storage Bench
Shara sitting on planter bench
DIY Planter Garden Bench
DIY Upholstered Storage Bench
One Board Shoe Bench

I hope you enjoyed seeing how to build a simple bench as much as I enjoyed sharing it with you! Grab the building plans for it here!

This bench with shoe shelf is a great beginner project that you can find many great uses for.

If you’d like to stay up to date with all the latest projects and plans, be sure to subscribe to the FREE newsletter for priority access to new content!

And if you enjoyed the build and want to save it for later, be sure to pin it or share it to your favorite social channel!

Pinterest collage image showing computer diagram drawing of completed bench at top and real life image of completed bench at bottom with text "how to build a simple bench with shelf"

Until next time, friends, happy building!

Simple Bench with Shelf

Simple Bench with Shelf

How to build a simple bench with a shelf underneath!

Materials

  • (1) 1x2x8
  • (1) 1x3x8
  • (2) 1x4x8
  • (1) ¾” plywood 24” x 48” (you only need ¼ sheet)
  • 1 ¼” wood screws
  • 1 ¼” finish nails
  • Iron On Edge Banding
  • Wood Glue

Tools

  • Miter saw
  • Circular saw
  • Cutting Guides
  • Finish Nailer
  • Drill/Driver

Instructions

  1. Cut and assemble the bench legs using wood glue and finish nails.
  2. Add bench side bracing using wood glue and 1 ¼" wood screws.
  3. Repeat steps 1 and 2 to build the second bench side.
  4. Add bench seat supports using wood glue and wood screws.
  5. Cut plywood for the shelf, dry fit, apply edge banding to exposed edges (optional).
  6. Cut plywood for bench top and apply edge banding.
  7. Stain and attach shelf.
  8. Attach bench seat and it's done!
© Shara, Woodshop Diaries
Project Type: DIY Furniture Plans / Category: Woodworking

30+ DIY Handmade Christmas Gift Ideas

December 3, 2022 by Shara, Woodshop Diaries

Image collage of six handmade Christmas gift ideas

Need some inexpensive, but heartfelt DIY handmade Christmas gift ideas for the upcoming holiday?

I’ve got a ton of choices with this list of 30+ DIY Christmas Gifts Ideas!

Image collage of nine handmade Christmas gift ideas with text overlay

There is just something special about a handmade Christmas gift. 

Even if the store bought one was cheaper…and even the handmade one isn’t perfectly square…or the finish isn’t JUST right. 

It’s the “handmade” part that makes it so valuable–the fact that someone who loves you spent their time making that just for YOU. 

I’m not normally a sentimental person, but those are the best gifts you can get 🙂

So this Christmas, if you are looking to give something special, heartfelt, personal and handmade, I’ve compiled a list of great DIY handmade Christmas gift ideas for you to check out below.

Unique Handmade Christmas Gift Ideas

These are fun and simple gift ideas for anyone on your list.

The majority of these projects can be made from scraps, so these are inexpensive gift options you can make quickly.

Simple Scrap Wood Picture Blocks

These SUPER easy blocks are perfect for pictures, cards, and more. Pair a set with a few new photos of the family as the perfect simple and inexpensive gift they’re sure to love!

Learn how to make scrap wood photo blocks

DIY Bookends

DIY Guitar Bookends--And Easy and Quick Scrap Wood Project

Aren’t these the cutest bookends you’ve ever seen?!

I made these using pieces of scrap wood from my ever growing pile, ha! They are the perfect handmade Christmas gift for any music lover you know.

Make these bookends

DIY Cutting Board

maple and walnut cutting board with apple on wooden table top

A cutting board is one of those tried and true gift ideas. They are easy to customize in wood type, shape, and design.

Plus–it’s one of those gifts you can never have too many of. So even if they already have one, they’ll be excited to open up another one!

Learn how to make a simple, basic cutting board

RELATED: There are many ways to make a cutting board. Here’s another DIY cutting board method you might like to try!

DIY Scrap Wood Book Stand

DIY scrap wood bookstand with cookbook on wood tabletop

This is the perfect hostess or wedding gift. While its size works great for most cookbooks, this would also be ideal for displaying photos, plaques, and more.

The back rest even folds up so it’s easy to pack and store away when not in use.

Learn how to make this easy DIY book stand

DIY Scrap Wood Tic Tac Toe

wooden tic tac toe table top game with x and o blocks

Tic tac toe is not just for kids! This table top tic tac toe game board is both functional, but also attractive.

It makes an excellent addition to a coffee table, or console table to bring the family together for a fun game night.

Learn how to make a scrap wood tic tac toe board

Modern Serving Tray

DIY walnut serving tray--great homemade DIY christmas gift idea

They can put together the biggest charcuterie board with this modern serving tray!

I made this with some Walnut boards that I scored for free, but you can use any type of boards you want to make this.

Make this serving tray

DIY Drink Coasters from Scrap Wood

Everyone can use a set of coasters. This fun idea is a great way to use up some of those smaller scrap pieces (they don’t even have to be the same wood type!), and the cutting board shape is cute and unique!

Learn how to make “cutting board” coasters here.

Looking for something a bit more traditional? These thick wooden coasters (shown below) made from scrap wood are simple, yet attractive and so easy to customize with a little wood stain!

Make these two tone coasters

DIY Wooden Box for Table

.

Building a simple wood box like this is an INCREDIBLY easy project that you can build from a single 1×6 board (or scraps!) and they make perfect handmade gifts for the holidays, housewarmings, or even weddings.

Build this modern centerpiece box

DIY Tea Storage Box with Mug Holder

Forget the coffee bar. Set them up with a tea bar!

This DIY handmade Christmas gift idea will wow the tea lover on your gift list and you can make it with scrap wood!

Make this tea storage box with mug holder

DIY Tea Station Tray

wooden tea station tray with mug holder and tea kettle stand

Another great gift idea for the the tea lover! This simple, compact tea station is the perfect gift idea.

You can include a set of mugs and a set of handmade scrap wood coasters to go with it. They can proudly (an conveniently!) display this gift in their kitchen and think of you every time they make tea!

Learn how to build a tea station tray here

Scrap Wood Catch All Tray

walnut and red oak catch all book stand and key holder tray

This is a super simple and easy scrap wood project perfect for anyone on your list!

It’s a catch all tray with handy pegs for holding keys. Gift this to the person who loves (or needs) a little extra organization in their life!

Learn how to make a key holder catch all tray

Scrap Wood Art

Scrap wood sunflowers stained different colors

While these are obviously sunflowers, this project is completely customizable to any shape, style, or color you want!

Cut out their favorite flower, the shape of a pet, a landscape scene–get as creative as you want! The build process is the same–just cut out whatever shape(s) you want!

Learn how to make easy scrap wood art here

Easy DIY Picture Frame

Easy custom floating picture frame--great Christmas gift idea

A custom floating picture frame with personalized sayings inside is the perfect gift for teachers, co-workers, or anyone on your gift list that is hard to buy for.

I’m sharing three different ways to make a custom floating picture frame, so you can take your pick of which style you want to make.

Make a floating custom picture frame

Scrap Wood Keepsake Box

DIY Continuous grain walnut box with tile top

Keepsake boxes are such a great DIY handmade Christmas gift. You can give them to anyone on your gift list.

I’m showing you how to make them in a hexagon shape and a rectangle inspired by the tile samples I bought to use for lids. Which shape will you make?

Make a keepsake box

DIY Footed Tray

This is probably the easiest project on this list. A footed tray can be used for so many things and in so many places.

When you see how easy they are to make you’ll be making one for everyone on your gift list.

Make this footed tray

DIY Serving Board

scrap wood serving tray board with rope handle

This easy project is a great way to use up some wood scraps and is a gift they are sure to love.

It’s as simple as cutting a handle shape on a board, and giving away.

Make this serving board.

Bluetooth Speaker Box

DIY Wireless Bluetooth Wooden Speaker Box--Looks like a retro mid century credenza and it's even got a hidden compartment for cord storage!

A Bluetooth speaker box is great for using in the shop, in your home office, or how about for your favorite tween or teen?

You can make this fun retro guy using scrap wood.

Make this Bluetooth speaker box

3-Tiered Wooden Tray

three tiered serving tray for kitchen

You see these all over Pinterest during seasonal holidays decorated with items for the season. Your favorite hostess will LOVE getting this DIY gift.

You’ll need 1×2 boards, plywood, and table legs to make this fun gift idea.

Make this 3-tiered tray

Handmade Lanterns as Gifts

These deserve a category of their own because there are so many options! I love building different style lanterns.

They make excellent scrap wood projects, gifts, and décor all around the house, the porch, and the patio.

DIY Arched Lanterns

set of three wooden arched lanterns in different colors on porch

These lanterns are SO much fun to make and can be customized to any size (and color!) you want.

The best part? You only need a couple basic tools to make them!

Learn how to build wooden arched lanterns here

DIY Scrap Wood Lantern

Here’s another wood lantern option for the candle lover on your gift list. You can make this using scrap wood too.

They’ll never know it was free to make!

Learn how to make this lantern here

DIY Lantern with Curved Top

This DIY lantern makes a perfect centerpiece and a great hostess gift!

You’ll need some square dowels and scrap wood to make this handmade Christmas gift. It’s a fun and easy project that they will love!

Make this wood lantern

DIY Wooden Lantern

How to build a GORGEOUS wood lantern! Great Christmas gift idea

You can never go wrong with a candle as a gift. Let’s take it up a notch and make a DIY wooden lantern they can put their candle in.

The top of the lantern is the hardest part, but trust me you can do this and they will love their DIY handmade Christmas gift!

Make this lantern

DIY Outdoor Lanterns

DIY outdoor lanterns small

I may just be slightly obsessed with lanterns…Here is a set that you can make from scrap wood and they make a great gift!

The set features three sizes and you can stain them or paint them any color you want.

Make this lantern set

Holiday Themed DIY Gift Ideas

These holiday themed gift ideas are fun and festive and make excellent hostess gifts for those holiday parties!

DIY Wooden Sled

decorative wooden snow sled with stenciled logo

This simple decorative sled makes an excellent centerpiece or decoration for the porch.

Customize the sled seat with a last name, a fun logo, or a holiday design of your choice.

Learn how to make a decorative wooden sled here

Stackable Wooden Tree

Wooden nesting christmas tree shelf stacked up three tiers high

This is one of my favorite ideas on the list! This stackable nesting wooden tree shelf is a super fun holiday gift idea they’re sure to love.

We use ours for displaying Christmas cards throughout the winter season (even after the other decorations come down!).

Learn how to make a nesting Christmas tree shelf here

DIY Snowflake Shelf

DIY wooden snowflake shelf hanging on wall

A simple, but oh, so fun gift idea they can display all winter long–a DIY snowflake shelf!

They can hang it on the wall, display it on the porch, set it up by the tree or fireplace–the possibilities are endless!

Learn how to make a snowflake shelf here

Tiered Candy Stand

Tiered Christmas tree candy stand

The perfect hostess gift! A DIY tiered candy stand they will love. And if you’re going to be visiting, you’ll get to enjoy the goodies they put on it.

That’s a win win in my book!

Make a tiered candy stand

DIY Handmade Christmas Gift Ideas to Personalize

These DY gift ideas are projects you can personalize with special notes, names, or dates to make these gifts extra special.

Custom Picture Frames

Create a large (or small–totally up to you!) picture frame with their favorite photo for an easy and inexpensive gift idea!

Use a pet photo, a wedding photo, or even a funny poster and customize the frame size to fit. They’ll be sure to love this personalized gift!

Learn how to make custom picture frames here

DIY Personalized Wall Clock

DIY Wooden wall clock with personalization--make your own with this free tutorial

Who doesn’t love clocks?! Personalize it with a family name and it becomes the perfect DIY handmade Christmas gift.

It’s super easy to make, all you need is two 1×10 boards and a clock kit.

Make this clock

RELATED: For More DIY Wall Clock Ideas, check these out!

DIY Personalized Lazy Susan

How to make a Personalized DIY Lazy Susan

Personalize a DIY lazy Susan charcuterie board with the state your recipient lives in.

The one I did was Kentucky, but you can use any state that fits for your gift. Or chose another fun shape or letter to personalize how you’d like.

Make a personalized Lazy Susan

.

DIY Keepsake Box

How to build a DIY wooden keepsake box with splines and picture frame top

Give them a keepsake box to keep all their treasured memories in. It’s the perfect gift for us sentimentalists.

The picture frame lid can be use for anything. A favorite note, a picture, or a drawing.

Make a keepsake box

DIY Handmade Christmas Gift Ideas for Kids

DIY Rotating Bookshelf

four sided rotating bookshelf made from plywood

This compact bookshelf rotates so you can store and display your favorite books on all four sides.

It’s the perfect place for kids to store their favorite games, books, and toys!

Learn how to build a rotating bookshelf here

DIY Kid’s Nesting Table

DIY Kid's nesting table with storage seats makes an excellent handmade Christmas gift idea

This fun gift idea will inspire creativity and it comes with four nesting storage seats to corral all those supplies.

You can make this with a sheet of plywood, some boards and just four tools! Your child will love it and will provide hours of entertainment.

Make this DIY nesting table

Kid’s Play Table and Chairs

How to Build a DIY Child's Table and Chairs with Shelf

This easy to build play set is perfect for coloring, activities, and games. Build one for the little one who loves to play!

Learn how to build a kid’s play table and chair set here

Life Size Ruler

Shara woodshop Diaries standing next to life size ruler

Kids will love this life size ruler! They’ll be racing to see who is taller.

Make it with just one board and your Cricut cutting machine.

If you don’t have a Cricut you could buy stencils and paint the numbers and lines.

Make this life size ruler

DIY Rocking Horse

How to build a DIY rocking horse for toddler or small child--dog shaped rocking horse with template to make your own

I built this for a friend’s new baby and I loved that it was a different take on the standard “rocking horse” because this one is a dog shape. 

The cool part is that you could tweak the design a little to look like different breeds if you wanted. 

Kid’s favorite toy can match kid’s best friend ????

Make this DIY Rocking “Horse”

.

DIY Four-Sided Bookshelf

This makes a great gift idea for kids that love to read.

That can put their favorite books front facing so they can find them easily.

Make this DIY bookshelf

DIY Toy Chests

Toy chests are a fun option to give a baby or young child that they can keep as an heirloom piece for years to come.

Here are some design ideas to pick from.

Toy Chest Option 1

building plans to make your own DIY Storage chest

This DIY handmade Christmas gift might just be more for parents than kids, but we’re going to call it a kid’s gift idea.

This toy chest will give your kids a place to store all their favorite toys. It may even help teach them to clean up their toys when they’re done playing.

We can hope so anyway…right?

Make this toy chest

Toy Chest Option 2

DIY hope chest toy box--great christmas gift idea for kids

Toy chest option 2 is a little more detailed with handles and even has soft close hinges to keep your kiddos fingers from getting smashed.

Make this toy chest

RELATED: Check out all these toy chest ideas for more options!

DIY Small Furniture Christmas Gift Ideas

For gifts a little larger in size, here is a great list of furniture builds that would make excellent gifts as well!

Easy DIY Corner Shelf

Shara Woodshop Diaries standing next to DIY corner shelf

Make this DIY corner shelf for under $30 in lumber and in just a weekend. They can use it as a plant stand, or as a bookshelf, or to display treasured items.

It will make a great handmade Christmas gift.

Make this corner shelf

DIY Modern Blanket Ladder

Blanket ladders aren’t just farmhouse style anymore and they make a great gift!

This modern take on the traditional blanket ladder is an easy DIY project you can make in a day.

Make this blanket ladder

DIY Tiered Plant Stand

Shara Woodshop Diaries placing plant on tiered plant stand

For the plant lover on your gift list, this tiered plant stand can be made using scrap wood.

I’m on a roll with scrap wood projects, that happens when you have a lot of it and can’t bear to throw any of it away, ha!

Make this tiered plant stand

Simple Shoe Bench

This simple shoe bench is a quick and inexpensive build that would make a great gift for a wedding, housewarming, or any occasion.

Learn how to build this simple shoe bench

DIY Plant Stand/End Table

Simple wooden side table plant stand

This would make a great gift for a college student. It’s small enough to use in a dorm room and they can use it for plants or as a bedside table.

It’s easy to make using 1x2s and a 2×6.

Make this plant stand/end table

Easy DIY Shoe Rack

Shara Woodshop Diaries placing shoes on DIY shoe rack

I’ve got another great handmade Christmas gift idea for your college student.

This DIY shoe rack takes up very little space and could also be used as a book case!

Make this DIY shoe rack/bookcase

DIY Vinyl Record Shelf

Modern angled vinyl record shelf

Maybe this isn’t a “small” furniture gift, but it’s the perfect gift for the person who loves records!

And you can build it from a single sheet of plywood!

Make this vinyl record shelf.

One Board Shoe Bench

Shara Woodshop Diaries placing shoes on shoe bench

This simple shoe bench can be made from a single 2x10x8 board!

It’s a practical gift idea that the recipient can use in their mudroom, or entryway and they’ll think of you every time they put their shoes away.

Make this one board shoe bench.

DIY Gift Ideas for the Pets

DIY Dog Bed

DIY Dog bed--handmade christmas gift ideas for pets

Let’s not forget our furry friends this Christmas! Give them a comfy place to lay down with this DIY dog bed. Add a big cushion and they’ll be all set.

Make this dog bed

DIY Dog Tent

How to make a DIY dog tent from a little fabric and some dowel rods! Super easy sewing tutorial--great beginner project!

Give them their own little sanctuary with this DIY dog tent. The teepee style is just so cute, don’t you think?

Make a DIY dog tent

DIY Dog Bowl Food Stand

DIY elevated dog food stand for DIY pet christmas gift!

Made in the same style as the DIY dog bed, this dog bowl stand gets their food and water off the floor and makes the bowls easier to reach.

Plus it cuts down on the mess on your floor!

Make this dog bowl stand

WOW, that’s a lot to choose from!  You can find lots more on the projects page as well.

I hope this list is helpful if you are looking to gift someone with a handmade Christmas gift this year.

And I hope that in the midst of all the sawdust and glue, that you find time to enjoy the holiday and spend time with those you love…and eat lots of Christmas candy in the process 😉

As always, thank you so much for your support and for following along.  To you and your family, have a very Merry Christmas 🙂

Image collage of nine handmade Christmas gift ideas with text overlay

Until next time, happy handmade Christmas gift building 🙂

Simple DIY Wood Box for Table

December 2, 2022 by Shara, Woodshop Diaries

In this post, I’m sharing how to make a simple DIY wooden box for your table centerpiece!

White oak centerpiece box with modern black risers on dining table with mini Christmas tree inside

If you’ve followed along for very long and this looks a little familiar, you may remember that I built a very similar DIY centerpiece box several years ago.

I built several of those and gave them away as Christmas gifts that year to several friends and family members.

Years later, they still talk about them and a few recipients still send me pictures as they change out their decorations for different seasons.

It’s safe to say these made excellent gifts!

So this year, I built a couple more of these DIY wooden box gifts, this time, with a few changes and some optional added “risers” on the bottom.

Close up of ¾" square dowel risers underneath white oak box

Building a simple wood box like this is an INCREDIBLY easy project that you can build from a single 1×6 board (or scraps!) and they make perfect handmade gifts for the holidays, housewarmings, or even weddings.

So if you’re ready to get building, let’s dive in.

Tools & Materials

*This post contains affiliate links. See policies.

Tools:

  • Miter Saw (or any saw you can cut straight lines with)
  • Brad Nailer
  • Sander
  • Clamps (optional)

Materials:

  • 1x6x8 board
  • ¾″ square dowel (optional–for the “risers” under the box)
  • Wood Glue
  • 1 ¼″ Brad Nails
  • Wood Finish of Your Choice

How to Build a Simple Wooden Box Centerpiece

This is a really simple project to build, but there are several ways you can make it.

I used wood glue and brad nails here, but feel free to skip the nails and use wood glue only if you’d rather. In that case, you can simply clamp the pieces tight until the glue dries.

Or, swap the nails for screws instead. You could go with some black screws for a little extra “industrial” detail.

You can also add some corner braces for extra detail and stability as well.

The risers I added are totally optional, so feel free to skip those if you aren’t feeling them 🙂

Prefer to print your plans? Grab the printable version of this project here.

Step 1: Cut Wooden Box Pieces to Size

You can make this entire box (minus the risers) from a single 1x6x8 board.

Cut List:

  • (2) 1×6 @ 5 ½″ long
  • (2) 1×6 @ 28 ½″ long
  • (1) 1×6 @ 27″ long

The 5 ½″ pieces will be the short sides, the 27″ piece will be the bottom and the 28 ½″ pieces will be the long sides.

Pieces cut to length to assemble wooden box laid out on workbench

I cut these pieces from my board (I used white oak here, in case you were wondering) and sanded them well before assembling.

Step 2: Assemble Short Sides to Bottom

I mentioned earlier that I used wood glue and brad nails to assemble my DIY wooden box.

So I ran a bead of wood glue between the short end of the bottom piece and one of the side pieces and used a couple brad nails to tack it in place.

Brad nailer sitting next to partially assembled DIY wooden box on workbench

You could use Fast Dry Wood Glue if you prefer–it’s a little cleaner. But if your boards are a little warped and don’t fit together really tight, the Fast Dry Wood Glue likely won’t work very well.

Note that the wood grain on the side piece is running opposite the bottom piece.

Since these 5 ½″ long pieces are 5 ½″ square (1x6s are 5 ½″ wide in case you didn’t know 🙂 ), you can technically run the grain either direction.

Brad nailer and bottle of glue sitting next to wooden box assembly with both sides attached

But I didn’t want the end grain on the top edge, so I ran it the other way.

Once the first side was secured to the bottom, I repeated to add the other short side piece.

Step 3: Add Long Sides to Wood Box

Once the short sides were assembled, I used wood glue and brad nails to secure the long sides to complete the box.

Close up of brad nailer securing long side to wooden box on workbench

Make sure to nail at both the top and bottom to help keep the short side pieces secure.

Wooden box fully assembled on workbench

Step 4: Assemble Risers (Optional)

The risers here are optional. However, they’re a fun little addition that makes this simple box feel a little more “modern.”

If you want to make one, it’s simple. They’re assembled from ¾″ square dowels.

Close up of ¾" square dowel

You can buy precut dowels, or, if you have a table saw, you can cut your own from scrap 1x material.

Cut List for Risers:

  • (2) ¾″ square dowel @ 7 ⅛″ long
  • (4) ¾″ square dowel @ 3″ long
square dowel pieces cut to length for risers

After lightly sanding each one, I used Fast Dry Wood Glue to assemble two 3″ pieces onto each end of each 7 ⅛″ pieces.

You can use regular wood glue instead, but I was impatient.

You can also use brad nails in addition to glue, but it’s tricky sometimes to nail these small pieces, so I didn’t try it.

Risers in clamps on workbench

I clamped these together for about 5 minutes, then gave them a coat of black wood stain.

Step 5: Finish

Speaking of stain, at this point, you can finish (stain, paint, etc) as desired.

I left the box a natural white oak color and stained the risers black for some contrast.

unfinished White oak box on workbench with black stained risers

You’re welcome to finish these however you’d like and once it’s dry, you can simply place the box on the risers where you want it.

I didn’t attach the risers so that they are easy to remove later if I decide I don’t want them.

Wooden centerpiece box sitting on risers on dining table empty

However, if you do want them permanent, you can secure them with brad nails through the bottom of the box.

Now it’s ready to fill with garland and Christmas decorations, simple vases, Mason jars and flowers, etc.

DIY wooden centerpiece box on dining table full of garland, ribbon, and ornaments

These would be so much fun to change around with the different seasons!

Prefer to print your plans? Grab the printable version of these plans here:

WANT SOME MORE DIY GIFT IDEAS?

With the upcoming holidays, I’ve teamed up with my friend, Kati, from Houseful of Handmade to share some easy and fun gift ideas you can make this season!

Cookbook Holder
Scrap Wood Drink Coasters
Tea Box with Mug Holder
Toy Barn Totes
DIY Two Tone Cutting Board
Easy Beginner Cutting Board
DIY Plant Stand
DIY Molkky Game with Carrier
DIY Wooden Centerpiece Box
DIY Modern Picture Frames

If you can’t wait to see what’s next, be sure to subscribe to the FREE newsletter below for priority access to all the latest projects and plans!

And if you enjoyed this DIY wooden box project and want to save it for later, don’t forget to pin it and share it to your favorite social channel!

Pinterest collage of wooden centerpiece box showing box at top with mini Christmas tree and box at bottom full of garland with text "how to make a wood centerpiece box"

Until next time, happy building!

DIY Plant Stand End Table

December 1, 2022 by Shara, Woodshop Diaries

In this post, I’m sharing how to build a simple two-tiered DIY plant stand that also doubles as an end table!

*This post was sponsored by MakeByMe and also contains affiliate links. See website policies.

Plants displayed on simple side table with top and bottom shelf

One can never have too many indoor plants, am I right?

However, if you keep adding to the collection, eventually you get to the point where you have to start storing them UP vs. OUT.

After all, there’s only so much room on the floor and the window sill.

So small tiered tables are a great option to store and display a few of those extra plants.

But, even if you aren’t a plant person, this easy DIY plant stand is also perfect as an end table next to your favorite chair or couch for books, a lamp, or a place to set your drink.

DIY plant stand end table displayed with plants on each shelf and a large plant sitting on floor next to it

No matter what you use it for, it’s a great weekend woodworking project and also makes an excellent gift idea!

So let’s dive in and see how to build it!

Tools & Materials:

Tools:

  • Miter Saw
  • Jig Saw (optional)
  • Circular Saw (optional)
  • Drill/Driver
  • Pocket Hole Jig
  • Clamps

Materials:

  • (1) 2x6x8 board
  • (2) 1x2x8 boards
  • 2 ½” pocket hole screws
  • 2 ½” wood screws & washers
  • Wood Glue

A Few Notes Before Building

This is a great beginner project build that should only take a couple hours (at the most) to build.

You may even be able to search your scrap pile and find everything you need to build it without buying any new lumber!

I used construction grade pine to build this end table and those boards typically come with rounded corners.

To make the joints look a little cleaner, I recommend removing the rounded corners if possible.

2x4 close up showing rounded edges

It’s not NECESSARY, but it does makes for a smoother looking project.

RELATED: 5 Secrets to Professional Looking DIY Projects

If you’re curious how to do that, check out this post for how to square board edges and how to make your own 2x2s.

The overall dimensions of this DIY end table are 18″ wide x 18″ deep x 26″ tall.

Helpful Resources for This Project:

  • How to glue up solid panels
  • How to make your own 2x2s and square board edges
  • How to use a pocket hole jig

Drawing the Building Plans

I partnered with MakeByMe to share the building plans for this plant stand/end table with you at the end of this post.

MakeByMe computer image showing completed plant stand table drawing

MakeByMe is a 3D modeling app that allows you to draw out your projects in a realistic looking digital environment before ever building anything.

One of my favorite features of the app is that once you’ve “built” your project digitally, the software automatically puts together a materials, tool, and cut list, along with a list of steps for assembling each joint.

Learn more about MakeByMe here.

How to Build a DIY Plant Stand End Table

If you’re ready to get building, let’s dive into the details.

This project should only take a couple of hours (at the most!) and just a few basic tools.

Step 1: Assemble X Braces

First, I cut down (2) 15″ long 2x2s and (4) 6 ¾″ long 2x2s to make two “X” shapes.

2x2s cut to size to assemble plant stand frame laid out on workbench

I drilled 1 ½″ pocket holes into the ends of each piece.

RELATED: How to use a pocket hole jig

Now, it’s usually recommended to use 2 screws per joint. However, when working with pocket holes on 2x2s, I’ve found that using 2 screws tends to cause splits.

So, I use 1 pocket hole on 2x2s and make sure to use plenty of wood glue.

Close up of pocket holes drilled in the ends of 2x2s

Once the pocket holes were drilled, I used wood glue and 2 ½″ pocket hole screws to assemble the 2 short pieces at the center of the long pieces to form two “X”s like shown below.

X braces with pocket holes drilled and assembled laying out on workbench surface

These braces will support the top panel and bottom shelf.

Step 2: Add Table Legs to Complete End Table Frame

I cut four 2×2 table legs to approximately 26″ long. If you prefer a taller or shorter table, feel free to modify this length.

Then, I used wood glue and 2 ½″ pocket hole screws to secure each branch of both X braces to each leg.

Shara Woodshop Diaries assembling plant stand frame using spacer block

I used a 2″ scrap wood spacer block to help me keep the Xs consistently spaced 2″ from the top and bottom ends of the legs.

I made sure to face the pocket holes toward the TOP of the frame so that when the solid panels are added later, they’ll be covered.

Step 3: Assemble Table Top Panels

I cut 2×6 boards–6 total– to about 15″ long to glue up two solid wood panels for the top and bottom shelves.

Close up of miter saw cutting 2x6s

I removed the rounded edges of these pieces on the table saw to make a cleaner glue up.

I glued up two sets of 3 boards and allowed to dry. I just applied glue to the edges and clamped–no dowels or biscuits.

However, you can add dowels and/or biscuits if you’d like.

Shara Woodshop Diaries gluing up top and bottom shelf panels for plant stand build

Once dry, I trimmed these panels down to 14 ¾″ square and sanded well.

Finished panels glued up, trimmed down, and sanded smooth sitting on top of workbench

To trim, you can use a circular saw and straight edge, a table saw, or a miter saw–whichever you prefer.

NOTE: If you’d like, you can certainly use a jig saw or router to cut 14 ¾″ diameter circle tops instead of squares.

RELATED: How to cut a perfect wooden circle

Step 4: Attach Top and Shelf to Plant Stand

NOTE: It’s likely going to be easier to finish (stain or paint) these pieces before installing the tops.

If you’d like, go ahead and paint/stain the panels and the frame as desired before proceeding. I left this table natural for now because I prefer the lighter wood color.

Since these tops are made from solid wood, it’s best to allow for some movement as the seasons change and wood expands and contracts.

If you skip this, the table isn’t going to just fall apart and crumble, so don’t panic.

However, drilling some oversized holes through the Xs will allow for some movement and hopefully prevent the tops from splitting down the road.

Close up of drilling oversized holes to install top and bottom of plant stand

I drilled ⅜″ holes in each branch of both X braces, then used 2 ½″ screws with a washer through these holes to secure the top and bottom shelves from the underside.

NOTE: The table is upside down in the image below using screws from the underside to secure the bottom shelf.

Shara Woodshop Diaries using screws and washers to secure bottom shelf of plant stand from underneath

Step 5: Enjoy Your New Table

And now it’s ready to be put to good use!

It’s the perfect size for next to your favorite chair for drinks and books or to set next to the window for plant display.

Plants on display on completed end table/plant stand

You can grab the building plans on MakeByMe here.

Looking for more Plant Stand Ideas?

If you or someone you know is in need of a few extra plant storage ideas, here are a few favorites that are easy to build!

DIY Corner Shelf
DIY Ladder Shelf Plant Stand
Scrap Wood Tiered Plant Stand

Want some more DIY Gift Ideas?

With the upcoming holidays, I’ve teamed up with my friend, Kati, from Houseful of Handmade to share some easy and fun gift ideas you can make this season!

Cookbook Holder
Scrap Wood Drink Coasters
Tea Box with Mug Holder
Toy Barn Totes
DIY Two Tone Cutting Board
Easy Beginner Cutting Board
DIY Plant Stand
DIY Molkky Game with Carrier
DIY Wooden Centerpiece Box
DIY Modern Picture Frames

We are adding new projects to this list every day this week, so stay tuned for new ideas!

If you can’t wait to see what’s next, be sure to subscribe to the FREE newsletter below for priority access to all the latest projects and plans!

And if you enjoyed this project and want to save it for later, don’t forget to pin it and share it to your favorite social channel!

Pinterest collage showing completed plant stand at bottom and diagram of project at top with text "how to build a plant stand table"

Until next time, happy building!

DIY Plant Stand End Table

DIY Plant Stand End Table

Yield: 1 plant stand end table

How to build this easy two-tier DIY plant stand that also doubles as an end table.

Materials

  • (1) 2x6x8 board
  • (2) 1x2x8 boards
  • 2 ½” pocket hole screws
  • 2 ½” wood screws & washers
  • Wood Glue

Tools

  • Miter Saw
  • Jig Saw (optional)
  • Circular Saw (optional)
  • Drill/Driver
  • Pocket Hole Jig
  • Clamps

Instructions

  1. Assemble X braces using wood glue and pocket hole screws.
  2. Add table legs to complete end table frame.
  3. Assemble table top panels.
  4. Attach top and shelf to plant stand.
  5. Enjoy your new table!
© Shara, Woodshop Diaries
Project Type: DIY Furniture Plans / Category: Woodworking

DIY Wooden Cutting or Charcuterie Board

November 30, 2022 by Shara, Woodshop Diaries

In this post, I’m sharing how to make a simple DIY wooden cutting board with two different color woods!

This makes the perfect serving or charcuterie board, too!

Two tone cutting board--walnut and maple sitting on table with vase

Making a basic wooden cutting or serving board is one of the most common beginner projects.

But even “advanced” woodworkers still enjoy making them. They’re just one of those projects that never get old and never go out of style.

Making a DIY wooden cutting board requires few tools and not a lot of lumber.

It’s easy to customize the size and color and wood type when making one.

And you can keep it as simple or as “complex” as you’d like by adding (or not adding) decorative edging, cutting unique shapes, or cutting handles/holes.

Two multicolor cutting boards laying on table top

In this post, I’m sharing how I made two similar, but slightly different boards.

Tools & Materials:

*This post contains affiliate links. See website policies.

Tools:

  • Miter Saw OR Circular Saw (to cut boards to length)
  • Table Saw (optional–only if you need to rip boards to different widths)
  • Jig Saw (optional–only if you want to cut a shape or design on the board)
  • Drill and Forstner Bits (if you want to make a hole)
  • Sander
  • Clamps

Materials:

  • Hardwood of your choice–scraps are a great option!
  • Wood Glue
  • Wood Finish (see notes below)

What to Know Before Making a Cutting Board

While making a DIY wooden cutting board or charcuterie serving board is a basic project, there are some things to consider before diving in.

Cutting Board Material Options

Typically for cutting or serving boards, hardwoods are recommended.

This is because most hardwoods have a tighter grain pattern and are harder to dent or damage than softwoods, like pine.

This makes them harder to scratch and less likely to absorb and harbor bacteria.

However, not all hardwoods are a great option. Some woods are toxic and not considered food safe.

Some commonly used hardwoods for cutting and serving boards are maple, cherry, walnut, and teak.

Walnut and maple boards laying on workbench

However, if you’re making a “cutting board” for decoration and don’t actually plan to use it in direct contact with food, feel free to branch out and use other materials as well.

Cutting Board Finish Options

If you plan to use your cutting board in a way that it will come in direct contact with food–like for cutting–it’s important to use a food safe finish.

There are tons of options for cutting board oils, butters, and waxes that are food safe. I like Walrus Oil, personally.

However, if you’re just planning to use your board for decoration or serving where food won’t be cut, feel free to branch out with your finish options if you’d like.

For example, in this post, the black and wood board is actually white oak that I stained black with wood stain. The stain itself isn’t food safe.

Stained black oak and natural oak stripes DIY cutting board laid out on table top with vase on top

However, I applied a clear poly to it, and once that’s cured, it’s okay to serve from (like the surface of a dining table).

NOTE: Check that the specific clear coat you plan to use is food safe once cured–not all clear coats are made the same.

But, even though the surface is fine to place food on, it’s still not okay to cut on.

Cutting could chip this finish off and cause pieces of it to get into the food.

So, when choosing a finish, it’s important to think about how you will be using the board and choose an appropriate finish.

Size and Style

As far as size and style, you can make your cutting board however you’d like.

Make it small, make it huge, add a handle, round the edges. Get as creative as possible.

For one of my boards, I simple rounded one corner and added a hole. For the other, I used a jig saw to cut a handle shape.

There’s not right or wrong here. That’s the beauty of making a cutting board–you can flex your creative muscles.

RELATED: Check out this fun X design cutting board from a few years back!

How to Make a DIY Wooden Cutting Board

Since there are so many options when making a serving board, the below tutorial is general.

I’ll share the basics, but feel free to branch out as needed.

Step 1: Select and Cut Wood to Size

If you’re working with limited tools, it’s best to choose woods with the same thickness so you don’t have to worry about using a planer.

In my case, I stuck with boards that were all ¾″ thick.

Maple and walnut boards laying side by side on workbench showing they're the same thickness

Cutting boards are a great way to use up some wood scraps and you can mix and match woods to use up whatever you’ve got.

I had some wide walnut boards and a small piece of maple to work with for my first board.

So, I cut down 2 pieces of walnut about 12″ long. Then I used a table saw to rip a 1 ½″ wide strip from my piece of maple and cut two pieces from that to 12″ long as well.

DIY walnut and maple cutting board pieces dry fit and laid out on workbench

I wanted to alternate the wood colors, so I ripped one of my walnut pieces in half so I could “sandwich” the maple between the walnut.

Feel free to cut your boards however large or small you’d like.

For my second board, I used all white oak, and cut a 1×4, two 1x2s and three 1x6s to piece together like shown below.

White oak charcuterie board pieces cut to size and laid out on workbench

Step 2: Glue Up Cutting Board

Once I had all my pieces cut down, next step was gluing them up.

Glue ups are both simple…and stressful…at the same time.

I like to use pipe clamps, but large bar clamps or even ratchet straps can work just as well.

You’re welcome to add dowels, dominoes or biscuits to these joints, but it’s really not necessary.

I laid out my pieces on my clamps, applied wood glue to the edges and clamped them together so that they were nice and flat (as flat as possible) across the top.

maple and walnut DIY cutting board in clamps with glue

If you’re working with several pieces, you may find it easier to glue up a few boards at a time instead of all at once.

Once the boards are clamped tight, wipe away excess glue OR let it cure up a little and carefully scrap it off with a chisel or screwdriver.

I did this for both of my boards and allowed the glue to cure for a few hours (check your specific glue for curing times).

Step 3: Sand and Trim

Once the glue was dry, I could sand and trim the edges. You can trim your board down to the size you’d like at this point.

I used a table saw to trim down both sides of my boards so the edges were flush.

You could also use a circular saw and straight edge if you’d rather.

Then, I sanded all the glue residue from both sides of each board using 100 grit sandpaper on my orbital sander.

orbital sander sanding maple and walnut cutting board

Then, I followed up with 150 grit, and 220 grit to get it nice and smooth.

Step 4: Add Optional Details

At this point, you can use a router to add a decorative edge or a juice groove. Or use a jig or band saw to round the corners, cut a handle, etc.

I kept things super simple here and just used a jig saw to round one corner of my walnut/maple board.

Then, I sketched and cut a handle shape out on my oak board.

using a pencil to draw handle for DIY charcuterie board design
Using a jig saw to cut handle shape on cutting board

I had to go back and re-sand these cut edges as they were a little rough because I used a “fast cut” jig saw blade.

Just a tip–for cutting details and curves, I recommend a fine finish (higher tooth count and thinner) jig saw blade for less tear out and cleaner edges.

I didn’t have one in the shop at the time I cut these, so I settled for a fast cut blade and lots of sanding haha.

I used a drill with a forstener bit to drill out a hole in both boards in case I want to hang it at some point.

maple and walnut cutting board with curved corner and a hole drilled out

Again, there’s no right or wrong here so cut/drill/add whatever details you wish.

Step 5: Finish Cutting/Serving Board

The final step is applying a finish to the board. See notes above.

I really don’t plan on using either of these boards for actually cutting on, so I applied finishes that are acceptable for serving/display.

I applied Walrus Oil Furniture Butter to the walnut/maple board.

applying an oil finish to maple and walnut cutting board

And I used some painters tape over the 1x2s on my oak board, and applied Minwax True Black wood stain.

Once it was dry, I applied Minwax Polycrylic to seal it.

applying black stain to white oak wooden serving board

NOTE: If you planned to cut or use utensils directly on your board, make sure to use a food safe finish.

And now the boards are ready for use or display! I really love having a few different styles and sizes of cutting boards displayed in the kitchen or pantry.

two different styles of two tone cutting and serving boards laid out on table top

Plus these make excellent gifts for Christmas, weddings, housewarming as well!

Speaking of gifts…

WANT SOME MORE DIY GIFT IDEAS?

With the upcoming holidays, I’ve teamed up with my friend, Kati, from Houseful of Handmade to share some easy and fun gift ideas you can make this season!

Cookbook Holder
Scrap Wood Drink Coasters
Tea Box with Mug Holder
Toy Barn Totes
DIY Two Tone Cutting Board
Easy Beginner Cutting Board
DIY Plant Stand
DIY Molkky Game with Carrier
DIY Wooden Centerpiece Box
DIY Modern Picture Frames

We are adding new projects to this list every day this week, so stay tuned for new ideas!

If you can’t wait to see what’s next, be sure to subscribe to the FREE newsletter below for priority access to all the latest projects and plans!

And if you enjoyed this DIY wooden cutting board project and want to save it for later, don’t forget to pin it and share it to your favorite social channel!

Pinterest collage image showing maple and walnut at top with completed cutting board at bottom with text "DIY two tone cutting board"

Until next time, happy building!

DIY Tea Storage Box with Mug Holder

November 29, 2022 by Shara, Woodshop Diaries

In this post, I’m sharing how to build a scrap wood DIY tea storage box with a mug holder!

Completed DIY tea storage box made of oak wood with wooden dowel mug holder

This is the perfect handmade gift idea for the tea enthusiast or the hard to shop for person on your list.

Personally, I would LOVE to open something like this as a gift! You can include some fun mugs and unique teas they may not have tried before.

It’s also a great easy DIY woodworking project to build for yourself from scraps you already have in your shop.

It fits perfect on the countertop, in the pantry, or tucked away in the cupboard.

So if you’re ready to build a DIY tea storage box with a built in mug holder, let’s dive in to the how-to!

Tools & Materials:

*This post contains affiliate links. See website policies.

Tools:

  • Miter Saw
  • Brad Nailer
  • Drill
  • Forstner bits

Materials:

  • Scrap 1x4s
  • Scrap 1x2s
  • Scrap ¼″ plywood
  • 1 ¼″ dowel
  • ½″ dowel
  • Wood Glue
  • 1 ¼″ brad nails

How to Build a DIY Tea Storage Box

This is a simple project and was built to have three sections to fit basic/standard tea bag packaging and three basic size mugs.

Feel free to adjust the sizing to fit however many sections and/or however many mugs you’d like.

Below is the cut list for this project. Take a look around your scrap pile for these pieces–it’s likely you may already have everything you need!

Cut List:

  • 1x4s
    • (1) 11 ¼″ long
    • (4) 3 ½″ long (30 degree mitered ends–see step 1)
  • 1x2s
    • (1) 11 ¼″ long
    • (2) 14″ long
  • ¼″ plywood
    • (1) panel 5″ x 11 ¼″
  • 1 ¼″ wood dowel
    • 12 ¼″ long
  • ½″ wood dowel
    • (3) 2 ½″ long

Prefer to print your plans? Grab the printable version of these plans here.

Step 1: Cut Tea Storage Box Pieces to Size

This tea bag storage box was made with three sections that fit basic tea bag packaging (packages approximately 2 ½″ wide).

You can adjust your measurements as needed if you’d like to make fewer or more sections.

But for this one, I trimmed 4 pieces of 1×4 for the sides and dividers with a 30 degree miter so that the back edge was 3 ½″ long and the front edge was 1 ½″ long.

Computer diagram showing how to cut tea box divider blocks from 1x4 boards

I also trimmed one piece of 1×4 to 11 ¼″ long for the back and one piece of 1×2 to 11 ¼″ long for the front.

Tea storage box front, back and divider pieces cut and ready to assemble

Step 2: Assemble Tea Box Organizer

I used wood glue and 1 ¼″ brad nails to secure the dividers to the back 1×4 board leaving 2 ¾″ space between them.

As a side note, if you wanted to use screws instead or just use glue and clamp until dry (and skip the nails altogether), you certainly can.

Divider blocks glued and nailed to back tea box board next to nailer on workbench

After the sides and dividers were attached to the back panel, I used wood glue and brad nails again to secure the front 1×2 across these pieces.

I made sure to keep 2 ¾″ spacing between the pieces. And again, if you wanted to use screws or just glue and no nails, you can.

oak tea organizer assembled with front 1x2 piece nailed in place

Next, I trimmed a piece of ¼″ plywood scraps to fit over the bottom of the box.

You could use ¼″ or ½″ or even ¾″ plywood or solid wood for this, but ¼″ scraps work great.

Wooden tea box frame on workbench next to ¼" plywood panel for bottom

I applied some wood glue and used brad nails to secure along the bottom edge of the box.

Shara Woodshop Diaries using brad nailer to attach bottom panel to tea box

Step 3: Create Mug Holder Pegged Dowel

If you just wanted a tea box, then you can stop after step 2. However, to add the mug holder stand, I needed to grab some dowels.

I cut a 1 ¼″ wooden dowel to about 12 ¼″ long and clamped it to the workbench securely.

I used a ½″ forstner bit to drill three holes along the dowel–one in the center and one about 2 ½″ from each end.

Using a forstner bit to drill holes for tea mug pegs in wooden dowel

I drilled these holes about ½″ deep–they don’t need to be all the way through.

Then, I trimmed three pieces of ½″ wooden dowel to about 2 ½″ long.

Large wooden dowel with three peg holes drilled out with smaller dowel pins cut to length for mug holder

I used some wood glue to install these into the holes and allowed to dry.

NOTE: Before drilling holes for pegs to hold your mugs, measure and check that these hole locations will work for your mugs.

Depending on the size, style, and type of mug, you may need to adjust your peg locations to fit your mugs.

smaller pegs glued into holes drilled in larger dowel

Step 4: Attach Mug Holder to Tea Storage Box

To hang this pegged dowel, I cut two more pieces of 1×2 about 14″ long.

I measured 2″ down from the top and marked the center at that location and used a forstner bit to drill 1 ¼″ holes about ½″ deep on both pieces.

Holes drilled out in 1x2 boards with forstner bit in drill

I used wood glue and brad nails to secure one of these 1x2s to the side of the tea box holder so that the drilled hole was at the top and faced toward the inside.

The back and bottom edges of the 1×2 are flush across the back and bottom edge of the tea box.

Shara Woodshop Diaries using brad nailer to secure 1x2s to side of tea box storage organizer

Then, I put a little wood glue in the drilled hole and inserted the pegged dowel from step 3.

Before the glue dried, I applied glue to the other 1×2 piece, and nailed it to the other side of the tea box.

It may be helpful to use a rubber mallet or clamp to make sure the dowel is fully inserted into the drilled out holes.

Assembling tea box organizer sides on workbench

I adjusted/rotated the dowel inside the holes so that the pegs tilted slightly upward before allowing the glue to dry.

They should be straight or tilted slightly up to prevent the mugs from sliding off the end.

After allowing time for the glue to dry and cure, it was ready to be put to use!

Completed oak DIY tea box storage organizer with mug holder on pegs

Prefer to print your plans? Grab the printable plans for this easy DIY tea box with mug holder here:

WANT SOME MORE DIY GIFT IDEAS?

With the upcoming holidays, I’ve teamed up with my friend, Kati, from Houseful of Handmade to share some easy and fun gift ideas you can make this season!

Cookbook Holder
Scrap Wood Drink Coasters
Tea Box with Mug Holder
Toy Barn Totes
DIY Two Tone Cutting Board
Easy Beginner Cutting Board
DIY Plant Stand
DIY Molkky Game with Carrier
DIY Wooden Centerpiece Box
DIY Modern Picture Frames

We are adding new projects to this list every day this week, so stay tuned for new ideas!

If you can’t wait to see what’s next, be sure to subscribe to the FREE newsletter below for priority access to all the latest projects and plans!

And if you enjoyed these DIY tea storage box project and want to save it for later, don’t forget to pin it and share it to your favorite social channel!

DIY wooden tea organizer box pinterest collage image showing front view at top and angled view of box at bottom with text "how to build a scrap wood tea box"

Until next time, happy building!

DIY Scrap Wood Drink Coasters

November 28, 2022 by Shara, Woodshop Diaries

In this post, I’m sharing how to make your own DIY drink coasters from wood scraps you already have!

DIY two tone oak wood drink coasters stacked in stand on table with white mug

Drink coasters are kind of like cutting boards–they can be as simple or as complex as you’d like.

And they’re also a common beginner woodworking project that even the more “advanced” woodworkers enjoy making as well.

Making some DIY drink coasters is a great way to utilize some of those small wood scraps and they also make great, inexpensive gifts!

So let’s dive in and make some!

Tools & Materials:

*This post contains affiliate links. See website policies.

Tools:

  • Miter Saw
  • Drill
  • ⅜″ Forstener or Drill Bit

Materials:

  • Scrap 1x2s
  • Scrap 1×6
  • ⅜″ wood dowel
  • Krazy Glue Fast Dry Wood Glue
  • Wood Finish
Oak boards and Krazy Glue  on workbench

How to Make DIY Wooden Coasters

There are a million ways to make wooden drink coasters, but this is a really simple method.

Feel free to get creative with your size, shape, and colors.

These coasters ended up being about 4 ½″ square, which seems like a great size for mugs!

Step 1: Cut 1x2s to Length

I made these coasters from 1x2s and simply glued them together. I used white oak 1×2 here.

So the first thing to do here was trim down my 1x2s to the length I needed.

I used three 1x2s per coaster, so for four coasters, I needed 12 pieces total.

The width of a 1×2 is actually 1 ½″, so if I put three side by side, that would be 4 ½″.

So to make these coasters square, I needed to trim them to 4 ½″ long.

Oak blocks cut to length to assemble simple wooden drink coasters

So I trimmed 12 pieces of 1×2 to 4 ½″ long.

HELPFUL TIP: You can clamp a stop block (just a scrap piece of wood) onto your miter saw to cut these all exactly the same length without having to measure each one.

Stop block clamped to miter saw for consistent length cuts

Step 2: Stain or Paint Pieces Separately

This step is optional. You can certainly stain or paint your coasters at the end vs now.

However, since I was doing two different colors, I found it easiest to finish the pieces separately, then glue them together.

6 oak blocks stained black

I stained half of my 1×2 pieces in Minwax True Black and let dry. I left the other half unfinished, but you could stain or paint a different color if you’d like.

Step 3: Glue Up Wooden Coasters

Once the stain had dried/soaked in, it was time to assemble the pieces into four wooden coaster squares.

Because I had already stained some of the pieces, I didn’t want to have to sand them again after glue up.

So instead of using regular wood glue and dealing with messy squeeze out, I used some Krazy Glue Fast Dry Wood Glue.

It dries clear and fast, so I was able to just run a small bead of glue along the edge of one piece, then press another piece to it for a few seconds.

Using Krazy Glue to assemble DIY drink coasters on workbench

Then, I repeated to add the third 1×2 to make a complete coaster. Super simple.

I alternated the colors to make my four coasters like shown below.

Bottle of Krazy Glue on workbench surrounded by completed wooden coasters

Once they were together, I applied a couple coats of Minwax Helmsman Water Based Clear Coat to seal the wood and protect it from water.

Step 4: Create Wooden Coaster Stand

You can certainly skip this part–the coasters by themselves still make a great gift!

But, if you wanted to provide a “home base” to store and stack the coasters in, this is easy to do.

I cut a scrap piece of 1×6 board to 5 ½″ square.

Then, I placed one of the coasters on it at angle so that the corners of the coaster were between the corners of the block on the bottom.

Coaster set on 1x6 block--using a pencil to mark corner dowel locations

I used a pencil to mark a dot about ¼″ from the edge of the coaster at each corner of the 1×6 square.

Then, I used a ⅜″ forstener bit to drill out shallow holes at these marks.

Drilling dowel holes with forstener bit

I trimmed 4 pieces of ⅜″ round dowel to 3 ½″ long.

You can measure the height of your coasters stacked together and add about ½″-¾″ to figure your dowel height–or just eyeball it haha.

Then, I used some Krazy Glue Craft Super Glue to glue these into the holes.

Gluing dowels into coaster holder stand

Once the glue was dry, I applied a clear coat to this stand and once it was dry, this set was complete and ready to keep or give away as a fun DIY handmade gift!

Completed two tone drink coasters with white mug

WANT SOME MORE DIY GIFT IDEAS?

With the upcoming holidays, I’ve teamed up with my friend, Kati, from Houseful of Handmade to share some easy and fun gift ideas you can make this season!

Cookbook Holder
Scrap Wood Drink Coasters
Tea Box with Mug Holder
Toy Barn Totes
DIY Two Tone Cutting Board
Easy Beginner Cutting Board
DIY Plant Stand
DIY Molkky Game with Carrier
DIY Wooden Centerpiece Box
DIY Modern Picture Frames

We are adding new projects to this list every day this week, so stay tuned for new ideas!

If you can’t wait to see what’s next, be sure to subscribe to the FREE newsletter below for priority access to all the latest projects and plans!

And if you enjoyed these DIY drink coasters and want to save it for later, don’t forget to pin it and share it to your favorite social channel!

Pinterest collage image showing unfinished drink coasters with glue at top and completed coasters at bottom

Until next time, happy building!

DIY Sliding Door Cabinet

November 12, 2022 by Shara, Woodshop Diaries

In this post, I’m sharing how to build a DIY sliding door cabinet perfect for a coffee station cabinet or even a TV stand!

White storage cabinet with slatted wood stained sliding doors against white wall

This post is sponsored by my friends at Kreg Tool and contains affiliate links. See website policies.

This simple DIY sliding door cabinet is a great way to add some extra storage to your kitchen or pantry.

But it would also make a great console in a dining room or even in your living room as a media cabinet.

Adjustable shelves provide flexible storage and the sliding doors are a fun addition to add some rustic charm.

But they’re also great for hiding what’s behind them.

I’m excited to be sharing the building plans with you, so if you’re ready to dive in, let’s go!

Tools & Materials:

Tools:

  • Miter saw
  • Circular Saw
  • Kreg Accu-Cut
  • Kreg Rip Cut
  • Kreg Pocket Hole Jig
  • Drill/Driver
  • Kreg Shelf Pin Jig
  • Brad Nailer

Materials:

  • (2) 4×8 sheets ¾” plywood
  • (1) 4×4 sheet ¼” plywood
  • (2) 1x6x8 boards
  • (2) 1x3x8 boards
  • (1) 1x4x8 board
  • (1) 8’ piece 3 ¼” tall baseboard trim molding
  • 4 ft Sliding door hardware kit
  • Iron On Edge Banding (optional)
  • Shelf Pins
  • 1 ¼” pocket hole screws
  • 1 ¼” brad nails
  • Wood glue

What to Know Before Building

Here are some tips and additional information about this DIY sliding door cabinet you may find helpful before building!

Cutting Down Plywood Sheets

The main body of the cabinet was built with ¾″ birch plywood.

So, the first thing I did was cut down my plywood sheets.

I used a circular saw and Kreg Rip Cut and Kreg Accu-Cut guides to help me cut everything down to size. Rip Cut shown below.

RELATED: How to cut plywood sheets using a circular saw

Shara Woodshop Diaries using Kreg Rip Cut to trim down plywood sheets

Normally, I don’t recommend cutting all your pieces at the beginning of a project, but in this case, it would work fine.

I cut three bottom panels, four side panels, 6 strips for the top supports, the top, and the shelves.

I’ve provided the cut diagram and full cut list in the plans linked below.

Overall Dimensions

The overall dimensions of this cabinet are approximately 50″ wide, 35 ¼″ tall, and 22″ deep.

Overall dimensional diagram of DIY sliding door cabinet

However, the sliding doors do stick out a little further than the countertop of the cabinet, so the above dimensions do not account for the doors.

Additional Resources

You may find these guides helpful for various tasks throughout the build:

  • How to cut down plywood sheets
  • How to apply iron on edge banding
  • How to use a pocket hole jig
  • How to finish wood furniture
  • 5 tips for more professional looking DIY furniture projects

How to Build a DIY Sliding Door Cabinet

I’m sharing the written tutorial below, but if you prefer to watch, I’ve also got a video here:

Step 1: Assemble Sliding Door Cabinet Body

I cut down ¾″ plywood panels for the 3 bottom pieces, the 4 side/divider panels, and the 6 top support strips.

Plywood pieces trimmed to size and laying on workbench for sliding door cabinet body

The full cut list can be found in the plans.

The front edge of the two middle divider panels will be exposed in the finished project. 

So I applied iron on edge banding to them before assembling. 

RELATED: How to apply iron on edge banding

Close up shot of corner of plywood edges--one is banded and one is not

HELPFUL TIP: People often ask if you have to use edge banding if you’re painting.  And no, you don’t. 

It’s totally up to you.  You could putty and sand the edges instead, but I’d rather just iron on the banding.

It’s a lot quicker and the edges are still smoother in the end.

I used a Kreg 720 pocket hole jig to drill ¾” pocket holes into the ends of the short top support pieces and along the ends of the bottom panels.

RELATED: Which pocket hole jig is best?

Shara Woodshop Diaries drilling pocket holes on Kreg 720 jig on workbench

Then, I began assembling the cabinet using 1 ¼” pocket hole screws.

RELATED: How to use a pocket hole jig

I used a scrap 1×4 block to install the bottom panels 3 ½” up from the bottom edge of each side.

Shara Woodshop Diaries assembling plywood cabinet on workbench

I installed the top supports flush to the top edge—one at the top and one at the back. 

Shara Woodshop Diaries assembling cabinet top supports with pocket hole screws

I made sure to keep the edge banded panels in the middle as I assembled everything.

Sliding Door Cabinet body assembled on workbench floor

Step 2: Build Face Frame

I only added a face frame along the top, bottom and sides of the cabinet. 

I didn’t frame the middle two dividers—which is why I applied edge banding to them earlier. 

So, I cut two pieces of 1×4 and two pieces of 1×3 to make a simple face frame.

Dimensions can be found in the building plans.

Shara Woodshop Diaries assembling face frame for cabinet build

The 1x4s were for the top and bottom and the 1x3s were for the sides.  I assembled using ¾” pocket holes and 1 ¼” pocket hole screws.

Step 3: Attach Face Frame to Cabinet Body

I test fit the frame onto the front of the cabinet body to ensure it fit. It’s always good to test fit before gluing haha.

Then I added some glue and brad nailed it in place. 

Shara Woodshop Diaries applying wood glue to front edge of cabinet

Notice that the face frame doesn’t come all the way to the bottom. 

Shara Woodshop Diaries nailing face frame onto front of cabinet

It’s actually flush across the top of the bottom panels, but there’s a ¾” space below it. 

That’s intentional.  It’ll be covered with trim.

Step 4: Add Baseboard Trim

Speaking of trim, the next step was to add some baseboard trim around the bottom. 

I cut to fit 3 ¼″ tall baseboard trim to go around the sides and the front of the cabinet.

Shara Woodshop Diaries nailing baseboard trim along front bottom edge of cabinet

I mitered the corners 45 degrees, and glued and nailed them in place. 

This front piece will cover the gap left below the face frame.

Step 5: Add Shelving

I pulled out my Kreg Shelf Pin Jig and drilled shelf pin holes in the three cabinet sections to install adjustable shelves. 

RELATED: Learn more about the shelf pin jig in this post

Shara Woodshop Diaries drilling shelf pin holes into cabinet sections using Kreg shelf pin jig

I used some scrap wood blocks to help me space these holes where I wanted and made sure that the front holes were a little under 14” from the back edge.

This was because I only made my shelves about 14” deep.

I went ahead and cut three shelves from ¾” plywood according to the cut list in the plans.

Step 6: Install Back Cabinet Panel

I cut a ¼” plywood back panel to fit over the back side of the cabinet, and made sure it fit, but I didn’t install it just yet.

Shara Woodshop Diaries test fitting back panel onto sliding door cabinet

Before attaching, I went ahead and painted the cabinet, shelves and back panel pieces separately to make things easier.

I primed everything, then painted SW Cotton White.

RELATED: How to finish raw wood furniture

Once the cabinet, shelves, and back panel were all painted, I stapled the back panel onto the cabinet

Shara Woodshop Diaries stapling back panel onto white cabinet

If you don’t have a stapler, you can certainly just glue and brad nail the panel as well.

RELATED: What’s the difference in brad nailers, finish nailers, and staplers?

Step 7: Add Top to Sliding Door Cabinet

I cut the top down to size earlier when I was cutting down my plywood sheets.

But, at this point, I applied iron on edge banding to the front and sides, sanded it, then stained it Minwax Provincial.

I centered it on the cabinet leaving 1″ overhang on both sides and the front.

Using a drill to install top panel to cabinet from inside supports

Then, I used 1 ¼” screws through the bottom side of the top supports to secure it.

Step 8: Assemble Doors

You can certainly make any style door you’d like for this, but I chose to make solid wood slatted doors. 

So I cut down five 1×6 pieces for each door plus two thinner slats to run along the back side. 

I cut my back pieces from scrap plywood, but 1x3s would work as well.

I went ahead and stained these pieces first before assembling–Minwax Provincial for the door slats and Minwax True Black for the back pieces.

Shara Woodshop Diaries nailing slats onto back side of sliding wood doors

I laid out my 1x6s face down, and glued and nailed the back pieces on to hold it all together.

I did this twice to make two identical doors.

Step 9: Install Sliding Door Hardware

Check out the video above for more info about installing the sliding door hardware.

I used this 4 ft sliding door hardware kit and I definitely recommend it–it’s a really great kit.

test fitting rollers on sliding door hardware rail

However, the instructions that come with it are quite…bad haha. So I share some helpful tips for installing it in the video here.

I predrilled the holes to mount the rail first, making sure it was far enough down from the top to leave room for the rollers to move. 

Predrilling holes through sliding door rail

Then, I installed the rail using the spacers and screws included in the kit into my predrilled holes.

Installing sliding door rail onto cabinet

For the rollers, I mounted them so that the bottom of the hardware bracket was about 3 ⅝” from the top of the door. 

Installing rollers onto sliding doors

I used the included screws to secure.

This kit comes with anti-jump pieces which are basically plastic spacers that attach to the top of the door to prevent it from accidentally lifting up and jumping off the rail. 

Close up image of anti jump spacer blocks of sliding door hardware

I screwed these into the top of each door.

You attach these with just one screw, so that when you place them onto the rail, you can rotate them in place so they can’t jump back off.

Shara Woodshop Diaries setting sliding doors on rail of cabinet

Now, the last part was installing the guides to help keep the doors from swinging back and forth. 

The kit comes with these guides…they are made of two pieces like shown here.

Close up of guide brackets included in sliding door hardware kit

I only had room to use one screw, but I screwed the L shaped bracket to the face frame right above the baseboard. 

Then, I secured the front piece of the bracket and adjusted as needed to get the doors where I wanted.

Installing guide brackets onto cabinet above baseboard

Then, finally, I adjusted the stops on the end of the rail where I wanted the doors to stop rolling. 

Adjusting sliding door rail stops on cabinet

There are just some set screws on the bottom you can tighten and loosen as needed.

Step 10: Finish DIY Sliding Door Cabinet

And with that, I could add the shelves in place using shelf pins and step back to check out the finished project.

Installing shelves into sliding door cabinet using shelf pins

I’ve built DIY sliding doors before, but never added them to furniture.

That was definitely a fun addition I’d love to try again in the future!

Completed DIY sliding door cabinet painted white with stained wood slatted doors covering two of the three sections--left side open

I hope you enjoyed watching this project come together and if you’d like to build your own, grab the building plans on KregTool.com here!

For priority access to the latest projects and plans on Woodshop Diaries, be sure to subscribe to the free newsletter below!

And if you’d like to save this for later, don’t forget to pin it or share to your favorite social media channel!

Pinterest collage image showing overall dimensional diagram at top and Shara Woodshop Diaries with sliding door cabinet at bottom with text "How to build a sliding door cabinet"

Until next time, friends, happy building!

DIY Sliding Door Cabinet

DIY Sliding Door Cabinet

Yield: 1 cabinet with sliding doors

Learn how to build your own DIY sliding door cabinet with these free building plans, helpful tips, and video tutorial!

Materials

  • (2) 4×8 sheets ¾” plywood
  • (1) 4×4 sheet ¼” plywood
  • (2) 1x6x8 boards
  • (2) 1x3x8 boards
  • (1) 1x4x8 board
  • (1) 8’ piece 3 ¼” tall baseboard trim molding
  • 4 ft Sliding door hardware kit
  • Iron On Edge Banding (optional)
  • Shelf Pins
  • 1 ¼” pocket hole screws
  • 1 ¼” brad nails
  • Wood glue

Tools

  • Miter saw
  • Circular Saw
  • Kreg Accu-Cut
  • Kreg Rip Cut
  • Kreg Pocket Hole Jig
  • Drill/Driver
  • Kreg Shelf Pin Jig
  • Brad Nailer

Instructions

  1. Cut down plywood according to the plans and prep for building.
  2. Assemble the sliding door cabinet body using 1 ¼" pocket hole screws.
  3. Build the face frame and attach face frame to the cabinet body using wood glue and brad nails.
  4. Add baseboard trim using glue and finish nails.
  5. Cut and install shelves using shelf pins.
  6. Staple back panel to the back of the cabinet body.
  7. Add top to sliding door cabinet having a 1" overhang.
  8. Assemble sliding doors face down and glueing and nailing the back pieces on to hold it all together.
  9. Install sliding door hardware, attach doors and you're done!
© Shara, Woodshop Diaries
Project Type: Furniture / Category: DIY Furniture Plans

DIY Dressers with Plans

November 7, 2022 by Shara, Woodshop Diaries

image collage of four DIY dressers you can build

Looking to build your own dresser? You’ve come to the right place.

Here are 17 of my favorite DIY dressers with plans. You could be building your own this weekend!

image collage of four DIY dressers you can build

Dressers are literally my favorite thing to build.

If you break it down into its simplest form, dressers are basically just several smaller boxes (drawers) installed inside a bigger box (dresser body).

So if you can build a box, you can build a dresser!

And there are so many styles and ways to combine these boxes to build your own custom dresser project to fit your taste and your space.

I know the thought of building drawers can seem intimidating. So, I’ve got you covered with a complete step by step drawer building series to walk you through it (including detailed videos!):

Drawer Building Series:

  • How to Measure for Drawer Boxes
  • How to Build a Drawer Box
  • How to Install Side Mount Slides
  • How to Install Drawer Fronts

What’s the best type of wood to build dressers?

My favorite material to build dressers with is plywood. Why?

Because plywood is strong, finishes well, is resistant to movement, and is (inch for inch) MUCH MUCH MUCH cheaper than the equivalent amount of solid lumber.

I recommend using a high quality hardwood cabinet grade plywood–something like birch, oak or maple. Learn how to choose the best plywood for your project here.

Here’s a popular DIY dresser design made from birch plywood.

Plywood is easy to work with and eliminates the need to glue up large panels to make the dresser body or drawer boxes.

This saves SO much time…and mess.

Plywood is also more stable than solid wood, so wood movement isn’t as big of a concern.

You can combine plywood with solid wood pieces in your dresser build to add details like framing, trim, or legs as well.

If you’re new to working with plywood for furniture builds, check out this guide on how to cut down plywood sheets.

And check out this guide to learn how to prevent tear out–those rough cuts that are common with plywood.

And you can check out this guide for how to cover plywood edges.

If you’d rather not use plywood, poplar or pine is a good choice for building DIY dressers, too. It’s durable and less expensive than other hardwoods.

But oak, walnut, and other common hardwood options work well, too.

What is a good size for a dresser?

Typically a dresser is around 16-22″ in depth.

Dresser heights usually vary from 28″ to 44″ tall. But some can be even taller.

Really tall dressers are usually referred to as a “chest of drawers” vs a “dresser,” though.

Dresser lengths can also vary greatly ranging from 30″ to 72″ long.

Obviously, the dimensions of dressers can vary, so you should choose a size that best suits your space.

Now on to what you came here for. I know you’ll find one or two you’ll want build yourself.

17 DIY Dressers You Can Build

DIY Modern Dresser

Mid-century modern style dressers are my favorite style to build!

So, clearly, when a friend asked me to build a DIY mid-century modern dresser, that was a project I could get excited about!

I have the build plans and and tutorial for you to build this Mid Century 6 drawer dresser here

And you can find the 4 piece Mid Century Modern matching bedroom set plans here.

Simple 3-Drawer Dresser

For this one, I stuck with a smaller, simpler dresser design.

This size is perfect for a small bedroom, or a guest room, or can even be used as a large nightstand or an entryway table.

Get the build plans and tutorial here.

If you know me, you know I love building matching furniture sets and you can find the matching bed plans here and matching nightstand plans here.

Matching 6 & 9 Drawer Dressers

This pair of matching dressers might be my favorite dresser builds yet! I built the 6 drawer dresser first.

And I loved it so much that I built a matching 9 drawer version!

These pieces are part of a 4 part matching set with tons of storage. Check out the matching simple storage bedroom set collection here.

DIY Dresser Desk

Need a dresser AND a desk?? Build an all-in-one with this genius DIY Dresser Desk with pull-out storage seat!

This dual piece of furniture is perfect for small bedrooms, dorm rooms, or guest bedrooms.

Build your own with the plans and full tutorial here.

Sliding Door Dresser Chest

Now this one may not be what comes to mind when you think of “dresser.”

BUT, this sliding door dresser is a unique take on the typical chest of drawers design and is a great way to add extra storage in the bedroom, bathroom, or office.

Grab the plans to build a sliding door dresser chest here.

Oversized Nightstand Dresser

Much like the last one, this “dresser” isn’t a typical dresser. Essentially, it’s a small 3 drawer dresser that is used as a nightstand.

The custom trim details on this design give this otherwise basic design some extra dimension and style.

Grab the plans to build your own oversized nightstand dresser here.

DIY Two Tone 6-Drawer Dresser

Check out this super simple, two tone 6 drawer dresser build!

This dresser is actually just one part of a large entertainment type center I built for a local library.

The drawers have locks since it was built for the library, but you can leave them out when you build yours. Get the plans and tutorial here.

DIY Modern Dresser with Open Shelf

This DIY modern dresser is built with poplar wood and features four drawers and an open shelf.

I used poplar, but you could use pine or any other wood you want. It’s a simple build and I have the plans and tutorial for you here.

It’s one of two dressers that go with my matching modern bedroom set collection. Check out the whole matching set here.

DIY Modern 5-Drawer Dresser

Here is the second dresser that goes with the one above.

The design features five drawers and I used simple black handles on both that really go with the vibe I was looking for.

You can finish this DIY modern dresser with any stain you choose, but I used Walrus Oil Furniture Butter to bring out the natural look of the poplar.

Get the plans to build your own 5-drawer dresser here.

DIY Shelf with Drawers

Similar to the DIY dresser with open shelf, this one has two deep dresser drawers instead of four standard drawers.

This piece is actually one of FIVE matching pieces I built for my dad’s office. You can check out the entire series here.

Great to use in a guest room, dorm room, or any bedroom where you could use extra storage.

Get the plans and tutorial to build your own.

DIY Modern Dresser Console

This dresser console ultimately became a bathroom vanity and you have to admit it certainly has the perfect design for it.

But, I also love it as a dresser and I designed it around the front trim.

You can build this using plywood or hardwood, the choice is up to you. But no matter what you build it from you are going to love it!

Get the plans and tutorial here.

DIY 5-Drawer Dresser

Each dresser I build has it’s own personality and it’s own design. 

But this one is one of my favorites! I think it’s the legs, they are actually vanity legs. Can you believe it?

This was also one of my very first dresser builds! Get the plans and tutorial for this five drawer dresser and build your own.

DIY Vintage Inspired Dresser

I can’t even with all the cuteness!  Doesn’t this little vintage inspired DIY dresser give you all the heart eyes??

But, if that’s not enough, just a few extra steps can take this dresser and make it a DIY changing table, too!! 

Get the plans and tutorial to build your own here.

Modern Farmhouse Faux Drawer Dresser

How to build a DIY Fake Drawer Apothecary Cabinet

Can you believe these “drawers” in this dresser are totally 100% fake?! 

Well, ACTUALLY, I lie.  There are drawers in here, but it’s not exactly how it appears. 

No one will ever know that there are actually shelves hidden behind some of those drawer panels.

I have the plans and tutorial for you to build your own here.

Modern DIY Dresser Armoire

How to build a Modern DIY Dresser Armoire

I LOVE the idea of a “dresser” that also has a cabinet on one side.

Sometimes you need more than just drawers, amiright?

You could also make a larger version as a kind of armoire or wardrobe.

I built this for friends of mine to use for their baby so I also added a tray that could be used as a changing table.

Get the plans and tutorial to build your own here.

DIY Modern Console Dresser

I know I say this about all of them, but this is one of my favorite dressers ever!

The stenciled design really puts it over the top with it’s mid-century modern vibe.

Two drawers, an open shelf, and enclosed shelves behind those fun doors make this one great as a dresser, dining room console, or a tv stand.

See the full tutorial and get the plans here.

6-Drawer Mid-Century Modern Dresser

One of the first DIY dressers I built was this mid-century beauty.

I learned a lot from this build and the best compliment I got on this DIY dresser was “that looks like it came straight out of the 70s.”  

Why, thank you, sir, that was the point.  

Build this one yourself with the full tutorial and add a bit of mid-century design to your room!

You can also build it with round legs and I show you how in this post.

There you have it, 17 DIY dressers you can build. I hope you’re inspired to build your own and create a piece of furniture that will last forever.

Be sure to pin it for later!

Image collage of four DIY dressers with text overlay "DIY dressers with plans"

Until next time, friend, happy building!

Easy DIY Corner Shelf

October 29, 2022 by Shara, Woodshop Diaries

In this post, I’m sharing how to build this easy DIY corner shelf from just under $30 in lumber!

Shara Woodshop Diaries taking a book off of wooden DIY corner shelf

What could you use this adorable corner shelf for?

Displaying pictures, storing books and décor, a plant shelf? The list goes on and on.

Not only is it practical and versatile, it’s also an EASY weekend woodworking project you can tackle in just a few hours.

Wooden corner shelf in corner against a black and white wall with books and plants on shelves

And best of all, it’s a budget friendly build, ringing in at just under $30 in lumber!

If you’re ready to build your own, I’ve got the plans, details and video for you below!

What to Know Before Building a DIY Corner Shelf

This is a GREAT weekend woodworking project that you can easily complete in just a few hours.

To save some time, I’ve written the building plans below so that the first step is gluing up the boards to cut the shelves from.

While the glue is drying, you can assemble the frame.

This way, you aren’t just wasting time sitting around waiting for glue to dry.

By the time you have the frame built, the glue should be dry enough to cut the shelves out.

Material Choices

Below, in the tools and materials list, you’ll see that this build requires (2) 2x6x8 boards and (3) 2x2x6 boards.

However, if you have a table saw, you can just purchase (3) 2x6x8 boards and cut your own 2x2s from one of those instead.

RELATED: How to Make Your Own 2x2s

2x6x8 boards laying on workbench in workshop

This will actually leave you with some decent size “scraps” that you can use on future projects and will likely cost a little less than buying precut 2x2s.

Project Cost

Three 2x6x8 boards cost me $27 (in October 2022, when this was built).

Lumber prices vary by location and change day to day, so it may be more or less at any given time and place.

But, even with fluctuations, this is a very budget friendly DIY project!

Overall Corner Shelf Dimensions

The overall dimensions of this project are 16″ deep x 16″ wide x 50 ½″ tall.

Overall dimensional diagram showing dimensions of corner shelf-16" x 16" x 50 ½"

Helpful Guides to Use in the Build

You may find these posts and how-tos helpful in the building process:

  • How to Square Board Edges and Make 2x2s
  • How to Use a Pocket Hole Jig
  • How to Draw a Circle or Arch
  • 5 Tips for Professional Looking DIY Furniture

Tools & Materials

Here’s what you need to build an easy DIY corner shelf.

**This post contains affiliate links. See policies.

Tools:

  • Miter Saw
  • Table Saw
  • Drill/Driver
  • Pocket Hole Jig
  • Jig Saw
  • Measuring Tape
  • Sander
  • Clamps (various sizes)

Materials:

  • (2) 2x6x8 boards
  • (3) 2x2x6 boards
  • 2 ½″ wood screws (can just use pocket hole screws if you’d like)
  • 2 ½″ pocket hole screws
  • Wood Filler or Dowels (to fill screw holes, if desired)
  • Wood Glue

Prefer to print your plans? Grab the printable version of the plans below here:

How to Build an Easy DIY Corner Shelf

I’m sharing the step by step process to build your own easy DIY corner shelf below, but if you’d prefer to print, you can find printable building plans here.

And if you prefer to watch, you can check out the video on YouTube here as well.

Faux YouTube Thumbnail for simple DIY corner shelf

Step 1: Glue Up Panel to Cut Corner Shelves

As mentioned earlier, I started the build with a glue up so that I could continue building while the glue dried.

This just saves a little time.

So, first, I trimmed one of my 2×6 boards into three pieces about 32″ long (it’s okay if not exact).

Typical construction lumber comes with rounded corners, which can make for pretty messy glue ups.

2x4 close up showing rounded edges

To avoid this, I like to square my board edges before gluing on the table saw. Basically, I rip a little off each side to remove the rounded edges.

RELATED: Check out this post to learn how to square board edges.

I trimmed two of these pieces to 5″ wide and the third piece to about 2 ½″ wide.

Diagram of glue up panel for corner shelves

Then, I glued these together into a solid panel.

RELATED: How to glue up solid panels

Shara Woodshop Diaries gluing up solid wood panel for cutting rounded shelving from

Step 2: Cut Corner Shelf Posts

The corner shelf posts here were made from 2x2s.

As mentioned previously, you can pick these up from the store precut to 1 ½″ square OR, you can cut your own from wider boards.

I cut one 2×2 to 50 ½″ long with square ends–with the miter angle set to 0 degrees.

Diagram of corner shelf posts showing dimensions and angles to be cut

Then, I cut two more 2x2s to 50 ⅞″ long with ends mitered 7 degrees parallel to each other.

To do this, simply set the miter saw’s miter angle to 7 degrees and trim the end of a 2×2.

Then, slide it over 50 ⅞″ and cut the same angle the same direction. Don’t flip the board or turn it over–the miters need to be cut parallel.

Step 3: Cut and Prepare Corner Shelf Back Slats

The shelf back slats are the boards that run between the corner posts.

Shara Woodshop Diaries dry fitting corner shelf pieces together on workbench in workshop with an arrow pointing to shelf slat pieces for clarification

These pieces are cut from 2x6s.

You’ll notice the shelves get smaller as they go from the bottom to the top shelf because the corner posts are slanted.

This means that all the shelf back slats aren’t the same length.

So I cut two of each of the four lengths paying attention to cut one end square and the other end with 7 degree miter.

Diagram of shelf slats showing location of mitered ends and pocket holes

Dimensions are detailed in the printable plans here.

Then, I drilled 1 ½″ pocket holes into the angled ends of each piece.

Sand pieces well before assembling in next step.

Step 4: Assemble Corner Shelf Frame

To assemble, I started by attaching all the shelf slats to the back corner post first.

I used a Kreg Quick Flip Countersink Bit to countersink and predrill my holes before driving the screws.

You don’t have to countersink the screws if you don’t have a countersinking bit.

Countersinking just allows the screw to sit further below the wood surface.

Shara Woodshop Diaries clamping and attaching shelf slat using screws

I started at the top and worked my way down attaching each slat to the 2×2 post using 2 ½″ screws.

I left an 8 ½″ space between each slat.

After I had four on on side, I installed the other four on the adjacent side the same way.

Shara Woodshop Diaries holding corner shelf back post with shelf slats attached onto adjacent ends

This looked kind of like a Christmas tree haha.

After the slats were secured to the back corner post, I added the angled posts using 2 ½″ pocket hole screws through the pocket holes drilled in step 3.

Diagram showing assembly of shelf slats between corner shelf posts

I made sure the posts were oriented correctly based on the mitered ends, then started at the top, securing the slats to the posts.

I made sure to keep a consistent 8 ½″ space between each slat.

Step 5: Cut Corner Shelves

By now the glue was dry from step 1.

So I trimmed the panel ends so that they were square–the panel should be 31-32″ long overall, but doesn’t have to be an exact length.

Diagram showing curve dimensions to cut for each shelf section

Then, I used a tape measure, square and a pencil to trace out four “quarter circles” in the diagram above to fit between each shelf slat.

Check out this post for how to draw any size circle or arch.

Shara Woodshop Diaries using tape measure to draw arches on wood panel on workbench

I used a miter saw to cut all my straight lines to ensure they were square, then used a jig saw to cut out my curves.

Once all four shelves were cut, I sanded them well to smooth out my curves and remove all the glue residue.

Using a belt sander to smooth rounded edges of corner shelves

Step 6: Install Shelves to Frame

Each shelf should fit perfectly between the shelf slats–smallest at top working down to the largest at the bottom.

I screwed these in using 2 ½″ screws through the back of each slat into the shelves.

Using a Ryobi driver to install corner shelves into frame on back side

I added one screw on each side, then went back and added another screw on one side just to help keep the shelf from twisting.

You can certainly add two screws on each side, but since these shelves are so small, it’s really overkill.

So I just added three screws on each shelf.

Step 7: Finish Shelf

At this point, you can fill or plug all the screw holes, if desired.

But all these holes will be hidden on the back side, so filling them is optional.

Completed spruce wood corner shelf with rounded shelf boards with books and plants displayed

Then, finish as desired and display your favorite things!

Looking for More DIY Shelving Ideas?

I LOVE how this simple shelf build turned out. It’s small, but eye catching.

Perfect for awards, small plants, books, and picture frames!

But, if you’re looking for even more DIY shelf ideas, here are a few favorites!

Geometric Bookshelf
Hidden Drawer Bookshelf
Vinyl Record Shelf
Easy DIY Shelf with Baskets
DIY Ladder Shelf Plant Stand

If you enjoyed this project and want to stay up to date on all the latest projects and plans, be sure to subscribe to the newsletter below!

And if you’d like to save this project for later, don’t forget to pin it or share it to your favorite social channel!

Pinterest collage image showing overall dimensional diagram at top with Shara and corner shelf at bottom with text "how to build a simple corner shelf"

Until next time, friends, happy building!

Easy DIY Corner Shelf

Easy DIY Corner Shelf

Yield: 1 corner shelf

This easy DIY corner shelf is a fun weekend woodworking project you can complete in a few hours with $30 in lumber! Grab the printable plans!

Materials

  • (2) 2x6x8 boards
  • (3) 2x2x6 boards
  • 2 ½" wood screws (can just use pocket hole screws if you'd like)
  • 2 ½" pocket hole screws
  • Wood Filler or Dowels (to fill screw holes, if desired)
  • Wood Glue

Tools

  • Miter Saw
  • Table Saw
  • Drill/Driver
  • Pocket Hole Jig
  • Jig Saw
  • Measuring Tape
  • Sander
  • Clamps (various sizes)

Instructions

  1. Glue up the panel by making cuts according to the plans and gluing to make a solid panel.
  2. Cut corner shelf posts
  3. Cut and prep the corner shelf back slats.
  4. Assemble corner shelf frame using countersink screws.
  5. Cut shelves from previously glued up panel.
  6. Install shelve to the frame.
  7. Finish as desired and display your favorite things!
© Shara, Woodshop Diaries
Project Type: DIY Furniture Plans / Category: Woodworking

DIY Modern Geometric Bookshelf

October 22, 2022 by Shara, Woodshop Diaries

In this post, I’m sharing how to build this fun and simple modern DIY geometric bookshelf!

Geometric plywood bookshelf natural wood and black against white wall

This simple bookshelf would be perfect for books, obviously.

But it would also make a great place to store old vinyl records and extra blankets.

You could even add one in the closet or bedroom to roll up and store away hoodies, t-shirts, or jeans.

The possibilities are endless!

Grab a few tools and the plans below to build your own this weekend!

Tips for Building a Modern DIY Geometric Wooden Shelf

This is an easy weekend woodworking project idea you can make from just barely over half a sheet of plywood and a 2×2 board.

Overall Bookshelf Dimensions:

The overall project dimensions are approximately 62″ tall, 12″ deep and 22″ wide.

Overall dimensional diagram showing geometric bookshelf sizing

Iron On Edge Banding:

Since I made this DIY geometric bookshelf using plywood, I used iron on edge banding to cover the exposed edges.

Edge banding is totally optional, but it does make the plywood edges look a little cleaner.

image showing plywood edges before and after edge banding has been applied

You can apply edge banding after assembly, but I find it easier, personally, to add it before assembling the pieces together.

RELATED: How to apply iron on edge banding

Filling Screw Holes:

I kept things simple and used wood glue and screws to assemble this shelf.

I used a Kreg Quick Flip to predrill and countersink my holes before driving the screws. The quick flip countersinks a ⅜″ diameter hole.

Kreg quick flip drill bit installed into drill on workbench

You could also use a regular countersink bit whatever size you’d prefer.

After I drove the screws, I could plug these holes with wood glue and a ⅜″ wood dowel.

Then, once the glue dried, I could trim these dowels using a flush cut blade on my oscillating saw and sand smooth.

wood dowels glued into screw holes of plywood bookshelf boxes

This created a really clean plug that will stain nicely to match the wood.

However, you can also plug or fill these holes using wood filler, if you’d rather.

Some guides you may find helpful for this build:

  • How to cut plywood sheets
  • How to make 2x2s from 2x4s
  • How to apply iron on edge banding
  • 5 secrets to professional looking DIY furniture

Tools & Materials:

Here’s what you’ll need to build a DIY geometric bookshelf:

*This post contains affiliate links. See policies page.

Tools:

  • Miter Saw
  • Circular saw and cutting guides
  • Drill/Driver
  • Kreg Quick Flip Drill Bit OR countersinking bit
  • Measuring tape
  • Sander
  • Clamps (optional, but helpful)

Materials:

  • (1) 4×8 sheet ¾″ plywood
  • (1) 2x2x8 board
  • 1 ¼″ wood screws
  • 2″ wood screws
  • Iron On Edge Banding
  • Wood Filler or Dowels (to fill screw holes)
  • Wood Glue
  • Wood Finish as desired

Prefer to print your plans? Grab the printable version of the plans below here:

How to Build a Wooden DIY Geometric Bookshelf

I’m sharing the step by step process to build your own geometric shelf below, but if you prefer to print, you can find printable plans here as well.

Also, if you prefer to watch, I’ve got the build video over on YouTube as well!

YouTube thumbnail image showing modern geometric bookshelf

Cut List

First, I cut my plywood sheet into 12″ wide strips.

I like to use my circular saw and Kreg Rip Cut to rip down my plywood sheets.

Using circ saw and Kreg Rip Cut to trim down plywood sheet

RELATED: You can learn how to cut plywood in this post.

A full cut diagram can be found in the printable plans here.

From these strips, I cut:

  • (10) pieces 12″ x 14 ¾″
  • (3) pieces 7 ¼″ x 12″
  • (3) pieces 8″ x 12″

Step 1: Assemble Top Geometric Shelf Box

First, I assembled a simple square box using wood glue and 1 ¼″ wood screws.

I overlapped each corner like shown below so that all the pieces fit together with equal sides.

Shara Woodshop Diaries assembling geometric bookshelf boxes on workbench

As mentioned in the notes above, I applied iron on edge banding to the sides that will be exposed once assembled.

This just made the edges look a little cleaner.

Diagram showing dimensions of geometric shelf top box

Step 2: Assemble Partial Shelf Boxes

The box made in step 1 is the very top of the shelf.

The rest of the structure is made of three “partial boxes.”

These partial boxes are made from (2) 14 ¾″ long pieces, a 7 ¼″ piece and an 8″ piece from the cut list.

Shara Woodshop Diaries screwing partial geometric boxes together for black and wood bookshelf

The two larger pieces are screwed together into a “V” shape and the smaller pieces are added on the sides.

Notice the orientation of the shorter pieces in the diagram.

Dimensional diagram of partial geometric bookshelf box assembly

The partial shelf boxes are assembled so that the two long sides are equal length and the two short sides are equal length.

The full box from step 1 and the three partial boxes here will fit together to make the shelf body.

Shara Woodshop Diaries laying out modern bookshelf boxes in workbench

See notes above. I plugged the countersunk screw holes using wood glue and wood dowels.

You can plug/fill the screw holes as desired.

Step 3: Cut and Attach Bookshelf Legs

The legs for this geometric bookshelf are cut from a 2×2.

I adjusted the miter saw to 22.5 degrees.

Miter saw adjusted to 22.5 degrees

Then I cut four legs with ends mitered NOT parallel to each other 13″ long.

2x2 geometric bookshelf leg diagram

Before installing the legs and attaching any shelf boxes together, I went ahead and stained two of the shelf boxes.

This is totally optional. You can finish however you’d like.

RELATED: How to finish wood furniture

I stained two partial boxes in Minwax True Black. I left the other two pieces their natural wood color.

One of the stained boxes will be the bottom, so I’ll install the legs to it–it was easier to stain before adding them.

These were kind of challenging to install since they’re at an odd angle and difficult to clamp.

So I found it easiest to mark the location to install–8″ from the bottom corner of the shelf box.

Shara Woodshop Diaries Measuring and marking where legs attach to bottom shelf box

Then, I held the leg in place and predrilled a hole through the shelf bottom and into the leg.

After predrilling, I added wood glue, then screwed a 2″ wood screw through the predrilled hole.

Predrilling holes to install shelf legs

I did this for all four legs and after they were all attached, it was time to assemble all the shelf boxes to this one.

Step 4: Attach Shelf Boxes

Starting from the bottom and working my way up, I attached each shelf box to the one below it.

I secured these using wood glue and 2″ wood screws–two per joint.

Shara Woodshop Diaries assembling bookshelf boxes together on workshop floor

I made sure to predrill all holes before driving the screws to help prevent plywood from splitting.

Each shelf box is secured to the one below it making sure to keep everything square.

Shara Woodshop Diaries securing bookshelf boxes together on workshop floor

After the top box was secured, the shelf was complete!

Now it’s ready for storing books, records, clothes, blankets, whatever you can think of!

Shara Woodshop Diaries standing next to two tone modern DIY wooden geometric bookshelf

I hope you enjoyed watching this DIY geometric bookshelf project come to life!

If you’d like to check out more shelf project ideas, here are a few favorites!

Hidden Drawer Bookshelf
Vinyl Record Shelf
Industrial Open Bookshelf
Simple Shoe/Book Rack

If you’d like priority access to the latest projects and plans, be sure to subscribe to the newsletter!

And if you’d like to save this project for later, don’t forget to pin it or share it to your favorite social channel!

Pinterest image collage showing Shara Woodshop Diaries with bookshelf on bottom and overall sizing diagram at top with text "how to build a geometric bookshelf"

Until next time, friends, happy building!

DIY Modern Geometric Shelf

DIY Modern Geometric Shelf

Yield: 1 geometric shelf

Step by step instructions to build your own modern DIY geometric bookshelf from plywood and 2x2s. Printable building plans and video

Materials

  • (1) 4x8 sheet ¾" plywood
  • (1) 2x2x8 board
  • 1 ¼" wood screws
  • 2" wood screws
  • Iron On Edge Banding
  • Wood Filler or Dowels (to fill screw holes)
  • Wood Glue
  • Wood Finish as desired

Tools

  • Miter Saw
  • Circular saw
  • Drill/Driver
  • Kreg Quick Flip Drill Bit
  • Measuring tape
  • Sander
  • Clamps (optional, but helpful)

Instructions

  1. Make cuts according to the plans.
  2. Assemble top shelf box using wood glue and 1 ¼" wood screws.
  3. Assemble partial shelf boxes.
  4. Paint or stain boxes in the stain or paint color of your choice.
  5. Cut and attach bookshelf legs.
  6. Attach shelf boxes and it's ready to use!
© Shara, Woodshop Diaries
Project Type: DIY Furniture Plans / Category: Woodworking

How to Install Threaded Inserts for Furniture Feet

October 11, 2022 by Shara, Woodshop Diaries

In this post, I’m sharing how to install threaded inserts into your DIY furniture projects to attach wooden legs or feet!

Using hex wrench to install threaded inserts into solid wood block

Threaded inserts are used many times when installing furniture feet into projects.

I’ve used them for installing the feet on the footboard of this bed.

On this nightstand project…

And on this 3 drawer dresser build.

Shara Woodshop Diaries screwing furniture foot into footboard of bed into threaded inserts

But threaded inserts are also useful for adding levelers on projects or even for adding casters, etc.

There are many uses for threaded inserts, so let’s dive into how to install them.

What You’ll Need:

**This post contains affiliate links. See policies page.

Tools:

  • Drill
  • Drill Bit (see step 1)
  • Hex/Allen Wrench (likely this is included with the inserts you purchase)

Materials:

  • Threaded inserts with hex socket
  • Furniture feet, casters, etc with hanger/threaded bolts
Close up of threaded insert with hex wrench and drill bit on workbench

What to Know Before Installing Threaded Inserts

Installing threaded inserts is a pretty simply process, but here are some helpful tips and things to consider before diving in.

What Size Inserts To Use

Many types of furniture feet, casters, and levelers come with a threaded rod sticking out the top.

In wooden furniture feet, these are called hanger bolts.

Close up of hanger bolt sticking out of wooden furniture foot

These threaded rods can be many different sizes, so it’s important to know the size of the bolt you are working with and make sure to purchase the same size inserts to fit them.

For example, in this dresser build, the feet came with 5/16-18 hanger bolts pre-installed.

So I purchased threaded inserts with inside dimensions of 5/16-18.

What Length Inserts to Use

Inserts come in different lengths.

In most cases, building basic furniture projects like nightstands and dressers, I’ve found about ¾″ long or even a little smaller works well.

Close up of threaded insert hex socket

But different applications will vary and it will also depend on the length of the bolt you’re installing into the insert as well.

If your bolt is 1″ long, you may want to use a 1″ long insert.

If your bolt is only ½″ long, there’s no need to use an insert that’s 1″ long.

Plywood vs Solid Wood

In order to install the insert into the project, you’ll need to make sure there is some wood in place to put it in.

In this dresser project, I had to add some scrap wood strips at the bottom to install the inserts into.

If you have to do this for your project, I highly recommend using solid wood and NOT plywood.

It is difficult (not impossible, but definitely challenging) to install threaded inserts into plywood as the plys will tend to crack and split apart.

I recommend avoiding adding threaded inserts into plywood.

How to Install Threaded Inserts

You can add threaded inserts to your furniture or building project to screw in some feet or casters in just a few minutes.

It’s definitely a fun and easy way to upgrade a project.

Here’s how to do it!

Step 1: Choose Drill Bit Size

Because not all inserts are the same size, not every instance will use the same size drill bit.

However, you want to choose a drill bit that is about the same size as the shank of the insert, but smaller than the threads.

Drill bit laying on workbench next to threaded insert

This is just like predrilling a hole for a screw.

To figure out what size that is, I like to hold the drill bit in front of the insert and find one that covers the shank, but I can still see the threads behind it.

Drill bit in front of insert showing exposed threads

Step 2: Mark and Drill Pilot Hole

Mark where you want to install the insert. This will depend on what you’re installing it into and the size/shape of what you’re screwing into them.

If installing feet, make sure you drill the hole where you want the CENTER of the foot to go.

Drilling out hole in wood block to install threaded inserts

Drill a hole slightly deeper than the length of the insert and vacuum out the debris.

Step 3: Thread in Insert

Use the hex wrench included with the inserts OR an Allen wrench that fits to carefully thread the insert into the hole.

You can use a drill if you have a bit large enough–I don’t, so I just use a hex wrench and do it by hand.

Using hex wrench to screw in threaded inserts in scrap wood block

Press down firmly to get it started and make sure it’s straight as it goes in and not crooked.

Drive the insert until it’s at least flush to the surface of the wood. It’s fine to go a little deeper than flush, if possible.

Install Threaded inserts flush to surface of wood

But, you don’t want it sticking out past the surface of the wood it’s installed into.

Step 4: Add Furniture Feet

Now, all you have to do is screw the hanger bolt or threaded rod into the insert.

installing hanger bolt into threaded inserts on bottom of wooden foot

Like I mentioned before, these can be wooden feet, legs, levelers, casters, etc.

Screw these in until snug.

Alternative Ways to Install Furniture Feet

Instead of adding threaded inserts into the project, if you’d rather, you can use mounting plates.

These are SUPER easy to install, but can be a little pricey, especially if you need several of them.

threaded foot mounting plate installed on bottom of cabinet

These come in both straight and angled versions so you can install your furniture feet straight up and down, or at a slight angle if you prefer.

You simply attach these plates to the bottom of your project using the screws that come with the plate, and screw the feet into them.

If your hanger bolts are long, you may have to trim the bolt, or drill out a hole underneath your plate for the excess bolt length to go into in order to screw them in tight.

Close up of hanger bolt screwed into mounting plate showing exposed bolt sticking out the top

The plate method is a great alternative, but I recommend using threaded inserts instead whenever possible.

Projects Ideas that Use Threaded Inserts

Ready to try it out for yourself?

Here are a few project ideas to practice installing threaded inserts on:

DIY Curved Head Board Bed
DIY One Drawer Nightstand
3 Drawer Dresser

I hope you found this guide on how to install threaded inserts helpful! Head over to the Getting Started page for more woodworking basics, tool guides, and DIY ideas.

And be sure to subscribe to the newsletter for priority access when new projects, plans, and tutorials are posted!

If you’d like to save this for later, don’t forget to pin it or share to your favorite social channel!

Pinterest collage image showing installing the insert and the foot at top with image of finished dresser with feet installed at bottom with text "How to add furniture feet to your projects"

Until next time, friends, happy building!

DIY Tiered Plant Stand

September 28, 2022 by Shara, Woodshop Diaries

In this post, I’m sharing how to build an easy DIY tiered plant stand from scrap wood!

This tiered plant stand project is as practical as it is cute!

If your window sills are running out of room for all your indoor plants, this scrap wood plant stand is a great idea to display some of them on instead.

Shara Woodshop Diaries setting plant on tiered black and wood plant stand

The tiered plant stand design takes up very little floor space and raises your plants off the floor to get better lighting and avoid drafts.

And, it only takes a few minutes to put together with pieces you probably already have in your scrap wood pile!

So let’s dive in and get building!

What You’ll Need:

*This post contains affiliate links. See policies page.

Tools:

  • Miter Saw (or any saw that can cut straight lines)
  • Drill/Driver
  • Measuring Tape
  • Clamp

Materials:

  • Scrap 2x2s
  • Scrap 2×8 pieces
  • 2 ½″ wood screws

What to Know Before Building a Tiered Plant Stand

This is an incredibly simple DIY project, but just in case you want to add your own touches, here are some tips to take note of before building.

This project is intended for smaller, lighter weight pots.

While it can structurally hold larger, heavier pots, this stand is tall and skinny and adding large pots can cause it to be top heavy and easier to accidentally knock over.

Keep that in mind if you make modifications.

If 3 Tiers Aren’t Enough…

This plant stand obviously has three tiers. But, if you get creative, you can definitely add more tiers to it with a few more 2×2 pieces and tops.

You can simply “branch off” one of the tier posts and add another (or a few more) tier(s).

It’s Easy to Customize the Sizing

The exact measurements of these 2×2 pieces are completely customizable.

I’ll share what I used in the plans below, but these can be changed if you want the tiers taller, shorter, closer together, further apart, whatever.

I used scrap 2×8 pieces of wood cut into squares for the plant stand tops. But, you could also use ¾″ plywood pieces, or 2x6s or 2x10s, etc.

Again, the exact size of these tops isn’t critical, so use what you’ve got on hand and what fits your plant pot size.

Scrap wood projects are about making do with what you’ve got and seeing what you can make from it.

So use this as a starting point, and add your own customizations 🙂

Overall Size

The overall dimensions of this project as built from the plans below is 16 ¾″ deep x 16 ¾″ wide x 33 ½″ tall.

3 tier Plant stand overall dimensional diagram

How to Build a DIY Tiered Plant Stand

If you prefer to watch, check out this quick tutorial video!

You can grab the measurements and project plans below in the step by step tutorial.

Prefer to print your plans? Grab the printable plans for this project here.

Step 1: Cut and Sand Plant Stand Parts

For this plant stand, I cut the following:

2x2s:

  • (2) pieces 8″ long
  • (1) piece 12″ long
  • (1) piece 22″ long
  • (1) piece 32″ long

2x8s:

  • (3) pieces 7 ¼″ long
Wood pieces laid out on workbench ready to assemble plant stand

After these pieces were cut, I gave them all a good sanding before assembling.

It’s always good to sand individual pieces before assembling because getting in the corners after pieces are together is difficult.

Step 2: Assemble “T” Brace

I took the two pieces of 8″ long 2×2 and assembled them together into a capital “T” shape.

Assembly diagram of T shaped brace to build plant stand

I used wood glue and a 2 ½″ wood screw to attach.

If you wanted, you could use pocket holes and screws for this instead.

RELATED: How to use a pocket hole jig

I was sure to predrill the hole first to help prevent the wood from splitting.

Close up of driving screw to assemble plant stand brace piece

You can certainly use two screws per joint if you’d like to help prevent twisting, but I just used one screw.

Step 3: Attach Tiered Posts

After the “T” brace was together, I attached the rest of the 2x2s on each end.

Shara Woodshop Diaries screwing plant stand tiers to T brace on workbench

I made sure to attach the T brace 6″ up from the bottom of each post and used wood glue and 2 ½″ wood screws to secure.

Dimensional diagram of 2 tier plant stand posts assembled onto T brace

Again, you could drill 1 ½″ pocket holes into the ends of the “T” brace and attach with 2 ½″ pocket hole screws instead of you prefer.

Step 4: Add Plant Stand Tops

Now the tiered frame is together, it’s time to add the tops–the part where the plants will sit on.

Diagram showing how to attach tops to tiered plant stand posts

I used 2x8s, but as mentioned previously, you can also use other sizes of wood–whatever fits your plant pots.

I centered these on each tiered post and secured using wood glue and 2 ½″ wood screws through the center.

Close up of driving screw to attach tops

Step 5: Finish

At this point, all that’s left is to finish as desired!

Prefer to print your plans? Grab the printable plans for this project here:

I stained the base with Varathane Ebony and the tops with Minwax Golden Oak.

And now it’s ready to display a few of my favorite indoor plants!

Completed plant stand black base and wood tops with three plants on each tier against white wall

If you’re looking to start or add to your indoor garden collection, I grabbed these Vigoro indoor plants from The Home Depot and they have several varieties to pick from!

Shara Woodshop Diaries holding various plants in her arms

You can place this tiered plant stand by your favorite chair, next to your window, or tuck it away in a corner next to your desk or bookshelf.

More Fun with Scrap Wood

Can’t get enough scrap wood projects?? I teamed up with my friend, Kati, from Houseful of Handmade to share some “Scrap Wood Summer” Projects!

Check out all the projects in the scrap wood series below. Click on an image to learn how to make each one!

Scrap Wood Monitor Stand
Scrap Wood Footed Tray
Scrap Wood Cake Plate
Scrap Wood Geometric Art
Scrap Wood Bookends
Scrap Wood Wall Shelf
Scrap Wood Curtain Rod Brackets
Scrap Wood Pumpkin Sign
Scrap Wood Tiered Plant Stand
Scrap Wood Plant Stand

Subscribe to the newsletter below to be the first to know about new projects, plans, and woodworking tips on Woodshop Diaries!

If you enjoyed this project and want to save it for later, don’t forget to pin it or share it to your favorite social channel!

Pinterest collage image showing Shara setting plant on stand at bottom and overall dimensional diagram at top with text "how to build a tiered plant stand from scrap wood"

Until next time, friends, happy building!

How to Make a Circle Jig for Your Router

September 26, 2022 by Shara, Woodshop Diaries

In this post, I’m showing you how easy it is to make your own DIY circle jig for your router with some scrap plywood!

Shara Woodshop Diaries using router with DIY circle jig to cut around table top

Cutting circles in wood can be done plenty of ways. You can use a jig saw, a band saw, or a table saw.

But one of the most common ways is to use a router with a circle jig.

Using a router with a circle jig pretty much guarantees a perfect circle–which is nearly impossible using a jig saw or band saw.

You can buy circle jigs from many woodworking supply and tool companies, but it’s super easy (and much cheaper) to just make your own using scraps you’ve already got in your workshop.

I’ll share how to make your own circle jig for your router below.

Speaking of circles, check out three ways to draw a circle of any size in this post.

What you’ll need:

This post contains affiliate links. See policies page.

Tools:

  • Drill
  • Drill bits–various sizes
  • Saw to cut jig material to size
  • Jig Saw OR Large Forstener Bit/Hole Saw
  • Screwdriver

Materials:

  • ¼″ plywood scraps
  • Pencil

**It’s POSSIBLE you may also need a few longer screws/bolts than what you have on your existing router. See step 4.

How to Make a Circle Jig for Router

Making the jig is simple and it’s easy to customize it for whatever type, style, or size of router that you have.

This can work with both trim and fixed base routers.

RELATED: Beginners Guide to Woodworking Routers

In this case, I used my larger fixed base router. You can watch how easy it is to make in this video, and grab all the details about it below.

Step 1: Select Circle Jig Material

For this jig, I used some scrap ¼″ plywood. MDF material would also work great for this as well.

You can certainly use thicker material, but if you do, you may have to pick up some longer screws/bolts. See step 4.

router on workbench next to ¼" plywood scrap to be used as jig material

I cut a piece that was about the same width as my router base, and about 36″ long.

NOTE: The length will determine the max size circle you can cut. So make sure you make it about 6″ or so longer than the max radius you plan to cut.

Step 2: Remove the Sub Base From Router

Make sure your router is not plugged in (for corded routers) and batteries are removed (for cordless routers).

I used a screwdriver to remove the clear sub base from my router.

Close up of router sub plate showing screw locations

This is the plate that attaches to the very bottom of the router. These are usually attached with three screws.

Removing screws from router sub plate using screwdriver

NOTE: Check manufacturer’s instructions/manual before modifying/removing any parts from your tools. Different brands/styles may vary.

Step 3: Mark and Drill Hole Locations on Circle Jig

I placed the sub base on one end of my jig piece from step 1 and used this as a template.

Placing clear router sub base on plywood jig board on workbench

I found a drill bit the same size as the holes I removed the screws from in step 2, and drilled these holes out in the jig.

Drilling holes through sub plate holes into jig

Then, I used a pencil to trace out the center hole where the router bit goes.

I used a jig saw to cut out this section. You could also use a large forstener bit or hole saw as well.

Cutting out circle in ¼" plywood using jig saw

Step 4: Attach Circle Jig to Router Base

After the holes were drilled/removed, I replaced the sub base I removed in step 2 back onto my router, this time, adding the jig between the two.

attaching circle jig to router base using screws

With this added thickness, you MAY have to pick up some longer screws or bolts.

When you replace base and are tightening the screws, make sure they’re long enough to “bite into” the threaded holes in the router base.

If not, take these screws to the hardware store and find some with the same thread pattern, but ¼″ longer.

NOTE: The router base will usually have additional holes that aren’t threaded. You can utilize these holes with bolts/nuts to mount the sub base plate and jig as well.

Step 5: Mark Pivot Point(s)

In many cases, you will want to make your pivot marks from the outside edge of your bit, not the center. That will ensure a more accurate overall circle diameter.

So, before marking and drilling my pivot point on the jig, I install my router bit.

For cutting circles, you can use a straight router bit or an up-cut spiral bit. I usually use a straight bit.

straight bit installed in fixed base router on wooden table top sitting on workbench

These bits come in various sizes and diameters, and it doesn’t really matter which size you use…I’m using a ½″ bit.

To mark my pivot point, I measure from the cutting edge of my bit, and mark the radius in the center of the jig.

Shara Woodshop Diaries measuring pivot point on circle jig for router

For example, if I’m cutting a 40″ diameter circle, I’ll measure and mark 20″ from the edge of my bit.

Then, I use a small drill bit (about ¼″ or so–exact size isn’t critical) to drill a hole at this mark. This is the pivot point.

Step 6: Cut Circle Using Router

Now it’s time to actually cut the circle!

I flip the panel I’m cutting my circle from upside down, find the center and mark it.

Shara Woodshop Diaries marking center of table top glued up panel

I use the same drill bit I drilled my pivot point in step 5 and drill into this center mark–not all the way, but deep enough that it’s going to stay put and not wiggle.

Now, I can slip my circle jig pivot hole onto this drill bit.

Router set up on circle jig on table top ready to cut with drill bit through pivot point

To cut, I adjust my router bit cutting depth to ABOUT ⅛″ deep. You want to make shallow passes–not cut a bunch of material at once.

Then, I carefully cut out my circle shape moving the router counterclockwise pivoting around the drill bit in the center.

Shara using circle jig with router to cut circle table top

After the first pass, I adjust the depth ⅛″ deeper and repeat.

You can repeat over and over to cut all the way through this way.

Just make sure when you get to the final cut, that you lift the piece on some scrap boards so you don’t cut into your work surface.

Additional Tips on Cutting Wood Circles

While you can cut the entire circle using a router with the jig, I prefer a combination of the router with the jig saw.

I like to make a few passes to cut about halfway through the wood thickness. This gives me a template of a perfect circle to cut on.

Then, I use a jig saw to cut around inside this groove. You want to make sure to cut towards the outside of the groove so you don’t cut into the circle!

Shara Woodshop Diaries using jig saw to cut inside router grooves on table top

Removing this excess material with a jig saw after you get your initial circle shape cut can help prevent possible binding and kickbacks.

It’s not really a time saver, but it does make the cutting process a little easier–and less scary if the router makes you nervous (like me!).

After the jig saw cuts away most of this excess material, you can either continue with the circle jig to clean up the rough edges, or use a flush cut router bit.

Shara Woodshop Diaries cleaning up round table top edges using router and circle jig

Once the circle is completely cut out, sand the edges and give both top and bottom surfaces a good sanding as well, and now you have a perfectly cut circle!

Circle Jig Projects to Practice On

Now that you know how to make your own circle jig and use it, it’s time to dive in and tackle some fun projects with it!

Here are a few of my favorite projects you can use your new DIY circle jig with:

Round Coffee Table with Decorative Legs
Modern Round Coffee Table
How to Build a DIY Round Wooden Pedestal Coffee Table
DIY Pedestal Coffee Table
Two Tone Clock

If you enjoyed this post and want to check out more woodworking tips and guides, check out the getting started page!

And if you want to receive priority access to all the latest projects and plans, be sure to subscribe to the newsletter!

Be sure to save this for later by pinning or sharing to your favorite social channel.

Until next time, friends, happy building!

DIY Coffee Table with Decorative Legs

September 24, 2022 by Shara, Woodshop Diaries

In this post, I’m sharing how to build a simple DIY coffee table with decorative legs!

*This post was sponsored by Kreg Tool. This post also contains affiliate links. See policies page.

Black and wood round coffee table with decorative legs and X braces between

Building a coffee table is a great weekend project for people of all skill levels.

It’s one of those projects that’s not too big, but not too small…challenging but not overwhelming.

I built this particular project for my parents’ living room and I made the top round so that I won’t be jabbing my knees into the corners whenever I come to visit haha.

Just kidding…kind of.

So if you’re ready to build one for yourself, I’m sharing the FREE building plans, step by step tutorial video, and so many helpful tips below.

Let’s dive in!

Before Building a Round Coffee Table with Decorative Legs

Wood Type:

You can use whatever type of wood you prefer for this project.

Close up of 2x6 lumber for coffee table top

I built it from basic 2x construction lumber to keep costs low.

However, if you have access to hardwood and want to use that, feel free.

Gluing up the Table Top:

The table top here was made of 2x6s glued together into a large panel.

Round wooden coffee table with black base overhead view of top

However, any 2x thick material would work for this. I actually recommend going with wider boards–like 2x12s–to minimize the number of glue joints in the build.

But, feel free to glue up your top with whatever width boards you’d like. As long as you end up with a panel roughly 40-42″ square, it’ll work just fine.

RELATED: Check out my post here on how to glue up table tops

Overall Size:

The overall size of this coffee table is 17 ½″ tall and 40″ diameter.

Overall dimensional diagram of coffee table with decorative legs

If you wanted to make your coffee table with a square top instead, you could also do that.

It wouldn’t change the overall dimensions, unless you cut the top something other than 40″ square.

Some posts you may find helpful throughout the project:

  • How to use a pocket hole jig
  • How to square board edges
  • How to build a table top

Tools & Materials:

Tools:

  • Kreg 720 Pocket Hole Jig
  • Miter Saw
  • Drill/Driver
  • Jig saw OR Router and straight bit (to cut round top)
  • Clamps
  • Sander

Materials:

  • (2) 2x12x8 boards
  • (2) 2x4x8 boards
  • (4) coffee table legs
  • 2 ½″ pocket hole screws
  • Washers, Z clips, OR Figure 8 Fasteners (to attach top)
  • Wood Glue

How to Build a Coffee Table with Decorative Legs

Now it’s time to grab your tools and head to the shop to get building!

I’m sharing the step by step tutorial below along with the free building plans, but if you prefer to watch, I also have a quick project overview video here:

Check out the full video on YouTube here.

Step 1: Assemble Coffee Table Top

I’ll warn you now–making the top is the most difficult part. Once you get past step 1, you can complete 2-4 in about 5 minutes.

But hang with me through this step. You got this.

First, I glued up a solid wood panel about 40-42″ square from 2x material.

You can use 2x anything, but if you use 2x12s, you only have to deal with three glue joints, so that makes it a little easier. See notes above.

In that case, you’d simply glue up 4 pieces of 2×12 about 42″ long–shown in grey below.

Diagram showing how to glue up 2x2 boards for table top

You can use glue with 1 ½” pocket holes with 2 ½” pocket hole screws to assemble the boards into a panel if you don’t want to wait for the glue to fully dry before moving on.

The pocket hole screws will act as a clamp until the glue dries. However, glue alone will work just fine if you keep the boards clamped until glue is fully dry.

If you have access to a table saw or jointer, I’d recommend squaring the edges off the boards before gluing up.

RELATED: How and why to square board edges before gluing

Running boards through table saw to square off rounded edges

Once the glue was dry, I flipped the panel upside down on some scrap blocks on my workbench and marked the center.

Mark center of table top panel

Then, I used my router with a straight bit and a circle jig to cut a 40″ diameter circle.

See the video here about how I made and used the jig.

Shara Woodshop Diaries using router to cut circle table top

However, if you don’t want to use a router, you can also just draw a 40″ diameter circle and use a jig saw to cut it out.

RELATED: How to draw any size circle

Once it’s cut out, sand it well to flatten, smooth, and remove any excess glue squeeze out.

Step 2: Build X Frames for Coffee Table Base

The rest of the build is super easy, so if you’ve made it here, high fives all around!

You can find all the dimensions in the plans here, but I assembled two identical “X” braces from 2x4s–one for the top and one for the bottom.

I cut two long pieces, and 4 short pieces, drilled 1 ½″ pocket holes into the ends of each, then assembled using 2 ½″ pocket hole screws.

Shara Woodshop Diaries assembling X braces using pocket holes and screws

I made sure the short pieces were centered on the long pieces when attaching.

Step 3: Assemble Coffee Table Base

Once both “x” braces were assembled from step 2, I attached them onto the legs.

I used these legs for this project. They come in a set of 4.

Shara Woodshop Diaries assembling DIY coffee table base on workbench

However, there are tons of premade legs you can find online, so if you want something different, feel free to browse around.

I used 2 ½″ pocket hole screws to attach one X brace at the bottom and one at the top of each leg.

I made sure the pocket holes on the top were facing toward the top and the ones on the bottom were facing toward the bottom.

Placing X coffee table base on concrete floor

That way, they’ll all be hidden in the finished project.

Step 4: Attach Top to Base

Because all of this is solid wood, it all has the potential to move. 

So there are tons of ways to attach the top to allow for wood movement. 

In my last two videos (the glass door cabinet, and the 3 drawer dresser), I show using figure 8 fasteners and that’s an option as well as using Z clips. 

But, another simpler option is to just drill some oversized holes through the base, but not into the top. 

Drilling hole to attach coffee table base to top

Then use screws with washers through these holes to secure. 

Drilling large holes in the base piece allows the screw to move within the hole as the top expands and contracts.

driving screw to attach coffee table base to top

I attached the base to the top in the center and at each end just behind the table legs.

Step 5: Finish Coffee Table

And that completed the building part.  All that was left was adding a little stain and some poly. 

I stained the base with Varathane Ebony and the top with Minwax Provincial. 

Close up of round coffee table top with black base

Then, I sealed the top with Minwax Polycrylic. 

I sealed the top and bottom sides of the top panel with poly to help keep it as stable as possible, and now it’s ready for mom and dad’s living room. 

Looking for More Coffee Table Ideas?

I hope you enjoyed watching this project come to life as much as I enjoyed building it!

If you want more information on the build, check out the full length YouTube video here:

faux youtube thumbnail image showing Shara Woodshop Diaries next to coffee table

And for all the dimensions and details, grab the free building plans for this project on KregTool.com.

Check out more DIY coffee table building plans here:

Modern Round Coffee Table
How to Build a DIY Round Wooden Pedestal Coffee Table
DIY Pedestal Coffee Table
DIY X Base Coffee Table

Sign up for the newsletter to be the first to know when new projects and plans are posted.

If you’d like to save this for later, don’t forget to pin it or share it to your favorite social channel!

Pinterest collage with overall dimensional diagram at top and finished round coffee table at bottom with text "How to build a round coffee table with decorative legs"

Until next time, friends, happy building!

How to Build a Simple 3 Drawer Dresser

September 19, 2022 by Shara, Woodshop Diaries

In this post, I’m sharing how to build this simple 3 drawer dresser.

*This post was sponsored by The Home Depot as part of the ProSpective Program. 

White oak 3 drawer dresser with decorative feet against white wall

Over the last couple months, I have been building a new matching bedroom furniture set. I’ve already shared the bed with arched headboard and the matching nightstands.

While those were fun, if you’ve followed along for very long, you know that DIY dressers are my absolute favorite projects to build.

So, I saved the best for last and now, I’m finally sharing the matching dresser!

I’ve done several DIY dresser builds over the years, but most of them have been pretty big. 

So, for this one, I stuck with a smaller, simpler dresser design. This size is perfect for a small bedroom, a guest room, or can even be used as a large nightstand or an entryway table.

I’ve got the printable plans, step by step tutorial, and video below, so if you’re ready to see how to build a simple 3 drawer dresser, let’s dive in!

What to Know Before Building a DIY 3-Drawer Dresser

Material Options:

I built this particular dresser using oak lumber that I had leftover from my recent display cabinet build.

You can certainly use oak lumber for this as well (or any other type of solid wood), but it will require you to glue up some larger panels for the sides and the top.

White oak lumber on concrete floor

If you’d prefer to save a few bucks or skip the glue ups, I’d suggest using ¾″ cabinet grade plywood (oak, birch, or maple) instead.

The plans and tutorial below will show overall sizes of each piece in the build. So you can either cut these from plywood or glue up solid wood panels to make these size pieces.

The amount of solid wood needed here will depend on the width and length of your boards, so you will need to determine how much/what size you need based on your availability of materials.

Overall Size:

The overall size of this 3 drawer dresser is 18″ deep, 29 ¼″ tall, and 40 ½″ wide.

Overall dimensional diagram of simple 3 drawer dresser

You may find these guides and tutorials helpful throughout the build:

  • How to cut plywood sheets using a circular saw
  • How to build and install drawers and drawer slides
  • How to cut your own 2x2s
  • How to use a pocket hole jig

Tools & Materials

*This post contains affiliate links. See policies page for details.

Tools:

  • Ryobi ONE+ 18V HP Drill/Driver
  • Ryobi ONE+ 18V HP Circular Saw
  • Cutting Guides (AccuCut and Rip Cut optional, but helpful)
  • Pocket Hole Jig
  • Miter Saw
  • Table Saw or router (optional to cut drawer dadoes)

Materials:

  • (3) 2x2x8 board
  • (1) 1x2x8 board
  • (1) 1x4x8 board (or 1×4 scraps)
  • (1) 4×8 sheet ¾″ plywood (or equivalent solid wood–see notes above)
  • (1) 4×8 sheet ¼″ plywood
  • (4) 5/16-18 threaded inserts OR furniture feet plates
  • (4) furniture feet
  • (3) pair 16″ drawer slides
  • 2″ wood screws OR Figure 8 Fasteners (to attach top)
  • 1 ¼″ pocket hole screws
  • 2 ½″ pocket hole screws
  • Wood Glue

RYOBI ONE+ 18V HP Drill/Driver Spotlight

You may have seen me using this Ryobi 18V ONE+ HP Drill and Driver for a while now in almost every project. 

So it’s nothing new to see me using them again here in this project.  But, maybe you’ve wondered why they’re my go to.

Close up of Ryobi drill driver on top of dresser

If aren’t familiar with what the “HP” stands for in the newer Ryobi tools, it’s High Performance. 

These brushless tools are designed with advanced technology to provide longer battery life and longer motor life without sacrificing performance.

This drill driver combo is part of the compact HP series, so they are significantly lighter weight and smaller than their previous versions, but with noticeably more power.  

Shara Woodshop Diaries using Ryobi HP drill to drill knob holes on dresser

And if you’re already on the Ryobi ONE+ 18 V battery platform, these HP tools work with those same batteries, so you can upgrade the tool without having to worry about getting new batteries.

You may also notice in the video that I upgraded my older Ryobi circular saw to the newer HP version as well and I’ve got it set up on my cutting guides so I’ll be putting it to good use on lots of future projects cutting down my plywood sheets.

Alright, let’s dive into this build.

How to Build a Simple 3-Drawer Dresser

The step by step tutorial to build this simple 3 drawer dresser is below. You can also grab the printable building plans with all the dimensions and details as well.

But if you prefer to watch, I also put together a quick video here and an in depth, full length build video at the end of this post as well.

Grab the 3 drawer dresser printable building plans here:

Step 1: Assemble DIY Dresser Side Panels

First, I built two identical side panels for the dresser.

These consisted of ¾″ thick panels installed between two 2x2s. Like I mentioned earlier, I used glued up solid oak panels, but ¾″ plywood would work just fine as well.

RELATED: How to cut down plywood sheets

Shara Woodshop Diaries installing side panel between dresser corner posts

I assembled the panel between the 2x2s using ¾″ pocket holes and 1 ¼″ pocket hole screws.

RELATED: How to use a pocket hole jig

Step 2: Assemble Simple Dresser Frame

Now, I was cutting it close to have enough oak lumber to complete the build, so I tried to use it sparingly where possible, so for the rest of the dresser frame, I used 1x2s instead of 2x2s. 

Since oak is quite a bit stronger than pine, this was fine in this case.  However, if you’re using pine, I’d definitely recommend going with 2x2s for these pieces.

Shara Woodshop Diaries assembling simple 3 drawer dresser frame on workbench

I cut four 1x2s and assembled them between the side panels at each corner using pocket holes and screws.

Step 3: Add Bottom Feet Braces

The feet I used here come with a threaded rod installed in the center. These are designed to be screwed into a threaded insert OR a threaded plate.

Close up of threaded rod installed in furniture feet

However, in order to use either of these, there needs to be something added on the bottom to screw them into.

So I cut two pieces of 1×4 scraps to fit between the 2x2s at the bottom. You can use 1×4 scraps, 1×6 scraps, etc for this.

Shara Woodshop Diaries installing scrap block on bottom of dresser using pocket holes

The exact size doesn’t matter as long as they’re wide enough to install a plate or an insert into.

I installed the two braces between the bottom 2x2s so that they’re flush across the bottom edge using ¾″ pocket holes and 1 ¼″ pocket hole screws.

Step 4: Install 3 Drawer Dresser Feet

I measured and marked about 2” in from each edge and drilled out a hole at these marks into the braces I added in step 3. 

Then, I installed 5/16″-18 threaded inserts into these holes.

Close up of installing threaded inserts into wood bracing blocks

If you didn’t want to mess with installing inserts, you could also install furniture leg mounting plates to screw the legs into as well.

Then, I screwed the feet into the inserts.

Screwing furniture feet into bottom of dresser frame

I really like these feet, but every now and then, you have to back the threaded rod out a little for them to screw into the inserts. 

You can just use some pliers to carefully turn the rod back a little so it sticks out longer.

Step 5: Add Dresser Drawer Dividers

For the drawer dividers, I simply cut two more 1x2s and installed into the frame using pocket holes and screws. 

You can divide these however you’d like, but I made the top drawer opening about 4” tall and divided the bottom two drawers evenly. 

Diagram showing where to install drawer dividers into 3 drawer dresser frame

You could switch it up and do one shallow drawer at top and one deep one at the bottom, three evenly sized drawers, whatever you’d like.

Step 6: Add Dresser Drawer Slides

I installed 16” ball bearing drawer slides in each opening so that the bottom of the drawer slides sat just above where I placed the dividers.

Driving screws to install drawer slides into dresser

I installed these 1” inset from the front edge to allow for inset drawer fronts later. 

Normally, for inset drawer fronts using ¾” material, I’d install the slides ¾” inset so that the drawer front would be flush to the frame once installed. 

However, in this case, I actually made the drawer front sit in from the front edge about ¼” just to add some dimension.  So that’s why the slides are 1″ inset in this case.

RELATED: How to Install Drawer Slides

Step 7: Build 3 Drawer Boxes

I used ¾″ plywood for my drawer boxes and tried to use up any of my scraps that I could since my scrap pile is OUT OF CONTROL ha!

I cut the pieces according to the plans to assemble one shallow drawer box and two deeper drawer boxes.

Much like you’ve seen in many of my past projects, I cut ¼” dadoes into the drawer box pieces about ½” up from the bottom edge to install a ¼” plywood bottom panel into.

Exploded view of drawer box pieces

But, if you don’t have a table saw or router (or you do, but you just don’t want to cut the dadoes), you can also just cut the drawer box sides a little shorter (in height) and just glue/staple the ¼″ plywood onto the bottom.

Check out this post for more information and alternatives to building drawer boxes.

Before assembling the pieces, I applied iron on edge banding to the tops of the pieces to hide the plys.  This is optional, but it makes it look a little cleaner, so I like to add it. 

RELATED: How to apply iron on edge banding

Shara Woodshop Diaries assembling drawer box using pocket holes on workbench

Then, I assembled the boxes using pocket holes and screws and installing the ¼” plywood bottom into the dadoes before adding the last piece.

Step 8: Install Drawer Boxes into DIY Dresser

I installed the drawer boxes onto the slides using ¼” plywood on the bottom of the drawers as spacer blocks.

Shara Woodshop Diaries installing drawer boxes into dresser frame

There are so many ways to install drawers, but I find installing them directly onto the slides in the cabinet to be the easiest for me. 

Check out this post for more information on installing drawer slides.

Then, I slid them back in place.

Step 9: Add Drawer Fronts

I glued up and trimmed down three oak drawer fronts—these were ¼” smaller than the openings in height and ¼” smaller in width.  That way, I can install them with ⅛” gap around all sides.

I prefer to do this before adding the top, so that I can easily access the inside of the drawers to install. 

Shara Woodshop Diaries securing drawer fronts onto dresser drawers using Ryobi driver

You can use playing cards or scrap wood to shim it up and screw it in, but I find it just as easy to eye ball it and either clamp or hold it in place while you drive the screws. 

I installed the top drawer front first, then removed the drawer and worked my way down to the bottom.

Step 10: Add Top

Before installing the drawers back into the dresser, I added the top.

I glued up a solid oak panel for my top, but you can certainly cut this from plywood as well.

To attach the top, I used these figure 8 clips since mine was solid wood. 

However, if you were using plywood, simply using 2″ wood screws through the top 2×2 supports would work fine.

Diagram showing how to attach the top to the dresser frame

But, for the figure 8 fasteners, I used a ⅝” forstener bit to drill a shallow hole in several places around the top of the dresser frame so that these clips would sit into them and be flush across the top. 

Check out more information on installing figure 8 fasteners in this post.

Then, I screwed these in place.

Close up installing figure 8 fasteners into dresser frame

I flipped the dresser over on the top, centered it, then screwed the other side of the clips into the top.

After flipping it back over, I put the drawers back in, and it was almost done.

Step 11: Add Back Panel

If you’ve seen many of my previous dresser builds, you know that I rarely ever add backs to my dressers. 

You can call me crazy, but it’s a pet peeve I have from past experiences. 

Diagram showing overall size of back panel and how to install onto simple 3 drawer dresser

You can certainly add a back panel onto this if you’d like, but I didn’t add one here.

Step 12: Add Trim on Sides

To finish this off, I cut and glued on some 1×2 trim on the sides at the top and bottom. 

Shara Woodshop Diaries gluing trim pieces onto dresser sides

I just used some quick dry wood glue and clamped it in place for a minute or two.  However, you could also just use some brad nails. 

Step 13: Add Hardware and Finish

To finish the piece, I applied a white oil based stain.

Once the stain dried, I applied a clear coat poly to seal it. Then, I measured out and drilled holes to add simple black knobs and it was finished!

Shara Woodshop Diaries drilling holes to install knobs into dresser drawers

I think this is definitely my favorite piece of the matching furniture series—but, really, dressers are always my favorite haha.

I hope you enjoyed watching this come to life as much as I enjoyed building it. 

Small white oak DIY 3 drawer dresser project with apple shaped feet

If you’d like to build your own, don’t forget to grab the building plans.

And if you’d like to watch the full length build video, check it out on YouTube here:

If you want to see the other matching pieces in the series, check them out here:

DIY Curved Head Board Bed
DIY One Drawer Nightstand

If building plans and woodworking projects are your thing, be sure to sign up for the newsletter for all the latest projects straight to your inbox!

Save this for later by pinning or sharing to your favorite social channel!

Pinterest collage showing overall dimensional diagram at top and Shara with white oak DIY dresser build at bottom with text "how to build a simple 3 drawer dresser"

Until next time, friends, happy building!

DIY Wooden Planters with X Side Trim

September 2, 2022 by Shara, Woodshop Diaries

In this post, I’m sharing how to build your own DIY wooden planters with X side trim!

I’ll even show you a quick trick for figuring your X trim angles no matter what size you make–no math required!

DIY wooden planter boxes with X trim on the sides on each side of front door with red mums inside

Every year when fall rolls around, I get so excited to put mums on each side of the front door.

I feel like when the mums make their appearance, it’s the official “fall kick off” at our house. All is right in the world 🙂

I’ve made several styles of DIY wooden planters over the years, but I think these taller boxes with the X trim might just be my all time favorite for mums!

Save them to use through the winter, too, and add mini lighted Christmas trees to the porch!

They’re a perfect weekend woodworking project, so if you’re ready to dive into the build, let’s go!

Tools & Materials:

This post contains affiliate links. See website policies before beginning.

Tools:

  • Miter saw
  • Table Saw
  • Drill/Driver
  • Brad Nailer
  • Speed Square

NOTE: Materials list below is for TWO planter boxes.

Materials:

  • (3) 2x4x8 boards (I used cedar)
    • **these will be ripped to 2x2s, so you can grab (5) 2x2s instead if you’d rather
  • (9) 1x6x72 fence pickets (I used cedar)
  • Exterior Wood Glue
  • 1 ¼″ exterior wood screws
  • 2 ½″ exterior wood screws
  • Brad nails (1″ long)
  • (2) nursery pots for planting (optional–see step 4)

Before Building X Detail Wooden Planter Boxes

Wood Type:

Since these are designed to be used outdoors, I recommend using cedar, teak, redwood, or another water and rot resistant wood type for these planter boxes.

Here, I used cedar for mine since it’s readily available where I live.

You can certainly use regular untreated pine or whitewood, and it will last maybe a year or two depending on how much water/weather exposure it gets.

Wood Sizes:

I mentioned that I used cedar for these DIY wooden planters, but I couldn’t find cedar 2x2s for the frame. So I actually purchased cedar 2x4s and made my own 2x2s using this tutorial.

For the sides, I used cedar fence pickets. You can certainly use cedar 1x material instead, but fence pickets are MUCH (like 10 times!) cheaper.

Fence pickets are a little thinner, a little rougher, and usually come in 6′ long boards.

Cedar lumber comparison showing photo of 2x4 vs fence picket vs 1x6 for wooden planter box project

They are labeled as 1x6s, but they’re actually ⅝″ thick. Standard 1x6s (not fence pickets) are ¾″ thick. So it can be a little confusing.

Their tolerances also aren’t super tight, so their thicknesses and widths may vary some board to board. But for the cost savings, they are WELL worth the slight differences.

Is a Table Saw Necessary?

Since there is so much potential for variation board to board, several of these pieces will need to be cut to fit. So, for that, I do recommend having a table saw handy for this project.

Overall Dimensions:

The overall dimensions of these wooden planter boxes with X detail are 15 ½″ deep x 15 ½″ wide x 27″ tall.

Overall dimensions of DIY wooden planter box with X trim--27" tall x 15 ½" square

Planter Pot Sizing:

I designed these planter boxes to fit these 6.24 gallon buckets perfectly.

They simply drop right in and the top lip rests on the edges so you can skip step 4 below–adding a bottom on the planter.

Shara Woodshop Diaries dropping plastic planting bucket into planter box

However, if you choose to use other pots with these planter boxes, you certainly can. Just proceed with step 4 to add a bottom to rest the pot onto.

How to Build DIY Wooden Planters with X Side Trim

Now it’s time to get building! You can grab the plans and step by step tutorial below.

But, if you prefer to watch, I’m sharing a project video here and right after it is a helpful video showing a trick for finding any angle for making “X” trim!

Check out the full length YouTube video here!

Grab the printable building plans here!

Step 1: Build Planter Box Frame

The main frame of the planter boxes are assembled using 2x2s.

You can purchase precut 2x2s, or cut down 2x4s to make your own using this tutorial.

Making your own 2x2s is typically cheaper than buying them precut, and they usually end up a lot straighter.

Either way, once I had my 2x2s, I trimmed them to length.

For each planter box, I cut:

  • (4) 27″ long
  • (8) 12 ½″ long

The full cut list and details can be found in the printable building plans.

You can assemble the frame using 1 ½″ pocket holes and 2 ½″ pocket hole screws if you’d like.

Diagram showing how to assemble planter box frame using 2x2s

But, I kept it even simpler than that and just used some wood glue and 2 ½″ exterior screws at each corner. The screws will show, but I didn’t mind.

I was careful to predrill each hole before driving the screws and I was also careful to slightly offset each screw at the corners so they didn’t run into each other.

Shara Woodshop Diaries assembling 2x2 DIY wooden planter box frame with screws on workbench

Notice that the pieces are 1″ down from the top and 1 ½″ up from the bottom of the corner pieces.

Step 2: Install Side Panels in Wooden Planter Box

After the frame was assembled, it was time to line the sides.

This is where I used cedar fence pickets. I trimmed these to about 24″ long and used 1 ¼″ exterior wood screws to secure them inside the frame.

Using cedar fence pickets to line inside of planter box frame

On two opposite sides of the frame, I installed two pieces all the way to the edge leaving a gap in the middle.

Then, on the other sides, I added two more pieces–there may be small gaps, but that’s okay.

Then, I cut to fit two pieces of fence pickets to fill the large gaps on the first sides.

Diagram showing how to cut to fit narrow center boards to complete planter box sides

It’s best to err on the side of a little too small than to try and force these pieces in place.

Step 3: Add X Trim Details to Planter Sides

Now it’s time to add the eye catching details! Obviously, you can skip this step if you don’t want to add the “Xs,” but they’re my favorite part!

I ripped down some strips about 1 ½″ wide from my fence pickets. You can certainly just use 1x2s instead, but again, using fence pickets will save you quite a bit of money.

Diagram showing how X trim is installed on sides of DIY wooden planters

Then, I cut to fit each piece in place. I have a great video on how to easily figure these angles using a speed square here:

And I’ve also detailed the measurements and angles in the printable plans as well.

After the pieces are dry fit to ensure they’ll work, I glued and brad nailed these pieces in place on each side of the planter box.

Shara Woodshop Diaries using brad nailer to install X trim on sides of DIY wooden planters

Step 4: Add Planter Bottom

This step is optional depending on what size and type of planter pots you’re using in your boxes.

If your plant pot doesn’t just drop into your planter box, you can use some scraps to add a simple “shelf” here to set it on.

I cut two thin pieces of scrap and glued and nailed them about 7″ down from the top inside opposite sides of the box.

Using a nailer to secure shelf supports on inside of wooden planters

Then, I cut two pieces of fence picket scrap to place across them as a “shelf.”

Shelf slats placed across shelf supports in wooden planter to rest plants on

You can install this as high or as low as needed to accommodate the size pot you’re using.

Step 5: Finish and Add Plants

All that’s left as this point is to apply a finish and add your plants!

Since I was using cedar here, it wasn’t necessary to apply a sealer, but you can paint, stain, poly as desired if you’d like.

Pair of completed DIY wooden planters with X trim detail in front of black garage door with red mums inside

Just make sure you apply an outdoor finish if you plan to use these outside. A finish will help keep these looking nice and new for longer.

You can swap out different plants for the seasons and use these all year long!

Don’t forget to grab the printable building plans to build your own here.

Looking for more DIY Wooden Planter Projects?

I LOVE building planters. Here’s several favorite designs from the past. I’m sharing plans for each one if you click on the images below.

DIY Planter Post
Scrap Wood Planter with Trellis
DIY Louvered Planter Box
Black and Wood Planter
How to Make a DIY Concrete Planter for Your Front Porch!
Concrete Planter Pot
How to Build a Modern Planter Box from Wood scraps! Great beginner project
Mid Century Planter Box

If you enjoyed these DIY wooden planters and can’t wait to see what’s next, be sure to subscribe to the newsletter for priority access to all the latest plans, posts, and woodworking tips!

To save this for later, don’t forget to pin it, heart it, or share it to your favorite social channel!

Pinterest image showing red mums in pair of wooden planters with overall dimension diagram at top with text "how to build planter boxes with X trim"

Until next time, friends, happy building!

DIY Wooden Planters with X Side Trim

DIY Wooden Planters with X Side Trim

Yield: DIY wooden planter

Make your own tall planter boxes with X side trim to use outdoors all year.

Materials

  • (3) 2x4x8 boards (I used cedar)
  • (9) 1x6x72 fence pickets (I used cedar)
  • Exterior Wood Glue
  • 1 ¼″ exterior wood screws
  • 2 ½″ exterior wood screws
  • Brad nails (1″ long)
  • (2) nursery pots for planting

Tools

  • Miter saw
  • Table Saw
  • Drill/Driver
  • Brad Nailer
  • Speed Square

Instructions

  1. Build the planter box frame using wood glue and 2 ½" exterior wood screws.
  2. Install side panels in wooden planter box by attaching them inside the frame using 1 ¼" exterior wood screws.
  3. Add X trim details to planter sides using wood glue and a brad nailer.
  4. Add the planter bottom. Using two thin pieces of scrap, glue and nail them about 7" down from the top of the planter box. This can vary depending on the size of your plant pot.
  5. Finish with paint or stain in the color of your choice. If you don't use cedar, be sure to apply a sealer. Add your plants and you're done!
© Shara, Woodshop Diaries
Project Type: DIY Outdoor Projects / Category: Woodworking

DIY Wooden Christmas Tree Skirt Box

August 30, 2022 by Shara, Woodshop Diaries

In this post, I’m sharing how to build a wooden chest that doubles as a DIY Wooden Christmas Tree Skirt Box!

Flocked Artificial Christmas Tree inside rustic wooden hope chest tree skirt box

I love a good multipurpose project and this one is great for SO MANY THINGS!

Keep your Christmas decorations stored away inside throughout the year in this beautiful hope chest.

I actually shared this same project previously as a hope chest here!

Then, when the season begins, bring them out, stick the tree inside, and hang the décor on the branches!

And in the off season, you can use it as a coffee table, an entryway bench, at the foot of a bed, etc.

I’m sharing how to build one for yourself below 🙂

Some Notes About Building the Wooden Christmas Tree Skirt Box:

Material Selection:

This project was built using basic constructions lumber–2x4s, 1x4s, and 1x6s.

I tried to keep the measurements to where standard board widths should fit together on the sides and top without having to trim a bunch of pieces on a table saw.

However, due to potential variations in wood sizing (wood shrinks/expands with humidity and changes seasonally), I do recommend having a table saw handy as you may need to trim some edges slightly for a good fit.

I used ¾″ plywood for the bottom because I had it available already in my workshop, but you could use 1x material instead if you’d rather.

You only need ¼ sheet of ply, though, and that’s likely usually cheaper than using 1xs…but either works fine.

Square Board Edges:

Speaking of table saws, I used mine to square off the rounded edges of my 2x4s before building. You could also use a jointer for this instead. This is TOTALLY OPTIONAL and not required.

However, squaring off the rounded edges will create cleaner joints and just makes the project look a little nicer.

Close up of squared edges of wood pieces joined together

If you aren’t sure what I’m talking about, check out this post about how and why to square board edges.

Keep in mind that by squaring the edges, you are narrowing the board width. The plus side to this is that if you cut them all, you can be sure your widths are consistent–each board will be exactly the same width which makes things easier to work with.

However, the down side is that you may have to modify your measurements slightly to compensate for the difference.

The plans below show using full 3 ½″ wide 2×4 boards, but if you cut yours to (for example) 3 ¼″ wide, the only difference is that the end project will be about 1″ shorter in height.

Overall Dimensions:

The overall project dimensions for this Christmas Tree Skirt Box d are 21 ½″ tall, 38″ wide, 18 ½″ deep.

Overall dimensional diagram showing size of Christmas tree skirt box with hope chest lid

*Note that the Christmas tree skirt box without the lid closed is 18″ tall. You don’t HAVE to add the lid for the tree stand box, but when the season is over, the lid makes it nice to be able to use it for storage.

HELPFUL RESOURCES TO USE IN THE BUILD:

Throughout the build, you may find these guides helpful to complete the project:

  • How to square board edges
  • How to cut plywood sheets
  • How to use a pocket hole jig
  • How to finish raw wood furniture
  • 5 tips to professional looking DIY furniture

TOOLS & MATERIALS:

*This post contains affiliate links. See website policies.

Tools:

  • Miter Saw
  • Drill/driver
  • Table Saw (optional)
  • Pocket Hole Jig

Materials:

  • ¼ sheet ¾″ Plywood
  • (1) 1x3x10
  • (1) 1x2x8
  • (5) 2x4x8
  • (5) 1x4x8
  • (1) 1x6x10
  • Wood Glue
  • 1 ¼″ pocket hole screws
  • 1 ¼″ wood screws
  • 2 ½″ pocket hole screws
  • Lid Hinges
  • Soft close mechanisms
  • Chest Handles 
  • Chest Latch

How to Build a Wooden Christmas Tree Skirt Box

Check out this tutorial video to see how this project came together, then grab the building plans below.

You can check out the printable plans available on Kreg Tool here. And the building tutorial is shown below as well.

Check out the full version of the build video on YouTube here.

Step 1: Assemble Frame Sides

The Christmas tree skirt box will need two of these side panels. You can see in the diagram below that the top and bottom boards are 2x4s, but the vertical pieces are 2″ wide.

Assembly diagram of side frame of tree skirt box

This isn’t a common precut size, so these will need to be ripped this width on a table saw. BUT, if you don’t have a table saw or don’t want to rip these, you can use full width 2x4s as well.

The reason I ripped them to 2″ is because in a future step, I’ll be butting a 2×4 onto the outside of this frame. That will add 1 ½″ thickness on the corner.

So, once complete, the front and the sides of each corner will both be the same width vs one being wider.

This is purely for aesthetics , so feel free to cut or not cut as desired.

I drilled 1 ½″ pocket holes into the ends of all four pieces for each frame. (The holes in the top/bottom boards won’t be used until the next step, but it’s easier to go ahead and drill them now.)

Shara Woodshop Diaries in workshop driving pocket holes in frame pieces of tree skirt box on workbench

I assembled two side frames using 1 ½″ pocket holes and 2 ½″ pocket hole screws through the ends of the vertical pieces.

Check out this guide for how to use pocket holes in woodworking projects!

Step 2: Complete Tree Skirt Box Frame

I built two frames like shown in the diagram below for the front and the back of the wooden Christmas tree skirt box.

These frames are made from 2×4 boards and are assembled using 1 ½″ pocket holes and 2 ½″ pocket hole screws through the vertical pieces like shown.

Long side frame of main box assembly diagram

Then, to complete the whole frame, I used 2 ½″ pocket hole screws through the holes drilled in step 1 in the top and bottom boards to assemble the front, back and side panels all together.

Main Christmas tree skirt box frame assembly diagram made from 2x4s

Step 3: Install Wooden Tree Skirt Box Bottom

I cut to fit a piece of ¾″ plywood to insert into the bottom of this frame. You will only need a piece about 15 ½″ x 35″.

However, if you prefer not to use plywood, you can use 1x boards here and install them using pocket holes and screws through the ends.

Once I made sure my plywood would indeed fit into the bottom of this frame, I drilled pocket holes around the edges and tapped it into place so that it was about ¾″ up from the bottom edge.

Image of plywood bottom panel installed into main frame of wooden tree skirt box

Then, I installed it using 1 ¼″ pocket hole screws.

Step 4: Add Slats on Sides

The sides slats of this project are 1×4 boards, but you could also use other widths instead if you preferred.

I cut several to line each side with–starting with the longer sides first. I dry fit them in place–10 should fit just perfect.

Shara Woodshop Diaries placing side slats on main frame of hope chest wooden Christmas tree stand

But if the fit is a little too snug, you may have to trim a blade width or two off the end pieces.

Once I made sure they’d fit, I used some wood glue and 1 ¼″ wood screws to secure them to the frame.

Diagram showing side slats installed

After the long sides were installed, I repeated for the short sides, except these should have slats per side.

Step 5: Build Optional Lid Frame

Since this is a wooden Christmas tree stand, the lid is actually optional. If you want to use it for a hope chest or bench during the off season, then obviously, add the top.

However, for the actual Christmas tree stand, it’s unnecessary and actually…kind of in the way. So feel free to skip it if you’d like.

If you’d like to build the lid, first, I started with the frame. I built the frame from 2x4s and simply cut four pieces so that the overall size of the frame was the same as the main box.

Main lid frame assembly diagram showing 2x4s assembled in a rectangle using pocket holes and screws

I used 1 ½″ pocket holes and 2 ½″ pocket hole screws to assemble it.

The top slats on the lid will rest down into this frame, so I lined the inside of the frame with 1x3s so that they were ¾″ down from the top. The slats can rest on these.

image of frame with 1x3 boards lining the inside sitting on workbench table in workshop

I just used some wood glue and 1 ¼″ screws to attach them.

Then, I cut to fit two 1x2s to run between them using ¾″ pocket holes and 1 ¼″ pocket hole screws.

Lid assembly diagram showing 1x2 stretcher pieces running between sides

I evenly spaced these and attached flush to the TOP of the 1x3s (so they were also ¾″ down from the top of the 2×4 frame).

NOTE: Put pocket holes facing the top so they’ll be hidden later by the slats.

Step 6: Install Lid Slats

Cut three 1×6 boards to fit into the lid frame. You’ll be able to fit two whole 1x6s, but you’ll need to rip the third one’s width to fit.

Wooden Christmas Tree Skirt Box lid with top slats--assembly diagram with dimensions to cut top pieces

Dry fit and cut the pieces to fit first. Once you ensure the fit, remove them, and add some wood glue on the 1x3s and 1x2s from Step 5 and set them back in place.

If you don’t mid seeing some nail holes, you can shoot a few brad nails through these pieces into the frame OR clamp them to hold them tight until the glue dries.

I flipped the lid over and also added a few 1 ¼″ wood screws through the 1x2s as well.

Step 7: Attach Lid to Christmas Tree Skirt Box

Now that the chest and the lid are assembled, the final step is putting them together!

Before adding the lid, I went ahead and stained the pieces separately to make things easier. I stained them Minwax Early American.

Shara Woodshop Diaries installing hinges between box and lid

Then, I used some non-mortise hinges to attach the lid. I simply screwed the hinges to the top edge of the back of the chest, then screwed the other half of the hinge to the bottom of the lid.

Additionally, I added some soft close mechanisms since the lid is rather heavy.

Close up looking inside wooden Christmas tree skirt box with decorations inside

However, adding these makes the lid not open fully, so they’ll need to be removed/adjusted when using as a Christmas tree stand. Then, you can put them back when the season is over if you’d like.

Step 8: Finish Tree Skirt Box

To finish up, I added a latch to the lid and some latches on the sides and gave it a few coats of Minwax Helmsman clear poly to seal it.

And then, it was ready for all the seasons!

Christmas tree sitting in wooden box as tree skirt

You can fully open the lid to place the tree inside, OR remove the lid altogether while in use as a tree stand.

This is one of my favorite hope chest designs, but it also works so great for a wooden Christmas tree skirt box.

Check out the printable building plans on Kreg Tool’s website here. And check it out as a hope chest build here as well.

I hope you enjoyed this project and for more seasonal project ideas, check out these favorites:

How to make your own DIY wooden Christmas village perfect for Scandinavian Christmas decor. Easy and free project tutorial
DIY Christmas Lantern Post from Wood Scraps and an Old Spindle--great way to repurpose an old spindle

If you’d like to stay up to date on all the latest projects and building plans, be sure to subscribe to the newsletter!

And if you want to save this for later, don’t forget to pin it!

Christmas tree inside wooden tree skirt box stand with text "DIY Wooden Christmas Tree Stand" pinterest image

Until next time, friends, happy building!

DIY Wooden Christmas Tree Skirt Box

DIY Wooden Christmas Tree Skirt Box

Yield: 1 Wooden Christmas tree skirt box

How to build a wooden chest that doubles as a DIY wooden Christmas tree skirt box. Store your Christmas decorations away when the season is over.

Materials

  • ¼ sheet ¾″ Plywood
  • (1) 1x3x10
  • (1) 1x2x8
  • (5) 2x4x8
  • (5) 1x4x8
  • (1) 1x6x10
  • Wood Glue
  • 1 ¼″ pocket hole screws
  • 1 ¼″ wood screws
  • 2 ½″ pocket hole screws
  • Lid Hinges
  • Soft close mechanisms
  • Chest Handles 
  • Chest Latch

Tools

  • Miter Saw
  • Drill/driver
  • Table Saw (optional)
  • Pocket Hole Jig

Instructions

  1. Assemble frame sides using 2 ½" pocket hole screws.
  2. Complete the tree skirt box frame using 1 ½" pocket holes and 2 ½" pocket hole screws.
  3. Install wooden tree skirt box bottom ¾" from the bottom edge and secure using 1 ¼ pocket hole screws.
  4. Add slats on the side using 1x4 boards secure them into place using wood glue and 1 ¼" wood screws.
  5. Build optional lid frame using 2x4s
  6. Install lid slats using wood glue and 1 ¼" wood screws.
  7. Stain your box.
  8. Attach the lid to the Christmas tree skirt box using non-mortise hinges and add soft close mechanisms since the lid is heavy.
  9. Ffinish the tree skirt box by giving it a few coats of clear poly.
© Shara, Woodshop Diaries
Project Type: Seasonal Decor / Category: Woodworking

DIY Display Cabinet with Drawer

August 27, 2022 by Shara, Woodshop Diaries

In this post I’m sharing how to build a display cabinet with drawer!

White oak cabinet with glass doors and adjustable shelves with drawer on bottom behind doors

I have had this project on my “to build” list for SO LONG. I built a glass door linen cabinet a while back that we left with our last house when we moved.

.

I really didn’t want to leave it, but it fit so perfectly in our bathroom, it felt like it was just part of the house.

.

So when we moved to our home now, I wanted to build another display cabinet, but this time, one with a drawer in the bottom!

.

I’m so excited to be sharing this build and the printable plans with you, so if you’re ready to dive into the project, let’s go!

.

Sign up for priority access to new woodworking projects and building plans:

.

First, let’s address some questions and important notes about the build.

Important Notes Before Building this DIY Display Cabinet with Drawer

Using Plywood vs Solid Wood

I built this project from solid white oak lumber provided by Weaber Lumber.

White oak lumber stacked on workshop floor

However, this could also be made from hardwood cabinet grade plywood as well. I’ve provided a plywood cut diagram in the building plans if you choose to use plywood for this build.

.

In the diagrams below and in the printable plans, I’m showing overall dimensions of each piece in the build, so if you prefer to use solid wood, you can simply glue up your own solid wood panels the same size.

.

The amount of solid wood lumber you will need will depend on the widths of the pieces you’re working with, so you will need to determine that based on your lumber options and availability.

“Glass” Door Material

You can use glass or acrylic/plexiglass for your doors. I used plexiglass because I can cut it myself with a circular saw.

Circular saw cutting plexiglass sheet

However, if you prefer real glass, you can check your local glass shops or big box stores as many of them will custom cut glass or you if you need it. I recommend sticking to ⅛″ or slightly thinner for these panels.

.

You can go thicker, but it’s not necessary and will just add to both the cost and the weight of the overall piece.

Back Panel Installation

You can install the back panel several ways. In the plans, I’m showing installing it by rabbeting the back of the cabinet.

.

However, you can also just staple directly onto the back edge OR you can even cut dadoes into the cabinet to install it.

Pocket Holes vs Dowels

I used wood glue and dowels to assemble the cabinet box and the base because I was working with solid wood.

.

However, if using plywood, I recommend using pocket holes and screws instead.

Overall Project Dimensions

This DIY display cabinet with drawer ended up being about 17 ¼″ deep x 69 ½″ tall x 30 ½″ wide.

DIY Display cabinet with drawer overall dimension diagram

Some Helpful Guides to Use in the Build

  • How to cut plywood sheets
  • How to use a pocket hole jig
  • How to build and install drawers
  • How to install concealed hinges
  • How to fill pocket holes
  • How to use a router
  • How to finish raw wood furniture
  • 5 tips to professional looking DIY furniture

Tools & Materials

Tools:

  • Circular Saw and straight edge (or cutting guides)
  • Miter Saw
  • Table Saw
  • Drill/Driver
  • Stapler/Brad Nailer
  • Pocket Hole Jig
  • ⅜″ dowel Jig (optional)
  • Router and Rabbeting Bit
  • Chisel
  • Shelf Pin Jig
  • Concealed Hinge Jig
  • Clamps
  • Sander

Materials:

  • (1) 1x2x8 board
  • (4) 1x3x8 boards
  • (1) 1x4x8 board
  • (2) 2x2x8 boards
  • (2) 4×8 sheets ¾″ plywood (OR glue up solid wood panels instead)
  • (1) 4×8 sheet ¼″ plywood
  • (1) pair 12″ drawer slides
  • (2) pair frameless full overlay concealed hinges
  • Shelf Pins
  • ⅜″ diameter x 1 ½″ wood dowels (optional)
  • Wood Glue
  • Super Glue for Plexiglass
  • 1 ¼″ pocket hole screws
  • 2 ½″ pocket hole screws (optional)
  • 2″ wood screws (OR Z clips/Figure 8 clips to attach base to cabinet)
  • Wood finish (as desired)
  • (2) sheets ⅛″ (or less) 24″ x 48″ acrylic or plexiglass

How to Build a Display Cabinet with Drawer

I’m sharing the step by step instructions below, but I also have some videos, too if you prefer to watch!

.

Here’s a quick intro video and the full build video is at the end of this post.

For the complete cut list, and all the dimensions and diagrams, you can grab the printable building plans here:

Step 1: Assemble Display Cabinet Box

To kick off the build, let’s start with the main body of the cabinet box.

.

I mentioned earlier that I glued up solid wood panels for this, but ¾″ plywood would also work just as well.

.

Either way, cut the pieces to size, then assemble like shown below.

Diagram showing main display cabinet box assembly with dimensions

If using plywood, I recommend using wood glue with ¾″ pocket holes and 1 ¼″ pocket hole screws.

.

However, if using solid wood, either pocket holes and screws OR wood glue and dowels are a good option.

Step 2: Add Back Panel

I mentioned in the notes above that you can install the back panel several different ways. If you don’t want to “inset” the panel into the cabinet, you can certainly just staple it onto the back.

.

However, for a little bit cleaner look, you can use a router and rabbeting bit to route the inside of the back edge of the box from step 1 about ¼″ deep.

.

Use a chisel to square off the corners (the bit will leave the corners rounded).

Diagram showing dimensions and installation of back plywood panel on display cabinet build

Then, cut ¼″ plywood to fit into the rabbet and staple in place.

Step 3: Assemble Display Cabinet Base

Now that the main box is together, it’s time to make the base.

.

The base is built from 2x2s. You can assemble the base like shown below using 1 ½″ pocket holes and 2 ½″ pocket hole screws. Be sure to use wood glue as well!

Diagram showing dimensions of pieces to assemble display cabinet base

However, I’d recommend using wood glue and dowels for this instead as the screws may tend to run into each other on the corners making assembly quite difficult.

.

After my base was assembled, I sanded it and then used a rabbeting bit on my router to cut a shallow rabbet around the outside top edge of the base.

Shara Woodshop Diaries routing rabbet on top edge of cabinet base

This is totally optional, but it adds a nice detail and leaves kind of a “reveal” between the base and cabinet that will hide any gaps.

Step 4: Install Cabinet Base

If you are using plywood for your cabinet, you can simply attach the base using 2″ long screws through the base frame up into the cabinet.

.

However, if you’re using solid wood for your cabinet, I recommend using these figure 8 brackets or Z clips. These will allow for wood movement.

Close up of figure 8 brackets used to install base to display cabinet

These are what you typically use to attach table tops to table bases. You can find more details on installing the figure 8 brackets in this dining table building tutorial.

.

I installed 4 of these around the top of my base.

Shara Woodshop Diaries installing figure 8 brackets to cabinet base

After the brackets were on the base, I attached the other side of the bracket to the cabinet bottom.

Shara Woodshop Diaries screwing brackets on base to cabinet bottom

Note that the front of the base will stick out in front of the cabinet about ¾″ so that it’ll be flush across the front later when the doors are added.

Step 5: Install Drawer Shelf and Trim

I added a stationary shelf and some trim around where the drawer will go at the bottom.

Fun Fact: The trim on the sides looks nice and is a great detail to add dimension, but it’s actually there to “push” the drawer box inside the cabinet enough to clear the hinges when the doors are added later.

If you skipped them and mounted your drawer slides directly to the side panels, you wouldn’t be able to slide your drawer open after installing the doors.

First, glue a piece of 1×2 on the bottom panel of the cabinet. Notice that this should be inset quite a bit.

Diagram of display cabinet bottom drawer trim installation

Then, install the stationary shelf using ¾″ pocket holes and 1 ¼″ pocket hole screws.

Diagram showing stationary shelf in display cabinet above drawer

This shelf can be a glued up solid wood panel OR ¾″ plywood.

.

Finally, glue the 1×2 trim pieces onto the sides between the bottom trim and the shelf.

Diagram showing side trim location on each side of drawer

All the dimensions and details for this build can be found in the printable building plans here.

Step 6: Add Drawer Spacer Blocks

Because we added these 1×2 trim pieces to the side in step 5, we need to add some spacer blocks behind them to mount the drawer slides onto so they can slide in and out.

2x2 spacer blocks glued onto side panel for drawer slides

For this, I glued 2×2 blocks ¾″ up from the bottom panel. You can also screw these in as well for a little extra holding power.

Step 7: Install Drawer Slides

Install 12″ drawer slides onto the spacer blocks so that the front edge of the slides are ¾″ inset from the trim on the sides.

Diagram showing installation of drawer slides in display cabinet

Step 8: Build and Install Drawer Box

I built my drawer box using ¾″ plywood scraps for the box and ¼″ plywood for the bottom panel.

.

I cut my pieces according to the cut list in the plans, then cut ¼″ dadoes ¼″ deep ½″ from the bottom edge to install the plywood bottom.

.

I assembled the box using ¾″ pocket holes and 1 ¼″ pocket hole screws.

Shara Woodshop Diaries assembling drawer box on workbench

Check out this guide for how to build and install drawer boxes for more details.

.

Then, I installed this onto the slides.

.

If you watch the YouTube video at the bottom of this post, you will see that I assembled my cabinet out of order because I was waiting on my slides to come in the mail.

.

So I already had my doors installed when I installed the drawer. Because the doors were now in the way, I had to remove the part of the slide that attaches to the drawer and screw these into the drawer box sides separately like shown below.

Screwing bracket from drawer slide into side of drawer box

PRO TIP: You can separate the parts of a ball bearing drawer slide using the little tabs on the sides. You extend the slide all the way and push the tab up or down (the left and right side will be opposite), and slide the inside piece out.

.

Usually, I keep my slides assembled when installing the drawers. But in this case, I wasn’t able to.

.

After the brackets are on the drawer box, you can slide them back together and into the cabinet.

Step 9: Add Drawer Front

Cut to fit a drawer front from either solid wood or ¾″ plywood that is ¼″ smaller in each direction than the drawer box opening.

.

Use 1 ¼″ wood screws from the inside of the drawer box to secure so that there is ⅛″ gap around all sides.

Securing drawer front onto drawer box with screws from the inside

See video at the end of the post for some helpful tips.

.

Before pushing the drawer in with the front installed, add some painters tape running up the inside of the drawer, over the top, and out the front. This will allow you to pull the drawer back out to finish and install knobs later.

Step 10: Add Shelving to Display Cabinet

For the rest of the shelves, I wanted them to be adjustable, so I used a Kreg Shelf Pin Jig to drill shelf pin holes along the insides of the cabinet box.

Drilling shelf pin holes in cabinet sides

I made sure to keep the front holes inset far enough that the shelves would still be able to reach them since they are quite a bit inset from the front edge.

.

See printable building plans for specifics.

.

Then, I cut three ¾″ thick shelves (these can be solid wood or ¾″ plywood) and used shelf pins to install them where I wanted.

Installing shelf pins into cabinet to add adjustable shelves

Check out more details on the shelf pin jig in this post about must have tools for cabinet building!

Step 11: Build Display Cabinet Door Frames

The last part of the build is the doors, so we are almost finished!

.

I’d recommend using wood glue and dowels to assemble the door frames if you are able–I ran out of dowels and used pocket holes and screws. Either method works, but with dowels, you won’t see them like you will pocket holes.

Door frame assembly diagram with dimensions

I used 1x3s for the sides, top and bottom, but used a 1×4 for the middle piece just because I thought it looked nice. You could stick with 1x3s for the entire frame if you wanted.

.

If you do assemble your doors using pocket holes and screws, check out this guide for how to plug pocket holes.

Step 12: Install “Glass” Into Cabinet Doors

After my door frames were together, I used a ⅜″ rabbeting bit to cut a rabbet along the inside openings of each frame to install my plexiglass panels into.

Shara rabbeting grooves to install plexiglass panels on glass door frame

I used a chisel to square out the corners (the rabbeting bit will leave rounded corners).

.

Then, I cut my plexiglass panels to fit.

.

You can cut plexiglass using a jig saw or circular saw with a fine tooth blade. Or, you can ask your local big box store or glass supplier if they can custom cut your pieces for you. Most of them will for free or for a small fee.

Installing plexiglass panels in rabbets on back side of display cabinet doors

I used some clear super glue to glue these panels into the rabbets. However, you could also use some picture frame turn buttons if you wanted the panels to be removeable for cleaning.

Step 13: Attach Display Doors to Cabinet

Use a concealed hinge jig to drill holes for concealed hinges for frameless full overlay doors.

.

Follow manufacturer’s instructions for installing hinges as every brand is different.

Close up installing concealed hinges on door frame

Install the hinges to the doors, then install the doors onto the cabinet.

Shara Woodshop Diaries installing door onto cabinet

Concealed hinges come with several adjustment settings. Adjust the hinges to align the doors so that they are straight and there’s about ⅛″ gap between the two doors.

Step 14: Finish Display Cabinet

You can finish your project as desired and add knobs, handles, etc to dress it up.

.

I was working with white oak and I wanted something simple that wouldn’t yellow over time or darken it too much, so I used Minwax Helmsman clear poly to seal everything.

Display cabinet with open doors and drawer

And to keep things simple and minimal, I added these simple black knobs to the drawer and the doors.

.

I’m so excited to put this to good use and to have another display cabinet again in my home!

Close up of front of display cabinet looking through plexiglass panels at books and baskets inside

I hope you enjoyed seeing it come to life and if you’d like to build your own, don’t forget to grab the DIY display cabinet printable building plans here!

.

Watch the full length build video for additional tips, information, and details:

Faux YouTube thumbnail for display cabinet with drawer

Want More DIY and Furniture Building Projects?

Enjoy this build and looking for more ideas? Here’s a few favorites:

Glass Door Linen Cabinet
Mid Century Bookcase
DIY Closet System
Small Linen Cabinet
DIY Wardobe with Drawer
DIY Armoire Cabinet

If you want to save this project for later, don’t forget to pin it or share it on your favorite social channel!

Pinterest collage image showing overall dimensional diagram at top and finished display cabinet at bottom with text "DIY display cabinet building plans!"

Until next time, friends, happy building!

DIY Display Cabinet with Drawer

DIY Display Cabinet with Drawer

Yield: 1 display cabinet with drawer

Build a DIY display cabinet with drawer using these building plans and video! Step by step instructions, tips & tricks to build it yourself

Materials

  • (1) 1x2x8 board
  • (4) 1x3x8 boards
  • (1) 1x4x8 board
  • (2) 2x2x8 boards
  • (2) 4x8 sheets ¾" plywood
  • (1) 4x8 sheet ¼" plywood
  • (1) pair 12" drawer slides
  • (2) pair frameless full overlay concealed hinges
  • Shelf Pins
  • ⅜" diameter x 1 ½" wood dowels (optional)
  • Wood Glue
  • Super Glue for Plexiglass
  • 1 ¼″ pocket hole screws
  • 2 ½" pocket hole screws (optional)
  • Figure 8 clips
  • Wood finish
  • (2) sheets ⅛" (or less) 24" x 48" acrylic or plexiglass

Tools

  • Circular Saw
  • Cutting guides
  • Miter Saw
  • Table Saw
  • Drill/Driver
  • Brad Nailer
  • Pocket Hole Jig
  • ⅜" dowel Jig (optional)
  • Router
  • Chisel
  • Shelf Pin Jig
  • Concealed Hinge Jig
  • Clamps
  • Sander
  • Rabbeting Bit

Instructions

  1. Assemble the display cabinet box using wood glue and dowels or wood glue and ¾" pocket holes and 1 ¼" pocket hole screws.
  2. Add back panel by either inseting it or stapling it to the back.
  3. Assemble the cabinet base using wood glue, 1 ½" pocket holes, and 2 ½" pocket hole screws.
  4. Install the cabinet base by attaching it using figure 8 brackets or Z clips.
  5. Install drawer shelf and trim.
  6. Add drawer spacer blocks to mount drawer slides on to.
  7. Install drawer slides inset ¾" from the trim on the sides.
  8. Build and install drawer box.
  9. Add drawer front using 1 ¼" wood screws.
  10. Add shelving to display cabinet by drilling shelf pin holes so they are adjustable.
  11. Build display cabinet doors frames using wood glue and dowels or wood glue and pocket holes.
  12. Using a router and rabbeting but, cut a rabbet along the inside openings of each frame and install the plexiglass panels using clear super glue.
  13. Attach display doors to cabinet using concealed hinges.
  14. Finish your display cabinet as desired.
© Shara, Woodshop Diaries
Project Type: DIY Furniture Plans / Category: Woodworking

Scrap Wood DIY Fall Pumpkin Sign

August 23, 2022 by Shara, Woodshop Diaries

In this post, I’m sharing how to make this ADORABLE DIY fall pumpkin sign from your wood scrap pile!

DIY Scrap Wood fall Pumpkin cut out sign on weathered wood back drop with fall foliage around

You guys know I love a huge furniture build, but sometimes these small scrap wood projects just fill my soul and make me smile.

There’s something so satisfying about starting and completing a project in just an hour or so. I know I’m not the only one, right??

And I’m always (and I mean ALWAYS) up for a fun fall project. It’s my favorite time of the year.

So, despite it’s small size and simplicity, this DIY fall pumpkin sign definitely tops my list of favorite projects. And I’m so excited to share how I made it with you below!

Tools & Materials:

*This post contains affiliate links. See website policies.

Tools:

  • Jig Saw (or scroll saw or band saw)
  • Miter Saw (Optional)
  • Sander
  • Scissors

Materials:

  • Scrap Wood (see notes below)
  • Pumpkin shape (or other shape as desired) printed on paper
  • Painters or Masking Tape
  • Wood Stain
  • Wood Glue

Some Notes About this DIY Fall Pumpkin Sign

Scrap Wood Options:

For this project, I used some scrap ¾″ maple plywood for the back–the part that I glued the pumpkin cut out onto.

And I used a small piece of scrap 1×4 red oak for the actual pumpkin pieces.

I also used some scrap 1×2 red oak wood for the frame.

Maple plywood square and red oak scrap boards laying on workbench surface

However, you can use any type of wood you’d like for this to make whatever size sign you want.

Pumpkin Templates:

For my pumpkin design, I just did a quick Google image search for “pumpkin cartoon shapes” and browsed around until I found one I liked.

Then, I added the image to a Word Document, sized it to fit the ¾″ plywood scrap piece that I was using for the back, and printed it out.

Pumpkin shape for sign printed on copy paper laying on maple plywood on workbench

You can sketch your own shape to use or do something completely different from a pumpkin. The possibilities are endless here.

You could even cut something out of a coloring book haha! You just need a shape to cut.

Stain Colors:

Feel free to get creative with the colors you use, but I actually bought some “fallish” stain colors this year to play with for some seasonal projects and they worked perfect for this.

For the pumpkin, I used Minwax Samara. It’s a really pretty orange.

Shara Woodshop Diaries staining pieces of pumpkin cut out shape for DIY wooden fall sign

For the stem, I used Minwax Weathered Oak, and for the leaf, I used Minwax Evergreen.

FYI…the Samara and Evergreen colors are not “off the shelf” colors. They are Minwax colors, but they have to be mixed–like paint.

I stopped by my local Sherwin Williams to get them to mix these up for me, but you can check out Minwax’s website here to see where all you can purchase it from and to see all their other color options as well.

It was such a fun color combo and they all looked really good on this red oak.

Tools:

I used a jig saw (with a scroll blade) to cut out my pieces and a miter saw to cut my frame.

However, you could also use a scroll saw or band saw to cut out your shape pieces instead and the same saw to cut your frame.

The miter saw is TOTALLY optional and you can definitely just use one type of saw for this entire project.

How to Make a Wooden Pumpkin Sign From Scraps

Ready to dive in? Let’s get building!

I’ve got the written step by step tutorial below, but I also put together a fun video as well that you can check out here:

Step 1: Cut Out Pumpkin Template

You can use this tutorial for any shape, any size. Obviously, in my case, I chose a pumpkin. You can sketch your own design if you’re good at drawing.

However, I just found a sketch of a pumpkin cartoon from a Google search and pasted the image into a Word Document.

I sized it so that it was about the size of a sheet of paper (you can size it however you like) and printed it out (see notes above).

Then, I used scissors to cut the pieces of the pumpkin shape apart.

Paper cut out of pumpkin shape--individual pieces cut out and labeled, laid out on plywood

I used a pencil to label each piece so I would know how they fit together because in the next step, they’ll get out of order.

Step 2: Lay Out Your Cuts

I cut my pumpkin pieces from some scrap 1×4 red oak so the board I was working with was pretty narrow.

So I just laid out my cut out pieces however they would fit on my board.

Shara Woodshop Diaries applying painters tape over paper cut outs laid out on red oak board

Once they were all laid out, I used some painters tape to stick them all in place.

Step 3: Cut Out Wood Pumpkin Pieces

Using a jig saw with a scroll blade, I carefully cut out each piece along the paper cut outs.

Jig saw cutting out pumpkin cut out shapes on oak board

You could also use a scroll saw or a band saw instead of a jig saw.

You should be able to see the paper templates through the painters tape.

These cuts should be fairly close to the templates, but they don’t have to be PERFECT.

Red oak pumpkin pieces cut and laid out on plywood

As you cut each piece, be sure to keep them labeled so you don’t get the pieces mixed up.

Step 4: Apply Wood Stain

Sand each piece well.

Then, stain as desired. I tried to mimic the natural colors of a pumpkin and used Minwax Samara for the body of the pumpkin.

Then, I used Minwax Weathered Oak for the stem, and Minwax Evergreen for the leaf.

Pieces of pumpkin cut out sanded and stained ready to be glued

Of course, you’re welcome to get creative and go crazy with whatever stain or paint colors you’d like 🙂

Step 5: Glue Pumpkin Pieces In Place

I used a piece of scrap ¾″ plywood a little larger than my overall pumpkin shape and laid these pieces out on them how I wanted to attach.

Then, I glued each piece, one at a time onto the plywood using some Krazy Glue Fast Dry Wood Glue.

Applying Krazy Glue Fast Dry Wood Glue to pumpkin pieces to glue wooden sign together

Regular wood glue would work fine instead, but this dries clear and a lot quicker. But either one will work 🙂

Step 6: Add Frame to Wooden Pumpkin Sign

Once the pumpkin pieces were dry on the plywood, I cut and glued some 1×2 pieces around the edges to frame this sign out.

You don’t have to add the frame, but I think it looks a little more finished with it on.

Gluing 1x2 red oak frame around DIY fall pumpkin sign project

Again, I just used some Krazy Glue to attach these pieces, but you could also use regular wood glue or brad nail these pieces as well.

And with that, this adorable little sign is ready for display!

Orange wooden pumpkin shape cut out and glued onto plywood back to make DIY fall pumpkin sign on weathered wood background with fall foliage

I planned to just set this on my bookshelf, so I didn’t add any hanging hardware. But if you wanted to hang it, you can easily just add a little sawtooth hanger on the back side.

Now I want to make one of these for all the seasons!

Looking for More Fun Fall Projects?

I really hope you enjoyed this fun and simple DIY fall pumpkin sign even half as much as I did haha.

.

But, if you’re looking for even more fun fall project ideas, I’ve got a few to share!

Super easy DIY fall leaf sign from wood scraps
Scrap Wood Leaf Sign
DIY Pupmpkin Shaped Wooden Tray
Wooden Wheelbarrow
DIY Wooden Sunflower Art
DIY Louvered Planter Box
DIY Front Porch Wagon

More Fun With Scrap Wood

Can’t get enough scrap wood projects?? I’m teaming up with my friend, Kati, from Houseful of Handmade all month long to share some “Scrap Wood Summer” Projects!

Check out all the projects in the series so far below. Click on an image to learn how to make each one!

Scrap Wood Monitor Stand
Scrap Wood Footed Tray
Scrap Wood Cake Plate
Scrap Wood Geometric Art
Scrap Wood Bookends
Scrap Wood Wall Shelf
Scrap Wood Curtain Rod Brackets
Scrap Wood Pumpkin Sign
Scrap Wood Tiered Plant Stand
Scrap Wood Plant Stand

We will be posting new Scrap Wood Summer projects every Tuesday through this entire month.

Subscribe to the newsletter to be the first to know when the new scrap wood projects come out!

If you’d like to save this project for later, don’t forget to pin it or share it to your favorite social channel!

Pinterest collage image showing tools and materials at top and completed scrap wood pumpkin sign at bottom with text "DIY SCRAP WOOD PUMPKIN SIGN"

Until next time, friends, happy building!

  • « Previous Page
  • 1
  • …
  • 3
  • 4
  • 5
  • 6
  • 7
  • …
  • 16
  • Next Page »

Hi! I'm Shara, the designer, maker, and videographer behind Woodshop Diaries. Let's get building, friends :)

Learn more →

Woodworking Tips & Guides

  • How to make simple Shaker style cabinet doors!!
    DIY Simple Shaker Cabinet Doors
  • 5 Tools To Get Started Woodworking
  • DIY Kitchen Cabinets–From Only Plywood
  • How to Square Board Edges and Make Your Own 2x2s

Footer

↑ back to top

Tips to Take Your Projects to the Next Level

--5 Secrets to Professional Looking DIY Furniture

--How to Properly Paint Wood Furniture

--How to EASILY Cover Plywood Edges

--How to Sand Wood

--10 Must Have Tools for Furniture and Cabinet Building

Printable Building Plans

Check out our shop to browse printable PDF building plans!

Website Policies

This website is for entertainment purposes. Using any information provided is to be at your own risk.

This site uses cookies to provide you with a better experience.

All images and text on this site are property of Woodshop Diaries, LLC. Please be respectful and don't steal this content.

See Policies and Privacy page on this site for more information.

Want to get in touch? Contact Us Here

Copyright © 2026